15
S
e
tup Guide
STEP 4
Turning the Power ON
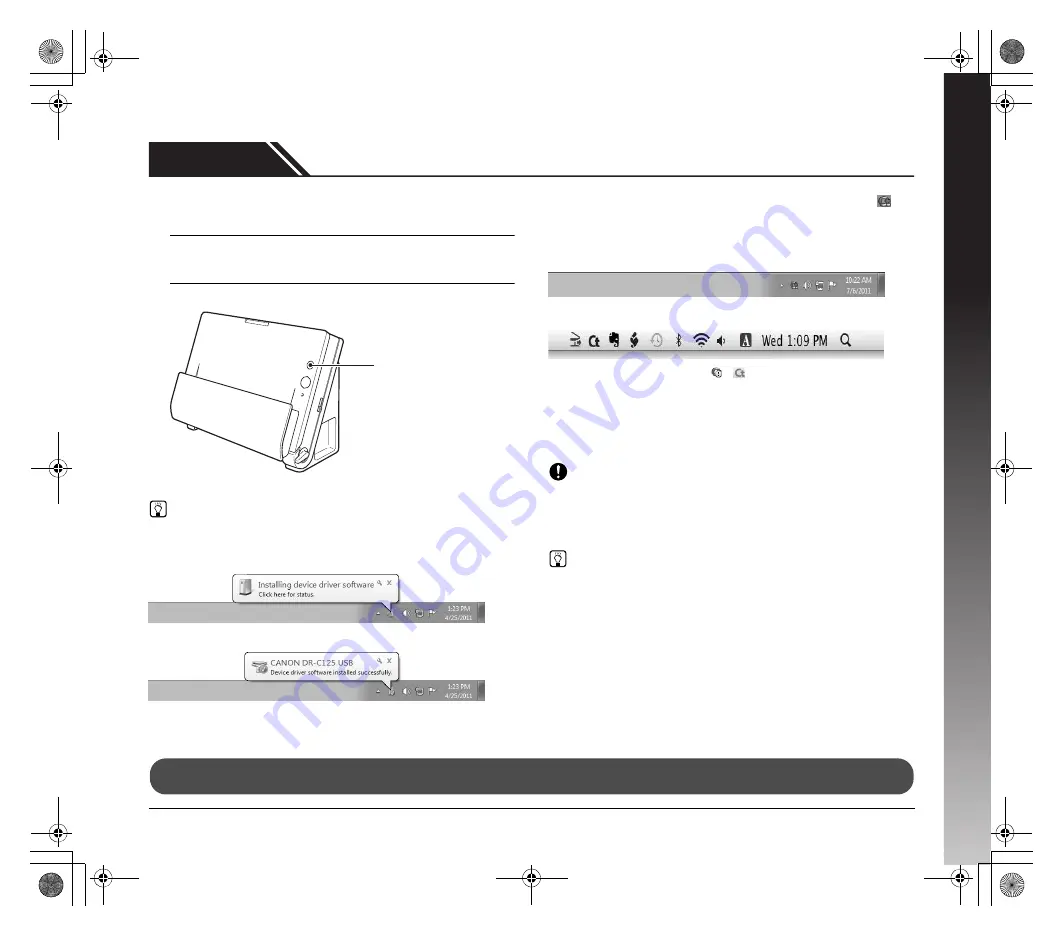
The power of the scanner can be turned ON and OFF with the power
button on the front of the scanner.
1
Make sure that the scanner and computer are connected
properly.
2
Press the power button.
The power button lights blue when the power turns ON.
Hint
In Windows, a balloon message such as shown below appears on the
task bar. If you wait a while, automatic scanner recognition will end
and the scanner will become ready to use.
Ð
When the scanner is properly connected to the computer, the
(CaptureOnTouch) icon appears on the taskbar (or menu bar) as
follows.
Windows taskbar
Mac OS X menu bar
If the taskbar icon appears as
(
), the scanner is not properly
connected to the computer. Check the status of the power switch and
USB cable.
Turning Off the Power
Press and hold the power button until the indicator goes out.
IMPORTANT
• After turning the scanner off, wait at least 10 seconds before turning
it back on.
• If you will not be using the scanner for an extended period, you
should disconnect the power cord from the AC outlet for safety.
Hint
The scanner’s auto power off setting is enabled by default, and the
scanner will turn off automatically if it is not operated for 4 hours.
For details on how to disable this setting, see “Auto Power Off Setting”
on p. 57.
Power button
This completes setup.
0-00-DR-C125_RG_UK.book Page 15 Thursday, September 8, 2011 6:03 PM


