background image

56

Scan Panel

###HOME > Chapter 7 Special Scanning > Scan Panel###
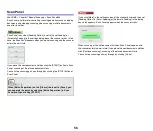
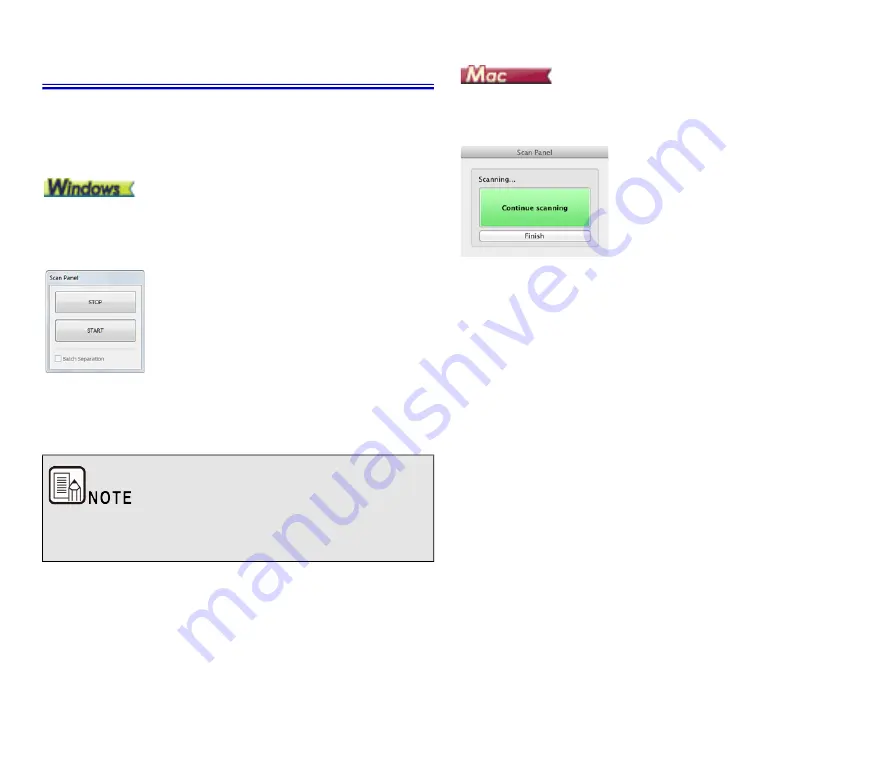
Scan Panel is software for controlling scanning operations such as feeding 
documents and stopping scanning when scanning multiple documents 
one after the other.

Scan Panel runs when [Feeding Option] is set to [Panel-Feeding] or 
[Automatic Feeding] in the settings dialog box of the scanner driver. In this 
case, the Scan Panel appears when you are not scanning and the scanner 
enters the wait state.


If you place the next document and then click the [START] button in Scan 
Panel, scanning of the placed document starts.
You can stop scanning part way through by clicking the [STOP] button of 
Scan Panel.

If you click [More] in the settings screen of the scanner driver and then set 
[Feeding Option] to [Panel-Feeding] or [Automatic Feeding] in the dialog 
box which appears, Scan Panel appears when the scanner starts.

When scanning of the first document finishes, Scan Panel appears and 
the scanner enters the wait state. If you place the next document and then 
click [Continue scanning], scanning of the placed document starts.
You can stop scanning part way through by clicking [Finish].

When [Batch Separation] on the [Others] tab is set to [Panel], you 
can separate the batch by selecting [Batch Separation] in Scan 
Panel and then clicking [START].

Summary of Contents for imageFORMULA DR-C225 2

Page 1: ...ner Chapter 4 Placing Documents Chapter 5 Scanning with CaptureOnTouch Chapter 6 Setting the Scanner Driver Chapter 7 Special Scanning Chapter 8 Regular Maintenance Chapter 9 Replacing Consumable Parts Chapter 10 Uninstalling the Software Chapter 11 Troubleshooting Chapter 12 Appendix 6T3 0030 05E ...

Page 2: ...ts 5 Regulations 7 Trademarks 9 About This Manual HOME Chapter 1 Introduction About This Manual Manuals for the Scanner Documentation for this scanner consists of the following manuals Product Safety Guide Before using the scanner be sure to read and follow these instructions Setup Guide This provides complete and comprehensive information about the scanner User Manual this manual This manual cont...

Page 3: ...below Compact Design The scanner has a compact size of 300 W x 339 H x 235 D 11 81 W x 13 3 H x 9 25 D mm when the document feed is open A newly designed feed mechanism saves space by eliminating the need for space to eject paper at the front of the scanner Fast Document Feeding Documents can be scanned at a speed of up to 25 pages per minute when scanning one sided or two sided documents of A4 si...

Page 4: ...s equipped with the Advanced Text Enhancement Mode only for Windows for enhancing the text of documents with dark or uneven backgrounds and the Advanced Text Enhancement II mode for enhancing the text when both the text and background are light These modes may not work depending on the type of document Color Drop out The scanner is equipped with a Color Drop out function that enables you to specif...

Page 5: ...ame and function of each part Make sure to read this section and familiarize yourself with the parts of the scanner before using the scanner Front View 1 Front Unit Open this when removing paper jammed inside the scanner cleaning the inside of the scanner or replacing rollers 2 Document Eject Pocket Scanned documents are output here 3 Feed Extension Plates Pull this out when loading long documents...

Page 6: ...rs 1 Power Connector Connect the supplied AC adapter to this connector 2 USB Connector Connect the supplied USB cable to this connector Back View 1 OPEN Button Press this button to open the front unit 2 Wi Fi function setting location DR C225W II only Set and confirm wireless connection using the Wi Fi function 3 Kensington Slot Connect an anti theft key chain or the like 4 Cable Grooves Secure th...

Page 7: ...difications not expressly approved by the party responsible for compliance could void the user s authority to operate the equipment Note This equipment has been tested and found to comply with the limits for a Class B digital device pursuant to Part 15 of the FCC Rules These limits are designed to provide reasonable protection against harmful interference in a residential installation This equipme...

Page 8: ...n and recycling of WEEE products please visit www canon europe com environment EEA Norway Iceland and Liechtenstein Fur EMVG Dieses Produkt ist zum Gebrauch im Wohnbereich Geschafts und Gewerbebereich sowie in Kleinbetrieben vorgesehen Model Names The following names may be provided for the safety regulations in each sales region of the Document Scanner DR C225W II Model 6130060 DR C225 II Model 6...

Page 9: ...arks Canon and the Canon logo are registered trademarks of Canon Inc in the United States and may also be trademarks or registered trademarks in other countries imageFORMULA is a trademark of CANON ELECTRONICS INC Microsoft Windows PowerPoint and SharePoint are registered trademarks or trademarks of Microsoft Corporation in the United States and other countries Microsoft product screen shot s repr...

Page 10: ...ts using the straight path provide adequate space in front of the scanner for scanned document output Avoid installing the machine in direct sunlight If this is unavoidable use curtains to shade the scanner Avoid locations where a considerable amount of dust accumulates Avoid warm or humid locations such as in the vicinity of a water faucet water heater or humidifier Avoid locations where ammonia ...

Page 11: ...are placed on it Do not use the power cord while it is coiled Do not pull directly on the power cord When disconnecting the power cord grasp the plug and remove it from the outlet Keep the area around the power cord clear of objects so that the power cord can be disconnected easily in an emergency Do not use an AC adapter other than the one provided with the scanner Do not use the AC adapter provi...

Page 12: ...er button to turn it OFF and disconnect the power plug from the power outlet Then contact your local authorized Canon dealer or service representative to have the unit serviced Before moving the scanner be sure to push the power button to turn it OFF and disconnect the power plug from the power outlet Do not install the scanner on a surface that is unstable tilted or subject to excessive vibration...

Page 13: ...d on the edge of a sheet of paper Disposal HOME Chapter 2 Important Safety Instructions Disposal When disposing of this scanner be sure to follow all local ordinances and laws or consult with the retailer who sold you the scanner When sending the scanner for repairs HOME Chapter 2 Important Safety Instructions When sending the scanner for repairs When a request is made for repairs the scanner need...

Page 14: ...oftware USB interface Hi Speed USB2 0 Monitor Resolution of 1024 768 XGA or better recommended Optical drive Drive capable of reading CDs DVDs Operating system Microsoft Windows 8 1 32 bit and 64 bit editions Microsoft Windows 10 32 bit and 64 bit editions Microsoft Windows Server 2012 R2 Microsoft Windows Server 2016 Microsoft Windows Server 2019 macOS 10 13 macOS 10 14 macOS 10 15 This is the en...

Page 15: ...ironment The scanner drivers provided with the scanner do not necessarily operate on all ISIS or TWAIN compatible applications For details contact your application software retailer In Windows 10 tablet mode the software may disrupt the display The Desktop Experience feature must be enabled for Windows Server 2012 R2 Precautions for Use in 64 bit Operating Systems The ISIS driver supplied with thi...

Page 16: ...ars on the taskbar as follows If the taskbar icon appears as or the scanner is not properly connected to the computer Check the status of the power and USB cable After turning the scanner off wait at least 10 seconds before turning it back on If you will not be using the scanner for an extended period you should disconnect the power cord from the AC outlet for safety The scanner s auto power off s...

Page 17: ...uments The scanner can scan documents ranging in size from business cards to Legal A4 The document sizes that this scanner can scan are shown below Plain Paper Size Width 50 8 mm to 216 mm 2 to 8 5 Length 53 9 mm to 356 mm 2 12 to 14 Paper weight When U turn path 52 to 128 g m2 14 to 34 lb bond 0 06 to 0 15 mm 0 0024 to 0 0059 When straight path 40 to 209 g m2 11 to 58 lb bond 0 05 to 0 25 mm 0 00...

Page 18: ...n pencil or similar material may make the rollers and scanning glass dirty which can lead to smudges on the scanned image and transfer the dirt to subsequent documents Always clean the internal parts of the scanner after scanning such documents When scanning a two sided document that is printed on thin paper the image on the opposite side of each page may show through In this case adjust the scann...

Page 19: ...ocuments Placing Documents for Standard Feeding Ordinarily standard feeding should be used when scanning multiple documents of a standard size at one time Standard feeding enables the multiple documents to be fed while separating each page 1 Open the document feed tray 2 Pull out the feed support Document type Feed method lever position Eject method lever position Standard paper and business cards...

Page 20: ...ject selection lever Set the feed selection lever to the standard feeding position lower position Set the eject selection lever to the U turn path position When scanning documents that contain both standard paper and plastic cards use the straight path 5 Adjust the document guides to fit the width of the document to be scanned ...

Page 21: ...welry that may get caught in the scanner while you are using it This may result in personal injury Be extra careful of neckties and long hair If anything gets caught in the scanner immediately turn OFF the power switch and disconnect the power cord from the power outlet to stop scanning Always smooth out any folds or curls in your documents before placing them into the feeder If the leading edge o...

Page 22: ...scanned without the pages being separated regardless of the number of pages 1 Set the feed selection lever and the eject selection lever Set the feed selection lever to the non separation position upper position The feed selection indicator will light white Set the eject selection lever to the straight path position If you select the Upside down feeding check box in the scanner driver settings you...

Page 23: ...cted at the front of the scanner Do not place anything that will block output near the document eject area Also install the scanner on a smooth surface to enable documents to be smoothly ejected When scanning multiple page documents that are fastened together such as invoices place the documents so that the edge that is fastened together is facing down ...

Page 24: ...h position 2 Adjust the document guides to fit the width of the card to be scanned 3 Place the card horizontally with the top edge facing upward Place the card one at a time If you place cards to be fed vertically they may not be ejected properly and cards that get jammed may be damaged when you remove them Take care of the orientation when placing cards Ultrasonic double feed detection will not f...

Page 25: ...on separation position upper position The feed selection indicator will light white Set the eject selection lever to the straight path position 2 Fold the document in half Align the left and right sides of the document and crease the document firmly If the document is not folded properly paper jams may occur or distortions may appear in the combined scanned image With the straight path documents a...

Page 26: ...itions Configure scanning conditions as follows when scanning folded documents Adjust the document guides to fit the width of the document Otherwise the image may scan as skewed or shifted The side of the folded document that is facing forward will be the left side of the combined image The maximum size for the combined image is A2 Set the scanning condition for folded documents on advanced settin...

Page 27: ...dows and log in as a user with administrator privileges 2 Click the Start button and then click All Programs Canon DR C225 and Canon imageFORMULA Utility imageFORMULA Utility starts Note the following when using the Long Document mode When scanning in the Long Document mode if the document is placed on the scanner in a skewed position it may hit the edges of the feeding area and be damaged Be care...

Page 28: ...e 1 000 mm or Long Document mode 3 000 mm depending on the length of the document 5 Click OK Setting Scanning Conditions Configure scanning conditions as follows when scanning documents in Long Document mode CaptureOnTouch Set Page Size to Match original size under Scanner setting Scanner driver Set Page Size to Match original size in the Basic tab Confirming Basic Conditions for Scanning on p 34 ...

Page 29: ... box appears 3 Click Maintenance The Maintenance dialog box appears 4 Select Long Document mode 1 000 mm or Long Document mode 3 000 mm depending on the length of the document 5 Click to close the dialog box Setting Scanning Conditions Configure scanning conditions as follows when scanning documents in Long Document mode CaptureOnTouch Set Page Size to Match original size under Scanner setting Sca...

Page 30: ...aptureOnTouch What is CaptureOnTouch 30 What is CaptureOnTouch HOME Chapter 5 Scanning with CaptureOnTouch What is CaptureOnTouch CaptureOnTouch is a scanning application that enables you to scan a document with a simple operation merely by selecting the screen panel For details about the operations and functions see the help of CaptureOnTouch ...

Page 31: ... Configuration and Functions of the Scanner Driver 31 Setting Basic Scanning Conditions 34 Function Restrictions Depending on Mode Setting 37 Configuration and Functions of the Scanner Driver HOME Chapter 6 Setting the Scanner Driver Configuration and Functions of the Scanner Driver The scanner driver has the following tabs Basic Tab These settings will apply when Default is clicked in the ISIS dr...

Page 32: ...essing method for scanned images Depending on the ISIS compatible application the application may have its own screen for setting scanning conditions If the scanner driver is opened in such an application setting items related to the functions provided by the scanner driver other than scanning conditions will be displayed on the Basic tab Gamma correction is set when the color tone of the scanned ...

Page 33: ...r operations related to document feeding Others Tab Configure settings for specialized scanning and image processing When the scanner driver is opened from CaptureOnTouch the following settings screen of the scanner driver appears ...

Page 34: ...he scanner settings Confirming Basic Conditions for Scanning When you scan a document make sure you confirm the Color mode Page Size Dots per inch and Scanning Side basic conditions in the Basic settings dialog box When you access the settings screen of the scanner driver from a TWAIN compatible application you can switch the settings screen between Simple Mode and Advanced Mode screens shown belo...

Page 35: ...ches the document to be scanned If Match original size is selected the edges of the document are detected and images that match the size of the document are saved Dots per inch Select the scanning resolution Higher resolutions provide clearer images but result in larger file sizes and slower scanning When Detect automatically is specified the resolution is detected automatically from the content p...

Page 36: ...lect the scanning resolution Higher resolutions provide clearer images but result in larger file sizes and slower scanning When Detect automatically is specified the resolution is detected automatically from the content printed in the document Page Size Select the page size that matches the document to be scanned If Detect automatically is selected the edges of the document are detected and images...

Page 37: ...d Text Enhancement Advanced Text Enhancement II O 256 level Gray O 24 bit Color O Setting value Prescan Detect automatically Black and White O Error Diffusion O Advanced Text Enhancement O Advanced Text Enhancement II O 256 level Gray O 24 bit Color O Setting value Edge emphasis Color drop out Background smoothing Detect automatically O O Black and White O O Error Diffusion O O Advanced Text Enhan...

Page 38: ...sing dialog box O Available for setting Not available for setting Only when Detection mode is set to Color or Gray in the settings screen that appears after Detect automatically is selected Setting value Check the image of the first page Detect automatically Black and White O Error Diffusion O Advanced Text Enhancement II O 256 level Gray O 24 bit Color O Setting value Enable Back Side Brightness ...

Page 39: ...e 47 When you want to scan a document placed upside down 48 When you want to match the orientation of images to the text when scanning a mixture of pages with different text orientations 49 When you want to rotate the images of a document placed horizontally to correct the orientation 50 When you want to set the scanner conditions automatically 51 When you want to use batch separation for scanning...

Page 40: ...elete for Page Size to display the Add Delete Page Size dialog box Name and register the unregistered page size in Page Size When you want to specify the scan area HOME Chapter 7 Special Scanning When you want to specify the scan area Specify the area of the document to be scanned in the Scan Area dialog box which is opened from the Area button on the Basic tab ...

Page 41: ...splayed in the preview window When you want to delete the images of the blank pages in two sided documents HOME Chapter 7 Special Scanning When you want to delete the images of the blank pages in two sided documents Set the scanning side setting to Skip Blank Page on the Basic tab to delete the images of the blank pages in the document If Skip Blank Page is selected the Setting button is enabled a...

Page 42: ...n adjust the level for judging whether pages are blank When you do not want to scan colored lines and text HOME Chapter 7 Special Scanning When you do not want to scan colored lines and text Specify the color red blue or green to be ignored dropped out in the color drop out settings on the Image processing tab and that color will not be scanned ...

Page 43: ... out in the dialog box that appears and that color will not be scanned When you want to enhance the color red HOME Chapter 7 Special Scanning When you want to enhance the color red Specify Red Enhance for Color drop out on the Image processing tab to enhance the color red in the document ...

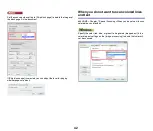
Page 44: ...drop out in the dialog box that appears to enhance the color red in the document When you want to enhance contours in images HOME Chapter 7 Special Scanning When you want to enhance contours in images Adjust the edge emphasis setting on the Image processing tab ...

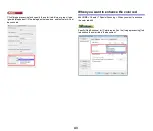
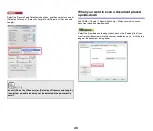
Page 45: ...want to make lines or characters in the scanned images thicker HOME Chapter 7 Special Scanning When you want to make lines or characters in the scanned images thicker Drag the slider for Character Emphasis on the Image processing tab to make the lines and characters that appear in the scanned image thicker ...

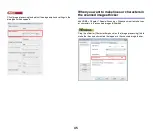
Page 46: ... that the text is emphasized for better readability Advanced Text Enhancement is suitable for a document with a light background color or a document with a non uniform background such as a pattern If the background is uniform it is removed where it surrounds the text and if the background is non uniform it is processed to enhance text readability Advanced Text Enhancement II is suitable for scanni...

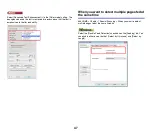
Page 47: ...text is emphasized for better readability When you want to detect multiple pages fed at the same time HOME Chapter 7 Special Scanning When you want to detect multiple pages fed at the same time Select the Double Feed Detection check box on the Feeding tab You can enable either one or both of Detect by Ultrasonic and Detect by Length ...

Page 48: ... down HOME Chapter 7 Special Scanning When you want to scan a document placed upside down Select the Upside down feeding check box on the Feeding tab if you want to insert documents into the scanner upside down i e with the top edge of the document facing down Even if Detect by Ultrasonic or Detect by Ultrasonic and Length is selected a double feed may not be detected if the document is small ...

Page 49: ...mages to the text when scanning a mixture of pages with different text orientations HOME Chapter 7 Special Scanning When you want to match the orientation of images to the text when scanning a mixture of pages with different text orientations Select Text orientation recognition in Document Orientation on the Others tab The text orientation on each page is detected and the scanned image is rotated ...

Page 50: ...en you want to rotate the images of a document placed horizontally to correct the orientation HOME Chapter 7 Special Scanning When you want to rotate the images of a document placed horizontally to correct the orientation Specify the rotation angle in Document Orientation on the Others tab When the Text Orientation Recognition check box is selected Document Orientation is unavailable ...

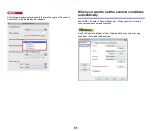
Page 51: ...n in the dialog box that appears When you want to set the scanner conditions automatically HOME Chapter 7 Special Scanning When you want to set the scanner conditions automatically Set Full Automatic Mode in User Preference to scan with scanning conditions that match the document ...

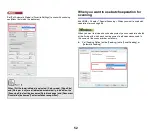
Page 52: ...and scan a document you can separate a batch at the timing with which each next document is placed and scanned In this case set the scanner driver as follows Set Feeding Option on the Feeding tab to Panel Feeding or Automatic Feeding When Full Automatic Mode is selected Color mode Page Size and Dots per inch are all detected automatically In addition the Scanning Side setting becomes Skip blank pa...

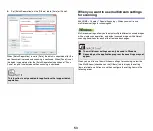
Page 53: ...ettings for scanning Multistream settings allow you to output multiple different scanned images with a single scan operation and output scanned images with different scanning conditions for each of the front and back pages When you want to use the multistream settings for scanning select the Use MultiStream checkbox on the Others tab to display the setting items related to multistream and then con...

Page 54: ... Front 2nd and Front 3rd in the same way 4 When specifying the scanning conditions of the back configure the settings in the same way as described in 1 to 3 In this case specify Stream count of Back and then set the scanning conditions for each of Back 1st to Back 3rd The following shows the setting conditions that can be set in the multistream settings Tab Items that can be set Basic tab Color mo...

Page 55: ...rom the list with the Delete button and save or load a configuration file with the Back Up or Restore button When you finish configuring a setting select Add Delete of Favorite Settings to save the setting Clicking the Add button registers the current setting to Favorite Setting List Use the Delete button to delete a setting from the list The preregistered Full Automatic Mode cannot be deleted fro...

Page 56: ...ng of the placed document starts You can stop scanning part way through by clicking the STOP button of Scan Panel If you click More in the settings screen of the scanner driver and then set Feeding Option to Panel Feeding or Automatic Feeding in the dialog box which appears Scan Panel appears when the scanner starts When scanning of the first document finishes Scan Panel appears and the scanner en...

Page 57: ... or write of the control settings From the configuration of the hardware you can set the automatic power off function Diagnostic tab You can output or delete the log file Network monitor tab You can see the scanners on the network You can also display a Web menu screen to make various scanner settings Start up of the Canon imageFORMULA Driver Setting Tool Click the Start button then click All Prog...

Page 58: ...lvents to clean the scanner Such solvents can damage or discolor the exterior of the scanner or create a risk of fire or electrical shock Cleaning the Scanner HOME Chapter 8 Regular Maintenance Cleaning the Scanner To clean the exterior of the scanner dampen a cloth with water or a mild detergent wring the cloth out thoroughly and then wipe the dirt away Then use a dry soft cloth to wipe away any ...

Page 59: ... air to remove dust and paper particles from the inside of the scanner 3 Clean the scanning glass Wipe the scanning glass with a cloth that has been dampened with water and thoroughly wrung out and then use a dry soft cloth to wipe away any moisture Do not spray water or neutral detergent directly on the scanner Precision mechanisms such as the light source may get wet and cause a malfunction Scra...

Page 60: ... that has been dampened with water and thoroughly wrung out 7 Reattach the retard roller and feed roller See Replacing the Feed Roller on p 67 Replacing the Retard Roller on p 68 8 Close the front unit by gently pushing it up on both sides until it clicks into place Make sure that the front unit is completely closed by pushing until you hear a click 9 Close the document feed tray Remove the retard...

Page 61: ...et 11 Clean the rollers inside the document eject pocket Wipe the rollers with a cloth that has been dampened with water and thoroughly wrung out and then use a dry soft cloth to wipe away any moisture 12 Close the document eject pocket ...

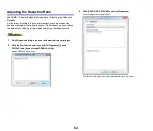
Page 62: ...pens you can reduce the amount of stretching of the image by adjusting the reduction ratio 1 Start Windows and log in as a user with administrator privileges 2 Click the Start button and then click All Programs Canon DR C225 and Canon imageFORMULA Utility imageFORMULA Utility starts 3 Click CANON DR C225 USB and click Properties Scanner properties are displayed The Events tab may not be displayed ...

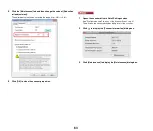
Page 63: ...3 0 to 3 0 5 Click OK to close the scanner properties 1 Opens the scanner driver s Detail Settings screen See Configuration and Functions of the Scanner Driver on p 31 This will open the advanced settings dialog box for the scanner 2 Click to display the Scanner Information dialog box 3 Click Maintenance to display the Maintenance dialog box ...

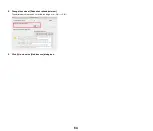
Page 64: ...64 4 Change the value of Reduction ratio adjustment The adjustment value can be set within the range from 3 0 to 3 0 5 Click to close the Maintenance dialog box ...

Page 65: ...rs feed roller and retard roller installed in the scanner are consumable parts The feed roller and retard roller wear with scanning If the feed roller and retard roller are worn documents may not feed correctly and paper jams or double feed errors may occur When more than 100 000 pages have been fed total number of pages fed by the scanner a message prompting you to replace the rollers is displaye...

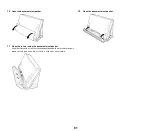
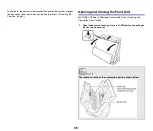
Page 66: ...eplace the rollers Resetting the Counters on p 69 Opening and Closing the Front Unit HOME Chapter 9 Replacing Consumable Parts Opening and Closing the Front Unit 1 Open the document feed tray Press the OPEN button and pull open the front unit toward you The location of each of the consumable parts is shown below ...

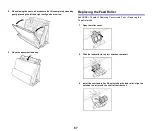
Page 67: ...ck 3 Close the document feed tray Replacing the Feed Roller HOME Chapter 9 Replacing Consumable Parts Replacing the Feed Roller 1 Open the roller cover 2 Slide the feed roller to the left and then remove it 3 Install the new feed roller When installing the feed roller align the notch on the roller with the shaft of the front unit ...

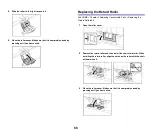
Page 68: ...ard Roller HOME Chapter 9 Replacing Consumable Parts Replacing the Retard Roller 1 Open the roller cover 2 Remove the retard roller and then install the new retard roller When installing the retard roller align the notch on the roller with the shaft of the main unit 3 Close the roller cover Make sure that it is completely closed by pressing until you hear a click ...

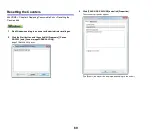
Page 69: ... log in as a user with administrator privileges 2 Click the Start button and then click All Programs Canon DR C225 and Canon imageFORMULA Utility imageFORMULA Utility starts 3 Click CANON DR C225 USB and click Properties The scanner s properties appear The Events tab may not be displayed depending on the model ...

Page 70: ...the scanner driver s Detail Settings screen See Configuration and Functions of the Scanner Driver on p 31 This will open the advanced settings dialog box for the scanner 2 Click to display the Scanner Information dialog box 3 Click Maintenance to display the Maintenance dialog box 4 Click Reset 5 Click to close the Maintenance dialog box ...

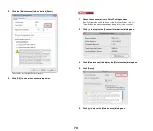
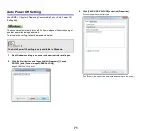
Page 71: ...ting follow the procedure below 1 Start Windows and log in as a user with administrator privileges 2 Click the Start button and then click All Programs Canon DR C225 and Canon imageFORMULA Utility imageFORMULA Utility starts 3 Click CANON DR C225 USB and click Properties Scanner properties are displayed The Events tab may not be displayed depending on the model The Auto Power Off setting is only a...

Page 72: ...72 4 Click the Maintenance tab and then clear the Turn off automatically after 4 hours check box 5 Click OK to close the scanner properties ...

Page 73: ...the Windows task bar click Start button click Windows System click Control Panel The Control Panel appears 2 Click Uninstall a program 3 From the Programs list select the software you want to remove and then click Uninstall The delete confirmation screen appears 4 Click Yes Uninstallation of the software is now complete No uninstaller is provided for macOS drivers To uninstall use Finder to delete...

Page 74: ...leshooting 79 Useful tips 80 Clearing a Paper Jam HOME Chapter 11 Troubleshooting Clearing a Paper Jam When paper jams occur during scanning use the following procedure to clear them Be careful when removing jammed paper It is possible to cut your hand on the edge of a sheet of paper 1 Remove any documents remaining in the feed tray ...

Page 75: ... side open the document eject tray 3 Remove the jammed document 4 Return the document eject tray to its original position Make sure that it is completely closed by pushing until you hear a click 5 Press the OPEN button and pull open the front unit toward you ...

Page 76: ...orce If the jammed paper tears while you are pulling it out make sure to remove any remaining pieces from inside the scanner When a paper jam or other problem occurs while Rapid recovery system is enabled in the scanner driver the image of the last document that was scanned properly is saved before scanning is stopped Therefore you can quickly resume scanning after resolving the cause of the inter...

Page 77: ...htens skewed or Deskew in the scanner driver settings 3 If many pages have been scanned since roller cleaning clean the rollers If documents still feed askew roller replacement or other maintenance may be needed See Chapter 8 Regular Maintenance on p 58 for roller replacement procedures Q4 If white lines or streaks appear in scanned images A4 Clean both sides of the scanner glass and the rollers I...

Page 78: ...emory becomes insufficient and scanning stops A9 If you configure scanning conditions that use a large amount of the computer s memory scanning may stop because of insufficient memory Although this depends on the computer s memory size the possibility of insufficient memory increases if any of the following scanning conditions overlap Color Mode is set to 24 bit Color A large page size e g Legal i...

Page 79: ...eed USB 2 0 compliant replace the cable with the supplied compliant cable 6 When the scanner is connected to the computer via a USB hub that is not Hi Speed USB 2 0 compliant remove the hub and connect the scanner directly to the computer If scanned image files cannot be opened in an application 1 Scanned images saved as multi page TIFF files can be opened only by programs that support this file f...

Page 80: ...w do I scan half folded documents folio scanning Set the feed method to non separation feeding and set the folded document in the scanner with the fold at the right If Upside down feeding is enabled in the scanner driver settings set the document with the fold at the left Specify half size document the size after folding and select Folio for the Scanning Side in the scanner settings then scan For ...

Page 81: ...ning and Scanning Shotcut select Attach to E mail in the Destination panel To use this function you need to install a plug in The plug in can be installed by selecting its checkbox when installing CaptureOnTouch How do I use the automatic document color detection function The scanner driver for this scanner includes a function that automatically detects the color mode from the contents of a docume...

Page 82: ...m2 Temperature 15 C to 27 5 C 59 F to 81 5 F Humidity 25 to 75 RH Total thickness 10 mm or less Scanning mixed size documents in the same batch A4 size or smaller 30 sheets up to 80 g m2 22 lb bond Total thickness 6 mm or less Business Card Size 50 8 mm x 53 9 mm 2 x 2 12 or larger Paper weight 300 g m2 80 lb bond 0 35 mm 0 0138 or less Orientation Vertical feeding only Card Size 53 9 mm x 85 5 mm...

Page 83: ... Folio scanning External Dimensions 300 mm 11 81 W x 220 mm 8 66 H x 156 mm 6 14 D with the feed tray close 300 mm 11 81 W x 339 mm 13 3 H x 235 mm 9 25 D with the feed tray open Weight without AC adapter DR C225 II Approximately 2 7 kg 5 95 lb DR C225W II Approximately 2 8 kg 6 17 lb Power Supply using AC adapter DC16V 0 7A Power Consumption DR C225 II 100V Scanning maximum 11 0 W In the sleep mo...

Page 84: ...atbed Scanner Unit 102 201 The optional Flatbed Scanner Unit 102 201 can be connected to and used with this scanner System requirements The computer must comply with the necessary system requirements of Flatbed Scanner Unit 102 201 The scanner driver of Flatbed Scanner Unit 102 201 needs to be installed to use the unit About Use with CaptureOnTouch About Assigning Function to Start Button When you...

Page 85: ...85 External Dimensions HOME Chapter 12 Appendix External Dimensions Front View Side View ...

Page 86: ...86 ...

Page 87: ...87 ...

Page 88: ...88 ...

Reviews: