S
ERVICE
P
ROCEDURES
35
T
O
REMOVE
A
CPU
When you handle electronic components, follow electrostatic discharge (ESD) precautions
(see
1 Remove the imagePASS from the copier (see
As part of this step, you must disconnect the power cable. Do not proceed until you have
done so.
2 Open the imagePASS (see
3 Remove the motherboard components.
4 Remove the power supply (see
).
5 Remove the motherboard from the chassis (see
).
Place the motherboard on a flat, antistatic surface.
6 Remove the CPU fan cable from motherboard.
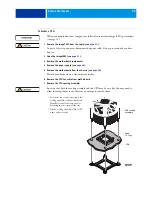
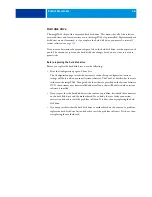
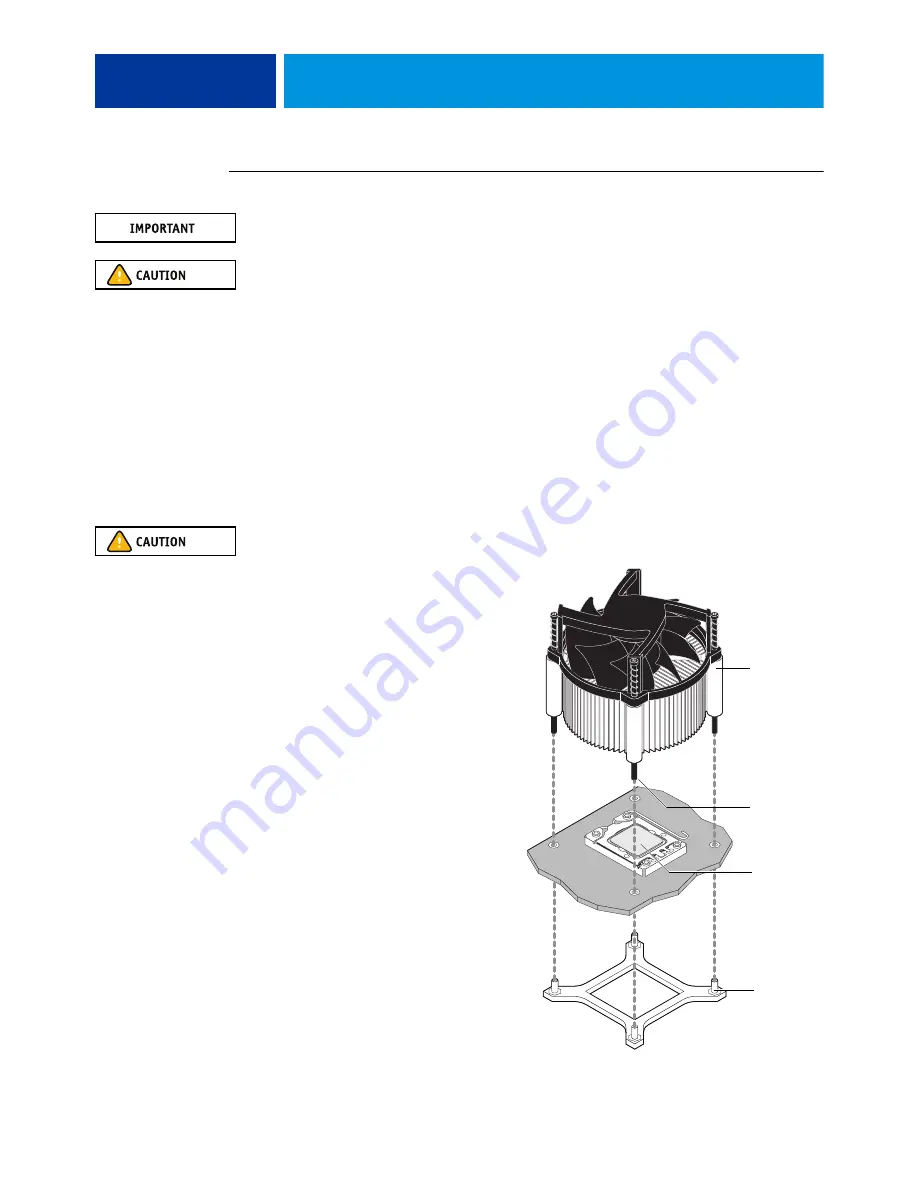
7 Remove the CPU cooling assembly:
Be aware that both the cooling assembly and the CPU may be very hot. You may need to
allow the components to cool before you attempt to remove them.
• Loosen the four screws that secure the
cooling assembly to the motherboard.
Partially loosen all the screws before
loosening any one screw all the way.
• Lift the cooling assembly off the CPU
socket and set it aside.
CPU cooling
assembly
Screw
(1 of 4)
CPU
Mounting
bracket

