


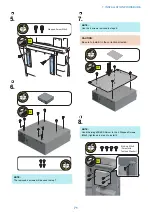
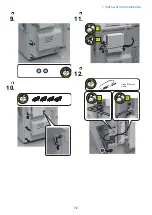

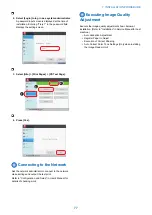
6.
NOTE:
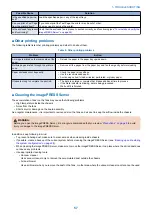
Ask the user to keep the removed Bypass PCB.
2x
1x
NOTE:
The removed screws will be used in step 8.
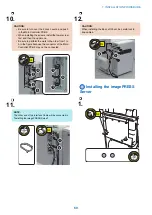
7.
1x
M3x6
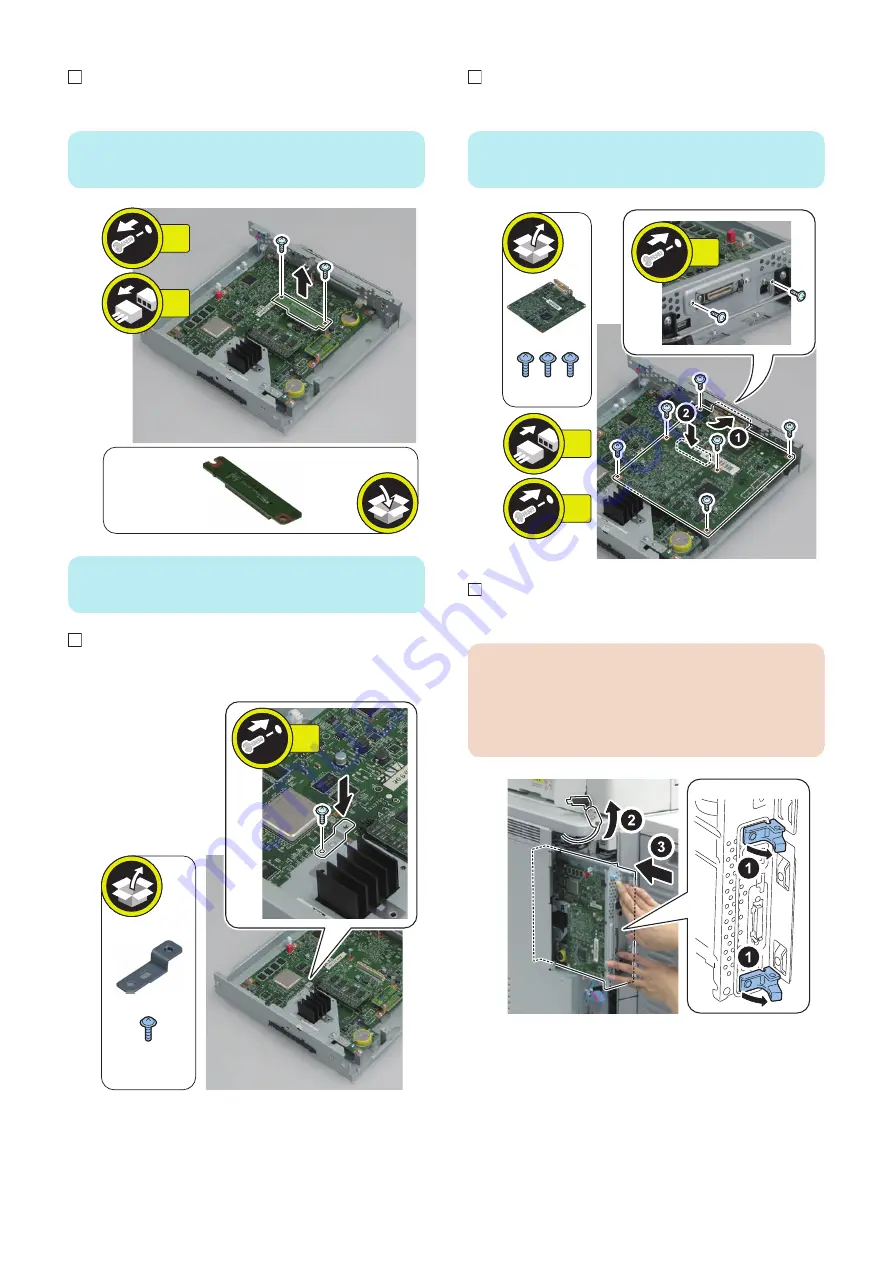
8.
NOTE:
Use the screws removed in steps 4, 5, and 6.
M3x6
6x
1x
2x
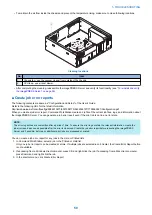
9.
CAUTION:
• Uniformly push in the Main Controller PCB 2 with
both hands until it stops.
• Install the Main Controller PCB 2 while paying
attention not to trap cables.
7. INSTALLATION PROCEDURE
68
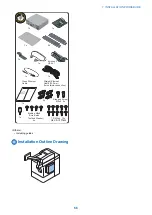
Summary of Contents for imagePRESS Server G200
Page 1: ...Revision 1 1 imagePRESS Server G200 Service Manual...
Page 6: ...Introduction 1 Introduction 2...
Page 11: ...USING THE IMAGEPRESS SERVER 2 Using the imagePRESS Server 7...
Page 13: ...The imagePRESS Server Tools menu 2 USING THE IMAGEPRESS SERVER 8...
Page 14: ...REPLACING PARTS 3 Replacing Parts 10 Cleaning the imagePRESS Server 36...
Page 42: ...INSTALLING SYSTEM SOFTWARE 4 Installing System Software 38...
Page 52: ...TROUBLESHOOTI NG 5 Troubleshooting 48...
Page 65: ...SPECIFICATIONS 6 Specifications 61...
Page 77: ...9 10 11 2x 1x 12 1x Cross Ethernet Cable 1x 7 INSTALLATION PROCEDURE 72...


