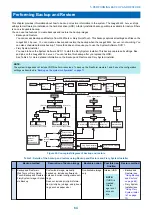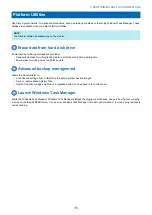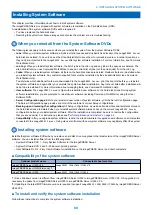
Backing up or restoring the imagePRESS Server
The following tasks describe using Backup and Restore on WebTools. Fiery QuickTouch uses the same menu selections and
features for backing up and restoring the
imagePRESS Server
. Refer to the following tasks if you are using Backup and Restore
on Fiery QuickTouch.
To setup automatic scheduled backup
NOTE:
When you set up the scheduled backup, only the latest backup will be stored. Previous backups will be deleted.
1. In the Backup and Restore window, click Fiery System Image > Schedule Backup.
If you have not logged in as an Administrator user, you are required to do so. Enter the administrator’s password, and click
Log In.
2. Select Enable automatic backup, and select when you want to start the backup process on the
imagePRESS Server
.
NOTE:
The backup process takes more than an hour to complete and it requires the
imagePRESS Server
to be Idle status. If the
imagePRESS Server
is not in Idle status, the backup process does not start.
3. Click Save.
To backup manually
1. In the Backup and Restore window, click Fiery System Image.
2. In Fiery System Image, select one of the following options:
•
Backup Now> USB:
Select this option if you want to create a backup on a USB flash drive.
•
New image:
Select this option if you want to create a backup of the current
imagePRESS Server
. You can select Create
bootable image option to make the USB flash drive a bootable device.
•
Fiery factory image:
Select this option if you want to create a backup of the
imagePRESS Server
factory image. When
you select this option, the Create bootable image option enables automatically.
If you select Create bootable image option, the USB device or hard disk drive specified as a destination becomes a bootable
device. Select this option when you want to boot the
imagePRESS Server
from the backup device to avoid the situation
where the HDD fails and cannot boot the
imagePRESS Server
. See
“Using bootable USB storage device to restore” on page
for booting from the bootable device. Bootable device is used for system restoration when a hardware failure occurs.
NOTE:
The minimum size required for the USB flash drive depends on the actual size of the backup file. You can determine the size of
the backup file by checking the Estimated size: field in the Create USB Backup dialog box. Prepare a USB flash drive with enough
capacity.
NOTE:
Due to Windows file system restriction, the maximum size of the USB flash drive you can use is 32GB if you enable the Create
bootable image option. You can use the USB flash drive with more than 32GB capacity without enabling the Create bootable image
option.
•
Backup Now> Internal hard drive:
Select this option if you want to create a backup on the HDD of the
imagePRESS
Server
. You must specify the file name of the backup image. The default image name is the server name of the
imagePRESS Server
.
5. PERFORMING BACKUP AND RESTORE
69
Summary of Contents for ImagePRESS Server H350 V2
Page 8: ...Introduction 1 Introduction 2 Specifications 7 ...
Page 17: ...INSTALLING HARDWARE 2 Installing Hardware 11 ...
Page 26: ...USING THE IMAGEPRESS SERVER 3 Using the imagePRESS Server 20 ...
Page 35: ...REPLACING PARTS 4 Replacing parts 29 ...
Page 86: ...INSTALLING SYSTEM SOFTWARE 6 Installing System Software 80 ...
Page 91: ...TROUBLESHOOTI NG 7 Troubleshooting 85 ...
Page 104: ...INSTALLATION PROCEDURE 8 Installation 98 Removable HDD Kit B5 108 ...

