background image

19 


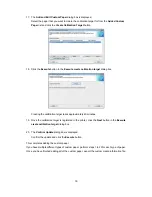
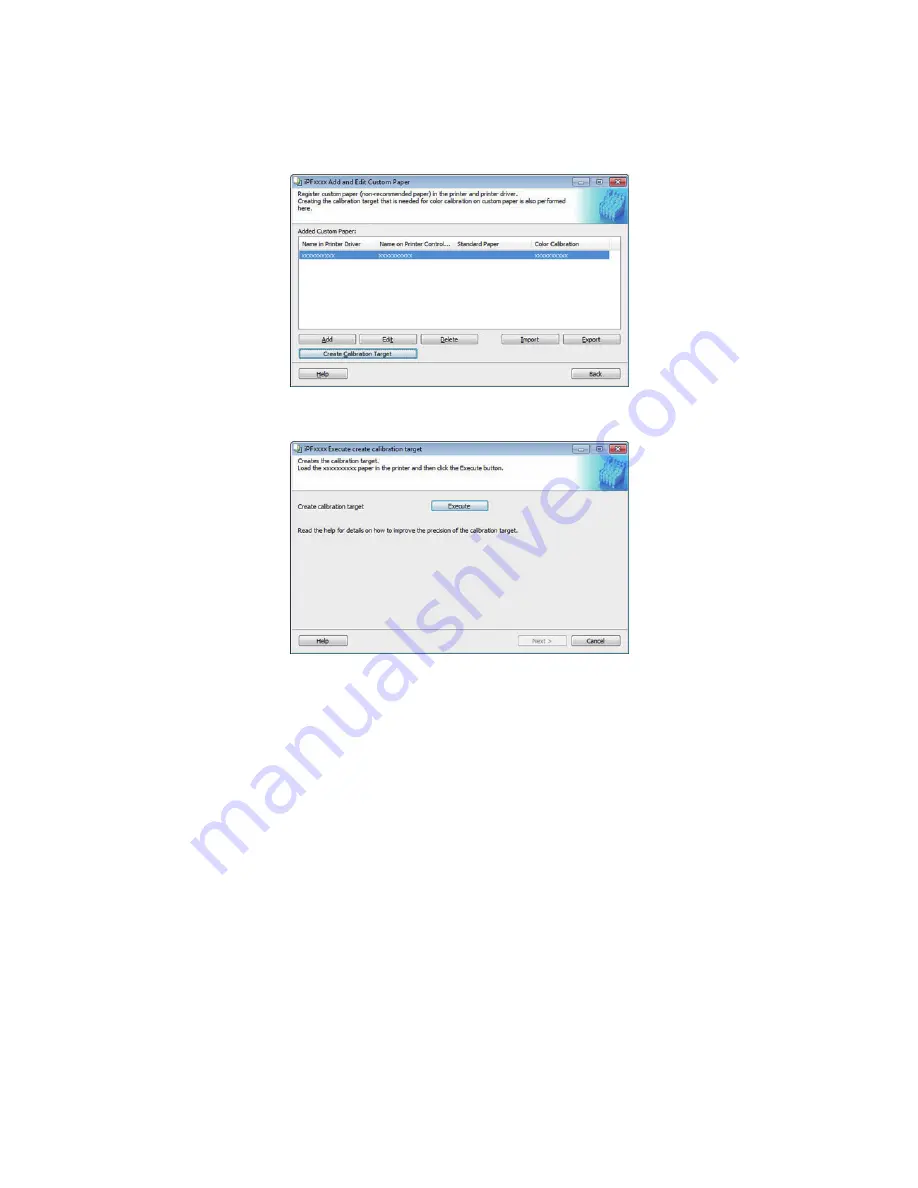
17. The 

Add and Edit Custom Paper

 dialog box is displayed. 

Select the paper that you want to create the calibration target for from the 

Added Custom 

Paper

 list and click the 

Create Calibration Target

 button. 


18. Click the 

Execute

 button in the 

Execute create calibration target

 dialog box. 


Creating the calibration target takes approximately 40 minutes. 

 
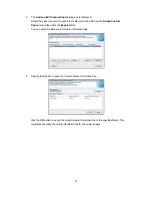
19.  Once the calibration target is registered in the printer, click the 

Next

 button in the 

Execute 

create calibration target

 dialog box. 


20. The 

Confirm Update

 dialog box is displayed. 

Confirm the update and click the 

Execute

 button. 

 
This completes adding the custom paper. 

If you have multiple different types of custom paper, perform steps 1 to 20 for each type of paper. 

Once you have finished adding all of the custom paper, export the custom media information file. 


Summary of Contents for imagePROGRAF iPF6450

Page 1: ...CALIBRATION LINK SETUP GUIDE Ver 1 00 Canon Inc...

Page 2: ...O THE OTHER PRINTERS 22 5 ADD THE CUSTOM PAPER TO THE COMPUTERS FOR PRINTING 24 6 EXECUTE PAPER FEED ADJUSTMENT AND COLOR CALIBRATION 26 OPERATION OF CALIBRATION LINK USING CCMC 28 CHECKING CALIBRATIO...

Page 3: ...that support calibration link by executing color calibration on the individual printers using a calibration target data for color calibration that matches the characteristics of the paper under the pr...

Page 4: ...management 1 Paper where feeding through the printer has been confirmed under standard testing conditions by Canon 2 Custom paper is paper that does not correspond to any genuine Canon paper or Canon...

Page 5: ...the recommended environmental conditions for genuine Canon paper see the Paper Reference Guide Paper Reference Guide can be installed on the computer from the User Software CD ROM included with the p...

Page 6: ...or South America Opaque Paper 120 No Yes No HW Coated Yes Yes Yes GlossyPhoto 170g Yes Yes Yes SatinPhoto 170g Yes Yes Yes GlossyPhotoHG170 Yes Yes Yes SemGlsPhotoHG170 Yes Yes Yes GlossyPhoto 200g N...

Page 7: ...ossy paper semi glossy paper proofing paper coated paper art paper For the sizes of rolls that can be used with a printer check the catalog or Canon website Please understand that Canon offers absolut...

Page 8: ...it mounted Calibration link does not need to be performed if you are only using genuine Canon paper A printer that supports calibration link Computer for managing paper Only one computer is used for a...

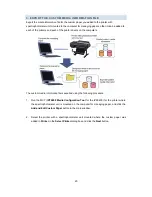
Page 9: ...unit mounted and create the calibration target 2 EXPORT THE CUSTOM MEDIA INFORMATION FILE Use MCT to export the media information file for the custom paper you added in step 2 to the computer for man...

Page 10: ...the printers that will perform calibration link For example if you have two iPF9400 units you need to install two iPF9400 printer drivers After installing the MCT and printer drivers perform the follo...

Page 11: ...ted from the printers and printer drivers If you have multiple printers repeat steps 1 to 5 on each of the printers to delete existing custom paper from all of the printers and printer drivers includi...

Page 12: ...ecifications of the custom paper you can use see P 7 Custom paper is added to the printer with spectrophotometer unit mounted by using the following procedure 1 Run the MCT iPF6450 Media Configuration...

Page 13: ...button If you do not know which media type to use as the basis of the custom paper click the Assist button to open the Media Type Selection Assistance dialog box and then set either the Weight gramma...

Page 14: ...Name in Printer Driver and add the created custom paper to the printer driver as is In this case create the custom paper information by changing the standard paper to another paper To use the custom p...

Page 15: ...Since Step 4 Paper feed adjustment is automatically performed when creating the calibration target later it is omitted at this point Click the Next button 10 The Roll Paper Settings dialog box is disp...

Page 16: ...printing finishes Borderless Printing Configures whether or not to permit borderless printing Permit Borderless printing is permitted Deny Borderless printing is denied Depending on the paper there a...

Page 17: ...est print using Maximum ink usage and the image to use using Image used in test print and then click the Start Print button 13 Determine and set the ink level that is thought to give the best visual t...

Page 18: ...trength check that the printhead is not rubbing against the paper If the printhead rubs against the paper there will be scratches in the printing results If the printhead rubs against the paper this c...

Page 19: ...bration target takes approximately 40 minutes 19 Once the calibration target is registered in the printer click the Next button in the Execute create calibration target dialog box 20 The Confirm Updat...

Page 20: ...n the computers The custom media information file is exported using the following procedure 1 Run the MCT iPF6450 Media Configuration Tool for the iPF6450 for the printer where the spectrophotometer u...

Page 21: ...d Custom Paper list and then click the Export button You can select multiple custom media information files 4 Specify the location to save the Custom Media Information File Click the OK button to expo...

Page 22: ...he other printers by using the following procedure 1 Connect the printer where you want to add the custom paper to the computer for managing paper 2 On the computer for managing paper run the MCT for...

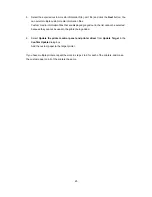
Page 23: ...rayed out in the list cannot be selected because they cannot be used in the printer being added 6 Select Update the printer control panel and printer driver from Update Target in the Confirm Update di...

Page 24: ...print on Install the corresponding printer drivers for all of the printers to print on Custom paper is added to the printer and the printer driver on the computer by using the following procedure 1 S...

Page 25: ...driver on the computer for printing If you have multiple printers repeat steps 2 to 7 for each of the printers If you have multiple computers for printing repeat steps 1 to 7 for each of the computers...

Page 26: ...0 in wide however a roll at least 406 4 mm 16 00 in wide depending on the paper type When Using Sheets only for genuine Canon paper One sheet of unused paper of at least A4 Letter size however one she...

Page 27: ...r to select Settings Adj tab and then press the OK button 9 Press or to select Adjust Printer and then press the OK button 10 Press or to select Calibration and then press the OK button 11 Press or to...

Page 28: ...following introduces an example of operating calibration link using CCMC CHECKING CALIBRATION LINK In CCMC printers that are in the calibration link state for the paper that is being fed where color...

Page 29: ...eet in the main window EXECUTING COLOR CALIBRATION REMOTELY For printers where a message such as It is recommended that you execute color calibration to keep the printer in the best condition is displ...

Page 30: ...on the computer for printing by following the procedure in 5 ADD THE CUSTOM PAPER TO THE COMPUTERS FOR PRINTING on P 24 5 Load the newly added custom paper into each printer and execute color calibrat...

Page 31: ...P 24 Q4 HOW DO I ONLY USE CALIBRATION LINK WITH GENUINE CANON PAPER A4 Load the genuine Canon paper into the printer to print from and execute color calibration Q5 WHAT DO I DO IF I RECREATED THE CUST...

Page 32: ...e A on the computer for managing paper in Office B 2 Add the custom paper that was added in Office A to the all of the printers in Office B by following the procedure in 4 ADD THE CUSTOM PAPER TO THE...

Page 33: ...he printed material dirty Check the interior of the upper cover of the printer and the interior of the spectrophotometer unit and clean them if they are dirty See Cleaning the Printer in Maintenance a...

Page 34: ...Adj Value in Set Adj Menu in the printer control panel set to Disabled Configure the following settings in the Set Adj Menu in the control panel 1 Select Calibration from Adjust Printer and then pres...

Page 35: ...nel Check the content of the error message and perform the corrective action See Error Messages in the User s Guide Do the serial numbers of the spectrophotometer sensor and white calibration tile mat...

Reviews: