2
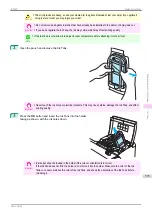
Open the pouch and remove the Ink Tank.
Important
•
Never touch the ink holes or electrical contacts. This may cause stains, damage the Ink Tank, and affect
printing quality.
3
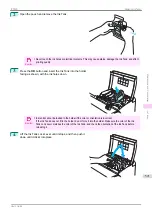
Press the
OK
button and insert the Ink Tank into the holder
facing as shown, with the ink holes down.
Important
•
Ink tanks cannot be loaded in the holder if the color or orientation is incorrect.
If the Ink Tank does not fit in the holder, do not force it into the holder. Make sure the color of the Ink
Tank Lock Lever matches the color of the Ink Tank, and check the orientation of the Ink Tank before
reloading it.
4
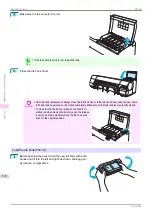
Lift the Ink Tank Lock Lever until it stops, and then push it
down until it clicks into place.
iPF830
Replacing Ink Tanks
Maintenance and Consumables
Ink Tanks
571
Summary of Contents for imagePROGRAF iPF830
Page 14: ...14 ...
Page 28: ...iPF830 User s Guide 28 ...
Page 144: ...iPF830 User s Guide 144 ...
Page 254: ...iPF830 User s Guide 254 ...
Page 318: ...iPF830 User s Guide 318 ...
Page 460: ...iPF830 User s Guide 460 ...
Page 494: ...iPF830 User s Guide 494 ...
Page 604: ...iPF830 User s Guide 604 ...
Page 636: ...iPF830 User s Guide 636 ...
Page 678: ...iPF830 User s Guide 678 ...


