background image

7

2

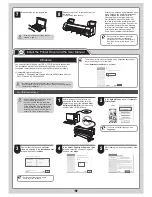
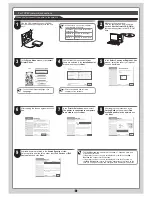
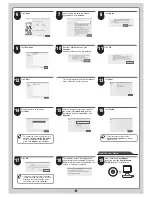
Make sure the printer is on. 

Turn the computer on and insert the 

provided 

User Software CD-ROM

 for 

your operating system in the CD-ROM 

drive. 

3

In the 

Setup Menu

 window, click 

Install 

Printer Driver

MEMO

• To choose a different language, click 

Language

.

4

Confirm that the required installation 

items are selected in the 

Installation List


window, and then click 

Next

MEMO

• Point at a software title to view a 

summary of the software. 

5

In the 

Select Country or Region of Use


window, select the country or region of 

use and click 

Next

6

After reading the license agreement, click 

Yes

7

In the 

Printer Selection

 window, select 

The printer is connected to computers 

in a network

 and click 

Next

8

After reading the precautions in the 

Getting Ready

 window, select 

Find 

available printers in the network

 and 

click 

Next

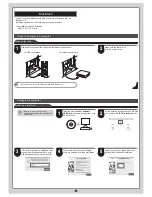
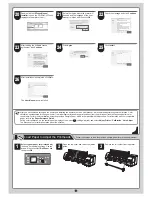
For TCP/IP (network) connections

When you first connect the printer to the network

Use the LAN cable to connect the LAN 

port on the back of the printer to the hub 

port. 

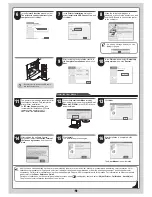
1

9

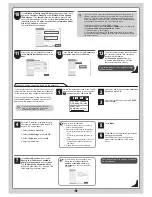
Available printers are listed in the 

Search Results

 window. 

Select a printer from the list on either their 

IPv4 Devices

 or 

IPv6 

Devices

 tabs and click 

Next

.  

MEMO

• The 

IPv6 Devices

 tab is displayed in Windows 7, Windows Vista, and 

Windows Server 2008.

• If the printer you want to use is not displayed in the list on the 

IPv6 

Devices

 tab, connect via IPv4 instead.

• If the printer you want to use is not displayed in the list of printers on 

the 

IPv4 Devices

 tab, refer to "When the printer cannot be found on the 

network" on page 8 to setup and configure an IP address for the printer. 

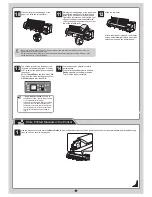
MEMO

• If the printer is on, the Link indicator 

under the LAN port lights. 

1000Base-T 
connection

The top and bottom LEDs 
light.

100Base-TX 
connection

The LED on the bottom 
lights green.

10Base-T 
connection

The LED on the top lights 
orange.

Summary of Contents for imagePROGRAF iPF8300

Page 1: ...nd other information Supported paper The Paper Reference Guide electronic manual provides information about paper You can access the User Manual and Paper Reference Guide as follows In Windows double...

Page 2: ...the carriage spacer b in the direction indicated by the arrow to remove it a b The belt stopper screw carriage spacer and Allen wrench are needed if the printer is moved to another location Keep the...

Page 3: ...you remove it from the pouch a a 9 Remove the orange protective part a Remove the other orange protective part b while holding the grip c a b c Never touch the parts covered by the protective parts D...

Page 4: ...settled on the bottom of the tank 4 Open the pouch and remove the ink tank Never touch the ink holes or metal contacts Touching these parts may cause stains damage the ink tank and affect print qualit...

Page 5: ...ect Deactivate the block and click Next Installation requires administrative rights such as those of Administrator Be sure to log on using an account with administrative rights before installation You...

Page 6: ...nstall User Manual dialog box is displayed insert the provided User Manuals CD ROM in the CD ROM drive and click Next 13 Click Next 14 After reading the software license agreement select I accept the...

Page 7: ...and click Next For TCP IP network connections When you first connect the printer to the network Use the LAN cable to connect the LAN port on the back of the printer to the hub port 1 9 Available print...

Page 8: ...en connecting to the network for the first time setup an IP address for the printer and then configure it on the printer When ink fills the system for the first time after printhead adjustment is fini...

Page 9: ...is connected to computers in a network and click Next 7 After reading the precautions in the Getting Ready window select Find available printers in the network and click Next 8 Available printers are...

Page 10: ...window select the country or region of use and click Next 5 After reading the license agreement click Yes 6 In the Printer Selection window select The printer is connected to computers in a network a...

Page 11: ...ided User Software CD ROM for your operating system in the CD ROM drive User Software 2 On the desktop double click the CD ROM icon and then the iPF Printer Setup icon 3 If the following screen is dis...

Page 12: ...IP Address and click Next 15 After entering your preferred name for the printer in Printer Name and the installation location in Location click Register 16 Click Finish MEMO To register another printe...

Page 13: ...printer driver and User Manual we recommend performing color calibration Color calibration compensates for changes in color from individual variation among printheads or from the printing environment...

Page 14: ...c to the shaft side to lock it a b c Insert the roll holder as far as it will go so there is no gap between the paper and the roll holder flange A gap can cause the paper to feed irregularly Remove a...

Page 15: ...re that the roll of paper is in close contact with the roll holder flange as described in step 5 14 Printhead position adjustment starts automatically When printhead adjustment is finished Ready appea...

Page 16: ...make sure that the paper is in close contact with the roll holder flange See step 5 on page 14 No maintenance cartridge installed The maintenance cartridge is not connected Install the maintenance ca...

Reviews: