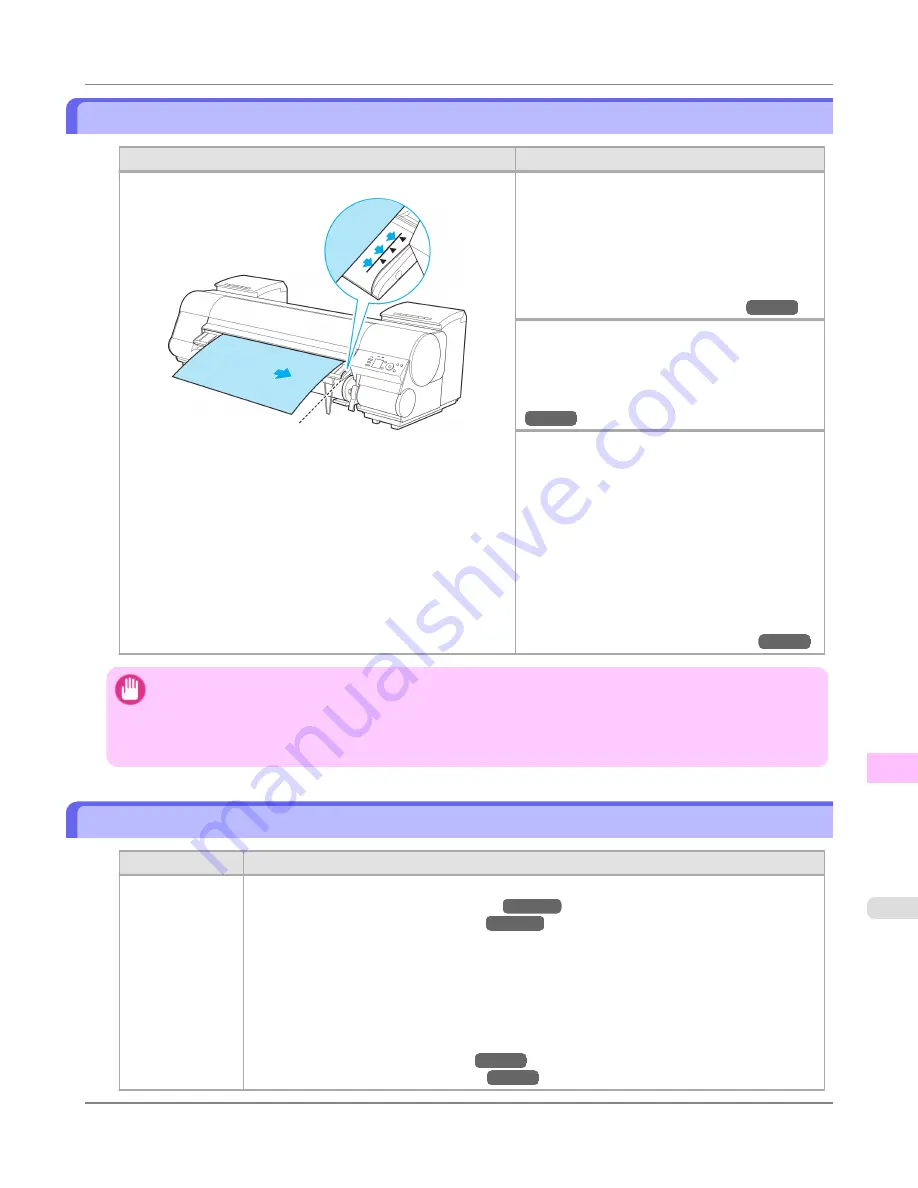
Paper loaded askew.
Cause
Corrective Action
Paper loaded crooked was detected when the paper was advanced.
Follow these steps to reload the roll.
1.
Lift the Release Lever.
2.
Adjust the right edge of the roll to make it par-
allel to the orange Paper Alignment Line.
3.
Lower the Release Lever.
(See "
Loading Rolls in the Printer
.")
→P.786
If this error recurs after you reload the roll, re-
move the Roll Holder from the printer, push the
roll firmly in until it touches the Roll Holder
flange, and reload the Roll Holder in the printer.
(See "
Attaching the Roll Holder to Rolls
.")
→P.782
Follow these steps to reload the sheet.
1.
Lift the Release Lever.
2.
Pull out the sheet.
3.
Adjust the right edge of the sheet to make it
parallel to the right Paper Alignment Line and
the trailing edge of the sheet to make it parallel
to the paper alignment line under the Paper Re-
tainer.
4.
Lower the Release Lever.
(See "
Loading Sheets in the Printer
.")
→P.813
Important
•
To disable this message (if it is displayed repeatedly despite reloading paper, for example), choose
Off
or
Loose
in the
Skew Check Lv.
setting of the printer menu. However, this may cause jams and printing prob-
lems because paper may be askew when printed. Also, the Platen may become soiled, which may soil the
back of the next document when it is printed.
Cannot feed paper.
Cause
Corrective Action
Paper could not
be advanced cor-
rectly during
feeding.
1.
Lift the Release Lever and remove the jammed paper.
(See "
Clearing Jammed Roll Paper
.")
→P.1057
(See "
Clearing a Jammed Sheet
.")
→P.1061
2.
Load paper.
3.
Lower the Release Lever.
4.
If "
Not finished printing. Finish printing remaining jobs?
" is shown on the Display Screen,
press the
OK
button.
Printing will resume, starting from the page on which the error occurred.
(See "
Loading Rolls in the Printer
.")
→P.786
(See "
Loading Sheets in the Printer
.")
→P.813
Error Message
>
Messages regarding paper
>
iPF8300S
Paper loaded askew.
13
1103
Summary of Contents for imagePROGRAF iPF8300S
Page 20: ......
Page 933: ...Control Panel Operations and Display Screen 914 Printer Menu 924 Control Panel iPF8300S 9 913 ...
Page 1142: ...Specifications Printer Specifications 1123 Specifications iPF8300S 14 1122 ...
Page 1148: ...Appendix How to use this manual 1129 Disposal of the product 1139 Appendix iPF8300S 15 1128 ...
Page 1159: ...Disposal of the product WEEE Directive 1140 Appendix Disposal of the product iPF8300S 15 1139 ...
Page 1160: ...WEEE Directive Appendix Disposal of the product WEEE Directive iPF8300S 15 1140 ...
Page 1161: ...Appendix Disposal of the product iPF8300S WEEE Directive 15 1141 ...
Page 1162: ...Appendix Disposal of the product WEEE Directive iPF8300S 15 1142 ...
Page 1163: ...Appendix Disposal of the product iPF8300S WEEE Directive 15 1143 ...
Page 1164: ...Appendix Disposal of the product WEEE Directive iPF8300S 15 1144 ...
Page 1165: ...Appendix Disposal of the product iPF8300S WEEE Directive 15 1145 ...
Page 1166: ...Appendix Disposal of the product WEEE Directive iPF8300S 15 1146 ...
Page 1167: ...Appendix Disposal of the product iPF8300S WEEE Directive 15 1147 ...
Page 1168: ...Appendix Disposal of the product WEEE Directive iPF8300S 15 1148 ...
Page 1170: ...V Vacuum Strength 863 W When to replace 1013 ...
Page 1171: ......
Page 1172: ... CANON INC 2011 ...


