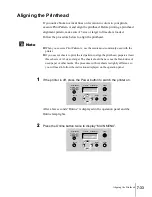
Aligning the Printhead
35
7-35
8
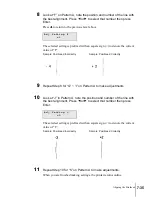
Look at “F” on Pattern A, note the position and number of the line with
the best alignment, Press
or
to select that number then press
Enter.
Press
to return to the previous level above.
The selected setting is prefixed with an equals sign (=) to denote the current
value of “F”.
9
Repeat Step 8 for “G” ~ “I” on Pattern A to make adjustments.
10
Look at “J” in Pattern A, note the position and number of the line with
the best alignment, Press
or
to select that number then press
Enter.
The selected setting is prefixed with an equals sign (=) to denote the current
value of “J”.
11
Repeat Step 10 for “K” on Pattern A to make adjustments.
When you are finished making settings, the printer returns online.
A d j . S e t t i n g F
= 0
Sample: Positioned Incorrectly
Sample: Positioned Correctly
A d j . S e t t i n g J
= 0
Sample: Positioned Incorrectly
Sample: Positioned Correctly
Summary of Contents for imagePROGRAF W7200
Page 1: ......
Page 67: ...3 Printing from Windows This chapter describes the basic procedures for printing from Windows ...
Page 72: ...Printing from Windows 3 6 ...
Page 86: ...Printing from a Macintosh 4 14 ...
Page 99: ...6 Maintenance This chapter describes how to replace consumables and maintain the printer ...
Page 124: ...Maintenance 6 26 ...
Page 125: ...7 Troubleshooting This chapter describes how to solve problems with the printer ...
Page 168: ...Troubleshooting 7 44 ...

