background image

imageRUNNER

2204F / 2204N / 2004N / 2004

User's Guide

USRMA-0997-01 2017-03 en

Copyright CANON INC. 2017

Summary of Contents for imageRunner 2004

Page 1: ...imageRUNNER 2204F 2204N 2004N 2004 User s Guide USRMA 0997 01 2017 03 en Copyright CANON INC 2017 ...

Page 2: ...per in the Multi Purpose Tray 46 Loading Envelopes in the Multi Purpose Tray 49 Loading Preprinted Paper 52 Specifying Paper Size and Type 55 Registering a Custom Paper Size 58 Registering in the Address Book imageRUNNER 2204F 60 Registering Destinations in the Address Book 61 Registering Destinations for One Touch Dial 64 Registering Multiple Destinations for Group Dial 67 Adjusting the Volume 70...

Page 3: ...inations 125 Various Fax Settings 128 Adjusting Resolution 129 Adjusting Density 130 Scanning 2 Sided Documents 131 Changing Default Settings 132 Receiving Faxes 133 Sending and Receiving Faxes According to Your Purposes 137 Making a Call before Sending Faxes Manual Sending 138 Sending Faxes to Multiple Destinations Simultaneously Sequential Broadcast 139 Storing Received Faxes into Memory Memory ...

Page 4: ...g from the Machine 219 Scanning from a Computer 222 Scanning Using MF Toolbox 223 Configuring Scan Settings in MF Toolbox 230 Scanning Using an Application 237 Configuring Scan Settings in ScanGear MF 239 Configuring Scan Settings in Simple Mode 240 Configuring Scan Settings in Advanced Mode 243 Using WSD 257 Linking with Mobile Devices imageRUNNER 2204F 2204N 2004N 261 Connecting to a Mobile Devi...

Page 5: ...MP 349 Security 354 Protecting the Machine from Unauthorized Access 355 Preventing Unauthorized Access imageRUNNER 2204F 2204N 2004N 356 Setting Access Privileges 358 Setting the System Manager ID imageRUNNER 2204F 2204N 2004N 359 Setting the Department ID Management imageRUNNER 2204F 2204N 2004N 361 Setting the System Manager PIN imageRUNNER 2004 368 Setting a Remote UI PIN imageRUNNER 2204F 2204...

Page 6: ...ageRUNNER 2204F 416 Setting Menu List 420 Network Settings imageRUNNER 2204F 2204N 2004N 421 Preferences 430 Timer Settings 436 Common Settings 440 Copy Settings 444 Fax Settings imageRUNNER 2204F 447 Printer Settings 458 Adjustment Maintenance 460 System Management Settings 465 Troubleshooting 474 Clearing Jams 476 When an Error Message Appears 491 When an Error Code Appears 499 Common Problems 5...

Page 7: ...st 556 Department ID Management Report imageRUNNER 2204F 2204N 2004N 557 Copy Print Charge Log Report 558 Viewing the Counter Value 559 Initializing Settings 561 Initializing Address Book imageRUNNER 2204F 562 Initializing Menu 563 Initializing System Management Settings 564 Initializing All Data Settings 565 Appendix 567 Feature Highlights 568 Going Green and Saving Money 569 Improving Efficiency...

Page 8: ...Optional Equipment 594 Manuals Included with the Machine 596 Using e Manual 597 Installing e Manual 598 Uninstalling e Manual 602 Screen Layout of e Manual 605 Viewing e Manual 608 Others 609 Basic Windows Operations 610 For Mac OS Users 617 Notice 618 VII ...

Page 9: ...Important Safety Instructions Important Safety Instructions 2 Installation 3 Power Supply 5 Handling 6 Maintenance and Inspections 8 Consumables 9 Important Safety Instructions 1 ...

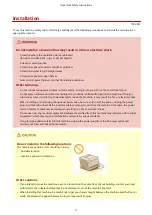
Page 10: ...re using this machine read this chapter and follow the instructions to properly use this machine Do not perform any operations not described in this manual Canon will not be responsible for any damages resulting from use not described in this manual improper use or repair changes not performed by Canon or a third party authorized by Canon Important Safety Instructions 2 ...

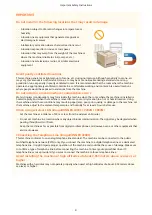
Page 11: ...ional accessories be sure to turn OFF the power unplug the power plug and then disconnect all the interface cables and power cord from the machine Otherwise the power cord or interface cables may be damaged resulting in a fire or electrical shock Do not use near any medical equipment Radiowaves emitted from this machine may interfere with medical equipment which may cause a malfunction and result ...

Page 12: ... hot or humid location Using the machine under these conditions may result in paper jams poor print quality or damage to the machine Let the machine adjust to the ambient temperature and humidity for at least 2 hours before use When using wireless LAN imageRUNNER 2204F 2204N 2004N Set the machine at a distance of 50 m or less from the wireless LAN router Do not set machine in a location where any ...

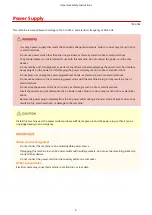
Page 13: ...wer strips with the machine Doing so may result in a fire or electrical shock Do not wrap the power cord or tie it in a knot as this may result in a fire or electrical shock Insert the power plug completely into the AC power outlet Failure to do so may result in a fire or electrical shock Remove the power plug completely from the AC power outlet during a thunder storm Failure to do so may result i...

Page 14: ...onnector as this may result in an electrical shock If you are using a cardiac pacemaker This machine generates a low level magnetic flux If you use a cardiac pacemaker and feel abnormalities please move away from this machine and consult your physician immediately Do not place heavy objects on this machine as they may fall resulting in injury For your safety please unplug the power cord if the mac...

Page 15: ...ors covers and other parts Doing so may result in damage to the machine Do not touch electrical contacts Do not turn OFF the machine during printing Also do not open and close the cover and do not remove or insert paper during printing Doing so can cause paper jams Use a telephone cable with a length of 3 m or less Use a USB cable with a length 3 m of or less The display is a touch panel Press gen...

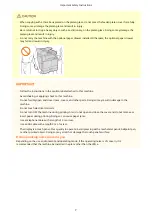
Page 16: ...se alcohol benzenes paint thinners or other flammable substances Do not use tissue paper or paper towels If these substances come into contact with electrical parts inside the machine they may generate static electricity or result in a fire or electrical shock Check the power cord and plug periodically for damage Check the machine for rust dents scratches cracks or excessive heat generation Use of...

Page 17: ...mall children If toner is ingested consult a physician or poison control center immediately Do not disassemble or modify the toner cartridge Doing so may cause the toner to scatter Remove the sealing tape of the toner cartridge completely without using excessive force Doing otherwise may cause the toner to scatter Handling the toner cartridge Do not remove the toner cartridge from this machine or ...

Page 18: ...form or placement or may be added or removed without notice Dispose of the removed sealing tape according to local regulations Toner Confirm that the code on the front cover of the machine and the one on the package of the genuine toner are the same If a message prompting you to replace the toner cartridge appears on the display replace the used toner cartridge with a new one Use only toner cartri...

Page 19: ...40 Loading Paper in the Paper Drawer 42 Loading Paper in the Multi Purpose Tray 46 Loading Envelopes in the Multi Purpose Tray 49 Loading Preprinted Paper 52 Specifying Paper Size and Type 55 Registering a Custom Paper Size 58 Registering in the Address Book imageRUNNER 2204F 60 Registering Destinations in the Address Book 61 Registering Destinations for One Touch Dial 64 Registering Multiple Dest...

Page 20: ...w to use the keys on the control panel and how to view the display Parts and Their Functions P 14 Using the Display This section describes how to toggle the display and select items Using the Display P 31 Entering Text imageRUNNER 2204F 2204N 2004N This section describes how to enter characters and numbers for registering destinations to the Address Book sending faxes etc Entering Text P 34 Placin...

Page 21: ...destinations for sending faxes Registering in the Address Book imageRUNNER 2204F P 60 Adjusting the Volume This section describes how to adjust the volume of various machine sounds such as those produced when fax sending is complete or when an error occurs Adjusting the Volume P 70 Entering Sleep Mode This section describes how to set the sleep mode Entering Sleep Mode P 72 Basic Operations 13 ...

Page 22: ...ition to describing the parts of the machine used for such basic operations as placing documents loading paper and replacing the toner cartridges this section also describes the keys on the control panel and display Read this section for tips on how to use the machine properly External View P 15 Internal View P 18 Control Panel P 20 Basic Operations 14 ...

Page 23: ...External View 1053 008 imageRUNNER 2204F 2204N 2004N When the DADF AT1 and Cassette Feeding Module AD1 are attached imageRUNNER 2004 Basic Operations 15 ...

Page 24: ...ys such as the Start key and Stop key a display and status indicators You can perform all the operations and specify settings from the control panel Control Panel P 20 Display P 24 Paper drawer 1 Load the type of paper you frequently use into the paper drawer Loading Paper in the Paper Drawer P 42 Paper drawer 2 Optional Load the type of paper you frequently use into the paper drawer Loading Paper...

Page 25: ... to a telephone line Power socket Connect the power cord Power switch Turns the power ON or OFF To restart the machine turn OFF the machine wait for at least 10 seconds and turn it back ON Toner code Indicates the type of genuine toner that can be used with the machine Use toner with a code that includes the same letters as the code on the front cover of the machine Basic Operations 17 ...

Page 26: ...Internal View 1053 009 imageRUNNER 2204F 2204N 2004N When the DADF AT1 and Cassette Feeding Module AD1 are attached imageRUNNER 2004 Basic Operations 18 ...

Page 27: ...er 2 left cover Cover of the Optional Cassette Feeding Module AD1 Open this cover when clearing a paper jam in paper drawer 2 Clearing Jams P 476 Fixing unit When a paper jam occurs around the fixing unit clear the paper jam from here Clearing Jams P 476 Left cover Open this cover to clear a paper jam inside the main unit Clearing Jams P 476 Toner cartridge Replace the toner cartridge when the ton...

Page 28: ...Control Panel 1053 00A imageRUNNER 2204F 2204N 2004N Basic Operations 20 ...

Page 29: ...gress of the current jobs and error statuses The display is a touch panel allowing you to operate the screen by touch to specify settings Display P 24 Using the Display P 31 Paper Settings key Press to select a paper source such as a paper drawer or multi purpose tray and register paper size and type Basic Operations 21 ...

Page 30: ... to use tone dialing such as when receiving fax information services imageRUNNER 2204F Receiving Fax Information Services P 146 Numeric keys 0 9 keys imageRUNNER 2204F 2204N 2004N Press to enter numbers and text Entering Text P 34 key imageRUNNER 2204F 2204N 2004N Press to enter symbols such as or Energy Saver key Press to put the machine into sleep mode The key lights up green when the machine is...

Page 31: ...p when the machine is connected to wireless LAN Processing Data indicator Blinks while operations are being performed Lights up when there are documents waiting to be processed Log In Out key imageRUNNER 2204F 2204N 2004N Press to log in out when Department ID Management has been set LINKS Using the Display P 31 Basic Operations 23 ...

Page 32: ...04F P 105 Using the Machine as a Scanner P 217 Favorite Copy Set You can register frequently used combinations of copy settings and recall them easily when needed Registering Frequently Used Copy Settings P 103 Menu Timer Settings Preferences and many other machine settings start from this button Setting Menu List P 420 Address Book imageRUNNER 2204F only Display destinations registered in the Add...

Page 33: ...egistering in the Address Book imageRUNNER 2204F P 60 Status Monitor Screen When you press a screen is displayed that enables you to check the status of documents that are being printed sent or received as well as the status of the machine such as the toner level or the network setting information such as the IP address of the machine Error Information Notification Displays the details of any erro...

Page 34: ...n below as an example 1 Network Information imageRUNNER 2204F 2204N 2004N only Displays the network settings such as the IP address of the machine and status such as the condition of wireless LAN communications Viewing Network Settings P 326 When a Message Is Displayed Messages are displayed at the top of the screen in situations such as when toner level is low or when a cover is left open The dis...

Page 35: ...respond to the error are displayed Follow the on screen instructions to solve the problem The screen displayed when a paper jam occurs is shown below as an example When an Error Message Appears P 491 LINKS Customizing the Home Screen P 28 Using the Display P 31 Basic Operations 27 ...

Page 36: ...Manager ID and PIN is displayed enter the System Manager ID and PIN tap Apply and press Setting the System Manager ID imageRUNNER 2204F 2204N 2004N P 359 If a screen for entering a PIN is displayed enter the PIN with the numeric keys and tap Apply Setting the System Manager PIN imageRUNNER 2004 P 368 2 Tap Set Display Order 3 Tap the button to move 4 Tap Previous or Next to move the button and tap...

Page 37: ... Manager ID imageRUNNER 2204F 2204N 2004N P 359 If a screen appears prompting you to enter a PIN enter the correct PIN and tap Apply Setting the System Manager PIN imageRUNNER 2004 P 368 2 Tap Insert and Delete Blank 3 Tap the button where you want to insert a blank and tap Insert To delete an inserted blank select the blank tap Delete and proceed to step 5 4 Tap Apply 5 Tap End LINKS Display P 24...

Page 38: ... a number of up to seven digits using the numeric keys and tap Apply If no PIN is registered proceed to step 6 3 Select PIN 4 Enter a number of up to seven digits using the numeric keys and tap Apply When PIN Confirm is displayed enter the PIN once again to confirm 5 Press The logon screen will be changed to the main screen After you finish using the machine press again to display the logon screen...

Page 39: ...Operating with wet soiled hands Operating the display while an object is placed on it Tap Touch the screen lightly and quickly Use for selecting or finalizing items Long Touch Keep finger held on the screen When text cannot be completely displayed on one line appears touch and hold the line to scroll all of the text Also continuously increases decreases the copy magnification Selecting items Tap a...

Page 40: ... displayed on the screen when there is still information that is undisplayed If the scroll bar is displayed tap to scroll the screen The screen changes page by page and the page number is displayed in the scroll bar Changing values and settings Changing values Tap to enter values If an icon such as below is displayed at the upper left of the screen you can enter values directly using the numeric k...

Page 41: ...on a scale tap You can change a variety of display related settings such as the scrolling speed or display language Display Settings P 432 To change the screen that is automatically displayed when the machine remains idle for a specified length of time Function After Auto Reset P 438 Basic Operations 33 ...

Page 42: ...rently selected type of text is indicated by the A a or 12 displayed above and to the right of the text input field You can also press to switch the type of text Types of Text That Can Be Entered Enter text with the numeric keys and the display Text that can be entered is listed below Key A a 12 _ 1 ABC abc 2 DEF def 3 GHI ghi 4 JKL jkl 5 MNO mno 6 Basic Operations 34 ...

Page 43: ...e the cursor to the end of the text and tap Example of Entering Text and Numbers Example Canon 1 1 Tap A a 12 or press repeatedly until A is selected 2 Press repeatedly until the letter C is selected 3 Tap A a 12 or press repeatedly until a is selected 4 Press repeatedly until the letter a is selected 5 Press repeatedly until the letter n is selected 6 Press repeatedly until the letter o is select...

Page 44: ...ied To avoid paper jams Do not place the following types of documents in the feeder as this may cause paper jams Wrinkled or creased paper Carbon paper or carbon backed paper Curled or rolled paper Coated paper Torn paper Onion skin or thin paper Stapled or clipped documents Paper printed by a thermal transfer printer Transparencies To scan documents more accurately Documents placed in the feeder ...

Page 45: ... transparencies cover them with plain white paper 3 Gently close the feeder platen cover The machine is ready to scan the document When scanning is complete remove the document from the platen glass Placing Documents in the Feeder 1 Spread the document guides apart Slide the document guides outward until they are slightly farther apart than the actual document width Basic Operations 37 ...

Page 46: ... a few times 3 Place the document s face up in the feeder Up to 50 sheets can be loaded at a time If 50 or more sheets are loaded scanning may stop or a paper jam may occur 4 Align the document guides against the edges of the document Slide the document guides inward until they are aligned securely against the edges of the document Basic Operations 38 ...

Page 47: ...e edges of the document Document guides that are too loose or too tight can cause misfeeds or paper jam While documents are being scanned Do not add or remove documents When scanning is complete Remove the scanned documents from beneath the feeder to prevent paper jams Basic Operations 39 ...

Page 48: ...cify the paper settings on the machine see Specifying Paper Size and Type P 55 For the amount of paper that can be loaded in each paper source see Paper P 586 Paper Type Paper Weight Paper Setting on the Machine Plain paper 64 to 90 g m Plain 64 90 g m Recycled paper 64 to 80 g m Recycled 64 80 g m Color paper 64 to 80 g m Color 64 80 g m Heavy paper 91 to 105 g m Heavy 1 91 105 g m 106 to 128 g m...

Page 49: ... place subject to high humidity dryness or drastic changes in temperature or humidity When printing on paper that has absorbed moisture Steam may emit from the paper output area or water droplets may form on the back side of the control panel or around the paper output area There is nothing unusual about any of these occurrences which occur when the heat generated from fixing toner on the paper ca...

Page 50: ... multi purpose tray Loading Paper in the Multi Purpose Tray P 46 1 Hold the handle of the paper drawer and pull it out until it stops 2 Push down the metal plate to lock it 3 Adjust the position of the paper guides When loading paper in the paper drawer 1 While squeezing the top part of the right guide slide it to align with the size indicator for the paper to be loaded Basic Operations 42 ...

Page 51: ... paper in the paper drawer 2 imageRUNNER 2204F 2204N 2004N Detach the end guide and reattach it to the slots aligned with the mark indicating the desired paper size Lift up the lock lever on the front slide guide and slide it backwards or forwards to align it with the groove marked with the desired paper size Basic Operations 43 ...

Page 52: ... abbreviations on the paper guides in the paper drawer indicate paper sizes as follows LGL Legal LTR Letter STMT Statement 5 Insert the paper into the paper drawer Make sure that the paper size setting of the paper drawer matches the size of the paper to load in the paper drawer Load the paper stack with the print side face up and against the left guide of the paper drawer Basic Operations 44 ...

Page 53: ...ading Envelopes in the Multi Purpose Tray P 49 or Loading Preprinted Paper P 52 6 Gently insert the paper drawer into the machine Continue to Specifying Paper Size and Type P 55 When changing the paper size or type If you load a different size or type of paper into the machine make sure to change the settings If you do not change the settings the machine cannot print properly LINKS Paper P 586 Bas...

Page 54: ...the paper in the multi purpose tray Load the paper that you usually use in the paper drawer Loading Paper in the Paper Drawer P 42 1 Open the multi purpose tray Pull out the auxiliary tray and extend the tray extension when loading large sized paper 2 Adjust the slide guides to match the size of the paper Basic Operations 46 ...

Page 55: ...ch paper can cause paper jams When loading envelopes or paper with a logo see Loading Envelopes in the Multi Purpose Tray P 49 or Loading Preprinted Paper P 52 Continue to Specifying Paper Size and Type P 55 Printing on the Back Side of Printed Paper Manual 2 Sided Printing You can print on the back side of printed paper Flatten any curls on the printed paper and insert it into the multi purpose t...

Page 56: ... You can use only the paper printed with this machine Basic Operations 48 ...

Page 57: ... envelopes For a description of the general procedure for loading paper in the paper drawer or multi purpose tray see Loading Paper in the Paper Drawer P 42 or Loading Paper in the Multi Purpose Tray P 46 Before Loading Envelopes Follow the procedure below to prepare the envelopes before loading 10 envelope at a time can be loaded in the multi purpose tray Follow steps 1 to 4 in the procedure belo...

Page 58: ... 4 Align the edges of the envelope on a flat surface Loaded Orientation Load the envelopes in portrait orientation short edge first with the non glued side front side face up Load the envelopes as shown in the illustrated bellow feeding direction Basic Operations 50 ...

Page 59: ...Basic Operations 51 ...

Page 60: ...ay see Loading Paper in the Paper Drawer P 42 or Loading Paper in the Multi Purpose Tray P 46 The orientation of the paper may vary depending on the settings in Switch Paper Feed Method Loading Paper with Logos in Portrait Orientation The loading method varies depending on the size of the paper with the logo and the paper source that is used When Loading A4 B5 size Paper with Logos Load the paper ...

Page 61: ...laten glass Loading Paper with Logos in Landscape Orientation The loading method varies depending on the size of the paper with the logo and the paper source that is used When Loading A4 B5 size Paper with Logos Load the paper so that the logo faces up in the paper drawer and faces down in the multi purpose tray as shown in the illustrations below Paper drawer Multi purpose tray Pay attention to t...

Page 62: ...r and faces down in the multi purpose tray as shown in the illustrations below Paper drawer Multi purpose tray Pay attention to the orientation when placing a document Place as follows with the document facing up in the feeder and facing down on the platen glass Feeder Platen glass Basic Operations 54 ...

Page 63: ...se tray which is convenient if you always load paper of the same size and type If the setting does not match the size and type of loaded paper a paper jam or printing error may occur 1 Press 2 Select the paper source If the same size type of paper is always set in the Multi Purpose Tray Tap Multi Purpose Tray On If you want to register the paper in paper drawer 1 or paper drawer 2 Tap Drawer 1 or ...

Page 64: ...sed paper size is known You can set the machine to display only frequently used paper sizes in the selection screen 1 Press 2 Tap Select Frequently Used Paper Sizes 3 Select the paper source 4 Select the frequently used paper sizes Basic Operations 56 ...

Page 65: ...The paper sizes without check mark are displayed in the Paper Size Other Sizes screen 5 Tap Apply LINKS Loading Paper in the Paper Drawer P 42 Paper P 586 Basic Operations 57 ...

Page 66: ...the multi purpose tray 1 Press 2 Tap Multi Purpose Tray 3 Tap On 4 Tap Custom 5 Specify the paper size 1 Specify the length of the X side Tap X Input the length of the X side using with to move the cursor between the digits for inputting whole numbers and fractions and tap Apply Basic Operations 58 ...

Page 67: ...ength of the Y side Tap Y Input the length of the Y side and tap Apply 3 Tap Apply 6 Select the paper type LINKS Loading Paper in the Paper Drawer P 42 Loading Paper in the Multi Purpose Tray P 46 Basic Operations 59 ...

Page 68: ...rs This allows them to be displayed by the One Touch buttons in the Home Screen You can register up to 4 destinations for One Touch Dial Registering Destinations for One Touch Dial P 64 Group Dial You can select multiple destinations that have already been registered and register them together as a group You can send faxes to multiple destinations at the same time You can register up to 50 destina...

Page 69: ...for Address Book imageRUNNER 2204F P 385 3 Select Coded Dial Fax Name Registering Name is optional If you register Name the destination can be searched alphabetically 4 Enter the name using the numeric keys and tap Apply 5 Tap Fax Number 6 Enter the number using the numeric keys and tap Apply Making detailed settings After tapping Details a screen similar to the following is displayed ECM TX If an...

Page 70: ...Settings However settings made from Address Book are enabled for the detailed settings of destinations registered in the Address Book 7 Tap Apply A three digit number is automatically set to destinations The number can be edited after it has been registered Editing the Content of Registered Destinations After registering destinations you can change the content of destinations such as numbers names...

Page 71: ...g and then tap Apply 6 Tap Apply Deleting a Registered Destination 1 Press and tap Address Book 2 Tap Details Edit 3 Use to select the tab containing the destination you want to delete and tap the destination 4 Tap Delete If a screen appears prompting you to enter a PIN enter the correct PIN using the numeric keys and tap Apply Setting a PIN for Address Book imageRUNNER 2204F P 385 5 Tap Yes Basic...

Page 72: ...Tap Regist Dest If a screen appears prompting you to enter a PIN enter the correct PIN using the numeric keys and tap Apply Setting a PIN for Address Book imageRUNNER 2204F P 385 3 Select One Touch Fax 4 Select a registration number You can change this number to another number later 5 Tap Name Registering Name is optional If you register Name the destination can be searched alphabetically 6 Enter ...

Page 73: ...ational 1 to International 3 according to the transmission conditions when registering overseas fax numbers You can also make detailed settings for destinations from Menu Fax Settings However settings made from Address Book are enabled for the detailed settings of destinations registered in the Address Book 9 Tap Apply Editing the Content of Registered Destinations in One Touch Dial You can make c...

Page 74: ...R 2204F P 385 5 Tap the item you want to edit perform editing and then tap Apply 6 Tap Apply Deleting a Registered Destination 1 Press and tap Address Book 2 Tap Details Edit 3 Select using and tap the destination you want to delete 4 Tap Delete If a screen appears prompting you to enter a PIN enter the correct PIN using the numeric keys and tap Apply Setting a PIN for Address Book imageRUNNER 220...

Page 75: ...c keys and tap Apply Setting a PIN for Address Book imageRUNNER 2204F P 385 3 Tap Coded Dial Groups can also be registered in One Touch Dial Select One Touch to register the group as a One Touch Dial number 4 Tap Group 5 Tap Name Registering Name is optional If you register Name the destination can be searched alphabetically 6 Enter the name using the numeric keys and tap Apply 7 Tap Number of Des...

Page 76: ...n tap Apply 12 Tap Apply Editing the Content of Registered Groups After registering destinations you can change the content of groups such as names destinations and coded dial numbers 1 Press and tap Address Book 2 Tap Details Edit 3 Select using and tap the destination you want to change 4 Tap Edit Basic Operations 68 ...

Page 77: ...ou want to edit perform editing and then tap Apply 6 Tap Apply Deleting a Group 1 Press and tap Address Book 2 Tap Details Edit 3 Select using and tap the group you want to delete 4 Tap Delete If a screen appears prompting you to enter a PIN enter the correct PIN using the numeric keys and tap Apply Setting a PIN for Address Book imageRUNNER 2204F P 385 5 Tap Yes Basic Operations 69 ...

Page 78: ...UNNER 2204F Sound produced when fax sending is complete Go to step 5 RX Done Tone imageRUNNER 2204F Sound produced when fax receiving is complete Scanning Done Tone imageRUNNER 2204F Sound produced when fax document scanning is complete Entry Tone Confirmation sound each time a key on the control panel or button on the display is pressed Select On produce a tone or Off not produce a tone Invalid E...

Page 79: ...s sleep mode Original in Feeder Detection Tone Sound produced when an original is loaded in the feeder 5 Use to set volume tap Apply Tap and move the cursor all the way to the left to mute the sound End sound only for error Tap When Error On Apply Basic Operations 71 ...

Page 80: ...operation such as adjustment or cleaning When a paper jam occurs When the receiver of an external telephone is off the hook When the menu screen is displayed When a job is waiting to be scanned to a computer When an error message is displayed on the screen There are some exceptions The machine sometimes enters sleep mode when error messages are displayed When You Want to Set the Auto Sleep Timer T...

Page 81: ... You can also tap the display or press any key other than to exit sleep mode NOTE If an external telephone is connected the machine exits sleep mode when you take the receiver off the hook imageRUNNER 2204F Basic Operations 73 ...

Page 82: ...s onto One Sheet 2 on 1 4 on 1 91 Copying Both Sides of an ID Card onto One Page 93 Erasing Dark Borders and Frame Lines Erase Frame 94 Collating Copies by Page 96 Splitting Facing Page Documents into Separate Pages for Copying 98 Copying Different Size Documents Together Different Size Originals imageRUNNER 2204F 2204N 2004N 99 Configuring Copy Settings to Your Needs 101 Changing Default Settings...

Page 83: ...y Operations P 77 Selecting Copy Paper P 80 Canceling Copies P 81 Using Copy Settings to Suit Your Needs Enlarging or Reducing P 85 Collating Copies by Page P 96 Selecting Document Type P 86 Adjusting Density P 87 Erasing Dark Borders and Frame Lines Erase Frame P 94 Copying Both Sides of an ID Card onto One Page P 93 Copying 75 ...

Page 84: ...Pages for Copying P 98 2 Sided Copying imageRUNNER 2204F 2204N 2004N P 88 Copying Different Size Documents Together Different Size Originals imageRUNNER 2204F 2204N 2004N P 99 Simplifying Your Frequent Copy Operations Changing Default Settings P 102 Registering Frequently Used Copy Settings P 103 Copying 76 ...

Page 85: ...Enter the number of copies using the numeric keys Enter a quantity from 1 to 99 Press to cancel the entered quantity For the imageRUNNER 2004 Enter the number of copies Enter a quantity from 1 to 99 Tap Clear to cancel the entered quantity 4 Specify the copy settings as necessary Select the settings Various Copy Settings P 83 Copying 77 ...

Page 86: ...ent size is displayed when copying multiple documents Follow the procedure below 1 Select the document size 2 Place the next document on the platen glass and press Repeat this step until you finish scanning the entire document 3 Tap Start Copy When the Paper Size Settings Mismatch message appears When an Error Message Appears P 491 When copying documents with text or images that extend to the edge...

Page 87: ... If you always want to make copies with the same settings Changing Default Settings P 102 Registering Frequently Used Copy Settings P 103 Copying 79 ...

Page 88: ... the paper source Specifying Paper Size and Type P 55 Loading Paper P 40 Copy Paper Select the paper source Auto imageRUNNER 2204F 2204N 2004N If the optional feeder is attached the machine automatically selects the paper loaded in the multi purpose tray or the paper drawer Selects the paper loaded in the multi purpose tray Selects the paper loaded in the drawer imageRUNNER 2204F 2204N 2004N Selec...

Page 89: ...ancel copying after checking the copy status Tap Cancel on the Screen That is Displayed While Copying Press to Cancel If the Screen Displays a List of Documents When is Pressed Documents have been scanned and are waiting to be printed Select the copy document to cancel Use to Cancel Copy Print Job Job Status Select the desired job Cancel Yes Copying 81 ...

Page 90: ...r of copies settings and other details are displayed If you only want to check the details without canceling copying press to return to the copy main screen Cancel Cancels copying LINKS Basic Copy Operations P 77 Copying 82 ...

Page 91: ...P 85 Collating Copies by Page P 96 Selecting Document Type P 86 Adjusting Density P 87 Erasing Dark Borders and Frame Lines Erase Frame P 94 Copying Both Sides of an ID Card onto One Page P 93 Copying Multiple Documents onto One Sheet 2 on 1 4 on 1 P 91 Splitting Facing Page Documents into Separate Pages for Copying P 98 2 Sided Copying imageRUNNER 2204F 2204N 2004N P 88 Copying 83 ...

Page 92: ...Copying Different Size Documents Together Different Size Originals imageRUNNER 2204F 2204N 2004N P 99 Copying 84 ...

Page 93: ...ratio in increments of 1 NOTE Copy Ratio is not available when using ID Card Copy Copy Copy Ratio Select the copy ratio Custom Ratio Use or the numeric keys to enter the copy ratio and press Apply You can set any copy ratio from 25 to 400 in 1 increments Preset copy ratio Select a copy ratio LINKS Basic Copy Operations P 77 Copying 85 ...

Page 94: ...e Select the document type Text Suitable when copying documents that only contain text Text Photo Suitable when copying documents that contain both text and photos Photo Suitable when copying documents that contain printed photos such as magazines or pamphlets Even if Density is set to Auto Density when Original Type is set to Text Photo or Photo Auto Density is canceled LINKS Basic Copy Operation...

Page 95: ...ly set an optimal density for a document Copy Density Adjust the density Apply Decreases the density Increases the density Auto Density An optimal density for the document is automatically set Original Type is automatically set to Text Selecting Document Type P 86 LINKS Basic Copy Operations P 77 Auto Recognize Original Orientation P 445 Copying 87 ...

Page 96: ...Copy 2 Sided Select the type of 2 sided copying Types of 2 sided copying The illustration below shows the types of 2 sided copying 1 Sided 2 Sided 2 Sided 2 Sided 2 Sided 1 Sided Original Finishing Type Specify if you want to change the binding such as when copying book type documents in calendar type format 1 Sided 2 Sided This function can only be used when the optional Duplex Unit C1 is attache...

Page 97: ...original Original Finishing Type 2 Sided 2 Sided Select the original binding type Select the binding type for the finished copy which is different from that of the original document 2 Sided 1 Sided This setting enables you to align the direction of the output paper This function can only be used when the optional DADF AT1 is attached to the imageRUNNER 2204F 2204N 2004N When a 2 sided document is ...

Page 98: ... Original Finishing Type 2 Sided 1 Sided Book Type LINKS Basic Copy Operations P 77 Copying Multiple Documents onto One Sheet 2 on 1 4 on 1 P 91 Copying 90 ...

Page 99: ...d if you increase it 2 on 1 4 on 1 is not available when using Erase Frame Different Size Originals Book 2 Pages or ID Card Copy When you copy multiple documents onto one page margins may be created in the copied image Copy N on 1 Select 2 on 1 or 4 on 1 Select the document size on the Scan Size screen On the Output Size screen select the paper source that contains the paper you want to use 2 on 1...

Page 100: ...LINKS Basic Copy Operations P 77 2 Sided Copying imageRUNNER 2204F 2204N 2004N P 88 Copying 92 ...

Page 101: ...is useful when copying a driver s license or ID card ID Card Copy is available with A4 Letter size paper or larger Copy Ratio is automatically set to 100 ID Card Copy is not available when using 2 Sided Erase Frame Different Size Originals Book 2 Pages or 2 on 1 4 on 1 Place the card Turn the card over How to place the card LINKS Basic Copy Operations P 77 Copying 93 ...

Page 102: ...nt Size Originals 2 on 1 4 on 1 or ID Card Copy Copy Erase Frame Select the type of Erase Frame Specify the width of the frame to erase Apply Select the paper size on the Scan Size screen Original Frame Specify Outer Frame Width to erase the dark borders and frame lines that appear around the copy if the original is smaller than the selected paper size You can also use this mode to create a blank ...

Page 103: ...Basic Copy Operations P 77 Copying 95 ...

Page 104: ...ped by page For example if you are making three copies of a five page document the printouts will be arranged in the following order Collate The copies are collated by sequential page order For example if you are making three copies of a five page document the printouts will be arranged in the following order Rotate Group The copies are grouped by page and each group is rotated 90 degrees For exam...

Page 105: ...ollated by sequential page order and each group is rotated 90 degrees For example if you are making three copies of a five page document the printouts will be arranged in the following order LINKS Basic Copy Operations P 77 Copying 97 ...

Page 106: ...and right pages NOTE When scanning a facing page document place it on the platen glass Place the document face down with its corner aligned with the top left corner of the platen glass as shown below Book 2 Pages is not available when using 2 Sided 2 on 1 4 on 1 ID Card Copy or Different Size Originals Copy Book 2 Pages Off Does not set this function On Sets this function Copying 98 ...

Page 107: ...ng Scanning with an improper combination may cause damage to the documents or paper jams Do not place the documents together that are of different weights or paper types as this may cause damage to the documents or paper jams NOTE Different Size Originals is not available when using 2 on 1 4 on 1 ID Card Copy Erase Frame or Book 2 Pages Copy Different Size Originals Off Does not set this function ...

Page 108: ...Basic Copy Operations P 77 Copying 100 ...

Page 109: ...hem whenever you need them NOTE The machine comes pre configured with factory default settings Setting Menu List P 420 You can change and register the default settings according to your needs Change the copy ratio to 95 and register it as the default setting From now on you can make copies without changing the copy ratio Changing Default Settings P 102 Go to Favorite Settings and register the comb...

Page 110: ...tions that you perform frequently you can eliminate the need to configure the same settings every time you make copies Menu Copy Settings Change Default Settings Select the setting Change the default value of the selected item Apply Apply Settings Select the item you want to set and change the default value LINKS Basic Copy Operations P 77 Various Copy Settings P 83 Copy Settings P 444 Copying 102...

Page 111: ...gs 1 to Settings 4 Select each setting and set the value Apply Yes Settings 1 to Settings 4 Register frequently used combinations of copy settings as one of the modes To edit the settings for a mode that has already been registered select that mode and press Regist Edit again Settings Configure your frequently used settings Various Copy Settings P 83 NOTE If you want to delete a registered setting...

Page 112: ...g Faxes 133 Sending and Receiving Faxes According to Your Purposes 137 Making a Call before Sending Faxes Manual Sending 138 Sending Faxes to Multiple Destinations Simultaneously Sequential Broadcast 139 Storing Received Faxes into Memory Memory Reception 141 Forwarding Received Faxes 144 Receiving Fax Information Services 146 Checking Status and Log for Sent and Received Documents 148 Sending Fax...

Page 113: ...ng this feature Registering in the Address Book imageRUNNER 2204F P 60 Using Basic Operations Sending Faxes P 108 Canceling Sending Faxes P 114 Receiving Faxes P 133 Specifying Scanning Settings Adjusting Resolution P 129 Adjusting Density P 130 Scanning 2 Sided Documents P 131 Specifying Destinations Simply and Quickly Specifying from Address Book P 117 Selecting Destinations Directly by Entering...

Page 114: ...Making a Call before Sending Faxes Manual Sending P 138 Sending Faxes to Multiple Destinations Simultaneously Sequential Broadcast P 139 Storing Received Faxes into Memory Memory Reception P 141 Forwarding Received Faxes P 144 Receiving Fax Information Services P 146 Faxing imageRUNNER 2204F 106 ...

Page 115: ... Sending Faxes Directly from Your Computer Sending Faxes from Your Computer PC Fax P 150 Faxing imageRUNNER 2204F 107 ...

Page 116: ... If your machine is connected to a PBX Private Branch Exchange tap R before entering the destination If R is not available you need to register the R key settings R Key Setting P 449 If you enter the wrong characters press Press to delete each character one by one press and hold to delete all the input characters at once To send overseas Enter the international access code the country code the are...

Page 117: ...is time can be changed as necessary Set Pause Time P 451 3 Enter the country code the area code and the fax number 4 Tap Pause to insert a pause at the end of the fax number as necessary The waiting time inserted here is fixed to 10 seconds This time cannot be changed 5 Tap Apply When Confirm Entered Fax Number is set to On a screen appears that prompts you to enter the destination again Checking ...

Page 118: ... marks beside the destinations see the explanations below Only destinations for one touch dialing are displayed A Z 0 9 ABC to YZ Displays destinations with recipient names whose first characters correspond to the characters of the selected tab Displays destinations for faxes Displays a list of destinations registered in Group Dial 4 Select a destination Faxing imageRUNNER 2204F 110 ...

Page 119: ... Tap Destination 2 Tap Specify from Coded Dial 3 Use the numeric keys to enter a three digit number 001 to 100 then tap Apply Specifying Destinations from One Touch 1 Tap Destination 2 Tap Specify from One Touch 3 Select a destination Faxing imageRUNNER 2204F 111 ...

Page 120: ...n the platen glass in step 1 Follow the procedures below 1 Select the document size When there is only one page to be scanned proceed to step 3 2 Place the next document on the platen glass and press Repeat this step until you finish scanning all of the pages 3 Tap Start TX The faxes are sent If you always want to send faxes with the same settings Changing Default Settings P 132 If you want to sou...

Page 121: ... to Your Purposes P 137 Checking Status and Log for Sent and Received Documents P 148 Specifying from Address Book P 117 Selecting Destinations Directly by Entering Coded Dial Numbers P 120 Specifying Destinations with the One Touch Buttons P 123 Faxing imageRUNNER 2204F 113 ...

Page 122: ... cancel sending faxes after checking the fax status Use Cancel to cancel Press to cancel If the screen displays a list of documents when is pressed Documents have been scanned and are waiting to be processed Select the document to cancel Use to cancel Fax TX Job Status Log Job Status Select the document Cancel Yes Faxing imageRUNNER 2204F 114 ...

Page 123: ...ther details are displayed If you only want to check the details without sending press to return to the fax main screen Cancel Cancels sending LINKS Sending Faxes P 108 Checking Status and Log for Sent and Received Documents P 148 Faxing imageRUNNER 2204F 115 ...

Page 124: ...ng Destinations Directly by Entering Coded Dial Numbers P 120 Specifying Destinations with the One Touch Buttons P 123 Specifying Previously Used Destinations P 125 TIPS for Enhancing Security If you want to limit available destinations to ones from the Address Book or previously specified ones Limiting Available Destinations imageRUNNER 2204F P 387 If you want to disable specifying previously use...

Page 125: ...tering in the Address Book imageRUNNER 2204F P 60 1 Press and tap Address Book 2 Use to select a tab All Displays all the destinations registered in the Address Book Only destinations for one touch dialing are displayed A Z 0 9 ABC to YZ Displays destinations with recipient names whose first characters correspond to the characters of the selected tab Displays destinations for faxes Displays a list...

Page 126: ...gs as necessary Select the settings Various Fax Settings P 128 5 Press to start sending Scanning starts If you want to cancel sending press Tap Yes To delete destinations If you specified multiple destinations you can delete destinations as necessary 1 Select Destination Confirm Edit 2 Select a destination you want to delete 3 Tap Remove Yes If you specified Group Dial in step 2 XX destination s i...

Page 127: ...tinations Before tapping Destination in step 1 you can press to toggle the destinations you specified Display a destination you want to delete and press LINKS Sending Faxes P 108 Sending Faxes to Multiple Destinations Simultaneously Sequential Broadcast P 139 Faxing imageRUNNER 2204F 119 ...

Page 128: ... to delete each character one by one press and hold to delete all the input characters at once If a confirmation screen appears When Confirm One Touch Coded Dial TX is set to On a screen is displayed that shows the destination and the name for the number For Group Dial the destination name and the number of destinations are shown Check the contents and if everything is correct and tap OK If you ha...

Page 129: ... 4 Press to start sending Scanning starts If you want to cancel sending press Tap Yes To delete destinations If you specified multiple destinations you can delete destinations as necessary 1 Select Destination Confirm Edit 2 Select a destination you want to delete 3 Tap Remove Yes If you specified Group Dial in step 2 XX destination s is displayed Tapping Number of Destinations displays destinatio...

Page 130: ...tinations Before tapping Destination in step 1 you can press to toggle the destinations you specified Display a destination you want to delete and press LINKS Sending Faxes P 108 Sending Faxes to Multiple Destinations Simultaneously Sequential Broadcast P 139 Faxing imageRUNNER 2204F 122 ...

Page 131: ...the destination and destination name registered to the one touch button if a destination registered for Group Dial the group name and number of destinations appears Confirm the destinations are correct and tap OK If destinations are incorrect tap Cancel and tap the one touch buttons again Checking Destinations before Sending Documents imageRUNNER 2204F P 390 Selecting several destinations Destinat...

Page 132: ...roup Dial in step 2 XX destination s is displayed Tapping Number of Destinations displays destinations registered in the group If you want to easily and quickly delete destinations without displaying a list of destinations Before tapping Destination in step 1 you can press to toggle the destinations you specified Display a destination you want to delete and press LINKS Sending Faxes P 108 Sending ...

Page 133: ... this feature Limiting Available Destinations imageRUNNER 2204F P 387 Destinations from a fax for which several destinations were specified as well as the destinations in Manual Sending are not available for this feature Sending Faxes to Multiple Destinations Simultaneously Sequential Broadcast P 139 Making a Call before Sending Faxes Manual Sending P 138 When you specify a destination using this ...

Page 134: ... Yes To delete destinations If you specified multiple destinations you can delete destinations as necessary 1 Select Destination Confirm Edit 2 Select a destination you want to delete 3 Remove Tap Yes If you specified Group Dial in step 2 XX destination s is displayed Tapping Number of Destinations displays destinations registered in the group Faxing imageRUNNER 2204F 126 ...

Page 135: ...nations without displaying a list of destinations Before tapping Destination in step 1 you can press to toggle the destinations you specified Display a destination you want to delete and press LINKS Sending Faxes P 108 Faxing imageRUNNER 2204F 127 ...

Page 136: ...ty of settings are available to suit your needs for example when you want to adjust density or enhance the clarity of an image Adjusting Resolution P 129 Adjusting Density P 130 Scanning 2 Sided Documents P 131 Faxing imageRUNNER 2204F 128 ...

Page 137: ...akes to send Fax Resolution Select the resolution 200 x 100 dpi Normal Suitable for documents that contain text only 200 x 200 dpi Fine Suitable for documents that contain fine text 200 x 200 dpi Photo Suitable for documents that contain photographs 200 x 400 dpi Superfine Achieves an even finer resolution than Fine LINKS Sending Faxes P 108 Faxing imageRUNNER 2204F 129 ...

Page 138: ...ou can adjust the density of the fax if the text or images in a document are too light or dark Fax Density Adjust the density Apply Decreases the density Increases the density LINKS Sending Faxes P 108 Faxing imageRUNNER 2204F 130 ...

Page 139: ...re placed on the platen glass or when the machine is set to Manual Sending Fax 2 Sided Original Select Book Type or Calendar Type Book Type Select for documents whose images on the front and back sides face the same direction Calendar Type Select for documents whose images on the front and back sides face in opposite directions LINKS Sending Faxes P 108 Making a Call before Sending Faxes Manual Se...

Page 140: ...eed to configure the same settings every time you send faxes Menu Fax Settings TX Function Settings Change Default Settings Select the setting Change the default value of the selected item Apply Settings Select the item you want to set and change the default value The default settings can be initialized Initialize Default Settings P 446 LINKS Sending Faxes P 108 Various Fax Settings P 128 Fax Sett...

Page 141: ...lly When the call is a telephone call An incoming call rings Pick up the handset to answer the call NOTE You need to connect your telephone to the machine beforehand Answering Machine When the call is a fax After an incoming call rings the machine receives the fax automatically When the call is a telephone call The answering machine activates enabling the caller to leave a message If you pick up t...

Page 142: ...g on your switchboard for telephone conversation NOTE You need to subscribe to the FaxStream service beforehand Telecom FaxAbility Only for New Zealand In Australia Telstra offers the FaxStream Duet capability This service assigns two numbers to a single telephone line one for faxes and one for telephone calls When the fax number is called the network sends a specific ringing tone which your machi...

Page 143: ...ecify the duration during which an incoming call rings for a telephone call Setting values 15 to 300 seconds default setting 22 seconds Action After Ring Enables you to specify how the machine operates if you do not pick up the handset while an incoming call is ringing Select End to disconnect the call or Receive to receive an incoming fax Default setting Receive If you want to print received docu...

Page 144: ...irectly connected with the machine the remote reception function is not available 1 When an incoming call rings pick up the telephone handset 2 If you hear a beep enter the ID number for Remote Reception with the telephone The ID number is set to 25 by default You can change this number as necessary Remote RX P 455 3 Hang up the handset LINKS Sending and Receiving Faxes According to Your Purposes ...

Page 145: ... before Sending Faxes Manual Sending P 138 Sending Faxes to Multiple Destinations Simultaneously Sequential Broadcast P 139 Storing Received Faxes into Memory Memory Reception P 141 Forwarding Received Faxes P 144 Receiving Fax Information Services P 146 LINKS Sending Faxes P 108 Receiving Faxes P 133 Checking Status and Log for Sent and Received Documents P 148 Faxing imageRUNNER 2204F 137 ...

Page 146: ...cuments in the feeder Documents cannot be scanned from the platen glass The machine cannot automatically scan both sides of the documents in Manual Sending 2 Press and tap Fax 3 Specify the scanning settings as necessary Various Fax Settings P 128 4 Dial the recipient s fax number 5 Ask the recipient to set their fax machine to receive your faxes If you hear a beep proceed to step 6 6 Press and ha...

Page 147: ...P 392 You need to register destinations in the Address Book or one touch buttons before using this feature Registering in the Address Book imageRUNNER 2204F P 60 Specifying Destinations with the One Touch Buttons P 123 1 Place the document s Placing Documents P 36 2 Press and tap Fax 3 Specify the destination To specify with the numeric keys enter the fax number and tap Apply To specify any additi...

Page 148: ... as necessary Select the settings Various Fax Settings P 128 5 Press to start sending LINKS Sending Faxes P 108 Canceling Sending Faxes P 114 Checking Status and Log for Sent and Received Documents P 148 Faxing imageRUNNER 2204F 140 ...

Page 149: ...assword necessary to unlock the feature and a time setting that specifies a period of time during the day in which received documents are stored in memory Menu Fax Settings RX Function Settings Memory Lock Settings On Specify each setting Apply If a screen for entering a System Manager ID and PIN is displayed enter the System Manager ID and PIN tap Apply and press Setting the System Manager ID ima...

Page 150: ...ll the documents in memory are printed You cannot select a specific document for printing If a time for the feature to deactivate has been specified the documents are automatically printed at the specified time Menu Fax Settings RX Function Settings Memory Lock Settings Off If a screen for entering a System Manager ID and PIN is displayed enter the System Manager ID and PIN tap Apply and press Set...

Page 151: ...us 4 Select the document you want to check To delete the checked document 1 Tap Delete 2 Tap Yes LINKS Receiving Faxes P 133 Checking Status and Log for Sent and Received Documents P 148 Faxing imageRUNNER 2204F 143 ...

Page 152: ...ited to the destinations registered in the Address Book If no destinations are registered register destinations in the Address Book before using this feature Registering in the Address Book imageRUNNER 2204F P 60 While the Memory Reception feature is activated documents remain in memory even after being forwarded and the same document can be forwarded any number of times 1 Press 2 Tap Fax RX Job S...

Page 153: ...forwarding destination from the Address Book For instructions on how to use the Address Book see Specifying from Address Book P 117 The document is forwarded to the specified destination Faxing imageRUNNER 2204F 145 ...

Page 154: ...ice actual procedures may differ from the ones described below Follow the procedures for the service you are using 1 Press and tap Fax 2 Tap Hook If an external telephone is connected to the machine you can pick up the handset instead of pressing Hook 3 When you hear a dial tone dial the information service 4 When the recorded message of the information service answers press This step is unnecessa...

Page 155: ...signed for the information you want to receive You can also use the keypad on the telephone to enter the information service number 6 Tap Start Receiving If you have picked up the handset hang it up LINKS Receiving Faxes P 133 Faxing imageRUNNER 2204F 147 ...

Page 156: ...e unnecessary documents When Display Job Log is set to Off you cannot check the communication logs Display Job Log P 469 The destinations in Manual Sending cannot be checked because they are not displayed 1 Press 2 Tap Fax TX Job Status Log or Fax RX Job Status Log 3 Check the statuses and communication logs for sent and received documents To check the statuses for sent and received documents 1 Ta...

Page 157: ...ocuments 1 Tap Job Log 2 Select the document whose log you want to check Fax TX Job Log Fax RX Job Log Displays a list of the documents that were sent and received OK is displayed when a document was sent or received successfully and Error is displayed when a document failed to be sent or received because it was canceled or there was some error Details Displays detailed information about the docum...

Page 158: ...ver Help Clicking Help on the fax driver screen displays the Help screen On this screen you can see information that is not in the e Manual including information about driver features such as registering frequently used settings and how to set up those features If you are a Mac OS user see Canon Fax Driver Guide for installing the fax driver and Fax Driver s Help for using fax functions For Mac OS...

Page 159: ... screen and tap or click Devices the fax you are using Print When you print in this way you can only specify settings for some of the print functions Windows 8 1 Server 2012 R2 Display the charms at the right of the screen and tap or click Devices Print the fax you are using Print When you print in this way you can only specify settings for some of the print functions If the message The printer re...

Page 160: ...cify Destination Name Communication Mode Fax Number URI Fax Number 4 Click OK If you need to specify a number to dial an outside line select Detailed Settings Add Outside Dialing Prefix to G3 IP Fax Number and enter the number The specified number is added to the beginning of the fax number when the machine dials To make it easier to specify destinations using the Address Book see Using Registered...

Page 161: ...Help on the fax driver screen If you have selected Confirm Fax Number URI when Setting Destination in the dialog box that is displayed when Security Settings of the Special tab is clicked also enter a number in Confirm Fax Number For more information click Help on the fax driver screen 4 Attach a cover sheet to the document as necessary Attaching Cover Sheets to PC Faxes P 154 5 Click Send to send...

Page 162: ...ow to display the print dialog box differs for each application For more information see the instruction manual for the application you are using 2 Select your fax driver and click Print 3 Click the Cover Sheet button and specify each setting Cover Sheet Attachment Select Different Sheet to Each Destination or Same Sheet to All Destinations Style Select a cover sheet from the three preset cover sh...

Page 163: ...tab Select the destination items you want to include and enter the information Destination names company names department names and fax numbers specified in the Select Destination Enter Destination tab Sending PC Faxes P 151 are included on the cover sheet Logo tab Signature tab Specify each setting The following screen shows an example for when the Logo tab is selected Faxing imageRUNNER 2204F 15...

Page 164: ...eets to Send Select this check box if you want to include the number of sheets that you are going to send in the cover sheet and specify the number of sheets in Number of Sheets to Send The number of sheets to send is not counted automatically The value specified here is included in the cover sheet Include Title Select this check box if you want to add a title to the cover sheet and enter the titl...

Page 165: ...k the contents of the cover sheet and if everything is correct click OK To modify the contents perform the steps from 3 again The specified cover sheet is attached to the fax when the fax is sent Faxing imageRUNNER 2204F 157 ...

Page 166: ...h as Microsoft Excel can be imported into the machine or the Address Book data can be exported to a file for use on other fax machines or applications You cannot use the Address Book if you do not have permission to access the folder where the Address Book is saved Log on as a user who has permission to access the folder or change the save location of the Address Book Changing Location to Save Add...

Page 167: ... for single destinations and 3 000 for group destinations You can select and combine registered group destinations and register them as separate group destinations You cannot use the Address Book if you do not have permission to access the folder where the Address Book is saved Log on as a user who has permission to access the folder or change the save location of the Address Book Changing Locatio...

Page 168: ...ting and click OK Address Enter the recipient name company name and department name Notes Enter comments as necessary Fax Number Enter the fax number s Hyphens can be inserted between numbers as necessary If you want to add explanations of the uses for the fax numbers such as Home or Office enter them in Description Faxing imageRUNNER 2204F 160 ...

Page 169: ...aying the Printer Folder P 610 2 Right click your fax icon and click Printing preferences 3 Click the Select Destination tab Edit Address Book 4 Click Add Group To change or delete registered destinations select a destination from Address Book and click Edit or Delete Faxing imageRUNNER 2204F 161 ...

Page 170: ...lays group destinations All Displays all the destinations registered in the Address Book Available Destinations Select the destinations to register in Group Dial and click Add The selected destinations are displayed in Current Group Members To select multiple destinations click the destinations while holding down SHIFT key or CTRL key To delete a destination from Current Group Members select a des...

Page 171: ...rmission to access the folder or change the save location of the Address Book Changing Location to Save Address Book Data P 168 1 Open a document in an application and display the print dialog box How to display the print dialog box differs for each application For more information see the instruction manual for the application you are using 2 Select your fax driver and click Print 3 Click the Sel...

Page 172: ...lick Add to Destination List To specify multiple destinations repeat step 4 You can search for destinations with Address List Clicking Edit Address Book allows you to edit the Address Book 5 Click Send Faxing imageRUNNER 2204F 164 ...

Page 173: ...have permission to access the folder where the Address Book is saved Log on as a user who has permission to access the folder or change the save location of the Address Book Changing Location to Save Address Book Data P 168 Importing Address Book Data The three types of file format which can be imported into the fax driver are CSV format files csv Canon Address Book files abk and device setting va...

Page 174: ...5 Select the file to import and click Open For a CSV file specify the separators used in the file The destinations imported from the file are displayed in Address Book Faxing imageRUNNER 2204F 166 ...

Page 175: ...k your fax icon and click Printing preferences 3 Click the Select Destination tab Edit Address Book 4 Click Export If you have selected Protect with Password when Exporting Address List in the dialog box that is displayed when Security Settings of the Special tab is clicked a dialog box for entering a password is displayed when you click Export For more information click Help on the fax driver scr...

Page 176: ...tors used in the file The Address Book data is exported to the specified location Changing Location to Save Address Book Data 1 Open the printer folder Displaying the Printer Folder P 610 2 Right click your fax icon and click Printing preferences 3 Click the Select Destination tab Edit Address Book Faxing imageRUNNER 2204F 168 ...

Page 177: ...ecify a Folder 5 Specify the location to save the Address Book data and click OK Save the Address Book data in a folder such as the My Documents folder where you have write permission Faxing imageRUNNER 2204F 169 ...

Page 178: ...lder click Copy The Address Book is created or copied If an Address Book already exists in the folder selected in step 4 the following message is displayed If you want to use the existing Address Book click Use as is and if you want to use the Address Book of the fax driver click Overwrite Faxing imageRUNNER 2204F 170 ...

Page 179: ...rinting Multiple Pages onto One Sheet 189 Printing Posters 191 Printing Booklet imageRUNNER 2204F 2204N 2004N only 192 Printing Borders 194 Printing Dates and Page Numbers 195 Printing Watermarks 197 Specifying Paper Source 199 Selecting Document Type 201 Saving Toner 203 Combining and Printing Multiple Documents 206 Configuring Printer Settings on the Machine 210 Configuring Print Settings to You...

Page 180: ...e of the print functions to suit your needs Printing from a Computer You can print a document made on your computer by using the printer driver Printing from a Computer P 173 Printing from a Smartphone Tablet You can print a document made on your smartphone or tablet from an iPhone iPad or Android terminal Linking with Mobile Devices imageRUNNER 2204F 2204N 2004N P 261 Using the Machine as a Print...

Page 181: ...more information see MF Driver Installation Guide About the Printer Driver Help Clicking Help on the printer driver screen displays the Help screen On this screen you can see the detailed descriptions that are not in the e Manual If you are a Mac OS user see Canon UFR II UFRII LT Printer Driver Guide for installing the printer drivers and Printer Driver s Help for using print functions For Mac OS ...

Page 182: ...log box differs for each application For more information see the instruction manual for the application you are using 2 Select the printer driver for the machine and click Preferences Properties or More Settings The screen that is displayed differs depending on the application you are using 3 Specify the print settings such as the number of copies and print orientation and click OK Using the Mach...

Page 183: ...usually reflected on the printer driver You can register the settings you specified in this step as a profile and use the profile whenever you print You can eliminate the need to specify the same settings every time you print Registering Combinations of Frequently Used Print Settings P 212 Clickable UI You can easily specify the page layout binding position etc intuitively on the preview image For...

Page 184: ...012 Display the charms at the right of the screen and tap or click Devices the printer you are using Print When you print in this way you can only specify settings for some of the print functions Windows 8 1 Server 2012 R2 Display the charms at the right of the screen and tap or click Devices Print the printer you are using Print When you print in this way you can only specify settings for some of...

Page 185: ...1 Double click the printer icon When the printer icon is not displayed Open the printer folder Displaying the Printer Folder P 610 right click your printer icon and click See what s printing or double click the icon of the printer driver for the machine 2 Select the document you want to cancel and click Document Cancel 3 Click Yes Printing of the selected document is canceled Several pages may be ...

Page 186: ...ome applications a screen like shown below appears You can cancel printing by clicking Cancel From the Control Panel Cancel printing using or Press to Cancel If the Screen Displays a List of Documents When is Pressed Tap the document to cancel Use to Cancel Copy Print Job Job Status Select the document on the Copy Print Job Status screen Cancel Yes Using the Machine as a Printer 178 ...

Page 187: ...Several pages may be output after you cancel printing LINKS Printing a Document P 174 Checking the Printing Status P 180 Using the Machine as a Printer 179 ...

Page 188: ...d your printouts that you thought had been printed you may want to see whether an error has occurred 1 Press 2 Tap Copy Print Job 3 Tap Job Status 4 Select the document to check Copy Print Job Status Displays a list of the documents that are being processed or are waiting to be processed Details Displays detailed information about the document selected from the list LINKS Printing a Document P 174...

Page 189: ...witching 1 Sided and 2 Sided Printing imageRUNNER 2204F 2204N 2004N only P 185 Collating Printouts by Page P 187 Printing Multiple Pages onto One Sheet P 189 Printing Posters P 191 Printing Booklet imageRUNNER 2204F 2204N 2004N only P 192 Printing Borders P 194 Printing Dates and Page Numbers P 195 Printing Watermarks P 197 Using the Machine as a Printer 181 ...

Page 190: ...Selecting Document Type P 201 Saving Toner P 203 Combining and Printing Multiple Documents P 206 Using the Machine as a Printer 182 ...

Page 191: ...ng the Original Document and Paper Size Preset Ratio The print ratio is automatically set based on the document and paper size you have specified Basic Settings tab Select the document size in Page Size Select the paper size in Output Size OK Specifying Print Ratio in Increments of 1 Basic Settings tab Select the Manual Scaling check box Enter the print ratio in Scaling OK Using the Machine as a P...

Page 192: ... reducing ratio For example there may be large blank spaces on your printout or portions of the document that are missing The enlarging reducing settings on some applications have priority over those on the printer driver LINKS Printing a Document P 174 Using the Machine as a Printer 184 ...

Page 193: ... of paper See Paper P 586 This function can only be used when the optional Duplex Unit C1 is attached Basic Settings tab Select 1 sided Printing or 2 sided Printing in 1 sided 2 sided Booklet Printing Select the position to bind in Binding Location OK 1 sided 2 sided Booklet Printing Select 1 sided Printing or 2 sided Printing For Booklet Printing see Printing Booklet imageRUNNER 2204F 2204N 2004N...

Page 194: ... position click Gutter Long Edge Left Prints images in such a way that the printed pages are opened horizontally when bound Short Edge Top Prints images in such a way that the printed pages are opened vertically when bound Gutter Specify a binding margin LINKS Printing a Document P 174 Printing Multiple Pages onto One Sheet P 189 Printing Booklet imageRUNNER 2204F 2204N 2004N only P 192 Using the ...

Page 195: ...hod of the printouts when printing multiple page documents Collate The printouts are grouped into complete sets in sequential page order For example if you are printing three copies of a five page document the printouts will be arranged in the following page order 1 2 3 4 5 1 2 3 4 5 1 2 3 4 5 Group The printouts are not collated For example if you are printing three copies of a five page document...

Page 196: ...If you select Off whether the printouts are collated or not depends on the setting made on the application LINKS Printing a Document P 174 Using the Machine as a Printer 188 ...

Page 197: ... Printing imageRUNNER 2204F 2204N 2004N only P 185 Basic Settings tab In Page Layout select the number of pages to print onto a single sheet In Page Order select the page distribution layout OK Page Layout Select the number of pages to print onto a single sheet from 1 on 1 to 16 on 1 For example to print 16 pages onto a single sheet select 16 on 1 For options such as Poster 2 x 2 see Printing Post...

Page 198: ...select Across from Left the first page is printed on the top left and then the rest of the pages are arranged rightward LINKS Printing a Document P 174 Switching 1 Sided and 2 Sided Printing imageRUNNER 2204F 2204N 2004N only P 185 Using the Machine as a Printer 190 ...

Page 199: ...r Basic Settings tab In Page Layout select the dimensions of your poster for example Poster 2 x 2 OK There are four size settings Poster 1 x 2 Poster 2 x 2 Poster 3 x 3 and Poster 4 x 4 Poster size settings cannot be selected when 2 sided printing is enabled Select 1 sided Printing in 1 sided 2 sided Booklet Printing and then select a poster size setting LINKS Printing a Document P 174 Enlarging o...

Page 200: ...hat the page numbers are correctly arranged Booklet printing may not be available with some sizes and types of paper See Paper P 586 This function can only be used when the optional Duplex Unit C1 is attached Basic Settings tab Select Booklet Printing in 1 sided 2 sided Booklet Printing Click Booklet to specify detailed settings as necessary OK OK 1 sided 2 sided Booklet Printing Select Booklet Pr...

Page 201: ...nto Sets Prints as multiple bundles divided by the number of the pages specified on Sheets per Set Bind each bundle and then combine them as one booklet Select this option when the document has so many pages that you cannot bind them all into a single booklet Specify Booklet Gutter If you are using a stapler or other binding tools specify the margin width for binding your booklet Select the Specif...

Page 202: ... of printouts Page Setup tab Click Page Options Select the border type in Edging OK OK Edging Select the border type Preview Displays a preview with the selected border LINKS Printing a Document P 174 Printing Dates and Page Numbers P 195 Printing Watermarks P 197 Using the Machine as a Printer 194 ...

Page 203: ...ate Specify the position to print the print date Print User Name Specify the position to print the user name logon name for the computer used to print the document Print Page Number Specify the position to print the page number Changing the Print Format of Dates and Page Numbers You can change formatting details such as font and font size when printing dates logon names or page numbers Click Forma...

Page 204: ...Printing a Document P 174 Printing Borders P 194 Printing Watermarks P 197 Using the Machine as a Printer 196 ...

Page 205: ...registered watermarks Page Setup tab Select the Watermark check box Select a watermark in the drop down list OK Watermark Select the Watermark check box to display the list of the watermarks in the drop down list Select a watermark from the menu Edit Watermark Displays the screen to create or edit watermarks Using the Machine as a Printer 197 ...

Page 206: ...ark name Attributes Alignment Print Style Click each tab to specify the text color or print position of the watermark For more information click Help on the printer driver screen LINKS Printing a Document P 174 Printing Borders P 194 Printing Dates and Page Numbers P 195 Using the Machine as a Printer 198 ...

Page 207: ... loaded with the paper you want to print on from Paper Source OK When a paper source has been selected it turns purple on the illustration of the machine displayed on your computer screen Printing Specific Pages onto Different Paper You can print specific pages of a document such as when you want to print the cover of a booklet on colored paper In this case load colored paper for the cover in the ...

Page 208: ...t for Cover and Others or Different for First Others and Last Also specify which paper should be used for the cover and the body pages You can select this option when you select Booklet Printing in 1 sided 2 sided Booklet Printing in the Basic Settings tab Printing Booklet imageRUNNER 2204F 2204N 2004N only P 192 LINKS Printing a Document P 174 Using the Machine as a Printer 200 ...

Page 209: ...nt type or purpose of printing For example select General for general use or select Photos when you want to print photo images in optimal print quality General A versatile option that is suitable when printing most documents Publications Suitable when printing documents that have a mix of photo images charts and graphs Graphics Suitable when printing documents that have charts or graphs Photos Sui...

Page 210: ...ify detailed settings for each item selected on Objective click Advanced Settings For more information click Help on the printer driver screen LINKS Printing a Document P 174 Using the Machine as a Printer 202 ...

Page 211: ... toner save setting is enabled fine lines and portions with lighter print density may become blurred Quality tab Select the document type in Objective Click Advanced Settings Select Toner Save in the Advanced Settings screen Select On from the drop down list OK OK Using the Machine as a Printer 203 ...

Page 212: ...om the drop down list on the bottom of the screen You can specify whether to enable the toner save setting for each document type Specify the toner save setting for each document type listed in Objective In the Advanced Settings screen you can specify various print settings other than toner save settings For more information click Help on the printer driver screen LINKS Using the Machine as a Prin...

Page 213: ...Printing a Document P 174 Using the Machine as a Printer 205 ...

Page 214: ...pages in the same paper size 1 Open a document in an application and display the print dialog box How to display the print dialog box differs for each application For more information see the instruction manual for the application you are using 2 Select the printer driver for the machine and click Preferences Properties or More Settings 3 Select Edit and Preview in Output Method Click OK on the In...

Page 215: ...r OK The Canon PageComposer starts Printing does not start in this step 5 Repeat steps 1 to 4 for the documents you want to combine The documents are added to the Canon PageComposer Using the Machine as a Printer 207 ...

Page 216: ...w Displays a preview of the document to be printed Document List Print Settings Click the Document List tab to display the documents added in steps 1 to 4 You can remove documents by selecting them in the list and clicking Delete from List Click the Print Settings tab to display the screen for specifying print settings such as the number of copies or 1 sided 2 sided printing The settings specified...

Page 217: ...r There are fewer settings available than when using the ordinary printing method 8 On the Document Name list select the combined document print job you want to print and click Printing starts For instructions on how to cancel printing see Canceling Prints P 177 LINKS Printing a Document P 174 Using the Machine as a Printer 209 ...

Page 218: ...hese paper sizes is loaded but the other is not For example if you are printing a Letter size document but only A4 paper is loaded in the machine the machine will print your document on A4 paper Menu Printer Settings Paper Size Override Select Off or On Off Does not perform paper size substitution Printing stops and an error message is displayed when the machine runs out of the paper that has been...

Page 219: ...in the printer driver screen and you can skip the operations to specify them and proceed to printing immediately Set TOP SECRET as a watermark and register it in profiles You can then select this watermark from profiles whenever you need it Registering Combinations of Frequently Used Print Settings P 212 Set 2 on 1 as a default setting in the printer driver From the next print job every printout p...

Page 220: ...e list This section explains how to register profiles and how to print using profiles Registering a Profile P 212 Selecting a Profile P 213 Registering a Profile 1 Change the settings that you want to register as a profile and click Add Make print settings as required on the Basic Settings Page Setup Finishing and Quality tabs Various Print Settings P 181 2 Enter a profile name in Name select an i...

Page 221: ...dit the pre registered profiles Selecting a Profile Simply select the profile that suits your objective and click OK Changing the settings of the currently selected profile You can change the settings of the currently selected profile In addition the changed settings can be registered as another profile LINKS Printing a Document P 174 Changing Default Settings P 214 Using the Machine as a Printer ...

Page 222: ... open the printer driver screen the setting will always be 2 on 1 eliminating the need to change this setting every time you make prints To perform the following procedure log on to your computer with an administrator account 1 Open the printer folder Displaying the Printer Folder P 610 2 Right click the icon of the machine and then click Printing preferences 3 Change the settings on the printing ...

Page 223: ...LINKS Printing a Document P 174 Registering Combinations of Frequently Used Print Settings P 212 Using the Machine as a Printer 215 ...

Page 224: ...achine 219 Scanning from a Computer 222 Scanning Using MF Toolbox 223 Configuring Scan Settings in MF Toolbox 230 Scanning Using an Application 237 Configuring Scan Settings in ScanGear MF 239 Configuring Scan Settings in Simple Mode 240 Configuring Scan Settings in Advanced Mode 243 Using WSD 257 Using the Machine as a Scanner 216 ...

Page 225: ...c OS Users P 617 Depending on the operating system and the version of the scanner driver or applications you are using the screens in this manual may differ from your screens Scanning from the Machine You can scan and save documents to your computer by using the operation panel of the machine Scanning from the Machine P 219 Scanning from a Computer You can scan documents placed on the machine from...

Page 226: ...e in MF Network Scan Utility Register by following the procedure below This procedure is not required if the machine and your computer are connected via USB The scan function is not available if the machine and your computer are connected in an IPv6 environment Use IPv4 or a USB connection 1 Click in the system tray 2 Select the check box for the machine and click OK Up to ten computers can be con...

Page 227: ...s will be saved to whether to scan documents in color or black and white whether to save documents as PDFs or JPEGs and other settings 1 Place the document s Placing Documents P 36 2 Press and tap Scan 3 Tap Computer 4 Select the destination computer This screen is not displayed if only a computer is connected to the machine via USB 5 Select the scan type Using the Machine as a Scanner 219 ...

Page 228: ...n be searched using a computer 2 Documents are scanned in black and white only with no intermediate shades of gray To change settings You can change settings from MF Toolbox Configuring Scan Settings in MF Toolbox P 230 6 Press Scanning starts To cancel tap Cancel Yes You cannot scan while the MF Toolbox setup screen is displayed Close the screen before scanning When placing documents in the feede...

Page 229: ... all of the pages When there is only one page to be scanned proceed to the next step 2 Tap Finish Scan The save destination folder is displayed on the computer About the save destination folder By default the scanned data is saved to the Pictures or My Pictures folder A subfolder named with the scanning date is created and the data is saved to that folder To change the save destination see Configu...

Page 230: ...can forward the scanned data to a specified application or attach it to an e mail message Scanning Using an Application You can scan images by using an application such as a word processing or image processing application and load the images directly into the application You do not need to start another application to scan Using WSD to Scan Even if you do not have a dedicated scanner driver you ca...

Page 231: ...t Settings P 465 Scanning is not possible in the following instances During printing copying faxing etc When importing exporting the Address Book When cleaning the fixing unit When paper is jammed in the feeder When the toner cover is open Scan after these operations are completed or remedying the error 1 Place the document s Placing Documents P 36 2 Double click the Canon MF Toolbox icon on the d...

Page 232: ... B W Scan Custom 1 Custom 2 You can register frequently used settings in advance Configuring Scan Settings in MF Toolbox P 230 You can also specify an application as a forwarding destination When you scan by using the operation panel the settings registered here are applied Scanning from the Machine P 219 To switch a scanner If two or more machines are installed and you want to switch to another m...

Page 233: ...ed to a folder on a computer or forwarded to an application Configuring Storing Settings P 233 Specifying External Applications to Forward Scanned Data P 235 If the scanning results are not achieved If the expected scanning results are not achieved for example if the image is too dark or the color tone is different from that in the original you can configure advanced scan settings with ScanGear MF...

Page 234: ...heck box 3 Click Start Scanning starts To cancel click Cancel The scanned images are displayed as thumbnails on the Scanned Image screen 4 Set the file format and save destination Save as Type Select a file format such as PDF or JPEG Available formats vary depending on the type of scan you selected in step 1 Using the Machine as a Scanner 226 ...

Page 235: ...o which you want to add the newly scanned document data The data is added to the existing file as additional pages 5 Click Save or Forward The scanned data is saved to a folder on a computer or forwarded to an application Configuring Storing Settings P 233 Specifying External Applications to Forward Scanned Data P 235 Adding Pages to an Existing PDF file Specify an existing PDF file to which you w...

Page 236: ...g Settings P 233 Specifying External Applications to Forward Scanned Data P 235 When placing documents on the platen glass The screen shown below is displayed 1 If there are additional pages of documents to be scanned place the next document on the platen glass and click Next Repeat this step until you finish scanning all of the pages When there is only one page to be scanned proceed to the next s...

Page 237: ...ation to save the scanned document Scanning from the Machine P 219 You can edit the computer name that appears on the display of the machine during this procedure Comment You can enter a comment for each type of scan Edit the comment as necessary Close Toolbox after Finishing Scanning when Started from Device When you scan by using the operation panel of the machine MF Toolbox starts You can speci...

Page 238: ...ave the scanned document an application as a forward destination and other settings For Mac OS users available functions vary For Mac OS Users P 617 Configuring Scan Settings P 230 Configuring Storing Settings P 233 Specifying External Applications to Forward Scanned Data P 235 Configuring Scan Settings Configure the scan settings such as the original document size color mode and resolution Using ...

Page 239: ...ed in the feeder documents placed on the platen glass are scanned Input Method imageRUNNER 2204F 2204N 2004N Select whether you want to scan a 1 sided or 2 sided document placed in the feeder Paper Size Select the document size If you select an option for a custom size the Paper Size Settings screen opens You can then enter a custom size Orientation imageRUNNER 2204F 2204N 2004N If documents are p...

Page 240: ... the type of scan Scanning Using MF Toolbox P 223 The quality of the scanned image is automatically adjusted so that the file size does not exceed the maximum limit that you specify here Image Quality Select the resolution of the scanned image that suits your intended use Available resolutions vary on whether the document is placed in the feeder or on the platen glass and whether the file format i...

Page 241: ...r or Color Magazine is selected for Scan Mode Configuring Scan Settings P 230 TIFF The scanned document is converted into a TIFF image PDF A PDF file is created If you scan a multi page document these pages are merged into one PDF file PDF Single Page A one page PDF file is created for each page of the scanned document For example if you scan a three page document three separate one page PDF files...

Page 242: ...anced settings for PDF files Create Searchable PDF Specify whether you want to convert the scanned document into a searchable PDF Characters in the scanned document are converted into text data and the text can be searched using a computer Text can also be edited with a word processing application To create a searchable PDF select 300 dpi for Image Quality Configuring Scan Settings P 230 Text Lang...

Page 243: ...plications to Forward Scanned Data If you specify an application to which you want to forward the scanned data the specified application automatically starts when scanning is complete For example you can specify Adobe Photoshop or other image processing application If you select Mail for the type of scan and specify an e mail application the scanned data is automatically attached to a new e mail m...

Page 244: ... Netscape Messenger Windows Mail Becky Ver 2 Mozilla Thunderbird LINKS Scanning Using MF Toolbox P 223 Using the Machine as a Scanner 236 ...

Page 245: ...ents P 36 The second or subsequent documents may not be scanned or an error message may be displayed depending on the application In such a case place and scan one document at a time 2 From the application select the start scan command The procedure for selecting the start scan command varies depending on the application For more information see the instruction manual for your application 3 Select...

Page 246: ...LINKS Configuring Scan Settings in ScanGear MF P 239 Using the Machine as a Scanner 238 ...

Page 247: ...ac OS users available functions vary For Mac OS Users P 617 Starting from an application You can use ScanGear MF to load the scanned image into Adobe Photoshop Microsoft Office Word or other image processing and word processing applications Select ScanGear MF from the scan commands Scanning Using an Application P 237 You can do the following by using ScanGear MF Previewing the image before scannin...

Page 248: ...frame that fits the scanned image is automatically set Each time you click the icon the cropping frame is reduced You can move the frame or change its size with your mouse Manually setting multiple scanning areas You can manually add cropping frames You can also specify cropping areas in the document so that each of them can be scanned as separate images Drag the cropping frames to specify the are...

Page 249: ... is scanned as a color image Document Grayscale ADF imageRUNNER 2204F 2204N 2004N The document is scanned as a grayscale image Select Purpose Select a setting based on your intended use of the scanned image Print 300dpi Select when printing the scanned image Image Display 150dpi Select when displaying the scanned image on a computer OCR 300dpi Select when using the scanned image with OCR optical c...

Page 250: ...her images into vivid colors This setting is available when a preview image is displayed and you select Photo Color or Magazine Color for Select Source LINKS Configuring Scan Settings in Advanced Mode P 243 Scanning Using MF Toolbox P 223 Scanning Using an Application P 237 Using the Machine as a Scanner 242 ...

Page 251: ... Images P 243 Specifying Settings for Documents and Color Mode P 244 Specifying Resolution and Image Size P 246 Adjusting Image Quality P 247 Adjusting Brightness and Color P 248 Specifying Other Settings P 251 Registering Frequently Used Settings P 253 Operating Preview Images If you place the document on the platen glass and click Preview a preview image is displayed You can specify the area you...

Page 252: ...To enlarge a part of the image to check the details use Zoom Left Rotate Right Rotate Rotates the preview image 90 degrees to the left or right Information Displays the current settings of the scanned image such as the color mode and size of the scan area Auto Crop Automatically sets the cropping frame that fits the scanned document Each time you click the icon the cropping frame is reduced Clear ...

Page 253: ...For normal cases select the same size as the document To specify the size with values select a unit and enter the values for width and height To lock the width to height ratio of the image click If you select ADF 2 sided for Original Input Method you cannot specify the size by entering the values The image size that can be scanned is limited on some applications If documents are placed in the feed...

Page 254: ...ze Output Resolution Select the resolution of the scanned image that suits your intended use If documents are placed in the feeder the maximum resolution is 300 dpi About the output resolution A resolution of 75 dpi is a rough guide for displaying the scanned image on a computer and 300 dpi for printing or creating a searchable PDF If you double the output resolution the image file size increases ...

Page 255: ...h as correction of scratches or faded colors on a photograph These settings are available if you select Color or Grayscale for Color Mode Specifying Settings for Documents and Color Mode P 244 Auto Tone Automatically adjusts the color tone of the image Reduce Dust and Scratches Makes dust or scratches on the document less noticeable High makes large scratches and dust less noticeable but may ruin ...

Page 256: ... depending on the settings selected for Color Mode Specifying Settings for Documents and Color Mode P 244 When Text Enhanced is selected you cannot configure these settings Brightness Contrast Adjusts the brightness and contrast the difference between the light and dark parts of the image To adjust while checking on a graph click on the upper right of the screen Channel If you select Color for Col...

Page 257: ...olor channels If you select Grayscale for Color Mode only Grayscale is displayed Black point Eyedropper Mid point Eyedropper White point Eyedropper Click the parts on the preview image or cropping frame you want to specify as the darkest the medium and the brightest Slide or Alternatively you can enter a value Gray Balance Eyedropper Tool Click a part on the preview image or cropping frame you wan...

Page 258: ...trast histogram and tone curve settings are displayed in a tone curve and as numerical values Perform a final check of the color settings Threshold Adjust the threshold value for black and white images You can enhance the appearance of text or reduce the visibility of text or images printed on the reverse side of a semi transparent document such as a newspaper The setting is available if you selec...

Page 259: ...es not start automatically and the most recently saved preview image is displayed None Preview does not start automatically and no preview image is displayed Cropping Frame on Previewed Images Select how the cropping frame Operating Preview Images P 243 is displayed on the preview image Execute Auto Cropping on Previewed Images Auto Crop is performed based on the scanned document Display the Last ...

Page 260: ...d If the application settings are specified to scan documents in black and white those settings are replaced and documents are scanned with the ScanGear MF color mode set to Text Enhanced Automatically Quit ScanGear after Scanning The ScanGear MF screen automatically closes after scanning is complete The screen may automatically close with some applications regardless of this setting Color Setting...

Page 261: ...ecify the music or sounds that are played while the machine is scanning or when scanning is complete Click Browse to specify a file to be played The following file formats extensions are supported MIDI files mid rmi midi Audio files wav aif aiff MP3 files mp3 Play Music During Scanning The specified sound file is played while scanning is being performed Play Sound When Scanning is Completed The sp...

Page 262: ... settings Select settings to register as necessary 3 Select Add Delete in Favorite Settings The Add Delete Favorite Settings screen is displayed Add Delete is available when the preview image is displayed 4 Enter a name into Setting Name and click Add Save Enter a name for the settings to register Use a name that is easy to find in the drop down list Using the Machine as a Scanner 254 ...

Page 263: ...low 1 Place the document s and click Preview 2 Adjust the brightness or color Adjusting Brightness and Color P 248 Select settings to register as necessary 3 Select Add Delete in the drop down list The Add Delete Tone Curve Settings or Add Delete Threshold Settings screen is displayed 4 Enter a name into Setting Name and click Add Save Enter a name for the settings to register Use a name that is e...

Page 264: ...isplay a preview image and select the registered setting in the drop down list LINKS Configuring Scan Settings in Simple Mode P 240 Scanning Using MF Toolbox P 223 Scanning Using an Application P 237 Using the Machine as a Scanner 256 ...

Page 265: ... set to Off Tap Scan Remote Scanner in the Home Screen to bring the machine online before operating the machine System Management Settings P 465 Scanning is not possible in the following instances During printing copying faxing etc When importing exporting the Address Book When cleaning the fixing unit When paper is jammed in the feeder When the toner cover is open Scan after these operations are ...

Page 266: ... select the machine and click OK 5 From the Source drop down list select the location where the document is placed When placing the document on the platen glass select Flatbed When placing in the feeder select Feeder Scan one side Using the Machine as a Scanner 258 ...

Page 267: ...ith the specified settings reflected click Preview 7 Click Scan Scanning a document starts When scanning is complete the scanned document is displayed in the list of files on the Windows Fax and Scan screen and saved in the Scanned Documents folder of Documents Sending the document to a computer using WSD You can also send the scanned document to computers on the network that support WSD In this c...

Page 268: ...anning with AirPrint 272 Faxing with AirPrint 274 Encrypting Communication of Print Data for Mobile Devices with TLS 276 Configuring Settings for Key Pairs and Digital Certificates 279 Generating Key Pairs 280 Using CA issued Key Pairs and Digital Certificates 287 Verifying Key Pairs and Digital Certificates 290 If AirPrint Cannot Be Used 292 Using Google Cloud Print 293 Managing the Machine Remot...

Page 269: ...tion to perform printing scanning or other operation with ease You can also use a mobile device to operate the machine remotely check the printing status and change machine s settings Connecting to a Mobile Device P 262 Making the Best Use of the Machine by Utilizing Applications P 263 Managing the Machine Remotely P 297 Linking with Mobile Devices imageRUNNER 2204F 2204N 2004N 261 ...

Page 270: ... Connecting to a Wireless LAN Like when connecting a computer and the machine connect a mobile device and the machine via a wireless LAN router Connecting to a Wireless LAN P 304 Linking with Mobile Devices imageRUNNER 2204F 2204N 2004N 262 ...

Page 271: ...www canon com Using Google Cloud Print You can print from an application or service that supports Google Cloud Print You can print by remotely operating the machine at any time and from anywhere for example even while you are on the go Using Google Cloud Print P 293 Printing with Mopria This machine also supports Mopria Using Mopria allows you to print with printers of different models from differ...

Page 272: ...iguring AirPrint Settings You can register information including the name of the machine and installation location that is used for identifying the machine You can also disable the AirPrint function of the machine Use the Remote UI to change these settings 1 Start the Remote UI and log on in System Manager Mode Starting Remote UI P 399 2 Click Settings Registration If you are using a mobile device...

Page 273: ...irPrint clear the check box Printer Name Location Latitude Longitude Enter the name and the installation location information to help you identify this machine when operating your Apple device This information is useful if you have more than one AirPrint printer Linking with Mobile Devices imageRUNNER 2204F 2204N 2004N 265 ...

Page 274: ... If you want to disable functions that you are not going to use with AirPrint or encrypt communications configure the necessary setting using the operation panel Changing Print and Fax Settings To perform printing or fax sending with AirPrint IPP protocol is used Turning the function On Off You can specify whether to perform printing and fax sending with AirPrint The factory default setting is On ...

Page 275: ... also view information about consumables such as paper and toner cartridge Further you can configure security function settings Encrypting Communication of Print Data for Mobile Devices with TLS P 276 1 Click System Preferences in the Dock on the desktop Printers Scanners 2 Select this machine and click Options Supplies 3 Click Show Printer Webpage 4 Log on to the Remote UI To change AirPrint sett...

Page 276: ... iPhone iPod touch Mac Mac OS and Safari are trademarks of Apple Inc registered in the U S and other countries AirPrint and the AirPrint logo are trademarks of Apple Inc Linking with Mobile Devices imageRUNNER 2204F 2204N 2004N 268 ...

Page 277: ...9 or later when you use USB connection Network Environment You need one of the following environments The Apple device and the machine are connected to the same LAN The Mac and the machine are connected via USB For printing it is required to select the Use IPP Printing check box Changing the Setting of Functions Available with AirPrint P 266 Printing from iPad iPhone or iPod touch 1 Make sure that...

Page 278: ...t it is connected to your Mac For how to make sure of this see Getting Started Manuals Included with the Machine P 596 2 Add the machine to the Mac from System Preferences Printers Scanners This operation is not necessary if the registration has already been performed for another operation 3 Open a document in an application and display the print dialog box How to display the print dialog box diff...

Page 279: ...6 Click Print Printing starts Linking with Mobile Devices imageRUNNER 2204F 2204N 2004N 271 ...

Page 280: ...function System Management Settings P 465 is set to Off first put the machine into online state by tapping Scan Remote Scanner then start the procedure for scanning You cannot scan while settings for operations are being made or while the machine is performing any operation whatsoever Scanning from the Mac 1 Make sure that the machine is turned ON and that it is connected to the Mac For how to mak...

Page 281: ... Open Scanner The Scanner screen is displayed 6 Configure the scan settings as necessary 7 Click Scan Scanning starts and scanned data is displayed Linking with Mobile Devices imageRUNNER 2204F 2204N 2004N 273 ...

Page 282: ...ine is turned ON and that it is connected to the Mac For how to make sure of this see Getting Started Manuals Included with the Machine P 596 2 Add the machine to your Mac from System Preferences Printers Scanners This operation is not necessary if the registration has already been performed for printing or scanning 3 Open a document in an application and display the print dialog box How to displa...

Page 283: ...6 Click Fax Fax sending starts Linking with Mobile Devices imageRUNNER 2204F 2204N 2004N 275 ...

Page 284: ...ed and sent or received over the network To use TLS you need to specify a key pair and enable the TLS function Generate or install the key pair for TLS before enabling TLS Configuring Settings for Key Pairs and Digital Certificates P 279 1 Display the screen for AirPrint Displaying the Screen for AirPrint P 267 2 Click TLS Settings If the screen for AirPrint is not displayed Log on to the Remote U...

Page 285: ...P 290 4 Enable TLS for the Remote UI 1 Click Print Security Settings on the screen for AirPrint If the screen for AirPrint is not displayed Log on to the Remote UI in System Manager Mode Starting Remote UI P 399 Settings Registration Network Settings TCP IP Settings click Edit in IPP Print Settings 2 Select the Use TLS check box set required items and then click OK Linking with Mobile Devices imag...

Page 286: ...me Set Change Password Specify a password to use for authentication To specify a password select the check box and then specify the password in Password and Confirm LINKS Using AirPrint P 264 Generating Key Pairs P 280 Using CA issued Key Pairs and Digital Certificates P 287 Linking with Mobile Devices imageRUNNER 2204F 2204N 2004N 278 ...

Page 287: ...nature which enables the machine to detect any spoofing or tampering of data It is extremely difficult for third parties to abuse digital certificates A digital certificate that contains a public key of a certification authority CA is referred to as a CA certificate CA certificates are used for verifying the device the machine is communicating with for features such as printing with AirPrint Up to...

Page 288: ...ate Network Communication Key P 280 Generate Key and Certificate Signing Request CSR P 282 Generate Network Communication Key 1 Display the screen for AirPrint Displaying the Screen for AirPrint P 267 2 Click Key and Certificate Settings If the screen for AirPrint is not displayed Log on to the Remote UI in System Manager Mode Starting Remote UI P 399 Settings Registration Security Settings Key an...

Page 289: ...is displayed for a currently used key pair and the key pair cannot be deleted In this case disable the function or replace the key pair before deleting it 4 Select Network Communication and click OK 5 Specify settings for the key and certificate Linking with Mobile Devices imageRUNNER 2204F 2204N 2004N 281 ...

Page 290: ...an Validity Start Date YYYY MM DD cannot be set Country Region Click the Select Country Region radio button and select the country region from the drop down list You can also click the Enter Internet Country Code radio button and enter a country code such as US for the United States State City Enter up to 24 alphanumeric characters for the location as necessary Organization Organization Unit Enter...

Page 291: ...ate Key Deleting a registered key pair Click Delete on the right of the key pair you want to delete click OK TLS is displayed for a currently used key pair and the key pair cannot be deleted In this case disable the function or replace the key pair before deleting it 4 Select Generate Key and Certificate Signing Request CSR and click OK Linking with Mobile Devices imageRUNNER 2204F 2204N 2004N 283...

Page 292: ...slower the communication However the security is tighter NOTE 512 bit cannot be selected for the key length if SHA384 or SHA512 is selected for Signature Algorithm Certificate Signing Request CSR Settings Country Region Click the Select Country Region radio button and select the country region from the drop down list You can also click the Enter Internet Country Code radio button and enter a count...

Page 293: ...is often abbreviated as CN 6 Click OK Key and Certificate Signing Request CSR may take approximately 10 to 15 minutes to generate 7 Click Store in File If a confirmation window appears click Save to save the file 8 Click Register Certificate 9 Click Choose File specify the file for the certificate signing request and click Register Linking with Mobile Devices imageRUNNER 2204F 2204N 2004N 285 ...

Page 294: ...ey Pairs and Digital Certificates P 287 Verifying Key Pairs and Digital Certificates P 290 Encrypting Communication of Print Data for Mobile Devices with TLS P 276 Linking with Mobile Devices imageRUNNER 2204F 2204N 2004N 286 ...

Page 295: ...rs and three CA certificates can be registered 1 Display the screen for AirPrint Displaying the Screen for AirPrint P 267 2 Click Key and Certificate Settings If the screen for AirPrint is not displayed or if you want to specify the CA certificate settings Log on to the Remote UI in System Manager Mode Starting Remote UI P 399 Settings Registration Security Settings Key and Certificate Settings fo...

Page 296: ... it Disabling or enabling the preinstalled CA certificates Click Disable on the right of the preinstalled CA certificate you want to disable To enable the certificate again click Enable on the right of the certificate 4 Click Install Deleting a key pair or CA certificate Click Delete on the right of the file you want to delete and then click OK 5 Click Choose File specify the file to install and c...

Page 297: ...e key pair to be registered Password Enter up to 24 alphanumeric characters for the password of the private key set for the file to be registered Registering a CA certificate Click Register on the right of the CA certificate you want to register LINKS Generating Key Pairs P 280 Verifying Key Pairs and Digital Certificates P 290 Encrypting Communication of Print Data for Mobile Devices with TLS P 2...

Page 298: ...ettings If the screen for AirPrint is not displayed or if you want to specify the CA certificate settings Log on to the Remote UI in System Manager Mode Starting Remote UI P 399 Settings Registration Security Settings Key and Certificate Settings for key pairs or CA Certificate Settings for CA certificates 3 Click the icon for the key pair or certificate that you want to verify Certificate details...

Page 299: ...ate The result from verifying the certificate is displayed as shown below LINKS Generating Key Pairs P 280 Using CA issued Key Pairs and Digital Certificates P 287 Linking with Mobile Devices imageRUNNER 2204F 2204N 2004N 291 ...

Page 300: ...re the machine is ready for communication Make sure that Bonjour on your Apple device is enabled Make sure that the machine is configured to enable operations from a computer even when no department ID and password are entered Setting the Department ID Management for Printing or Faxing from the Computer P 365 For printing make sure that the paper is loaded in the machine and the machine has suffic...

Page 301: ...You may not be able to use this function in some countries or regions Google Cloud Print does not support printing from IPv6 adresses To use Google Cloud Print a Google account is required If you do not have one access Google website to create your account Checking the Machine Settings Before setting up Google Cloud Print check the following Make sure that the machine is assigned an IPv4 address a...

Page 302: ...and tap Apply Setting the System Manager PIN imageRUNNER 2004 P 368 3 Select Google Cloud Print Settings Enable Google Cloud Print 4 Tap On or Off Registering the Machine with Google Cloud Print Registering the machine with Google Cloud Print allows you to print from anywhere 1 Start the Remote UI and log on in System Manager Mode Starting Remote UI P 399 2 Click Settings Registration 3 Click Netw...

Page 303: ...or for other reasons unregister the machine and register it again 5 Click the link of the URL displayed for URL for Registration 6 Follow the on screen instructions to register the machine You can print from a Google Cloud Print compatible application such as Google Chrome Gmail or Google Docs Access the Google Cloud Print website for information about the latest applications that support Google C...

Page 304: ...ome The machine s display shows the following confirmation screen before completion of the registration Press Yes to complete the registration For the registration procedure see the instruction manual for your mobile device or the Google Cloud Print website Linking with Mobile Devices imageRUNNER 2204F 2204N 2004N 296 ...

Page 305: ... Web browser and start the Remote UI Check the IP address set to the machine in advance Viewing Network Settings P 326 If you have any questions ask your Network Administrator 1 Start the Web browser on your mobile device 2 Enter http the IP address of the machine in the address field If you want to use an IPv6 address enclose the IPv6 address with brackets example http fe80 2e9e fcff fe4e dbce So...

Page 306: ...314 Checking the SSID and Network Key 318 Setting IP Addresses 319 Setting IPv4 Address 320 Setting IPv6 Addresses 323 Viewing Network Settings 326 Configuring the Machine for Printing or Faxing from a Computer 329 Configuring Printing Protocols and WSD Functions 330 Configuring Printer Ports 333 Setting Up Print Server 336 Configuring the Machine for Your Network Environment 339 Configuring Ether...

Page 307: ...convenience and ease of use Relax and proceed with the network setup one step at a time Connecting to a Computer Viewing the Machine s Network Settings Connecting to a Network P 300 Viewing Network Settings P 326 Configuring or Preparing for Print PC Fax Scan Functions Configuring the Machine for Printing or Faxing from a Computer P 329 Customizing the Machine for More Convenient Network Experienc...

Page 308: ...rking devices see the instruction manuals for the devices or contact your manufacturer Before You Start Follow these steps to connect the machine to a network Check your computer settings Make sure that the computer is correctly connected to the network For more information see the instruction manuals for the devices you are using or contact the device manufacturers Make sure that the network sett...

Page 309: ...he setting you selected in step 2 Connecting to a Wired LAN P 303 Connecting to a Wireless LAN P 304 Set the IP address as necessary This step is required when you want to assign a specific IP address to the machine or change the dynamic IP addressing protocol from the default DHCP Setting IP Addresses P 319 Network imageRUNNER 2204F 2204N 2004N 301 ...

Page 310: ... to Wireless LAN or vice versa you will need to uninstall MF Drivers installed on your computer and then reinstall them 1 Tap Menu in the Home Screen 2 Tap Network Settings If a screen for entering a System Manager ID and PIN is displayed enter the System Manager ID and PIN tap Apply and press Setting the System Manager ID imageRUNNER 2204F 2204N 2004N P 359 3 Tap Select Wired Wireless LAN 4 Tap W...

Page 311: ...nect a LAN cable Connect the machine to a router by using a LAN cable Push the connector in until it clicks into place 2 Wait approximately 2 minutes While you wait the IP address is set automatically You can set the IP address manually Setting IP Addresses P 319 LINKS Connecting to a Network P 300 Network imageRUNNER 2204F 2204N 2004N 303 ...

Page 312: ...ation might be leaked to a third party because radio waves used in wireless communication can go anywhere nearby even beyond walls Wireless LAN security The wireless LAN security that is supported by the machine is listed below For the wireless security compatibility of your wireless router see the instruction manuals for your networking devices or contact your manufacturer 128 104 64 40 bit WEP W...

Page 313: ...reless connection you can either select a wireless router or manually enter the required information Regardless of the method make sure that you have the required setup information including the SSID and network key Checking the SSID and Network Key P 318 Selecting a Wireless Router Select this setup option if you need to manually set up the connection but want to complete the setup as easily as p...

Page 314: ...f a screen for entering a System Manager ID and PIN is displayed enter the System Manager ID and PIN tap Apply and press Setting the System Manager ID imageRUNNER 2204F 2204N 2004N P 359 3 Tap Wireless LAN Settings If the Do you want to enable the wireless LAN message is displayed tap Yes 4 Read the message that is displayed and tap OK 5 Tap WPS Push Button Mode 6 Tap Yes 7 Press and hold the WPS ...

Page 315: ...e IP address settings of the machine are completed Signal strength When more than one wireless router is available for connection the machine connects to the device with the strongest signal Signal strength is measured using RSSI Received Signal Strength Indication Reducing power consumption You can set the machine to enter Power Save Mode based on signals emitted from the wireless router Power Sa...

Page 316: ...n for entering a WPS PIN code For more information see the instruction manuals for your networking device From the Operation Panel 2 Tap Menu in the Home Screen 3 Tap Network Settings If a screen for entering a System Manager ID and PIN is displayed enter the System Manager ID and PIN tap Apply and press Setting the System Manager ID imageRUNNER 2204F 2204N 2004N P 359 4 Tap Wireless LAN Settings ...

Page 317: ...cator is blinking on the operation panel The Wi Fi indicator blinks when a wireless router is detected When the setup is completed the screen below is displayed and approximately 2 seconds later the Wi Fi indicator lights up Wait approximately 2 minutes until the IP address settings of the machine are completed Signal strength When more than one wireless router is available for connection the mach...

Page 318: ...ave Mode P 422 If the IP address of the machine has changed In a DHCP environment the IP address of the machine may be changed automatically If this happens the connection is maintained as long as the machine and the computer belong to the same subnet LINKS Connecting to a Wireless LAN P 304 Network imageRUNNER 2204F 2204N 2004N 310 ...

Page 319: ...Auto AES CCMP or TKIP If you want to select Shared Key for WEP authentication or AES CCMP for WPA WPA2 encryption you need to set up the connection using the manual entry method Setting Up Connection by Specifying Detailed Settings P 314 1 Tap Menu in the Home Screen 2 Tap Network Settings If a screen for entering a System Manager ID and PIN is displayed enter the System Manager ID and PIN tap App...

Page 320: ...lled and ready to connect to the network Installation Settings Problems P 504 8 Enter the network key that you have written down Enter the network key using the numeric keys and tap Apply Entering Text P 34 WEP WPA PSK or WPA2 PSK 9 Tap Yes If an error message is displayed during setup Tap Close check whether the network key is correct and return to step 5 10 Check that the Wi Fi indicator is blin...

Page 321: ...he device with the strongest signal Signal strength is measured using RSSI Received Signal Strength Indication Reducing power consumption You can set the machine to enter Power Save Mode based on signals emitted from the wireless router Power Save Mode P 422 If the IP address of the machine has changed In a DHCP environment the IP address of the machine may be changed automatically If this happens...

Page 322: ...ork Settings If a screen for entering a System Manager ID and PIN is displayed enter the System Manager ID and PIN tap Apply and press Setting the System Manager ID imageRUNNER 2204F 2204N 2004N P 359 3 Tap Wireless LAN Settings If the Do you want to enable the wireless LAN message is displayed tap Yes 4 Read the message that is displayed and tap OK 5 Select SSID Settings Enter Manually 6 Enter th...

Page 323: ...entication error if the shared key authentication is set on the wireless router If this happens the machine automatically changes the setting to Shared Key and retries the connection 3 Tap Edit WEP Key 4 Select the WEP key 1 to 4 you want to edit Up to four WEP keys can be registered 5 Enter the network key that you have written down Enter the network key using the numeric keys and tap Apply Enter...

Page 324: ...ryption method 3 Enter the network key that you have written down Enter the network key using the numeric keys and tap Apply Entering Text P 34 8 Tap Yes If an error message is displayed during setup Tap Close check whether the specified settings are correct and return to step 5 9 Check that the Wi Fi indicator is blinking on the operation panel The Wi Fi indicator blinks when a wireless router is...

Page 325: ...gnal Signal strength is measured using RSSI Received Signal Strength Indication Reducing power consumption You can set the machine to enter Power Save Mode based on signals emitted from the wireless router Power Save Mode P 422 If the IP address of the machine has changed In a DHCP environment the IP address of the machine may be changed automatically If this happens the connection is maintained a...

Page 326: ... name and network name Network Key A keyword or password used for encrypting data or authenticating a network Some other terms used for network key include encryption key WEP key WPA WPA2 passphrase and preshared key PSK Wireless Security Protocols Authentication Encryption When manually setting up a wireless connection by specifying detailed settings you need to specify security settings Check th...

Page 327: ...ires a unique network IP address Two versions of IP addresses are available IPv4 and IPv6 Configure these settings depending on the network environment To use IPv6 addresses you need to properly configure the IPv4 address settings Network imageRUNNER 2204F 2204N 2004N 319 ...

Page 328: ...ager ID and PIN is displayed enter the System Manager ID and PIN tap Apply and press Setting the System Manager ID imageRUNNER 2204F 2204N 2004N P 359 3 Select TCP IP Settings IPv4 Settings IP Address Settings 4 Configure IP address settings Auto Acquire Select to automatically assign an IP address via a protocol such as DHCP When Auto Acquire On is displayed automatic addressing is enabled Manual...

Page 329: ...ng to On 4 Tap Apply IP addresses assigned via DHCP BOOTP RARP override the address obtained via Auto IP Manually entering an IP address 1 Check that Auto Acquire is set to Off If On is displayed tap Auto Acquire and set both Select Protocol and Auto IP to Off 2 Tap Manually Acquire 3 Specify the IP address subnet mask and gateway address or default gateway Specify the settings in the following or...

Page 330: ... 2 Tap Network Settings If a screen for entering a System Manager ID and PIN is displayed enter the System Manager ID and PIN tap Apply and press Setting the System Manager ID imageRUNNER 2204F 2204N 2004N P 359 3 Select TCP IP Settings IPv4 Settings PING Command 4 Enter the IPv4 address of another device on the network and tap Apply If a proper connection has been established the result is displa...

Page 331: ...ed to communicate with devices beyond a router A link local address is automatically set when the IPv6 function of the machine is enabled Manual address 1 An address that is entered manually When using this address specify the prefix length and default router address Stateless address 6 An address that is generated automatically using the MAC address of the machine and the network prefix that is a...

Page 332: ...4 Click Edit in IPv6 Settings 5 Select the Use IPv6 check box and configure the required settings Network imageRUNNER 2204F 2204N 2004N 324 ...

Page 333: ... number that indicates how many bits are available for the network address Default Router Address Specify the IPv6 address of the default router as necessary Addresses that start with ff or multicast address cannot be entered Use DHCPv6 Select the check box when using a stateful address When not using DHCPv6 clear the check box 6 Click OK Checking whether the settings are correct Make sure that th...

Page 334: ...n a connection failure even when the IP address is correctly configured This problem can be solved by setting a certain interval before the machine starts communicating Setting a Wait Time for Connecting to a Network P 343 You can print a list of the current network settings User Data List System Manager Data List P 556 Viewing IPv4 Settings Network Information IPv4 Select the setting to view View...

Page 335: ...Settings and Information 1 Tap Menu in the Home Screen 2 Tap Network Settings If a screen for entering a System Manager ID and PIN is displayed enter the System Manager ID and PIN tap Apply and press Setting the System Manager ID imageRUNNER 2204F 2204N 2004N P 359 3 Tap Wireless LAN Settings If the Do you want to enable the wireless LAN message is displayed tap Yes 4 Read the message that is disp...

Page 336: ...displayed 3 Select the setting to view WEP WPA WPA2 PSK Wireless LAN Status and Latest Error Information can be viewed from Press Network Information Wireless LAN Information and select the setting to view LINKS Connecting to a Wireless LAN P 304 Setting IPv4 Address P 320 Setting IPv6 Addresses P 323 Configuring DNS P 344 Network imageRUNNER 2204F 2204N 2004N 328 ...

Page 337: ...xing from a computer perform the basic setup procedures including the printer driver installation Printing protocols are rules for delivering document data created on a computer to the machine and can be selected according to the printing purpose or the network environment Ports are gateways for passing document data from a computer to the printer Incorrect port settings are often the cause when d...

Page 338: ... machine include LPD RAW and WSD Web Services on Devices To change protocols port numbers see Changing Port Numbers imageRUNNER 2204F 2204N 2004N P 379 1 Start the Remote UI and log on in System Manager Mode Starting Remote UI P 399 2 Click Settings Registration 3 Click Network Settings TCP IP Settings 4 Configure printing protocols Network imageRUNNER 2204F 2204N 2004N 330 ...

Page 339: ...nting Select the check box to print via LPD When not using LPD printing clear the check box Use RAW Printing Select the check box to print via RAW When not using RAW printing clear the check box 3 Click OK Configuring WSD 1 Click Edit in WSD Settings 2 Configure the settings as necessary Network imageRUNNER 2204F 2204N 2004N 331 ...

Page 340: ...p Scan and specify a WSD connected computer as a scan destination Scanning from the Machine P 219 Use Multicast Discovery Select the check box to set the machine to reply to multicast discovery messages If the check box is cleared the machine stays in sleep mode even when multicast discovery messages are flowing on the network 3 Click OK Using the operation panel LPD RAW and WSD settings can also ...

Page 341: ...pecified In such situations your attempt to print fails because the document data cannot reach the machine To fix this type of problem configure the printer port settings on the computer To perform the following procedure log on to your computer with an administrator account 1 Open the printer folder Displaying the Printer Folder P 610 2 Right click your printer icon and click Printer properties o...

Page 342: ...er installation 1 Click Add Port 2 Select Canon MFNP Port in Available port types and click New Port 3 Click Auto Detect select the machine when it is detected and click Next If the machine is not detected Click Refresh If the problem persists click IP address or MAC address enter the IP address or MAC address of the machine Viewing Network Settings P 326 and then click Next Network imageRUNNER 22...

Page 343: ...N 2004N P 379 have been changed on the machine the corresponding settings on the computer must also be configured This change is only available for LPR or RAW ports 1 Click Configure Port 2 Click the LPR or RAW radio button in Protocol Type change the number in the Port Number text box as necessary and then click OK 4 Click Close LINKS Setting Up Print Server P 336 Network imageRUNNER 2204F 2204N ...

Page 344: ...You may be unable to install drivers over the network depending on the operating system and the bit architecture 32 bit or 64 bit of the print server and client computers When implementing a print server in a domain environment consult your Network Administrator To obtain device information when using a print server Canon Driver Information Assist Service must be added during the printer driver in...

Page 345: ...ration is required if you want to install MF Drivers in other computers running a different bit architecture via the print server 1 Click Additional Drivers 2 Select the check box for the bit architecture that other computers are running and click OK Select additional drivers from the following according to the operating system of the print server Network imageRUNNER 2204F 2204N 2004N 337 ...

Page 346: ...OM into the drive on the computer click Browse to specify the folder that contains MF Drivers and then click OK If the print server runs a 32 bit operating system select DRIVERS x64 Driver folders on the provided DVD ROM If the print server runs a 64 bit operating system select DRIVERS 32bit Driver folders on the provided DVD ROM 4 Follow the on screen instructions to install the drivers 5 Click O...

Page 347: ...e for Your Network Environment 1053 058 The configuration of a network varies depending on the purpose of the network Specify the settings necessary to suit your network environment Network imageRUNNER 2204F 2204N 2004N 339 ...

Page 348: ...em Manager ID and PIN tap Apply and press Setting the System Manager ID imageRUNNER 2204F 2204N 2004N P 359 3 Select Ethernet Driver Settings Auto Detect 4 Select whether to configure Ethernet settings automatically or manually Configuring Ethernet settings automatically Tap On The machine detects and automatically sets the communication mode and the Ethernet type that can be used Configuring Ethe...

Page 349: ...s setting for most environments 3 Select the Ethernet type Tap Ethernet Type tap 10BASE T or 100BASE TX 4 Tap Apply LINKS Changing the Maximum Transmission Unit P 342 Setting a Wait Time for Connecting to a Network P 343 Network imageRUNNER 2204F 2204N 2004N 341 ...

Page 350: ...the machine as necessary For more information contact your Network Administrator 1 Tap Menu in the Home Screen 2 Tap Network Settings If a screen for entering a System Manager ID and PIN is displayed enter the System Manager ID and PIN tap Apply and press Setting the System Manager ID imageRUNNER 2204F 2204N 2004N P 359 3 Select TCP IP Settings MTU Size 4 Select the MTU LINKS Configuring Ethernet ...

Page 351: ...onnected or if you add a new device If this type of problem occurs set a wait time for connecting to the network 1 Tap Menu in the Home Screen 2 Tap Network Settings If a screen for entering a System Manager ID and PIN is displayed enter the System Manager ID and PIN tap Apply and press Setting the System Manager ID imageRUNNER 2204F 2204N 2004N P 359 3 Tap Waiting Time for Connection at Startup 4...

Page 352: ...gure the DNS mDNS or DHCP option settings as necessary Note that the procedures for configuring DNS are different for IPv4 and IPv6 1 Start the Remote UI and log on in System Manager Mode Starting Remote UI P 399 2 Click Settings Registration 3 Click Network Settings TCP IP Settings 4 Configure DNS settings Network imageRUNNER 2204F 2204N 2004N 344 ...

Page 353: ...lphanumeric characters for the name of the domain the machine belongs to such as example com DNS Dynamic Update Select the check box to dynamically update the DNS records whenever the machine s IP address is changed When specifying the interval between updates enter the time in hours in the DNS Dynamic Update Interval text box mDNS Settings Use mDNS Adopted by Bonjour mDNS multicast DNS is a proto...

Page 354: ... Update Select the check box to enable Option 81 to dynamically update the DNS records through the DHCP server 3 Click OK Configuring IPv6 DNS 1 Click Edit in IPv6 Settings 2 Configure IPv6 DNS settings The Use IPv6 check box must be selected to configure the settings Setting IPv6 Addresses P 323 Network imageRUNNER 2204F 2204N 2004N 346 ...

Page 355: ...ch as example com DNS Dynamic Update Select the check box to dynamically update the DNS records whenever the machine s IP address is changed To specify the type s of addresses you want to register to the DNS server select the check box for Register Manual Address Register Stateful Address or Register Stateless Address To specify the interval between updates enter the time in hours in the DNS Dynam...

Page 356: ...ettings can also be accessed from Menu in the Home Screen IPv4 Settings P 423 IPv6 Settings P 424 LINKS Setting IPv4 Address P 320 Setting IPv6 Addresses P 323 Viewing Network Settings P 326 Network imageRUNNER 2204F 2204N 2004N 348 ...

Page 357: ...not support the trap notification feature of SNMP To change the port number of SNMP see Changing Port Numbers imageRUNNER 2204F 2204N 2004N P 379 SNMP management software when installed on a computer on the network enables you to configure monitor and control the machine remotely from the computer For more information see the instruction manuals for your management software 1 Start the Remote UI a...

Page 358: ...4 Click Edit 5 Specify SNMPv1 settings Network imageRUNNER 2204F 2204N 2004N 350 ...

Page 359: ... Community If you do not need to use Dedicated Community clear the check box Enabling SNMPv1 1 Select the Use SNMPv1 check box 2 Select the Use Community Name 1 or Use Community Name 2 check box enter the community name in the Community Name text box and specify the MIB Access Permission setting Up to two community names can be registered 3 Select the Use Dedicated Community check box and specify ...

Page 360: ...s of the machine become unavailable such as obtaining machine information via the printer driver Using the operation panel SNMPv1 settings can also be accessed from Menu in the Home Screen SNMP Settings P 427 Network imageRUNNER 2204F 2204N 2004N 352 ...

Page 361: ... Rules imageRUNNER 2204F 2204N 2004N 376 Changing Port Numbers imageRUNNER 2204F 2204N 2004N 379 Setting a Proxy imageRUNNER 2204F 2204N 2004N 381 Restricting the Machine s Functions 383 Restricting Access to Address Book and Sending Functions imageRUNNER 2204F 384 Setting a PIN for Address Book imageRUNNER 2204F 385 Limiting Available Destinations imageRUNNER 2204F 387 Prohibiting PC Faxing image...

Page 362: ...ctions Set the necessary configuration depending on your environment You can configure the best security system by building an environment that inhibits access to printers on your in house network via the Internet and using such environment together with the machine s security features Preventing Unauthorized Access imageRUNNER 2204F 2204N 2004N P 356 Establishing the Basics of Information Securit...

Page 363: ...chine from Unauthorized Access 1053 05J Prevent unauthorized third parties from accessing and using the machine You can implement multiple security measures such as using firewalls and changing port numbers Security 355 ...

Page 364: ...red in the Multifunction Machine P 357 Assigning a Private IP Address An IP address is a numerical label assigned to each device participating in a computer network A global IP address is used for the communication connecting to the Internet and a private IP address is used for the communication within a local area network such as a LAN in the company If a global IP address is assigned your printe...

Page 365: ...372 Specifying the TLS Encrypted Communication For information on the TLS Encrypted Communication see Encrypting Communication of Print Data for Mobile Devices with TLS P 276 Setting PIN to Manage Information Stored in the Multifunction Machine If a malicious third party attempts to gain unauthorized access to a printer multifunction machine setting PIN to information stored in the machine will re...

Page 366: ...by registering a Department ID You can register multiple Department IDs If a user tries to operate the machine when Department IDs are enabled a logon screen is displayed and the user must enter their own Department ID and PIN to use the machine Information for each Department ID can be viewed such as how many pages have been copied printed or scanned in black and white or color Setting the Depart...

Page 367: ...ke sure that only Administrators know the System Manager ID and PIN 1 Tap Menu in the Home Screen 2 Tap System Management Settings 3 Select System Manager Information Settings System Manager ID and PIN 4 Specify the System Manager PIN Specify the System Manager ID and then specify the System Manager PIN Enter a number of up to seven digits and tap Apply When PIN Confirm is displayed enter the PIN ...

Page 368: ...contact information Administrator comments the installation location of the machine as well as to the settings that you can register by using the control panel The registered information can be viewed on the Device Information page of the Remote UI Checking System Manager Information P 408 Logging on to the machine If you try to access Network Settings or System Management Settings when only the S...

Page 369: ...anagement function Additional settings are required if you want to enable Department ID Management for operations from a computer such as printing Registering Editing Department ID and PIN P 361 Enabling the Department ID Management P 363 Setting the Department ID Management for Printing or Faxing from the Computer P 365 Blocking Jobs When Department ID Is Unknown P 366 Registering Editing Departm...

Page 370: ...ts both in the PIN and Confirm text boxes Page Restriction Select the check boxes of the items you want to set and then enter the maximum number of pages that can be copied printed for those departments NOTE Total Prints is the combined number of copies and prints that are allowed Editing the settings of the registered Department ID 1 Click the corresponding text link under Department ID to edit 2...

Page 371: ...s to zero click the corresponding text link under Department ID and click Clear Count OK If you want to return the counts of all Department IDs to zero click Clear All Counts OK Enabling the Department ID Management After you register as many Department IDs as necessary enable Department ID Management 1 Start the Remote UI and log on in System Manager Mode Starting Remote UI P 399 2 Click Settings...

Page 372: ...llow Print Jobs with Unknown IDs Allow Scan Jobs with Unknown IDs check boxes see Blocking Jobs When Department ID Is Unknown P 366 NOTE Using the control panel If you only want to enable or disable the settings you can use Menu in the Home Screen Department ID Management On Off 1 P 466 Logging on to the machine When you try to operate the machine when Department ID Management is enabled the follo...

Page 373: ...our computer with an administrator account 1 Open the printer folder Displaying the Printer Folder P 610 2 Right click your printer or fax icon and click Printer properties or Properties 3 Click the Device Settings tab and specify the required settings 1 Select the Use Department ID Management check box and click Settings on the right of it For the fax driver also select the Allow PIN Setting chec...

Page 374: ... the machine and the computer are connected via a USB or WSD port 3 Click OK NOTE Logging on to the machine When you try to print or fax from a computer when Department ID Management is enabled the following pop up screen is displayed unless the Confirm Department ID PIN When Printing Confirm Department ID PIN when Sending Fax check box is cleared Blocking Jobs When Department ID Is Unknown If you...

Page 375: ...puter P 365 However if the check box is selected for this setting you can print from a computer without entering the ID and PIN Clear the check box to require entering an ID and PIN Allow Scan Jobs with Unknown IDs If the check box is selected you can select Scan on the main screen and scan documents to a computer anytime Clear the check box to disable the selection of Scan when Department ID Mana...

Page 376: ...ors know the PIN 1 Tap Menu in the Home Screen 2 Tap System Management Settings 3 Select System Manager Information Settings System Manager PIN 4 Specify the System Manager PIN Enter a number of up to seven digits and tap Apply When PIN Confirm is displayed enter the PIN once again to confirm You cannot set a PIN that consists only of zeros such as 00 or 0000000 To disable the PIN press to erase t...

Page 377: ... 05W You can set a PIN for access to the Remote UI All users use a common PIN 1 Start the Remote UI and log on in System Manager Mode Starting Remote UI P 399 2 Click Settings Registration 3 Click Security Settings Remote UI Settings 4 Click Edit Security 369 ...

Page 378: ...seven digits both in the PIN and Confirm text boxes 6 Click OK If PIN is forgotten Set a new Remote UI Access PIN in the settings menu on the control panel Remote UI Settings P 468 If Remote UI settings are initialized The Remote UI Access PIN is also initialized After an initialization reset the PIN Initializing Menu P 563 LINKS Setting Access Privileges P 358 Setting the System Manager ID imageR...

Page 379: ... security unauthorized third parties can access computers and other communication devices that are connected to a network To prevent this unauthorized access specify the settings for packet filter a feature that restricts communication to devices with specified IP addresses or MAC addresses Security 371 ...

Page 380: ... communications You can specify a single IP address or a range of IP addresses Up to 4 IP addresses or ranges of IP addresses can be specified for both IPv4 and IPv6 The packet filters described in this section control communications over TCP UDP and ICMP 1 Start the Remote UI and log on in System Manager Mode Starting Remote UI P 399 2 Click Settings Registration 3 Click Security Settings IP Addr...

Page 381: ...ses to restrict receiving data by the machine IPv6 Address Inbound Filter Specify IPv6 addresses to restrict receiving data by the machine 5 Specify the settings for packet filtering Blocked Addresses Register addresses to be blocked as well as check or delete registered blocked addresses Security 373 ...

Page 382: ...ith devices having their IP addresses registered in Allowed Addresses and restricts communication with devices with any other IP addresses However communication is restricted for IP addresses also registered in Blocked Addresses Check for entry errors If IP addresses are incorrectly entered you may be unable to access the machine from the Remote UI in which case you need to set IPv4 Address Filter...

Page 383: ...le or disable the IP Address Filter settings from Menu in the Home Screen IPv4 Address Filter P 467 IPv6 Address Filter P 467 LINKS Specifying MAC Addresses for Firewall Rules imageRUNNER 2204F 2204N 2004N P 376 Security 375 ...

Page 384: ...devices with specified MAC addresses but permit other communications Up to 10 MAC addresses can be specified This function is unavailable when the machine is connected to a wireless LAN 1 Start the Remote UI and log on in System Manager Mode Starting Remote UI P 399 2 Click Settings Registration 3 Click Security Settings MAC Address Filter 4 Click Edit Security 376 ...

Page 385: ...o Register text box and click Add Allows communication received only with devices having registered MAC addresses and restricts communication with devices with any other MAC addresses You do not need to delimit the address with hyphens or colons Check for entry errors If MAC addresses are incorrectly entered you may become unable to access the machine from the Remote UI in which case you need to s...

Page 386: ...K You can enable or disable the MAC Address Filter settings from Menu in the Home Screen MAC Address Filter P 467 LINKS Specifying IP Addresses for Firewall Rules imageRUNNER 2204F 2204N 2004N P 372 Security 378 ...

Page 387: ... network environment To change the port number for proxy server Setting a Proxy imageRUNNER 2204F 2204N 2004N P 381 1 Tap Menu in the Home Screen 2 Tap Network Settings If a screen for entering a System Manager ID and PIN is displayed enter the System Manager ID and PIN tap Apply and press Setting the System Manager ID imageRUNNER 2204F 2204N 2004N P 359 3 Select TCP IP Settings Port Number Settin...

Page 388: ...LINKS Configuring Printer Ports P 333 Security 380 ...

Page 389: ...acilitates management of traffic between in house and outside networks but also blocks unauthorized access and consolidates anti virus protection for enhanced security When you use Google Cloud Print to print over the Internet you can enhance security by setting a proxy When setting a proxy make sure that you have the necessary proxy information including the IP address port number and a user name...

Page 390: ... necessary Enter a number between 1 and 65535 Use Proxy within Same Domain Select the check box to use a proxy server specified in the same domain Use Proxy Authentication To enable authentication by the proxy server select the check box and enter up to 24 alphanumeric characters for the user name in the User Name text box Set Change Password To set or change the password for the proxy authenticat...

Page 391: ... these functions Restricting Access to Address Book and Sending Functions imageRUNNER 2204F Restricting Access to Address Book and Sending Functions imageRUNNER 2204F P 384 Restricting USB Functions Restricting USB Functions P 393 Disabling HTTP Communication and Remote Management imageRUNNER 2204F 2204N 2004N Disabling HTTP Communication imageRUNNER 2204F 2204N 2004N P 394 Disabling Remote UI ima...

Page 392: ...g the available fax and e mail destinations to those registered in the Address Book or by setting a PIN for the Address Book so that unauthorized users cannot add or edit Address Book entries You can also avoid sending documents to unintended recipients if the machine is set to ask you to enter the fax number twice for confirmation Security 384 ...

Page 393: ...r ID imageRUNNER 2204F 2204N 2004N P 359 3 Select Restrict TX Function Address Book PIN 4 Set the PIN for editing the Address Book Enter a number of up to seven digits using numeric keys and tap Apply When PIN Confirm is displayed enter the PIN once again to confirm You cannot set a PIN that consists only of zeros such as 00 or 0000000 To disable the PIN press to erase the PIN leave the text box b...

Page 394: ...Registering Address Book from Remote UI imageRUNNER 2204F P 416 Security 386 ...

Page 395: ... for entering a System Manager ID and PIN is displayed enter the System Manager ID and PIN tap Apply and press Setting the System Manager ID imageRUNNER 2204F 2204N 2004N P 359 3 Select Restrict TX Function Restrict New Destinations 4 Tap On Off Cancels the restriction on new destinations Fax numbers and e mail addresses can be specified by using any method On Enables the restriction Users need to...

Page 396: ...a screen for entering a System Manager ID and PIN is displayed enter the System Manager ID and PIN tap Apply and press Setting the System Manager ID imageRUNNER 2204F 2204N 2004N P 359 4 Tap Off Off Disables PC faxing On Enables PC faxing LINKS Sending Faxes from Your Computer PC Fax P 150 Setting a PIN for Address Book imageRUNNER 2204F P 385 Limiting Available Destinations imageRUNNER 2204F P 38...

Page 397: ...ID and PIN is displayed enter the System Manager ID and PIN tap Apply and press Setting the System Manager ID imageRUNNER 2204F 2204N 2004N P 359 3 Select Restrict TX Function Restrict Resending from Log 4 Tap On Off Enables use of previously used destinations On Disables use of previously used destinations LINKS Limiting Available Destinations imageRUNNER 2204F P 387 Prohibiting Sequential Broadc...

Page 398: ... Entered Fax Number If a screen for entering a System Manager ID and PIN is displayed enter the System Manager ID and PIN tap Apply and press Setting the System Manager ID imageRUNNER 2204F 2204N 2004N P 359 4 Tap On Off Does not display the screen for confirming the fax number On Displays the screen for confirming the fax number Displaying Destinations in Address Book When using One Touch buttons...

Page 399: ...R 2204F 2204N 2004N P 359 3 Select Restrict TX Function Confirm One Touch Coded Dial TX 4 Tap On Off Does not display the details of the selected entered One Touch button or coded dial number On Displays the details of the selected entered One Touch button or coded dial number LINKS Registering Destinations P 159 Specifying from Address Book P 117 Registering Address Book from Remote UI imageRUNNE...

Page 400: ...ID and PIN tap Apply and press Setting the System Manager ID imageRUNNER 2204F 2204N 2004N P 359 4 Select Confirm Sequential Broadcast or Reject Sequential Broadcast Off Enables sequential broadcasting Confirm Sequential Broadcast Displays the confirmation screen when sending a fax via sequential broadcasting Reject Sequential Broadcast Disables sequential broadcasting LINKS Limiting Available Des...

Page 401: ...creen for entering a System Manager ID and PIN is displayed enter the System Manager ID and PIN tap Apply and press Setting the System Manager ID imageRUNNER 2204F 2204N 2004N P 359 3 Select Use as USB Device 4 Select Off Off Disables the USB port located on the back side of the machine On Enables the USB port located on the back side of the machine 5 Restart the machine Turn OFF the machine wait ...

Page 402: ...he Remote UI WSD printing and printing with Google Cloud Print 1 Tap Menu in the Home Screen 2 Tap Network Settings If a screen for entering a System Manager ID and PIN is displayed enter the System Manager ID and PIN tap Apply and press Setting the System Manager ID imageRUNNER 2204F 2204N 2004N P 359 3 Select TCP IP Settings Use HTTP 4 Tap Off Off Disables HTTP communication On Enables HTTP comm...

Page 403: ...r machine controlled remotely over the network by malicious third parties 1 Tap Menu in the Home Screen 2 Tap System Management Settings If a screen for entering a System Manager ID and PIN is displayed enter the System Manager ID and PIN tap Apply and press Setting the System Manager ID imageRUNNER 2204F 2204N 2004N P 359 3 Tap Remote UI Settings Use Remote UI 4 Tap Off Off Disables the Remote UI...

Page 404: ...nt over a network and is often used for communication via a Web browser or an e mail application TLS enables secure network communication when you access the machine from a computer via the Remote UI Encrypting Communication of Print Data for Mobile Devices with TLS P 276 Using Key Pairs and Digital Certificates A key pair system uses two differing keys one for encrypting data public key and one f...

Page 405: ...mote UI 399 Remote UI Screens 401 Managing Documents and Checking the Machine Status 406 Setting Up Menu Options from Remote UI 410 Saving Loading Address Book from Remote UI imageRUNNER 2204F 412 Registering Address Book from Remote UI imageRUNNER 2204F 416 Using Remote UI imageRUNNER 2204F 2204N 2004N 397 ...

Page 406: ... Remote UI Managing Documents and Checking the Machine Status P 406 Setting Up Menu Options from Remote UI P 410 Saving Loading Address Book from Remote UI imageRUNNER 2204F P 412 Registering Address Book from Remote UI imageRUNNER 2204F P 416 Basics of the Remote UI Starting Remote UI P 399 Remote UI Screens P 401 System Requirements The following environment is required to use the Remote UI In a...

Page 407: ...device is encrypted Encrypting Communication of Print Data for Mobile Devices with TLS P 276 When certificate settings or TLS settings have no errors continue browsing the Web site 3 Log on to the Remote UI When Department ID Management is disabled Select System Manager Mode or General User Mode System Manager Mode You can perform all the Remote UI operations and configure all the settings Enter t...

Page 408: ...ter the PIN Setting a Remote UI PIN imageRUNNER 2204F 2204N 2004N P 369 When Department ID Management is enabled Enter the appropriate ID in Department ID and PIN in PIN Setting the Department ID Management imageRUNNER 2204F 2204N 2004N P 361 4 Click Log In Portal Page main page will be displayed Remote UI Screens P 401 Using Remote UI imageRUNNER 2204F 2204N 2004N 400 ...

Page 409: ...ff from the Remote UI The Login page will be displayed Mail to System Manager Displays a window for creating an e mail to the system manager specified in System Manager Information under System Management Refresh Icon Refreshes the currently displayed page Device Basic Information Displays the current status of the machine and error information If an error has occurred the link to the Error Inform...

Page 410: ...ode you can change the settings items and save load the registered data Setting Up Menu Options from Remote UI P 410 Address Book imageRUNNER 2204F Displays the coded dial numbers list registered in the Address Book You can also register or edit the Address Book when you have logged on in System Manager Mode Registering Address Book from Remote UI imageRUNNER 2204F P 416 Status Monitor Cancel Page...

Page 411: ...UI P 410 Breadcrumb Trail Indicates the series of pages you opened to display the currently displayed page You can check what page is currently displayed Top Icon Moves the scroll box up to the top of the page when the page is scrolled down Edit Allows you to register or change machine settings Setting Up Menu Options from Remote UI P 410 System Management Settings You can only set System Manageme...

Page 412: ...4F P 60 Coded Dial Displays the list of the coded dial numbers Registering in the Address Book imageRUNNER 2204F P 60 Breadcrumb Trail Indicates the series of pages you opened to display the currently displayed page You can check what page is currently displayed List Number Specifies the range of coded dial numbers displayed on the page Top Icon Moves the scroll box up to the top of the page when ...

Page 413: ...Registering Editing the Address Book You can register or edit the Address Book when you have logged on in System Manager Mode Using Remote UI imageRUNNER 2204F 2204N 2004N 405 ...

Page 414: ...The list of the documents currently printing or waiting to be printed is displayed Log on to the Remote UI Starting Remote UI P 399 Status Monitor Cancel Job Status You can delete a document job by clicking Cancel If you logged on in System Manager Mode all the print documents currently printing and waiting to be printed will be listed If you entered your user name when you logged on in General Us...

Page 415: ...rmation When an error occurs this page will be displayed by clicking the message displayed under Error Information on Portal Page main page Portal Page Main Page P 401 Log on to the Remote UI Starting Remote UI P 399 Status Monitor Cancel Error Information Checking Consumables Paper size and type for the paper source serial number for the toner cartridge and other information is displayed Using Re...

Page 416: ...g Maximum Print Speed The maximum print speed is displayed Log on to the Remote UI Starting Remote UI P 399 Status Monitor Cancel Device Features Checking System Manager Information Information about the machine and the system manager is displayed This information is set in System Management on the Settings Registration page System Management Settings P 465 Using Remote UI imageRUNNER 2204F 2204N ...

Page 417: ...Checking Print Total Counter The total number of pages that have been printed by the copy print and fax functions is displayed Log on to the Remote UI Starting Remote UI P 399 Status Monitor Cancel Check Counter LINKS Remote UI Screens P 401 Using Remote UI imageRUNNER 2204F 2204N 2004N 409 ...

Page 418: ...n only be set using the Remote UI Some settings require you to first log on in System Manager Mode before you can change them 1 Start the Remote UI Starting Remote UI P 399 2 Click Settings Registration 3 Click the menu item you want to set For more information about the settings menu see each item below Menu items Referents Preferences Using Remote UI imageRUNNER 2204F 2204N 2004N 410 ...

Page 419: ...447 Printer Settings Printer Settings P 458 Output Report Settings Printing Reports and Lists P 548 System Management Settings System Management System Management Settings P 465 Department ID Management Setting the Department ID Management imageRUNNER 2204F 2204N 2004N P 361 Network Settings Network imageRUNNER 2204F 2204N 2004N P 299 Security Settings Security P 354 Initialize Setting Information...

Page 420: ...ine Exporting Address Book Data P 412 Loading Address Book Data P 413 Do not turn OFF the machine until the import or export process is complete It may take a few minutes to complete the process If the machine is turned OFF during the process it may result in damage to data or the machine Do not operate the machine during the export import process Before exporting importing check that no operation...

Page 421: ...orted Address Book is saved The Address Book will be saved Do not operate until the process is complete The screen remains the same during the export process Do not operate the Remote UI until the message The file name download has completed is displayed at the bottom of the screen Loading Address Book Data The Address Book data currently registered is overwritten when you load the Address Book da...

Page 422: ...ook PIN is displayed enter the PIN and click OK Setting a PIN for Address Book imageRUNNER 2204F P 385 4 Specify the Address Book file to be imported and click Start Importing To specify the file to be imported click Browse and select the file or enter the path to the file in File Path the file name with the location where the file is saved Using Remote UI imageRUNNER 2204F 2204N 2004N 414 ...

Page 423: ...d into the machine LINKS Remote UI Screens P 401 Registering Address Book from Remote UI imageRUNNER 2204F P 416 Registering in the Address Book imageRUNNER 2204F P 60 Address Book List imageRUNNER 2204F P 554 Using Remote UI imageRUNNER 2204F 2204N 2004N 415 ...

Page 424: ...Starting Remote UI P 399 2 Click Address Book If the enter PIN page is displayed The Address Book is protected by a PIN Enter the PIN and click OK 3 Click Coded Dial You can also register destinations in One Touch In this case click One Touch instead of Coded Dial Registering in the Address Book imageRUNNER 2204F P 60 4 Click the text link under Number Type or Name for an item named Not Registered...

Page 425: ...ding text link under Number Type or Name You can delete a registered item by clicking the corresponding Delete button 5 Select Destination Type to Register and click OK 6 Specify required settings and click OK Using Remote UI imageRUNNER 2204F 2204N 2004N 417 ...

Page 426: ...LINKS Remote UI Screens P 401 Saving Loading Address Book from Remote UI imageRUNNER 2204F P 412 Address Book List imageRUNNER 2204F P 554 Using Remote UI imageRUNNER 2204F 2204N 2004N 418 ...

Page 427: ...ettings imageRUNNER 2204F 2204N 2004N 421 Preferences 430 Timer Settings 436 Common Settings 440 Copy Settings 444 Fax Settings imageRUNNER 2204F 447 Printer Settings 458 Adjustment Maintenance 460 System Management Settings 465 Setting Menu List 419 ...

Page 428: ... this machine You can adjust each of the settings in detail Access these settings by tapping Menu in the Home Screen You can print the setting menu in list form to check the current settings User Data List System Manager Data List P 556 Setting Menu List 420 ...

Page 429: ...he setting Conversely when switching the machine from Wired LAN to Wireless LAN you do not need to specify this setting You can switch using the following Wireless LAN Settings Selecting Wired LAN or Wireless LAN P 302 Wired LAN Wireless LAN Wireless LAN Settings Specify settings for connecting the machine to a wireless LAN You can also view the current settings or specify the setting for saving p...

Page 430: ... router Setting Up Connection Using WPS Push Button Mode P 306 WPS PIN Code Mode Select to configure a wireless connection by entering a PIN code for a WPS wireless router Setting Up Connection Using WPS PIN Code Mode P 308 Power Save Mode Select whether or not the machine enters Power Save Mode based on signals emitted from the wireless router Off On Menu Network Settings Wireless LAN Settings Re...

Page 431: ... Address 0 0 0 0 Subnet Mask 0 0 0 0 Gateway Address 0 0 0 0 Check Settings Auto Acquire IP Address Subnet Mask Gateway Address PING Command Select to check that the machine is connected to a computer over a network Testing the Network Connection P 322 DNS Settings Specify settings for Domain Name System DNS which provides a host name for IP address resolutions Configuring DNS P 344 DNS Server Set...

Page 432: ...ne in an IPv6 network Use IPv6 Enable or disable IPv6 in the machine You can also view the current settings Setting IPv6 Addresses P 323 Off On Check Settings Stateless Address Settings Enable or disable stateless addresses Setting IPv6 Addresses P 323 Off On Check Settings Use DHCPv6 Enable or disable the stateful address that is acquired via DHCPv6 Setting IPv6 Addresses P 323 Off On Check Setti...

Page 433: ... Settings Enable or disable LPD a printing protocol that can be used on any hardware platform or operating system Configuring Printing Protocols and WSD Functions P 330 Off On RAW Print Settings Enable or disable RAW a Windows specific printing protocol Configuring Printing Protocols and WSD Functions P 330 Off On WSD Settings Enable or disable automatic browsing and acquiring information for the ...

Page 434: ...emote UI WSD printing or printing with Google Cloud Print Disabling HTTP Communication imageRUNNER 2204F 2204N 2004N P 394 Off On Use Network Link Scan Specify settings for using AirPrint Off On Menu Network Settings TCP IP Settings Use Network Link Scan Select Off or On Port Number Settings Change port numbers for protocols according to the network environment Changing Port Numbers imageRUNNER 22...

Page 435: ...ng the machine from a computer running SNMP compatible software Monitoring and Controlling the Machine with SNMP P 349 SNMPv1 Settings Enable or disable SNMPv1 When enabling SNMPv1 specify a community name and access privileges to Management Information Base MIB objects Off On Community Name 1 Settings Off On Community Name 2 Settings Off On Dedicated Community Settings Off On Menu Network Setting...

Page 436: ... Menu Network Settings Dedicated Port Settings Select Off or On Waiting Time for Connection at Startup Specify a wait time for connecting to a network Select the setting depending on the network environment Setting a Wait Time for Connecting to a Network P 343 0 to 300 sec Ethernet Driver Settings Select the communication mode of Ethernet half duplex full duplex and the Ethernet type 10BASE T 100B...

Page 437: ... address of the machine which is a number unique to each communication device Viewing the MAC Address P 327 Initialize Network Settings Select to return the Network Settings to the factory defaults Initialize Menu P 472 Setting Menu List 429 ...

Page 438: ...isk 1 are only available for the imageRUNNER 2204F Settings marked with an asterisk 2 are only available for the imageRUNNER 2204F 2204N 2004N Volume Settings P 430 Display Settings P 432 Volume Settings Adjust volume at which the machine beeps when a key is pressed on the control panel or when a paper jam occurs Adjusting the Volume P 70 Fax Tone 1 Select whether to make a dial tone while a fax i...

Page 439: ...ps when a key is pressed on the control panel Off On Invalid Entry Tone Select whether the machine beeps when an invalid settings value is entered such as when a user is trying to enter a number unavailable for a setting Off On Warning Tone Select whether the machine beeps when problem such as a paper jam or an operation mistake occurs Off On Job Done Tone Select whether the machine beeps when cop...

Page 440: ...screen and display the main screen of a different function Home Copy Fax 1 Scan Menu Preferences Display Settings Default Screen after Startup Restoration Select a function to display the desired screen Home Screen Button Display Settings Change the order in which Home Screen buttons are displayed Customizing the Home Screen P 28 Menu Preferences Display Settings Home Screen Button Display Setting...

Page 441: ... Menu Preferences Display Settings Millimeter Inch Entry Switch Select Millimeter or Inch Notify to Check Paper Settings You can set the machine so that after you load the paper in the paper drawer a pop up screen is displayed prompting you to confirm the paper loaded in the paper drawer is the same as the paper registered in the paper settings Off On Menu Preferences Display Settings Notify to Ch...

Page 442: ...sage Display Time Set a number for the interval Apply Scrolling Speed Adjust the speed for scrolling the screen by selecting from three levels Slow Standard Fast Menu Preferences Display Settings Scrolling Speed Select the speed Cursor Movement Type 2 Configure how the cursor moves after a character is entered on the screen Select Auto to automatically move the cursor to the right of the entered c...

Page 443: ...English French Japanese Korean Malay Portuguese Spanish Thai Vietnamese Menu Preferences Display Settings Language Select a language Remote UI Language 2 Select the display language used for the Remote UI screens Chinese Simplified Chinese Traditional English French Japanese Korean Portuguese Spanish Menu Preferences Display Settings Remote UI Language Select a language Setting Menu List 435 ...

Page 444: ...set Time P 438 Function After Auto Reset P 438 Auto Sleep Time P 439 Auto Offline Time P 439 Date Time Settings Specify date and time settings including the date format and the 12 or 24 hour clock display setting The date and time that are printed on each fax document report and list are determined by these settings Date Format Select the date format order of year month and day YYYY MM DD MM DD YY...

Page 445: ...lect the time zone If the time zone setting is changed the values set in Current Date Time Settings are also changed accordingly UTC 12 00 to UTC 0 00 to UTC 12 00 UTC Coordinated Universal Time UTC is the primary time standard by which the world regulates clocks and time The correct UTC time zone setting is required for Internet communications Menu Timer Settings Date Time Settings Time Zone Sele...

Page 446: ... indicator is blinking However Auto Reset is performed when the error does not prevent the user from continuing to use a function 0 Auto Reset is disabled 1 to 2 to 9 min Menu Timer Settings Auto Reset Time Set the Auto Reset time Apply The screen displayed after the Auto Reset is performed can be selected in Function After Auto Reset Function After Auto Reset Select whether to return the display ...

Page 447: ...setting menu is displayed We recommend using the factory default settings to save the most power Entering Sleep Mode P 72 3 to 10 to 60 min Auto Offline Time 1 If a key has not been pressed for a specified period of time after the screen below is displayed the machine is set online for scanning the machine automatically becomes offline Specify the time period at which the machine becomes offline Y...

Page 448: ...Source Auto Selection Enable or disable the automatic drawer selection feature for the paper sources If automatic drawer selection is set to On when printing documents the machine automatically selects a paper source that is loaded with the appropriate paper size Also when the paper runs out this setting enables continuous printing by switching from one paper source to another that is loaded with ...

Page 449: ...ons Select the function for which you want to configure automatic drawer selection NOTE Select Other for functions such as printing reports and lists Paper Sources Select the paper source for which you want to enable NOTE Multi Purpose Tray is not displayed if Printer was selected on the previous screen Automatic drawer selection is always enabled for printing on paper fed from the multi purpose t...

Page 450: ...Priority Drawer 2 2 Speed Priority Print Side Priority NOTE This mode can be set when a duplexing unit is attached Menu Common Settings Switch Paper Feed Method Select the paper source Select Speed Priority or Print Side Priority Paper Sources Select the paper source that you want to change the setting for Speed Priority When using paper that has been preprinted with a logo you need to change how ...

Page 451: ... sided printing Paper P 586 Speed Priority is applied to the paper source instead In this case you need to load the paper in the same way as when Speed Priority is selected Loading Preprinted Paper P 52 1 sided printing speed may be slower when Print Side Priority is selected Setting Menu List 443 ...

Page 452: ...t Settings P 444 Auto Recognize Original Orientation P 445 Initialize Default Settings P 446 Change Default Settings You can change the factory default settings about copy The selected settings are used as the default settings of the copy function Changing Default Settings P 102 Number of Copies 1 to 99 Density 4 to 0 to 4 Auto Density Original Type Text Text Photo Photo 2 Sided 1 Off 1 Sided 2 Si...

Page 453: ... on 1 Off 2 on 1 4 on 1 ID Card Copy Select Layout Different Size Originals 1 Off On Finishing Group Collate Rotate Group Rotate Collate Book 2 Pages Off On Erase Frame Off Original Frame Book Frame Auto Recognize Original Orientation Automatically rotate images by calculating original size copy ratio etc and print them on paper loaded in the paper source Off On Setting Menu List 445 ...

Page 454: ...inal Orientation Select On or Off Initialize Default Settings Select to restore the copy settings that you specified in Change Default Settings to the factory defaults Menu Copy Settings Initialize Default Settings Yes Setting Menu List 446 ...

Page 455: ...NER 2004 P 368 Asterisks Settings marked with 1 are unavailable depending on the country or region of purchase Settings marked with 2 have different values depending on the country or region of purchase Basic Settings P 447 TX Function Settings P 450 RX Function Settings P 454 RX Print Settings P 456 Fax Setup Guide P 457 Basic Settings Specify the basic settings for using the machine as a fax dev...

Page 456: ...ert sound when the handset of a telephone connected to the machine is not properly set on the cradle You can also adjust the volume of the alert sound 0 to 5 Menu Fax Settings Basic Settings Off Hook Alarm Select the volume of the alert sound Apply Communication Management Settings Specify the communication start speed settings and the R key settings TX Start Speed Adjust the communication start s...

Page 457: ...ttings Basic Settings Communication Management Settings RX Start Speed Select a communication start speed R Key Setting If your machine is connected through a PBX Private Branch Exchange it is necessary to set the access method You can set the PBX type to Prefix or Hooking If you register the outside line access number to the R key you can easily access the outside line PSTN PBX Prefix Hooking Men...

Page 458: ...to 200 x 400 dpi Superfine Density Nine Levels 2 Sided Original Off Book Type Calendar Type Register Unit Name Register the name of a company or person The registered name is sent as sender information to the destination TX Terminal ID P 452 Menu Fax Settings TX Function Settings Register Unit Name Register the name of a company or person Apply ECM TX Enable or disable error correction mode ECM EC...

Page 459: ...ause after the international access code or the fax number If the code or the number is still not recognized correctly change the duration of the pause For instructions on how to enter a pause see step 3 on Sending Faxes P 108 1 to 2 to 15 sec Menu Fax Settings TX Function Settings Set Pause Time Specify the duration of pause Apply Auto Redial 2 Specify settings for Auto Redial a function that aut...

Page 460: ...g the sender information including the fax number and the name of the machine to the fax header The recipient can check who sent the fax by looking at the added information Off On Print Position Inside Image Area Outside Image Area Mark Number as TEL FAX FAX TEL Menu Fax Settings TX Function Settings TX Terminal ID On Specify the settings Apply Print Position Specifies the position to print the te...

Page 461: ... Entered Fax Number Select whether to require users to enter the fax number twice when it is entered by using the numeric keys Displaying the Screen for Confirming the Fax Number P 390 Off On Restrict Sequential Broadcast This enables you to help prevent sending a fax to an incorrect number by restricting the sending of faxes to multiple destinations Off Confirm Sequential Broadcast Reject Sequent...

Page 462: ...s It may take a longer time than usual to process data when ECM is enabled because the error check and corrections are performed while the data is transmitted Menu Fax Settings RX Function Settings ECM RX On Incoming Ring 2 Specify settings for sounding a ring to notify you of incoming faxes This feature is only available when Auto or Fax Tel Auto Switch is selected for the receive mode Specify ho...

Page 463: ...ettings RX Function Settings Remote RX On Specify the ID number for receiving a fax Apply Switch to Auto RX Specify settings for automatically receiving a fax after the machine has rung for a specified time period This feature is only available when Manual is selected for the receive mode By using this feature faxes can be received even when no one is available to pick up the handset Off On 1 to 1...

Page 464: ...oth sides of paper Off On If the optional duplex unit is attached the setting is available Menu Fax Settings RX Print Settings Print on Both Sides On Reduce RX Size Specify settings for reducing the image size of a received document You can select an automatic reduction ratio that reduces the received document to size of the loaded paper You can also select a ratio from a list Off On Reduction Rat...

Page 465: ... image both vertically and horizontally Select Vertical Only to reduce only vertically RX Page Footer Select whether to print information including date and time of reception and page numbers on the bottom of received faxes Off On Menu Fax Settings RX Print Settings RX Page Footer On Fax Setup Guide Select to display on screen instructions for specifying settings including the fax number and the t...

Page 466: ...r if one of these paper sizes is loaded but the other is not For example if you are printing a Letter size document but only A4 paper is loaded in the machine the machine will print your document on A4 paper Off On Menu Printer Settings Paper Size Override Select Off or On Mobile Print Halftones 1 Select the image processing when printing from a mobile device with AirPrint Mopria TM etc Select Gra...

Page 467: ... whether to give priority to print speed or to print quality when using AirPrint Speed Priority Image Quality Priority Menu Printer Settings Speed Image Quality Priority for AirPrint Select Speed Priority or Image Quality Priority Setting Menu List 459 ...

Page 468: ... Area 1 P 461 Speed Image Quality Priority for Rotate Collate P 461 Special Processing P 461 Clean Transfer Roller P 464 Clean Drum Unit P 464 Clean Fixing Assembly P 464 Clean Feeder 1 P 464 Printer Density Adjust the density to the most appropriate levels for copying printing received faxes and printing reports and lists Nine Levels Menu Adjustment Maintenance Printer Density Adjust the density ...

Page 469: ...peed Priority or Image Quality Priority Speed Priority Image Quality Priority Menu Adjustment Maintenance Speed Image Quality Priority for Rotate Collate Select Speed Priority or Image Quality Priority Special Processing If the print results are not satisfactory due to the paper type or usage environment you may use the settings below to improve the quality of the printouts Special Printing Mode O...

Page 470: ...mode number when printing on paper that has been stored at high temperature and high humidity for a long time Mode 1 Mode 2 Mode 3 Mode 4 Mode 5 Menu Adjustment Maintenance Special Processing Special Printing Mode M Select the mode Special Printing Mode N Change the Special Printing Mode N setting if paper curls or jams when printing on paper that has absorbed moisture Mode 2 is more effective tha...

Page 471: ...ge may re appear faintly on the next output Menu Adjustment Maintenance Special Processing Special Printing Mode S Select the mode Special Printing Mode P Set the Special Printing Mode P setting to On if paper curls when printing on a lightweight paper Off On NOTE If both Special Printing Mode P and Special Printing Mode N are enabled Special Printing Mode P overrides Special Printing Mode N Menu ...

Page 472: ... P 537 Clean Drum Unit Clean the drum unit if print quality deteriorates Drum P 538 Clean Fixing Assembly Clean the fixing assembly after a toner cartridge is replaced or if black streaks appear on printouts Fixing Assembly P 539 Clean Feeder 1 Clean the feeder rollers if documents become dirty after being fed through the feeder Feeder P 533 If the feeder is attached the setting is available Setti...

Page 473: ...4F 2204N 2004N Settings marked with an asterisk 2 are only available for the imageRUNNER 2204F Settings marked with 3 have different defaults depending on the country or region of purchase Network Settings P 465 System Manager Information Settings P 466 Device Information Settings P 466 Department ID Management On Off 1 P 466 Security Settings 1 P 467 Select Country Region P 468 Remote UI Settings...

Page 474: ...umeric characters for the name of an Administrator Device Information Settings 1 Enter up to 32 alphanumeric characters for the name and the installation location to identify the machine Device Name Location Menu System Management Settings Device Information Settings Select Device Name or Location Enter Device Name or Location Entering Text P 34 Apply Department ID Management On Off 1 Select wheth...

Page 475: ...le or disable settings for filtering packets received from devices with specified IPv6 addresses Specifying IP Addresses for Firewall Rules imageRUNNER 2204F 2204N 2004N P 372 Inbound Filter Off On Menu System Management Settings Security Settings IPv6 Address Filter Inbound Filter Select Off or On MAC Address Filter Enable or disable settings for filtering packets received from devices with speci...

Page 476: ...lows you to configure machine settings from a Web browser Use Remote UI Select whether to use the Remote UI Using the Remote UI allows you to configure machine settings from a Web browser Disabling Remote UI imageRUNNER 2204F 2204N 2004N P 395 Off On Remote UI Access Security Settings Set whether a PIN is required for accessing the Remote UI Set a PIN of up to 7 digits All users use a common PIN S...

Page 477: ...the fax numbers and e mail addresses that can be specified as destinations to those already registered in the Address Book Limiting Available Destinations imageRUNNER 2204F P 387 Off On Restrict Resending from Log Select whether to prevent a destination from being selected from the sent job logs Disabling Use of Previously Used Destinations imageRUNNER 2204F P 389 Off On Confirm One Touch Coded Di...

Page 478: ...on Plug and Play Select a page description language so that the machine is detected as a printer that is compatible with that language when it is connected to a computer by using Plug and Play For more information see MF Driver Installation Guide Network 1 Select a page description language so that the machine is detected as a printer that is compatible with that language when it is detected over ...

Page 479: ... manually install the firmware update available on the Canon Web site yourself For instructions on how to install the update see the instruction manual available on the Web site When the machine uses a wireless LAN update with Via Internet below or use a USB cable to connect Via Internet 1 Select to automatically install the firmware update without using a computer Follow the on screen instruction...

Page 480: ... Menu P 563 Initializing System Management Settings P 564 Preferences Timer Settings Common Settings Copy Settings Fax Settings 2 Printer Settings Adjustment Maintenance System Management Settings Initialize All Initialize All Data Settings Delete all data on the machine and return it to its factory default settings Menu Initialize All Data Settings Yes Yes Restart the machine Setting Menu List 47...

Page 481: ...n Settings Problems 504 Copying Problems 508 Scanning Problems 509 Printing Problems 511 Faxing Telephone Problems imageRUNNER 2204F 512 Miscellaneous Problems 514 When You Cannot Print Properly 515 Printing Results Are Not Satisfactory 517 Paper Creases or Curls 522 Paper Is Fed Incorrectly 524 When a Problem Cannot Be Solved 526 Troubleshooting 473 ...

Page 482: ... Common Problems If you suspect that the machine is malfunctioning see the following sections before contacting Canon Common Problems P 502 Installation Settings Problems P 504 Copying Problems P 508 Printing Problems P 511 Scanning Problems P 509 Faxing Telephone Problems imageRUNNER 2204F P 512 Miscellaneous Problems P 514 Printing Results are Not Satisfactory If printing results are not satisfa...

Page 483: ...Troubleshooting 475 ...

Page 484: ...at surface to even the edges of the paper before loading it into the machine Check that the paper is appropriate for the machine Paper P 586 Check that no jammed paper fragments remain in the machine Do not forcibly remove the jammed document or paper from the machine Forcibly removing the paper may damage parts If you are not able to remove the paper contact your local authorized Canon dealer Whe...

Page 485: ...nd remove the jammed paper from the output tray 3 Gently close the feeder cover 4 Lift the feeder and remove the jammed document 5 Gently close the feeder Paper Jams in the Drawer 1 1 Remove the jammed paper from the output tray Troubleshooting 477 ...

Page 486: ...2 Press the button on the left cover of the main unit and open the left cover 3 Open the drawer 1 left cover Troubleshooting 478 ...

Page 487: ...ammed paper 7 Gently push the drawer 1 back into the machine until it clicks 8 Close the drawer 1 left cover 9 Place your hand where the hand symbol is located on the left cover of the main unit and then gently close the left cover until it clicks into place in the closed position Troubleshooting 479 ...

Page 488: ...al NOTE Cassette Feeding Module AD1 is not available for the imageRUNNER 2004 1 Remove the jammed paper from the output tray 2 Press the button on the left cover of the main unit and open the left cover 3 Open the drawer 1 left cover Troubleshooting 480 ...

Page 489: ...4 Remove the jammed paper 5 Close the drawer 1 left cover 6 Open the drawer 2 left cover 7 Remove the jammed paper Troubleshooting 481 ...

Page 490: ...Gently push the drawer 2 back into the machine until it clicks 11 Close the drawer 2 left cover 12 Place your hand where the hand symbol is located on the left cover of the main unit and then gently close the left cover until it clicks into place in the closed position Troubleshooting 482 ...

Page 491: ...aper Jams around the Output Area 1 Remove the jammed paper from the output tray 2 Press the button on the left cover of the main unit and open the left cover 3 Remove the jammed paper Troubleshooting 483 ...

Page 492: ...paper Touching the fixing assembly when it is still hot may result in burns 4 Open the drawer 1 left cover 5 Remove the jammed paper 6 Close the drawer 1 left cover 7 Place your hand where the hand symbol is located on the left cover of the main unit and then gently close the left cover until it clicks into place in the closed position Troubleshooting 484 ...

Page 493: ...ailable for the imageRUNNER 2004 1 Remove the jammed paper from the output tray 2 Press the button on the left cover of the main unit and open the left cover 3 Remove any jammed paper that is protruding from the upper and lower parts of the duplex unit Troubleshooting 485 ...

Page 494: ... touch anything in this unit 4 Open the drawer 1 left cover 5 Remove the jammed paper 6 Close the drawer 1 left cover 7 Place your hand where the hand symbol is located on the left cover of the main unit and then gently close the left cover until it clicks into place in the closed position Troubleshooting 486 ...

Page 495: ...Jams around the Fixing Assembly 1 Remove the jammed paper from the output tray 2 Press the button on the left cover of the main unit and open the left cover 3 Open the drawer 1 left cover Troubleshooting 487 ...

Page 496: ...ching the fixing assembly when it is still hot may result in burns 5 Close the drawer 1 left cover 6 Place your hand where the hand symbol is located on the left cover of the main unit and then gently close the left cover until it clicks into place in the closed position Paper Jams in the Multi Purpose Tray 1 If paper is loaded in the multi purpose tray remove the paper Troubleshooting 488 ...

Page 497: ...2 Press the button on the left cover of the main unit and open the left cover 3 Remove any jammed paper Troubleshooting 489 ...

Page 498: ...4 Place your hand where the hand symbol is located on the left cover of the main unit and then gently close the left cover until it clicks into place in the closed position Troubleshooting 490 ...

Page 499: ... WPS was attempted a wireless router could not be detected within a specific period of time Connect again paying attention to the time limit Setting Up Connection Using WPS Push Button Mode P 306 Setting Up Connection Using WPS PIN Code Mode P 308 An SSID or network key of a wireless router was entered manually but the entry was incorrect Check the SSID and network key and enter the correct ones a...

Page 500: ...uding causes and solutions appear on the display check the contents Cannot receive the fax Make sure the fax was sent correctly by the sender The recipient s machine did not respond within 35 seconds Ask the sender to send the fax again If you hear a beep tap Start Receiving to receive the fax Receiving Faxes P 133 Cannot specify a group Group Dial was specified as a destination after pressing Hoo...

Page 501: ... paper set paper correctly and perform cleaning again Clearing Jams P 476 The amount of toner required for cleaning the fixing assembly is insufficient Cleaning requires toner Replace the toner cartridge and perform the cleaning again Replacing the Toner Cartridges P 541 Connect the computer The machine is not connected to a computer when you try to scan a document Connect the machine to a compute...

Page 502: ...e wireless LAN connection check the security settings of the wireless router Could not connect using WPS When automatic setting with WPS was attempted the connection failed due to an error Wait for a while and set again If the problem persists check whether the wireless router supports WPS If WPS is supported Check whether the machine is properly installed and ready to connect to the network Insta...

Page 503: ... or lists can be printed on A4 or Letter size paper Load A4 or Letter size paper and set its size Loading Paper P 40 Specifying Paper Size and Type P 55 Paper on which received documents can be printed is not loaded Received documents can be printed on A4 or Letter size paper Load A4 or Letter size paper and set its size Also set the paper type to Plain 64 90 g m Recycled 64 80 g m or Color 64 80 ...

Page 504: ...as toner Configuring Purchase Information for Consumables P 543 It is recommended to replace the toner cartridge when printing a large volume of documents Replacing the Toner Cartridges P 541 Allowed Paper Size A4 A3 B4 LTR LGL 11x17 Type Plain Recycled Color Paper other than the size displayed on the screen has been selected when printing reports Select the paper size displayed on the screen Spec...

Page 505: ...changing the settings Load the paper with the size that is set to Paper Settings Loading Paper P 40 Specifying and registering new destinations is restricted Only destinations that are registered in the Address Book can be specified to send a fax or e mail To enter a new destination with the control panel or add or edit it in the Address Book you need to set Restrict New Destinations to Off For mo...

Page 506: ...e connected is not set to the machine correctly Check the network key the WEP key of the wireless router and set it to the machine again Checking the SSID and Network Key P 318 Setting Up Connection by Selecting a Wireless Router P 311 Setting Up Connection by Specifying Detailed Settings P 314 The authentication method of the machine is set to Shared Key but that of the wireless router is set to ...

Page 507: ... fax could not be sent or received due to its large data size When sending a fax Reduce the resolution and scan the document Adjusting Resolution P 129 When receiving a fax Ask the sender to divide the document into multiple sections or reduce the resolution before sending 005 A fax could not be sent because the recipient s machine did not respond within 35 seconds When the recipient s machine is ...

Page 508: ...n If the documents that failed to be forwarded remain in memory you can forward it again Registering in the Address Book imageRUNNER 2204F P 60 037 Memory is full If a sending or printing job is queued wait until the job is completed If a received document is stored in memory print or delete it Storing Received Faxes into Memory Memory Reception P 141 If sending a document with many pages divide i...

Page 509: ...852 An error occurred because the main power was turned OFF due to an unspecified cause while a job was being processed Check that the power cord is securely inserted in the outlet the power cannot be easily cut etc and then try executing the job again as necessary 853 A job could not be executed due to insufficient resources caused by trying to print a large number of pages at the same time etc R...

Page 510: ...nctions P 14 Is sleep mode activated If you leave the machine unattended for a specific period of time it enters sleep mode for power conservation not allowing you to operate it To cancel sleep mode press Is any message displayed on the screen If a problem occurs a message is displayed When a Problem Cannot Be Solved P 526 Has the Power Switch Been Just Turned ON Wait a few moments until the machi...

Page 511: ...ou have loaded or paper to be used meets the paper requirements Loading Paper P 40 Make sure to load the same size and type of paper into the drawer or multi purpose tray Paper Jams Occur Repeatedly Make sure that the paper is properly loaded Loading Paper P 40 Make sure that the number of paper you have loaded or paper to be used meets the paper requirements Loading Paper P 40 If a problem persis...

Page 512: ...ed firmly and the IP address is set correctly and then start the Remote UI again For how to check see Getting Started Manuals Included with the Machine P 596 or Viewing Network Settings P 326 If the machine is connected to a wireless LAN check that the settings are specified correctly and then start the Remote UI again For how to check see Getting Started Manuals Included with the Machine P 596 or...

Page 513: ...is hidden using a stealth mode set the SSID to be visible on the wireless router A mode that disables the SSID auto detection of other devices Check whether the machine is properly installed and ready to connect to the network When the machine cannot connect to the wireless LAN P 506 The Printer Port Name is Not Displayed in Print to the following port s Make sure that the correct printer driver i...

Page 514: ...after the MF Toolbox has been uninstalled Follow the steps in the procedure below to remove the folder For Windows Vista Right click the Start menu and select Explore All Users From Programs in Start Menu delete the Canon folder For Windows 7 8 Delete the Canon folder in All Programs under the Start menu Cannot Use the Software after Upgrading the Windows Operation System Uninstall the software fo...

Page 515: ... manually set up the connection If the wireless router is set as described below manually enter all the required information for the wireless LAN connection Setting Up Connection by Specifying Detailed Settings P 314 ANY connection refusal is activated The WEP key that was automatically generated hexadecimal is selected The stealth mode is activated A function in which the wireless router refuses ...

Page 516: ...f the copy will have the same top bottom orientation 2 Sided Copying imageRUNNER 2204F 2204N 2004N P 88 The Alarm Sounds or The memory is full Scanning will be canceled Do you want to print Appears on the Screen Follow the onscreen instructions and solve the problem Split the document into smaller subsets before you make a copy Loading Paper P 40 Documents Cannot Be Scanned Up to 100 documents can...

Page 517: ...t again During Scanning a Computer Connected to the Machine Freezes or is Disconnected Quit all running applications to increase the memory usage Make sure that the machine has sufficient free hard disk space when scanning documents at a high resolution If an error occurs while scanning a specific image for Photoshop access the Edit menu select Preferences and click Memory Set Memory Usage somewhe...

Page 518: ...ighlighted marks by adjusting the brightness Lower the monitor gamma value Configuring Scan Settings in Advanced Mode P 243 Distortion Patterns moire Appear On the Scanned Images Specify Scan Mode of MF Toolbox to Color Magazine If you cannot change Scan Mode of MF Toolbox specify Select Source in the Basic Mode of ScanGear MF to Magazine Color Platen Glass Configuring Scan Settings in Simple Mode...

Page 519: ...pace in memory is running low the processing speed of the machine becomes slow just as a computer does There is nothing abnormal You cannot print with Google Cloud Print Using Google Cloud Print P 293 You Cannot Print 2 sided Documents Specify the 2 sided printing options in the printer driver You Cannot Print over a TCP IP Network Is the printer driver properly installed on your computer MF Drive...

Page 520: ...ations in the history cannot be specified A fax cannot be sent on an optical fiber line The machine is compliant with use on analog lines When using an optical fiber line or IP phone line the machine may not work correctly depending on the connection environment or connected devices In such a case contact the provider of the optical fiber line or IP phone The results of a sent fax are not satisfac...

Page 521: ...ow Print or delete data in memory Checking Deleting Documents in Memory P 142 Printing Documents in Memory P 142 A fax cannot be received on an optical fiber line The machine is compliant with use on analog lines When using an optical fiber line or IP phone line the machine may not work correctly depending on the connection environment or connected devices In such a case contact the provider of th...

Page 522: ...rom in the Output Area Use only dry paper in the machine Moisture evaporates from damp paper due to the heat generated inside the fixing assembly it is most likely to occur at low room temperatures This is not a malfunction but you can prevent this by using a stack of new unopened paper However if you smell something burning immediately turn OFF the machine unplug the power plug from the AC power ...

Page 523: ...ur local authorized Canon dealer Smudge Marks Appear on the Edge of Printouts P 517 Streaks Appear on Printouts P 517 White Streaks Appear P 518 Toner Smudges and Splatters Appear P 518 Printouts Are Faded P 518 Printed Pages Have White Specks P 519 A Portion of the Page Is Not Printed P 519 Print Density Is Uneven P 520 Printouts Are Grayish P 520 Troubleshooting 515 ...

Page 524: ...The Toner Adheres to the Hand P 521 Paper Creases P 522 Paper Curls P 522 Printouts Are Skewed P 524 Paper Is Not Fed Two or More Sheets Are Fed Together P 524 Troubleshooting 516 ...

Page 525: ...curs if a margin is set to none in the printer driver A margin of 5 mm or less around the edge of paper or 10 mm or less around the edge of envelopes is not printable with the machine Make sure to have margins around the document to print Finishing tab Advanced Settings Expand Print Region and Print Off Streaks Appear on Printouts Are you using appropriate paper Check usable paper and replace with...

Page 526: ...artridges P 541 Toner Smudges and Splatters Appear Are you using appropriate paper Check usable paper and replace with appropriate paper Paper P 586 Loading Paper P 40 Is toner running low Check how much toner is left and replace the toner cartridges as necessary Replacing the Toner Cartridges P 541 Printouts Are Faded Troubleshooting 518 ...

Page 527: ...paper size and type settings properly Paper P 586 Loading Paper P 40 Specifying Paper Size and Type P 55 Printed Pages Have White Specks Are you using appropriate paper Check usable paper and replace with appropriate paper Paper P 586 Loading Paper P 40 Is the drum in the toner cartridge deteriorated Replace the toner cartridge with a new one Replacing the Toner Cartridges P 541 A Portion of the P...

Page 528: ...cartridges as necessary Replacing the Toner Cartridges P 541 Printouts Are Grayish Is Density in Copy Settings set too dark Adjust the setting so that density is lighter Setting Menu List P 420 Is the printer installed where it is subject to direct sunlight or strong light Install the printer in an appropriate location Installation P 3 Was the toner cartridge been left in direct sunlight for a lon...

Page 529: ...cified is not appropriate Select the appropriate paper type setting Loading Paper P 40 The paper type loaded is not appropriate Make sure that the number and type of the paper loaded in the drawer meets the paper requirements Paper P 586 Troubleshooting 521 ...

Page 530: ...ding Paper P 40 Are you using appropriate paper Check usable paper and replace with appropriate paper Paper P 586 Paper Curls Are you using appropriate paper Check usable paper and replace with appropriate paper Also specify the paper size and type settings properly Paper P 586 Loading Paper P 40 Specifying Paper Size and Type P 55 If using plain paper 64 to 90 g m making the following change in t...

Page 531: ... Page Setup tab Paper Type Plain L Troubleshooting 523 ...

Page 532: ... in the Paper Drawer P 42 Are you printing on curled envelopes Uncurl the envelopes and print again Loading Envelopes in the Multi Purpose Tray P 49 Paper Is Not Fed Two or More Sheets Are Fed Together Is paper loaded correctly Fan the paper stack thoroughly so that paper is not stuck together Check whether paper is loaded correctly Loading Paper P 40 Check whether the number of sheets of paper lo...

Page 533: ...Loading Paper P 40 Check whether mixed sizes and types of paper are loaded together Troubleshooting 525 ...

Page 534: ...emble or repair the machine yourself it may not be covered by the warranty Information To Prepare Before When Contacting Canon When contacting us have the following information ready Product name imageRUNNER 2204F 2204N 2004N 2004 Dealer where you purchased the machine Problem details performed operations and the results phenomena etc The error code displayed on the touch panel display Troubleshoo...

Page 535: ... imageRUNNER 2204F 549 Communication Management Report imageRUNNER 2204F 551 RX Result Report imageRUNNER 2204F 553 Address Book List imageRUNNER 2204F 554 User Data List System Manager Data List 556 Department ID Management Report imageRUNNER 2204F 2204N 2004N 557 Copy Print Charge Log Report 558 Viewing the Counter Value 559 Initializing Settings 561 Initializing Address Book imageRUNNER 2204F 5...

Page 536: ...Cartridges If you want to check the remaining toner level Replacing the Toner Cartridges P 541 How to replace toner cartridges How to Replace the Toner Cartridges P 545 Printing Reports and Lists Print out reports describing transmission results or a list of Address Book information Printing Reports and Lists P 548 Checking the Total Pages Printed by the Machine If you want to check the total page...

Page 537: ... read the safety instructions before you start cleaning Maintenance and Inspections P 8 Where to Clean Exterior of the machine and ventilation slots Exterior P 530 Rollers inside the feeder Feeder P 533 Interior of the machine and fixing assembly Fixing Assembly P 539 Platen glass and the underside of the feeder platen cover Platen Glass P 531 Maintenance 529 ...

Page 538: ... were received by using the Memory Reception function faxes that are waiting to be sent and reports that are automatically printed after sending and receiving faxes are not deleted 2 Clean the exterior of the machine and the ventilation slots Use a soft well wrung out cloth dampened with water or a mild detergent diluted with water To locate the ventilation slots see External View P 15 3 Wait for ...

Page 539: ...s waiting to be printed is deleted Fax documents that were received by using the Memory Reception function faxes that are waiting to be sent and reports that are automatically printed after sending and receiving faxes are not deleted 2 Open the feeder platen cover 3 Clean the platen glass and the underside of the feeder platen cover Clean the areas with a cloth dampened with water Then wipe the ar...

Page 540: ...4 Wait for the cleaned area to dry completely 5 Gently close the feeder platen cover 6 Reconnect the power cord and turn ON the machine Maintenance 532 ...

Page 541: ... 1 Turn OFF the machine and unplug the power cord from the AC power outlet When you turn OFF the machine data that is waiting to be printed is deleted Fax documents that were received by using the Memory Reception function faxes that are waiting to be sent and reports that are automatically printed after sending and receiving faxes are not deleted 2 Open the feeder cover 3 Wipe rollers inside the ...

Page 542: ...er Then wipe the area with a soft dry cloth 6 Clean the transparent plastic part of the inner cover Clean the areas with a well wrung out cloth dampened with water Then wipe the area with a soft dry cloth 7 Gently close the inner cover 8 Gently close the feeder cover 9 Lift the feeder Maintenance 534 ...

Page 543: ...a and the document feeding roller Clean the areas with a well wrung out cloth dampened with water Then wipe the area with a soft dry cloth 11 Gently close the feeder 12 Reconnect the power cord and turn ON the machine Maintenance 535 ...

Page 544: ...lacing Documents P 36 Then follow the procedure below 1 Press and tap Menu Adjustment Maintenance 2 Tap Clean Feeder You cannot use this function when jobs are stored in memory 3 Tap Start Cleaning starts When the Finished message is displayed approximately 30 seconds later press to return to the main screen Maintenance 536 ...

Page 545: ... procedure below to clean the transfer roller Note that you cannot clean the transfer roller when the machine has documents waiting to be printed 1 Press and tap Menu 2 Tap Adjustment Maintenance 3 Tap Clean Transfer Roller 4 Tap Start Cleaning starts When the Finished message is displayed approximately 30 seconds later press to return to the main screen Maintenance 537 ...

Page 546: ...w to clean the drum unit Note that you cannot clean the drum unit when the machine has documents waiting to be printed 1 Press and tap Menu 2 Tap Adjustment Maintenance 3 Tap Clean Drum Unit 4 Tap Start Cleaning starts When the Finished message is displayed approximately 30 seconds later press to return to the main screen Maintenance 538 ...

Page 547: ...performing the following procedure Cleaning requires toner Make sure that there is sufficient toner remaining beforehand It takes approximately 90 seconds to clean the fixing assembly Checking Toner Level P 542 Loading Paper in the Multi Purpose Tray P 46 1 Press and tap Menu 2 Tap Adjustment Maintenance 3 Tap Clean Fixing Assembly 4 Load paper A4 or LTR in the multi purpose tray and tap OK Start ...

Page 548: ... After cleaning is completed and the message Finished appears press to return to the Home Screen Maintenance 540 ...

Page 549: ...ridge to evenly distribute the toner inside the cartridge Replace the toner cartridge if you see this message before you start to print a large job If this message is displayed the incoming fax will be stored in the memory without being printed Also reports are not printed even if they are set to be printed automatically You can continue printing when this message is displayed but the print qualit...

Page 550: ...ing to the following whenever you want to It is recommended that you check the level before you start to print a large job Device Information Toner Level Check the toner level Toner Level Displays the amount of remaining toner The toner level value that is displayed is an approximation and may differ from the actual value LINKS Consumables P 9 Maintenance 542 ...

Page 551: ...an and register edit the documentation of your local authorized Canon dealer business card information etc 1 Press and tap Menu Output Report Purchase Information for Consumables 2 Tap Register Edit Purchase Information Yes 3 Place the document Placing Documents P 36 press If the documentation is already registered a confirmation screen for overwriting the existing data is displayed Printing Purch...

Page 552: ...on for Consumables 2 Tap Print OK press Deleting Purchase Information Delete purchase information that you no longer need 1 Press and tap Menu Output Report Purchase Information for Consumables 2 Tap Delete Purchase Information Yes 3 Press Maintenance 544 ...

Page 553: ...P 8 and Consumables P 9 before replacing the toner cartridges 1 Open the front cover 2 While pressing the unlock tab on the grip turn the toner cartridge in the direction of the arrow clockwise 3 Pressing the unlock tab pull out the toner cartridge 4 Remove a new toner from the box Maintenance 545 ...

Page 554: ...he cartridge with the label is facing up and push the toner cartridge into the machine as far as it will go Support the new toner cartridge with one hand from underneath while pushing it into the machine with the other hand 7 Hold the toner cartridge in place with one hand and then remove the protective seal by pulling it straight out with the other hand Maintenance 546 ...

Page 555: ...If the seal breaks inside the toner cartridge and cannot be removed completely the toner cartridge cannot be used Throw away the seal after removing it from the toner cartridge 8 Turn the toner cartridge in the direction of the arrow counterclockwise Turn the toner cartridge fully until it locks into place 9 Close the front cover If you cannot close the toner cover Make sure that the toner cartrid...

Page 556: ... imageRUNNER 2204F You can check the list of destinations registered in the Address Book Address Book List imageRUNNER 2204F P 554 User Data List System Manager Data List You can check the list of the settings Setting Menu List P 420 as well as the content that has been registered in the machine User Data List System Manager Data List P 556 Department ID Management Report imageRUNNER 2204F 2204N 2...

Page 557: ...TX Result Report Select the print setting Off Select if you do not want to print TX Result Reports On Select to print a TX Result Report every time you send a document Only When Error Occurs Select to print a TX Result Report only when a sending error occurs Example Result OK indicates that the transmission was completed successfully while NG and three digits an error code indicates that the trans...

Page 558: ...To print a part of a fax document on the report When you select On or Only When Error Occurs a part of a fax document can be included in the report Tap Include TX Image to On Maintenance 550 ...

Page 559: ...ettings Menu Output Rprt Report Settings Communication Management Report Select the print setting Auto Print 40 Transmissions Tap On to print the report automatically after every 40 transmissions or Off if you do not want to print the report automatically Separate TX RX Tap On to print sent and received reports separately or Off to print both reports on one sheet Print the Report Manually Menu Out...

Page 560: ...Result OK indicates that the transmission was completed successfully while NG and three digits an error code indicates that the transmission failed When an Error Code Appears P 499 Maintenance 552 ...

Page 561: ...RX Result Report Select the print setting Off Select if you do not want to print RX Result Reports On Select to print an RX Result Report every time you receive a document Only When Error Occurs Select to print an RX Result Report only when a receiving error occurs Example Result OK indicates that the transmission was completed successfully while NG and three digits an error code indicates that th...

Page 562: ...Dial One Touch and Group Dial by printing an Address Book List Menu Output Rprt Print List Address Book List Select the registration type that you want to print Check that the size and type of paper displayed on the screen is loaded in the machine OK Yes Example Coded Dial Example One Touch Example Group Dial Maintenance 554 ...

Page 563: ...LINKS Registering in the Address Book imageRUNNER 2204F P 60 Registering Address Book from Remote UI imageRUNNER 2204F P 416 Maintenance 555 ...

Page 564: ...ort Menu Output Rprt Print List User Data List or System Manager Data List Check that the size of paper displayed on the screen is loaded in the machine OK Yes Example The User Data List does not include the setting information for Network Settings and System Management Settings To check all setting items print the System Manage Data List LINKS TX Result Report imageRUNNER 2204F P 549 Communicatio...

Page 565: ... that were copied printed and scanned for each Department ID The report enables you to monitor usage and improve management Menu Output Rprt Print List Department ID Management Report Check that the size of paper displayed on the screen is loaded in the machine OK Yes Example LINKS Setting the Department ID Management imageRUNNER 2204F 2204N 2004N P 361 Maintenance 557 ...

Page 566: ...n check the counter numbers which are used for the total counter charge counter Menu Output Rprt Print List Copy Print Charge Log Report Check that the size of paper displayed on the screen is loaded in the machine OK Yes Example Maintenance 558 ...

Page 567: ...below may be displayed Number Counter Name Counted Items Counted Number per One Printed Scanned Sheet 1 Job Type Size Number of Printed Scanned Sides Large 2 Small 3 One Sided Two Sided imageRUNNER 2204F 2204N 2004N only 101 Total 1 All Print Jobs 1 1 1 2 102 Total 2 All Print Jobs 2 1 1 2 103 Total Large All Print Jobs 1 0 1 2 112 Total Black White Large All Print Jobs 1 0 1 2 113 Total Black Whi...

Page 568: ...ch item on the counter is as follows number in the Size Large or Small column number in the Number of Scanned Printed Sides One Sided or Two Sided column For the imageRUNNER 2204F 2204N 2004N Example For large double sided print the number added to 102 Total 2 is 2 2 4 For the imageRUNNER 2004 Example For large single sided print the number added to 102 Total 2 is 2 1 2 2 Large Standard size large...

Page 569: ...s 1053 08X You can restore the following settings Initializing Address Book imageRUNNER 2204F P 562 Initializing Menu P 563 Initializing System Management Settings P 564 Initializing All Data Settings P 565 Maintenance 561 ...

Page 570: ...izing If a screen for entering a System Manager ID and PIN is displayed enter the System Manager ID and PIN tap Apply and press Setting the System Manager ID imageRUNNER 2204F 2204N 2004N P 359 Menu System Management Settings Initialize Address Book Yes LINKS Registering in the Address Book imageRUNNER 2204F P 60 Registering Address Book from Remote UI imageRUNNER 2204F P 416 Maintenance 562 ...

Page 571: ...ings P 564 If a screen for entering a System Manager ID and PIN is displayed enter the System Manager ID and PIN tap Apply and press Setting the System Manager ID imageRUNNER 2204F 2204N 2004N P 359 Menu System Management Settings Initialize Menu Select the item you want to initialize Yes Items for initializing Select the setting you want to initialize Initialize All Initializes all the settings M...

Page 572: ...tap Apply and press Setting the System Manager ID imageRUNNER 2204F 2204N 2004N P 359 Menu System Management Settings Initialize Menu System Management Settings Select the item that you want to initialize Yes Restart the machine if necessary Items for initializing Select the setting you want to initialize Initialize All Initializes all the settings To initialize the settings in Network Settings yo...

Page 573: ...Setting Menu List P 420 together at the same time You are required to restart the machine after initializing all data settings If a screen for entering a System Manager ID and PIN is displayed enter the System Manager ID and PIN tap Apply and press Setting the System Manager ID imageRUNNER 2204F 2204N 2004N P 359 Menu System Management Settings Initialize All Data Settings Yes Yes and restart the ...

Page 574: ...ument Type 584 Scan Area 585 Paper 586 Copy Specifications 589 Fax Specifications 590 Scanner Specifications 591 Printer Specifications 592 Network Environment imageRUNNER 2204F 2204N 2004N 593 Optional Equipment 594 Manuals Included with the Machine 596 Using e Manual 597 Installing e Manual 598 Uninstalling e Manual 602 Screen Layout of e Manual 605 Viewing e Manual 608 Others 609 Basic Windows ...

Page 575: ...ix 1053 093 This chapter contains technical specifications of this machine instructions on how to use the e Manual disclaimers copyright information and other important information for customers Appendix 567 ...

Page 576: ...ighlights 1053 094 Give the features that are described in this section The features are grouped under four headings Going Green and Saving Money Improving Efficiency Going Digital and So Much More Appendix 568 ...

Page 577: ...s from your computer Switching 1 Sided and 2 Sided Printing imageRUNNER 2204F 2204N 2004N only P 185 To print 2 Sided incoming faxes Print on Both Sides P 456 Print Multiple Pages on a Single Sheet To really start saving paper shrink multiple pages onto a single sheet 2 or 4 pages for copies and up to 16 pages for print jobs sent from your computer To copy multiple pages of a document onto one she...

Page 578: ...ality printing There s a setting that uses less toner Give it a try and save toner and money For more information about this function see Saving Toner P 203 Send Faxes Directly From Your Computer Fax documents directly from your computer Why bother printing and then faxing It just wastes paper and costs you money You can save yourself this trouble and cut costs with paperless faxing For more infor...

Page 579: ...For more information about this function see Storing Received Faxes into Memory Memory Reception P 141 Appendix 571 ...

Page 580: ...an Address Book address as a fax destination Specifying from Address Book P 117 To save Address Book addresses on your computer or to export Address Book addresses from your computer to the machine using the Remote UI Registering Address Book from Remote UI imageRUNNER 2204F P 416 To save Address Book addresses on your computer or export Address Book addresses from your computer to the machine usi...

Page 581: ...ation You can easily specify the page layout as well as binding position switching between 1 sided and 2 sided printing etc intuitively on the preview image in the printer driver The simple click operation allows you to conveniently make settings while viewing how settings are applied For more information Printing a Document P 174 Appendix 573 ...

Page 582: ...nal and or civil liability If you are uncertain about the legality of using your product to scan print or otherwise reproduce any particular document and or of the use of the images scanned printed or otherwise reproduced you should consult in advance with your legal advisor for guidance For more information about this function see Configuring Scan Settings in ScanGear MF P 239 Searchable PDFs You...

Page 583: ... into text data that you can then edit with a text editor For more information about this function see Scanning Using MF Toolbox P 223 Add Images to a Work in Progress Some applications work with the machine to let you easily import scanned images directly into documents you re working on This way you can skip the steps of opening a separate application just for receiving the scanned images and th...

Page 584: ... for this age of speed For more information on useful functions with smartphones tablets see the Canon website For information on Mopria TM including certified terminals visit http www mopria org For more information Linking with Mobile Devices imageRUNNER 2204F 2204N 2004N P 261 Go Wireless imageRUNNER 2204F 2204N 2004N No cables easy installation simple maintenance If you ve got a WPS wireless L...

Page 585: ...e information about this function see Printing Posters P 191 Make Booklets imageRUNNER 2204F 2204N 2004N Sometimes your documents deserve better presentation than a staple in the upper left corner Making booklets is easy The print driver will take care of the page positioning for you All you have to do is fold the pages and staple them along the middle For more information about this function see ...

Page 586: ... Machine Specifications P 579 Optional Equipment Specifications P 581 Wireless LAN Specifications P 583 Document Type P 584 Scan Area P 585 Paper P 586 Copy Specifications P 589 Fax Specifications P 590 Scanner Specifications P 591 Printer Specifications P 592 Network Environment imageRUNNER 2204F 2204N 2004N P 593 Appendix 578 ...

Page 587: ...proximately 35 5 kg Dimensions H x W x D When the Platen Cover Type X is attached one drawer attached 502 mm x 622 mm x 589 mm When the Feeder DADF AT1 is attached one drawer attached 607 mm x 622 mm x 605 mm Installation Space W x D When the multi purpose tray is extended 921 mm x 589 mm When the multi purpose tray is extended and the Feeder DADF AT1 is attached 921 mm x 605 mm Number of Tones 25...

Page 588: ...n Area P 585 1 Depending on the system and conditions of use these values may differ 2 Warm up time may vary depending on the environment and conditions under which the machine is being used At a room temperature of 20 C in all above cases Appendix 580 ...

Page 589: ...l Scanning Speed For the imageRUNNER 2204F 2204N Copying 1 sided scanning 22 sheets minute A4 in Black and White at 600 x 600 dpi Scanning 1 sided scanning 23 sheets minute A4 in Black and White at 300 x 300 dpi For the imageRUNNER 2004N Copying 1 sided scanning 20 sheets minute A4 in Black and White at 600 x 600 dpi Scanning 1 sided scanning 23 sheets minute A4 in Black and White at 300 x 300 dpi...

Page 590: ...IO Argentina OFFICIO Argentina LTR Argentina LTRR Government LTR Government LTRR Government LGL AUS FOOLSCAP FOOLSCAP F4A India LGL Paper Weight 64 to 90 g m2 Power Source Maximum Power Consumption From main unit Approximately 14 W Dimensions H x W x D 218 mm x 381 mm x 118 mm Weight Approximately 1 25 kg Depending on the conditions of use these values may differ Appendix 582 ...

Page 591: ...ency Range 2 412 to 2 472 MHz Transmission Scheme DS SS System OFDM System Communication Mode Infrastructure Mode Security WEP WPA PSK TKIP AES CCMP WPA2 PSK TKIP AES CCMP Connection Method WPS Wi Fi Protected Setup Manual setup Maximum Radio Frequency Power Transmitte 15 98 dBm Appendix 583 ...

Page 592: ...rds Special types of paper for example tracing paper transparencies etc Booklet Plain paper one page document multi page documents of the same size thickness and weight Size W x L Up to 297 x 431 8 mm Maximum size 297 x 432 mm Minimum size 148 x 128 mm Weight Up to 2 kg 52 to 105 g m Paper Capacity 1 sheet Up to 50 sheets A4 80 g m Appendix 584 ...

Page 593: ...he document Make sure that text and images in your documents fit within the shaded area The scan area varies depending on the function used and where documents are placed in the feeder or on the platen glass Platen Glass Feeder imageRUNNER 2204F 2204N 2004N Copy Fax Scan Appendix 585 ...

Page 594: ...tray are listed below Paper Size Paper Source Multi purpose Tray Drawer 1 Drawer 2 A3 1 2 B4 1 2 A4 1 2 A4R 1 B5 1 B5R 1 A5 A5R 1 11 x 17 1 2 LGL 1 2 LTR 1 2 LTRR 1 STMT STMTR 1 EXEC 1 OFFICIO 1 Ecuador OFFICIO 1 Brazil OFFICIO 1 Mexico OFFICIO 1 Argentina OFFICIO 1 A LTR 1 A LTRR 1 GLTR 1 GLTR R 1 Appendix 586 ...

Page 595: ...rce Capacity Chlorine free paper can be used with this machine Paper Type Paper Capacity for Paper Drawer Paper Capacity for Multi Purpose Tray Plain paper 64 to 90 g m2 250 sheets 80 sheets Heavy paper 91 to 105 g m2 Not available 50 sheets Heavy paper 106 to 128 g m2 Not available 50 sheets Recycled paper 64 to 80 g m2 250 sheets 50 sheets Color paper 64 to 80 g m2 250 sheets 80 sheets Pre punch...

Page 596: ... Printable Area The shaded areas in the image below indicate the printable area of the document Appendix 588 ...

Page 597: ...00 MAX Copy Speed 1 1 sheet minute For the imageRUNNER 2204F 2204N A4 22 A4R 11 A3 11 A5R 13 B5 20 B5R 13 For the imageRUNNER 2004N 2004 A4 20 A4R 11 A3 10 A5R 13 B5 20 B5R 13 Multiple Copies 1 to 99 sheets First Copy Time 7 4 seconds A4 Except when paper is fed from the multi purpose tray The copy speed may vary depending on the settings for paper type paper size When continuously copying adjustm...

Page 598: ...emory at 33 6 Kbps Image Memory 256 pages Fax Resolution Normal 200 x 100 dpi Fine 200 x 200 dpi Photo 200 x 200 dpi Superfine 200 x 400 dpi Auto Dial Function Address Book 104 destinations including destinations stored in one touch keys 1 Depending on your locale or your telephone connection you may be unable to perform data communication In this case contact your local authorized Canon dealer 2 ...

Page 599: ... 8 mm Scan Resolution Optical resolution Platen glass up to 600 x 600 dpi Feeder up to 600 x 600 dpi Software interpolation resolution 9 600 x 9 600 dpi Scan Speed 23 sheets minute Driver TWAIN WIA 2 0 Windows Vista 7 8 8 1 10 ICA Mac OS X 10 6 x or later Depending on the conditions of use these values may differ Appendix 591 ...

Page 600: ...geRUNNER 2004N 1 sided printing 20 ppm 2 sided printing 14 ppm For the imageRUNNER 2004 1 sided printing 20 ppm Output Resolution 600 x 600 dpi Number of Tones 256 The print speed on A4 size plain paper is measured during continuous printing However this varies depending on the use conditions and environment of the machine Appendix 592 ...

Page 601: ...ent imageRUNNER 2204F 2204N 2004N 1053 09U Network Interface For the imageRUNNER 2204F 2204N 2004N 10Base T 100Base TX RJ 45 Protocol Supported TCP IP Frame type Ethernet II Print applications LPD Raw IPP Appendix 593 ...

Page 602: ... 2204N 2004N The Platen Cover Type X can be attached to the imageRUNNER 2204N 2004N in place of the feeder DADF AT1 Close the platen cover to secure originals that have been placed on the platen glass Feeder DADF AT1 imageRUNNER 2204N 2004N The Feeder can be attached to the imageRUNNER 2204N 2004N in place of the platen cover Automatically feeds documents into the machine for scanning When two or ...

Page 603: ... Cassette BB1 You can replace the standard paper drawer of the machine with the optional paper drawer The optional paper drawer cannot be attached to the optionalCassette Feeding Module AD1 For how to load paper into the paper drawer see Loading Paper P 40 For available paper sizes see Paper P 586 Duplex Unit C1 imageRUNNER 2204F 2204N 2004N The Duplex Unit C1 can be attached to the imageRUNNER 22...

Page 604: ...e using this machine e Manual This Manual This manual describes all the functions of the machine in a manual that is viewed using a Web browser You can browse information by category or enter a keyword to search for pages on a specific topic Using e Manual P 597 MF Driver Installation Guide This manual describes how to install the MF drivers MF Toolbox and the supplied software on the CD ROM DVD R...

Page 605: ...y keyword Perform a search by entering a keyword such as fax or wireless LAN and the pages containing the keyword are displayed You can find the page you are looking for from those results You can also enter phrases such as connecting to a network The keyword search also supports the AND Boolean to search for multiple keywords Search Tab P 607 System Requirements To use the e Manual the following ...

Page 606: ... depending on the country region or the model of the machine 1 Insert the User Software and Manuals CD ROM DVD ROM into the drive on the computer Select a language and click OK if you are prompted to do so 2 Click Custom Installation If the above screen is not displayed see Displaying the Software Programs Manuals Setup Screen P 611 3 Select USB Connection and click Next Appendix 598 ...

Page 607: ...ar all the check boxes except for Manuals and click Install 5 Read the License Agreement and click Yes to agree The installation begins Wait a moment This process may take some time 6 Click Exit Appendix 599 ...

Page 608: ...7 Click Next Exit Viewing the e Manual Double click the shortcut icon of the e Manual on the desktop Appendix 600 ...

Page 609: ...and Manuals CD ROM DVD ROM into the drive on the computer Select a language and click OK if you are prompted to do so If the Software Programs Manuals Setup screen does not appear remove the CD ROM DVD ROM from the drive and then insert it again or see Displaying the Software Programs Manuals Setup Screen P 611 2 Click Manuals 3 Click e Manual Depending on the operating system you are using a secu...

Page 610: ...sert the User Software and Manuals CD ROM DVD ROM into the drive on the computer Select a language and click OK if you are prompted to do so 2 Click Start Software Programs If the above screen is not displayed see Displaying the Software Programs Manuals Setup Screen P 611 If AutoPlay is displayed click Run MInst exe 3 Click Start for Manual Uninstaller Appendix 602 ...

Page 611: ...4 Click Next Uninstall begins Wait a moment This process may take some time 5 Click Exit 6 Click Back Exit Appendix 603 ...

Page 612: ...Appendix 604 ...

Page 613: ... Highlights Provides a variety of practical examples of ways to use the machine Click to toggle the display of practical examples by category or click the sliding display for more information about each category The sliding display can be stopped by moving the pointer onto it Feature Highlights P 606 Quick Help Troubleshooting Maintenance Click to view how to solve problems or maintain the machine...

Page 614: ...y the corresponding topic page Topic Page Contains information about how to configure and use the machine Navigation See what chapter topic you are currently viewing Click to jump to the corresponding page To return to the previous page click Back on your Web browser Click to display the hidden detailed descriptions Click again to close the detailed descriptions Appendix 606 ...

Page 615: ...r Enter keyword s here Enter a keyword or keywords and click to display the search results in the search dialog box Search result dialog box Displays the search results of the pages that contain the specified keywords From the results locate the page you are looking for and click the topic title of the page Appendix 607 ...

Page 616: ...erations Indicates operational requirements and restrictions Be sure to read these items carefully to operate the machine correctly and avoid damage to the machine or property Indicates a clarification of an operation or contains additional explanations for a procedure Indicates useful functions or tips for using the machine Keys and Buttons Used in this Manual Keys on the control panel and button...

Page 617: ...Others 1053 0A4 This section describes basic Windows operations and includes disclaimers copyright information and other information Appendix 609 ...

Page 618: ... Server 2008 R2 Start select Devices and Printers Windows Server 2008 Start select Control Panel double click Printers Windows 8 Server 2012 Right click the lower left corner of the screen select Control Panel View devices and printers Windows 8 1 Server 2012 R2 Right click Start select Control Panel View devices and printers Windows 10 Right click Control Panel Hardware and Sound Devices and prin...

Page 619: ...D ROM DVD ROM follow the procedure below The CD ROM DVD ROM drive name is indicated as D in this manual The CD ROM DVD ROM drive name may differ depending on the computer you are using Windows Server 2003 Server 2003 R2 1 Start select Run 2 Enter D MInst exe and then click OK Windows Vista 7 Server 2008 Server 2008 R2 1 Enter D MInst exe in Search programs and files or Start Search under the Start...

Page 620: ...ter driver is operational by printing a test page in Windows 1 Load A4 size paper in the multi purpose tray Loading Paper in the Multi Purpose Tray P 46 2 Open the printer folder Displaying the Printer Folder P 610 3 Right click your printer icon and click Printer properties or Properties in the pop up menu 4 Print a test page Click the General tab Click Print Test Page to print a test page Append...

Page 621: ...he lower left corner of the screen select Control Panel Windows 8 1 Server 2012 R2 Right click Start select Control Panel If you are using Windows 10 proceed to step 2 2 Display System Windows Vista 7 8 8 1 Server 2008 R2 Server 2012 Server 2012 R2 Click System and Maintenance or System and Security System Windows Server 2008 Click System Windows 10 Click select Settings System About 3 Check the b...

Page 622: ... System 3 Click the Computer Name or Network ID tab 4 Click Change or Properties Windows Vista 7 8 8 1 Server 2008 Server 2008 R2 Server 2012 Server 2012 R2 1 Display Control Panel Windows Vista 7 Server 2008 Server 2008 R2 Start select Control Panel Windows 8 Server 2012 Right click the lower left corner of the screen select Control Panel Appendix 614 ...

Page 623: ... and Maintenance System Windows Server 2008 Double click System Windows 10 Click Settings double click System click About Checking the LPR RAW Printer Port 1 Open the printer folder Displaying the Printer Folder P 610 2 Right click your printer icon and click Printer properties or Properties in the pop up menu 3 Check the port settings Click the Ports tab Make sure that the correct port is selecte...

Page 624: ...Appendix 616 ...

Page 625: ...ing manuals or the help on the drivers Canon UFR II UFRII LT Printer Driver Guide Canon Fax Driver Guide Canon Scanner Driver Guide Driver s Help Displaying the Driver Guide Double click the following HTML file in the Documents folder on the supplied CD ROM DVD ROM Canon UFR II UFRII LT Printer Driver Guide Office Documents XXXXXX Guide index html Canon Fax Driver Guide FAX Documents XXXXXX Guide ...

Page 626: ... your cooperation in the correct disposal of this product will contribute to the effective usage of natural resources For more information regarding return and recycling of WEEE products please visit http www canon co in environment or write to us at customer delight canon co in Also this product complies with the E Waste Management Rules 2016 and prohibits use of lead mercury hexavalent chromium ...

Page 627: ...ademarks of Apple Inc Microsoft Windows Windows Vista Windows Server Internet Explorer Word Excel and Power Point are either registered trademarks or trademarks of Microsoft Corporation in the United States and or other countries iOS is a trademark or registered trademark of Cisco in the U S and other countries and is used under license Google Cloud Print and Google Chrome are either registered tr...

Page 628: ... for use with the Canon product you purchased the PRODUCT 4 You may not assign sublicense market distribute or transfer the SOFTWARE to any third party without prior written consent of rights holders of the SOFTWARE 5 Notwithstanding the foregoing you may transfer the SOFTWARE only when a you assign all of your rights to the PRODUCT and all rights and obligations under the conditions to transferee...

Page 629: ...s and Conditions of the License See Page bldimake MIT License 3 FreeType The FreeType Project LICENSE 4 Incl MIT License 9 JPEG The Independent JPEG Group s JPEG software README for release 6b of 27 Mar 1998 10 math MIT License 11 mDNSResponder Apache License Version 2 0 12 mDNSResponder part of mDNSShared The BSD License 16 OpenSSL OpenSSL License Original SSLeay License 17 pcftypes h MIT License...

Page 630: ...s of the Software THE SOFTWARE IS PROVIDED AS IS WITHOUT WARRANTY OF ANY KIND EXPRESS OR IMPLIED INCLUDING BUT NOT LIMITED TO THE WARRANTIES OF MERCHANTABILITY FITNESS FOR A PARTICULAR PURPOSE AND NONINFRINGEMENT IN NO EVENT SHALL THE OPEN GROUP BE LIABLE FOR ANY CLAIM DAMAGES OR OTHER LIABILITY WHETHER IN AN ACTION OF CONTRACT TORT OR OTHERWISE ARISING FROM OUT OF OR IN CONNECTION WITH THE SOFTWA...

Page 631: ... programs documentation and makefiles at the very least This license was inspired by the BSD Artistic and IJG Independent JPEG Group licenses which all encourage inclusion and use of free software in commercial and freeware products alike As a consequence its main points are that o We don t promise that this software works However we will be interested in any kind of bug reports as is distribution...

Page 632: ...roject www freetype org All rights reserved Please replace year with the value from the FreeType version you actually use Legal Terms 0 Definitions Throughout this license the terms package FreeType Project and FreeType archive refer to the set of files originally distributed by the authors David Turner Robert Wilhelm and Werner Lemberg as the FreeType Project be they named as alpha beta or final ...

Page 633: ... PARTICULAR PURPOSE IN NO EVENT WILL ANY OF THE AUTHORS OR COPYRIGHT HOLDERS BE LIABLE FOR ANY DAMAGES CAUSED BY THE USE OR THE INABILITY TO USE OF THE FREETYPE PROJECT 2 Redistribution This license grants a worldwide royalty free perpetual and irrevocable right and license to use execute perform compile display copy create derivative works of distribute and sublicense the FreeType Project in both...

Page 634: ...for commercial advertising or promotional purposes without specific prior written permission We suggest but do not require that you use one or more of the following phrases to refer to this software in your documentation or advertising materials FreeType Project FreeType Engine FreeType library or FreeType Distribution As you have not signed this license you are not required to accept it However a...

Page 635: ...nd distribution If you are looking for support start in this list if you haven t found anything to help you in the documentation o freetype devel nongnu org Discusses bugs as well as engine internals design issues specific licenses porting etc Our home page can be found at http www freetype org end of FTL TXT ...

Page 636: ...d in all copies or substantial portions of the Software THE SOFTWARE IS PROVIDED AS IS WITHOUT WARRANTY OF ANY KIND EXPRESS OR IMPLIED INCLUDING BUT NOT LIMITED TO THE WARRANTIES OF MERCHANTABILITY FITNESS FOR A PARTICULAR PURPOSE AND NONINFRINGEMENT IN NO EVENT SHALL SUNSOFT INC OR ITS PARENT COMPANY BE LIABLE FOR ANY CLAIM DAMAGES OR OTHER LIABILITY WHETHER IN AN ACTION OF CONTRACT TORT OR OTHER...

Page 637: ... 10 this software is based in part on the work of the Independent JPEG Group ...

Page 638: ...te this software is freely granted provided that this notice is preserved copysignf c Copyright c 1993 by Sun Microsystems Inc All rights reserved math_private h Copyright c 1993 by Sun Microsystems Inc All rights reserved powf c Copyright c 1993 by Sun Microsystems Inc All rights reserved scalbnf c Copyright c 1993 by Sun Microsystems Inc All rights reserved ...

Page 639: ...cumentation source and configuration files Object form shall mean any form resulting from mechanical transformation or translation of a Source form including but not limited to compiled object code generated documentation and conversions to other media types Work shall mean the work of authorship whether in Source or Object form made available under the License as indicated by a copyright notice t...

Page 640: ...sfer the Work where such license applies only to those patent claims licensable by such Contributor that are necessarily infringed by their Contribution s alone or by combination of their Contribution s with the Work to which such Contribution s was submitted If You institute patent litigation against any entity including a cross claim or counterclaim in a lawsuit alleging that the Work or a Contr...

Page 641: ... names of the Licensor except as required for reasonable and customary use in describing the origin of the Work and reproducing the content of the NOTICE file 7 Disclaimer of Warranty Unless required by applicable law or agreed to in writing Licensor provides the Work and each Contributor provides its Contributions on an AS IS BASIS WITHOUT WARRANTIES OR CONDITIONS OF ANY KIND either express or im...

Page 642: ...should be enclosed in the appropriate comment syntax for the file format We also recommend that a file or class name and description of purpose be included on the same printed page as the copyright notice for easier identification within third party archives Copyright yyyy name of copyright owner Licensed under the Apache License Version 2 0 the License you may not use this file except in complian...

Page 643: ...ay be used to endorse or promote products derived from this software without specific prior written permission THIS SOFTWARE IS PROVIDED BY APPLE AND ITS CONTRIBUTORS AS IS AND ANY EXPRESS OR IMPLIED WARRANTIES INCLUDING BUT NOT LIMITED TO THE IMPLIED WARRANTIES OF MERCHANTABILITY AND FITNESS FOR A PARTICULAR PURPOSE ARE DISCLAIMED IN NO EVENT SHALL APPLE OR ITS CONTRIBUTORS BE LIABLE FOR ANY DIRE...

Page 644: ...this software must display the following acknowledgment This product includes software developed by the OpenSSL Project for use in the OpenSSL Toolkit http www openssl org 4 The names OpenSSL Toolkit and OpenSSL Project must not be used to endorse or promote products derived from this software without prior written permission For written permission please contact openssl core openssl org 5 Product...

Page 645: ...t includes cryptographic software written by Eric Young eay cryptsoft com This product includes software written by Tim Hudson tjh cryptsoft com Original SSLeay License Copyright C 1995 1998 Eric Young eay cryptsoft com All rights reserved This package is an SSL implementation written by Eric Young eay cryptsoft com The implementation was written so as to conform with Netscapes SSL This library is...

Page 646: ...ines from the library being used are not cryptographic related 4 If you include any Windows specific code or a derivative thereof from the apps directory application code you must include an acknowledgement This product includes software written by Tim Hudson tjh cryptsoft com THIS SOFTWARE IS PROVIDED BY ERIC YOUNG AS IS AND ANY EXPRESS OR IMPLIED WARRANTIES INCLUDING BUT NOT LIMITED TO THE IMPLI...

Page 647: ... 20 including the GNU Public Licence ...

Page 648: ...ished to do so subject to the following conditions The above copyright notice and this permission notice shall be included in all copies or substantial portions of the Software THE SOFTWARE IS PROVIDED AS IS WITHOUT WARRANTY OF ANY KIND EXPRESS OR IMPLIED INCLUDING BUT NOT LIMITED TO THE WARRANTIES OF MERCHANTABILITY FITNESS FOR A PARTICULAR PURPOSE AND NONINFRINGEMENT IN NO EVENT SHALL THE AUTHOR...

Page 649: ...l be included in all copies or substantial portions of the Software THE SOFTWARE IS PROVIDED AS IS WITHOUT WARRANTY OF ANY KIND EXPRESS OR IMPLIED INCLUDING BUT NOT LIMITED TO THE WARRANTIES OF MERCHANTABILITY FITNESS FOR A PARTICULAR PURPOSE AND NONINFRINGEMENT IN NO EVENT SHALL GROUPE BULL BE LIABLE FOR ANY CLAIM DAMAGES OR OTHER LIABILITY WHETHER IN AN ACTION OF CONTRACT TORT OR OTHERWISE ARISI...

Page 650: ...ellectual property of rights holders of the SOFTWARE 3 You may use the SOFTWARE solely for use with the Canon product you purchased the PRODUCT 4 You may not assign sublicense market distribute or transfer the SOFTWARE to any third party without prior written consent of rights holders of the SOFTWARE 5 Notwithstanding the foregoing you may transfer the SOFTWARE only when a you assign all of your r...

Page 651: ... to remain under this license does not apply to any document created using the fonts or their derivatives DEFINITIONS Font Software refers to the set of files released by the Copyright Holder s under this license and clearly marked as such This may include source files build scripts and documentation Reserved Font Name refers to any names specified as such after the copyright statement s Original ...

Page 652: ...rsion except to acknowledge the contribution s of the Copyright Holder s and the Author s or with their explicit written permission 5 The Font Software modified or unmodified in part or in whole must be distributed entirely under this license and must not be distributed under any other license The requirement for fonts to remain under this license does not apply to any document created using the F...

Reviews: