Chapter 2
2-4
2.1.3 Before Starting the Work (230V CENV)
0017-7151
iR2025 / iR2030
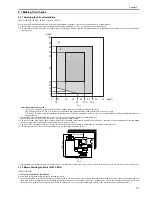
1-1 Points to Make Before Installation
Be sure to go through the following before starting the work:
1) If you are installing the machine after moving it from a cold to warm location, be sure to leave the machine unpacked for at least 2 hours so that the machine is
fully used to the site temperature, thus avoiding image faults caused by condensation. (The term "condensation" refers to the formation of droplets of water on
the surface of a metal object brought in from a cold to warm place, i.e., as the result of the rapid cooling of the moisture (vapor) around the object.)
2) The machine weighs a maximum of about 50 kg. Be sure to work in a group of 2 persons when lifting it.
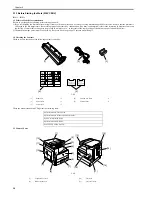
1-2 Checking the Contents
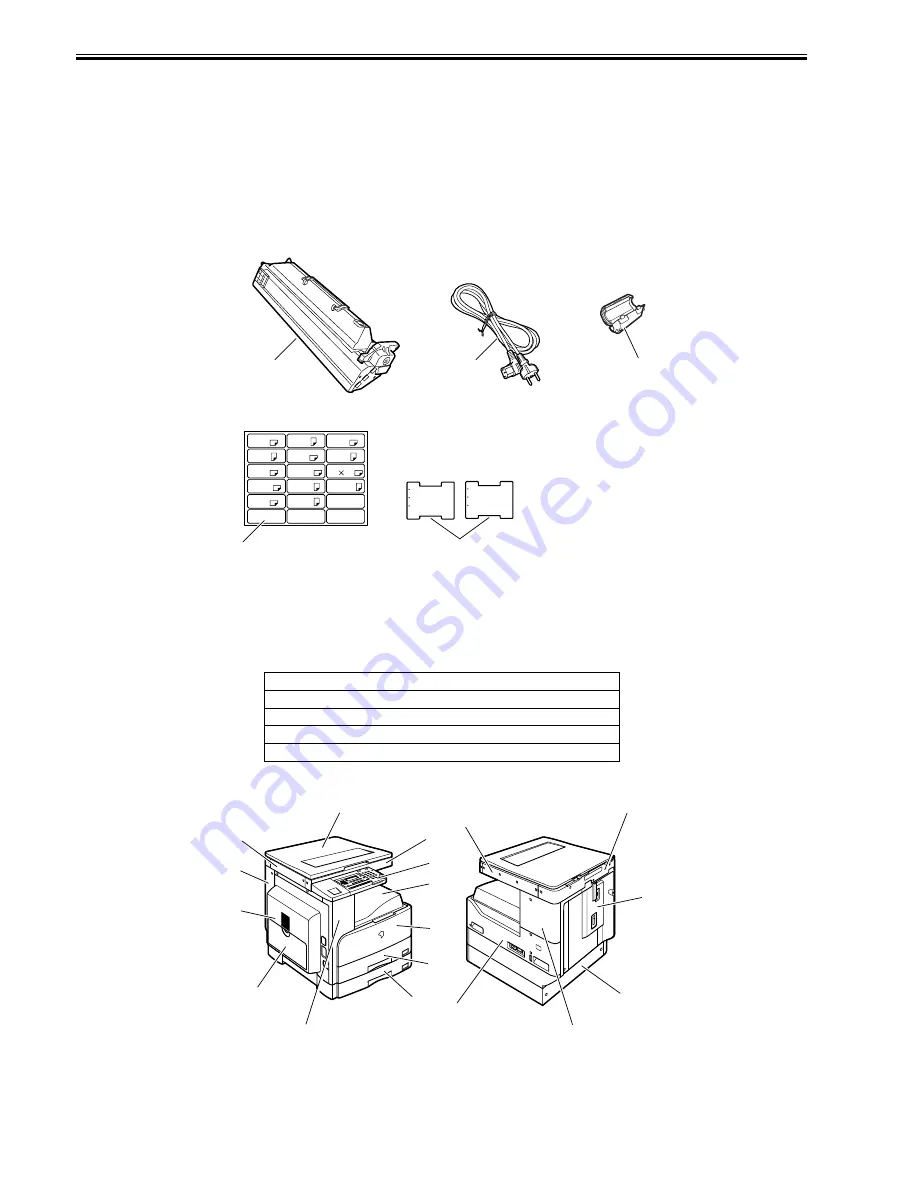
Check to be sure that none of the following contents is missing:
F-2-5
Check the documentation and CD against the following table:
1-3 Names of Parts
F-2-6
[1]
Drum unit
---1
[4]
Cassette size label
---2
[2]
Power cable
---1
[5]
Caution sheet
---2
[3]
Ferrite core
---1
Operators manual: User's Guide
Operators manual: Network Quick Start Guide
Drum Unit Replacing Guide
Operators manual CD-ROM
Driver/Utility CD-ROM (UFR)
[1]
Copyboard cover*1
[10]
Left door
[2]
Reader front cover
[11]
Left cover (rear)
[1]
[2]
[5]
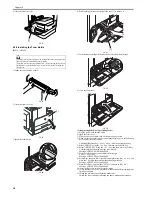
Bitte stellen Sie den Hebel zum
Erkennen des Papierformats auf
das neue Format ein.
Set the size detector lever to the
new paper size.
Placer I’indicateur de format sur
le nouveau format.
FU5-xxxx
Bitte stellen Sie den Hebel zum
Erkennen des Papierformats auf
das neue Format ein.
Set the size detector lever to the
new paper size.
Placer I’indicateur de format sur
le nouveau format.
FU5-xxxx
A3
A5
B5
8K
LTR
A4
B5
11 17
STMT
A4
B4
16K
LTR
LGL
[4]
[3]
[1]
[2]
[7]
[8]
[17]
[9]
[10]
[11]
[12]
[13]
[14]
[15]
[16]
[18]
[3]
[4]
[5]
[6]
Summary of Contents for imageRunner 2022
Page 1: ...Aug 8 2007 Service Manual iR2030 2025 2022 2018 Series ...
Page 2: ......
Page 6: ......
Page 20: ...Contents ...
Page 21: ...Chapter 1 Introduction ...
Page 22: ......
Page 57: ...Chapter 1 1 33 ...
Page 60: ......
Page 61: ...T 1 11 ...
Page 64: ......
Page 65: ...T 1 12 ...
Page 68: ......
Page 69: ...Chapter 2 Installation ...
Page 70: ......
Page 72: ......
Page 125: ...Chapter 2 2 53 ...
Page 126: ......
Page 127: ...Chapter 3 Main Controller ...
Page 128: ......
Page 130: ......
Page 142: ......
Page 143: ...Chapter 4 Original Exposure System ...
Page 144: ......
Page 170: ......
Page 171: ...Chapter 5 Laser Exposure ...
Page 172: ......
Page 174: ......
Page 181: ...Chapter 6 Image Formation ...
Page 182: ......
Page 184: ......
Page 196: ......
Page 197: ...Chapter 7 Pickup Feeding System ...
Page 198: ......
Page 217: ...Chapter 8 Fixing System ...
Page 218: ......
Page 220: ......
Page 234: ......
Page 235: ...Chapter 9 External and Controls ...
Page 236: ......
Page 255: ...Chapter 10 RDS ...
Page 256: ......
Page 258: ......
Page 268: ......
Page 269: ...Chapter 11 Maintenance and Inspection ...
Page 270: ......
Page 272: ......
Page 275: ...Chapter 12 Standards and Adjustments ...
Page 276: ......
Page 278: ......
Page 281: ...Chapter 12 12 3 ...
Page 282: ......
Page 283: ...Chapter 13 Correcting Faulty Images ...
Page 284: ......
Page 286: ......
Page 299: ...F 13 11 F 13 12 1 2 3 4 5 6 7 8 9 10 11 12 13 14 15 16 17 ...
Page 300: ......
Page 301: ...Chapter 14 Self Diagnosis ...
Page 302: ......
Page 304: ......
Page 317: ...Chapter 15 Service Mode ...
Page 318: ......
Page 381: ...Chapter 16 Upgrading ...
Page 382: ......
Page 384: ......
Page 411: ...Chapter 17 Service Tools ...
Page 412: ......
Page 414: ......
Page 417: ...Aug 8 2007 ...
Page 418: ......


