xxvi
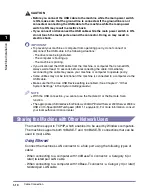
IMPORTANT
Turn OFF the control panel power switch for safety when the machine will not be used
for a long period of time, such as overnight. Also, turn OFF the main power switch, and
disconnect the power cord for safety when the machine will not be used for an
extended period of time, such as during consecutive holidays.
Maintenance and Inspections
WARNING
•
When cleaning the machine, first turn OFF the main power switch, then disconnect
the power cord. Failure to observe these steps may result in a fire or electrical shock.
•
Disconnect the power cord from the power outlet regularly, and clean the area around
the base of the power plug’s metal pins and the power outlet with a dry cloth to
ensure that all dust and grime is removed. If the power cord is connected for a long
period of time in a damp, dusty, or smoky location, dust can build up around the
power plug and become damp. This may cause a short circuit and result in a fire.
•
Clean the machine using a slightly dampened cloth with a mild detergent mixed with
water. Do not use alcohol, benzene, paint thinner, or other flammable substances.
Check detergent for flammability prior to use. If flammable substances come into
contact with a high-voltage area inside the machine, it may result in a fire or electrical
shock.
•
There are some areas inside the machine which are subject to high-voltages. When
removing jammed paper or when inspecting the inside of the machine, do not allow
necklaces, bracelets, or other metal objects to touch the inside of the machine, as
this may result in burns or electrical shock.
•
Do not burn or throw used toner cartridges into open flames, as this may cause the
toner remaining inside the cartridges to ignite, resulting in burns or a fire.
•
Make sure that the power plug is firmly inserted into the power outlet after cleaning
the machine. Do not use the machine while the connection is loose, as doing so may
cause a fire.
•
Check the power cord and power plug regularly. If the following conditions occur,
contact your local authorized Canon dealer, as the condition may cause a fire:
- There are burn marks on the power plug.
- The blade on the power plug is deformed or broken.
- The power goes OFF and ON when the power cord is bent.
- There are cuts, cracks, or indentations on the power cord.
- A part of the power cord becomes hot.
•
Check the power cord and power plug regularly to make sure that they are not
handled in the following manner, as this may result in a fire or electrical shock:
- The connection part of the power plug is loose.
- Stress is being applied to the power cord by a heavy object or by affixing it with
staples.
- The power plug is loose.
- The power cord is tied in a bundle.
Summary of Contents for imageRUNNER 2545
Page 2: ...imageRUNNER 2545i 2545 2535i 2535 2530i 2530 2525i 2525 2520i 2520 User s Guide...
Page 8: ...vii Chapter 7 Appendix Available Paper Stock 7 2 Index 7 4...
Page 93: ...Consumables 5 20 Routine Maintenance 5...
Page 109: ...Service Call Message 6 16 Troubleshooting 6...
Page 116: ...imageRUNNER 2545i 2545 2535i 2535 2530i 2530 2525i 2525 2520i 2520 Guide de l utilisateur...
Page 145: ...xxx...
Page 165: ...Marche suivre de l installation 2 8 Avant de commencer utiliser la machine 2...
Page 211: ...Consommables 5 20 Entretien p riodique 5...
Page 234: ...imageRUNNER 2545i 2545 2535i 2535 2530i 2530 2525i 2525 2520i 2520 Anwenderhandbuch...
Page 240: ...vii Kapitel 7 Anhang Geeignetes Druck Kopiermaterial 7 2 Index 7 4...
Page 275: ...Kabelanschluss 1 14 Systeminstallation 1...
Page 327: ...Verbrauchsmaterial 5 20 Regelm ige Wartung 5...
Page 350: ...imageRUNNER 2545i 2545 2535i 2535 2530i 2530 2525i 2525 2520i 2520 Guida per l utente...
Page 356: ...vii Capitolo 7 Appendice Tipi di carta accettati 7 2 Indice analitico 7 4...
Page 441: ...Consumabili 5 20 Manutenzione ordinaria 5...
Page 464: ...imageRUNNER 2545i 2545 2535i 2535 2530i 2530 2525i 2525 2520i 2520 Gu a de usuario...
Page 470: ...vii Cap tulo 7 Ap ndice Papel disponible 7 2 ndice alfab tico 7 4...
Page 493: ...xxx...
Page 513: ...Flujo de configuraci n 2 8 Antes de utilizar este equipo 2...

