background image

Managing the Department IDs and User IDs

3-13

Sp

ec

ifyin

g

 De

pa

rt

m

e

nt

 ID

 an

d

 Us

er

 M

a

n

a

g

e

m

en

t

3

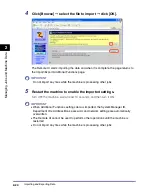
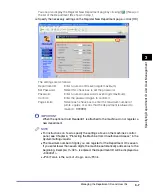
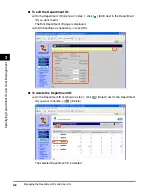
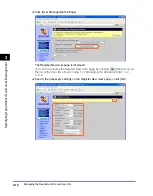
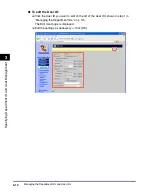
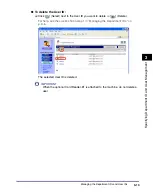
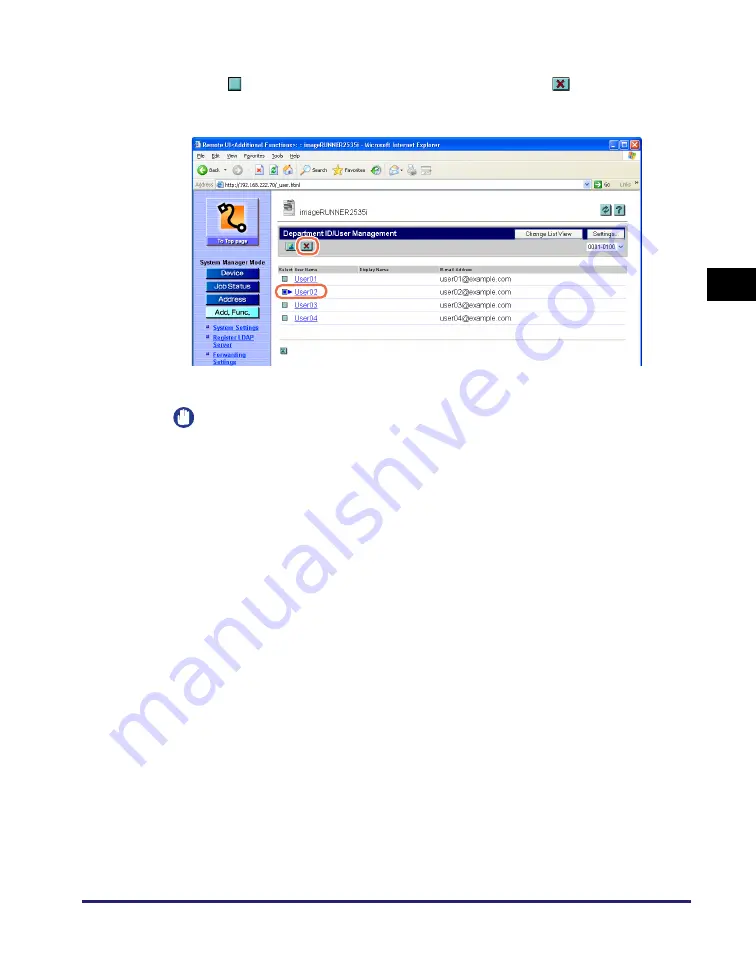
To delete the User ID:

Click [

] (Select) next to the User ID you want to delete 

 [

] (Delete).

For help, see the screen shot in step 1 in “Managing the Department IDs,” on 
p. 3-5.

The selected User ID is deleted.

IMPORTANT

When the optional Card Reader-E1 is attached to the machine, do not delete a 
user.

Summary of Contents for imageRUNNER 2545i

Page 1: ...Remote UI Guide Remote UI Guide Please read this guide before operating this product After you finish reading this guide store it in a safe place for future reference ENG...

Page 2: ...imageRUNNER 2545i 2545 2535i 2535 2530 2525 2520 Remote UI Guide...

Page 3: ...ions Copying Guide CD ROM Sending and Fax Instructions Sending and Facsimile Guide CD ROM Remote User Interface Instructions Remote UI Guide This Document CD ROM Network Connectivity Security Manageme...

Page 4: ...agement Customizing Settings Appendix Includes the glossary and index Chapter 1 Chapter 2 Chapter 3 Chapter 4 Chapter 5 Considerable effort has been made to ensure that this manual is free of inaccura...

Page 5: ...he Remote UI 1 6 System Requirements 1 7 Before Using the Remote UI 1 8 Starting the Remote UI 1 9 Viewing the Machine Status and Information 1 13 Chapter 2 Managing Jobs and Machine Data Managing Job...

Page 6: ...nt ID Management and User Management 3 2 Managing the Department IDs 3 5 Managing the User IDs 3 9 Chapter 4 Customizing Settings Customizing the System Settings 4 2 Editing the LDAP Server Settings 4...

Page 7: ...d these items carefully to operate the machine correctly and avoid damage to the machine or property NOTE Indicates a clarification of an operation or contains additional explanations for a procedure...

Page 8: ...ation of accessories and optional equipment are not displayed in the web browser Therefore the screen shots of the Remote UI used in this manual may differ from the ones you actually see on your web b...

Page 9: ...ogo Windows Vista and Windows Vista logo are trademarks or registered trademarks of Microsoft Corporation in the U S and or other countries Other product and company names herein may be the trademarks...

Page 10: ...f Canon Inc Disclaimers The information in this document is subject to change without notice CANON INC MAKES NO WARRANTY OF ANY KIND WITH REGARD TO THIS MATERIAL EITHER EXPRESS OR IMPLIED EXCEPT AS PR...

Page 11: ...x...

Page 12: ...d how to start it Overview of the Remote UI 1 2 Functions of the Remote UI 1 3 The Top Page of the Remote UI 1 4 Logon Modes of the Remote UI 1 5 Buttons on the Remote UI 1 6 System Requirements 1 7 B...

Page 13: ...To use the Remote UI all you need is a web browser and a network connection between your computer and the machine First set the IP Internet Protocol address for the machine from the machine s control...

Page 14: ...delete their own jobs the Permit End User s Job Operation setting must be enabled See To specify the System Manager ID and System Password on p 4 8 Importing and exporting the machine data You can sa...

Page 15: ...d press the ENTER key on your computer keyboard the Remote UI top page is displayed NOTE The appearance of the Remote UI top page depends on the management mode applied to the machine For more informa...

Page 16: ...nctions except those restricted to the System Manager Major functions open to End Users and the System Manager are Checking the machine status such as paper or toner amount Checking the job status and...

Page 17: ...to display the machine status and various setting information Click to display the status of the jobs and the logs of the jobs processed by the machine Click to manage the Address Book of the machine...

Page 18: ...indows XP Windows Vista Windows 7 Web Browser Microsoft Internet Explorer 6 0 or later Macintosh OS Operating System Mac OS X 10 3 or later except Classic Environment Web Browser Mac OS X 10 3 x Safar...

Page 19: ...n Specify the name of the device in the Device Info Settings to identify the machine you operate from the Remote UI by the specified name IMPORTANT Connection via a proxy server is not possible If you...

Page 20: ...If you change the language on the Remote UI the characters of the displayed language can be entered However if the displayed language is different from the language used on the touch panel display of...

Page 21: ...e both set to 7654321 at purchase Change them before using the machine See To specify the System Manager ID and System Password on p 4 8 To log in to the Remote UI in the End User Mode select the opti...

Page 22: ...0 For information on other network connection problems and remedies see Chapter 8 Troubleshooting in the System Settings Guide or consult your network administrator When Department ID Management is en...

Page 23: ...ssword text box When both Department ID Management and User Management are enabled NOTE The same Remote UI top page as shown in When User Management is enabled on p 1 12 appears Enter the User ID and...

Page 24: ...he Remote UI the Device Status page in the Device menu is displayed From the Device menu you can view the current status of the machine information about the consumables such as paper and other inform...

Page 25: ...click Error Information Device Information page Displays the information about the machine such as the system manager s information and the location where the machine is installed Device Features page...

Page 26: ...e Job Logs 2 4 Managing the Address Book 2 5 Editing the Destinations 2 6 Importing and Exporting Data 2 11 Exporting Address Book Data 2 12 Importing Address Book Data 2 13 Exporting User Management...

Page 27: ...owing sections Print Job Status Log Send Receive Fax Job Log Send Store Receive Job Log Managing the Print Jobs You can manage the print jobs that are being processed or waiting to be processed by the...

Page 28: ...1 Click Job Status Status in the Job Status menu The list of print jobs being processed or waiting to be processed by the machine is displayed 2 To delete a print job click Select next to the job you...

Page 29: ...obs Send Store Receive Job Log the last 128 jobs IMPORTANT The Job Logs are displayed only when the Job Log Display setting in the Edit System Settings page is enabled See Customizing the System Setti...

Page 30: ...es File Server Address You can manage file server addresses with the information to save scanned documents in a file server such as the protocol and path name of the destination folder Fax Number You...

Page 31: ...ress Book The Address Book and One touch Speed Dial use a similar procedure for editing destinations 1 Click Address One touch Speed Dial or Address Book from the menu displayed under Address If the a...

Page 32: ...age is displayed Select the type of the address from the Type drop down list box specify the necessary settings depending on the type of address you selected click OK The new address is registered in...

Page 33: ...x Enter the name for the group in the Group Name text box Click Address Book The list of addresses registered in the machine is displayed in the new window Specify the type of address from the drop do...

Page 34: ...dress is registered and the page returns to the Address Book page To edit the details of the destination Click the name or any number next to the name on the Address Book page shown in step 1 The Dest...

Page 35: ...ne Data 2 Edit the settings as necessary click OK The page returns to the Address Book page To delete the destination On the Address Book page shown in step 1 click Select next to the address you want...

Page 36: ...hine when necessary IMPORTANT The importing exporting operation may take a few minutes to complete Do not turn the machine s main power OFF until the operation is complete Otherwise the machine may ma...

Page 37: ...Address Book Data You can save export the Address Book data stored in the machine as a file 1 Click Add Func Import Export in the Add Func menu The Import Export page is displayed 2 Click Address Book...

Page 38: ...e new data The machine imports exports the Address Book data based on the index numbers displayed on the address list on the Address Book page on the Remote UI An address entry is overwritten if the i...

Page 39: ...e select the file to import click OK The Remote UI starts importing the data and when it is complete the page returns to the Import Export Address Book page IMPORTANT Do not import any files while the...

Page 40: ...into the machine from a saved exported file IMPORTANT Be sure to disable the Department ID Management and User Management before importing the User Management data See Enabling Department ID Managemen...

Page 41: ...in Exporting Address Book Data on p 2 12 The Import Export User Management Data page is displayed 3 Click Import For help see the screen shot in step 3 in Exporting User Management Data on p 2 14 The...

Page 42: ...to reset the passwords after loading importing the User Management data IMPORTANT Before you enable Department ID Management and User Management be sure to reset the passwords for User IDs as directe...

Page 43: ...and Exporting Data 2 18 Managing Jobs and Machine Data 2 2 Click Settings The Department ID User Management Settings page is displayed 3 Click User Management Settings The Register New User page is d...

Page 44: ...Machine Data 2 4 Click Cancel on the Register New User page Specifying the new user information is not required in this step The User IDs registered in the machine are displayed 5 Click the User ID to...

Page 45: ...the User Types of all the User IDs are set to User End User Every user is regarded as the System Manager and will be able to log in to the Remote UI in the System Manager Mode Change Password for the...

Page 46: ...the Register New Department page To display the list of the User IDs again follow steps 1 to 4 Exporting Additional Functions Setting Data You can save export the Additional Functions setting data sto...

Page 47: ...nd Exporting Data 2 22 Managing Jobs and Machine Data 2 3 Click Start Export 4 Follow the instructions on the computer screen to specify the location to save the file The file is saved in the specifie...

Page 48: ...page shown in step 3 in Exporting Additional Functions Setting Data on p 2 21 1 Click Add Func Import Export in the Add Func menu For help see the screen shot in step 1 in Exporting Address Book Data...

Page 49: ...the machine is processing other jobs 5 Restart the machine to enable the imported settings Turn OFF the machine wait at least 10 seconds and then turn it ON IMPORTANT When Additional Functions settin...

Page 50: ...er describes how to specify the Department ID Management and User Management settings by using the Remote UI Managing the Department IDs and User IDs 3 2 Enabling Department ID Management and User Man...

Page 51: ...t and User Management depending on your needs IMPORTANT Be sure to confirm the System Manager ID and System Password are properly set to log in to the Remote UI in the System Manager Mode before enabl...

Page 52: ...3 The page above displays the list of the Department IDs The page above displays the list of the User IDs 2 Click Settings on the page shown in step 1 You can find the Settings button both on the Depa...

Page 53: ...it is enabled the users must enter their Department ID and password when it is set to log in to the Remote UI Enable User Management Select this check box to enable User Management When it is enabled...

Page 54: ...k Add Func Department ID User Management in the Add Func menu NOTE The list of the Department IDs switches to the list of the User IDs by clicking Change List View The Change List View button appears...

Page 55: ...ent IDs To register a new Department ID NOTE You can register up to 1 000 departments Click Settings on the page shown in step 1 You can find the Settings button both on the Department ID and on the U...

Page 56: ...hapter 6 Protecting the Machine from Unauthorized Access in the System Settings Guide The maximum number of digits you can register for the Department ID is seven If you enter fewer than seven digits...

Page 57: ...t ID list shown in step 1 click Edit next to the Department ID you want to edit The Edit Department ID page is displayed Edit the settings as necessary click OK To delete the Department ID On the Depa...

Page 58: ...ent and User Management are enabled make sure to assign a Department ID to each user Only users who have the Department ID can log in to the machine or the Remote UI User IDs can be registered edited...

Page 59: ...Click User Management Settings The Register New User page is displayed You can also display the Register New User page by clicking New User on the list of the User IDs shown in step 1 in Managing the...

Page 60: ...Remote UI User ID Enter a User ID a log in name 32 characters maximum Set Password Select this check box to set a password for the User ID Password Enter the password 32 characters maximum Confirm Ent...

Page 61: ...ying Department ID and User Management 3 To edit the User ID Click the User ID you want to edit on the list of the User IDs shown in step 1 in Managing the Department IDs on p 3 5 The Edit User page i...

Page 62: ...nt 3 To delete the User ID Click Select next to the User ID you want to delete Delete For help see the screen shot in step 1 in Managing the Department IDs on p 3 5 The selected User ID is deleted IMP...

Page 63: ...Managing the Department IDs and User IDs 3 14 Specifying Department ID and User Management 3...

Page 64: ...s This chapter describes how to customize the machine settings by using the Remote UI Customizing the System Settings 4 2 Editing the LDAP Server Settings 4 9 Editing the Forwarding Settings 4 13 Cust...

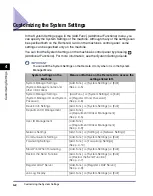
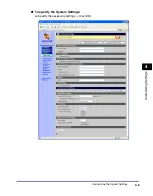
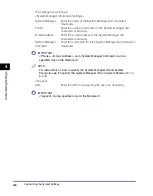
Page 65: ...access the settings listed left System Manager Settings System Manager s name and other information Add Func System Settings Edit See p 4 5 System Manager Settings System Manager ID and System Passwo...

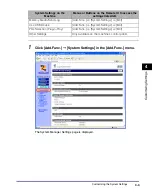
Page 66: ...ings page is displayed Memory Media Send Log Add Func System Settings Edit Use USB Device Add Func System Settings Edit PDL Selection Plug n Play Add Func System Settings Edit Other Settings Only avai...

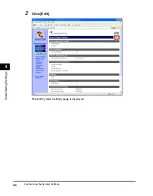
Page 67: ...Customizing the System Settings 4 4 Customizing Settings 4 2 Click Edit The Edit System Settings page is displayed...

Page 68: ...Customizing the System Settings 4 5 Customizing Settings 4 To specify the System Settings Specify the necessary settings click OK...

Page 69: ...o specify the System Manager ID and System Password on p 4 8 Support IMPORTANT Support can be specified only on the Remote UI System Manager Enter the name of the System Manager 32 characters maximum...

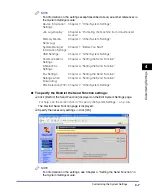
Page 70: ...rmation on the settings see Chapter 4 Setting the Send Function in the System Settings Guide Device Information Settings Chapter 7 Other System Settings Job Log Display Chapter 6 Protecting the Machin...

Page 71: ...at purchase Change them before using the machine IMPORTANT Permit End User s Job Operation can be specified only on the Remote UI Set ID and Password Select this check box to set the System Manager ID...

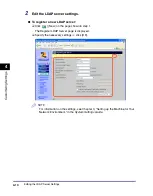
Page 72: ...LDAP server settings NOTE For instructions on how to edit the LDAP server settings on the machine s control panel see Chapter 3 Setting up the Machine for Your Network Environment in the System Setti...

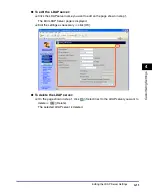
Page 73: ...ings To register a new LDAP server Click New on the page shown in step 1 The Register LDAP Server page is displayed Specify the necessary settings click OK NOTE For information on the settings see Cha...

Page 74: ...LDAP server name you want to edit on the page shown in step 1 The Edit LDAP Server page is displayed Edit the settings as necessary click OK To delete the LDAP server On the page shown in step 1 clic...

Page 75: ...lick Register Edit LDAP Search Attributes on the page shown in step 1 The Register Edit LDAP Search Attributes page is displayed Specify or edit the necessary settings click OK NOTE For information on...

Page 76: ...he forwarding settings on the machine s control panel see Chapter 4 Setting the Send Function in the System Settings Guide 1 Click Add Func Forwarding Settings in the Add Func menu The Forwarding Sett...

Page 77: ...the System Settings Guide To forward all received documents without specific conditions Click Forwarding without Conditions on the page shown in step 1 The Add New Conditions page is displayed Specif...

Page 78: ...lect All in the Receive Type drop down list box all the forwarding settings registered in the machine are displayed The Edit Conditions page is displayed Edit the settings as necessary click OK To del...

Page 79: ...on the Remote UI References Common Settings Add Func Settings Common Settings Chapter 3 Configuring the Machine s Basic Settings in the Reference Guide Copy Settings Add Func Settings Copy Settings Ch...

Page 80: ...he setting item you want to edit The settings page for the selected item is displayed Address Book Settings Address Chapter 4 Specifying Destinations Easily and Quickly in the Sending and Facsimile Gu...

Page 81: ...stomizing Settings 4 3 Edit the settings as necessary click OK The screen shot above is for the Volume Settings NOTE For information on the settings see the other references listed on the table in Cus...

Page 82: ...5 1 CHAPTER 5 Appendix This chapter includes the glossary and index Glossary 5 2 Index 5 5...

Page 83: ...Web site A cookie allows the Web site to recognize the user on subsequent visits Cookies are generally used to enable a user to automatically sign on to certain Web sites and to customize the features...

Page 84: ...usually written as four numbers delimited by periods For example 128 121 4 5 IPv6 Internet Protocol version 6 An IPv6 address is 128 bit long and consists of eight groups of four hexadecimal digits de...

Page 85: ...rnet Protocol address Remote UI Remote User Interface The Remote UI is software that enables you to perform operations which are usually performed on the machine s control panel using a Web browser su...

Page 86: ...2 bps 5 2 Buttons on the Remote UI 1 6 C Cookie 5 2 D Department ID Deleting 3 8 Editing 3 8 Registering 3 6 Department ID Management 3 2 Enabling 3 2 DHCP 5 2 E End User Mode 1 10 F Forwarding Settin...

Page 87: ...specifying 4 7 S System Manager ID specifying 4 8 System Manager Mode 1 10 System Password specifying 4 8 System requirements 1 7 OS Macintosh 1 7 OS Windows 1 7 Web browser Macintosh 1 7 Web browser...

Page 88: ...9 F The Metropolis Tower 10 Metropolis Drive Hunghom Kowloon Hong Kong USRM1 5267 00 CANON INC 2009 CANON INC 30 2 Shimomaruko 3 chome Ohta ku Tokyo 146 8501 Japan CANON U S A INC One Canon Plaza Lake...

Reviews: