COPYRIGHT © 1999 CANON INC. CANON imageRUNNER 400/330 REV.0 JAN. 1999 PRINTED IN JAPAN (IMPRIME AU JAPON)
12-35
CHAPTER 12 INSTALLATION
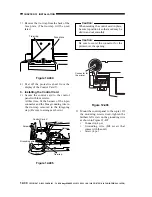
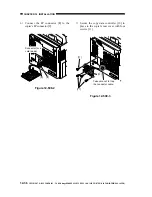
Figure 12-506
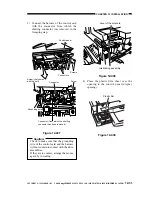
2) Remove the rear cover.
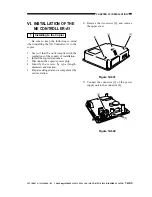
3) Cut the red tie-wrap [3], and move the 8P
connector [4] and the 9P connector [5] to
the left.
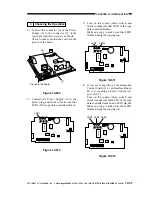
Figure 12-507
4) Mount the rear cover.
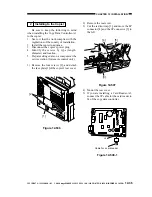
5) If you are installing a Card Reader-A1,
connect the 9P cable for the card reader to
J4 of the copy data controller.
Figure 12-508-1
2
Installing to the Copier
Be sure to keep the following in mind
when installing the Copy Data Controller-A1
to the copier:
1. See to it that the work complies with the
regulations of the country of installation.
2. Install the copier in advance.
3. Disconnect the copier's power plug.
4. Identify the screws by type (length,
diameter) and location.
5. Prepare settings data on a computer at the
service station (for remote control only).
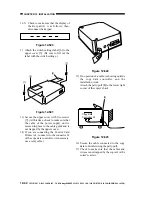
1) Remove the four screws [2], and detach
the face plate [1]of the copier's rear cover.
[1]
[2]
[2]
[3]
[4]
[5]
J4
Cable for a card reader

