background image

NetWare Print Service Settings

4-3

4

Using a NetW

are Netw

o

rk

 (Windo

ws)

NetWare Print Service Settings

To print using a NetWare network, you need to specify print service settings, 
including print server and queue settings. You can use the software listed below to 
specify the print service settings from your computer.

NWADMIN or PCONSOLE (Novell software provided with NetWare)

NetSpot Device Installer (Canon utility)

NetSpot Console (via a web browser) (Canon utility)

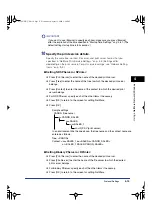
IMPORTANT


To specify the print service settings from NWADMIN or NetSpot Device Installer, the 
computer must have Novell Client (NetWare Client by Novell) installed. To specify the 
print service settings using NetSpot Console, the computer with NetSpot Console 
installed must have Novell Client (NetWare Client by Novell) installed, and TCP/IP 
protocol must be supported by your network environment. 

The following procedures describe a sample NetWare setup. Depending on your 
environment, the actual setup procedure may differ.

NOTE


You can specify the print server settings on the NetWare server and the print service 
settings of the machine at the same time, using NetSpot Device Installer or NetSpot 
Console. For instructions on how to specify the settings, see each online help.

For more information on NetSpot Device Installer or NetSpot Console, see Chapter 7, 
"Using Utilities to Make Network and Device Settings."

E210_NWG_US.book  Page 3  Wednesday, August 18, 2004  3:40 PM

Summary of Contents for imageRUNNER 4570

Page 1: ...s guide before operating this equipment After you finish reading this guide store it in a safe place for future reference ENG Network Guide Network Guide E210_NWG_Cover1_4 book Page 1 Wednesday August 18 2004 3 39 PM ...

Page 2: ...Mac_Fax_00Front1_US fm copy Page 0 Tuesday May 18 2004 11 22 AM ...

Page 3: ...imageRUNNER 4570 3570 2870 2270 Network Guide 0 Otł E210_NWG_US book Page i Wednesday August 18 2004 3 40 PM ...

Page 4: ...tructions Sending and Facsimile Guide Setting Up the Network Connection and Installing the CD ROM Software Network Quick Start Guide Remote User Interface Instructions Remote UI Guide CD ROM Network Connectivity and Setup Instructions Network Guide This Document CD ROM Network ScanGear Installation and Instructions Network ScanGear User s Guide CD ROM PS PCL UFR II Printer Instructions PS PCL UFR ...

Page 5: ...iew the manual in PDF format Adobe Reader Acrobat Reader Acrobat is required If Adobe Reader Acrobat Reader Acrobat is not installed on your system please download it from the Adobe Systems Incorporated website http www adobe com The machine illustration on the cover may differ slightly from your machine E210_NWG_US book Page iii Wednesday August 18 2004 3 40 PM ...

Page 6: ...g Utilities to Make Network and Device Settings Chapter 8 Troubleshooting Chapter 9 Appendix Includes the network settings specifications glossary and index How This Manual Is Organized Considerable effort has been made to ensure that this manual is free of inaccuracies and omissions However as we are constantly improving our products if you need an exact specification please contact Canon E210_NW...

Page 7: ...Using E Mail I Fax 1 5 Optional Equipment Requirements 1 5 System Environment Requirements 1 5 Sending Data 1 6 Optional Equipment Requirements 1 6 System Environment Requirements 1 6 Checking Your Network Environment 1 8 Sample Windows Network 1 8 With a NetWare Server 1 8 Without a NetWare Server 1 9 Sample Macintosh Network 1 10 Sample UNIX Network 1 11 Using a Network with Various Types of Com...

Page 8: ...m a Computer 3 39 Editing a CA Certificate 3 41 E Mail I Fax Settings 3 44 Startup Time Settings 3 51 Setting Up a Computer for Printing Sending a Fax Windows UNIX 3 53 Printer Connection Method LPD Raw 3 55 Windows 98 Me 3 55 Windows 2000 XP Server 2003 3 56 Windows NT 4 0 3 61 UNIX 3 65 Printer Connection Method IPP IPPS 3 66 Windows 98 Me NT 4 0 3 66 Windows 2000 XP Server 2003 3 68 Printer Con...

Page 9: ... Setup Procedures 5 2 Protocol Settings 5 3 Settings from the Control Panel 5 3 TCP IP Settings 5 4 SMB and WINS Settings 5 4 Setting Up a Computer for Printing Sending a Fax 5 11 Connecting to a TCP IP Network 5 11 Connecting to a NetBIOS Network 5 11 Windows 98 Me 5 12 Windows 2000 XP Server 2003 5 13 Windows NT 4 0 5 14 Printer Connection Method 5 15 Setting Up a Computer as a File Server 5 17 ...

Page 10: ...ems and Remedies 8 4 Data Sending File Sharing Problems and Remedies 8 9 Encrypted SSL Data Communication Problems and Remedies 8 12 Chapter 9 Appendix Network Setting Items 9 2 Available Software for Network Settings 9 14 Confirming Settings 9 15 Viewing the Network Access Log 9 17 Specifications 9 18 Ethernet Interface Adaptor 9 18 Hardware Specifications 9 18 Software Specifications 9 18 Glossa...

Page 11: ...s that should be observed for safety CAUTION Indicates a caution concerning operations that may lead to injury to persons or damage to property if not performed correctly In order to use the machine safely always pay attention to these cautions IMPORTANT Indicates operational requirements and restrictions Be sure to read these items carefully in order to operate the product correctly and to avoid ...

Page 12: ...w keys and buttons to be clicked or pressed are expressed in this manual Control Panel Keys Key icon Key Name Touch Panel Display Keys Key Name Buttons on Computer Operation Screens Button Name Examples Start Stop Examples Cancel Done Examples OK Add E210_NWG_US book Page x Wednesday August 18 2004 3 40 PM ...

Page 13: ...ons that come with your machine The keys or buttons which you should click or press are marked with a as shown below When multiple buttons or keys can be clicked or pressed they will be highlighted and mentioned in the order in which they should be clicked or pressed 2 Press System Settings Press this key for operation E210_NWG_US book Page xi Wednesday August 18 2004 3 40 PM ...

Page 14: ...ndows Millennium Edition operating system Windows Me Microsoft Windows NT operating system Windows NT Microsoft Windows 2000 operating system Windows 2000 Microsoft Windows XP operating system Windows XP Microsoft Windows Server 2003 operating system Windows Server 2003 Microsoft Windows operating system Windows PostScript 3 emulation PS Novell NetWare NetWare E210_NWG_US book Page xii Wednesday A...

Page 15: ... and other countries Windows Server is a trademark of Microsoft Corporation in the United States and other countries Netscape and Netscape Navigator are trademarks of Netscape Communications Corporation NetWare Novell IPX SPX NDS NDPS and Novell Client are trademarks of Novell Inc Red Hat is a trademark of Red Hat Inc in the United States and other countries RSA is a trademark of RSA Security Inc ...

Page 16: ...his document is subject to change without notice CANON INC MAKES NO WARRANTY OF ANY KIND WITH REGARD TO THIS MATERIAL EITHER EXPRESS OR IMPLIED EXCEPT AS PROVIDED HEREIN INCLUDING WITHOUT LIMITATION THEREOF WARRANTIES AS TO MARKETABILITY MERCHANTABILITY FITNESS FOR A PARTICULAR PURPOSE OF USE OR AGAINST INFRINGEMENT OF ANY PATENT CANON INC SHALL NOT BE LIABLE FOR ANY DIRECT INCIDENTAL OR CONSEQUEN...

Page 17: ...etwork environment you are using Optional Equipment and System Environment Requirements 1 2 Printing or Sending a Fax from a Computer 1 2 Using E Mail I Fax 1 5 Sending Data 1 6 Checking Your Network Environment 1 8 Sample Windows Network 1 8 Sample Macintosh Network 1 10 Sample UNIX Network 1 11 Using a Network with Various Types of Computers 1 12 E210_NWG_US book Page 1 Wednesday August 18 2004 ...

Page 18: ...optional equipment is required for printing or sending a fax from a computer Printing Multi PDL Printer Kit Sending a Fax either of the following Super G3 FAX Board Super G3 Multi Line FAX Board IMPORTANT You cannot use the Super G3 FAX Board and Super G3 Multi Line FAX Board simultaneously For more information on fax boards see the Sending and Facsimile Guide For more information on the equipment...

Page 19: ... Microsoft Windows XP Home Edition Microsoft Windows Server 2003 Solaris Version 1 1x SunOS Version 4 1x or later Solaris Version 2 5x SunOS Version 5 5x or later Compatible Computers Windows IBM PC compatibles With a NetBIOS Network Compatible OS Microsoft Windows 98 Microsoft Windows Me Microsoft Windows NT Server 4 0 Microsoft Windows NT Workstation 4 0 Microsoft Windows 2000 Server Microsoft W...

Page 20: ...rs IBM PC compatibles With an AppleTalk Network Compatible AppleTalk EtherTalk Phase 2 See the Driver Guide for compatible operating systems and computers With a Server Based Computing Environment Compatible Windows Terminal Server Services Microsoft WIndows NT 4 0 Terminal Server Edition Microsoft Windows 2000 Server Microsoft Windows Server 2003 Compatible Software Citrix MetaFrame 1 8 Citrix Me...

Page 21: ...il receiving server software Qpopper 2 53 or later UNIX Microsoft Exchange Server Windows Microsoft Exchange Server 5 5 Service Pack 1 or later Lotus Domino R4 6 or later Windows IMPORTANT If you are using Windows NT 4 0 you need to install Service Pack 6a or later If you are using Windows 2000 you need to install Service Pack 2 or later NOTE The machine sends e mail or I fax messages to mail serv...

Page 22: ...ver 4 0 and Internet Information Server 4 0 Microsoft Windows 2000 Server and Internet Information Services 5 0 Microsoft Windows XP Professional and Internet Information Services 5 1 Microsoft Windows Server 2003 and Internet Information Services 6 0 Solaris Version 2 6 or later Red Hat Linux 7 2 Mac OS X FTP server for imageWARE Gateway Compatible protocol TCP IP With a NetBIOS Network Compatibl...

Page 23: ... protocol NetBIOS over TCP IP NetBT With a NetWare Network Compatible server Novell NetWare Version 3 2 4 11 4 2 5 5 1 6 6 5 Compatible protocol IPX IMPORTANT If you are using Windows NT 4 0 you need to install Service Pack 6a or later If you are using Windows 2000 you need to install Service Pack 2 or later E210_NWG_US book Page 7 Wednesday August 18 2004 3 40 PM ...

Page 24: ...r NetBIOS NetBIOS over TCP IP protocol can be used Multiple protocols can also be used at the same time To use the e mail I fax function a TCP IP protocol is required After configuring the settings in accordance with Chapter 2 Settings Common to the Network Protocols see the following depending on the protocol Chapter 3 Using a TCP IP Network Chapter 4 Using a NetWare Network Windows Chapter 5 Usi...

Page 25: ...ent like the one below either TCP IP or NetBIOS NetBIOS over TCP IP protocol can be used Multiple protocols can also be used at the same time After configuring the settings in accordance with Chapter 2 Settings Common to the Network Protocols see the following depending on the protocol Chapter 3 Using a TCP IP Network Chapter 5 Using a NetBIOS Network IMPORTANT The machine does not support NetBEUI...

Page 26: ...ter 2 Settings Common to the Network Protocols see the following depending on the protocol Chapter 6 Using an AppleTalk Network Macintosh Chapter 3 Using a TCP IP Network IMPORTANT You can only use the e mail I fax functions or data sending functions for the machine if the optional equipment is installed For the equipment needed see Optional Equipment and System Environment Requirements on p 1 2 M...

Page 27: ...computers the TCP IP protocol is used After configuring the settings in accordance with Chapter 2 Settings Common to the Network Protocols see the following Chapter 3 Using a TCP IP Network Solaris SunOS Protocol TCP IP The Machine E210_NWG_US book Page 11 Wednesday August 18 2004 3 40 PM ...

Page 28: ... sending function a TCP IP NetWare or NetBIOS protocol is required After configuring the settings in accordance with Chapter 2 Settings Common to the Network Protocols see the following depending on the protocol Chapter 3 Using a TCP IP Network Chapter 4 Using a NetWare Network Windows Chapter 5 Using a NetBIOS Network IMPORTANT You can only use the e mail I fax functions or data sending functions...

Page 29: ...he desired protocol Chapters 3 to 6 be sure to set items explained in this chapter Network Environment Setup Procedures 2 2 Connecting the Machine to a Computer or Network 2 3 Connecting to a Network 2 4 Connecting to a USB Interface 2 5 Interface Settings 2 7 Settings from the Control Panel 2 7 Communication Environment Setup 2 12 Settings from the Control Panel 2 12 E210_NWG_US book Page 1 Wedne...

Page 30: ...n p 2 7 Specify the interface settings for communication between the machine and computers on your network To specify the settings use The machine s control panel The Remote UI via a web browser 3 Communication Environment Setup See Communication Environment Setup on p 2 12 Set up a configuration for communication between the machine and computers on your network IMPORTANT If you are configuring t...

Page 31: ... the interface cable or network cable be sure to observe the following precautions in order to avoid electrical shock Turn OFF the main power switch before disconnecting the power cord from the power outlet See Chapter 1 Before You Start Using This Machine in the Reference Guide Turn OFF the computer and disconnect the power cord from the power outlet IMPORTANT External USB devices e g memory keyb...

Page 32: ...T 100Base TX connector that can be used on most LANs Using Ethernet Connect the machine s RJ 45 connector to a hub port using a Category 5 twisted pair LAN cable IMPORTANT You cannot use the machine as a repeater bridge or gateway If two or more machines are on an AppleTalk network they should be switched on 10 seconds or more apart Hub Ethernet Cable PC with 100Base TX Connector PC with 10Base T ...

Page 33: ...tall a printer driver if necessary See the PCL Driver Guide the PS Driver Guide or the UFR II Driver Guide Connecting to a USB Interface You can connect the machine to a computer with a USB port via a USB cable The machine is USB 2 0 Hi Speed compatible The printer drivers USB class driver and utility that matches the operating system on your computer will be installed For more information on inst...

Page 34: ...necting the cable may cause your computer or machine to operate poorly When the machine is connected to a personal computer via the USB cable you will not be able to use some of the utilities See the Network Quick Start Guide NOTE If the machine is connected to a computer with a USB cable you can print a document from your computer using the printer driver or send a fax from your computer using th...

Page 35: ...protocol settings you can change the content by using the Remote UI NOTE For instructions on how to enter settings using the Remote UI see Chapter 3 Customizing Settings in the Remote UI Guide Settings from the Control Panel The procedures for specifying the settings from the control panel are as follows IMPORTANT Settings specified from the control panel become effective after the machine is rest...

Page 36: ... Manager ID and Password using the numeric keys appears on the touch panel display enter the System Manager ID and password For instructions on how to enter the System Manager ID and password see Chapter 2 Basic Operations in the Reference Guide 3 Press Network Settings E210_NWG_US book Page 8 Wednesday August 18 2004 3 40 PM ...

Page 37: ...uto Detect If you want the machine to automatically determine the communication mode Half duplex Full duplex and Ethernet type 10Base T 100Base TX Press On Skip to step 8 If you want to manually specify the communication mode Half duplex Full duplex and Ethernet type 10Base T 100Base TX Press Off Proceed to step 6 E210_NWG_US book Page 9 Wednesday August 18 2004 3 40 PM ...

Page 38: ...ttings screen If you want to alternately send and receive Press Half Duplex If you want to simultaneously send and receive Press Full Duplex 7 Specify Ethernet Type on the Ethernet Driver Settings screen If you want to establish a 10Base T network connection Press 10 Base T If you want to establish a 100Base TX network connection Press 100 Base TX 8 Confirm the settings you specified press OK The ...

Page 39: ...e Network Protocols NOTE For instructions on how to turn ON OFF the machine see Chapter 1 Before You Start Using This Machine in the Reference Guide The Ethernet driver settings are complete E210_NWG_US book Page 11 Wednesday August 18 2004 3 40 PM ...

Page 40: ...from the control panel is as follows IMPORTANT Settings specified from the control panel become effective after the machine is restarted after the procedure NOTE For instructions on how to enter characters using the touch panel display see Chapter 2 Basic Operations in the Reference Guide 1 Specify the SNMP settings If you want to set or browse each item of the machine with a utility that uses SNM...

Page 41: ...ou do not want to set or browse each item of the machine with a utility that uses SNMP to obtain information Press Additional Functions System Settings Network Settings Press or until SNMP Settings appears press SNMP Settings Press Off Press OK 2 Specify the port setting If you want to set or browse detailed information on the machine with a Canon printer driver or utility E210_NWG_US book Page 13...

Page 42: ...s OK The display returns to the Network Settings screen If you do not want to set or browse detailed information on the machine with a Canon printer driver or utility On the Network Settings screen press or until Enable Dedicated Port appears press Enable Dedicated Port Press Off Press OK The display returns to the Network Settings screen E210_NWG_US book Page 14 Wednesday August 18 2004 3 40 PM ...

Page 43: ...ning the machine on computers other than those whose IP addresses are allowed even if both Use SNMP and Enable Dedicated Port are On For details see Protocol Settings on p 3 3 3 If you are using the optional Multi PDL Printer Kit the optional Super G3 FAX Board or the optional Super G3 Multi Line FAX Board set the spooler Otherwise skip to step 5 If you want to spool print jobs transmitted to this...

Page 44: ...ted in the Macintosh Chooser For more information see Setting Up a Computer for Printing on p 6 8 If you print a file in PDF or PS format by specifying its URL on the Remote UI the print job will always be spooled regardless of the settings made under this option NOTE When you spool a print job on the machine s hard disk the time required to release a computer outputting a print job is shortened N...

Page 45: ... at least 10 seconds and then turn it ON NOTE For instructions on how to turn ON OFF the machine see Chapter 1 Before You Start Using This Machine in the Reference Guide The communication environment setup is complete Proceed to Chapters 3 to 6 depending on the protocol E210_NWG_US book Page 17 Wednesday August 18 2004 3 40 PM ...

Page 46: ...Communication Environment Setup 2 18 2 Settings Common to the Network Protocols E210_NWG_US book Page 18 Wednesday August 18 2004 3 40 PM ...

Page 47: ...cedures 3 2 Protocol Settings 3 3 Settings from the Control Panel 3 4 Setting Up a Computer for Printing Sending a Fax Windows UNIX 3 53 Printer Connection Method LPD Raw 3 55 Printer Connection Method IPP IPPS 3 66 Printer Connection Method FTP 3 70 Setting Up a Computer as a File Server 3 72 FTP Server Settings 3 73 E210_NWG_US book Page 1 Wednesday August 18 2004 3 40 PM ...

Page 48: ... Server See Setting Up a Computer as a File Server on p 3 72 Specify the settings of the computer receiving data sent from the machine You can only send data if the optional equipment is installed For the equipment needed see Optional Equipment and System Environment Requirements on p 1 2 IMPORTANT It is recommended that steps 1 and 3 above be performed by the network administrator The machine or ...

Page 49: ... is not possible to use the Remote UI on computers whose IP addresses are not allowed a utility on the computers cannot be used to set or browse detailed information concerning the machine Once you set the range of IP addresses of computers from which data print fax I fax job can be sent to the machine the machine rejects data sent from computers whose IP addresses are not allowed For instructions...

Page 50: ...or instructions on how to enter characters using the touch panel display see Chapter 2 Basic Operations in the Reference Guide TCP IP Settings NOTE If only the optional Multi PDL Printer Kit the optional Super G3 FAX Board or the optional Super G3 Multi Line FAX Board is installed set the following items LPD Settings See step 13 RAW Settings See step 14 IPP Settings See step 18 1 Press Additional ...

Page 51: ...e numeric keys appears on the touch panel display enter the System Manager ID and password For instructions on how to enter the System Manager ID and password see Chapter 2 Basic Operations in the Reference Guide 3 Press Network Settings 4 Press TCP IP Settings E210_NWG_US book Page 5 Wednesday August 18 2004 3 40 PM ...

Page 52: ... Enter the IP address using numeric keys Specify the Subnet Mask and Gateway Address settings in the same way Using DHCP Press DHCP Enter the IP address subnet mask and gateway address If this information cannot be obtained via DHCP after you restart the machine the settings entered in this step are used E210_NWG_US book Page 6 Wednesday August 18 2004 3 40 PM ...

Page 53: ...s step are used If the machine is restarted after DHCP BOOTP or RARP settings are complete the TCP IP Settings screen displays the IP address setting values obtained from the DHCP BOOTP or RARP server If the IP address host name and domain name have been previously set these will be overwritten by the setting values obtained from DHCP BOOTP or RARP If you use DHCP without the DNS dynamic update fu...

Page 54: ...IP address of a DNS server using numeric keys If you do not want to set up a DNS secondary server enter 0 0 0 0 10 Enter the host name and domain name Enter the name of the machine as Host Name and the network domain name of the machine as Domain Name Example Host Name host_name Domain Name organization company com E210_NWG_US book Page 8 Wednesday August 18 2004 3 40 PM ...

Page 55: ...is available in the environment where there is a dynamic DNS server To use the DNS dynamic update function enter the IP address of a DNS server and the host name and domain name of the machine See steps 9 and 10 12 Confirm the settings you specified press OK The display returns to the TCP IP Settings screen 13 Specify the LPD settings If you want to use LPD as the print application On the TCP IP S...

Page 56: ...ettings you specified press OK The display returns to the TCP IP Settings screen If you do not want to use LPD as the print application On the TCP IP Settings screen press or until LPD Settings appears press LPD Settings Press Off Confirm the settings you specified press OK The display returns to the TCP IP Settings screen 14 Specify the Raw settings If you want to use Raw as the print application...

Page 57: ...SNTP settings IMPORTANT In order to perform time synchronization through SNTP it is necessary to set the time zone of the region in which you are using the machine in advance For instructions on how to set the time zone see Chapter 6 System Manager Settings in the Reference Guide If you want to perform time synchronization using SNTP On the TCP IP Settings screen press or until SNTP Settings appea...

Page 58: ...hat enables the machine to print jobs which are uploaded to this server from PCs on the network This function is for use in special environments such as in a large scale system that includes a printing function for processing a large amount of business data This function however is not a general printing method For more information on the type of data you can print and the procedure for printing v...

Page 59: ...the touch panel display The port number is 21 and cannot be changed If you do not want to use FTP as the print application On the TCP IP Settings screen press or until FTP Print Settings appears press FTP Print Settings Press Off for Use FTP printing Confirm the settings you specified press OK The display returns to the TCP IP Settings screen 17 Specify the PASV mode for FTP IMPORTANT Whether you ...

Page 60: ...Settings screen 18 Specify the IPP settings If you want to use IPP as the print application On the TCP IP Settings screen press or until IPP Settings appears press IPP Settings Press On Pressing On for IPP Settings automatically sets Use HTTP to On To use SSL to encrypt the IPP data press On for Use SSL E210_NWG_US book Page 14 Wednesday August 18 2004 3 40 PM ...

Page 61: ...User and the password to use for IPP authentication in Password Confirm the settings you specified press OK The display returns to the TCP IP Settings screen If you do not want to use IPP as the print application On the TCP IP Settings screen press or until IPP Settings appears press IPP Settings Press Off Confirm the settings you specified press OK The display returns to the TCP IP Settings scree...

Page 62: ...e If you do not want to share device information with multiple devices On the TCP IP Settings screen press or until Discovery Settings appears press Discovery Settings Press Off for Response Press OK The display returns to the TCP IP Settings screen 20 Specify the HTTP settings On the TCP IP Settings screen press or until Use HTTP appears press Use HTTP If you want to use the Remote UI or IPP pres...

Page 63: ...t on the System Settings screen 21 If you are using the optional Multi PDL Printer Kit set a proxy Otherwise skip to step 22 If you want to use a proxy server On the TCP IP Settings screen press or until Proxy Settings appears press Proxy Settings Press On for Use Proxy Press Server Address to enter a proxy server IP address or name Press Port Number to enter the port number of a proxy server usin...

Page 64: ...ngs Press Off for Use Proxy Press OK The display returns to the TCP IP Settings screen IMPORTANT If you are using the optional Multi PDL Printer Kit you can print a file in the PDF or PS format by specifying its URL on the Remote UI To print a file by specifying its URL on the Remote UI you need to make the following settings Use HTTP On See step 20 Proxy Settings The settings suitable for your en...

Page 65: ...ses of computers from which data print fax I fax job can be sent to the machine On the TCP IP Settings screen press or until IP Address Range Settings appears press IP Address Range Settings Press Permit IP Address es for RX Print Range E210_NWG_US book Page 19 Wednesday August 18 2004 3 40 PM ...

Page 66: ...he display returns to the IP Address Range Settings screen If you want to restrict the IP addresses of computers from which data print fax I fax job can be sent to the machine On the TCP IP Settings screen press or until IP Address Range Settings appears press IP Address Range Settings Press Permit IP Address es for RX Print Range Press On for Apply Settings press Register E210_NWG_US book Page 20...

Page 67: ...he range press OK Press OK The display returns to the IP Address Range Settings screen Press Reject IP Address es for RX Print Range Press On for Apply Settings press Register If you want to store only one IP address press Single Address enter the IP address that is to be rejected using numeric keys press OK If you want to store a range of IP addresses that are to be rejected press Multiple Addres...

Page 68: ... set or browsed using the Remote UI or utility On the TCP IP Settings screen press or until IP Address Range Settings appears press IP Address Range Settings Press Permit IP Address es for Setting Browsing Range Press Off for Apply Settings press OK The display returns to the IP Address Range Settings screen Press Reject IP Address es for Setting Browsing Range E210_NWG_US book Page 22 Wednesday A...

Page 69: ... UI or utility On the TCP IP Settings screen press or until IP Address Range Settings appears press IP Address Range Settings Press Permit IP Address es for Setting Browsing Range Press On for Apply Settings press Register If you want to store only one IP address press Single Address enter the IP address that is to be permitted using numeric keys press OK The display returns to the IP Address Rang...

Page 70: ...ress es for Setting Browsing Range Press On for Apply Settings press Register If you want to store only one IP address press Single Address enter the IP address that is to be rejected using numeric keys press OK If you want to store a range of IP addresses that are to be rejected press Multiple Addresses press First Address enter the first IP address in the range using numeric keys press Last Addr...

Page 71: ...dress es are not permitted If Apply Settings for both Permit IP Address es and Reject IP Address es is set to On IP addresses that are beyond the ranges of both Permit IP Address es and Reject IP Address es are not permitted If Apply Settings for both Permit IP Address es and Reject IP Address es is set to On IP addresses that are within the ranges of both Permit IP Address es and Reject IP Addres...

Page 72: ... addresses to allow access to press OK Press OK The display returns to the TCP IP Settings screen IMPORTANT Up to 100 MAC addresses can be specified If you select On for Apply Settings you will become unable to access from MAC addresses which have not been specified Check the MAC addresses carefully before specifying them If the corresponding MAC address does not exist you will become unable to ac...

Page 73: ...edly until the Additional Functions screen closes 26 Restart the machine Turn OFF the machine wait at least 10 seconds and then turn it ON NOTE For instructions on how to turn ON OFF the machine see Chapter 1 Before You Start Using This Machine in the Reference Guide 27 Check to see if the network settings you specified are set correctly Press Additional Functions System Settings Network Settings ...

Page 74: ...to a switching hub the machine may not be able to connect to a network even though your network settings are appropriate This problem may be resolved by delaying the startup of network communications for the machine See Startup Time Settings on p 3 51 for information on how to set up the startup time Press Done press or until SNTP Settings appears press SNTP Settings Press NTP Server Check OK is d...

Page 75: ...n also use this key pair and server certificate to enable encrypted SSL communication The procedure for generating and registering a key pair and self signed server certificate using the control panel of the machine is as follows IMPORTANT Up to two key pairs can be registered 1 Press Additional Functions System Settings Network Settings 2 Press TCP IP Settings The TCP IP Settings screen is displa...

Page 76: ... key pair IMPORTANT Up to 24 alphanumeric characters can be entered for Key Name Press 512 or 1024 for Key Length bit You cannot generate a key pair with a key length other than 512 or 1024 bit 6 Set the self signed server certificate Press Next The Digital Certificate Settings screen is displayed E210_NWG_US book Page 30 Wednesday August 18 2004 3 40 PM ...

Page 77: ...ot issue a server certificate if all the items are left blank A DNS server is necessary to use the FQDN of the machine in Shared Name Use the IP address of the machine if you do not have a DNS server Press OK Country Name Select the country name from the 25 countries in the list or enter an Internet country code 2 characters maximum State Set the state name 24 characters maximum City Set the city ...

Page 78: ...firm the key pair and server certificate you have registered see Editing Key Pairs and Server Certificates on p 3 35 You cannot use any of the keys until a key pair has been generated and registered 9 Press Done The display returns to the TCP IP Settings screen 10 Press Done repeatedly until the Additional Functions screen closes 11 Restart the machine Turn OFF the machine wait at least 10 seconds...

Page 79: ...eb browser Remote UI The procedure for registering installed files in the machine using the control panel is as follows IMPORTANT Up to two key pairs can be registered For instructions on how to install a key pair file and server certificate file see the Remote UI Guide 1 Press Additional Functions System Settings Network Settings 2 Press TCP IP Settings The TCP IP Settings screen is displayed 3 P...

Page 80: ...name of the private key in Key Name and the password for the private key in Password press OK IMPORTANT You can register only key pair files which use the RSA algorithm 7 When the confirmation message is displayed press OK NOTE For instructions on how to confirm a registered key pair and server certificate see Editing Key Pairs and Server Certificates on p 3 35 E210_NWG_US book Page 34 Wednesday A...

Page 81: ...de The procedure for registering the key pair and server certificate is complete Editing Key Pairs and Server Certificates You can confirm the settings of registered key pairs and server certificates You can also erase unnecessary key pairs and server certificates and set the default key pair The key pair set as the default key pair is used for SSL communication 1 Press Additional Functions System...

Page 82: ...e server certificate you want to confirm press Certificate Details The Certificate Details screen is displayed To perform verification on the server certificate press Certificate Verification The verification results are displayed on the bottom of the Certificate Details screen Confirm the displayed information press Done The Key and Certificate List screen is displayed E210_NWG_US book Page 36 We...

Page 83: ... is set to On for any of the following items that key pair cannot be erased The key pair can be erased when all of the settings are set to Off Remote UI See the Remote UI Guide IPP Settings See step 18 of TCP IP Settings on p 3 14 SMTP Reception in E Mail I Fax See step 6 of E Mail I Fax Settings on p 3 48 Receiving Settings in Device Information Delivery Settings See the Reference Guide When the ...

Page 84: ...air press Default Key Settings NOTE The key pair with default displayed to the left of it is set as the default key pair To change the default key pair select a key pair which does not have default displayed to the left of it When the confirmation message is displayed press Yes Confirm the displayed information press Done The Key and Certificate List screen is displayed Press Done The display retu...

Page 85: ...ring a CA Certificate File Installed from a Computer Apart from the X 509 DER format CA certificate preinstalled in the machine you can also register a CA certificate file which has been installed using a web browser Remote UI The procedure for registering installed files in the machine using the control panel is as follows IMPORTANT For instructions on how to install a CA certificate file see the...

Page 86: ...r CA Certificate 5 Select the file to register press Register NOTE To erase an unnecessary file select the file press Erase When the confirmation message is displayed press Yes 6 When the confirmation message is displayed press Yes NOTE To confirm the CA certificate you have registered see Editing a CA Certificate on p 3 41 E210_NWG_US book Page 40 Wednesday August 18 2004 3 40 PM ...

Page 87: ...OFF the machine see Chapter 1 Before You Start Using This Machine in the Reference Guide The procedure for registering CA certificates is complete Editing a CA Certificate You can confirm the settings of registered CA certificates You can also erase unnecessary CA certificates 1 Press Additional Functions System Settings Network Settings 2 Press TCP IP Settings The TCP IP Settings screen is displa...

Page 88: ... the CA certificate you want to confirm press Certificate Details The Certificate Details screen is displayed To perform verification on the CA certificate press Certificate Verification The verification results are displayed on the bottom of the Certificate Details screen Confirm the displayed information press Done The CA Certificate List screen is displayed E210_NWG_US book Page 42 Wednesday Au...

Page 89: ...t the CA certificate to erase press Erase When the confirmation message is displayed press Yes Confirm the displayed information press Done The CA Certificate List screen is displayed Press Done The display returns to the Certificate Settings screen 6 Press Done The display returns to the TCP IP Settings screen E210_NWG_US book Page 43 Wednesday August 18 2004 3 40 PM ...

Page 90: ... machine see Chapter 1 Before You Start Using This Machine in the Reference Guide The procedure for editing CA certificates is complete E Mail I Fax Settings IMPORTANT You can only use the e mail I fax functions if the optional equipment is installed For the equipment needed see Optional Equipment and System Environment Requirements on p 1 2 1 Press Additional Functions 2 Press System Settings E21...

Page 91: ...n how to enter the System Manager ID and password see Chapter 2 Basic Operations in the Reference Guide 3 Press Network Settings 4 Press or until E mail I Fax appears press E mail I Fax 5 Specify the mail server for receiving e mail I faxes The machine supports both SMTP and POP3 functions NOTE The machine can receive I fax images and communication error notices only E210_NWG_US book Page 45 Wedne...

Page 92: ...ter the host name after the symbol in the e mail address Input Example ifax host_name organization company com In this example the host name of the machine registered with the DNS server is host_name organization company com If you want to receive e mail I faxes using a POP server Press On for POP press Off for SMTP Receipt Press E mail Address enter the e mail address your machine will use Input ...

Page 93: ...or instructions on how to manually check the POP server see Chapter 8 Checking Changing the Send Receive Status in the Sending and Facsimile Guide Press Authent Encryption Select the authentication method supported by the POP server from Standard APOP or POP AUTH If you want to send encrypted data press On for Allow SSL POP IMPORTANT If the POP server does not support SSL encryption data is not en...

Page 94: ... before sending e mail Press SMTP Server enter the SMTP server IP address or name using the keyboard on the touch panel display Input Example IP address 192 168 1 1 Name smtp organization company com Press Authent Encryption press On for POP Authentication before Sending press Off for SMTP Authentication SMTP AUTH Press OK The display returns to the E mail I Fax screen E210_NWG_US book Page 48 Wed...

Page 95: ...ions from the host not using SSL are rejected IMPORTANT Even if you select SSL for Allow SSL SMTP Receive the data will not be encrypted if the SMTP host does not support encryption In order to select SSL or On for Allow SSL SMTP Receive to allow SSL transmission it is necessary to generate a key pair in advance For instructions on how to generate a key pair see Generating a Key Pair and Server Ce...

Page 96: ...ess 192 168 1 1 Name smtp organization company com Press Authent Encryption press Off both for SMTP Authentication SMTP AUTH and POP Authentication before Sending Press OK The display returns to the E mail I Fax screen 7 Confirm the settings you entered press OK 8 Press Done repeatedly until the Additional Functions screen closes 9 Restart the machine Turn OFF the machine wait at least 10 seconds ...

Page 97: ...e spanning tree process performed between switching hubs prevents them from communicating with each other immediately after the machine connects to a switching hub In this case use the following procedure to delay the start of communication 1 Press Additional Functions System Settings Network Settings 2 Press or until StartupTime Settings appears press Startup Time Settings E210_NWG_US book Page 5...

Page 98: ...splay returns to the Network Settings screen 5 Press Done repeatedly until the Additional Functions screen closes 6 Restart the machine Turn OFF the machine wait at least 10 seconds and then turn it ON NOTE For instructions on how to turn ON OFF the machine see Chapter 1 Before You Start Using This Machine in the Reference Guide The startup time settings are complete E210_NWG_US book Page 52 Wedne...

Page 99: ...ing information as a guide to determine the print application you are using and then perform the necessary operations LPD This is the print application generally used with TCP IP See Printer Connection Method LPD Raw on p 3 55 Raw This is a print application used with Windows It can send a job to the machine at higher speeds than LPD See Printer Connection Method LPD Raw on p 3 55 IPP IPPS This is...

Page 100: ...Network Quick Start Guide If Windows NT 2000 XP Server 2003 is on your network the following procedure enables you to set up a print server for more efficient management of network printers Once a print server is set up print jobs can be managed by the print server Also by setting up an alternate driver for the print server printer drivers can be installed in each computer via the network For inst...

Page 101: ...allation in Chapter 2 Getting Started in the PS Driver Guide If you want to use the fax driver See the procedure for dynamic installation in Chapter 2 Getting Started in the Fax Driver Guide IMPORTANT If your computer fails to transmit data to the printer during installation of the driver when the error message appears click No set the byte count mode to off NOTE The print application will be LPD ...

Page 102: ...e machine prints without spooling a print job on the hard disk regardless of its spool settings The installation of the driver and the port settings is complete Windows 2000 XP Server 2003 Installing a New Driver 1 Install the driver Install the driver according to the following procedures indicated in the manual for each driver If you want to use the PCL printer driver See the procedure for dynam...

Page 103: ... User s Guide see the Network Quick Start Guide If you use Canon LPR2 the port changes are complete IMPORTANT If you use LPD enter one of the following in LPR Queue Name in the Add Port dialog box of Canon LPR2 LP The machine prints according to its spool settings Normally enter LP as a print queue SPOOL The machine prints only after spooling a print job on the hard disk regardless of its spool se...

Page 104: ...s 3 Right click the icon of the printer you installed click Properties 4 Click the Ports tab to display the Ports sheet 5 Click Add Port to open the Printer Ports dialog box 6 From Available ports types select Standard TCP IP Port click New Port The Add Standard TCP IP Printer Port Wizard starts 7 Click Next 8 Enter the printer IP address or printer host name For Windows 2000 E210_NWG_US book Page...

Page 105: ...ow appears click Finish If the dialog box displays Additional Port Information Required follow the instructions on the screen to search again or click Standard click Canon Network Printing Device with P9100 under Device type click Next to exit the Wizard 9 Click Close to close the Printer Ports dialog box 10 If you want to use LPD change the port configuration information If you want to use Raw pr...

Page 106: ...ts according to its spool settings Normally LP is entered as a print queue SPOOL The machine prints only after spooling a print job on the hard disk regardless of its spool settings DIRECT The machine prints without spooling a print job on the hard disk regardless of its spool settings NOTE If you are using Raw this step is not required 11 Click OK The installation of the driver and the port setti...

Page 107: ...If Microsoft TCP IP Printing is not included in Network Services proceed to step 2 otherwise skip to step 3 2 If Microsoft TCP IP Printing is not installed install it Click Add in the Services sheet Select Microsoft TCP IP Printing from Network Services click OK When asked to insert the Windows NT setup disk insert the disk in the CD ROM drive After the files have been copied the Network dialog bo...

Page 108: ...ails on print queues and instructions on how to change the settings see Changing the Port after Installing the Driver on p 3 62 Changing the Port after Installing the Driver 1 Install Canon LPR2 and change the port settings If you do not want to use Canon LPR2 proceed to step 2 For instructions on how to install Canon LPR2 and set ports see Chapter 1 Using Canon LPR2 in the Canon LPR2 User s Guide...

Page 109: ... click the icon of the printer you installed click Properties 4 Click the Ports tab to display the Ports sheet 5 Click Add Port to open the Printer Port dialog box 6 From Available Printer Ports select LPR Port click New Port The Add LPR compatible printer dialog box opens IMPORTANT If LPR Port is not displayed you need to install the Microsoft TCP IP Printing service Click Cancel to close all dia...

Page 110: ... three print queues are available LP The machine prints according to its spool settings Normally LP is entered as a print queue SPOOL The machine prints only after spooling a print job on the hard disk regardless of its spool settings DIRECT The machine prints without spooling a print job on the hard disk regardless of its spool settings 9 Click OK The installation of the driver and the port setti...

Page 111: ...Add Access to Printer In Printer Name enter the desired print queue name You can specify a print queue The following three print queues are available LP The machine prints according to its spool settings Normally LP is entered as a print queue SPOOL The machine prints only after spooling a print job on the hard disk regardless of its spool settings DIRECT The machine prints without spooling a prin...

Page 112: ...ollowing is the procedure for specifying the port setting Windows 98 Me NT 4 0 NOTE If you are using Windows 98 Me you can also set IPP by installing the IPP Client software for Windows 98 Me supplied by Microsoft In the following procedures items displayed on the screen for Windows 98 are used items might differ depending on your operating system 1 Check the settings for RX Print Range in IP Addr...

Page 113: ...to use the fax driver See the procedure for standard installation in Chapter 2 Getting Started in the Fax Driver Guide When the dialog box for selecting the port appears during installation click Use Standard Port 4 When you have finished installing the drivers use Canon LPR2 to set the ports For instructions on how to install Canon LPR2 and set ports see Chapter 1 Using Canon LPR2 in the Canon LP...

Page 114: ...P Address Range Settings do not permit the IP address you cannot install a driver If the IP address of the computer is beyond the range of the permitted addresses set for RX Print Range after installing a driver you cannot print from the computer NOTE For details see step 22 in TCP IP Settings on p 3 4 2 Start the Add Printer Wizard If you are using Windows 2000 On the Start menu point to Settings...

Page 115: ...log box for locating your printer appears If you are using Windows 2000 click Connect to a printer on the Internet or on your intranet If you are using Windows XP Server 2003 click Connect to a printer on the Internet or on a home or office network If you want to use regular IPP printing enter the following URL in URL http the IP address or host name of the machine ipp If you want to use encrypted...

Page 116: ... general printing method The only types of data you can print using this method are plain text data and binary data after it has passed through the printer driver Since jobs uploaded to the FTP server are printed without passing through a printer driver if you upload application data it does not pass through a printer driver and therefore will never be printed correctly The following is the proced...

Page 117: ...220 Connection established Name 172 24 176 244 none user_name User login 331 Password required to login Password Enter password 230 User user_name logged in ftp bin Set file type 200 Type set to IMAGE binary ftp put print txt Upload print file 200 PORT command successful 150 Opened BINARY data connection for file transfer 226 Transfer complete ftp bye Cut off server connection 221 Server closing d...

Page 118: ...er see Setting Up a Computer as a File Server on p 5 17 IMPORTANT You can only send data from the machine if the optional equipment is installed For the equipment needed see Optional Equipment and System Environment Requirements on p 1 2 Samba 2 2 8a or later is supported This section describes only the procedures for setting up a computer to receive data sent from the machine To send data from th...

Page 119: ... of Microsoft Internet Information Services 6 0 IIS 6 0 If IIS is not installed in the computer you are using you will need to install IIS before entering these settings For installation procedures see the manuals provided with your operating system Verification of users for access to FTP servers is done by referencing the local account database Windows 2000 Server XP Professional Server 2003 that...

Page 120: ...n the Start menu point to Administrative Tools click Internet Information Services Manager 3 Enter the FTP site settings Right click the Default FTP Site icon click Properties In Windows Server 2003 the Default FTP Site icon is displayed under FTP Sites In the Default FTP Site Properties dialog box click the Security Accounts tab to display the Security Accounts sheet If you are using Windows 2000...

Page 121: ...ick OK to close the Default FTP Site Properties dialog box 4 Confirm Full computer name If you are using Windows 2000 Right click the My Computer icon on the desktop click Properties Click the Network Identification tab to display the Network Identification sheet confirm Full computer name For Windows 2000 E210_NWG_US book Page 75 Wednesday August 18 2004 3 40 PM ...

Page 122: ...splay the Computer Name sheet confirm Full computer name Click Cancel to close the dialog box 5 Set up the users and passwords for access to the FTP server If you are using Windows 2000 right click the My Computer icon click Manage The Computer Management window opens If you are using Windows XP Server 2003 on the Start menu right click My Computer click Manage The Computer Management window opens...

Page 123: ... the password in Confirm Password Enter a user name and a password not longer than 24 alphanumeric characters If User must change password at next logon is selected any new users added must change their passwords in order to send data from the machine You cannot change the password from the control panel Confirm the settings click Create Close the Computer Management window For Windows 2000 For Wi...

Page 124: ... setting Server side settings The machine s recipient settings Full Computer Name starfish organization company com Create a directory named share in the specified FTP server s home directory lnetpub ftproot and then set share as the data destination The Protocol drop down list FTP Host Name starfish organization company com File Path share User User name entered in step 5 Password Password for th...

Page 125: ... Sending and Facsimile Guide The settings for sending data to the FTP server are complete Windows NT 4 0 IMPORTANT It is recommended that Windows NT Server 4 0 be configured by the network manager The use of Windows NT Server as an FTP server requires the installation of Microsoft Internet Information Server 4 0 IIS 4 0 If IIS 4 0 is not installed in your computer you will need to install IIS 4 0 ...

Page 126: ...ive or directory may differ For details see the Windows NT Server 4 0 manual 2 Start IIS 4 0 NOTE For instructions on how to start IIS 4 0 see the manual provided with IIS 4 0 3 Enter the FTP site settings Right click the Default FTP Site icon click Properties In the Default FTP Site Properties dialog box click the Security Accounts tab to display the Security Accounts sheet deselect Allow Anonymo...

Page 127: ...t select both Read and Write Click OK to close the Default FTP Site Properties dialog box 4 Confirm Host Name and Domain Right click the Network Neighborhood icon on the desktop click Properties In the Network dialog box click the Protocols tab to display the Protocols sheet E210_NWG_US book Page 81 Wednesday August 18 2004 3 40 PM ...

Page 128: ...rk Protocols double click TCP IP Protocol The Microsoft TCP IP Properties dialog box opens Click the DNS tab to display the DNS sheet confirm the host name and domain settings Click Cancel to close the Network dialog box E210_NWG_US book Page 82 Wednesday August 18 2004 3 40 PM ...

Page 129: ... characters If User Must Change Password at Next Logon is selected any new users added must change their password in order to send data from the machine You cannot change the password from the control panel Confirm the settings you entered click Add Exit the User Manager 6 Set a recipient address using the control panel Sample recipient setting Server side settings confirmed in step 4 Host name st...

Page 130: ...on the control panel If you switch the language of the touch panel display Host Name and File Path may not be displayed correctly If the FTP port number is set to a value other than 21 specify the following for Host Name IP address of FTP server Port number Example 192 168 1 21 21000 NOTE For instructions on how to specify recipient address settings see Chapter 2 Basic Sending Methods in the Sendi...

Page 131: ... to a workstation as a superuser 2 Set up the users who send documents from the machine and their passwords Enter a user name and a password not longer than 24 alphanumeric characters 3 Create a shared directory to be used for recipient addresses and then enable read access and write access by the users who will be sending data 4 Set a recipient address using the control panel Sample recipient set...

Page 132: ...anel display Host Name and File Path may not be displayed correctly If the FTP port number is set to a value other than 21 specify the following for Host Name IP address of FTP server Port number Example 192 168 1 21 21000 NOTE For instructions on how to specify recipient address settings see Chapter 2 Basic Sending Methods in the Sending and Facsimile Guide The settings for sending data to the FT...

Page 133: ...of the user to whom you want to send data from the machine through Mac OS X enter the password Enter a user name and a password not longer than 24 alphanumeric characters Close the Users window 4 Create a shared folder to which files are to be sent Sample setting Create a folder named iR_Folder in the Public folder in the Home folder 5 Grant access to the shared folder created in step 4 Click to s...

Page 134: ...e entered for File Path on the control panel If you switch the language of the touch panel display Host Name and File Path may not be displayed correctly If the FTP port number is set to a value other than 21 specify the following for Host Name IP address of FTP server Port number Example 192 168 1 21 21000 The Protocol drop down list FTP Host Name IP address of Macintosh User User name entered in...

Page 135: ...tore data sent from the machine For details about the settings see the imageWARE Gateway User s Guide NOTE Up to 128 alphanumeric characters can be entered for a folder name Enter a user name and a password not longer than 24 alphanumeric characters 3 On the FTP server for imageWARE Gateway export destination data For details about the settings see the imageWARE Gateway User s Guide IMPORTANT A DN...

Page 136: ...3 Select Custom Format from File Format Click Start Import IMPORTANT If the System Manager ID and password of the machine are set the dialog box for entering a user name and password appears enter the System Manager ID in User Name and password in Password If you switch the language of the touch panel display Host Name and File Path may not be displayed correctly If the FTP port number is set to a...

Page 137: ...Print Service Settings 4 3 Types of Print Service 4 4 Setup Using NetWare Administrator or PCONSOLE 4 5 Protocol Settings 4 9 Settings from the Control Panel 4 9 Setting Up a Computer for Printing Sending a Fax 4 17 Connecting to a NetWare Network 4 17 Printer Connection Method 4 17 Setting Up a Computer as a File Server 4 18 E210_NWG_US book Page 1 Wednesday August 18 2004 3 40 PM ...

Page 138: ...Canon utility NetSpot Console via a web browser Canon utility 3 Computer Settings for Printing See Setting Up a Computer for Printing Sending a Fax on p 4 17 Specify the settings of each computer you use for printing or sending a fax You can only print or send a fax from a computer if the optional equipment is installed For the equipment needed see Optional Equipment and System Environment Require...

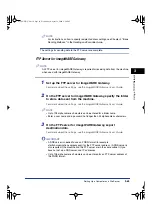
Page 139: ...ll installed To specify the print service settings using NetSpot Console the computer with NetSpot Console installed must have Novell Client NetWare Client by Novell installed and TCP IP protocol must be supported by your network environment The following procedures describe a sample NetWare setup Depending on your environment the actual setup procedure may differ NOTE You can specify the print se...

Page 140: ... the network environment you are using If you are using NetWare 3 2 only the Bindery mode is available Queue Server Mode and Remote Printer Mode The machine supports both the queue server mode and the remote printer mode Queue Server Mode If the machine is used in the queue server mode all print server functions are provided by the machine itself no other print server hardware or software is requi...

Page 141: ... Printer enter the printer name in Name From Type select the printer connection method If you are using the queue server mode select Other Unknown from Type If you are using the remote printer mode select Parallel from Type click Communication to open the Parallel Communication dialog box select LPT1 from Port and Manual load under Connection type Under Interrupts specify the appropriate setting f...

Page 142: ...e print server On the Available Options menu select Print Server Information press ENTER on the keyboard Press INSERT on the keyboard Enter the name of the print server you are setting up press ENTER on the keyboard Press ESC on the keyboard to return to the Available Options menu NOTE Be sure to remember the name of the print server You need it to specify the printer s protocol settings 3 Set up ...

Page 143: ... want to use press ENTER on the keyboard 5 Specify the printer name type etc In Name enter the name you want to use for the printer press ENTER on the keyboard If you are using the queue server mode select Defined elsewhere from Type If you are using the remote printer mode select Remote Parallel LPT1 from Type Specify the remaining items press ESC on the keyboard In the confirmation box that open...

Page 144: ...etWare file server as a print server enter LOAD PSERVER NLM print server name on the file server press ENTER on the keyboard If you are using a dedicated print server enter PSERVER EXE enter the print server name on the print server press ENTER on the keyboard NOTE This step is not required if you are using the queue server mode NetWare print service settings are complete Proceed to Protocol Setti...

Page 145: ... or NetSpot Console see Network Setting Items on p 9 2 The following procedure describes sample settings using the control panel NOTE For instructions on how to enter settings using the Remote UI see Chapter 3 Customizing Settings in the Remote UI Guide For more information on NetSpot Device Installer or NetSpot Console see Chapter 7 Using Utilities to Make Network and Device Settings Settings fro...

Page 146: ...ger ID and Password using the numeric keys appears on the touch panel display enter the System Manager ID and password For instructions on how to enter the System Manager ID and password see Chapter 2 Basic Operations in the Reference Guide 3 Press Network Settings E210_NWG_US book Page 10 Wednesday August 18 2004 3 40 PM ...

Page 147: ...e for your environment from the Frame Type drop down list If you select Auto Detect the frame type is automatically determined 7 Select the print service from the Print Service drop down list Specify the same settings specified in NetWare Print Service Settings on p 4 3 E210_NWG_US book Page 11 Wednesday August 18 2004 3 40 PM ...

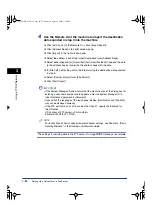
Page 148: ... selecting the desired options from the list on the screen that appears when you press Browse or by entering the desired character string for each item To select from the Browse screen proceed to step 9 to enter character strings skip to step 10 9 Specify the print service details Specify the same tree context file server and print server names that you specified in NetWare Print Service Settings ...

Page 149: ...g NetWare Press OK Skip to step 11 Setting NDS PServer or NPrinter If the browse right is limited to the specific user Press Browse In the Browse screen press the tree to which you want to log in press Down Select the context to which you want to log in press Down repeatedly if necessary Press Log In If the browse right is limited to the specific user it is necessary to log in to NetWare as a user...

Page 150: ...tting Bindery PServer or RPrinter Press Browse In the Browse screen select the file server to which the desired print server belongs press Down In the Enter Network Password screen enter the name and password of a user on the file server press OK If the password is not specified leave Password blank Select the desired print server press OK For Bindery PServer specify each item on the screen for se...

Page 151: ...h the desired print server belongs Press Context to enter the name of the context to which the desired print server belongs For NDS PServer specify each of the other items if necessary Press OK to return to the screen for setting NetWare Press OK Setting Bindery PServer or RPrinter Press Print Server to enter the name of the desired print server Press File Server to enter the name of the file serv...

Page 152: ...screen closes 12 Restart the machine Turn OFF the machine wait at least 10 seconds and then turn it ON NOTE For instructions on how to turn ON OFF the machine see Chapter 1 Before You Start Using This Machine in the Reference Guide The protocol settings are complete E210_NWG_US book Page 16 Wednesday August 18 2004 3 40 PM ...

Page 153: ...he driver according to the following procedures indicated in the manual for each driver The UFR II printer driver is not available for Windows NT If you want to use the PCL printer driver See the procedure for standard installation in Chapter 2 Getting Started in the PCL Driver Guide If you want to use the PS printer driver See the procedure for standard installation in Chapter 2 Getting Started i...

Page 154: ...vironment This section describes only the procedures for setting up a computer receiving data sent from the machine To send data from the machine to a server on the network you must enter an address setting from the control panel For instructions on how to specify recipient address settings see Chapter 2 Basic Sending Methods in the Sending and Facsimile Guide In some environments additional detai...

Page 155: ... or you can press each key to enter the desired value for each item Sample recipient settings NDS Mode Example If you send data to the data under share_vol in the above tree structure the settings of the host name and the file path differ depending on the location of a user account TREE CANON SALES SALES_JP share_vol volume data directory jenkins user SALES_US john user smith user MARKETING Tokyo ...

Page 156: ...ol data User CN jenkins Password Password for the above user Host Name SALES_US SALES TREE CANON File Path share_vol SALES_JP data One dot is required before data User CN john Password Password for the above user Host Name SALES TREE CANON File Path share_vol SALES_JP data User CN smith Password Password for the above user Host Name Tokyo MARKETING TREE CANON File Path share_vol SALES_JP SALES dat...

Page 157: ...ative path from the user context You may omit the xx portion but the TREE portion with the tree name may not be omitted Enter a user name prefixed with CN Unless the same directory tree contains the user account name by which a user logs in and the volume object to which data is sent dots are required according to the layer of the relative path For example one dot is required to indicate the layer...

Page 158: ...Setting Up a Computer as a File Server 4 22 4 Using a NetWare Network Windows E210_NWG_US book Page 22 Wednesday August 18 2004 3 40 PM ...

Page 159: ...ings from the Control Panel 5 3 Setting Up a Computer for Printing Sending a Fax 5 11 Connecting to a TCP IP Network 5 11 Connecting to a NetBIOS Network 5 11 Printer Connection Method 5 15 Setting Up a Computer as a File Server 5 17 Connecting to a TCP IP Network 5 17 Connecting to a NetBIOS Network and Configuring a Shared Folder 5 18 E210_NWG_US book Page 1 Wednesday August 18 2004 3 40 PM ...

Page 160: ...tional Equipment and System Environment Requirements on p 1 2 3 Computer Settings for a File Server See Setting Up a Computer as a File Server on p 5 17 Specify the settings of the computer receiving data sent from the machine You can only send data if the optional equipment is installed For the equipment needed see Optional Equipment and System Environment Requirements on p 1 2 IMPORTANT It is re...

Page 161: ...t items that can be set with NetSpot Device Installer or NetSpot Console see Network Setting Items on p 9 2 NOTE For instructions on how to enter settings using the Remote UI see Chapter 3 Customizing Settings in the Remote UI Guide For more information on NetSpot Device Installer or NetSpot Console see Chapter 7 Using Utilities to Make Network and Device Settings Settings from the Control Panel T...

Page 162: ...g procedure NOTE WINS Windows Internet Name Service is a service for associating a NetBIOS name which is a computer name or printer name on a NetBIOS network with an IP address To use WINS a WINS server is required 1 Press Additional Functions 2 Press System Settings NOTE If the message Enter the System Manager ID and Password using the numeric keys appears on the touch panel display enter the Sys...

Page 163: ...Protocol Settings 5 5 5 Using a NetBIOS Network 3 Press Network Settings 4 Press SMB Server Settings 5 Press On for Use SMB Server E210_NWG_US book Page 5 Wednesday August 18 2004 3 40 PM ...

Page 164: ...no workgroup on your environment create a workgroup in the Windows environment and then enter the workgroup name For more information see the manuals provided with the operating system IMPORTANT You cannot enter the domain name as the workgroup name You cannot enter a character string that includes blanks in Server and Workgroup 7 Press Comment Enter a comment about the printer if necessary If you...

Page 165: ... print or send a fax from a computer if the optional equipment is installed For the equipment needed see Optional Equipment and System Environment Requirements on p 1 2 If you want to use SMB printing Press SMB Printer Settings Press On for Use SMB Press Printer enter the printer name of the machine IMPORTANT Enter the printer name of up to 12 characters in Printer when printing from Windows NT Yo...

Page 166: ...Press OK 10 Confirm the settings you specified press OK The display returns to the Network Settings screen 11 To specify the WINS settings press TCP IP Settings Otherwise skip to step 17 12 Press WINS Configuration E210_NWG_US book Page 8 Wednesday August 18 2004 3 40 PM ...

Page 167: ...D setting Enter the scope ID if necessary The scope ID is an identifier for determining the range available to a printer or computer Regardless of the WINS Configuration setting a scope ID is referred to from the network IMPORTANT If you set a scope ID the machine cannot communicate with any computer whose scope ID is different from the scope ID you set here If a scope ID is not set on any of the ...

Page 168: ...oses 18 Restart the machine Turn OFF the machine wait at least 10 seconds and then turn it ON NOTE For instructions on how to turn ON OFF the machine see Chapter 1 Before You Start Using This Machine in the Reference Guide The protocol settings are complete E210_NWG_US book Page 10 Wednesday August 18 2004 3 40 PM ...

Page 169: ...rinting or sending a fax must have TCP IP client software installed and must be enabled for TCP IP network use For details see the manuals provided with the operating system Connecting to a NetBIOS Network All computers that use the machine for printing or sending a fax must be enabled for NetBIOS network use See the procedures referenced below to set the computers Windows 98 Me See Windows 98 Me ...

Page 170: ...are installed confirm that both Client for Microsoft Networks and File and printer sharing for Microsoft Networks appear If not click Add to install these components Select TCP IP from The following network components are installed click Properties The TCP IP Properties dialog box appears on the screen Click the Bindings tab to display the Bindings sheet click Client for Microsoft Networks Click O...

Page 171: ...ntrol Panel Network Connections Right click the Local Area Connection icon click Properties The Local Area Connection Properties dialog box opens Confirm that Client for Microsoft Networks File and Printer Sharing for Microsoft Networks and Internet Protocol TCP IP are all selected If any of these functions are not selected select them now Double click Internet Protocol TCP IP to open the Internet...

Page 172: ... click the Network Neighborhood icon displayed on the desktop click Properties Click the Services tab to display the Services sheet Confirm that NetBIOS Interface and Server appear in Network Services If not click Add to install them Click OK Restart the computer if prompted E210_NWG_US book Page 14 Wednesday August 18 2004 3 40 PM ...

Page 173: ...ide If you want to use the PS printer driver See the procedure for alternative printer driver installation in Chapter 2 Getting Started in the PS Driver Guide If you want to use the UFR II printer driver See the procedure for alternative printer driver installation in Chapter 2 Getting Started in the UFR II Driver Guide If you want to use the fax driver See the procedure for alternative fax driver...

Page 174: ...ocedure for standard installation in Chapter 2 Getting Started in the PS Driver Guide If you want to use the UFR II printer driver See the procedure for standard installation in Chapter 2 Getting Started in the UFR II Driver Guide If you want to use the fax driver See the procedure for standard installation in Chapter 2 Getting Started in the Fax Driver Guide When the dialog box for selecting the ...

Page 175: ...sent from the machine To send data from the machine to a server on the network you must enter an address setting from the control panel For instructions on how to specify recipient address settings see Chapter 2 Basic Sending Methods in the Sending and Facsimile Guide The following procedures describe a sample shared folder configuration Depending on your environment the actual configuration proce...

Page 176: ... displayed on the screen for Windows 98 are used items might differ depending on your operating system 1 Specify the NetBIOS settings Right click the Network Neighborhood icon displayed on the desktop click Properties In The following network components are installed confirm that both Client for Microsoft Networks and File and printer sharing for Microsoft Networks appear If these components do no...

Page 177: ...the level of access control If you select User level access control specify a domain in which a list of users and groups is saved In the Network dialog box click the Identification tab to display the Identification sheet Confirm the computer name Click OK to close the Network dialog box E210_NWG_US book Page 19 Wednesday August 18 2004 3 40 PM ...

Page 178: ...ed As enter the share name in Share Name For Access Type select either Full or Depends on Password Enter a password If Depends on Password is selected enter a password not longer than 14 alphanumeric characters for full access Confirm the settings you entered click OK If User level access control is selected Right click the folder you want to share using Explorer click Sharing E210_NWG_US book Pag...

Page 179: ...gs you entered click OK Click OK to close the properties dialog box of the shared folder 3 Set a recipient address using the machine s control panel There are two methods for specifying the recipient address settings You can select the desired values from the list that appears when you press Browse or you can press each key to enter the desired value for each item Sample recipient setting Server s...

Page 180: ...d for User Enter each of these items on the server using no more than their allowable number of characters If you change the language of the touch panel display Host Name and File Path may not be displayed correctly or you may not be able to browse the directories If the language of the touch panel display differs from the computer used as a master browser Host Name and File Path may not be displa...

Page 181: ...onfigured by the network manager NOTE The number of users or clients that can access a server running Windows 2000 Server XP Server 2003 is limited After this number of users or clients is reached it is not possible to send to a server running Windows 2000 XP Server 2003 1 Log on to Windows as an Administrator 2 Specify the NetBIOS settings If you are using Windows 2000 right click the My Network ...

Page 182: ...CP IP Properties dialog box in the General sheet click Advanced Click the WINS tab in the WINS sheet click Enable NetBIOS over TCP IP Click OK until all the dialog boxes are closed Restart the computer if prompted 3 Confirm the computer name If you are using Windows 2000 Right click the My Computer icon click Manage The Computer Management window opens Right click the Computer Management Local ico...

Page 183: ...rt menu right click My Computer click Properties Click the Computer Name tab to display the Computer Name sheet Click Change More in the Computer Name Changes dialog box In the DNS Suffix and NetBIOS Computer Name dialog box confirm NetBIOS computer name Click Cancel until all the dialog boxes are closed 4 Set up the users and passwords for access to the shared folder Right click the My Computer i...

Page 184: ...he password in Confirm Password Enter a user name not longer than 20 alphanumeric characters and a password not longer than 14 alphanumeric characters If User must change password at next logon is selected any new users added must change their passwords in order to send data from the machine You cannot change the password from the control panel Confirm the settings click Create For Windows 2000 Fo...

Page 185: ...figure the shared folder Right click the folder you want to share using Explorer click Properties On the Sharing sheet click Share this folder enter the share name in Share name 6 Set security To create a shared folder on a FAT or FAT32 format disk If the Security tab is not displayed Click Permissions select or add the users or groups to whom you want to give access to the shared folder E210_NWG_...

Page 186: ...ead or a higher access authority Click OK close the properties dialog box of the shared folder NOTE To display the Security tab in Windows XP open Folder Options deselect Use simple file sharing However you can share folders and files with Use simple file sharing selected Select or deselect Use simple file sharing to suit your environment For details about the settings see the manual provided with...

Page 187: ...right window pane select Microsoft network server Digitally sign communications always set to Disabled Close the Domain Controller Security Settings window NOTE To browse the directories and send data in the Windows Server 2003 Active Directory environment you must first specify this setting 8 Set a recipient address using the control panel There are two methods for specifying the recipient addres...

Page 188: ... using no more than their allowable number of characters If you change the language of the touch panel display Host Name and File Path may not be displayed correctly or you may not be able to browse the directories If the language of the touch panel display differs from the computer used as a master browser Host Name and File Path may not be displayed correctly or you may not be able to browse the...

Page 189: ...ngs to a domain containing Windows 2000 Server 2003 domain controllers For instructions on how to specify recipient address settings see Chapter 2 Basic Sending Methods in the Sending and Facsimile Guide The settings for sending data to the shared folder are complete Windows NT 4 0 IMPORTANT It is recommended that Windows NT Server 4 0 be configured by the network manager NOTE Windows NT Server 4 ...

Page 190: ...Services If these services do not appear click Add to install them Click the Protocols tab to display the Protocols sheet confirm that TCP IP Protocol appears in Network Protocols If this protocol does not appear click Add to install it Click the Identification tab to display the Identification sheet confirm the computer name E210_NWG_US book Page 32 Wednesday August 18 2004 3 40 PM ...

Page 191: ... the password in Confirm Password enter additional information if necessary Enter a user name not longer than 20 alphanumeric characters and a password not longer than 14 alphanumeric characters If User Must Change Password at Next Logon is selected any new users added must change their password in order to send data from the machine You cannot change the password from the control panel Confirm th...

Page 192: ... on a FAT or FAT32 format disk If the Security tab is not displayed Click Permissions to open the Access Through Share Permissions dialog box select or add the users or groups to whom you want to give access to the shared folder Select either Change or Full Control from Type of Access click OK Click OK close the properties dialog box of the shared folder E210_NWG_US book Page 34 Wednesday August 1...

Page 193: ...piration of the time specified in Startup Time Settings on p 3 51 The default setting startup time is 60 seconds You can enter up to 128 alphanumeric characters for both Host Name and File Path on the control panel If you change the language of the touch panel display Host Name and File Path may not be displayed correctly or you may not be able to browse the directories If the language of the touc...

Page 194: ... than 20 alphanumeric characters and a password not longer than 14 alphanumeric characters 3 Set a recipient address using the control panel There are two methods for specifying the recipient address settings You can select the desired values from the list displayed by pressing Browse Or you can press each key to enter the desired value for each item Sample recipient setting Server side settings C...

Page 195: ...eric characters can be entered Enter each of these items on the server using no more than their allowable number of characters If you change the language of the touch panel display Host Name and File Path may not be displayed correctly or you may not be able to browse the directories If the language of the touch panel display differs from the computer used as a master browser Host name and File pa...

Page 196: ...racters for the domain name and up to 20 for the user name user_name organization company com up to 128 characters in total Note that the latter is only applicable when sending to a Windows 2000 XP Server 2003 computer that belongs to a domain containing Windows 2000 Server 2003 domain controllers For instructions on how to specify recipient address settings see Chapter 2 Basic Sending Methods in ...

Page 197: ...ngs and procedures for printing via an AppleTalk network AppleTalk Network Setup Procedures 6 2 Macintosh Network Settings 6 3 Protocol Settings 6 4 Settings from the Control Panel 6 5 Setting Up a Computer for Printing 6 8 E210_NWG_US book Page 1 Wednesday August 18 2004 3 40 PM ...

Page 198: ...evice Installer Canon utility NetSpot Console via a web browser Canon utility 3 Macintosh Print Settings See Setting Up a Computer for Printing on p 6 8 Specify the settings for each computer you use for printing IMPORTANT You can only print from a computer if the optional equipment is installed For the equipment needed see Optional Equipment and System Environment Requirements on p 1 2 It is not ...

Page 199: ...nder AppleTalk If Inactive is selected select Active 2 Check that the AppleTalk connection method is Ethernet On the Apple menu point to the control panels click AppleTalk Set the selection to Ethernet Close the AppleTalk dialog to save the setting NOTE In an environment connecting to Ethernet through LocalTalk select Printer Port The Macintosh network settings are complete E210_NWG_US book Page 3...

Page 200: ... with software other than the control panel of the machine TCP IP protocol must be supported by your network environment Some items cannot be set using NetSpot Device Installer or NetSpot Console For details about items that can be set with NetSpot Device Installer or NetSpot Console see Network Setting Items on p 9 2 The following procedures describe sample settings using the control panel NOTE F...

Page 201: ...OTE For instructions on how to enter characters using the touch panel display see Chapter 2 Basic Operations in the Reference Guide 1 Press Additional Functions 2 Press System Settings NOTE If the message Enter the System Manager ID and Password using the numeric keys appears on the touch panel display enter the System Manager ID and password For instructions on how to enter the System Manager ID ...

Page 202: ...Protocol Settings 6 6 6 Using an AppleTalk Network Macintosh 3 Press Network Settings 4 Press AppleTalk Settings 5 Press On for AppleTalk E210_NWG_US book Page 6 Wednesday August 18 2004 3 40 PM ...

Page 203: ...ng a network that is set up in zones enter the name of the zone You can also enter a zone name by pressing Browse and selecting the appropriate name from the displayed list 8 Confirm the settings you specified press OK 9 Press Done repeatedly until the Additional Functions screen closes 10 Restart the machine Turn OFF the machine wait at least 10 seconds and then turn it ON NOTE For instructions o...

Page 204: ...er and to set the port IMPORTANT You can only print from a computer if the optional equipment is installed For the equipment needed see Optional Equipment and System Environment Requirements on p 1 2 NOTE Select either of the following names displayed in the Chooser xxx indicates the name of the printer entered in Service Name xxx_D the print job is printed without spooling to the hard disk of the...

Page 205: ...lities to Make Network and Device Settings This chapter describes the utilities used for managing networks and printers NetSpot Device Installer 7 2 NetSpot Console 7 3 E210_NWG_US book Page 1 Wednesday August 18 2004 3 40 PM ...

Page 206: ...ot Device Installer can be accessed directly without installation enabling network users to quickly and easily specify the initial settings of network devices For the system requirements for NetSpot Device Installer and instructions on how to install the utility see the Readme file for NetSpot Device Installer For instructions on how to display the Readme file see the Network Quick Start Guide E21...

Page 207: ...ces using a web browser such as list or map display of devices detailed protocol settings display and notification of device status and job manipulations For the system requirements for NetSpot Console and instructions on how to install the utility see the NetSpot Console User s Guide or the Readme file For instructions on how to display the NetSpot Console User s Guide or Readme file see the Netw...

Page 208: ...NetSpot Console 7 4 7 Using Utilities to Make Network and Device Settings E210_NWG_US book Page 4 Wednesday August 18 2004 3 40 PM ...

Page 209: ...e printing problems Network Connection Problems and Remedies 8 2 Printing Problems and Remedies 8 4 Data Sending File Sharing Problems and Remedies 8 9 Encrypted SSL Data Communication Problems and Remedies 8 12 E210_NWG_US book Page 1 Wednesday August 18 2004 3 40 PM ...

Page 210: ...f the machine or dial up router This may result in subscriber line charges and call charges Examples The file or mail server s host name or IP address set on the machine does not exist on the network The DNS server exists on an external network You attempt to access a device connected to an external network if the device s information is set on the DNS server on the network to which the machine is...

Page 211: ...achine setting items or browse information on the machine Check the settings for Setting Browsing Range in IP Address Range Settings See step 22 in TCP IP Settings on p 3 4 Cause 2 Use SNMP or Enable Dedicated Port Settings is set to Off Remedy Set Use SNMP and Enable Dedicated Port Settings to On See Communication Environment Setup on p 2 12 Cause 3 The SNMP community name does not match Remedy I...

Page 212: ...e IP address of the computer in which a driver is to be installed is not permitted by the settings for both RX Print Range and Setting Browsing Range in IP Address Range Settings Remedy If you are using a NetBIOS network and the IP address of the computer in which a driver is to be installed is not permitted by the settings for both RX Print Range and Setting Browsing Range in IP Address Range Set...

Page 213: ...nt to Settings click Printers Right click the printer icon you are using on the pop up menu click Properties Click the Details tab to display the Details sheet Click Spool Settings to open the Spool Settings dialog box Confirm that Spool print jobs so program finishes printing faster is selected If it is not selected select it click OK Cause 4 The name of the file being printed is too long Remedy ...

Page 214: ...ddress settings are appropriate This problem may be resolved by delaying the startup of network communications for the machine See Startup Time Settings on p 3 51 Cause 3 The computer that is printing is not properly set up Remedy Check the following Confirm that the proper printer driver is installed If you are printing from Windows each computer must have a printer driver installed For instructi...

Page 215: ...erating If you are using a DHCP server confirm that the WINS server is working correctly with the DHCP server NOTE Your computer may not be able to recognize the machine even though the IP address settings are appropriate This problem may be resolved by delaying the startup of network communications for the machine See Startup Time Settings on p 3 51 Cause 3 NetBIOS network is not properly set up ...

Page 216: ...ol Panel on p 6 5 In particular check the following Set the Phase to a valid phase type Set the Zone to the zone to which the printer belongs NOTE Your computer may not be able to recognize the machine even though the IP address settings are appropriate This problem may be resolved by delaying the startup of network communications for the machine See Startup Time Settings on p 3 51 Cause 3 The com...

Page 217: ... ready User 192 168 37 195 none user_name User login 331 Password required for user_name Password Enter password 230 User user_name logged in ftp cd export share Move to data destination directory 250 CWD command successful ftp bin Set data transfer type binary 200 Type set to I ftp put sample tif Set transfer file name for verification ftp by Cut off server connection 221 Goodbye NOTE If the abov...

Page 218: ...log in to NetWare file server From Windows Explorer double click Entire Network check that the NetWare server you want to share is listed there You can also check for the NetWare server as follows On the Start menu point to Find click Computer enter the name of the server you want to share check that the server is on the network This server name will be the Host Name you entered when you set up th...

Page 219: ...e touch panel display of the machine Remedy After confirming the error message see Chapter 8 Troubleshooting in the Reference Guide and perform the necessary operations according to the error message displayed Unable to Send Data Share Files Windows and Samba File Sharing Cause 1 File sharing settings for the shared folder are incorrect Remedy Check the following settings On the computer you are u...

Page 220: ... from a Computer on p 3 33 Cannot delete the default key when SSL is On Check the SSL setting is displayed when you try to erase a key pair Cause The key you are trying to erase is currently being used for encrypted SSL communication Remedy Cancel all SSL settings and encrypted SSL communication Cannot change settings because the selected key is used Check the SSL settings is displayed when you tr...

Page 221: ...lossary and index Network Setting Items 9 2 Available Software for Network Settings 9 14 Confirming Settings 9 15 Viewing the Network Access Log 9 17 Specifications 9 18 Ethernet Interface Adaptor 9 18 Glossary 9 19 Index 9 38 E210_NWG_US book Page 1 Wednesday August 18 2004 3 40 PM ...

Page 222: ...er or NetSpot Console In the following N A stands for Not Applicable For more information on Device Information Delivery see Chapter 6 System Manager Settings in the Reference Guide TCP IP Settings Item Setting Description Default Setting Can be set in NetSpot Device Installer Can be set in NetSpot Console Device Information Delivery IP Address Settings IP Address IP address 0 0 0 0 N A Subnet Mas...

Page 223: ...0 0 N A N A Host Name 47 Characters maximum CANON represents the last six digits of a MAC address N A N A Domain Name 47 Characters maximum NULL N A N A DNS Dynamic Update On Off Off N A N A PING Command PING Command IP Address 0 0 0 0 N A N A N A WINS Configuration WINS Resolution On Off Off N A N A WINS Server IP Address 0 0 0 0 N A N A Scope ID 63 Characters maximum NULL N A N A Node Type Auto ...

Page 224: ... time synchronization 1 to 48 hours 24 N A N A N A NTP Server Check N A N A N A FTP Print Settings Use FTP printing On Off On N A N A User User name for FTP server login 24 Characters maximum NULL N A N A N A Password Password for FTP server login 24 Characters maximum NULL N A N A N A Use PASV Mode for FTP Use PASV Mode for FTP On Off Off N A N A IPP Settings 1 IPP Settings On Off On N A N A Use ...

Page 225: ...aracters maximum NULL N A N A N A Key Algorithm Display only N A N A N A Key Length bit 512 1024 512 N A N A N A Start Date of Validity Year Month Date 1950 01 01 2049 12 31 NULL N A N A N A End Date of Validity Year Month Date 1950 01 01 2049 12 31 NULL Country Name Country name and code 2 Characters maximum United States US State 24 Characters maximum NULL City 24 Characters maximum NULL Organiz...

Page 226: ... Verification N A N A N A Erase N A N A N A Certificate Settings CA Certificate List Certificate Details Version Serial Number Signature Algorithm Issue Destination Start Date of Validity End Date of Validity Issuer Public Key Certificate Thumbprint Certificate Verification N A N A N A Erase N A N A N A Certificate Settings Register Key and Certificate Register Key Name 24 Characters maximum Passw...

Page 227: ...thentication Settings 2 Use Proxy Authentication On Off Off N A N A N A User 24 Characters maximum NULL N A N A N A Password 24 Characters maximum NULL N A N A N A IP Address Range Settings 3 RX Print Range Reject IP Address es Apply Settings On Off Up to 8 IP addresses can be stored Off N A N A N A RX Print Range Permit IP Address es Apply Settings On Off Up to 8 IP addresses can be stored Off N ...

Page 228: ...only N A Node Number Auto Set display only N A Packet Signature Auto Set display only N A Print Service 1 Bindery PServer RPrinter NDS PServer NPrinter NDS PServer N A Bindery PServer Settings 1 Print Server 47 Characters maximum NULL N A File Server 47 Characters maximum NULL N A Print Server Password 20 Characters maximum NULL N A Service Mode Service only currently mounted form Change forms as ...

Page 229: ... maximum NULL N A Tree 32 Characters maximum NULL N A Context 256 Characters maximum NULL N A Print Server Password 20 Characters maximum NULL N A Service Mode Service only currently mounted form Change forms as needed Minimize form changes across print queues Minimize form changes within print queues Minimize form changes within print queues N A N A Printer Number 0 to 254 0 N A Polling Interval ...

Page 230: ...rmation Delivery AppleTalk On Off Off N A N A Phase Phase 2 fixed N A Service Name 32 Characters maximum Model name N A N A Zone 32 Characters maximum N A Item Setting Description Default Setting Can be set in NetSpot Device Installer Can be set in NetSpot Console Device Information Delivery Use SMB Server On Off On N A N A N A Server 15 Characters maximum NULL N A N A Workgroup 15 Characters maxi...

Page 231: ...N A Community Name Community Name public N A N A N A Item Setting Description Default Setting Can be set in NetSpot Device Installer Can be set in NetSpot Console Device Information Delivery Enable Dedicated Port On Off On N A N A Item Setting Description Default Setting Can be set in NetSpot Device Installer Can be set in NetSpot Console Device Information Delivery Use Spooler On Off On N A N A I...

Page 232: ...ault Setting Can be set in NetSpot Device Installer Can be set in NetSpot Console Device Information Delivery SMTP Receipt On Off On N A N A POP On Off On N A N A SMTP Server Server name or IP address 48 Characters maximum NULL N A N A N A E mail Address 64 Characters maximum NULL N A N A N A POP Server Server name or IP address 48 Characters maximum NULL N A N A N A POP Address 32 Characters maxi...

Page 233: ...on before Sending On Off Off N A N A N A SMTP Authentication SMTP AUTH On Off Off N A N A N A User User name for SMTP authentication 64 Characters maximum NULL N A N A N A Password Password for SMTP authentication 32 Characters maximum NULL N A N A N A Allow SSL POP On Off Off N A N A N A Allow SSL SMTP Send On Off Off N A N A N A Allow SSL SMTP Receive SSL On Off Off N A N A N A Item Setting Desc...

Page 234: ... can be set See Network Setting Items on p 9 2 Type of Settings The Machine s Control Panel Web Browser Remote UI NetSpot Device Installer NetSpot Console NWADMIN PCONSOLE TCP IP Protocol Setting See p 3 3 NetWare Print Server Settings See p 4 3 NetWare Protocol Settings See p 4 9 NetBIOS Protocol Settings See p 5 3 AppleTalk Protocol Settings See p 6 4 E210_NWG_US book Page 14 Wednesday August 18...

Page 235: ...to confirm the network settings made from the machine s touch panel display To print a user s data list follow the procedure below 1 Press Additional Functions Report Settings 2 Press Network under Print List 3 Press User s Data List E210_NWG_US book Page 15 Wednesday August 18 2004 3 40 PM ...

Page 236: ...Confirming Settings 9 16 9 Appendix 4 Press Yes E210_NWG_US book Page 16 Wednesday August 18 2004 3 40 PM ...

Page 237: ... on how to set the machine to permit or reject specific IP addresses see step 22 in TCP IP Settings on p 3 4 1 Press System Monitor 2 Press Print Log 3 Select Network from the drop down list The log pertaining to the rejected IP addresses is displayed NOTE Up to 100 logs can be displayed You can export the log to a CSV format file using the Remote UI For instructions see the Remote UI Guide E210_N...

Page 238: ...Supported TCP IP Frame type Print applications Ethernet II LPD Raw IPP IPPS IPX SPX Frame type Print applications Ethernet II Ethernet 802 2 Ethernet 802 3 Ethernet SNAP Auto Detect Bindery PServer NDS PServer RPrinter NPrinter LPD IPP NetBIOS Frame type Print application Ethernet II SMB AppleTalk Frame type Print application Ethernet SNAP PAP Printer Access Protocol E210_NWG_US book Page 18 Wedne...

Page 239: ...originals to make one or two sided copies ASCII code ASCII American Standard Code for Information Interchange is a set of standardized codes used to represent letters numbers punctuation marks a few symbols and control characters A seven digit or seven bit binary number can represent one of 128 distinct codes Auto Redial When Auto Redial is set to On the machine automatically redials the recipient...

Page 240: ... necessary to install Canon Driver Information Assist Service on the server PC to set up the printer configuration automatically or to use the Job Accounting feature CCITT ITU T A committee that sets international standards for telecommunications CCITT ITU T was formerly known as CCITT Consultative Committee for International Telegraph and Telephone but is now succeeded by ITU T International Tele...

Page 241: ... A file left on a user s computer when the user visits a Web site A cookie allows the Web site to recognize the user on subsequent visits Cookies are generally used to enable a user to automatically sign on to certain Web sites and to customize the features offered by such sites Copy Ratio Zoom Ratio Numeric representation for the reduction or enlargement of an original CSV Comma Separated Value f...

Page 242: ...hout storing the document in memory This enables you to send a document even when the memory is full DNS Domain Name System The system that associates the IP address assigned to a computer with the domain name DNS server Domain Name System server A server which maintains a database that translates the domain names of Internet servers such as www w3 org into Internet Protocol IP addresses such as 1...

Page 243: ...tem for connecting multiple computers Data is sent from one computer to another by dividing it into packets and the packets reach their destinations smoothly without any collision with other packets EtherTalk An Apple Computer network standard used to extend an AppleTalk network to an Ethernet network F File formats File formats are used to save image data This machine supports three different fil...

Page 244: ... program with which the user transfers files G Gamma Correction An adjustment to the overall brightness of a scanner monitor or printer On your Canon machine gamma correction refers to the degree of contrast on a printed document Gateway Address The default address of a network or Web site It provides a single domain name and point of entry to the site H HP GL 2 A graphics language that enables co...

Page 245: ...he Workgroup Edition and the Enterprise Edition of imageWARE Document Manager It consists of two programs imageWARE Document Manager Gateway Server that stores the documents and imageWARE Document Manager Gateway Administrator that makes settings for the document storage destinations Internet Protocol IP The underlying set of networking rules that describes how data is transmitted across the Inter...

Page 246: ...rmat so they can be transferred across the Internet more quickly L LAA Locally Administered Address When a device is powered ON its network address is presented to the network The default network address assigned by the manufacturer at the time of production is known as the UAA Universally Administered Address while an address specified by the network administrator to override the UAA is the LAA L...

Page 247: ...ers to easily specify port settings for network printing M MAC address Media Access Control address The hardware address of the network adapter of a computer connected to a local area network MEAP Multifunctional Embedded Application Platform A system enabling the installation of the Java platform and Java applications on your machine Utilization of MEAP also enables you to install and uninstall M...

Page 248: ...nagement of multiple printers connected to a network from one central location A network manager can monitor conditions of network printers ascertain online offline status error status the amount of paper in cassettes verify information on mounted fonts and other readings All the functions that are conventionally conducted through the operation panel of the respective machines can be performed fro...

Page 249: ...corporate firewalls generally reject external data requests from FTP servers the PASV mode may allow FTP to be used with NAT Network Address Translation and with clients behind firewalls depending on the environment The PASV mode also ensures that all data flow requests come from inside the network where the client is located Pause You can insert a pause within a telephone number or at the end of ...

Page 250: ...hernet networks Phase 2 refers to the version with extended addressing features which was introduced in 1989 PIN Code Personal Identification Number To prevent unauthorized access to telephone lines some PBX Private Branch Exchange systems require that a PIN code be entered when dialing to make a call or to send a document Depending on the PBX system the PIN code may be entered before the number a...

Page 251: ... hardware nor software is required R RARP Reverse Address Resolution Protocol A protocol which associates a network adapter address MAC address with an IP Internet Protocol address Raster Graphics Raster graphics represents an image as a pattern of dots as opposed to vector graphics which represents an image as a geometrical formula Each row of colored dots in the mosaic of colored dots constitute...

Page 252: ...ination of these colors in equal amounts produces white RIP Raster Image Processor The hardware and software functions of a printer that convert vector graphic descriptions from a computer into raster graphic images that can be printed Rotary Pulse Also called pulse dial On a rotary pulse telephone a dial is turned to send pulses to the telephone switching system RX Abbreviation for Reception Rece...

Page 253: ...s the Internet intranet or across networks regardless of operating system network protocol or product class SMB Server Message Block A protocol that provides file and printer sharing over a network for Windows computers SMTP Simple Mail Transfer Protocol A TCP IP protocol for sending messages from one computer to another on a network SNMP Simple Network Management Protocol The network management p...

Page 254: ...elecommunication Standardization Sector When the remote party s machine supports the same standard confidential or relayed communications are possible by attaching a subaddress and a password in advance Subaddress Books The main Address Book is subdivided into 10 smaller address books which are considered subaddress books Subnet A portion of a network which may be a physically independent network ...

Page 255: ...se P dialing TIFF Tagged Image File Format A file format that saves images as high density bitmaps and is suitable for large amounts of image data The information field tag at the start of each image data record indicates the type of data represented Token Ring A local area network system developed by IBM in which conflict during message transmission is avoided by granting tokens that allow comput...

Page 256: ...hrome printers Ultra Fine A resolution mode for sending originals at 16 dots mm x 15 4 lines mm eight times the standard resolution If the receiving fax machine does not support this mode the original is automatically sent in the Super Fine or Fine mode URL Uniform Resource Locator A standard way of specifying the location of an object usually a Web page on the Internet The URL for a Web page woul...

Page 257: ...hine enables you to apply individual stamps such as CONFIDENTIAL COPY or DRAFT as well as your own customized stamps to your printed documents in the form of a watermark WINS Windows Internet Name Service A service for associating a NetBIOS name which is a computer name or printer name on a NetBIOS network with an IP address To use WINS a WINS server is required E210_NWG_US book Page 37 Wednesday ...

Page 258: ...g 9 13 SMTP Authentication SMTP AUTH 9 13 User 9 13 Authentication Settings 9 7 Password 9 7 Use Proxy Authentication 9 7 User 9 7 Auto Detect 2 9 4 11 9 12 Auto Redial 9 19 Available software for network settings 9 14 B Banding 9 20 Bindery Mode 4 4 4 6 Bindery Print Service 4 4 Bindery PServer Bindery Queue Server Mode 4 4 4 12 Bindery PServer Settings 9 8 Buffer Size 9 8 File Server 9 8 Polling...

Page 259: ...NIX Linux 5 36 Windows 2000 XP Server 2003 5 23 Windows 95 98 Me 5 18 Windows NT 4 0 5 31 Container object 4 5 9 21 Context 4 15 9 9 9 21 Context name 4 15 Control panel 2 7 2 12 3 4 4 9 5 3 6 5 Cookie 9 21 Copy Ratio 9 21 CSV 9 21 D Delayed Transmission 9 21 Device Status Extension 9 22 DHCP 3 6 9 2 9 22 Direct 3 60 3 64 3 65 Direct Sending 9 22 Discovery Settings 9 5 Response 9 5 Scope Name 9 5 ...

Page 260: ... Address 3 6 9 2 9 24 Generate Key 9 5 City 9 5 Country Name 9 5 End Date of Validity 9 5 Key Algorithm 9 5 Key Length bit 9 5 Key Name 9 5 Organization 9 5 Orgnztion Unit 9 5 Shared Name 9 5 Start Date of Validity 9 5 State 9 5 H Half Duplex 2 10 Host Name 3 8 9 3 HP GL 2 9 24 HTTP 3 16 3 53 9 24 I I fax 9 25 imageWARE 9 25 imageWARE Document Manager Gateway 9 25 Interface settings 2 7 Internet P...

Page 261: ...anner Page 9 3 LPR 9 27 LPR2 9 27 M MAC Address 9 12 9 27 Macintosh network 1 10 6 3 Macintosh network settings 6 3 MEAP 9 27 Memory Lock 9 27 Memory RX Inbox 9 27 Memory Sending 9 28 N NDPS Novell Distributed Print Services 4 4 NDS Novell Directory Service 4 4 4 19 NDS print server 4 4 NDS print service 4 4 NDS PServer 4 4 4 12 NDS PServer Settings 9 9 Buffer Size 9 9 Context 9 9 Polling Interval...

Page 262: ...l Settings 9 11 Startup Time Settings 9 11 TCP IP Settings 9 2 Node Number 4 11 9 8 Node Type 9 3 Novell Client 4 3 NPrinter NDS remote printer mode 4 4 4 12 NPrinter Settings 9 9 Context 9 9 Print Server 9 9 Printer Number 9 9 Tree 9 9 NTFS 9 28 NTFS format 5 35 NTP Server Address 9 4 NTP Server Check 9 4 NWADMIN 4 3 O One Touch Speed Dialing 9 29 OS 2 9 29 P Packet Signature 9 8 9 29 Password 9 ...

Page 263: ...ronment requirements 1 3 Protocol 1 8 3 3 4 9 5 3 6 4 9 30 Protocol settings AppleTalk 6 4 E Mail I Fax settings TCP IP 3 44 NetWare 4 9 SMB and WINS settings NetBIOS 5 4 Startup time settings TCP IP 3 51 TCP IP settings NetBIOS 5 4 TCP IP settings TCP IP 3 4 Proxy server 3 17 9 31 Proxy Settings 9 7 Authentication Settings 9 7 Port Number 9 7 Server Address 9 7 Use Proxy within the Same Domain 9 ...

Page 264: ...network 5 2 NetWare network 4 2 Network environment 2 2 TCP IP network 3 2 Setup using NetWare Administrator or PCONSOLE 4 5 NDS queue server mode or remote printer mode 4 5 Queue server mode or remote printer mode in bindery mode 4 6 SLA 9 33 SMB 3 53 9 33 SMB Printer Settings 9 10 Printer 9 10 Use SMB 9 10 SMB Server Settings 5 4 5 5 9 10 Comment 5 6 9 10 LM Announce 5 6 9 10 Server 5 6 9 10 SMB...

Page 265: ...LPD Banner Page 3 10 9 3 LPD Settings 3 9 Multiple Addresses 3 21 3 24 Node Type 9 3 Permit IP Address es 3 19 3 20 3 22 3 23 9 7 PING Command 3 27 9 3 Port Number 3 17 9 7 Primary Server DNS 9 3 Proxy Settings 3 17 9 7 RARP 3 7 9 2 RAW Settings 3 10 9 3 Receiving MAC Address Settings 9 7 Reject IP Address es 3 20 3 21 3 22 3 24 9 7 RX Print Range 3 19 9 7 Scope ID 9 3 Secondary Server DNS 9 3 Ser...

Page 266: ... 9 4 Use Spooler 2 15 9 11 Use SSL 9 4 User 9 13 Using E Mail I Fax 1 5 UTP 9 36 V Vector Graphics 9 36 Viewing the Network Access Log 9 17 W WAN 9 37 Watermark 9 37 Web browser 2 7 3 3 4 9 5 3 Windows network 1 8 With NetWare server 1 8 Without NetWare server 1 9 WINS Windows Internet Name Service 5 4 9 37 WINS Configuration 5 8 9 3 Node Type 9 3 Scope ID 5 9 9 3 WINS Resolution 9 3 WINS Server 5...

Page 267: ...Mac_Fax_00Front1_US fm copy Page 0 Tuesday May 18 2004 11 22 AM ...

Page 268: ...ent 102 avenue du General de Gaulle 92257 La Garenne Colombes Cedex France CANON U K LTD Woodhatch Reigate Surrey RH2 8BF United Kingdom CANON DEUTSCHLAND GmbH Europark Fichtenhain A10 47807 Krefeld Germany CANON ITALIA S p A Via Milano 8 20097 San Donato Milanese MI Italy CANON LATIN AMERICA INC 703 Waterford Way Suite 400 Miami Florida 33126 U S A CANON AUSTRALIA PTY LTD 1 Thomas Holt Drive Nort...

Reviews: