background image

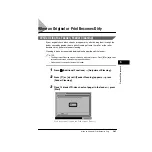
When an Original or Print Becomes Dirty

5-25

5

Routine Maintenance

When an Original or Print Becomes Dirty

While Using the Feeder (Feeder Cleaning)

If your originals have black streaks or appear dirty after feeding them through the 
feeder caused by powder from a pencil rubbing off onto the roller, or the roller 
becomes dirty, perform a feeder cleaning.

Cleaning is done by repeatedly feeding blank paper though the feeder.

NOTE

The Adjustment/Cleaning screen is made up of several screens. Press [

] or [

] to scroll 

to the desired screen and make the required settings.

It takes about 10 seconds to clean the feeder.

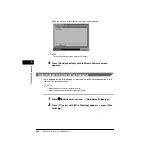
1

Press

(Additional Functions) 

 [Adjustment/Cleaning].

2

Press [

] or [

] until [Feeder Cleaning] appears 

 press 

[Feeder Cleaning].

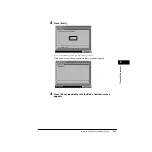
3

Place 10 blank LTR-size sheets of paper in the feeder 

 press 

[Start].

If you do not want to clean the Feeder, press [Cancel].

Summary of Contents for ImageRunner 5020 Series

Page 1: ...Strada 6 20089 Milanofiori Rozzano MI Italy CANON LATIN AMERICA INC 703 Waterford Way Suite 400 Miami Florida 33126 U S A CANON AUSTRALIA PTY LTD 1 Thomas Holt Drive North Ryde Sydney N S W 2113 Australia CANON SINGAPORE PTE LTD 79 Anson Road 09 01 06 Singapore 079906 CANON HONGKONG CO LTD 9 F The Hong Kong Club Building 3A Chater Road Central Hong Kong The contents of this guide are printed on 10...

Page 2: ......

Page 3: ...imageRUNNER 6020i 5020i 6020 5020 Reference Guide ...

Page 4: ... Box Guide Sending Instructions Sending Guide Setting Up the Network Connection and Installing the CD ROM Software Network Quick Start Guide Remote User Interface Instructions Remote UI Guide CD ROM Network Connectivity and Setup Instructions Network Guide CD ROM Network ScanGear Installation and Instructions Network ScanGear User s Guide CD ROM PS PCL Printer Instructions PS PCL Printer Guide CD ...

Page 5: ...sample reports the specifications of the main unit the Relationship between Original Orientation and Preprinted Paper Output Chart and the index Chap 1 Please read this chapter Chap 2 Chap 3 Chap 4 Chap 5 Chap 6 Chap 7 Chap 8 Considerable effort has been made to ensure that this manual is free of inaccuracies and omissions However as we are constantly improving our products if you need an exact sp...

Page 6: ...x Maintenance and Inspections xxiii Consumables xxiv Other Warnings xxiv Periodic Inspection of the Breaker xxv Legal Limitations on the Usage ofYour Product and the Use of Images xxviii Operations and Terms Used in This Manual xxix Chapter 1 Before You Start Using This Machine Installation Location and Handling 1 3 Installation Precautions 1 3 Avoid Installing the Machine in the Following Locatio...

Page 7: ...sed Keys 1 40 Touch Panel Key Display 1 41 Adjusting the Brightness 1 42 Entering Characters from the Touch Panel Display 1 43 Entering Alphabet Characters 1 43 Entering Special Characters 1 45 Entering Values in Inches 1 47 Entering the Department ID and Password 1 48 Operations after Turning the Power ON 1 48 Operations after Using Functions 1 50 Logging in through the Authentication Screens of ...

Page 8: ...ings Additional Functions Settings Table 3 3 Setting Specifications That Are Common to Each Function Common Settings 3 8 Selecting the Initial Function at Power ON 3 8 Selecting the Default Display after Auto Clear 3 10 Setting the Entry Tone Error Tone and the Job Done Tone 3 11 Setting Inch Input 3 13 Setting a Paper Drawer for Auto Paper Selection Auto Drawer Switching 3 14 Identifying the Type...

Page 9: ...ort TX Report 3 68 Setting the Specifications of an Activity Report 3 71 Printing Lists 3 75 Printing the Address Book List 3 75 Printing the Additional Functions Settings List 3 78 Chapter 4 System Manager Settings Specifying the System Manager Settings System Manager Settings 4 3 Setting Department ID Management Dept ID Management 4 8 Storing the Department ID Password and Impression Limit 4 9 C...

Page 10: ...Auto Offline Auto Offline 4 91 Setting MEAP Settings MEAP Settings 4 93 Setting Use HTTP Server Use HTTP 4 93 Printing Installed Applications Information Print System Information 4 95 LDAP Server Settings 4 97 Registering an LDAP Server 4 97 Changing an LDAP Server Setting 4 111 Deleting an LDAP Server 4 113 Printing LDAP Server Settings 4 114 Chapter 5 Routine Maintenance Loading Paper 5 2 Loadin...

Page 11: ...7 Optional Equipment System Configuration 7 2 Paper Deck G1 7 3 Parts and Their Functions 7 3 Clearing Paper Jams in the Paper Deck 7 4 Loading Paper in the Paper Deck 7 7 Finisher F1 Saddle Finisher F2 Puncher Unit B1 7 10 Parts and Their Functions 7 10 Finishing Functions 7 11 Clearing Paper Jams in the Finisher 7 15 Replacing the Staple Cartridge in the Stapler Unit 7 18 Removing Jammed Staples...

Page 12: ... Lists 8 2 Send Job List 8 2 TX Report TX Error Report 8 3 Activity Report TX RX 8 5 Copy Log List 8 7 Print Log List 8 8 Forwarding Conditions List 8 9 Registered LDAP Server List 8 10 Address Book List 8 11 User s Data List 8 12 Specifications 8 13 Main Unit 8 13 Feeder 8 15 Paper Deck G1 8 15 Finisher F1 Saddle Finisher F2 8 16 Puncher Unit B1 8 17 Copy Tray C3 8 18 Card Reader C1 8 18 Relation...

Page 13: ...d are expressed in this manual Control Panel Keys Key icon Key Name Examples Start Stop Touch Panel Display Keys Key Name Examples Cancel Done WARNING Indicates a warning concerning operations that may lead to death or injury to persons if not performed correctly In order to use the machine safely always pay attention to these warnings CAUTION Indicates a caution concerning operations that may lea...

Page 14: ...he model or options are not displayed on the touch panel display The keys which you should press are marked with a as shown below When multiple keys can be pressed on the touch panel display all keys are marked Select the keys which suit your needs Illustrations Used in This Manual Illustrations used in this manual are those displayed when the optional Saddle Finisher F2 is attached to the imageRU...

Page 15: ... to correct the interference at his own expense Do not make any changes or modifications to the equipment unless otherwise specified in the manual If such changes or modifications should be made you could be required to stop operation of the equipment Laser Safety This product complies with 21 CFR Chapter 1 Subchapter J as a Class Ι laser product under the U S Department of Health and Human Servic...

Page 16: ...TRAHL AUSSETZEN ATTENZIONE EMISSIONE DI UN RAGGIO LASER INVISIBILE A SEGUITO DELL APERTURA DELLA COPERTURA O DELLA RIMOZIONE DEL GRUPPO DI SVILUPPO EVITARE L ESPOSIZIONE DIRETTA AL RAGGIO LASER PRECAUCIÓN RADIACIÓN LÁSER INVISIBLE EN CASO DE ABRIR LA CUBIERTA Y RETIRAR LA UNIDAD REVELADORA EVITE LA EXPOSICIÓN AL HAZ LÁSER VARO AVATTAESSA KEHITYSYKSIKÖN POISSAOLLESSA OLET ALTTINA NÄKYMÄTTÖMÄLLE LAS...

Page 17: ...United States and or in other countries Active Directory and Windows are registered trademarks of Microsoft Corporation in the United States and or in other countries Other product and company names herein may be the trademarks of their respective owners As an ENERGY STAR Partner Canon USA Inc has determined that this machine meets the ENERGY STAR Program for energy efficiency The International EN...

Page 18: ...Inc Disclaimers The information in this document is subject to change without notice CANON INC MAKES NO WARRANTY OF ANY KIND WITH REGARD TO THIS MATERIAL EITHER EXPRESS OR IMPLIED EXCEPT AS PROVIDED HEREIN INCLUDING WITHOUT LIMITATION THEREOF WARRANTIES AS TO MARKETABILITY MERCHANTABILITY FITNESS FOR A PARTICULAR PURPOSE OF USE OR AGAINST INFRINGEMENT OF ANY PATENT CANON INC SHALL NOT BE LIABLE FO...

Page 19: ...t may not be covered under your Limited Warranty Installation WARNING Do not install the machine near alcohol paint thinner or other flammable substances If flammable substances come into contact with electrical parts inside the machine it may result in a fire or electrical shock Do not place the following items on the machine If these items come into contact with a high voltage area inside the ma...

Page 20: ...for proper ventilation of working parts inside the machine Blocking these openings can cause the machine to overheat Never place the machine on a soft surface such as a sofa or rug Do not install the machine in the following locations A damp or dusty location A location near a water faucet or water A location exposed to direct sunlight A location subject to high temperatures A location near open f...

Page 21: ...wer cords other than the power cord provided as this may result in a fire or electrical shock As a general rule do not use extension cords Using an extension cord may result in a fire or electrical shock If an extension cord must be used however use one rated for voltages of 120 V AC and over untie the cord binding and insert the power plug completely into the extension cord outlet to ensure a fir...

Page 22: ... the power cord or interface cable may be damaged resulting in a fire or electrical shock Do not drop paper clips staples or other metal objects inside the machine Also do not spill water liquids or flammable substances alcohol benzene paint thinner etc inside the machine If these items come into contact with a high voltage area inside the machine it may result in a fire or electrical shock If the...

Page 23: ...time such as overnight Also turn OFF the main power switch and disconnect the power cord for safety when the machine will not be used for an extended period of time such as during consecutive holidays Do not place your hand in the part of the tray where stapling is performed when a finisher is attached as this may result in personal injury ...

Page 24: ...ctions for safety Never open covers other than those instructed in this manual Do not remove the caution label attached to the cover of the laser scanner unit If the laser beam escapes from the machine exposure may cause serious damage to your eyes DANGER Laser radiation when open AVOID DIRECT EXPOSURE TO BEAM DANGER Laser radiation when open AVOID DIRECT EXPOSURE TO BEAM DANGER Laser radiation wh...

Page 25: ...ge area inside the machine it may result in a fire or electrical shock There are some areas inside the machine which are subject to high voltages When removing jammed paper or when inspecting the inside of the machine do not allow necklaces bracelets or other metal objects to touch the inside of the machine as this may result in burns or electrical shock Do not burn or throw used toner bottles int...

Page 26: ...onsult a physician Consumables WARNING Do not burn or throw used toner bottles into open flames as this may cause the toner remaining inside the bottles to ignite resulting in burns or a fire Do not store toner bottles or copy paper in places exposed to open flames as this may cause the toner or paper to ignite resulting in burns or a fire When discarding used toner bottles put the bottles in a ba...

Page 27: ... following procedure IMPORTANT Make sure that the main power is turned ON and the machine is neither printing nor scanning before inspecting the breaker If a malfunction occurs after a periodic inspection contact your local authorized Canon dealer 1 Push the test button with the tip of a ball point pen or similar object NOTE The breaker is located on the bottom left side of the machine near the po...

Page 28: ...test button to turn the power ON and OFF If the breaker lever does not switch to the OFF side position repeat step 1 If the breaker lever does not switch to the OFF side position despite carrying out the above procedure two or three times contact your local authorized Canon dealer 3 Once you have confirmed that the power is OFF press the main power switch to OFF side ...

Page 29: ... of the Breaker xxvii 4 Move the breaker lever to the ON I side position 5 Press the main power switch to ON I side 6 Fill in the check sheet at the end of this manual to document your periodic inspections of the breaker ...

Page 30: ...gality of using your product to scan print or otherwise reproduce any particular document and or of the use of the images scanned printed or otherwise reproduced you should consult in advance with your legal advisor for guidance Paper Money Travelers Checks Money Orders Food Stamps Certificates of Deposit Passports Postage Stamps canceled or uncanceled Immigration Papers Identifying Badges or Insi...

Page 31: ...e in a complex way so that not only copies but also various kinds of prints may sometimes have to wait their turn before they can be output To avoid confusion when reading this manual the terms scanning printing and copying used throughout this manual are defined below There are some cases in which the scanning of an original when making a copy and the process of making a print are described separ...

Page 32: ...Operations and Terms Used in This Manual xxx Copying Printing data scanned from an original followed by finishing stapling hole punching etc ...

Page 33: ...eling Jobs 1 16 Displaying a Guide Screen 1 17 Reading Messages from the System Manager 1 18 Other Useful Functions 1 20 Parts and Their Functions 1 22 External View 1 22 Internal View 1 24 Feeder 1 25 Control Panel Parts and Functions 1 26 Checking the Counter 1 27 Checking Device Information 1 30 Main Power and Control Panel Power 1 32 How to Turn ON the Main Power 1 32 Control Panel Power Switc...

Page 34: ...50 Logging in through the Authentication Screens of SDL and SSO 1 51 Placing Originals 1 55 Orientation of Originals 1 56 Placing an Original on the Platen Glass 1 57 Placing Originals in the Feeder 1 60 Making Prints Using the Stack Bypass 1 63 Using the Stack Bypass while Reserving Print Jobs 1 69 Multifunctional Operations 1 74 Available Paper Stock 1 75 ...

Page 35: ...ling the Machine in the Following Locations Avoid locations subject to extremes of temperature and humidity whether low or high For example avoid installing the machine near water faucets hot water heaters humidifiers air conditioners heaters or stoves Avoid installing the machine in direct sunlight If this is unavoidable shade the machine using curtains Be sure that the curtains do not block the ...

Page 36: ...d period of time in a poorly ventilated room or when making a large quantity of prints be sure to ventilate the room to make the working environment as comfortable as possible Avoid locations where a considerable amount of dust accumulates Avoid locations where ammonia gas is emitted Avoid locations near volatile or flammable materials such as alcohol or paint thinner Avoid locations which are sub...

Page 37: ...rinting can adversely affect the operation of such equipment Avoid installing the machine near televisions radios or other similar electronic equipment The machine might interfere with sound and picture signal reception Insert the power plug into a dedicated power outlet and maintain as much space as possible between the machine and other electronic equipment Do not remove the machine s leveling f...

Page 38: ...me damaged if it is often stepped on or if heavy objects are placed on it Continued use of a damaged power cord can lead to an accident such as a fire or electrical shock Provide Adequate Installation Space Provide enough space on each side of the machine for unrestricted operation 29 1 4 743 mm 49 1 244 mm 52 5 8 1 335 mm 29 1 4 743 mm 49 1 244 mm 85 3 8 2 167 mm more than 2 3 8 60 mm more than 2...

Page 39: ...e parts inside the machine are subject to high voltages and temperatures Take adequate precaution when inspecting the inside of the machine Do not carry out any inspections not described in this manual Be careful not to spill liquid or drop any foreign objects such as paper clips or staples inside the machine If a foreign object comes into contact with electrical parts inside the machine it might ...

Page 40: ...hen it will not be used for a prolonged period of time such as overnight It is recommended that you do not store data on the hard disk of this machine without first backing up copies on a computer or printing out such data This is necessary to avoid the possible loss of data in case the machine or its hard disk is damaged In the center of the front cover is the ventilation port Do not block this p...

Page 41: ...on the touch panel display You can press Copy Send Mail Box Scan or System Monitor to change functions See Selecting the Initial Function at Power ON on p 3 8 To display other functions such as a MEAP application if it is installed press IMPORTANT Scan is displayed when the Network Scan feature is installed NOTE Send is only displayed on the imageRUNNER 6020i 5020i You can set the initial screen t...

Page 42: ...alled a license is issued For each application you can set the terms of validity and impression limits for Scan Print or Copy jobs NOTE For details on obtaining licenses contact your local authorized Canon dealer Copy Press to use the Copy function See Chapter 1 Basic Copying in the Copying Guide Send Press to use the Send function See Chapter 1 Various Sending Methods in the Sending Guide Mail Bo...

Page 43: ... of the imageRUNNER is set to On you can configure the machine so that it can only be used after the department ID and password have been entered SDL Simple Device Login A login service that you can use with one machine only You can register user data in the memory of the machine from a web browser In addition it enables you to manage user data by linking to the Department ID Management function o...

Page 44: ... common settings related to many functions of the machine as well as customize specific functions to suit your needs For details on settings not explained in this manual see the following manuals Copy Settings Copying Guide Communications Settings Address Book Settings Sending Guide Mail Box Settings Mail Box Guide Printer Settings PS PCL Printer Guide Network Settings Network Guide Additional Fun...

Page 45: ...ructions on how to specify the Network Settings see the Network Guide Auto Online Offline is only displayed if the Network Scan Function is attached Functions That Conserve Power You can conserve power efficiently using the following modes when the machine is not being used NOTE After the machine wakes up from being in one of these modes there will be a slight delay in starting to use the machine ...

Page 46: ...n set the machine to enter the Sleep mode whenever you desire by pressing the control panel power switch To reactivate the machine press the control panel power switch NOTE Turn the control panel power switch OFF when not using your machine for a prolonged period of time for example at night The machine may not enter the Sleep mode completely depending on the status of the installed MEAP applicati...

Page 47: ...when the machine is in the Low Power mode or at the time and day of the week set with the Daily Timer the machine automatically enters the Sleep mode If the time set for the Auto Sleep mode to take place is shorter than that of the Low Power mode the Auto Sleep mode has priority The machine enters the Sleep mode Even when the machine is in the Low Power mode the Daily Timer settings are performed ...

Page 48: ...g priority NOTE For a description of functions see Chapter 2 Checking Job and Device Status The status of each icon displayed on the screen is as follows Icon Type of Job Description Icon Machine Status Description Copy job Error Send job Paper jam Mail Box job Staple jam Printer job Add toner Remote copy job Report job Network Scan job Additional Functions job The System Monitor Screen Device The...

Page 49: ...ings up a guide screen with an explanation of that function Use this guide function if you do not understand how to use the mode you are setting In this example the Margin mode has been selected If you press Guide after pressing Special Features Margin the touch panel display changes to the Guide Function screen as shown above Press Done to return to the Various Originals Menu screen To return the...

Page 50: ...iginals with Text Photo press or to read the detailed information Press Done to return to the Various Originals screen To return the display to the Guide Menu screen press Done Reading Messages from the System Manager A message board is used to indicate messages on the touch panel display from the System Manager to users of this machine through the Remote UI feature See Chapter 2 Remote UI Functio...

Page 51: ...e If you press Done and close the message board you can perform normal operations The message appears again when the main power is turned back ON or after Auto Clear has taken place You can set the Auto Clear Time from 0 to 9 minutes in one minute increments You can also cancel this function See Setting the Time for the Display to Return to the Basic Features Screen after Finishing Operations on p...

Page 52: ...of about two minutes after prints have been made or a key operation is performed the machine automatically restores the standard settings NOTE You can set the Auto Clear Time from 0 to 9 minutes in one minute increments The default setting is 2 minutes See Setting the Time for the Display to Return to the Basic Features Screen after Finishing Operations on p 3 54 Job Duration Display Function If y...

Page 53: ...ifferent indicators as shown below Paper Output When scanning and printing one original and when printing on free size paper or other available paper stock that is set in the stack bypass the paper is output as face up In other cases paper is output face down in page order For details about the available paper stock see Available Paper Stock on p 1 75 Display Remaining Paper Paper drawer is approx...

Page 54: ... of the parts on the outside and inside of the main unit control panel and touch panel display An illustration of the machine with some of the optional equipment attached is also provided to show you the copier model For more information on optional equipment parts and their functions see Chapter 7 Optional Equipment External View 1 2 3 4 5 6 7 8 9 ...

Page 55: ...es d d d d Original Output Area Originals that have been scanned from the original supply tray are output to the Original Output Area in the order that they are fed into the feeder e e e e Stack Bypass Feeds transparencies and nonstandard size paper stock See Making Prints Using the Stack Bypass on p 1 63 f f f f Main Power Switch Press to the I side to turn the power ON See Main Power and Control...

Page 56: ...g Toner on p 5 12 d d d d Front Cover Open this cover when clearing a paper jam See Clearing Paper Jams on p 6 2 e e e e Unit 1 Fixing Transport Unit Pull the Fixing Unit out to clear a paper jam that has occurred on the left side of the machine f f f f Unit 2 Duplexing Transport Unit Pull the Transport Unit out to clear a paper jam that has occurred on the right side of the machine g g g g Breake...

Page 57: ... glass Place originals into this tray with the surface that you want to copy face up c c c c Original Output Area Originals that have been scanned from the original supply tray are output to the Original Output Area in the order that they are fed into the feeder d d d d Slide Guide Adjust the slide guides to match the width of the original e e e e Original Set Indicator Lights when originals are p...

Page 58: ... key Press to clear incorrectly entered values or characters j j j j Error Indicator Flashes or lights if there is an error in the machine When the indicator flashes follow the instructions appearing on the touch panel display When the Error indicator maintains a steady red light contact your local authorized Canon dealer k k k k Processing Data Indicator Flashes green when the machine is performi...

Page 59: ...d print page counts You can also check print and scan page counts that are performed by the users who enter through login services for each application 1 Press Counter Check on the control panel The counter totals are shown on the touch panel display The machine s serial number is displayed Display Contrast Counter Check ...

Page 60: ...Press MEAP Counter Press the Application Name drop down list select the desired application The Application ID and license expiration date are displayed If the counter for the desired application is not displayed press or To check the version information of an application press Version Information ...

Page 61: ...Checking the Counter 1 29 Before You Start Using This Machine 1 The counter totals are shown on the touch panel display 2 Press Done The display returns to the Basic Features screen ...

Page 62: ...ng Device Information This function enables you to check the version of this machine and get information about the options attached 1 Press Counter Check on the control panel 2 Press Device Configuration The Device Configuration screen is displayed Display Contrast Counter Check ...

Page 63: ...g Device Information 1 31 Before You Start Using This Machine 1 3 Check the device configuration settings The Device configuration screen is divided into multiple screens Press or to display the desired screen ...

Page 64: ...to the power outlet WARNING Do not connect or disconnect the power cord with wet hands as this may result in electrical shock 2 Press the power switch to ON I side The main power switch is located on the right side of the machine The main power indicator on the control panel lights when the main power switch is turned ON IMPORTANT If the main power indicator on the control panel does not light eve...

Page 65: ...e initial function in Common Settings from the Additional Functions screen The Start Up screen is displayed until the machine is ready to scan If a message appears on the touch panel display proceed to step 4 The screen below is displayed when the machine is ready to scan The machine is ready to print within six minutes for the imageRUNNER 6020i 6020 or five minutes for the imageRUNNER 5020i 5020 ...

Page 66: ...ions to display on the Basic Features screen when turning ON the main power according to the Additional Functions settings See Selecting the Initial Function at Power ON on p 3 8 When the machine becomes ready to scan jobs can be reserved See Chapter 1 Basic Copying in the Copying Guide Chapter 4 Using Arranging Documents Stored in an Inbox in the Mail Box Guide or Chapter 1 Various Sending Method...

Page 67: ...ears the MEAP Start Up screen is displayed The background color of the screen is changed to brown You can press to switch to the Basic Features screen The MEAP Basic Features screen is displayed If login authentication by a login service is set The Start Up screen is displayed until the machine is ready to scan ...

Page 68: ...ine to become ready to print if you scan originals while the machine is warming up If SSO or SDL is set as the login service the machine will take longer to become ready to scan 4 If a message appears on the touch panel display follow the instructions If the message You must insert a control card appears Insert a control card into the card slot The Basic Features screen is displayed NOTE If the op...

Page 69: ...password have not been set this message will not appear For instructions on how to enter the Department ID and password see Operations after Turning the Power ON on p 1 48 If an authentication screen other than Department ID appears Enter the user name and password press Log In The SDL screen is used as an example above The Basic Features screen is displayed NOTE For instructions on how to enter t...

Page 70: ...ower Switch Press the control panel power switch to cancel the Sleep mode and resume normal machine operations NOTE The machine can receive and print documents from a personal computer even when it is in the Sleep mode I fax documents can also be received while the machine is in the Sleep mode ...

Page 71: ...uides or sections for instructions Setting Up and Connecting the Machine to the Network See the Network Guide Installing the Printer Driver See the PS Driver Guide and the PCL Driver Guide Using the Send Function See the Sending Guide Date and Time Settings See Setting the Current Date and Time on p 3 48 System Manager Settings See Specifying the System Manager Settings System Manager Settings on ...

Page 72: ... NOTE Before using the touch panel display peel off the protective film from the display Frequently Used Keys The following keys on the touch panel display are used frequently Press to close the current setting screen retaining the programmed settings from the Additional Functions screen Press to cancel the mode function that is either being set or has already been set on screens other than the Ad...

Page 73: ...at those keys have additional screens to set their functions If you press a key that does not have a right triangle it turns that mode On or Off Keys that have a colored triangle in the lower right corner and that appear on screens for storing settings are keys that already have settings stored in them State of Keys Description Key is not selected It is available for selection Key is highlighted K...

Page 74: ...ng numeric keys on the control panel Adjusting the Brightness If the touch panel display is difficult to view use the display contrast dial on the control panel to adjust its brightness NOTE To make the touch panel display brighter turn the dial counterclockwise To make it darker turn the dial clockwise Before Selection Drop Down List After Selection You can enter values using the touch panel disp...

Page 75: ...achine Entering Characters from the Touch Panel Display On screens which require alphanumeric entry enter characters using the keys displayed on the touch panel display as shown below Entering Alphabet Characters Example Enter Canon 1 Press the entry mode drop down list select Alphanum ...

Page 76: ...enter the desired symbols The entered values are displayed as shown below NOTE If you make a mistake when entering characters press or to position the cursor press Backspace to delete the characters enter the correct characters To delete all of the characters you have entered press Clear The available entry modes and maximum number of characters that you can enter vary depending on the type of ent...

Page 77: ... Switch is set to On some characters may be restricted and cannot be entered 1 Press the entry mode drop down list select Symbol 2 Press or to display the desired special character 3 Press é To enter a space press Space To move the cursor press or To enter alphanumeric characters press the entry mode drop down list select Alphanum enter the characters ...

Page 78: ...on the cursor press Backspace to delete the characters enter the correct characters To delete all of the characters you have entered press Clear The entered characters are displayed as shown below NOTE The available entry modes and maximum number of characters vary depending on the type of entries you are making 4 When you have entered all characters press OK C ...

Page 79: ...eric entry set the Inch Entry mode to On in Common Settings from the Additional Functions screen You can then enter inches when you press Inch on a screen requiring numeric entry The following example shows inch entry in the Zoom Program mode 1 To enter 1 1 2 inches press 1 _ 1 2 using the numeric keys on the touch panel display The entered values are displayed as shown above ...

Page 80: ... message prompting you to enter the Department ID or to insert the control card may be displayed even if you are already using the machine Follow the instructions of the message If you are using MEAP applications to manage authentication the following procedure is not necessary Operations after Turning the Power ON After turning the power ON the screen for entering the Department ID and Password m...

Page 81: ...e correct values 2 Press ID The Basic Features screen of the selected function appears on the touch panel display NOTE If the Department ID or password that you entered are incorrect the message This number has not stored Enter the number again appears Repeat the procedure from step 1 C ID 1 2 3 4 5 6 7 8 0 ID 9 C Reset Guide Additional Functions Processing Data Error Clear ...

Page 82: ...ot press ID after finishing your operations any subsequent copies are totaled under the same Department ID which you previously entered When your operations are complete the screen for entering the Department ID and password automatically appears after the set Auto clear time has elapsed even if you forget to press ID See Setting the Time for the Display to Return to the Basic Features Screen afte...

Page 83: ...ready for use NOTE For this section SDL and SSO Single Sign On are used as examples to explain the procedure However if you are using other login services login procedures may vary For details on selecting and setting login services contact your local authorized Canon dealer For instructions on how to register a user see the MEAP SMS Administrator Guide For instructions on how to turn the power ON...

Page 84: ...Logging in through the Authentication Screens of SDL and SSO 1 52 1 Before You Start Using This Machine 2 Enter the user name press OK You can also enter values using numeric keys 3 Press Password 0 9 ...

Page 85: ...ifference between the current time set in the computer register by the Active Directory and the time set on the machine an error occurs when you log on using SSO To be able to log on using SSO it is necessary to match the current time on both the computer and the machine For instructions on setting the current date and time of the machine see Chapter 3 Customizing Settings You must use the user lo...

Page 86: ...anel display You can also log on by pressing ID If the user name or password that you entered are incorrect a message appears prompting you to verify your user name and password Repeat the procedure from step 1 NOTE Depending on the SDL settings a drop down list that enables you to select a login record may be displayed For instructions on the settings see the MEAP SMS Administrator Guide ID ...

Page 87: ...ild mode See Chapter 2 Additional Copy Functions in the Copying Guide Chapter 2 Scanning Originals into an Inbox in the Mail Box Guide or Chapter 1 Various Sending Methods in the Sending Guide Platen Glass Place the originals on the platen glass when scanning bound originals originals on heavy or lightweight paper and transparencies Feeder Place a stack of originals in the feeder and press Start T...

Page 88: ...ode you have set LTR and STMT originals can be placed either vertically or horizontally However the scanning speed for horizontally placed originals is somewhat slower than for vertically placed originals You can place originals horizontally when printing with a Preset Zoom mode such as when enlarging an LTR original onto 11 x 17 paper Horizontally placed LTR and STMT originals are referred to as ...

Page 89: ...and STMTR 1 Lift up the feeder platen glass cover IMPORTANT The machine is equipped with an open close sensor on the feeder platen glass cover see circled area in the above illustration When placing originals on the platen glass lift up the feeder platen glass cover about 11 7 8 30 cm so that the sensor detaches from the feeder If the sensor does not detach from the feeder the size of the original...

Page 90: ... left corner Place books and other bound originals on the platen glass in the same way When enlarging LTR or STMT originals onto 11 x 17 or LGL paper place the originals horizontally on the platen glass and align them with the LTRR or STMTR marks NOTE If you are copying STMT originals using the platen glass you need to set LTRR STMT Original Selection from the Additional Functions screen See Disti...

Page 91: ...n hard on the feeder platen glass cover when using the platen glass to make copies of thick books Doing so may damage the platen glass and result in personal injury IMPORTANT If you are placing originals on the platen glass the size of the original is detected after the feeder platen glass cover is closed Be sure to close the feeder platen glass cover before copying NOTE Remove the original from t...

Page 92: ...R STMT Tray capacity 100 sheets 20 Ib bond 80 g m2 IMPORTANT Do not place the following types of originals in the feeder Originals with tears or large binding holes Severely curled originals or originals with sharp folds Clipped or stapled originals Carbon backed paper or other originals which might not feed smoothly Transparencies and other highly transparent originals Check the condition of orig...

Page 93: ...the originals 2 Neatly place your originals face up into the original supply tray If you are enlarging LTR or STMT originals onto 11 x 17 or LGL paper place your originals horizontally Place your originals as far into the feeder as they will go until the Original Set indicator is lit Original Set Indicator ...

Page 94: ... The scanned originals are output face down to the original output area You can place different size originals i e LTR and 11 x 17 STMT and LTRR together in one group into the feeder when you set the Different Size Originals mode See Chapter 2 Additional Copy Functions in the Copying Guide Chapter 2 Scanning Originals into an Inbox in the Mail Box Guide or Chapter 1 Various Sending Methods in the ...

Page 95: ...annot use the Auto Copy Ratio Entire Image Finisher 1 2 Sided 2 2 Sided Book 2 Sided Two Page Separation Cover Sheet Insertion Shift Booklet Transparency Interleaving Image Combination Image Separation Image Repeat Form Composition or Page Numbering modes See Chapter 1 Basic Copying in the Copying Guide or Chapter 2 Additional Copy Functions in the Copying Guide If you select Free Size for printin...

Page 96: ...paper has already been loaded into the stack bypass Press Paper Select Stack Bypass to specify the loaded paper proceed to step 6 If the specified paper is different from the paper which is loaded into the stack bypass Check to see if any job is reserved See Checking Job and Device Status on p 2 2 If there is a current reserved job reserve a change of paper for the stack bypass See Using the Stack...

Page 97: ...o the stack bypass Make sure that the height of the paper stack does not exceed the limit mark Align the required number of sheets of paper with the slide guides The surface that you want to print on must be placed face up Insert the paper into the machine until it stops IMPORTANT If Stack Bypass Standard Settings is set to On you can load only the registered paper types into the stack bypass Slid...

Page 98: ...ing screen is displayed adjust the width of the slide guides specify the paper size press OK If the following screen is displayed adjust the width of the slide guides to match the paper size stored in Stack Bypass Standard Settings or set Stack Bypass Standard Settings to Off See Setting the Standard Paper for the Stack Bypass on p 3 35 ...

Page 99: ...to On you can load only the registered paper types into the stack bypass NOTE When loading paper other than a standard size press Free Size To select an A or B series paper size press A B size 5 Select the paper type press OK IMPORTANT Select the correct paper type to avoid a paper jam NOTE If you select Free Size you cannot select Transparency For details on paper types see Available Paper Stock ...

Page 100: ...ne If you press Stack Bypass Settings you can reset the paper size and type 7 Place your originals select the desired copy settings 8 Press Start Copying starts NOTE To cancel all settings and return the machine to the standard mode press Reset Paper Size Currently Loaded Paper Size Selected ...

Page 101: ... following example assumes that 11 x 17 plain paper is being fed from the stack bypass for the current job and that you are reserving LTR plain paper to be fed from the stack bypass for the next reserved job IMPORTANT If Stack Bypass Standard Settings is set to On you can reserve a job only with the registered paper types See Setting the Standard Paper for the Stack Bypass on p 3 35 1 Place your o...

Page 102: ...ding paper other than a standard size press Free Size To select an A or B series paper size press A B size If Stack Bypass Standard Settings is set to On the screen which shows the paper size type selected beforehand will be displayed See Setting the Standard Paper for the Stack Bypass on p 3 35 4 Select the paper type press OK ...

Page 103: ...current job is using LTR plain paper from the stack bypass the first reserved job will use LTRR plain paper the second reserved job will use LGL plain paper the third reserved job will use 11 x 17 plain paper and the fourth reserved job will use STMTR plain paper The paper size type that is shown here and on the Basic Features screen is STMTR plain paper 5 Press Done This completes the reserved se...

Page 104: ...splayed when its turn comes to print Even when setting reserved print settings and if paper is loaded in the stack bypass specify the same paper size and type as specified in steps 2 and 3 Otherwise printing will not start 8 Select the paper size press Next NOTE When loading paper other than a standard size press Free Size To select an A or B series paper size press A B size ...

Page 105: ...Making Prints Using the Stack Bypass 1 73 Before You Start Using This Machine 1 9 Select the paper type press OK Printing starts ...

Page 106: ...is printed However an interrupt copy job is printed at the end of a copy set IMPORTANT The Send function is only available on the imageRUNNER 6020i 5020i NOTE If more than one send receive job is being performed at the same time performance of the network sending and receiving may be reduced Printing from an inbox involves the same procedure as printing data in an inbox Printing remote copy jobs o...

Page 107: ... on Letterhead or 3 Hole Punch paper we recommend that you set the Image Orientation Priority to On from the Additional Functions screen See Chapter 3 Customizing Settings in the Copying Guide 5 3 Hole Punch paper can only be set vertically LTR Set the 3 Hole Punch paper as follows according to its orientation Left open when loading paper into the paper drawers set the paper with the holes on the ...

Page 108: ...e Paper Deck on p 7 7 Stack bypass Making Prints Using the Stack Bypass on p 1 63 The paper deck is optional Paper Size Width x Length Available Loading Place Paper Set Place Paper Drawer 1 2 Paper Drawer 3 4 Stack Bypass Paper Deck 11 x 17 11 x 17 LGL 8 1 2 x 14 LTR 11 x 8 1 2 LTRR 8 1 2 x 11 STMTR 5 1 2 x 8 1 2 Free Size 4 x 5 7 8 to 11 5 8 x 17 100 x 148 mm to 297 x 432 mm Possible Not Possible...

Page 109: ...ing Copy and Print Job Details 2 8 Printing the Copy and Print Job Logs 2 10 Checking Send Job Details 2 12 Performing Send Jobs 2 14 Checking Received Job Details 2 21 Performing Received Jobs 2 23 Canceling a Job 2 27 Canceling from the Touch Panel Display 2 27 Canceling Using the Stop Key 2 28 Canceling a Job from the System Monitor Screen 2 29 Priority Printing 2 31 Handling Print Jobs Sent fr...

Page 110: ...to check a job that has already been processed From the System Monitor screen it is possible to quickly acquire information about the machine check the amount of paper remaining in the standard and optional paper sources check the amount of memory currently being used and view any error messages NOTE Many of the check change job operations can also be performed from the Remote UI See Chapter 2 Rem...

Page 111: ...f a job type Copy Send Print or Receive is selected Press Status to check the jobs that are currently being processed or waiting to be processed Print is selected in this example Press Log to check the jobs that have already been processed The log is organized according to job types Select the job type you want to check from the Select Type drop down list IMPORTANT You cannot check the status of s...

Page 112: ...tatus of the machine Icon Status of Job Description Icon Type of Job Description Operating Copy job Waiting Send job Error Mail Box job Canceling Printer job Paused Remote copy Secured job Report job Job complete Local print The status of the job and device currently being processed is displayed The amount type and size of the paper loaded in the paper drawers are displayed The amount of memory av...

Page 113: ...this machine as input The machine then processes this data and outputs it This operation is called Spool NOTE The spool status is displayed only if the optional Multi PDL Printer Kit is attached Operations such as checking or canceling spool jobs are possible only if Use Spooler is set to On For details see the Network Guide 1 Press System Monitor 2 Press Print ...

Page 114: ...Checking Job and Device Status 2 6 2 Checking Job and Device Status 3 Press Spool Status 4 Press the Spool Type drop down list ...

Page 115: ...s Select the job whose spooling you want to cancel press Cancel Press Yes If you do not want to cancel the job press No If you want to check a job s detailed information Press Spool Status Select the desired job press Details check the detailed information Press Done 5 Press Done The display returns to the Basic Features screen ...

Page 116: ...cified IMPORTANT The memory of this machine can store up to 3 700 pages If a paper jam occurs or if the machine runs out of paper print jobs can be sent even if this maximum capacity has been reached However the last job s will not be saved Checking Copy and Print Job Details 1 Press System Monitor select the job type Copy or Print IMPORTANT To check the details of jobs specified through a MEAP ap...

Page 117: ...ils 2 9 2 Checking Job and Device Status 2 Press Status or Log select the job whose details you want to check press Details 3 Check the detailed information press Done repeatedly until the Basic Features screen appears ...

Page 118: ...p 1 select a job type from the Select Type drop down list press Print List NOTE If plain or recycled paper 11 x 17 LGL LTR or LTRR is loaded in a paper drawer that has been set to On when you press Other to select a paper source in Drawer Eligibility for APS ADS from the Additional Functions screen you can print a list See Setting a Paper Drawer for Auto Paper Selection Auto Drawer Switching on p ...

Page 119: ...g Job and Device Status 3 Press Yes If you do not want to print press No The Copy Log List is printed if you selected Copy The Print Log List is printed if you selected Print 4 Press Done The display returns to the Basic Features screen ...

Page 120: ...ot check the status of send jobs specified from MEAP applications because these jobs are not displayed NOTE If you set Erase Failed TX to Off and specify multiple destinations the job status screen of the specified destinations that were completed without errors indicates Finished Also in this case if you select any of these destinations and cancel their jobs their job details are indicated on the...

Page 121: ...ob press Resend See Resending a Send Job on p 2 17 If you want to print the job status details or log press Print List See Printing the Send Job Status Log on p 2 19 If you are sending to multiple recipients using the same sending method you can display the Broadcast List Press Broadcast List to confirm the recipients and status 4 Press Done repeatedly until the Basic Features screen appears ...

Page 122: ...ions Settings in the Sending Guide Multiple destinations cannot be changed at the same time Also sending destinations within a group cannot be changed at one time If there is any job being processed or in the Send queue that has the same job number as the destination you want to change the change cannot be made except for Delayed Send jobs You cannot check the status of send jobs specified from ME...

Page 123: ...ng Job and Device Status 3 Press Change Destination If you are sending to multiple destinations using the same sending method Broadcast List is displayed Press Broadcast List select the destination to be changed press Change Destination ...

Page 124: ...s 4 Change the destination The destinations which can be changed and their details are as follows E mail E mail address I Fax I Fax address File Host name file path user name password 5 Press OK 6 Press Done repeatedly until the Basic Features screen appears ...

Page 125: ...as not sent due to an error IMPORTANT To change the address of the job with a send error set Erase Failed TX to Off from the Additional Functions screen See Chapter 3 Setting Storing the Communications Settings in the Sending Guide 1 Press System Monitor Send 2 Press Status select the job to resend press Details ...

Page 126: ...vice Status 3 Press Resend If you are sending to multiple destinations using the same sending method Broadcast List is displayed Press Broadcast List select the destination press Resend 4 Press Done repeatedly until the Basic Features screen appears ...

Page 127: ...nd jobs specified from MEAP applications because these jobs are not displayed NOTE If plain or recycled paper 11 x 17 LGL LTR or LTRR is loaded in a paper drawer that has been set to On when you press Other to select a paper source in Drawer Eligibility for APS ADS from the Additional Functions screen you can print a list See Setting a Paper Drawer for Auto Paper Selection Auto Drawer Switching on...

Page 128: ... Job and Device Status 3 Press Yes If you do not want to print press No If you selected Status the TX Reserve List is printed If you selected Log the Activity Report is printed 4 Press Done The display returns to the Basic Features screen ...

Page 129: ...PORTANT You cannot check the details of jobs that have been received through MEAP applications 1 Press System Monitor Receive 2 Select the job whose details you want to check press Details NOTE The status of each icon displayed on the left side of the list is as follows A job for which an Activity Report has already been printed A job for which an Activity Report has not yet been printed ...

Page 130: ...Checking Job Details 2 22 2 Checking Job and Device Status 3 Confirm the details 4 Press Done repeatedly until the Basic Features screen appears ...

Page 131: ...b Log 1 Press System Monitor Receive 2 Press Print List NOTE If plain or recycled paper 11 x 17 LGL LTR or LTRR is loaded in a paper drawer that has been set to On when you press Other to select a paper source in Drawer Eligibility for APS ADS from the Additional Functions screen you can print a list See Setting a Paper Drawer for Auto Paper Selection Auto Drawer Switching on p 3 14 ...

Page 132: ...f you do not want to print press No The Activity Report is printed 4 Press Done The display returns to the Basic Features screen Checking Received I Fax Jobs 1 Press System Monitor Receive 2 Press Checking RX of I Fax Jobs A message that the job is being checked is displayed ...

Page 133: ...en so that you can receive documents using POP Post Office Protocol 3 Press Done The display returns to the Basic Features screen Checking Forwarded Job Details You can check the details of a job while the job is being forwarded using Forwarding Settings 1 Press System Monitor Receive 2 Press Forwarding Status select the job whose details you want to check press Details ...

Page 134: ...Checking Job Details 2 26 2 Checking Job and Device Status 3 Confirm the details 4 Press Done repeatedly until the Basic Features screen appears ...

Page 135: ...o cancel a job in several ways Canceling from the Touch Panel Display 1 Press Cancel on the screen which appears while the machine is scanning printing or waiting to print the document The selected job is canceled NOTE When you cancel a job during scanning be sure to remove the original of that job ...

Page 136: ...d press Cancel on the touch panel display on the screen that appears during printing 2 Select the job to be canceled from the list press Cancel You cannot select multiple jobs and cancel them all at once When canceling multiple jobs select and cancel one job at a time If you do not want to cancel the job press Resume Copying The selected job is canceled 3 Press Resume Copying 3 6 9 ON OFF Start St...

Page 137: ...el remote or cascade copy jobs from the machine that is scanning the original press Copy on the System Monitor screen 2 Press Status 3 Select the job to be canceled press Cancel You cannot select multiple jobs and cancel them all at once If multiple jobs need to be canceled select and cancel one job at a time The job in the process of sending may not be canceled even if you press Cancel ...

Page 138: ...0 2 Checking Job and Device Status 4 Press Yes If you do not want to cancel the job press No NOTE The canceled job is displayed as NG No Good on the Log screen 5 Press Done The display returns to the Basic Features screen ...

Page 139: ...ce Status 2 Priority Printing When you set priority printing for a job the machine starts printing the job once the current print job is complete 1 Press System Monitor Print 2 Press Status 3 Select the job for priority printing press Print Next ...

Page 140: ...Priority Printing 2 32 2 Checking Job and Device Status 4 Press Done The display returns to the Basic Features screen ...

Page 141: ...hecking Job and Device Status 2 Handling Print Jobs Sent from a Computer You can temporarily stop a print job sent from a computer or skip a print error if it occurs 1 Press System Monitor Print 2 Press Status 3 Select the desired job press Details ...

Page 142: ...inue the print job even when a print error occurs by pressing Auto Continue depending on the type of print error However the print output may not be the same as expected If printing is canceled from a computer or if the data is less than one page the print job may not be processed correctly Press Form Feed to force the print data remaining in memory to be output 5 When you are finished handling th...

Page 143: ...ob IMPORTANT If the main power is turned OFF any secured documents are erased The secured document is erased after printing is complete You cannot change the settings of the secured document Please note that the memory of the machine can store up to 3 700 pages When you send a secured document to be stored in the memory to be printed at a later time and the memory is full already reached its maxim...

Page 144: ... keys press OK Enter the same password that you originally assigned to the document at the computer The machine becomes ready to print the secured document To cancel printing press Cancel Printing starts NOTE If there is a current or reserved job the machine starts printing after that job is complete 5 Press Done The display returns to the Basic Features screen 0 9 ...

Page 145: ... 3 26 Storing an Image Form 3 28 Setting the Standard Paper for the Stack Bypass 3 35 Setting the Standard Local Print Settings 3 39 Changing the Display Language 3 41 Reversing the Display Colors 3 43 Setting the Offset Jobs Mode 3 44 Returning the Common Settings to Their Defaults 3 45 Setting the Timer Timer Settings 3 48 Setting the Current Date and Time 3 48 Setting the Time to Initiate Auto ...

Page 146: ...3 Customizing Settings 3 2 3 Customizing Settings Report Settings 3 68 Specifying Report Settings 3 68 Printing Lists 3 75 ...

Page 147: ... Function Select Initial Function Copy Send Mail Box MEAP Set System Monitor as the Initial Function On Off Set Device as the default screen for System Monitor On Off p 3 8 Auto Clear Setting Initial Function Selected Function p 3 10 Audible Tones Entry Tone Error Tone Job Done Tone All On Off p 3 11 Inch Entry On Off p 3 13 Drawer Eligibility For APS ADS Copy Printer Mail Box Receive Other Bypass...

Page 148: ...ith the Finisher Do Not Collate Collate Offset Collate Group Offset Group Staple Corner Top Left Bottom Left Top Right Bottom Right Double Left Right With the Finisher Puncher Unit B1 Do not Collate Collate Offset Collate Group Offset Group Staple Corner Top Left Bottom Left Top Right Bottom Right Double Left Right Hole Punch With the Copy Tray C3 Do Not Collate Collate Rotate Collating Group Rota...

Page 149: ...5 Daily Timer Settings Sunday to Saturday 00 00 to 23 59 in one minute increments p 3 57 Low power Mode Time 10 15 20 30 40 50 min 1 hour 90 min 2 3 4 hours p 3 58 Adjustment Cleaning Zoom Fine Adjustment X Y 0 1 0 to 1 0 in 0 1 increments p 3 60 Saddle Stitcher Staple Repositioning Press Start p 3 61 Saddle Stitch Position Adjustment 2 0 mm to 2 0 mm 0 mm in 0 25 mm increments p 3 63 Exposure Rec...

Page 150: ...24 Hours Print MDN DSN on Receipt On Off Always send notice for RX errors On Off Use Send Via Server On Off Memory RX Inbox Settings Memory RX Inbox Password 7 digit number max Use I Fax Memory Lock On Off Memory Lock Start Time Everyday Select Days Off Memory Lock End Time Everyday Select Days Off p 4 32 Remote UI On Off p 4 50 Manage Access to Address Book Address Book Password 7 digit number ma...

Page 151: ...tems that appear only when the appropriate optional equipment is attached For instructions on how to set the modes not described in this manual refer to the appropriate Operation Manual listed in the front of this Reference Guide See Manuals for the Machine Depending on the types of optional equipment attached some items may not be displayed ...

Page 152: ...een and make the required settings Selecting the Initial Function at Power ON You can specify which screen to display when you turn ON the main power or after the Auto Clear function has taken place The System Monitor screen can also be specified as the initial screen NOTE The default settings are Select Initial Function Copy Set System Monitor as the Initial Function Off Set Device as the default...

Page 153: ...hat there is no MEAP application installed appears Send is only displayed if you are using the imageRUNNER 6020i 5020i If you want to set the System Monitor screen as the initial screen Select On for Set System Monitor as the Initial Function press OK The System Monitor screen appears when the main power is turned ON or after Auto Clear initiates The selected mode is set NOTE If you do not want to...

Page 154: ...al Function is displayed after Auto Clear initiates NOTE The time delay for Auto Clear can be set See Setting the Time for the Display to Return to the Basic Features Screen after Finishing Operations on p 3 54 The default setting is Initial Function 1 Press Additional Functions Common Settings Auto Clear Setting NOTE If the desired setting is not displayed press or to scroll to the desired settin...

Page 155: ... example if the System Monitor screen is set as the Initial Function and Auto Clear is performed after setting the Mail Box function the display returns to the Inbox Selection screen The selected mode is set 3 Press Done repeatedly until the Basic Features screen appears Setting the Entry Tone Error Tone and the Job Done Tone You can select whether to sound audible tones The following tones sound ...

Page 156: ...Settings 1 Press Additional Functions Common Settings Audible Tones NOTE If the desired setting is not displayed press or to scroll to the desired setting 2 Select On or Off for the desired tones press OK The selected mode is set 3 Press Done repeatedly until the Basic Features screen appears ...

Page 157: ...s for entering values in inches on the numeric entry screens NOTE The default setting is On Even if Inch Entry is set to On you still have the option to enter measurements in millimeters by pressing mm 1 Press Additional Functions Common Settings Inch Entry NOTE If the desired setting is not displayed press or to scroll to the desired setting ...

Page 158: ...ter Mail Box Receive and Other functions It is useful when different paper drawers are used for different purposes NOTE Paper drawers set to On are used for the following functions APS Auto Paper Selection The machine automatically selects the appropriate paper size paper drawer based on the original s size and copy ratio settings ADS Auto Drawer Switching If a paper drawer runs out of paper durin...

Page 159: ...g is not displayed press or to scroll to the desired setting 2 Select Copy Printer Mail Box Receive or Other The prints from a Remote Copy job are included in Copy Receive can only be selected if you are using the imageRUNNER 6020i 5020i Remote copying can only be used if you are using the imageRUNNER 6020i 5020i You can select Other if you are setting the paper drawers to be used for printing rep...

Page 160: ...tep 2 you can select whether the machine considers the paper type loaded in a paper drawer If Consider Paper Type is set to On the paper is not fed even when it runs out during printing unless another paper drawer is loaded with the same paper size and type For details on stored paper types see Identifying the Type of Paper in a Paper Drawer on p 3 17 If you set Consider Paper Type to Off the pape...

Page 161: ...until the Basic Features screen appears Identifying the Type of Paper in a Paper Drawer You can specify the paper type loaded in each paper drawer 1 Press Additional Functions Common Settings 2 Press or until Store Paper Type appears press Store Paper Type 3 Select the paper drawer for which you want to store the paper type ...

Page 162: ...awer is indicated in the following places 4 Select the paper type loaded in the paper drawer press OK Load the same type of paper as the stored paper type in each paper drawer The selected mode is set NOTE For details on paper types see Available Paper Stock on p 1 75 Paper Drawer 1 Paper Drawer 2 Paper Drawer 3 Paper Drawer 4 ...

Page 163: ...es screen appears NOTE The paper types stored here are displayed through the use of icons on the paper selection screen as shown below Changing the Energy Saver Mode Setting You can reduce the power that is consumed by the machine by changing the Energy Saver mode setting NOTE The default setting is 10 1 Press Additional Functions Common Settings ...

Page 164: ... the approximate delay times from power ON to Ready to Print status are listed below 10 10 less power approximately 50 seconds 25 25 less power approximately 90 seconds 50 50 less power approximately 180 seconds None 2 less power approximately 0 seconds The figures in parentheses show the approximate time it takes for the machine to return to the Ready to Print status The selected mode is set 4 Pr...

Page 165: ... machine is in the Sleep Mode NOTE When the printer or sending functions are attached to the machine the Energy Consumption in the Sleep Mode setting may be set automatically depending on the network settings or the status of jobs The default setting is Low 1 Press Additional Functions Common Settings 2 Press or until Energy Consumption in Sleep Mode appears press Energy Consumption in Sleep Mode ...

Page 166: ... Basic Features screen appears Distinguishing between LTRR and STMT Originals You can designate the way the machine handles LTRR or STMT originals placed on the platen glass For example you can make a setting to distinguish the original sizes manually or scan the originals of only one of these sizes NOTE The default setting is Use LTRR Format 1 Press Additional Functions Common Settings ...

Page 167: ...stinguish Manually If you place an LTRR or STMT original on the platen glass a screen enabling you to select the original size appears when scanning Use LTRR Format If you place an LTRR or STMT original on the platen glass the machine detects the original as LTRR Use STMT Format If you place an LTRR or STMT original on the platen glass the machine detects the original as STMT The selected mode is ...

Page 168: ... to be used NOTE It is possible to assign a single tray to multiple functions We recommend attaching the supplied labels to the trays to identify their respective uses Blank labels are also provided The default settings are Tray A Copy Printer Mail Box Receive and Other Tray B Copy Printer Mail Box Receive and Other 1 Press Additional Functions Common Settings 2 Press or until Tray Designation app...

Page 169: ...eport function If you want to set a tray as the designated tray for only a certain function select only that function The selected mode is set NOTE When the paper reaches the stacking limit of the tray while both trays are set as the designated tray for a certain function the machine automatically changes the output tray to another available tray However it is recommended that a single output tray...

Page 170: ... printing does not take place even if you set it as the highest priority until the current job is complete However if the current job is paused a job with a higher priority may start printing depending upon the settings The default settings are Copy 1 Highest priority Printer 2 Mail Box 3 Receive 3 Other 3 1 2 and 3 indicate the priority sequence 1 Press Additional Functions Common Settings 2 Pres...

Page 171: ... Copy job are included in Copy You can only select Receive if you are using the imageRUNNER 6020i 5020i Select Other if you are printing from the Report function The PDL prints from MEAP applications are included in Printer The Local prints from MEAP applications are included in Mail Box The selected mode is set NOTE If the same printing priority has been specified for multiple functions printing ...

Page 172: ... Documents Stored in an Inbox in the Mail Box Guide IMPORTANT Up to 100 image forms can be stored However this number varies depending upon the capacity of the hard disk Be sure to place the original that contains the image form on the platen glass It is not possible to scan an image form from the feeder NOTE Image forms from an Entire Image Composition can also be retrieved from a personal comput...

Page 173: ... That Are Common to Each Function Common Settings 3 29 3 Customizing Settings 3 Press Store 4 Select the size of the original that contains the image form press Next NOTE To select an A or B series paper size press A B size ...

Page 174: ...Setting Specifications That Are Common to Each Function Common Settings 3 30 3 Customizing Settings 5 Select a form feature If Entire Image Composition is selected Press Next ...

Page 175: ...canning Originals into an Inbox in the Mail Box Guide If you want to change the scanning exposure press or See Chapter 1 Basic Copying in the Copying Guide or Chapter 2 Scanning Originals into an Inbox in the Mail Box Guide If you want to select the image quality for scanning select the type of original from the image quality drop down list See Chapter 1 Basic Copying in the Copying Guide or Chapt...

Page 176: ... the form name If you do not enter the form name the date and time will be displayed instead 7 Place the original that contains the image form on the platen glass press Start The image form is stored and displayed on the image form list NOTE The following two types of icons appear on the screen Transparent Image Entire Image Composition 8 Press Done repeatedly until the Basic Features screen appea...

Page 177: ...k Print make a copy of the image See Chapter 2 Additional Copy Functions in the Copying Guide or Chapter 4 Using Arranging Documents Stored in an Inbox in the Mail Box Guide 4 Check the detailed information press Done If you want to change the name of an image form press Change Form Name NOTE For instructions on how to enter characters on the touch panel display See Entering Characters from the To...

Page 178: ...ional Functions Common Settings 2 Press or until Store Form for Form Composition appears press Store Form for Form Composition 3 Select the image form that you want to erase press Erase NOTE To check stored image forms press Check Print make a copy of the image See Chapter 2 Additional Copy Functions in theCopying Guide or Chapter 4 Using Arranging Documents Stored in an Inbox in the Mail Box Guid...

Page 179: ...ou can set the paper size and type that the stack bypass uses beforehand This setting is useful if you always load the same paper size and type into the stack bypass NOTE If you are using the stack bypass as a paper source for the Copy Mail Box and Receive functions you must select the stack bypass when setting Drawer Eligibility For APS ADS See Setting a Paper Drawer for Auto Paper Selection Auto...

Page 180: ...at Are Common to Each Function Common Settings 3 36 3 Customizing Settings 2 Press or until Stack Bypass Standard Settings appears press Stack Bypass Standard Settings 3 Select On press Store If you select Off proceed to step 6 ...

Page 181: ... 3 Customizing Settings 4 Select the desired paper size press Next NOTE To select a nonstandard paper size press Free Size To select an A or B series paper size press A B size 5 Select the desired paper type press OK NOTE If Free Size is selected Transparency cannot be selected ...

Page 182: ...Setting Specifications That Are Common to Each Function Common Settings 3 38 3 Customizing Settings 6 Press OK The selected mode is set 7 Press Done repeatedly until the Basic Features screen appears ...

Page 183: ...t Paper Source Copies Finisher With the Finisher Do not Collate Collate Offset Collate Group Offset Group Staple Corner Top Left Bottom Left Top Right Bottom Right Double Left Right With the Finisher and Puncher Unit B1 Do not Collate Collate Offset Collate Group Offset Group Staple Corner Top Left Bottom Left Top Right Bottom Right Double Left Right Hole Punch With the Copy Tray C3 Do not Collate...

Page 184: ...ne Paper Select Select the paper source Copies Set the number of copies from one to 2 000 sets Finisher Set the type of collating Two sided Print Set whether to perform two sided printing Erase Document After Printing Set whether to erase a document after printing Merge Documents Set whether to merge documents when you select multiple documents The mode selection screen is divided into two screens...

Page 185: ...uage You can change the language displayed on the touch panel display NOTE The default setting is Off If there is a difference between the language set on the machine and the one set on the Active Directory the sender s common name is not displayed on the e mail recipient s machine 1 Press Additional Functions Common Settings 2 Press or until Language Switch appears press Language Switch ...

Page 186: ...want to change the display language 4 Press OK The selected mode is set and the display returns to the Basic Features screen NOTE If Language Switch is set to On some characters are restricted and cannot be entered To enable all characters perform the following steps On the Language Switch Screen Display select Off press OK Even if Language Switch is set to On there are some languages that cannot ...

Page 187: ...isplay for better viewing If you are finding it hard to make out what is being shown on the display using this function may make things clearer NOTE The default setting is Off 1 Press Additional Functions Common Settings 2 Press or until Reversed Display Color appears press Reversed Display Color 3 Select On or Off press OK The color tone of the touch panel display is changed ...

Page 188: ... the Basic Features screen appears Setting the Offset Jobs Mode This mode enables you to collate and output each job separately If Offset Jobs is set to Off the machine outputs pages without collating NOTE The default setting is On 1 Press Additional Functions Common Settings 2 Press or until Offset Jobs appears press Offset Jobs ...

Page 189: ...atures screen appears Returning the Common Settings to Their Defaults You can restore all of the Common Settings to their defaults initial settings NOTE If you set Language Switch to On and then initialize the Common Settings while switching languages the Language Switch setting returns to the default setting of Off However the displayed language remains unchanged See Changing the Display Language...

Page 190: ...That Are Common to Each Function Common Settings 3 46 3 Customizing Settings 2 Press or until Initialize Common Settings appears press Initialize Common Settings 3 Press Yes To cancel initializing the Common Settings press No ...

Page 191: ...h Function Common Settings 3 47 3 Customizing Settings The message Initialized appears on the display for approximately two seconds The Common Settings are returned to their defaults 4 Press Done repeatedly until the Basic Features screen appears ...

Page 192: ...les you to set the current date and time The set date and time also act as a guide to set functions which require a timer GMT The time at the Greenwich Observatory in England is referred to as Greenwich Mean Time GMT Time Zone The standard time zones of the world are expressed globally in terms of the difference in hours up to 12 hours from GMT 0 hours A time zone is a region throughout which the ...

Page 193: ... or to scroll to the desired setting 2 Enter the current date month day year and time using numeric keys Enter all four digits of the year Enter the date and the time in 24 hour notation as four consecutive digits Examples May 06 0506 7 05 a m 0705 11 18 p m 2318 NOTE If you make a mistake when entering values press Clear enter the values again starting with the month 0 9 C ...

Page 194: ...time zone where the machine is located NOTE The default setting is GMT 5 00 Eastern time US Canada GMT 5 00 Central time US Canada GMT 6 00 Mountain time US Canada GMT 7 00 Pacific time US Canada GMT 8 00 If the desired time zone is not displayed press or to scroll through the list If you are setting Daylight Saving Time Press On Start Date ...

Page 195: ...ress End Date make the settings in the same way as Start Date press OK NOTE If you set the Daylight Saving Time the machine automatically sets the standard time of the machine one hour forward on the specified date and time You can also set the time by pressing numeric keys The Time settings can be set in one hour increments from 0 to 23 hours The default setting is On Between 2 00 a m on the firs...

Page 196: ...til the Basic Features screen appears Setting the Time to Initiate Auto Sleep after Finishing Operations If the machine is not operated no keys are pressed for a certain period of time the control panel power switch automatically switches OFF to save power The machine enters the Sleep mode NOTE The default setting is 1 hour ...

Page 197: ...red setting is not displayed press or to scroll to the desired setting 2 Press or to enter the desired Auto Sleep Time press OK The Auto Sleep Time settings are 10 15 20 30 40 or 50 minutes 1 hour 90 minutes and 2 3 or 4 hours in one hour increments The selected mode is set 3 Press Done repeatedly until the Basic Features screen appears ...

Page 198: ...eturns to the Basic Features screen Standard setting of the selected function This time is called Auto Clear Time The Auto Clear Time can be set from 0 to 9 minutes in one minute increments and can also be set to Off NOTE If 0 is selected the Auto Clear Time mode is not set The default setting is 2 minutes 1 Press Additional Functions Timer Settings Auto Clear Time NOTE If the desired setting is n...

Page 199: ...selected mode is set 3 Press Done repeatedly until the Basic Features screen appears Setting the Time for the Unit to Quiet Down after the Last Task This machine enters the Quiet mode after a specified amount of time has elapsed following a print job or after a key has been pressed You can specify the amount of time that elapses prior to entering the Quiet mode NOTE If 0 is selected the Quiet mode...

Page 200: ...d setting is not displayed press or to scroll to the desired setting 2 Press or to enter the desired time period press OK The Time Until Unit Quiets Down settings are from 0 to 9 minutes in one minute increments You can also enter values by using numeric keys The selected mode is set 3 Press Done repeatedly until the Basic Features screen appears 0 9 ...

Page 201: ...Sleep mode each day of the week NOTE Setting Range Daily from Sunday to Saturday 00 00 to 23 59 in one minute increments If the Auto Sleep Time and Daily Timer modes are both set the Auto Sleep Time setting has priority The default setting is no setting 1 Press Additional Functions Timer Settings Daily Timer Settings NOTE If the desired setting is not displayed press or to scroll to the desired se...

Page 202: ...er You can also press Clear to clear the incorrect values The selected mode is set 3 Press Done repeatedly until the Basic Features screen appears Setting the Low Power Mode Time If the machine is not operated no keys are pressed for a certain period of time after prints have been made or a key operation performed the machine automatically enters the Low power mode You can easily change the time i...

Page 203: ... Mode Time appears press Low power Mode Time 3 Press or to enter the Low Power mode time press OK The Low power Mode Time settings are 10 15 20 30 40 or 50 minutes 1 hour 90 minutes and 2 3 or 4 hours The selected mode is set 4 Press Done repeatedly until the Basic Features screen appears ...

Page 204: ...the desired screen and make the required settings Making a Zoom Fine Adjustment When you print a copy or document from an inbox a slight difference in size may occur between the size of the original image and the size of the printed image If this happens you can perform a fine adjustment to compensate for this difference 1 Press Additional Functions Adjustment Cleaning Zoom Fine Adjustment NOTE If...

Page 205: ...ddle Stitcher Unit After a staple jam in the optional Saddle Stitcher Unit has been cleared or the staple cartridge is replaced paper is fed to the unit and is stapled a few times This procedure makes staples immediately available for the next job IMPORTANT This function can only be set when the Saddle Finisher F2 optional is attached The following paper sizes can be used for this function 11 x 17...

Page 206: ...itional Functions Adjustment Cleaning Saddle Stitcher Staple Repositioning NOTE If the desired setting is not displayed press or to scroll to the desired setting 2 Press Start To cancel staple repositioning press Cancel 3 Press Done repeatedly until the Basic Features screen appears ...

Page 207: ...er are not exactly in the middle of the booklet you can make adjustments to the saddle stitch position to compensate for this error IMPORTANT This function can only be set if the Saddle Finisher F2 optional is attached 1 Press Additional Functions Adjustment Cleaning Saddle Stitch Position Adjustment NOTE If the desired setting is not displayed press or to scroll to the desired setting ...

Page 208: ...st during saddle stitching NOTE Some of the paper sizes displayed may not be available in certain countries 3 Press or to adjust the saddle stitch position press OK The adjustment range is from 2 0 mm to 2 0 mm in 0 25 mm increments The selected mode is set 4 Press Done repeatedly until the Basic Features screen appears ...

Page 209: ...riginal image and the printed image when the exposure scale is set in the middle NOTE The default setting is in the middle 5 on a scale from 1 to 9 1 Press Additional Functions Adjustment Cleaning Exposure Recalibration NOTE If the desired setting is not displayed press or to scroll to the desired setting 2 Press Light or Dark to adjust the exposure press OK The selected mode is set ...

Page 210: ... Number Position When you print documents with page numbers you can adjust the page number position as shown in the illustration below NOTE The default setting is 7 16 12 mm 1 Press Additional Functions Adjustment Cleaning Page Number Position Adjustment NOTE If the desired setting is not displayed press or to scroll to the desired setting 1 1 1 1 1 1 ...

Page 211: ...er the desired page number position press OK The selected mode is set NOTE If you want to enter values in millimeters press mm When entering values in millimeters you can use numeric keys and Clear to clear your entries 3 Press Done repeatedly until the Basic Features screen appears 0 9 C ...

Page 212: ...y Send job only after an error occurs or not at all You can also specify whether an Activity Report is printed after every 100 documents have been sent or received or at specific times IMPORTANT You cannot specify the Report Settings for MEAP applications Send Result Report TX Report The default setting is to print a report when an error occurs However you can select to print a Send Result Report ...

Page 213: ...Report Settings 3 69 3 Customizing Settings 1 Press Additional Functions Report Settings 2 Press Send under Settings 3 Press TX Report ...

Page 214: ...for Error Copy Print press OK On The Send Result Report is printed with a portion of the original Off The Send Result Report is printed without a portion of the outgoing original If you select Off Press OK The Send Result Report is not printed The selected mode is set 5 Press Done repeatedly until the Basic Features screen appears ...

Page 215: ...u can print Send or Receive job logs separately You can also print an Activity Report manually from the System Monitor screen See Printing the Send Job Status Log on p 2 19 Printing a Received Job Log on p 2 23 NOTE The default settings are Auto Print On Daily Activity Report Time Off Send Receive Separate Off You cannot print an Activity Report for send and receive jobs that are specified through...

Page 216: ...Report Settings 3 72 3 Customizing Settings 3 Press Activity Report 4 Select On or Off for Auto Print On Prints a report after every 100 Send Receive jobs Off The Activity Report is not printed ...

Page 217: ...e Off The Daily Activity Report Time is not set If you select On Enter the time using numeric keys Enter the time in 24 hour notation as four digits without a space Examples 7 05 a m 0705 11 18 p m 2318 If you make a mistake when entering values enter the four digits again You can also press Clear to clear the incorrect values 0 9 C ...

Page 218: ...ly press Send Receive Separate On If you do not want to print Send and Receive jobs separately do not press Send Receive Separate If the Send Receive Separate mode is On press Send Receive Separate to turn the Send Receive Separate mode Off The selected mode is set 7 Press Done repeatedly until the Basic Features screen appears ...

Page 219: ...nctions screen you can print a list See Setting a Paper Drawer for Auto Paper Selection Auto Drawer Switching on p 3 14 Printing the Address Book List You can print the contents of a subaddress book Address Book 1 to 10 or One touch Buttons This function is useful if you wish to see the address details IMPORTANT If you select an Address Book and press Print List all of the destinations in the Addr...

Page 220: ...Report Settings 3 76 3 Customizing Settings 3 Press Address Book List 4 Select an Address Book from 1 to 10 or One touch Buttons to print press Print List ...

Page 221: ...ort Settings 3 77 3 Customizing Settings 5 Press Yes If you do not want to print the list press No The selected address book list is printed 6 Press Done repeatedly until the Basic Features screen appears ...

Page 222: ...Functions settings are Send Prints all settings related to sending functions that were set from the Additional Functions screen Network Prints all settings related to network functions that were set from the Additional Functions screen 1 Press Additional Functions Report Settings 2 Press Send or Network under Print List In this example Send is selected 3 Press User s Data List ...

Page 223: ...ettings 3 79 3 Customizing Settings 4 Press Yes If you do not want to print the User s Data List press No The selected User s Data List is printed 5 Press Done repeatedly until the Basic Features screen appears ...

Page 224: ...Report Settings 3 80 3 Customizing Settings ...

Page 225: ... 50 Setting Access Restriction to an Address Book Manage Access to Address Book 4 52 Setting a Password for an Address Book Address Book Password 4 52 Setting Access Number Management for an Address Book Access Number Management 4 54 Setting Device Information Device Information Settings 4 56 Setting Forwarding Conditions Forwarding Settings 4 58 Storing Forwarding Settings 4 58 Storing Forwarding...

Page 226: ...4 System Manager Settings 4 2 System Manager Settings 4 Registering an LDAP Server 4 97 Changing an LDAP Server Setting 4 111 Deleting an LDAP Server 4 113 Printing LDAP Server Settings 4 114 ...

Page 227: ...cation NOTE If the optional Card Reader C1 is attached cards to which number 1 to 1 000 have been assigned cannot be used when registering the System Manager ID For instructions on how to enter characters see Entering Characters from the Touch Panel Display on p 1 43 The maximum number of characters you can assign for a name contact or comment is 32 and 64 for an e mail address The maximum number ...

Page 228: ...o the desired setting 2 Press System Manager ID enter a number up to seven digits using numeric keys You must set a System Manager ID in order to manage the operations of the machine You cannot store a System Manager ID with only zeros as the number such as 0000000 NOTE If you make a mistake when entering a number press Clear to clear the entire number 0 9 C ...

Page 229: ...m Password enter a number up to seven digits using numeric keys You cannot store a System Password with only zeros as the number such as 0000000 NOTE If you make a mistake when entering the password press Clear to clear the password 4 Press System Manager enter the name of the System Manager press OK 0 9 C ...

Page 230: ...Settings System Manager Settings 4 6 System Manager Settings 4 5 Press E mail Address enter the e mail address of the System Manager press OK 6 Press Contact Information enter the contact information for the System Manager press OK ...

Page 231: ...tings 4 7 System Manager Settings 4 7 Press Comment enter a comment for the System Manager press OK 8 Once you have completed all the settings press OK To cancel storing the System Manager Settings press Cancel The display returns to the Basic Features screen ...

Page 232: ...DL or SSO is set as a login service Department ID Management is performed on the Department ID which shares the same user name and password with the MEAP User Authentication If SDL or SSO is set as a login service the Limit Functions is not available If SDL is set as a login service the registered information in SDL and the registered user data and password in Department ID Management of the machi...

Page 233: ...Management If the System Manager ID and Password have already been set enter the System Manager ID and System Password using numeric keys press ID NOTE If the desired setting is not displayed press or to scroll to the desired setting 2 Select whether to use Department ID Management If you select On To store the Department ID and password press Store Dept ID Password proceed to step 3 0 9 ID ...

Page 234: ...OK Done The display returns to the Additional Functions screen 3 Press Store 4 Press Dept ID enter the Department ID using numeric keys You cannot store a Department ID with only zeros as the number such as 0000000 NOTE If you make a mistake when entering a number press Clear to clear the entire number 0 9 C ...

Page 235: ...ering the Department ID 6 If you want to set a page limit restriction press Impression Limit enter the impression limit using numeric keys The Impression Limit range is from 0 to 999 999 You cannot print more than the set number of impressions NOTE The Impression Limit denotes the number of surfaces that are printed If you print on both sides of a sheet the print is counted as two impressions If y...

Page 236: ...Setting Department ID Management Dept ID Management 4 12 System Manager Settings 4 7 Press OK 8 Press Limit Functions ...

Page 237: ...Off for all of the functions on the screen Department ID Management is set only for copying or printing operations from computers 10 Press Limit Impressions to set print restrictions press Done This validates the Impression Limit set in step 6 NOTE You must specify an Impression Limit in step 6 in order for Limit Impressions to be effective The Impression Limit cannot be set for each department ...

Page 238: ... pressing OK activates Department ID Management The selected mode is set 12 Press Done repeatedly until the Basic Features screen appears If the screen below appears enter the Department ID and password NOTE For instructions on how to enter the Department ID and Password see Entering the Department ID and Password on p 1 48 ...

Page 239: ...rd and impression limit settings of the stored Department ID 1 Press Additional Functions System Settings Dept ID Management If the System Manager ID and Password have already been set enter the System Manager ID and System Password using numeric keys press ID NOTE If the desired setting is not displayed press or to scroll to the desired setting 2 Press On Store Dept ID Password 0 9 ID ...

Page 240: ...n digits and the impression limit Press Password enter the password Press Impression Limit enter the new impression limit press OK You cannot store a password with only zeros as the number such as 0000000 The Impression Limit range is from 0 to 999 999 You cannot print more than the set limit number of impressions NOTE You cannot change Department IDs If you make a mistake when entering a number p...

Page 241: ...ting Department ID Management Dept ID Management 4 17 System Manager Settings 4 5 Press Done 6 Press OK If you selected On in step 2 pressing OK activates Department ID Management The selected mode is set ...

Page 242: ...8 Erasing the Department ID and Password The following instructions describe how to erase a Department ID and password that you have stored NOTE You cannot erase a Department ID if the Department ID is managed by the optional Card Reader C1 1 Press Additional Functions System Settings Dept ID Management If the System Manager ID and Password have already been set enter the System Manager ID and Sys...

Page 243: ... Department ID Management Dept ID Management 4 19 System Manager Settings 4 2 Press On Store Dept ID Password 3 Press or to display the Department ID that you want to erase select the Department ID press Erase ...

Page 244: ...Setting Department ID Management Dept ID Management 4 20 System Manager Settings 4 4 Press Yes To cancel erasing press No The selected Department ID and all of its settings are erased 5 Press Done ...

Page 245: ...On in step 2 pressing OK activates Department ID Management 7 Press Done repeatedly until the Basic Features screen appears If the screen below appears enter the Department ID and password NOTE For instructions on how to enter the Department ID and password see Entering the Department ID and Password on p 1 48 ...

Page 246: ...tals for the Department IDs that correspond to registered users For instructions on how to register users in a MEAP authentication application see the MEAP SMS Administrator Guide 1 Press Additional Functions System Settings Dept ID Management If the System Manager ID and Password have already been set enter the System Manager ID and System Password using numeric keys press ID NOTE If the desired ...

Page 247: ...without a Department ID left blank are the number of prints from computers that do not correspond with a stored Department ID unknown ID If you only want to check the counter Press or to display the desired Department ID check the print totals If you want to print the displayed list Press Print List Yes If you do not want to print the displayed list press No ...

Page 248: ... the screen press Done NOTE If plain or recycled paper 11 x 17 LGL LTR or LTRR is loaded in a paper drawer that has been set to On when you press Other to select a paper source in Drawer Eligibility for APS ADS from the Additional Functions screen you can print a list See Setting a Paper Drawer for Auto Paper Selection Auto Drawer Switching on p 3 14 4 Press Done ...

Page 249: ...On in step 2 pressing OK activates Department ID Management 6 Press Done repeatedly until the Basic Features screen appears If the screen below appears enter the Department ID and password NOTE For instructions on how to enter the Department ID and password see Entering the Department ID and Password on p 1 48 ...

Page 250: ...s It is also possible to erase the print totals for specific departments 1 Press Additional Functions System Settings Dept ID Management If the System Manager ID and Password have already been set enter the System Manager ID and System Password using numeric keys press ID NOTE If the desired setting is not displayed press or to scroll to the desired setting 2 Press On Print Totals 0 9 ID ...

Page 251: ...er Settings 4 If you want to erase the print totals for one specific department Select the department whose print totals you want to erase press Clear If you want to erase all counts Press Clear All Totals 3 Press Yes If you do not want to erase the copy counts press No ...

Page 252: ...Setting Department ID Management Dept ID Management 4 28 System Manager Settings 4 The message Erased appears on the touch panel display for approximately three seconds 4 Press Done ...

Page 253: ...On in step 2 pressing OK activates Department ID Management 6 Press Done repeatedly until the Basic Features screen appears If the screen below appears enter the Department ID and password NOTE For instructions on how to enter the Department ID and password see Entering the Department ID and Password on p 1 48 ...

Page 254: ... NOTE The default setting is On 1 Press Additional Functions System Settings Dept ID Management If the System Manager ID and Password have already been set enter the System Manager ID and System Password using numeric keys press ID NOTE If the desired setting is not displayed press or to scroll to the desired setting 2 Press On If you select On Department ID Management is enabled See Entering the ...

Page 255: ...hine does not output prints from computers that do not correspond with a stored Department ID The selected mode is set NOTE If you selected On in step 2 pressing OK activates Department ID Management 4 Press Done repeatedly until the Basic Features screen appears If the screen below appears enter the Department ID and password NOTE For instructions on how to enter the Department ID and password se...

Page 256: ... Sending You can set the maximum data size for outgoing e mail messages and I fax documents If the size of a Send job exceeds this limit the e mail message is divided into several e mail messages and then sent I Fax transmissions that exceed the data size limit are handled as errors and are not sent Default Subject You can store a default subject name if you forget to specify one when sending a jo...

Page 257: ... default settings are as follows Maximum Data Size For Sending 3 MB Default Subject Attached Image Full Mode TX Timeout 24 hours Print MDN DSN on Receipt Off Always send notice for RX errors On Use Send Via Server Off 1 Press Additional Functions System Settings If the System Manager ID and System Password have been set enter the System Manager ID and System Password using numeric keys press ID NO...

Page 258: ...T The maximum data size for sending must not be greater than the maximum data size of the mail server Contact your System Administrator for details NOTE If you enter 0 MB as the data size there is no size limit on the data that is sent You can send messages without limiting the data size The data size limit can be set in 1 MB increments If the size of an e mail message exceeds the set limit the e ...

Page 259: ... System Manager Settings 4 4 Press Subject 5 Enter the default subject press OK NOTE For instructions on how to enter characters see Entering Characters from the Touch Panel Display on p 1 43 The maximum number of characters you can enter for the default subject is 40 ...

Page 260: ... Timeout time You can set the Full Mode TX Timeout time from 1 to 99 hours in one hour increments You can also use numeric keys to enter values and Clear to clear your entries 7 Select On or Off for Print MDN DSN on Receipt On Prints an e mail reception notice when the machine receives MDN DSN mail Off Does not print an e mail reception notice when the machine receives MDN DSN mail 0 9 C ...

Page 261: ...f an error occurs the sender is not informed of the details of the error 9 Select On or Off for Use Send Via Server press OK On Enables you to use the Send Via Server setting when specifying destination conditions for I fax sending Off Does not enable you to use the Send Via Server setting when specifying destination conditions for I fax sending The selected mode is set 10 Press Done repeatedly un...

Page 262: ...e password NOTE The maximum number of digits you can store for the password is seven If you enter fewer than seven digits the machine stores the password with leading zeros Example If 321 is entered 0000321 is stored The default setting is Off 1 Press Additional Functions System Settings Communications Settings If the System Manager ID and Password have already been set enter the System Manager ID...

Page 263: ...keys press OK If you do not want to set a password do not enter any values You cannot store a password with only zeros as the number such as 0000000 The selected mode is set NOTE If you make a mistake when entering the password press Clear to clear your entry 4 Press Done repeatedly until the Basic Features screen appears 0 9 C ...

Page 264: ... print send the documents from memory after checking the relevant Memory RX Inbox NOTE The default setting is Off 1 Press Additional Functions System Settings Communications Settings If the System Manager ID and Password have already been set enter the System Manager ID and System Password using numeric keys press ID NOTE If the desired setting is not displayed press or to scroll to the desired se...

Page 265: ...ction to On See Chapter 3 Storing Received Documents in Inboxes in the Mail Box Guide 4 Press Done repeatedly until the Basic Features screen appears Memory Lock Start Time Settings You can set Memory Lock to start automatically at a specified time NOTE The default setting is Off 1 Press Additional Functions System Settings Communications Settings If the System Manager ID and Password have already...

Page 266: ...Specifying the Communications Settings Communications Settings 4 42 System Manager Settings 4 2 Press Memory RX Inbox Settings Memory Lock Start Time 3 Select Everyday Select Days or Off ...

Page 267: ...he start time using numeric keys press OK You can store up to five different start times Enter the time in 24 hour notation as four digits without a space Examples 7 05a m 0705 11 18p m 2318 If you make a mistake when entering values enter the four digits again NOTE If you make a mistake when entering the time press Clear to clear your entry 0 9 C ...

Page 268: ... 5 enter the start time using numeric keys press OK You can store up to five different start times for each day of the week Enter the time in 24 hour notation as four digits without a space Examples 7 05a m 0705 11 18p m 2318 If you make a mistake when entering values enter the four digits again NOTE If you make a mistake when entering the time press Clear to clear your entry 0 9 C ...

Page 269: ... On or Off by pressing On or Off under I Fax Memory Lock on the Memory RX Inbox screen from the Inbox Selection screen of the Mail Box function See Chapter 3 Storing Received Documents in Inboxes in the Mail Box Guide The selected mode is set NOTE You can select Everyday for Memory Lock Start Time and Select Days for Memory Lock End Time and vice versa 4 Press Done repeatedly until the Basic Featu...

Page 270: ...me NOTE The default setting is Off 1 Press Additional Functions System Settings Communications Settings If the System Manager ID and Password have already been set enter the System Manager ID and System Password using numeric keys press ID NOTE If the desired setting is not displayed press or to scroll to the desired setting 2 Press Memory RX Inbox Settings Memory Lock End Time 0 9 ID ...

Page 271: ...umber 1 to 5 enter the end time using numeric keys press OK You can store up to five different end times Enter the time in 24 hour notation as four digits without a space Examples 7 05a m 0705 11 18p m 2318 If you make a mistake when entering values enter the four digits again NOTE If you make a mistake when entering the time press Clear to clear your entry 0 9 C ...

Page 272: ...to 5 enter the end time using numeric keys press OK You can store up to five different end times for each day of the week Enter the time in 24 hour notation as four digits without a space Examples 7 05a m 0705 11 18p m 2318 If you make a mistake when entering values enter the four digits again NOTE If you make a mistake when entering the time press Clear to clear your entry 0 9 C ...

Page 273: ...k On or Off by pressing On or Off under I Fax Memory Lock on the Memory RX Inbox screen from the Inbox Selection screen of the Mail Box function See Chapter 3 Storing Received Documents in Inboxes in the Mail Box Guide The selected mode is set NOTE You can select Everyday for Memory Lock Start Time and Select Days for Memory Lock End Time and vice versa 4 Press Done repeatedly until the Basic Feat...

Page 274: ...ed through the Remote UI NOTE For details on the Remote UI see the Remote UI Guide The default setting is On 1 Press Additional Functions System Settings Remote UI If the System Manager ID and Password have already been set enter the System Manager ID and System Password using numeric keys press ID NOTE If the desired setting is not displayed press or to scroll to the desired setting 0 9 ID ...

Page 275: ...ttings can be specified through the Remote UI Off Settings cannot be specified through the Remote UI The selected mode is set NOTE Turn the power OFF after setting this mode The setting is only valid after the main power of the machine is turned back ON 3 Press Done repeatedly until the Basic Features screen appears ...

Page 276: ... for an Address Book Address Book Password You can set a password for an address book If a password is set restrictions can be placed on storing editing or erasing destinations NOTE The maximum number of digits you can store for the password is seven If you enter fewer than seven digits the machine stores the password with leading zeros Example When 321 is entered 0000321 is stored 1 Press Additio...

Page 277: ...d 3 Enter the password using numeric keys press OK If you do not want to set a password do not enter any values You cannot store a password with only zeros as the number such as 0000000 The selected mode is set NOTE If you make a mistake when entering the password press Clear to clear your entry 4 Press Done repeatedly until the Basic Features screen appears 0 9 C ...

Page 278: ...stering an access number when storing the address in an address book NOTE The default setting is Off 1 Press Additional Functions System Settings If the System Manager ID and Password have already been set enter the System Manager ID and System Password using numeric keys press ID NOTE If the desired setting is not displayed press or to scroll to the desired setting 2 Press Manage Access to Addres...

Page 279: ...ss Book Manage Access to Address Book 4 55 System Manager Settings 4 3 Select On or Off press OK If you do not want to set an access number select Off The selected mode is set 4 Press Done repeatedly until the Basic Features screen appears ...

Page 280: ...ructions on how to enter characters see Entering Characters from the Touch Panel Display on p 1 43 The maximum number of characters which can be entered is 32 1 Press Additional Functions System Settings Device Information Settings If the System Manager ID and Password have already been set enter the System Manager ID and System Password using numeric keys press ID NOTE If the desired setting is n...

Page 281: ...d location of this machine Press Device Name enter the name of this machine press OK Press Location enter the place where this machine is located press OK Press OK To cancel storing the Device Information press Cancel The selected mode is set 3 Press Done repeatedly until the Basic Features screen appears ...

Page 282: ... and how to store change and erase forwarding destinations NOTE Forwarding Settings can only be set if you are using the imageRUNNER 6020i 5020i The maximum number of forwarding settings that you can store is 150 You cannot use the forwarding function if you are using MEAP applications Storing Forwarding Settings 1 Press Additional Functions System Settings Forwarding Settings If the System Manage...

Page 283: ...ecalled forwarding settings are displayed IMPORTANT The forwarding settings are stored in memory if you press OK on the Store screen or the Edit screen Identical forwarding settings are stored only once in memory NOTE The three most recent forwarding settings that were stored in memory are not erased even when the power is turned OFF The forwarding settings of a received document that were not sto...

Page 284: ... condition press OK NOTE For instructions on how to enter characters see Entering Characters from the Touch Panel Display on p 1 43 The maximum number of characters you can enter for the condition name is 50 The first 24 characters of the entered condition name are also stored as the Send Doc Name However you can change the Send Doc Name ...

Page 285: ... From or Subject information matches all of the characters entered differs from Forwards the document if the To From or Subject information differs from the characters entered begins with Forwards the document if the To From or Subject information begins with the characters entered ends with Forwards the document if the To From or Subject information ends with the characters entered contains Forwa...

Page 286: ... and Subject drop down lists press Set next to the desired criteria enter the new criteria press OK NOTE If disregarded is selected you cannot enter any criteria For instructions on how to enter characters see Entering Characters from the Touch Panel Display on p 1 43 The maximum number of characters you can enter for the To From and Subject criteria is 128 If you select a Confidential Fax Inbox a...

Page 287: ...he received document to another machine relay function Conf Fax Inbox Select to store the received document in a Confidential Fax Inbox NOTE If you specify a group address that includes user inboxes as destinations the documents are not forwarded to those inboxes You cannot select Conf Fax Inbox if you do not set the forwarding conditions as follows To disregarded From equals Subject disregarded ...

Page 288: ... the desired destination is not displayed press or to scroll to the desired destination Press the Type drop down list to restrict the type of addresses displayed in the list Press the Address Book drop down list to display a list of subaddress books 1 to 10 or One touch Buttons The subaddress books categorize the addresses stored in the Address Book You cannot select multiple destinations NOTE To ...

Page 289: ...he desired inbox is not displayed press or to scroll to the desired inbox You cannot select multiple Confidential Fax Inboxes IMPORTANT You cannot select a Confidential Fax Inbox that is already set with forwarding conditions 11 Press Send Doc Name If a Confidential Fax Inbox is selected as a forwarding destination this procedure is not necessary Proceed to step 12 ...

Page 290: ...utomatically entered as the document s name by default However you can change this name You can also enter values using numeric keys NOTE For instructions on how to enter characters see Entering Characters from the Touch Panel Display on p 1 43 The maximum number of characters you can enter for the Document Name is 24 13 Press Forwarding Time 0 9 ...

Page 291: ...end time using numeric keys press OK You can set the start time and end time from 00 00 to 23 59 Enter the time in 24 hour notation as four digits without space Examples 7 05 a m 0705 11 18 p m 2318 If you want to specify the entire day enter 00 00 as the start time and 23 59 as the end time The forwarding time is set NOTE If you make a mistake when entering the time press Clear to clear your entr...

Page 292: ...me from 00 00 to 23 59 Enter the time in 24 hour notation as four digits without space Examples 7 05 a m 0705 11 18 p m 2318 If you press All Day the start and end time for the selected day of the week are automatically set to 00 00 and 23 59 respectively The forwarding time is set NOTE If you make a mistake when entering the time press Clear to clear your entry and enter another four digit number...

Page 293: ... images into a single PDF file Received images can be forwarded in the PDF format NOTE To view a TIFF file a software application that supports the TIFF file formats such as Imaging for Windows is required To view a PDF file Adobe Acrobat Reader is required 16 Select whether to divide images and place them on separate pages If you want to separate multiple images and place them on separate pages a...

Page 294: ...ument is stored in the Memory RX Inbox or printed If Off is selected the received document is not stored in the Memory RX Inbox or printed NOTE If Store Print Received Doc is set to On and Memory Lock is set to On the received document is saved in the Memory RX Inbox If Store Print Received Doc is set to On and Memory Lock is set to Off the received document is printed See Storing Received I Fax D...

Page 295: ...mber using numeric keys specify the destination press OK If you do not want to specify an access number press No Access Number See Chapter 4 Registering Editing Address Book Settings in the Sending Guide Press the alphabet keys e g ABC to display the range of entries If the desired destination is not displayed press or to scroll to the desired destination Press the Address Book drop down list to d...

Page 296: ...Address Book beforehand See Chapter 4 Registering Editing Address Book Settings in the Sending Guide 20 Select whether to check Notice Only for Errors If you want the forwarding done notice to be sent only when an error occurs press Notice Only for Errors If you want the forwarding done notice to be sent every time a received document is forwarded do not press Notice Only for Errors 21 Press OK Th...

Page 297: ...r Settings 4 22 If necessary press the E mail Priority drop down list select a priority for your forwarded e mail messages This setting is only necessary if the forwarding destination is an e mail address 23 Press Done repeatedly until the Basic Features screen appears ...

Page 298: ...that you have specified NOTE Forwarding destinations can be stored one at a time according to the Receive Type of the received document A Confidential Fax Inbox cannot be specified as a forwarding destination when forwarding destinations do not match the forwarding conditions 1 Press Additional Functions System Settings Forwarding Settings If the System Manager ID and Password have already been se...

Page 299: ...Setting Forwarding Conditions Forwarding Settings 4 75 System Manager Settings 4 2 Press Forward w o Conditions 3 Press Forwarding Destination ...

Page 300: ...ation is not displayed press or to scroll to the desired destination Press the Type drop down list to restrict the type of addresses displayed in the list Press the Address Book drop down list to display a list of subaddress books subaddress books 1 to 10 or One touch Buttons Subaddress books categorize the addresses stored in the Address Book You cannot select multiple destinations NOTE To cancel...

Page 301: ...name of the document press OK You can also enter values using numeric keys to enter numbers and Clear to clear your entry NOTE For instructions on how to enter characters see Entering Characters from the Touch Panel Display on p 1 43 The maximum number of characters you can enter for the document s name is 24 0 9 C ...

Page 302: ... selected as a forwarding destination this step is not necessary File Types TIFF Forwards images in the TIFF format PDF Inserts multiple images into a single PDF file Received images can be forwarded in the PDF format NOTE To view a TIFF file a software application that supports the TIFF file format such as Imaging for Windows is required To view a PDF file Adobe Acrobat Reader is required ...

Page 303: ...ff 9 Press the Store Print Received Doc drop down list select On or Off If On is selected the received document is stored in the Memory RX Inbox or printed If Off is selected the received document is not stored in the Memory RX Inbox or printed NOTE If Store Print Received Doc is set to On and Memory Lock is set to On the received document is saved in the Memory RX Inbox If Store Print Received Do...

Page 304: ... number numeric keys specify the destination press OK If you do not want to specify an access number press No Access Number See Chapter 4 Registering Editing Address Book Settings in the Sending Guide Press the alphabet keys e g ABC to display the range of entries If the desired destination is not displayed press or to scroll to the desired destination Press the Address Book drop down list to disp...

Page 305: ... destinations in the Address Book beforehand See Chapter 4 Registering Editing Address Book Settings in the Sending Guide 12 Select whether to check Notice Only for Errors If you want the forwarding done notice to be sent only when an error occurs press Notice Only for Errors If you want the forwarding done notice to be sent every time a received document is forwarded do not press Notice Only for ...

Page 306: ...arding Settings If the System Manager ID and Password have already been set enter the System Manager ID and System Password using numeric keys press ID NOTE If the desired setting is not displayed press or to scroll to the desired setting 2 Select the desired forwarding setting whose details you want to check press Edit If the desired forwarding setting is not displayed press or to scroll to the d...

Page 307: ...Forwarding Settings on p 4 58 4 Press Done repeatedly until the Basic Features screen appears Forwarding Received Documents You can set whether to forward received documents 1 Press Additional Functions System Settings Forwarding Settings If the System Manager ID and Password have already been set enter the System Manager ID and System Password using numeric keys press ID NOTE If the desired setti...

Page 308: ...ot displayed press or to scroll to the desired forwarding setting On Forwards a document to specified destinations if they match the forwarding conditions Off Does not forward a document to specified destinations even if they match the forwarding conditions To cancel forwarding press Validate Invalidate again The selected forwarding setting is enabled 3 Press Done repeatedly until the Basic Featur...

Page 309: ...rding Settings If the System Manager ID and Password have already been set enter the System Manager ID and System Password using numeric keys press ID NOTE If the desired setting is not displayed press or to scroll to the desired setting 2 Select the forwarding setting to be erased press Erase If the desired forwarding setting is not displayed press or to scroll to the desired forwarding setting 0...

Page 310: ...til the Basic Features screen appears Printing a Forwarding Settings List You can check and print a list of forwarding settings 1 Press Additional Functions System Settings Forwarding Settings If the System Manager ID and Password have already been set enter the System Manager ID and System Password using numeric keys press ID NOTE If the desired setting is not displayed press or to scroll to the ...

Page 311: ...n set to On when you press Other to select a paper source in Drawer Eligibility for APS ADS from the Additional Functions screen you can print a list See Setting a Paper Drawer for Auto Paper Selection Auto Drawer Switching on p 3 14 3 Press Yes If you do not want to print the list press No The forwarding conditions list is printed 4 Press Done repeatedly until the Basic Features screen appears ...

Page 312: ...lay Message board settings are done from the Remote UI however erasing a message board can be done from the main unit as well NOTE For instructions on how to create a message board see Chapter 2 Remote UI Functions in the Remote UI Guide 1 Press Additional Functions System Settings Clear Message Board If the System Manager ID and Password have already been set enter the System Manager ID and Syste...

Page 313: ...lear Message Board 4 89 System Manager Settings 4 2 Press Yes If you do not want to erase the message board press No The contents of the Message Board are cleared 3 Press Done repeatedly until the Basic Features screen appears ...

Page 314: ...n is enabled Setting Auto Online Auto Online If Auto Online is set to On you can set this machine to automatically connect to a network simply by pressing Scan on the Basic Features screen NOTE The default setting is Off 1 Press Additional Functions System Settings If the System Manager ID and Password have already been set enter the System Manager ID and System Password using numeric keys press I...

Page 315: ...ions when the machine is connected to a network online When Auto Offline is set to On the machine automatically goes offline when the Auto Clear function activates 1 Press Additional Functions System Settings If the System Manager ID and Password have already been set enter the System Manager ID and System Password using numeric keys press ID 2 Press Auto Online Offline Auto Offline NOTE If the de...

Page 316: ... the machine automatically goes offline at the specified Auto Clear Time If the Auto Clear Time is set to Off 0 the machine automatically goes offline after approximately two minutes See Setting the Time for the Display to Return to the Basic Features Screen after Finishing Operations on p 3 54 4 Press Done repeatedly until the Basic Features screen appears ...

Page 317: ...he HTTP is required for MEAP functions and MEAP applications To use HTTP for other than MEAP functions e g Remote UI set the Use HTTP in Network Settings to On See Chapter 3 Using a TCP IP Network in the Network Guide If you set the Use HTTP in System Settings from the Additional Functions screen to On the port number for the MEAP functions and MEAP applications is automatically set to 8000 1 Pres...

Page 318: ...ect On or Off press OK If you do not want to use HTTP press Off The selected mode is set NOTE Turn the main power OFF after this setting is made This setting is only enabled after the main power of the machine is turned back ON 5 Press Done repeatedly until the Basic Features screen appears ...

Page 319: ... jobs when printing Job Name MEAP SYSTEM INFORMATION is always set Job Client The login name of the user who operates Additional Functions is set However this is activated only if you enter from MEAP authentication Client Job ID 0 is always set to the field of the application ID Document Format Supported Document Format is obtained using CPCA If PCL exists in the Supported Document Format PCL is s...

Page 320: ...me of the application vendor License Status Prints the license status None License is not necessary Not Installed License is necessary but has been disabled Installed An effective license has been installed Invalid License is invalid Overlimit Installed license has exceeded its limit License Expires After Prints the expiration date of the application If License Status is None it is not printed Lic...

Page 321: ...this machine Windows 2000 Server with Active Directory Novell NetWare 5 1 NDS or later Lotus Notes Domino R5 or later For more information contact your local authorized Canon dealer You can register up to five LDAP servers Registering an LDAP Server You have to specify the relevant information for the LDAP server such as the server name and address 1 Press Additional Functions System Settings If t...

Page 322: ...LDAP Server Settings 4 98 System Manager Settings 4 3 Press Store 4 Press Server Name 5 Enter the server name press OK You can enter up to 24 characters for the server name ...

Page 323: ...TE For instructions on how to enter characters see Entering Characters from the Touch Panel Display on p 1 43 The maximum number of characters you can enter for the server name is 24 6 Press Server Address 7 Enter the server s address press OK You can also use numeric keys to enter numbers and Clear to clear your entries 0 9 C 0 9 C ...

Page 324: ...an IP address NOTE You can enter up to 48 characters for the server s address 8 Press Location to Start Search If the server s LDAP version is 3 then you do not have to specify Location to Start Search If the LDAP version is 3 the machine can automatically retrieve settings from the server and sets the location to start searching If the server s LDAP version is 2 you have to specify Location to St...

Page 325: ... or c to each dot separated series of characters that configure the distinguished name and separate each series of characters by a comma Example If TEAM1 SALESDEPT CANON is the distinguished name in NDS ou team1 ou salesdept o canon If you are using Lotus Notes Domino R5 or later Enter the dn Distinguished Name of the node on the directory tree such as ou team1 ou salesdept o canon or c jp You can...

Page 326: ...rom 1 to 65 535 If you make a mistake when entering the port number press Clear enter the correct number 12 Press Max No of Addresses to Search enter the maximum number of addresses to search using numeric keys You can enter any number from 1 to 1 000 If you make a mistake when entering the number press Clear enter the correct number 0 9 C 0 9 C ...

Page 327: ...e or Use security auth IMPORTANT Use security auth next to Login Information can be selected only if the LDAP server is running on Windows 2000 Server with Active Directory If you entered an IP address in step 7 and Reverse DNS Lookup a function that looks up the host name from the IP address is not supported select either Do not use or Use If Login Information is set to Use security auth the mach...

Page 328: ...ersion and character code press OK UTF 8 Unicode SJIS Shift Japan Industrial Standard EUC Extended Unix Code JIS Japan Industrial Standard ISO International Organization for Standardization Select the LDAP version and character code according to the LDAP server s environment If Use is selected Press User ...

Page 329: ... you are using Novell NetWare 5 1 NDS or later Press User add the corresponding object class o ou or c to each dot separated series of characters that configure the distinguished name and separate each series of characters by a comma Example If user1 TEAM1 SALESDEPT CANON is the distinguished name in NDS cn user1 ou team1 ou salesdept o canon If you are using Lotus Notes Domino R5 or later Press U...

Page 330: ...enter up to 24 characters for the password Select On or Off for Display authentication dialog when searching On When searching for information on the server a login information dialog box is displayed even if a password is not required Off When searching for information on the server a login information dialog box is not displayed when a password is not required ...

Page 331: ... 4 107 System Manager Settings 4 Select the Server LDAP version and character code press OK Select the LDAP version and character code according to the LDAP server s environment If Use security auth is selected Press User ...

Page 332: ...LDAP Server Settings 4 108 System Manager Settings 4 Enter the user name press OK Example If user1 is the Windows user name user1 NOTE You can enter up to 128 characters for the user name Press Password ...

Page 333: ... Settings 4 109 System Manager Settings 4 Enter the password press OK After pressing OK the password that you entered appears as asterisks NOTE You can enter up to 24 characters for the password Press Domain Name ...

Page 334: ... On or Off for Display authentication dialog when searching press OK On When searching for information on the server a login information dialog box is displayed even if a password is not required Off When searching for information on the server a login information dialog box is not displayed when a password is not required The display returns to the Store LDAP Server screen 15 Press Done repeatedl...

Page 335: ... Press Additional Functions System Settings If the System Manager ID and Password have already been set enter the System Manager ID and System Password using numeric keys press ID 2 Press or until Store LDAP Server appears press Store LDAP Server 3 Select the LDAP server whose settings you want to change press Edit The settings for the selected LDAP server are displayed 0 9 ID ...

Page 336: ...instructions on how to change the LDAP server settings see Registering an LDAP Server on p 4 97 5 Select Do not use Use or Use security auth change the settings for the selected mode press OK The display returns to the Store LDAP Server screen 6 Press Done repeatedly until the Basic Features screen appears ...

Page 337: ...1 Press Additional Functions System Settings If the System Manager ID and Password have already been set enter the System Manager ID and System Password using numeric keys press ID 2 Press or until Store LDAP Server appears press Store LDAP Server 3 Select the LDAP server that you want to erase press Erase 0 9 ID ...

Page 338: ...AP Server Settings You can print out the LDAP server settings NOTE For more information on the Registered LDAP Server List see Registered LDAP Server List on p 8 10 1 Press Additional Functions System Settings If the System Manager ID and Password have already been set enter the System Manager ID and System Password using numeric keys press ID 2 Press or until Store LDAP Server appears press Store...

Page 339: ...n set to On when you press Other to select a paper source in Drawer Eligibility for APS ADS from the Additional Functions screen you can print a list See Setting a Paper Drawer for Auto Paper Selection Auto Drawer Switching on p 3 14 4 Press Yes To cancel printing press No The LDAP Server List is printed 5 Press Done repeatedly until the Basic Features screen appears ...

Page 340: ...LDAP Server Settings 4 116 System Manager Settings 4 ...

Page 341: ... Paper Size 5 8 Adding Toner 5 12 Routine Cleaning 5 17 Cleaning the Platen Glass Rear Side of the Platen Glass Cover 5 17 Cleaning the Touch Panel Display 5 19 Cleaning the Feeder 5 20 When an Original or Print Becomes Dirty 5 25 While Using the Feeder Feeder Cleaning 5 25 Output Sheets Are Dirty Wire Cleaning 5 26 Consumables and Optional Equipment 5 28 Consumables 5 28 Optional Equipment for th...

Page 342: ...ails on available paper stock that can be loaded into the paper drawers see Available Paper Stock on p 1 75 Loading Paper in the Paper Drawers When the selected paper has run out or the selected paper drawer runs out of paper during printing a screen prompting you to load paper appears on the touch panel display CAUTION When loading paper take care not to cut your hands on the edges of the paper I...

Page 343: ...ically made after you load the paper When you select another paper drawer the remaining prints are made after you press OK To cancel printing press Cancel If you press Another Function you can select and use the functions not being operated 1 Press and release the open button on the paper drawer in which you want to load paper ...

Page 344: ...he drawer is stuck and does not pull all the way out do not pull it out by force Push it back into the machine and try pressing the release button and pulling it out again 3 Open a package of paper and remove the paper stack CAUTION When loading paper take care not to cut your hands on the edges of the paper ...

Page 345: ...h color images have been copied Paper which has been copied on using a digital full color copier do not copy on the reverse side of this paper Paper which has been printed on using a thermal transfer printer do not copy on the reverse side of this paper NOTE For high quality prints we recommend using Canon paper Immediately before loading the paper fan the pages several times and align the edges t...

Page 346: ...t in the paper drawer Make sure that the height of the paper stack does not exceed the limit mark at the back of the paper drawer Make sure that the paper size setting on the paper drawer matches the size of the paper that is loaded NOTE Paper drawers 1 and 2 hold about 1 500 sheets of paper each 20 lb bond 80 g m2 Paper drawers 3 and 4 hold about 550 sheets of paper each 20 lb bond 80 g m2 For de...

Page 347: ... not to get your fingers caught as this may result in personal injury IMPORTANT Never place paper or any other items in the open part of the paper drawer next to the paper stack Doing so may cause a paper jam NOTE If paper runs out during printing load the paper and follow the instructions on the touch panel display The machine automatically restarts and produces the remaining prints ...

Page 348: ...er drawer 3 only The paper size loaded in paper drawer 4 can only be changed by your service representative For more details contact your local authorized Canon dealer When setting STMT size paper place it horizontally STMTR NOTE You can adjust the paper drawers to hold the following standard paper sizes 11 x 17 LGL LTR LTRR and STMTR 1 Press and release the open button on the paper drawer that yo...

Page 349: ...ver on the left guide as shown in the illustration Without releasing the lever slide the left guide to align it with the mark for the desired paper size When loading 11 x 17 size paper slide the left guide all the way to the left and push it down Left guide ...

Page 350: ...operly for the paper size loaded in the paper drawer the correct paper size may not appear on the touch panel display Improperly adjusting the guides may also cause paper jams dirty prints or make the inside of the machine dirty To prevent these problems check that the guides are adjusted correctly for the loaded paper size 5 Load the appropriate paper size into the drawer CAUTION When loading pap...

Page 351: ... size plate to match the new paper size that you loaded 7 Gently push the paper drawer back into the machine until it clicks CAUTION When returning the paper drawer to its original position be careful not to get your fingers caught as this may result in personal injury ...

Page 352: ... made but at this time you should purchase new toner so that you have it on hand when it is needed When the toner has run out and prints can no longer be made a message describing how to add toner appears on the touch panel display Add toner by following the described procedure CAUTION Never dispose of the finished toner in a fire or incinerator This may result in an explosion ...

Page 353: ... 300 prints can still be made LTR size Canon Standard Chart However since this number may vary depending upon the original being copied it is recommended that the toner be added as soon as possible You can check how to add toner by pressing Previous or Next on the screen If the toner runs out during a print job the remaining prints are made after you add toner 1 Open the toner supply cover 2 Hold ...

Page 354: ...bottle down into the toner supply port until you hear a click The toner bottle is now locked into the toner supply port 4 Press down lightly on the toner bottle with one hand and pull out the black shutter of the toner supply port with your other hand as far as it will go 5 Grip the shutter of the toner bottle and pull it out slowly until it stops ...

Page 355: ...nto the toner box 7 Push back the shutter of the toner bottle and the toner supply port 8 Make sure you hear a click when the black shutter of the toner supply port has been pushed back in as far as the position When the toner bottle starts to come loose from the toner supply port lightly hold it so that it does not fall over ...

Page 356: ...the bottle and result in burns or a fire CAUTION When removing used toner bottles from the toner supply port remove the bottles carefully to prevent the toner from scattering and entering your eyes or mouth If toner enters your eyes or mouth wash them immediately with cold water and consult a physician 10 Close the toner supply cover CAUTION When closing the cover be careful not to get your finger...

Page 357: ... power cord from the power outlet regularly and clean the area around the base of the power plug s metal pins and the power outlet with a dry cloth to ensure that all dust and grime is removed If the power cord is connected for a long period of time in a damp dusty or smoky location dust can build up around the power plug and become damp This may cause a short circuit and result in a fire CAUTION ...

Page 358: ...eder 2 Wipe the platen glass with a cloth dampened with water or a mild cleaning agent Then wipe the area with a dry cloth 3 Wipe the rear side of platen glass cover with a cloth dampened with water or a mild cleaning agent Then wipe the area with a dry cloth ...

Page 359: ...al injury Cleaning the Touch Panel Display Follow the procedure below to clean the touch panel display 1 Wipe the touch panel display with a cloth dampened with water or a mild cleaning agent Then wipe the area with a dry cloth NOTE Since the touch panel display becomes dirty with normal use we recommend that you clean it once a week or every 10 days ...

Page 360: ...ORTANT If the feeder scanning area is dirty it may result in problems in reading originals or a dirty print out Spin the roller while cleaning it 1 Open the feeder cover by pulling up the lever on the top of the feeder 2 Clean the roller a total of 8 places on the rear side of the feeder cover with a dampened cloth Then wipe the area with a dry cloth ...

Page 361: ...er a total of 3 places as shown in the illustration with a dampened cloth Then wipe the area with a dry cloth 4 Open the middle cover by holding the knob in the back 5 Clean the roller a total of 5 places with a dampened cloth Then wipe the area with a dry cloth ...

Page 362: ... 6 Clean the roller underneath a total of 4 places with a dampened cloth Then wipe the area with a dry cloth 7 Close the middle cover CAUTION When closing the cover be careful not to get your fingers caught as this may result in personal injury ...

Page 363: ...8 Close the feeder cover CAUTION When closing the cover be careful not to get your fingers caught as this may result in personal injury 9 Open the feeder 10 Clean the feeder scanning area with a dampened cloth Then wipe the area with a dry cloth ...

Page 364: ...eath the feeder with a dampened cloth Then wipe the area with a dry cloth IMPORTANT Do not push on the white plate hard The white plate is a soft delicate area 12 Close the feeder CAUTION Close the feeder gently to avoid catching your hand as this may result in personal injury ...

Page 365: ...s dirty perform a feeder cleaning Cleaning is done by repeatedly feeding blank paper though the feeder NOTE The Adjustment Cleaning screen is made up of several screens Press or to scroll to the desired screen and make the required settings It takes about 10 seconds to clean the feeder 1 Press Additional Functions Adjustment Cleaning 2 Press or until Feeder Cleaning appears press Feeder Cleaning 3...

Page 366: ...ly until the Basic Features screen appears Output Sheets Are Dirty Wire Cleaning If dirt appears on the printed paper clean the wire of the corona assembly in the main unit as the need arises NOTE It takes about 30 seconds to clean the wire Wire cleaning cannot be performed while printing 1 Press Additional Functions Adjustment Cleaning 2 Press or until Wire Cleaning appears press Wire Cleaning ...

Page 367: ...comes Dirty 5 27 Routine Maintenance 5 3 Press Start If you do not want to clean the wire press Cancel While wire cleaning is being performed the screen below appears 4 Press Done repeatedly until the Basic Features screen appears ...

Page 368: ...efore your stock runs out Consumables Paper Stock In addition to plain paper 11 x 17 LGL LTR and STMT transparencies labels and other types of paper stock are available For details consult your local authorized Canon dealer CAUTION Do not store paper in places exposed to open flames as this may cause the paper to ignite resulting in burns or a fire IMPORTANT For high quality print output we recomm...

Page 369: ... exposed to open flames This may cause the toner to ignite and result in a burn or a fire IMPORTANT Store toner bottles in a cool location away from direct sunlight The recommended storage conditions are temperatures below 86 F and humidity below 80 Genuine Supplies Canon has developed and manufactured parts supplies and GPR 4 Toner specifically for use in this machine For superior print quality w...

Page 370: ...Maintenance Optional Equipment for the Main Unit Cassette P3 You can adjust this cassette to suit the paper size you want to load See Adjusting a Paper Drawer to Hold a Different Paper Size on p 5 8 Available paper sizes 11 x 17 LGL LTR LTRR and STMTR ...

Page 371: ...Right Cover 6 14 Clearing Paper Jams in Paper Drawer 1 6 17 Clearing Paper Jams in Paper Drawer 2 6 20 Clearing Paper Jams in the Stack Bypass 6 24 Clearing Paper Jams in Paper Drawers 3 or 4 6 27 Clearing Paper Jams in the Feeder 6 29 List of Error Messages 6 34 Self Diagnostic Display 6 34 List of Error Codes without Messages 6 37 If Memory Becomes Full during Scanning 6 47 Service Call Messages...

Page 372: ... indicating the location of the paper jam You can confirm the location of the paper jam IMPORTANT When a paper jam occurs in the feeder you cannot continue to operate the machine Follow the directions on the touch panel display to remove the jammed paper See Clearing Paper Jams in the Feeder on p 6 29 If the MEAP screen is displayed a message appears in the Job Print monitor area Press System Moni...

Page 373: ...ns or electrical shock When removing jammed paper take care not to allow the toner to come into contact with your hands or clothing as this will dirty your hands or clothing If they become dirty wash them immediately with cold water Washing them with warm water will set the toner and make it impossible to remove the toner stains When removing paper which has become jammed inside the machine remove...

Page 374: ... paper tears while being removed be sure to remove any remaining pieces from inside the machine Feeder See Clearing Paper Jams in the Feeder on p 6 29 Exit slot Remove the protruding paper Main Unit See Clearing Paper Jams in the Main Unit on p 6 7 Stack Bypass See Clearing Paper Jams in the Stack Bypass on p 6 24 Paper Drawer 3 or 4 See Clearing Paper Jams in Paper Drawers 3 or 4 on p 6 27 Paper ...

Page 375: ...thin an optional unit see the directions on how to clear a paper jam on the following pages for each option Finisher F1 Saddle Finisher F2 Puncher Unit B1 See Clearing Paper Jams in the Finisher on p 7 15 Paper Deck G1 See Clearing Paper Jams in the Paper Deck on p 7 4 ...

Page 376: ...tore all levers and covers to their original positions 4 Continue operations following the instructions displayed on the touch panel display If there is remaining paper to be removed a screen indicating how to clear the paper jam appears on the touch panel display Repeat the procedure from step 1 Printing resumes after all indicated paper jams are cleared unless there is still a paper jam in the f...

Page 377: ...inside the main unit a screen similar to the one shown below appears on the touch panel display Check where the jam has occurred and follow the procedure described below and the procedure that appears on the touch panel display to help you remove the jammed paper 1 Open the front cover of the main unit ...

Page 378: ... 6 8 Troubleshooting 6 2 Move the green lever in the direction of the arrow 3 Grip the lever and pull out Unit 1 NOTE Unit 1 and Unit 2 are pulled out together 4 Remove any remaining jammed paper from Unit 1 Unit 2 Unit 1 ...

Page 379: ...arrow and remove any jammed paper CAUTION The parts located around the cover are subject to high temperatures When removing jammed paper take care not to touch anything in this area except the left cover and the green knob 7 Turn the knob on Unit 2 in the direction of the arrow displayed below and remove any jammed paper ...

Page 380: ...en closing the cover be careful not to get your fingers caught as this may result in personal injury 9 Gently push Unit 1 back into its original position CAUTION When returning Unit 1 to its original position be careful not to get your fingers caught as this may result in personal injury ...

Page 381: ...Jams 6 11 6 Troubleshooting 10 Return the green lever to its original position 11 Remove any remaining jammed paper from Unit 2 12 Open the left cover on Unit 2 and remove any jammed paper as shown in the illustration ...

Page 382: ...paper as shown in the illustration 14 Lift up the top portion of Unit 2 and remove any jammed paper Then close it 15 Gently push Unit 2 back to its original position CAUTION When returning Unit 2 to its original position be careful not to get your fingers caught as this may result in personal injury ...

Page 383: ...he cover be careful not to get your fingers caught as this may result in personal injury 17 Continue to follow the instructions on the touch panel display NOTE The screen indicating how to remove the paper jam will remain displayed until the paper jam has been cleared See Screen Shown When There Is a Paper Jam on p 6 2 ...

Page 384: ...ow appears on the touch panel display Check where the jam has occurred and follow the procedure described below and the procedure that appears on the touch panel display to help you remove the jammed paper NOTE If the Paper Deck G1 optional is attached move the paper deck away from the main unit See Paper Deck G1 on p 7 3 1 Open the upper right cover of the main unit ...

Page 385: ...Troubleshooting 2 Remove any jammed paper 3 Close the upper right cover CAUTION When closing the cover be careful not to get your fingers caught as this may result in personal injury 4 Open the lower right cover of the main unit ...

Page 386: ...ain unit See Paper Deck G1 on p 7 3 CAUTION When closing the cover be careful not to get your fingers caught as this may result in personal injury 7 Continue to follow the instructions on the touch panel display NOTE The screen indicating how to remove the paper jam will remain displayed until the paper jam has been cleared See Screen Shown When There Is a Paper Jam on p 6 2 ...

Page 387: ...pears on the touch panel display Check where the jam has occurred and follow the procedure described below and the procedure that appears on the touch panel display to help you remove the jammed paper NOTE If the Paper Deck G1 optional is attached move the paper deck away from the main unit See Paper Deck G1 on p 7 3 1 Open the upper right cover of the main unit ...

Page 388: ...per right cover of the main unit CAUTION When closing the cover be careful not to get your fingers caught as this may result in personal injury 4 Press and release the paper drawer release button of the paper drawer indicated on the touch panel display until the paper drawer comes out ...

Page 389: ...elease button and pull it out again 6 Remove any jammed paper 7 Return the paper drawer to its original position If the Paper Deck G1 optional has been moved reattach the paper deck to the main unit See Paper Deck G1 on p 7 3 CAUTION When returning the paper drawer to its original position be careful not to catch your fingers between the edge of the paper drawer and the main unit ...

Page 390: ...eared See Screen Shown When There Is a Paper Jam on p 6 2 Clearing Paper Jams in Paper Drawer 2 If a paper jam occurs in Paper Drawer 2 a screen similar to the one shown below appears on the touch panel display Check where the jam has occurred and follow the procedure described below and the procedure that appears on the touch panel display to help you remove the jammed paper 1 Open the front cove...

Page 391: ...r Jams 6 21 6 Troubleshooting 2 Turn the green knob in the direction of the arrow to feed the jammed paper to Unit 2 3 Gently pull out Unit 2 4 Open the top cover of Unit 2 and remove any jammed paper Then close it ...

Page 392: ...inal position CAUTION When returning Unit 2 to its original position be careful not to get your fingers caught as this may result in personal injury 6 Close the front cover CAUTION When closing the cover be careful not to get your fingers caught as this may result in personal injury ...

Page 393: ...ton of the paper drawer indicated on the touch panel display until the paper drawer comes out 8 Pull out Paper Drawer 2 If the drawer seems to be stuck do not pull it out by force Push it back into the machine and try pressing the release button and pull it out again 9 Remove any jammed paper ...

Page 394: ... panel display NOTE The screen indicating how to remove the paper jam will remain displayed until the paper jam has been cleared See Screen Shown When There Is a Paper Jam on p 6 2 Clearing Paper Jams in the Stack Bypass If a paper jam occurs in the stack bypass a screen similar to the one shown below appears on the touch panel display Check where the jam has occurred and follow the procedure desc...

Page 395: ...he Paper Deck G1 optional is attached move the paper deck away from the main unit See Paper Deck G1 on p 7 3 1 Open the upper right cover of the main unit 2 Remove all loaded paper from the stack bypass 3 Remove any jammed paper inside on the right cover ...

Page 396: ...Paper Deck G1 on p 7 3 CAUTION When closing the cover be careful not to get your fingers caught as this may result in personal injury 5 Continue to follow the instructions on the touch panel display NOTE The screen indicating how to remove the paper jam will remain displayed until the paper jam has been cleared See Screen Shown When There Is a Paper Jam on p 6 2 ...

Page 397: ...ne shown below appears on the touch panel display Check where the jam has occurred and follow the procedure described below and the procedure that appears on the touch panel display to help you remove the jammed paper 1 Press and release the paper drawer release button of the paper drawer indicated on the touch panel display until the paper drawer comes out ...

Page 398: ...force Push it back into the machine and try pressing the release button and pull it out again 3 Remove any jammed paper 4 Return the paper drawer to its original position CAUTION When returning the paper drawer to its original position be careful not to catch your fingers between the top of the paper drawer and the main unit ...

Page 399: ... has been cleared See Screen Shown When There Is a Paper Jam on p 6 2 Clearing Paper Jams in the Feeder If a paper jam occurs in the Feeder a screen similar to the one shown below appears on the touch panel display Check where the jam has occurred and follow the procedure described below and the procedure that appears on the touch panel display to help you remove the jammed paper 1 Open the Feeder...

Page 400: ...Clearing Paper Jams 6 30 Troubleshooting 6 2 Remove any jammed originals 3 Open the middle cover by holding the knob in the back 4 Remove any jammed paper ...

Page 401: ... 5 Close the middle cover CAUTION When closing the cover be careful not to get your fingers caught as this may result in personal injury 6 Turn the roller knob on the back edge of the feeder in the direction of the arrow Remove any jammed paper ...

Page 402: ...eshooting 6 7 Once you have removed the jammed paper close the Feeder Cover CAUTION When closing the cover be careful not to get your fingers caught as this may result in personal injury 8 Open the Feeder and remove any jammed paper ...

Page 403: ...o avoid catching your hand as this may result in personal injury 10 Continue to follow the instructions on the touch panel display NOTE The screen indicating how to remove the paper jam will remain displayed until the paper jam has been cleared See Screen Shown When There Is a Paper Jam on p 6 2 ...

Page 404: ...ause The machine has run out of paper No more prints can be made The paper drawer is not correctly inserted Remedy Load paper See Loading Paper in the Paper Drawers on p 5 2 Insert the paper drawer as far as it will go See Loading Paper in the Paper Drawers on p 5 2 Load LTR size paper Cause The paper drawer loaded with the best paper size selected by the Automatic Paper Selection mode is not inse...

Page 405: ...cted to the main unit Remedy Connect the Finisher to the main unit properly See Finisher F1 Saddle Finisher F2 Puncher Unit B1 on p 7 10 Paper is jammed in the indicated location Remove the jammed paper Cause An original jam or paper jam has occurred preventing you from making prints Remedy Remove paper from the machine following the guidance messages on the touch panel display See Clearing Paper ...

Page 406: ... the network is congested as a result of continuous sending or heavy use of FTP or Windows SMB Remedy Wait a moment and browse again Set the IP Address Cause The IP address of the main machine has not been set Remedy Set the IP address in Additional Functions and turn the main power back ON No response from the server Check the settings Cause The setting of the specified server is not correct or t...

Page 407: ...on the Activity Report and Send Result Report See Specifying Report Settings on p 3 68 Take the necessary procedures depending on the error code NOTE If a send job is canceled STOP appears in the Results column 022 Cause Forwarding cannot be performed because the contents of the Group Address specified as forwarding destinations have been deleted or are only User Inboxes Transmission cannot be per...

Page 408: ...document to multiple recipients at the same time Send the document in smaller partitions and or to a smaller number of recipients 703 Cause You cannot write because of insufficient memory for image data Remedy Please wait a few moments Try again after other Send jobs complete Erase documents stored in an inbox If the machine still does not operate normally turn the main power OFF then turn it back...

Page 409: ...nother sending component Remedy Try sending again 711 Cause There was insufficient memory in the inbox Remedy Delete the documents stored in the inbox 712 Cause The maximum number of documents is stored in an inbox Remedy Delete the documents stored in the inbox 749 Cause Because the service call message is being displayed you cannot perform jobs Cause Turn the main power OFF wait for 10 seconds a...

Page 410: ...cables and connectors If the machine still does not operate normally turn the main power OFF then turn it back ON 754 Cause The Server is not functioning when sending data or the network is down The destination setting is not correct Remedy Check the server and network Check the destination settings 755 Cause You cannot send jobs because TCP IP is not functioning correctly IP address is not set Wh...

Page 411: ...nd setting of the file server 802 Cause The e mail I Fax SMTP server setting in Additional Functions is not correct The DNS server name setting is not correct Connection to the DNS server failed Remedy Check the names of the SMTP server and DNS server in Additional Functions Check that the DNS server is operating correctly 803 Cause Before sending all pages the network connection was cut by the re...

Page 412: ...file name exists on the server and cannot be overwritten Remedy Change the settings on the file server to enable overwriting 810 Cause A POP server connection error occurred when receiving an I Fax The POP server returned an error during connection A timeout error occurred on the server side during connection to the POP server Remedy Check the POP server name setting in Additional Functions Confir...

Page 413: ... Check the settings and ask the sender to resend 820 Cause You have received data that cannot be processed BASE 64 or uuencode is incorrect Remedy Check the settings and ask the sender to resend 821 Cause You have received data that cannot be processed TIFF analysis error occurs Remedy Check the settings and ask the sender to resend 822 Cause You have received data that cannot be processed Image c...

Page 414: ...o not know the password contact your system manager 827 Cause You have received data that cannot be processed Contains MIME information that is not supported Remedy Check the settings and ask the sender to resend 828 Cause You have received HTML data Remedy Ask the sender to use a file format other than HTML and resend 829 Cause Data that contains more than 1 000 pages is received Remedy This mach...

Page 415: ...been sent because the Network Settings in Additional Functions have not been set or trouble has occurred at the mail server end Remedy Check the DNS Server Settings in the Network Settings and the E mail I Fax and IP address settings in Additional Functions Check the status of the mail server and DNS server 834 Cause An MDN error notification is received because I Fax address or destination condit...

Page 416: ...ile a job was being processed Remedy Check to see if the main power switch is ON Try processing the job again if necessary 853 Cause When trying to print a large number of pages the job is not performed due to insufficient memory resources Remedy Reduce the number of pages to print or perform the print job again when other jobs are not reserved 899 Cause The e mail or I Fax has been successfully s...

Page 417: ...wing number of pages Copy 100 pages Printer 100 pages Mail Box 100 pages Others 100 pages For example the Copy function can hold up to 3 700 pages of images 100 3 600 3 700 pages However the number of pages that the machine s memory can hold may differ depending on the amount of memory required for documents stored in inboxes and jobs on standby 1 Operate the machine according to the message and f...

Page 418: ...ect and use the other functions that are not being used If the screen below appears Select Cancel or Another Function Cancel Returns to the Basic Features screen Try printing when the current job is complete If you press Another Function Select and use the other functions that are not being used ...

Page 419: ...bed below WARNING Do not connect or disconnect the power cord with wet hands as this may result in electrical shock CAUTION Always grasp the plug portion when disconnecting the power cord Pulling on the power cord may expose or snap the core wire or otherwise damage the power cord If the power cord is damaged this could cause current to leak resulting in a fire or electrical shock IMPORTANT If you...

Page 420: ...ler 1 Turn the main power switch OFF Allow at least 10 seconds before turning the main power switch back ON 2 If the machine still does not operate normally carry out the following procedure and contact your local authorized Canon dealer Turn OFF the main power and disconnect the power plug ...

Page 421: ...ooting 3 Contact your service representative Confirm the following information when contacting your local authorized Canon dealer Product name Type of problem and the status of the machine The error code appearing on the touch panel display ...

Page 422: ...l panel switch are both ON check that the breaker is not OFF If the breaker is OFF contact your local authorized Canon dealer Do not switch the breaker back ON WARNING If the breaker is in the OFF position do not switch the current leakage breaker back ON Doing so may lead to a fire electrical shock smoke or the tripping of other breakers in the facility I side side ...

Page 423: ...artridge in the Stapler Unit 7 18 Removing Jammed Staples from the Stapler Unit 7 22 Clearing Paper Jams in the Saddle Stitcher Unit 7 25 Replacing the Saddle Stitcher Unit s Staple Cartridge 7 29 Removing Jammed Staples from the Saddle Stitcher Unit 7 32 Clearing Paper Jams in the Puncher Unit 7 37 Removing Punch Waste 7 40 Consumables 7 42 Copy Tray C3 7 43 Parts and Their Functions 7 43 Clearin...

Page 424: ... System Configuration The following optional equipment can be attached to the machine NOTE Peel the film off the touch panel display before using it Saddle Finisher F2 Card Reader C1 Paper Deck G1 Puncher Unit B1 Copy Tray C3 Finisher F1 Main Unit ...

Page 425: ...ower indicators are lit you may not be able to open the paper deck In this case press Energy Saver beforehand to reactivate the machine and press the open button on the paper deck NOTE The paper size of the paper deck is fixed to LTR Parts and Their Functions a a a a Release Lever Press to remove the paper deck from the Main Unit b b b b Open Button Press to load paper or to check for a paper jam ...

Page 426: ... of the machine do not allow necklaces bracelets or other metal objects to touch the inside of the machine as this may result in burns or electrical shock When removing jammed paper take care not to allow the toner to come into contact with your hands or clothing as this will dirty your hands or clothing If they become dirty wash them immediately with cold water Washing them with warm water will s...

Page 427: ...ss the open button to open the paper deck IMPORTANT When the machine is in the Low Power Mode the touch panel is not displayed and only Energy Saver and the Main Power indicators are lit you may not be able to open the paper deck In this case press Energy Saver beforehand to reactivate the machine and press the open button on the paper deck ...

Page 428: ...ing the paper deck to the main unit be careful not to get your fingers caught as this may result in personal injury 6 Continue to follow the instructions on the touch panel display NOTE The screen indicating how to remove the paper jam will remain displayed until the paper jam has been cleared See Screen Shown When There Is a Paper Jam on p 6 2 ...

Page 429: ...ly Energy Saver and the Main Power indicators are lit you may not be able to open the paper deck In this case press Energy Saver beforehand to reactivate the machine and press the open button on the paper deck 2 Open a package of paper and remove the paper stack Make sure that the seam on the center of the package is face up CAUTION When loading paper take care not to cut your hands on the edges o...

Page 430: ...Paper on which color images have been copied Paper which has been copied on using a digital full color copier do not copy on the reverse side of the printed paper Paper which has been printed on using a thermal transfer printer do not copy on the reverse side of this paper NOTE For high quality prints we recommend using Canon paper Immediately before loading paper fan the pages several times and a...

Page 431: ...f the paper deck NOTE The paper deck holds up to 3 500 sheets of paper 20 lb bond 80 g m2 4 Close the paper deck CAUTION When returning the paper deck to its original position be careful not to get your fingers caught as this may result in personal injury NOTE For details on print direction of paper already printed with logos or patterns see Relationship between Original Orientation and Preprinted...

Page 432: ...nisher F2 Puncher Unit B1 Parts and Their Functions 6 1 4 5 2 This illustration shows the Saddle Finisher F2 with the Puncher Unit B1 attached to it In the description on the following pages Finisher F1 and Saddle Finisher F2 are referred to collectively as Finisher unless otherwise stated 3 7 8 ...

Page 433: ...TANT You cannot set the Offset mode when printing on STMTR size paper NOTE When the Collate or Group functions are set or prints are output from a computer the output papers are shifted about 1 1 4 30 mm before delivery a a a a Upper Cover Open to remove jammed paper b b b b Top Cover of the Puncher Unit Open this cover when a paper jam occurs in the puncher unit c c c c Front Cover of the Puncher...

Page 434: ...he number of sheets to staple in one set exceeds 30 for 11 x 17 LGL and LTRR size or 50 for LTR size stapling can not be performed Only Collating is performed If the machine stops while stapling and a message Load staples appears this means that almost all of the staples have been used and the staple case must be replaced In this case replace the staple case See Replacing the Staple Cartridge in t...

Page 435: ...bound is 15 The paper sizes that can be saddle stitched are 11 x 17 and LTRR This function is only available when the Saddle Finisher F2 is attached ABC ABC ABC ABC Corner Staple Area Double Staple Area Upper Right Upper Left Lower Right Lower Left Upper Right Upper Left Lower Right Lower Left Right Side Left Side Left Side Right Side When originals are placed in the feeder 6 5 4 3 3 8 7 2 1 6 8 1...

Page 436: ...cally selects the type of hole punch 2 or 3 holes depending on the selected paper size 2 holes LGL LTRR 3 holes 11 x 17 LTR You cannot punch holes in STMTR size paper Holes cannot be punched in transparencies tracing paper labels and 3 hole punch paper This function is only available when the Finisher is equipped with the Puncher Unit B1 ABC ABC V A B C V A B C Platen Glass Feeder Hole Punched Are...

Page 437: ...ting the inside of the machine do not allow necklaces bracelets or other metal objects to touch the inside of the machine as this may result in burns or electrical shock When removing jammed paper take care not to allow the toner to come into contact with your hands or clothing as this will dirty your hands or clothing If they become dirty wash them immediately with cold water Washing them with wa...

Page 438: ...ully remove any paper protruding from the output tray IMPORTANT If you use the staple mode while making prints do not remove the output sheets that are not yet stapled Stapling will continue after you remove the jammed paper 2 Open the top cover and check the inside of the finisher ...

Page 439: ... remove any jammed paper Then return Cover 1 to its original position CAUTION When closing the cover be careful not to get your fingers caught as this may result in personal injury 4 Lift up Cover 2 and remove any jammed paper NOTE When you lift up Cover 2 Cover 1 is also lifted Cover 1 Cover 2 ...

Page 440: ...instructions on the touch panel display NOTE The screen indicating how to remove the paper jam will remain displayed until the paper jam has been cleared See Screen Shown When There Is a Paper Jam on p 6 2 Replacing the Staple Cartridge in the Stapler Unit When the Finisher runs out of staples the staple cartridge must be replaced A display similar to the one shown below appears on the touch panel...

Page 441: ...2 Puncher Unit B1 7 19 7 Optional Equipment 1 Open the upper front cover of the Finisher 2 Push down the green lever The staple case will slightly slide out 3 Pull out the protruding staple case by holding its left and right sides ...

Page 442: ...t the empty staple cartridge Place the staple case as shown in the illustration and pull out the staple cartridge 5 Insert the new staple cartridge NOTE Only one staple cartridge can be inserted at a time Use only the specifically recommended staple cartridge for use on this machine ...

Page 443: ...raight out 7 Gently push the staple case back into the Finisher until the green lever returns to its original position 8 Make sure that the staple case is firmly secured and close the upper front cover of the Finisher CAUTION When closing the cover be careful not to get your fingers caught as this may result in personal injury ...

Page 444: ...ly performs a dry stapling operation several times to reposition the staples Removing Jammed Staples from the Stapler Unit If a staple jam occurs a screen similar to the one shown below appears on the touch panel display Follow the procedure described below to remove any jammed staples 1 Open the upper front cover of the Finisher ...

Page 445: ...r F2 Puncher Unit B1 7 23 7 Optional Equipment 2 Push down the green lever The staple case will slightly slide out 3 Pull out the protruding staple case by holding its left and right sides 4 Lower the bracket on the staple case ...

Page 446: ...al Equipment 7 5 Remove all of the jammed staples that slide from the staple cartridge 6 Return the bracket on the staple case to its original position 7 Gently push the staple case back into the finisher until the green lever returns to its original position ...

Page 447: ...n you close the cover the staple unit automatically performs a dry stapling operation several times to reposition the staples Clearing Paper Jams in the Saddle Stitcher Unit If a paper jam occurs in the Saddle Finisher F2 while using the Booklet Mode a screen similar to the one shown below appears on the touch panel display Check where the jam has occurred and follow the procedure described below ...

Page 448: ... clothing as this will dirty your hands or clothing If they become dirty wash them immediately with cold water Washing them with warm water will set the toner and make it impossible to remove the toner stains When removing paper which has become jammed inside the machine remove the jammed paper gently to prevent the toner on the paper from scattering and getting your eyes or mouth If toner gets yo...

Page 449: ...ct the Saddle Finisher F2 to the main unit CAUTION When returning the Finisher to its original position be careful not to catch your fingers between the edge of the Finisher and the main unit 4 Open the lower front cover of the finisher 5 Turn the knob on the right counterclockwise ...

Page 450: ...tional Equipment 7 6 Press in the knob on the left and turn it clockwise 7 Remove any jammed paper 8 Close the lower front cover of the finisher CAUTION When closing the cover be careful not to get your fingers caught as this may result in personal injury ...

Page 451: ...s a Paper Jam on p 6 2 Replacing the Saddle Stitcher Unit s Staple Cartridge When the finisher runs out of staples the staple cartridge must be replaced A screen similar to the one shown below appears on the touch panel display Follow the procedure described below to replace the staple cartridge IMPORTANT Before replacing the staple cartridge remove all output sheets from the booklet tray NOTE Thi...

Page 452: ... Saddle Finisher F2 Puncher Unit B1 7 30 Optional Equipment 7 1 Open the lower front cover of the finisher 2 Pull out the saddle stitcher unit 3 Pull out the stapler unit on the saddle stitcher unit and push it up ...

Page 453: ... the empty staple cartridge by holding its left and right sides 5 Insert the new staple cartridge IMPORTANT Replace both the inner and outer staple cartridges at the same time 6 Push the stapler unit of the saddle stitcher unit back in and down Then return it to its original position ...

Page 454: ...TANT Once you have replaced the staple cartridge be sure to reposition the staples in the saddle stitcher unit See Staple Repositioning for the Saddle Stitcher Unit on p 3 61 Removing Jammed Staples from the Saddle Stitcher Unit If a staple jam occurs a screen similar to the one shown below appears on the touch panel display Follow the procedure described below to remove any jammed staples IMPORTA...

Page 455: ...f a paper jam occurs at the same time as a staple jam remove the jammed paper before removing the jammed staples This procedure is only required when the Saddle Finisher F2 is attached to the machine 1 Open the lower front cover of the finisher 2 Pull out the saddle stitcher unit ...

Page 456: ...r Unit B1 7 34 Optional Equipment 7 3 Pull out the stapler unit on the saddle stitcher unit and push it up 4 Grasp the left and right sides of the staple cartridge and remove it 5 On the stapler unit push down Part A and pull up Knob B A B ...

Page 457: ...Optional Equipment 6 Remove the jammed staples and return Knob B to its original position 7 Return the staple cartridge to its original position 8 Push the stapler unit on the saddle stitcher unit in and down as shown and return it to its original position ...

Page 458: ...hine and close the lower front cover CAUTION When closing the cover be careful not to get your fingers caught as this may result in a personal injury IMPORTANT Once you have removed the jammed staples be sure to reposition the staples inside the saddle stitcher unit See Staple Repositioning for the Saddle Stitcher Unit on p 3 61 ...

Page 459: ...necklaces bracelets or other metal objects to touch the inside of the machine as this may result in burns or electrical shock When removing jammed paper take care not to allow the toner to come into contact with your hands or clothing as this will dirty your hands or clothing If they become dirty wash them immediately with cold water Washing them with warm water will set the toner and make it impo...

Page 460: ...onal Equipment 7 1 Open the front cover of the puncher unit 2 Align the of the knob within the range of 3 Close the front cover of the puncher unit CAUTION When closing the cover be careful not to get your fingers caught as this may result in personal injury ...

Page 461: ...1 7 39 7 Optional Equipment 4 Open the top cover of the puncher unit 5 Remove any jammed paper 6 Close the top cover of the puncher unit CAUTION When closing the cover be careful not to get your fingers caught as this may result in personal injury ...

Page 462: ...eared See Screen Shown When There Is a Paper Jam on p 6 2 Removing Punch Waste When the punch waste tray becomes full a screen similar to the one shown below appears on the touch panel display Follow the procedure described below to remove the punch waste IMPORTANT When the punch waste tray is full you cannot make copies or prints using the Hole Punch mode NOTE This procedure is only required when...

Page 463: ...Finisher F1 Saddle Finisher F2 Puncher Unit B1 7 41 7 Optional Equipment 1 Open the front cover of the puncher unit 2 Pull out the punch waste tray 3 Discard the punch waste into a receptacle ...

Page 464: ...front cover of the puncher unit CAUTION When closing the cover be careful not to get your fingers caught as this may result in personal injury Consumables Use only the staple cartridges recommended for use on this machine There is a space behind the upper front cover for storing staple cartridges equivalent to the space occupied by three staple cartridges NOTE We recommend that you order staple ca...

Page 465: ...ed in page order and outputs them Group Function This function outputs all prints of the same page in one group Rotate Function This function collates paper of the same size and outputs the copy sets in alternating directions IMPORTANT The paper sizes that can be selected when you set the Rotate function are LTR and LTRR Parts and Their Functions a a a a Copy tray Paper is output here 1 ...

Page 466: ...per Jams in the Copy Tray If a paper jam occurs in the Copy Tray C3 a screen similar to the one shown below appears on the touch panel display Check where the jam has occurred and follow the procedure described below and the procedure that appears on the touch panel display to help you remove the jammed paper ...

Page 467: ...ill dirty your hands or clothing If they become dirty wash them immediately with cold water Washing them with warm water will set the toner and make it impossible to remove the toner stains When removing paper which has become jammed inside the machine remove the jammed paper gently to prevent the toner on the paper from scattering and getting your eyes or mouth If toner gets your eyes or mouth wa...

Page 468: ...et your fingers caught as this may result in personal injury 2 Continue to follow the instructions on the touch panel display NOTE The screen indicating how to remove the paper jam will remain displayed until the paper jam has been cleared See Screen Shown When There Is a Paper Jam on p 6 2 ...

Page 469: ...not appear on the touch panel display even when the control card is inserted make sure that The control card is inserted in the correct direction The control card is inserted as far as it can go An unusable control card is not inserted Insert the usable control card correctly For instructions on how to turn the power ON see Main Power and Control Panel Power on p 1 32 When the Card Reader C1 optio...

Page 470: ...1 7 48 Optional Equipment 7 Operations before Using the Main Unit 1 Insert the control card into the card slot Make sure it faces in the correct direction The Basic Features screen appears on the touch panel display ...

Page 471: ...ions after Using the Main Unit 1 After you finish using the machine remove the control card The touch panel display returns to the screen prompting the user to insert a control card If SDL is set as a login service the following screen is displayed ...

Page 472: ...ss than seven digits the machine stores them as follows Example If 321 is entered 0000321 is stored Changing the Password and Impression Limit You can change the password and impression limit of the stored Department ID 1 Press Additional Functions System Settings Dept ID Management If a System Manager ID Password is set press System Settings enter the System Manager ID and System Password press I...

Page 473: ...nd impression limit Press Password enter the password Press Impression Limit enter the impression limit press OK You cannot store a password with only zeros as the number 0 such as 0000000 The Impression Limit Range is from 0 to 999999 You cannot print more than the set limit number of impressions To delete the number you entered press Clear 0 9 C ...

Page 474: ...s Limit Functions 6 Select functions to which you want to apply Department ID Management except for Copy press OK The functions for which the Limit Functions setting has been set to Off are not subject to Department ID Management except for printing ...

Page 475: ...Impressions to set the print restrictions press Done This validates the impression limit set in step 4 NOTE To set the print restriction you must create an impression limit in step 4 8 Press OK 9 Press Done repeatedly until the Basic Features screen appears ...

Page 476: ...em Manager ID Password is set press System Settings enter the System Manager ID and System Password press ID NOTE If the desired setting is not displayed press or to scroll to the desired setting 2 Press Print Totals 3 Check or print the list of print totals The print total with the Department ID left blank not displayed is the total number of prints from a computer that does not correspond with a...

Page 477: ...y checking the counter Press or to display the desired department check the print totals When printing the displayed list Press Print List Yes when the screen below appears If you do not want to print press No The screen below appears during printing ...

Page 478: ...n set to On after being specified as Other on the Drawer Eligibility for APS ADS screen you can print a list See Setting a Paper Drawer for Auto Paper Selection Auto Drawer Switching on p 3 14 To cancel printing press Cancel To close the screen press Done 4 Press Done 5 Press OK 6 Press Done repeatedly until the Basic Features screen appears ...

Page 479: ... department when the Card Reader C1 is being used 1 Press Additional Functions System Settings Dept ID Management If a System Manager ID Password is set press System Settings enter the System Manager ID and System Password press ID NOTE If the desired setting is not displayed press or to scroll to the desired setting 2 Press Print Totals ID ...

Page 480: ...ader C1 7 58 Optional Equipment 7 When erasing the print total for one particular department Select the department whose Print Total you want to erase press Clear When erasing all counts Press Clear All Totals ...

Page 481: ...Card Reader C1 7 59 7 Optional Equipment 3 Press Yes If you do not want to erase the counter press No The message Erased appears on the touch panel display for approximately three seconds 4 Press Done ...

Page 482: ...ot to print documents from a computer that does not correspond with a stored Department ID NOTE The default setting is On 1 Press Additional Functions System Settings Dept ID Management If a System Manager ID Password is set press System Settings enter the System Manager ID and System Password press ID NOTE If the desired setting is not displayed press or to scroll to the desired setting ID ...

Page 483: ... OK On Allows the machine to output prints from computers that do not support a Department ID Off Allows the machine to output prints from computers that support a Department ID The selected mode is set 3 Press Done repeatedly until the Basic Features screen appears ...

Page 484: ...Card Reader C1 7 62 Optional Equipment 7 ...

Page 485: ...8 Forwarding Conditions List 8 9 Registered LDAP Server List 8 10 Address Book List 8 11 User s Data List 8 12 Specifications 8 13 Main Unit 8 13 Feeder 8 15 Paper Deck G1 8 15 Finisher F1 Saddle Finisher F2 8 16 Puncher Unit B1 8 17 Copy Tray C3 8 18 Card Reader C1 8 18 Relationship between Original Orientation and Preprinted Paper Output Chart 8 19 Index 8 21 ...

Page 486: ... each send job was accepted 24 hour notation ST TIME Prints the time the send job was started 24 hour notation DESTINATION ADDRESS Prints the address of the recipient File path is printed on a second line If the address and or file path exceeds the column capacity the address and or file path is truncated DESTINATION ID Prints the abbreviated name of the recipient If the abbreviation exceeds the c...

Page 487: ...omplete A Send Result Report can also be printed along with a portion of the sent document By default the report is printed when an error occurs However you can also specify it be printed after every send job or not printed at all See Send Result Report TX Report on p 3 68 NOTE The default settings are as follows Send Result Report For Error Only Error Copy Print On Please note that the addresses ...

Page 488: ...ss of the sending destination to which you have not finished sending If the abbreviation exceeds the display capacity only the first characters are shown TRANSACTION OK Prints the name and address of the sending destination to which you have finished sending If a field exceeds its display capacity only those characters that fit on the display are printed ERROR When a sending error occurs the name ...

Page 489: ...ult settings are as follows Auto Print On Daily Activity Report Time Off Send Receive Separate Off Please note that the addresses in the above report are fictitious DEPT ID When a Department ID is set it is listed in a log A log of send jobs is printed for each ID ST TIME Prints the date and time 24 hour notation that the send job was started An asterisk indicates that you have already printed a r...

Page 490: ...ur digit number which is automatically assigned when the transaction is accepted MODE Prints the communication type and service name Communication type TX RX Communication service FTP SMB IPX I FAX MAIL PGS Prints the number of pages of the original that were sent normally to the remote party RESULT Prints OK NG or plus the elapsed communication time If NG is printed the error code is printed on t...

Page 491: ...umber which is automatically assigned when a Copy job is accepted TIME Prints the date and time in 24 hour notation when a Copy job was completed SHEET x COPIES Prints the number of pages of originals and number copies DEVICE NAME Prints the name of the device used for copying LOCAL COPY is printed when this machine is used for copying Cascade Copy is printed when Cascade Copy is used The output d...

Page 492: ... are printed for each Department ID JOB NO Prints the four digit number which is automatically assigned when a Print job is accepted TIME Prints the date and time in 24 hour notation when a Print job was completed JOB NAME Prints the name of a printed document or type of job USER Prints the name of the user who performed the print job PGS Prints the number of pages of the original RESULT Prints OK...

Page 493: ...ons List You can print the contents of the Forwarding Settings You can also print a Forwarding Conditions List manually whenever necessary See Printing a Forwarding Settings List on p 4 86 NOTE Please note that the addresses in the above report are fictitious ...

Page 494: ...can print the contents of the registered LDAP server settings You can print a Registered LDAP Server List manually whenever necessary See Printing LDAP Server Settings on p 4 114 NOTE For more information on specifying LDAP Server Settings see LDAP Server Settings on p 4 97 ...

Page 495: ...d destination When printing the content of a one touch button the number of the one touch button is printed in the first line CLASS Prints the registered destination class DESTINATION ADDRESS If the medium is File Shows the host name on the first line and the folder path on the second line If the medium is Mail Box Shows the inbox number If the medium is I Fax or e mail Prints the I Fax address or...

Page 496: ...List The User s Data List shows all the registered Communications Settings Report Settings and System Manager Settings in the Additional Functions mode You can print the list whenever you want See Printing the Additional Functions Settings List on p 3 78 ...

Page 497: ...of Tones 256 Acceptable Paper Stock Plain Paper Paper Drawer 1 2 17 lb bond to 110 lb index 64 g m 2 to 200 g m2 Paper Drawer 3 4 17 lb bond to 24 lb bond 64 g m 2 to 90 g m2 Stack Bypass 17 lb bond to 110 lb index 64 g m2 to 200 g m2 Transparency Tracing paper Labels Heavy Recycled Color Letterhead Bond 3 Hole Punch Stack Bypass selected Acceptable Originals Sheets books 3 dimensional objects Up ...

Page 498: ... of 68 F First Copy Time Platen glass selected 3 8 seconds max Maximum Copy Speed imageRUNNER imageRUNNER 6020i 6020 5020i 5020 Direct 11 x 17 30 cpm 30 cpm LGL 36 cpm 36 cpm LTR 60 cpm 50 cpm LTRR 42 cpm 39 cpm STMTR 60 cpm 50 cpm Reduction 11 x 17 STMTR 50 60 cpm 50 cpm 11 x 17 LTRR 64 42 cpm 39 cpm 11 x 17 LGL 73 36 cpm 36 cpm LGL LTR 78 42 cpm 39 cpm Enlargement LGL 11 x 17 121 30 cpm 30 cpm L...

Page 499: ...3 mm Dimensions for each tray and stack bypass tray are given in their extended conditions Weight Approx 462 lb 210 kg Originals 11 x 17 LGL LTR LTRR and STMT Original Paper Weights One sided scanning 10 to 32 lb bond 38 to 128 g m 2 Two sided scanning 13 to 32 lb bond 50 to 128 g m 2 Original Tray Capacity 100 sheets Original Replacement Speed 55 sheets minute LTR Power Source From the Main Unit ...

Page 500: ...m2 Staple Mode LTR 30 sets or 4 3 8 110 mm equivalent to 750 sheets 20 lb bond 80 g m2 11 x 17 LGL LTRR 30 sets or 2 7 8 74 mm equivalent to 500 sheets 20 lb bond 80 g m2 Non Collate Collate Group with different paper sizes 1 3 4 44 mm equivalent to 300 sheets 20 lb bond 80 g m2 Staple with different paper sizes 30 sets or 7 8 22 mm equivalent to 150 sheets 20 lb bond 80 g m2 Saddle Stitch 1 to 5 ...

Page 501: ...for removing paper jams 72 5 8 x 29 1 4 1 844 mm x 743 mm Weight Finisher F1 Approx 70 5 lb 32 kg Saddle Finisher F2 Approx 114 lb 52 kg Finisher F1 Puncher Unit B1 Approx 82 4 lb 37 4 kg Saddle Finisher F2 Puncher Unit B1 Approx 126 lb 57 4 kg Paper 17 Ib bond to 110 lb index 64 g m 2 to 200 g m2 Hole Punching System Sequential processing system Punch Hole Quantity Hole Diameter 2 holes 3 holes 8...

Page 502: ...0 g m2 Dimensions H x W x D 4 x 18 3 8 x 13 3 8 100 mm x 465 mm x 340 mm Weight Approx 1 4 Ib 670 g Card to be used Magnetic type card Optical type card Card readout method Magnetic Optical readout Magnetic card reading direction Inserting Direction Store replay Replay Power source From main unit Dimensions H x W x D 1 1 4 x 3 1 2 x 4 32 mm x 88 mm x 100 mm Weight Approx 10 4 oz 295 g ...

Page 503: ... n t i a l Confidential C o n f i d e n t i a l Confidential Confidential Confidential Orientation in Paper Drawer 1 2 Orientation in Paper Drawer 3 4 Orientation in Stack Bypass Paper Deck Orientation on the Platen Glass Orientation in the Feeder Auto Orientation Setting Staple Setting Staple Setting Original Paper Orientation Settings Either On or Off Either On or Off Either On or Off Either On ...

Page 504: ...ion in Paper Drawer 1 2 Orientation in Paper Drawer 3 4 Orientation in Stack Bypass Paper Deck Orientation on the Platen Glass Orientation in the Feeder Auto Orientation Setting Staple Setting Staple Setting Original Paper Orientation Settings Either On or Off Either On or Off Either On or Off Either On or Off Set to On when paper orientation in paper drawers is vertical Output Example LTR 11 x17 ...

Page 505: ... Toner 5 12 Additional Functions key 1 26 Additional Functions screen 1 12 Address Book List 3 75 8 11 Adjustment Cleaning 3 60 Always Send Notice for RX Errors 4 32 Audible Tones 3 12 Auto Clear Setting 3 10 Auto Clear Time 3 54 Auto Offline 4 91 Auto Online 4 90 Auto Online Offline 4 90 Auto Sleep Time 3 53 B Back 1 40 Booklet Tray 7 11 Breaker 1 24 ...

Page 506: ...0 Copy Log List 8 7 Copy Tray C3 7 43 Counter Check 1 27 1 30 Counter Check key 1 26 D Daily Timer Settings 3 57 Date Time Settings 3 49 Default Subject 4 32 Department ID 1 48 Dept ID Management 4 9 7 50 Details 2 8 Device 2 4 Device Information Settings 4 56 Display Contrast Dial 1 26 1 42 Done 1 40 Drawer Eligibility For APS ADS 3 15 E E mail I Fax Settings 4 33 Energy Consumption in Sleep Mode...

Page 507: ... 7 11 Front Cover of the Puncher Unit 7 11 Full Mode TX Timeout 4 32 G Guide key 1 26 Guide Screen 1 17 I ID key 1 26 Inch Entry 3 13 Initial Function 3 8 Initialize Common Settings 3 46 J Job Type 2 3 Job Print Monitor Area 1 10 L Language Switch 3 41 List of Error Messages 6 34 Loading Paper 5 2 Log 2 3 Low power Mode Time 3 59 LTRR STMT Original Selection 3 23 ...

Page 508: ... MEAP Settings 4 93 Memory Lock End Time 4 46 Memory Lock Start Time 4 42 Memory RX Inbox Password 4 38 Memory RX Inbox Settings 4 38 Message board 1 18 Multifunctional Operations 1 74 N Next 1 40 Numeric keys 1 26 O Offset Jobs 3 44 OK 1 40 Open Button 7 3 Original Output Area 1 23 1 25 Original Set Indicator 1 25 Original Supply Tray 1 23 1 25 Output Tray A 7 11 Output Tray B 7 11 ...

Page 509: ...List 8 8 Print MDN Message Disposition Notification DSN Delivery Status Notification on Receipt 4 32 Print System Information 4 95 Print Totals 4 22 7 57 Printing Priority 3 26 Priority Printing 2 31 Processing Data Indicator 1 26 Puncher Unit B1 7 10 R Received Job 2 21 Registered LDAP Server List 8 10 Release Lever 7 3 Remote UI 4 50 Report Settings 3 68 Reset key 1 26 Reversed Display Color 3 4...

Page 510: ...2 5 Stack Bypass 1 23 Stack Bypass Settings 1 69 Stack Bypass Standard Settings 3 36 Standard Local Print Settings 3 40 Start key 1 26 Status 2 3 Stop key 1 26 Store Form for Form Composition 3 28 Store LDAP Server 4 97 Store Paper Type 3 17 System Manager Settings 4 3 System Monitor 1 10 System Monitor screen 1 16 T Test Button 1 24 Time Until Unit Quiets Down 3 56 Timer Settings 3 48 Toner Suppl...

Page 511: ...n Glass Cover 1 24 Unit 1 Fixing Transport Unit 1 24 Unit 2 Duplexing Transport Unit 1 24 Upper Cover 7 11 Use HTTP 4 94 Use I Fax Memory Lock 4 40 Use Send Via Server 4 33 User s Data List 3 78 8 12 W Wire Cleaning 5 26 Z Zoom Fine Adjustment 3 60 ...

Page 512: ...Index 8 28 8 Appendix ...

Page 513: ...rs in the System Settings from the Additional Functions screen This mode is called the System Management mode The operations which can be managed in the System Management mode are Mail box Document Management Mail Box Settings Entering the System Management Mode When Department ID Management Is Enabled 1 Enter the System Manager ID and System Password using numeric keys Press Dept ID enter the Sys...

Page 514: ... ii When Department ID Management Is Not Enabled 1 Press Additional Functions 2 Press System Settings 1 2 3 4 5 6 7 8 0 ID 9 C Start Reset Guide Additional Functions Clear ...

Page 515: ...enters the System Management Mode NOTE Enter the number stored under System Manager Settings See Specifying the System Manager Settings System Manager Settings on p 4 3 Canceling the System Management Mode 1 Press ID Be sure to press Reset after you press ID The System Management Mode is canceled 0 9 ID ID 1 2 3 4 5 6 7 8 0 ID 9 C Reset Guide Additional Functions Processing Data Error Clear ID ...

Page 516: ...de You can operate the inbox documents stored by users For example you can control an inbox whose password was forgotten delete unwanted documents or retrieve documents from an inbox secured by a password in case of an emergency 1 Enter the System Management Mode 2 Press Mail Box 3 Proceed to operate the inbox See the Mail Box Guide 1 2 3 4 5 6 7 8 0 ID 9 C Start Reset Guide Additional Functions C...

Page 517: ...e password of an inbox which the user has forgotten 1 Press Additional Functions When the machine is already in the System Management mode press Additional Functions and proceed to step 5 If Department ID Management is enabled enter the System Manager ID in the Dept ID also enter the System Password in the Password using numeric keys press ID 1 2 3 4 5 6 7 8 0 ID 9 C Start Reset Guide Additional F...

Page 518: ...System Manager ID Password using numeric keys press ID The machine enters the System Management Mode NOTE Enter the number stored under System Manager Settings See Specifying the System Manager Settings System Manager Settings on p 4 3 0 9 ID ...

Page 519: ... vii 4 Press Done The display returns to the Additional Functions screen 5 Press Mail Box Settings change the settings See Chapter 5 Customizing Settings in the Mail Box Guide ...

Page 520: ... viii ...

Page 521: ...dure described in the Periodic Inspection of the Breaker on p xxv of the imageRUNNER 6020i 5020i and imageRUNNER 6020 5020 Reference Guide once or twice a month How to Fill in this Check Sheet Fill in the date of inspection and the name of inspector When the inspection finished normally write a check mark under OK If not contact your service representative Also write a check mark under NG Date of ...

Page 522: ... x ...

Page 523: ......

Page 524: ...Strada 6 20089 Milanofiori Rozzano MI Italy CANON LATIN AMERICA INC 703 Waterford Way Suite 400 Miami Florida 33126 U S A CANON AUSTRALIA PTY LTD 1 Thomas Holt Drive North Ryde Sydney N S W 2113 Australia CANON SINGAPORE PTE LTD 79 Anson Road 09 01 06 Singapore 079906 CANON HONGKONG CO LTD 9 F The Hong Kong Club Building 3A Chater Road Central Hong Kong The contents of this guide are printed on 10...

Reviews: