background image

Summary of Contents for imageRunner 60

Page 1: ...osed CD ROM before connecting the video camcorder to your computer with this cable STOP Veillez ainstaller Ie logiciel apartir du CD fourni avant de brancher Ie cable de connexion du camescope aI ordinateur iATENCION Asegurese de haber instalado el software que contiane el CD ROM antes de conectar la videocamera al ordenador con este cable ...

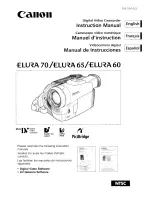
Page 2: ...digital IC II Manual de Instrucciones an LU A 70 LU A6S LU A60 Minil T Digital Video Cassette rJ BUBBLE JET DIRECT DIRECT PRim t PictBridge Please read also the following instruction manuals Veuillez lire aussi les modes d emploi suivants Lea tambien los manuales de instrucciones siguientes Digital Video Software DV Network Software ...

Page 3: ...d by turning the equipment off and on the user IS encouraged to try to correct the interference by one or more of the fo lowlng measures Reorient or relocate the receiving antenna Increase the separation between the eqUlpmerlt and receiver Connect the equipment into an outlet On a CirCUit different from that to which the receiver is connected Consult the dealer or an experienced radiorrV techniCia...

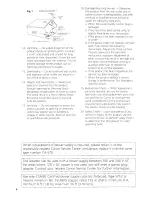
Page 4: ... product should be cleaned only as recommended in 12 Power Cord Protection Power cords thiS manual should be routed so that they are not likely 6 Accessories Do not use accessories not to be walked on or pinched by items placed upon or against them Pay particular recommended In this manual as they may attention to plugs and the pOint from be hazardous which the cords eXit the product 7 Avoid magne...

Page 5: ... change in performance This indicates a objects of any kind into this product need for service through openings as they may touch 19 Replacement Parts When replacement dangerous voltage points or short out parts parts are required be sure the service that could result In a fire or electriC shock technician has used replacement parts that Be careful not to splil liqUid of any kind are specified by ...

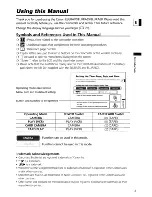
Page 6: ...ing your camcorder or when you have replaced the backup battery SettIog Jbe Iime ZQneJDayligbtSaving Time Operating modes see below _ 1 Menu item and its default setting I I J5 ISYSTEM 1 IT ZONE OsT N y I h M Ub o o _ 1 I Button and switches to be operated u 2 Turn the SET dIal to select SYSTEM and press the Il l SETd aJ ItJA 3 Turn the SET dIal to select ZONE OST and press Nl Operating Mode POWER...

Page 7: ... for Making Better Videos 31 Playback Playing Back a Tape 32 Adjusting the Volume 34 Playing Back on a TV Screen 35 Advanced Functions Menus and Settings 38 Recording Using the Recording Programs 45 Using the Night Modes 48 Skin Detail Function 50 Adjusting Exposure Manually 51 Adjusting the Focus Manually 52 Setting the White Balance 54 Setting the Shutter Speed 56 Using the Self Timer 58 Changin...

Page 8: ...fter Recording 100 Recording Motion JPEG Movies on a Memory Card 101 Selecting the Focusing Point 103 Selecting the Drive Mode 104 Recording Panoramic Images Stitch Assist Mode 106 Playing Back a Memory Card 108 Protecting Images 111 Erasing Images 112 Combining Images Card Mix 113 Formatting a Memory Card 117 Creating a Start up Image 118 Direct Printing Printing Still Images 119 Selecting the Pr...

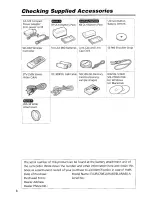
Page 9: ... I STV 250N Stereo IIFC OOPCUUSB Cable SDC 8M SD Memory Video Cable Card containing If I samp G J I WA 34 Wide Attachment L _ The serial number of this product can be found at the battery attachment unit of the camcorder Write down the number and other information here and retain this book as a permanent record of your purchase to aid identification in case of theft Date of Purchase Model Name ELU...

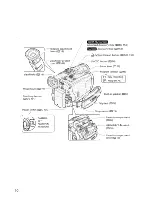
Page 10: ...button J D28 fast forward button J D32 CARD button J D108 II jr FOCUS button J D52 I II play pause button J D32 REC SEARCH button J D28 I 9 record review button J D28 Z RECSEARCH FOCUS INIGHTMODE 1 ts 32 A L E fii II x 2 IJ48 1 button lJJ62 I 3 J END END SEARCH button CIJ72 r ooifl I V A I E U 4 I DATA CODE button lJJ70 cQ stitch assist button J D106 SLIDE SHOW button J D109 9 ...

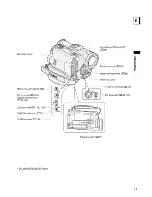
Page 11: ...t stop button lJ24 101 Power switch lJ 5 135 CAMERA OFF PLAY VCR NETWORK ELU A 70 LU A65 Advanced Accessory shoe lJ 80 154 G BD Accessory shoe lJ 153 IoN print share button lJ 120 131 PHOTO button lJ 96 Zoom lever lJ 29 Cassette compartment lJ 16 _ _ OPEN EJECT switch lJ 16 Cassette compartment cover lJ 16 ...

Page 12: ... terminal 1II61 88 __ I MIC i 1 i f 1 USB terminal III 119 130 l5CHARGE l DC CHARGE indicator 1II13 _ DC IN terminal 1II13 ELURA70 ELURA65 only Assist lamp White LED III48 Remote sensor III 20 Stereo microphone III 88 11 ...

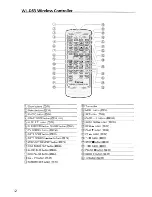
Page 13: ... buttons CIl74 ZERO SET MEMORY button CIl 73 QJ 12bit AUDIO OUT button CIl90 AUDIO DUB button CIl89 Q REC PAUSE button CIl84 QJ AV DV button CIl87 REMOTE SET button CIl77 Transmitter MENU button CIl38 SET button CIl38 CARD buttons CIl108 SLIDE SHOW button CIl109 REW button CIl32 PLAY button CIl32 FF button CIl32 11 button CIl33 STOP button CIl32 II button CIl33 PAUSE button CIl33 SLOW I button CIl...

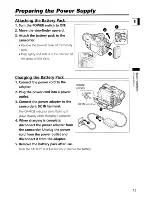
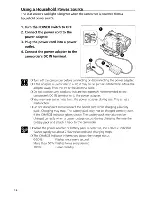
Page 14: ...4 When charging is complete disconnect the power adapter from the camcorder Unplug the power cord from the power outlet and disconnect it from the adapter 5 Remove the battery pack after use Press the BATIERY RELEASE button to remove the battery 1 Turn the POWER switch to OFF 2 M ove the viewfinder upward 3 Attach the battery pack to the camcorder Remove the terminal cover of the battery pack Pres...

Page 15: ...to the camcorder s DC IN terminal or to the power adapter o You may hear some noise from the power adapter during use This is not a malfunction o Do not disconnect and reconnect the power cord while charging a battery pack Charging may stop The battery pack may not be charged correctly even if the CHARGE indicator glows steady The battery pack may also not be charged correctly when a power outage ...

Page 16: ...recording with repeated operations such as start stop zooming power on off Actual time may be shorter o We recommend charging the battery pack in temperatures between 50 of and 86 F 10 C and 30 O Outside the temperature range of 32 of to 104 of 0 Q to 40 C the CHARGE indicator flashes rapidly and charging stops o A lithium ion battery pack can be charged at any charge state Unlike conventional bat...

Page 17: ... Press the mark on the cassette compartment until it clicks 4 Wait for the cassette compartment to retract automatically and close the cassette compartment cover 16 o Do not interfere with the cassette compartment while it is opening or closing automatically or attempt to close the cover before the cassette compartment has fully retracted o Be careful not to get your fingers caught in the cassette...

Page 18: ...arge disassemble heat above 212 of 100 C or incinerate the battery Replace the battery with a CR1616 made by Panasonic Hitachi Maxell Sony Toshiba Varta or Renata Use of other batteries may present a risk of fire or explosion o Do not pick up the battery using tweezers or other metal tools as this will cause a short circuit o Wipe the battery with a clean dry cloth to ensure proper contact o Keep ...

Page 19: ...to the lens cap 2 Pass the grip belt through the loop on the cord Press the buttons on the lens cap when attaching removing it Hook the lens cap on the grip belt while you are recording and place it over the lens when you have finished Hold the camcorder with your right hand and adjust the belt with your left Adjust the grip belt so that you can reach the zoom lever with your index finger and the ...

Page 20: ...rough the wide attachment It could damage your eyesight o If you zoom to telephoto the picture will not be in focus o If dust accumulates on the wide attachment or on the camcorder lens clean both lenses gently with a blower brush o Do not touch the lens to avoid smudges and fingerprints o Do not store the wide attachment in a humid place as it may mold II 0 The wide attachment may obstruct the re...

Page 21: ...ert the batteries following the and markings Replace both batteries 3 Close the battery cover 20 o Camcorder and wireless controller are equipped with 2 remote sensor modes CD 77 If the wireless controller does not work check if camcorder and wireless controller are set to the same mode a The wireless controller may not work properly when the remote sensor IS subjected to strong light sources or d...

Page 22: ...s the SET dial The time zone setting appears see table on the next page The default setting is New York 4 Turn the SET dial to select the setting option that represents your time zone and press the SET dial To adjust for daylight saving time select the time zone with the e next to the area Setting the Date andTim e MENU OJ 38 SYSTEM 5 Turn the SET dial to select D TIME SET and press the SET dial T...

Page 23: ...s Angeles 6 KARACHI 18 DENVER L DACCA N CHICAGO 13J BANGKOK 20 N Y New York 9 H KONG Honq Konq 21 CARACAS j TOKYO 221 RIO Rio de Janeiro ll SYDNEY 23 FERNAN Fernando de Noronha 121 SOLOMON 24 AZORES Once you have set time zone date and time you do not need to reset the clock o each time you travel to another time zone Just set the time zone to the one of your destination and the camcorder automati...

Page 24: ...he SET dial to select DISPLAY SETUP and press the SET dial 3 Turn the SET dial to select OfT DISPLAY and press the SET dial 4 Turn the SET dial to select ON 5 Press the MENU button to close the menu t t i I CARD CAMERA i DI5PLAY OFF I I CAMERA I0_1_5P_L_A_Y_5_E_T_UP_l_ _ _ I O T 1 Press the MENU button to open the menu 23 ...

Page 25: ... mode Set the POWER switch to CAMERA and the TAPE CARD switch to 3 Push the OPEN button at the LCD panel and open the LCD panel 4 Press the start stop button to begin recording Press the start stop button again to pause recording 24 When You Have Finished Recording 1 Turn the POWER switch to OFF 2 Close the LCD panel and return the viewfinder into its initial position 3 Replace the lens cap 4 Unlo...

Page 26: ... 20 seconds before shutoff To continue recording turn the POWER switch to OFF and then back to CAMERA o About the LCD and viewfinder screen The screens are produced with extremely high precision manufacturing techniques with more than 99 99 of the pixels operating to specification Less than 0 01 of the pixels may occasionally misfire or appear as black or green dots This has no effect on the recor...

Page 27: ...plays appear on the viewfinder screen Adj ysting the arig ht ness Qf the U O Sc reen 1 Press the MENU button to open the menu 2 Turn the SET dial to select DISPLAY SETUP and press the SET dial 3 Turn the SET dial to select BRIGHTNESS and press the SET dial 4 Turn the SET dial to adjust the brightness level 5 Press the MENU button to close the menu CARQ RtAY c I r w CA RD EAMERA j t I DISPLAY SETUP...

Page 28: ...re used flashes in red when the lithium button battery is not installed or when it runs out The camcorder counts from 1 to 10 seconds when you start recording This is helpful to avoid scenes that are too short Indicates the remaining time of the tape in minutes 3 END flashes when the tape reaches the end When the time left is less than 15 seconds the remaining tape time may not appear Depending on...

Page 29: ...ew button I The camcorder rewinds the tape plays back the last few seconds and returns to record pause mode Record Search CAMERA In record pause mode this function allows you to play back the tape forward or reverse to locate the point where you wish to begin recording 28 Press and hold the REC SEARCH button forward or button reverse Release the button at the point you wish to begin recording The ...

Page 30: ... Zoom out T o Zoom lever 18x optical zoom 16x optical zoom 14x optical zoom Move the zoom lever toward W to zoom out wide angle Move it toward T to zoom in telephoto Press the zoom lever slightly for a slow zoom Press harder for a faster zoom I I You can also use the T and W buttons on the wireless controller Howevert you Q O cannot control the zoom speed 29 ...

Page 31: ...dial 4 Turn the SET dial to select a setting option 5 Press the MENU button to close the menu 30 o Digital zoom cannot be used in the night modes o Digital zoom cannot be used when the multi image screen is selected o A zoom Indicator appears for 4 seconds It extends in light blue when the digital zoom is set to 72x ELURA70 64x ELURA65 or 56x ELURA60 and extends further in dark blue when set to 36...

Page 32: ... the microphone or lens f9f M r Stc pi Jity Lean against a wall i r I I Lie on your elbow Ligbt igQ When recording outdoors we recommend recording with the sun at your back Put the camcorder on a table Use a tripod 11 o When using a tripod do not leave the viewfinder exposed to direct sunlight as it may melt due to concentration of the light by the lens o Do not use tripods With fastening screws l...

Page 33: ...R and the TAPE CARD switch to 2 Open the LCD panel You can also close the LCD panel with the screen facing outward 3 Press the button to rewind the tape 4 Press the II button to begin playback 5 Press the button to stop playback 32 o To use the viewfinder close the LCD panel o About the screen display During playback the time code gives the hours minutes seconds and frames The remaining tape time ...

Page 34: ...ause Press and hold it to play back continuous frame advancelframe reverse SLOW I Slow Forward Slow Reverse Plays back at about 1 3 normal speed Press the button on the wireless controller during normal or reverse playback Press the play button to return to normal playback x 2 Forward x2 Playback Reverse x2 Playback Plays back at 2 times normal speed Press the button on the wireless controller dur...

Page 35: ... not change the setting following the procedure below ARD M RA or vtcs t X i l MENU CR SETUP CO 38 Open the menu and select VCR SETUP Select AV PHONES 0 set it to PHONES 0 and close the menu 0 The built in speaker does not sound when 0 is displayed 0 Do not connect headphones unless 0 is displayed as it produces noise CAR PlAY Turn the SET dial up to increase the volume and down to lower the volum...

Page 36: ...low STV 250N Stereo Video Cable supplied I ls wi th AudiQLVldeQlerrninals Refer also to the TV or VCR instruction manual 1 Turn off all devices before starting the connections 2 Connect the STV 250N Stereo Video Cable to the camcorder s AV terminal and the audio video terminals on the TVIVCR Connect the white plug to the white audio terminal L left the red plug to the red audio terminal R right an...

Page 37: ...er s AV terminal and the audio terminals of the TVIVCR Connect the white plug to the white AUDIO terminal L left and the red plug to the red AUDIO terminal R right Do not connect the yellow plug 4 If connecting to a TV set the input selector to VIDEO If connecting to a VCR set the input selector to LINE o We recommend powering the camcorder from a household power source o The picture quality is hi...

Page 38: ...UDIO SETUP and press the SET dial 3 Turn the SET dial to select OUTPUT CHI and press the SET dial 4 Turn the SET dial to select a setting option UR Stereo L R channels Bilingual Main Sub UL Stereo L channel Bilingual Main RlR Stereo Rchannel Bilingual Sub 5 Press the MENU button to dose the menu 1 Press the MENU button to open the menu MENU CO 38 r d The setflng resets to the UR setting when you t...

Page 39: ...t a setting option 5 Press the MENU button to dose the menu When setting the white balance shutter speed or language press the SET dial first before pressing the MENU button 38 o Pressing the MENU button at any time closes the menu o Items that are not available appear in purple o You may find it more convenient to use the wireless controller to operate the menu Press the MENU button on the wirele...

Page 40: ...c 1IL INDOOR OUTDOOR 54 FLASH AUTO A RED EYE FLASH ON 80 FLASH OFF AF AST LAMP AUTO OFF 81 NIGHT MODE flNIGHT 0 NIGHT P i1 S NIGHT 48 SKIN DETAIL SOFT NORMAL 50 STILL I REC OFF OdFINE OdNORMAL 97 VCR SETUP REC MODE SP LP 59 AV PHONESO AV PHONES 0 61 AUDIO SETUP WIND SCREEN AUTO OFF 60 AUDIO MODE 16bit 12bit 60 OVOLUME 61 DISPLAY SETUPI BRIGHTNESS 26 LCD MIRROR ON OFF 25 TV SCREEN ON OFF 136 DfT DI...

Page 41: ...u Menu Item Setting Options OJ SYSTEM WL REMOTE I 1 I 2 OFF J 77 BEEP ON OFF 78 T lONE DST See Iist of time zones 21 DITIME SET 21 MY CAMERA S UP SOUND OFF DEFAULT MY SOUND 75 SHTR SOUND OPER SOUND SELF T SOUND ...

Page 42: ...ER FINE FINE NORMAL 93 MOVIE SIZE 320 x 240 160 x 120 94 FILE NOS RESET CONTINUOUS 95 DISPLAY SETUP BRIGHTNESS 26 TV SCREEN ON OFF 136 DISPLAYS ON OFF PLAYBK 136 6SEC DATE ON OFF 71 DATA CODE DATE TIME CAMERA DATA CAM DIT 70 DITIME SEL DATE TIME DATE TIME 70 LANGUAGE DEUTSCH ENGLISH ESPANOL FRAN AIS 76 ITALIANO PYCCKIIl0 J j JX a gg DATE FORMAT 76 SYSTEM WI REMOTE 1aTI 1 iaTI 2 OFF D 77 BEEP ON OF...

Page 43: ...00 CARD SETUP IMG QUALITY SUPER FINE FINE NORMAL 93 IMAGE SIZE 1280 x 960 640 x 480 93 MOVIE SIZE 320 x 240 160 x 120 94 FILE NOS RESET CONTINUOUS 95 VCR SETUP AV PHONES I AV PHONES 61 AUDIO SETUP WIND SCREEN AUTO OFF 60 VOLUME 61 DISPLAY SETUP BRIGHTNESS 26 LCD MIRROR ON OFF 25 TV SCREEN ON OFF 136 DIT DISPLAY ON OFF 23 LANGUAGE DEUTSCH ENGLISH ESPANOL FRAN AIS 76 ITALIANO PYCCKV1V1 i Px B g DATE...

Page 44: ...Submenu Menu Item Setting Options OJ MY CAMERA S UP SOUND OFF DEFAULT MY SOUND 75 SHTR SOUND OPER SOUND SELF T SOUND Q OJ J n CD Q T I s J n c5 J VI 43 ...

Page 45: ...V PHONES 34 DISPLAY SETUP BRIGHTNESS 26 TV SCREEN ON OFF 136 DISPLAYS ON OFF PLAYBK 136 D TIME SEL DATE TIME DATE TIME 70 LANGUAGE DEUTSCH ENGLISH ESPANOL FRAN AIS 76 ITALIANO PYCCKV1l11 3t B fi DATE FORMAT 76 SYSTEM WL REMOTE GTIJ1 GTIJ2 OFF GTIJ 77 BEEP ON OFF 78 T ZONE DST See list of time zones 21 D TIME SET 21 MY CAMERA CREATE START UP IMAGE 118 SEL S UP IMG NO IMAGE GANON LOGO MY IMAGE 75 S ...

Page 46: ...o record sports scenes such as tennis or golf or moving objects such as roller coasters lQ iil Use this mode to give accent to your subject by blurring the background or foreground The blur effect increases the more you zoom to telephoto m gg tl iQbt Use this mode to record spotlit scenes or fireworks rflI ig gjmi l gg Use this mode in bright places such as a sunny beach or ski resort It prevents ...

Page 47: ...aJ H Digital Zoom 0 0 Image Stabilizer ON Focus A 0 White Balance A 0 Shutter Speed A 0 A Exposure Lock x 0 Digital Effects x 0 16 9 x Card Mix x A Auto setting 0 Available x Not available 11 illIII I II Can be used only in CAMERA mode Set the program selector to D IIDII appears 46 ...

Page 48: ...of the program selector o Do not change the mode during recording as the brightness of the image may change abruptly o Sports Portrait mode The picture may not appear smooth when played back o Sand Snow mode The subject may become overexposed in dark surroundings Check the image on the screen The picture may not appear smooth when played back Low Light mode Moving subjects may leave a trailing aft...

Page 49: ...ode Super Night Mode LU A 70 LU A 65 NIGHT MODE button Program selector 48 E I_C_AM_E_R_A_S_E_T_Up 1 NIGHT MODE NIGHT 1 Set the program selector to El 2 Open the menu and select CAMERA SETUP Select NIGHT MODE select a setting option and close the menu 3 Press the NIGHT MODE button The symbol of the selected mode appears on the screen Pressing the NIGHT MODE button again resets the camcorder to the...

Page 50: ...er modes o White points may appear on the screen o Autofocus may not work as well as in other modes In such case adjust the focus manually o Digital zoom and multi image screen cannot be used while a night mode is activated o The program AE mode cannot be changed while a night mode is activated 49 ...

Page 51: ... appearance SKIN DETAIL NORMAL CAMERA SETUP MENU CD 38 Open the menu and select CAMERA SETUP Select SKIN DETAIL set it to SOFT and close the menu I 0 Skin detail function cannot be used when the program selector is set to D o 0 To obtain the best effect use this function when recording a person in close up Note that areas Similar to the skin color may lack In detail 50 ...

Page 52: ...m during exposure lock the brightness of the image may change 1 Set the program selector to lEJ 2 Press the EXP button Exppsure Adj ustrnent When the exposure is locked you can adjust it manually to handle difficult lighting conditions The camcorder s iris can be set to any position from fully closed to fully open Turn the SET dial to adjust the brightness of the image The adjustment range depends...

Page 53: ...s SET dial m i iOI RECSEARCIi FOCUS NIGHT MODE Jl JlaJl0 1 i FOCUS button CAMERA CARD CAMERA 52 1 Set the program selector to fl 2 Adjust the zoom When you operate the zoom after adjusting the focus the subject may not stay in focus Adjust the zoom before the focus 3 Press the FOCUS button MF appears 4 Turn the SET dial to adjust the focus Turn the SET dial up or down until the image appears focus...

Page 54: ... off the camcorder Use this function when you wish to focus on faraway subjects such as mountains or fireworks Press the FOCUS button more than 2 seconds after step 2 in Adjusting the Focus Manually MFoo appears When you operate the zoom or turn the SET dial 00 disappears and the Q camcorder changes to manual focus 53 ...

Page 55: ...g night scenes fireworks sunrise or sunset SET dial MENUbutton a CAMERA r 1 CARD CAMERA MENU CO 38 I_C_A_M_ER_A_S_ET_u_p I 1 WH i TE SAL AUTO 54 1 Set the program selector to lEJ 2 For custom white balance Point the camcorder at a white object and zoom in until it fills the whole screen Keep the camcorder zoomed at the white object until step 3 is completed 3 Open the menu and select CAMERA SETUP ...

Page 56: ...CARD switch o When you have set the custom white balance Depending on the light source d may keep flashing The result will still be better than with the auto setting Reset the white balance when the lighting condition changes Turn off the digital zoom o Custom white balance may provide better results in the following cases Changing lighting conditions Close ups Subjects in a single color sky sea o...

Page 57: ...nt the camcorder directly at the sun when the shutter speed is set to 1 1000 or higher o The image may flicker when recording With high shutter speeds o Recording under fluorescent lights CAMERA mode In Easy Recording Auto mode or the night modes the camcorder automatically detects the flicker of fluorescent lighting and adjusts the shutter speed accordingly However if the screen starts to flicker...

Page 58: ...you can set the camcorder not to use a slow shutter speed SHUTTER ON CARD CAMERA CAMERA MENU IC_AM_E_R_A_S_E_T_U_P I I A SL CO 38 L I Open the menu and select CAMERA SETUP Select A SL SHUTTER set it to OFF and close the menu 0 When set to ON moving subjects may leave a trailing afterimage o If JJI camcorder shake warning appears in CARD CAMERA mode stabilize the camcorder for example by mounting i...

Page 59: ...1O second countdown 2 seconds when using the wireless controller The count down appears on the screen To record a still image press the PHOTO button CD 96 58 o To cancel the self timer press the self timer button Once the countdown has begun you can also press the start stop button when recording movies or the PHOTO button when recording still image to cancel the self timer o The self timer will b...

Page 60: ...not be used for audio dubbing OJ 88 o Depending on the nature and usage condition of the tape picture and sound recorded in LP mode may be distorted We recommend using the SP mode for important recordings o If you record in both SP and LP modes on the same tape the playback picture may become distorted and the time code may not be written correctly If you play back a tape that has been recorded in...

Page 61: ...ars for approximately 4 seconds The camcorder reduces wind noise automatically However you can turn off the wind screen when recording indoors or when you want the microphone to be as sensitive as possible CARD CAMERA PLAY VCR _A_U_D_I O_S_E_TU_P I I WIN 0 SC RE EN AUTO CAMERA MENU aJ 38 Open the menu and select AUDIO SETUP Select WIND SCREEN set it to OFF and close the menu WS OOB appears when yo...

Page 62: ...microphone or the optional OM 50 Directional Stereo Microphone to the accessory shoe Refer also to the instruction manual of the microphone MENU AUD 10 SETUP I I OVOLUME _mJrrnrm CD 38 I I _ Open the menu a d select AUDIO SETUP Select VOLUME adjust the volume with the SET dial and close the menu You can turn off the volume completely by turning the SET dial down until OFF appears Turn the SET dial...

Page 63: ...he center and expands sideways until it fills the whole screen The image is wiped off from the sides of the screen The image appears from the corners until it fi lis the whole screen The image is wiped off from the corners A small image appears from the left jumps into the center and enlarges until it fills the whole screen The image shrinks jumps from the center to the left and disappears The ima...

Page 64: ...he pieces move around until the puzzle is solved The image appears from both sides like tides The image disappears from both sides like tides The image appears in zigzag from the top of the screen Black stripes appear in zigzag from the Ibottom of the screen until they cover the Iwhole image The screen turns yellow forms a beam I that becomes thinner and the image appears Beam BEAM Puzzle PUZZLE 6...

Page 65: ...some pixels Cube CUBE The image becomes a cube and rotates Wave WAVE I Both nds of the image sway In waves I f I X f I t Color Masking COLOR M The image becomes a rhombus surrounded by a masking frame that i changes the colors m i _ i z L Mirror MIRROR Creates a symmetrical image as if there would be a mirror in the center of the screen Multi IJIlage S rEaen c rJ Q7 Captures moving subjects in 4 9...

Page 66: ...ECTS button The name of the selected fader flashes CAMERA mode 5 Fade in In record pause mode press the ON OFF button and begin recording by pressing the start stop button Fade out During recording press the ON OFF button and pause recording by pressing the start stop button The fader can be activated deactivated by pressing the ON OFF button PLAY VCR mode 5 Fade in In playback pause mode press th...

Page 67: ... of the selected effect flashes 5 Press the ON OFF button The name of the selected effect stops flashing The effect can be activated deactivated by pressing the ON OFF button DIGITAL EFFECTS DIGITAL EFFECTS qJ Selecting an Effect in CARD CAMERA Mode 4 r 0 66 1 Press the DIGITAL EFFECTS button BLK WHT flashes 2 Press the ON OFF button BLK WHT stops flashing The effect can be activated deactivated b...

Page 68: ...te every 6 frames slow every 8 frames In Low light mode moderate every 8 frames slow every 12 frames 5 Select MULTI S again S sPEED and S sPLlT appears 6 Select S SPUT 4 9 16 settings appear 7 Select the number of sequences 8 Press the DIGITAL EFFECTS button 9 Press the ON OFF button MANUAL Images will be captured each time you press the ON OFF button The blue frame indicating the next sequence di...

Page 69: ...wer with digital effects o Digital effects cannot be used in the following cases When the program selector is set to D During DV dubbing a Faders cannot be used when Card Mix is activated About the multi image screen a The multi image screen cannot be used in the following cases In the night modes When the 16 9 format is selected When Card Mix is activated a In PLAY VCR mode Pressing any tape oper...

Page 70: ...rd T To shrink the image below 2 times magnification move the zoom lever toward W 2 Select the magnified area with the SET dial Turn the SET dial to move the image to the right and left or up and down Pressing the SET dial switches between the directions To cancel the magnification move the zoom lever toward W until the frame disappears 1 Move the zoom lever toward T II Movies played back from a m...

Page 71: ...y SET dial c MENU button cS J L R DATA CODE button Sele tingthe Q teIJi m e Qi pJ yCQmbjn tiQn c ELAY C _ l i t ott l t MENU DISPLAY SETUP II ID TIME SEL DATE TIMEII CJ38 Open the menu and select DISPLAY SETUPI Select D TIME SEL set it to DATE or TIME and close the menu Sel e ct ing theQata CQde Pisp l ay CQ QlbinatiQn 70 I DISPLAY SETUP l iDATA CODE DATE TIME I Open the menu and select DISPLAY SE...

Page 72: ...order off fi 0 Only date and time appear in CARD PLAY mode Six SetQlldAu10 0ale Date and time appear for 6 seconds when you begin playback or to indicate that date or time zone has changed PtAY VCR d3 IDISPLAY SETUP 1 i6SEC DATE OFF Open the menu and select DISPLAY SETUP Select 6SEC DATE set it to ON and close the menu c g n l c TI l l o l Vl 71 ...

Page 73: ...tton END SEARCH appears The camcorder rewinds fast forwards the tape plays back the last few seconds of the recording and stops the tape Pressing the button again cancels the search 0 End search cannot be used once you unload the cassette o End search may not work properly if a blank sectIon exists on the tape o You cannot use end search to locate the editing end of audio dubbing ...

Page 74: ...VCR REW III button o ZERO SET rn l MEMORY CD button 0 0 PLAY button STOP button 1 Press the ZERO SET MEMORY button at the point you wish to return to later 0 00 00 mJ appears To cancel press the ZERO SET MEMORY button again 2 When you have finished playback rewind the tape RTN appears The tape stops automatically at 0 00 00 The tape counter changes tq time code The zero set memory may not function...

Page 75: ...the wireless controller Press the or r I button to begin searching Press more than once to search for further date changes up to 10 times Press the STOP button to stop searching 74 _ 0 A recording of longer than a minute per date area is required d 0 Date search may not function if the data code is not correctly displayed ...

Page 76: ...FAUlT I iSELF T SOUND DEFAULT I 1 Open the menu and select MY CAMERA 2 Select the menu item you wish to change When selecting a start up image set the camcorder to CARD PLAY mode 3 Select a setting option and close the menu o You can save your original images or the images and sounds contained in the supplied software ZoomBrowser EX for Windows or ImageBrowser for Macintosh to the setting options ...

Page 77: ...anguage open the menu and select DISPLAY SETUP Select LANGUAGE select a language and close the menu If you have mistakenly changed the language follow the mark next to the menu item to change the setting Cba gging the O a te forooat You can select between three date formats For example JAN 1 2004 1 JAN 2004 and 2004 1 1 CAMERA PLAY t CR CARD CAMERA CARD PLAY 76 MENU IDISPLAY SETUP iIDATE FORMAT JA...

Page 78: ...de appears for a few seconds 2 On the wireless controller press and hold the REMOTE SET button Press the ZOOM T button for mode 2 Keep the button pressed for over 2 seconds If you have set the camcorder to mode 1 press the ZOOM W button for mode 1 o The wireless controller returns to mode 1 when you replace the batteries Change the mode if necessary o Make sure that camcorder and wireless controll...

Page 79: ...ses the full width of the CCD providing high resolution 16 9 recording When you turn off the image stabilizer you will get a larger horizontal angle of view MENU 038 78 To switch 16 9 on open the menu and select CAMERA SETUP Select 16 9 set it to ON and close the menu 16 9 appears Q The 16 9 mode cannot be selected in the Easy Recording mode C The multi Image screen cannot be used when the 16 9 fo...

Page 80: ...D o The image stabilizer is designed to compensate a normal degree of camcorder shake o The Image stabilizer might not be as effective when using the night modes Demonstration Mode The demonstration mode displays the camcorder s main features It starts automatically when you leave the camcorder turned on without loading a recording media for more than 5 minutes However you can set the camcorder no...

Page 81: ...ires FLASH OFF The flash does not fire Use this setting in places where flash photography is prohibited CARDGAMERA CAMERA MENU ICAMERA SETUP II I FLASH AUTO A 038 1 Set the video flash light s POWER switch to 0 ON 2 Open the menu and select CAMERA SETUP Select FLASH select a setting option and close the menu The symbol of the selected flash mode appears on the screen A n disappears after 4 seconds...

Page 82: ...mark appears o We recommend not USing the flash when the wide attachment supplied with the ELURA70 the optional Wide converter or Tele converter is attached Their shadows appear on the screen o The flash mode cannot be selected when exposure is locked or after the first still image in Stitch Assist mode o The red eye reduction mode cannot be used in stitch assist mode o About the AF Assist Lamp Wh...

Page 83: ...vice Refer also to the instruction manual of the digital video device Signal flow q Commercially available DV cable Recording 82 1 Set the camcorder to PLAY VCR mode and load a recorded cassette If you are connecting via AV terminal check the setting OJ 35 2 Connected device Load a blank cassette and set the device to record pause mode 3 Locate the scene you wish to copy and pause playback shortly...

Page 84: ...o When connecting a digital video device If the picture does not appear reconnect the DV cable or turn the camcorder off and back on again Proper operation cannot be guaranteed for all digital video devices equipped with a DV terminal If operation does not work use the S video or AV terminal m c 3 to 83 ...

Page 85: ...ank cassette 3 Connected device Load the recorded cassette 4 Press the REC PAUSE button In record pause mode and during recording you can check the picture on the screen 5 Connected device Play back the tape 6 Press the II button when the scene you wish to record appears Recording starts 7 Press the button to stop recording Press the 111 button to pause recording Press the 111 button again to rest...

Page 86: ...ecord appears Recording starts 7 Press the button to stop recording Press the 111 button to pause recording Press the 111 button again to restart recording 8 Connected Device Stop playback o Blank sections may be recorded as anomalous picture o If the picture does not appear reconnect the DV cable or turn the camcorder off and back on again o You can only record signals from devices with the T log...

Page 87: ...gital signals via the DV terminal The DV terminal serves as output terminal only Turn off all devices before starting the connections Unload the tape from the camcorder Refer also to the instruction manual of the connected device You can also connect a VCR with 5 S1 VIDEO terminal CO 36 E VIDEO I Ii L Signalflow r JAUDIO AV STV 250N Stereo Video R Cable supplied Signal flowq 86 Commercially availa...

Page 88: ...hat include copyright protective signals or anomalous signals such as ghost signals o For normal use set AV DV OUT to OFF If it IS set to ON digital signals cannot be input via the camcorder s DV terminal o Depending on the software and the specifications of your computer you may not be able to transfer converted signals via the DV terminal 0 We recommend powering the camcorder from a household po...

Page 89: ...This function is operated with the wireless controller CD Connecting an Audio Device Refer also to the instruction manual of the connected device Audio device e g CD player OUTPUT I AUDIO L e r R e LU A70 LU A65 Signal flow q STV 250N Stereo Video Cable supplied Connecting a Microphone 88 When uSing the built in microphone do not connect any cables to the MIC _ terminal ...

Page 90: ...y tapes recorded in SP mode 12 bit audio sound with this camcorder Audio dubbing will stop if the tape has a blank section or a section recorded in LP mode or 16 bit mode a You cannot use the DV terminal for audio dubbing a If you add sound to a tape not recorded with this camcorder sound quality may decrease a Sound quality may decrease when you add sound to the same scene for more than 3 times a...

Page 91: ... Plays back stereo 1 and stereo 2 The mix balance can be adjusted 2 If you have selected MIX VARI adjust the mix level Open the menu and select AUDIO SETUP Select MIX BALANCE adjust the balance with the SET dial and dose the menu Turn the SET dial down to increase the volume of Stereo 1 and up to increase the volume of Stereo 2 The camcorder resets to STEREO 1 when you turn the camcorder off lI Ho...

Page 92: ... on and reconnect them o Do not disconnect the DV cable open the memory card cover remove the memory card change the position of the POWER switch or turn off the camcorder and computer while data is being transferred to the computer while the camcorder s card access indicator IS flashing Doing so may damage the memory card s data o The image files on your memory card and the image files saved on t...

Page 93: ...move the memory card without first pushing it in 1 Turn off the camcorder Make sure that the card access indicator is not flashing before you turn off the camcorder 2 Open the cover 3 Push the memory card to release it Remove the memory card 4 Close the cover 92 II Card access indicator o This camcorder is compatible with SO Memory Cards or MultiMediaCards only Do not use any other types of memory...

Page 94: ...of File Size No of File Size Image Quality Images per Image Images per Image Superfine 6 850 KB 34 175 KB Fine 10 550 KB 50 120 KB Normal 18 300 KB 84 65 KB These figures are approximate They vary according to the recording condition and the subject Sample images already recorded on the supplied SO Memory Card are to be included in the total number o Still images are compressed and recorded in the...

Page 95: ...he menu and select CARD SETUP Select MOVIE SIZE set it to 160x120 and close the menu 0 Movies are recorded in the Motion JPEG format 0 Maximum recording time on a 8 MB SO Memory Card Image Size Max Recording File Size per Second Time 8 MB 320 x 240 approx 20 sec 250 KB sec 160x120 approx 50 sec 120 KB sec Approx 69 mi n on a 512 M B SD Memory Card 94 ...

Page 96: ...dy contains image files the consecutive file number will be assigned CONTINUOUS The camcorder memorizes the file number of the last image and assigns the consecutive file number to the next image even when a new memory card is inserted If a higher file number already exists on the memory card the consecutive number will be assigned There will be no duplication of file numbers This is useful for or...

Page 97: ...n focus IS adjusted The beep sounds tWice The picture may appear out of focus for a v moment while the camcorder is focusing z V Exposu re IS locked When you press the PHOTO button on the wireless controller recording starts immediately 3 Press the PHOTO button fully 0 and focusing frame disappear and you hear a shutter sound The card access indicator flashes and the card access display appears Th...

Page 98: ...F No focusing frame appears In step 2 0 turns green and focus and exposure are locked o The camcorder shuts off when you do not operate it for 5 minutes to save power I mAUTO POWER OFF appears 20 seconds before shutoff To continue recording turn the POWER switch to OFF and then back to CAMERA Recording a Still Image on a Memory Card While Recording MQVies QQq Iape When you are recording a movie on...

Page 99: ... line in function or via the DV terminal as still images on a memory card For connecting instructions refer to page 35 and 82 PLAY VCR 98 1 Set the camcorder to PLAY VCR mode If a cassette is loaded make sure that the tape is stopped When recording via the AV terminal make sure that AV OV is displayed on the screen When recording vIa the DV terminal make sure that AV OV is not displayed Change the...

Page 100: ...lect the date and time it has been recorded on the memory card a The size of the still image will be 640 x 480 flashing in red No card rn in green 6 or more images rn in yellow 1 to 5 images rn in red No more images The indication may not decrease even though a recording has been made or may decrease by 2 images at once All indicators are displayed in green when a memory card is played back 99 ...

Page 101: ...etting option and close the menu o A still image is displayed as long as you hold the PHOTO button after recording o The FILE OPER menu appears when you press the SET dial while you are reviewing a still image or when you press the SET dial right after recording In this menu you can protect CJ 111 or erase 0 112 the image o REVIEW cannot be selected when Q continuous shooting high speed continuous...

Page 102: ...is flashing Doing so could result in data damage a When you are using a SO Memory Card make sure that the protect switch is set to allow recording a Do not load unload a cassette during recording a We recommend using a Canon SO Memory Card or a SO Memory Card that guarantees a transfer rate of 2 MB sec right after you have formatted it with this camcorder With memory cards not formatted with this ...

Page 103: ...e tape 3 Press the start stop button when the scene you wish to record appears 4 Press the start stop button to stop recording When recording from a tape in the camcorder or other video devices a A movie recorded from an image in 16 9 format will be vertically compressed a The data code of the movie will reflect the date and time it has been recorded on the memory card a Recording stops at blank s...

Page 104: ...e of the subject or the distance the camcorder may focus outside the frame 0 When you operate the zoom lever the frames other than the selected one disappear 0 The focusing point can be selected only when Focus Priority is set to ON in CARD CAMERA mode a The focusing point returns to the center if you turn off the camcorder change from CARD CAMERA mode or move the program selector to D o The focus...

Page 105: ...MERA Press the DRIVE MODE button to switch between the drive modes The setting changes with each press of the button CARD CAMERA Press and hold the PHOTO button A series of still images will be recorded as long as you hold the PHOTO button Still Image Size Frames per Second Maximum Number Normal speed Htgh speed of Continuous Shots 1280 x 960 3 frames 5 frames 10 images 640 x 480 3 frames 5 frames...

Page 106: ...CARD CAMERA Press the PHOTO button Three still images in different exposures are recorded to the memory card RB Make sure that there is sufficient space on the memory card d 105 ...

Page 107: ... Try to include a distinctive item landmark etc in the overlapping portion 1 Press the cQ button CARDMIXI cQl SLIDE SHOW 2 Select the direction with the CARD button CARD button clockwise CARD button counterclockwise REC SEARCH 106 3 Select the program AE mode and zoom on the subject Adjust focus and exposure manually as necessary Once the sequence has started you cannot change the program AE mode ...

Page 108: ...imum of 26 images can be recorded 6 Press the cO button after the last image For deta i1s on how to merge these images refer to the Digital Video Software Instruction Manual o Compose each Image so that it overlaps 30 to 50 of the adjoining Image Try to keep the vertical misalignment within 10 o Do not include moving subject in the overlapping portion o Do not try to stitch Images that include bot...

Page 109: ...OW button CARD PLAY 1 Set the camcorder to CARD PLAY mode 2 Press the CARD button to move between images REC SEARCH A 108 3 To play back a movie press the 11 button The first scene appears as a still image when playback is complete Pressing the 11 button during playback pauses the playback Press the 11 button again to restart playback Pressing the button displays the first scene of the movie Press...

Page 110: ...he card access indicator is flashmg Doing so could result in data damage CARD PLAY C III I Q QJ 1 Press the SLIDE SHOW button Images are played back one after another 2 Press the SLIDE SHOW button to stop the slide show 1 Move the zoom lever toward W Up to 6 images appear 2 Turn the SET dial to select an image Move the CB to the image you wish to view You can switch between the Index pages by pres...

Page 111: ...number in the upper right of the screen indicates the image number of the current image by the total number of images CARD PLAY 110 Press and hold the CARD or CARD button When you release the button the image of the displayed image number appears is REC SEARCH A ...

Page 112: ...image you wish to protect 2 Open the menu and select CARD OPERATIONS Select On PROTECT and press the SET dial On appears on the image To cancel the protection press the SET dial 3 Close the menu 1 Select the image you wish to protect 2 Press the SET dial to open the FILE OPER menu In CARD CAMERA mode the menu appears when you press the SET dial while you are reviewing a still image or when you pre...

Page 113: ...is protected YES appears In purple 4 Select YES The image is erased and the prevIous image appears 5 Select RETURN to close the menu I ras i ngjl Single I mageIAll lmag s 112 Ji F D OPERATIONS I II MAGE ER S _ I 1 Open the menu and select CARD OPERATIONS 2 Select IMAGE ERASE 3 Select SINGLE or ALL When erasing a single image ERASE THIS IMAGE NO and YES appears If an image is protected YES appears ...

Page 114: ...mix image Mix level adjustment blue area of the still image Live video recording C 9 m btQmg KgY c AM HRQ MA Combines backgrounds with your recordings Record your subject in front of a blue curtain and the subject not blue will be superimposed on the card mix image Mix level adjustment blue area of the live video recording Card mix image Live video recording C grd YminqD Kgy ARP LLJMl Combines ill...

Page 115: ...m Animation moves randomly in the display Mix level adjustment blue area of the card animation image Live video recording SET dial 1 l MENU button c1 0 1 UJ Card mix image Program selector I c i CARD MIX button 114 CAMERA MENU I CARD MIX I IMIX TYPE CARD CHROMAI C 38 I MIX LEVEL I 1 Set the program selector to El 2 Open the menu and select CARD MIX The card mix menu appears 3 Select the image you ...

Page 116: ...X button CARD MIX stops flashing The combined image appears c Card mix cannot be used when STILL I REClls set to OdFINE or OdNORMAL Movies recorded on a memory card cannot be combined with camcorder recordings Additional sample images are provided on the supplied DIGITAL VIDEO SOLUTION DISK Refer to Adding Still mages from Your Computer to the Memory Card in the Digital Video Software Instruction ...

Page 117: ...www canondv com For details on how to add the downloaded images to the memory card refer to Adding Still mages from Your Computer to the Memory Card in the Digital Video Software Instruction Manual PhotoEssentials Royalty Free Stock Photography The PhotoEssentials suite of royalty free images on CD ROM features premium quality assignment photography and is ideally suited for use in advertising bro...

Page 118: ...ages o Images erased by formatting cannot be recovered o If you use a memory card other than the supplied one format it with the camcorder iCARD OPERATIONS MENU G 38 1 Open the menu and select CARD OPERATIONS 2 Select FORMAT CANCEL and EXECUTE appears 3 Select EXECUTE ALL DATA WILL BE ERASED FORMAT THIS CARD NO and YES appears 4 Select YES and close the menu Formatting starts Selecting NO brings y...

Page 119: ...th the CARD buttons 2 Open the menu and select MY CAMERA 3 Select CREATE START UP IMAGE SET THIS AS START UP IMAGE YES and NO appears 4 Select YES OVERWRITE MY IMAGEn NO and YES appears 5 Select YES The still image will be saved and the image that was saved to MY IMAGE is erased Retain the original data of the still image you have set as the start up image on your computer or removable disk ...

Page 120: ...mcorder and insert a memory card that contains still images 2 Turn on the printer c 3 Set the camcorder to CARD PLAY mode n 4 Connect the camcorder to the printer using the cable appears and changes to or 1_when the printer is properly connected to the camcorder Does not appear with movies or still images that cannot be played back with the camcorder The ltV print share button lights up and the cu...

Page 121: ...inting may not be performed correctly Do not turn off the camcorder or the printer Do not change the position of the TAPE CARD switch Do not detach the cable Do not open the memory card cover or remove the memory card o Images not recorded with this camcorder uploaded from a computer edited on a computer and Images whose file names have been changed may not be printed correctly o Cancel Printing P...

Page 122: ...aIso to the printer manual for details If the error still persists and printing does not restart follow below iEl procedure 1 Disconnect the cable 2 Turn the POWER switch of the camcorder to OFF and back to PLAY VCR 3 Reconnect the cable o When you have finished printing 1 Disconnect the cable from the camcorder and printer 2 Turn off the camcorder 121 ...

Page 123: ...23 OJ 124 OJ 125 A maximum of 99 copies can be selected for one still image 1 Press the SET dial The print setting menu appears Depending on the printer the message I BUSY I may appear before the camcorder displays the print setting menu 2 Turn the SET dial to select lJ COPIES and press the SET dial 122 3 Turn the SET dial to select the number of copies and press the SET dial 4 Turn the SET dial t...

Page 124: ...printed BORDERLESS 8 UP The center portion of the recorded image is printed at an enlarged size The image s top bottom and sides may be cropped slightly o Date print cannot be selected with the CP Printers CP 200 and CP 300 o VIVID VIVID NR and NR can be selected with Canon Bubble Jet Printers o With CP Printers make sure to select the paper size of the attached paper cassette 1 In the print setti...

Page 125: ...iiiHWEiMitUWMiM HEiMiWiWiWWiH WiMi 1 In the print setting menu turn the SET dial to select e date and press the SET dial 2 Turn the SET dial to select a date print option and press the SET dial r 8iiSetting the Print Style Paper Size CARD 1 CARD 2 CARD 3 LTR A4 For details on paper type refer to the Bubble Jet Printer User Guide 124 Borders IBorderless Prints right to the edges of the page IBorder...

Page 126: ...al Pressing the MENU button brings you back to the print settings menu _Setting the Print Style Image Standard Prints 1 still image per page Multiple Prints 8 copies of the same still image on one page Borders Borderless Prints right to the edges of the page Bordered Prints with a border 0 BORDERED The image area remains relatively unchanged from the recorded image when it is printed BORDERLESS MU...

Page 127: ... SET dial 3 Turn the SET dial to select the image style and press the SET dial Pressing the MENU button brings you back to the print settings menu 5iljij ti ggM lbi iQ Qil 2 Turn the SET dial to select q BORDERS and press the SET dial 3 Turn the SET dial to select a borders option and press the SET dial Pressing the MENU button brings you back to the print settings menu ...

Page 128: ...left or up and down Pressing the SET dial switches between the directions Pressing the MENU button brings you back to the print settings menu o About the color of the trimming frame Canon CP Printers only White No trimming settings Green Recommended trimming size The trimming frame may not appear in green depending on the image size paper size or borders settings Red The image is magnified beyond ...

Page 129: ...menu 3 Select ddJ PRINT ORDR 4 Select the number of copies appears on the image To cancel the pnnt order set the number of copies to O 5 Select RETURN to close the menu Selecting in Index Screen Display P_ 1 II II II 0 0 CARD PLAY I_C_A_RD_O_P_ER_A_T_l_ON_s I I I1PRINT 0RD EA MENU JJ 38 1 Move the zoom lever toward W up to 6 images app ear Select the tmage you wish to print 2 Open the menu and sel...

Page 130: ... direct print function and select PRINT without having set the print order 3 Make sure that PRINT is selected and press the SET dial Printing starts The print setting menu disappears when printing is complete o Depending on the connected printer you can select style or paper settings before step 3 o Cancel Printing Printing Errors OJ 120 o Restarting Printing Open the CARD PLAY menu and select PRI...

Page 131: ...our memory card and the image files saved on the hard disk drive of your computer are valuable original data files If you wish to use image files on your computer make copies of them first and use the copied filel retaining the original o Make sure that camcorder and computer are not connected WIth a DV cable before connecting the camcorder to the computer using the USB cable Otherwise the compute...

Page 132: ...on SET dial ltV button The first time you connect the camcorder to the computer you need to install the software and set the auto launch setting 1 Install the supplied Digital Video Software See Installing the Software in the Digital Video Software Instruction Manual 2 Connect the camcorder to the computer using the USB cable See Connecting the Camcorder to a Computer in the Digital Video Software...

Page 133: ...select c SELECT TRANSFER 2 Press the ltV button 3 Select the image you wish to transfer with the CARD button 4 Press the ltV button The selected image is transferred to the computer and displayed in the Main Window of ZoomBrowser EX Pressing the MENU button brings you back to the transfer menu To continue transferring select another image with the CARD button 1 Turn the SET dial to select WALLPAPE...

Page 134: ...and press the SET dial or press the MENU button o Only still images in JPEG format and movies in Motion JPEG format can be transferred o When printing with the 1tV button the camcorder retains the transfer setting even if you turn it off or change the position of the TAPE CARD switch When you have selected w SELECT TRANSFER or WALLPAPER the screen to select a still image appears Press the MENU but...

Page 135: ...n 4 Select RETURN to close the menu CARD PLAY ___I I gTRANS FER ORDER J OPERATIONS 1 Move the zoom lever toward W Up to 6 images appear 2 Open the menu and select CARD OPERATIONS Select g TRANSFER ORDER 3 Press the SET dial on the image you wish to transfer g appears on the image To cancel the transfer order press the SET dial again 4 Close the menu S le ting inJnde S reenDi play I f rqsing AJI lf...

Page 136: ...een When you have connected the camcorder to the computer start DV Messenger You can now operate the camcorder from the computer using DV Messenger o When DV Messenger is started and set up for communication the video picture appears on the computer screen o In NETWORK mode the camcorder can only be operated from the computer except for the following functions When the DV Messenger CAMERA control ...

Page 137: ...he index screen H i dJogLS bQwing tbe Oi p lg s Qn tbe IV S n e n When you connect a TV for recording you can select to show the camcorder displays on the TV screen For playback you can hide the camcorder displays on the TV screen CAMERA MENU OJ 38 CARD CAMERA I 0_1_5P_L_AY_S_ET_U_P_I _ _ _ Ji 1TV SC REEN ON Open the menu and select DISPLAY SETUPI Select TV SCREEN set it to OFF and close the menu ...

Page 138: ... II Manual focus OJ52 White balance OJ 54 r a w r h Card mix OJ 113 Digital effects OJ 62 Date and time OJ 21 AFIAE locked still J image recording Self timer OJ 58 l Accessory connected to the J Advanced Accessory Shoe CD 80 Backup battery OJ 17 J Volume level of built in speaker or headphones OJ 34 DV input OJ 85 Fast forward playback I III Playback pause rewind playback OJ 33 I OJ 33 x2 I x2 x2 ...

Page 139: ... r Still image quality CD93 I I rRemalnlng card capacity fi for still images CD99 o Still image size CD 93 Movie size CD 94 Remaining card capacity for movies CD 102 Camcorder shake warning CD 57 Protect mark CD 111 File number CD 95 Current image total images Ml tiIii Length of the movie Lap time ...

Page 140: ...orm audio dubbing on a tape with a 88 BLANK blank section HEADS DIRTY USE Video heads are dirty Clean the video heads 143 CLEANING CASSETIE COPYRIGHT PROTECTED You attempted to play back a copyright protected tape 85 PLAYBACK IS RESTRICTED COPYRIGHT You attempted to dub a copyright protected tape May also 85 PROTECTED DUBBING appear when an anomalous signal is received during analog RESTRICTED lin...

Page 141: ...printing PAPER HAS BEEN CHANGED Paper size has been changed between print setting and start of printing MEDIA TYPE ERROR You attempted to use a paper size type that is not supported by the printer INCOMPATIBLE PAPER SIZE You attempted to print on paper that cannot be used with the camcorder INK ERROR There is a problem with the ink t f k Th k t d t t d NO INK e In car rI ge IS no Inser e or IS ou ...

Page 142: ...el ERROR printing disconnect the USB cable and turn off the printer After a while turn the printer back on and reconnect the USB cable When you are printing using the V button check the print settings Or you attempted to print from a memory card that contains a large number of images Reduce the number of images CHECK PRINT The print setting cannot be used for printing with the V SETIINGS button PR...

Page 143: ...ipment Do not disassemble the camcorder If the camcorder does not function properly consult qualified service personnel Handle the camcorder with care Do not subject the camcorder to shocks or vibration as this may cause damage D Avoid sudden changes in temperature Moving the camcorder rapidly between hot and cold temperatures may cause condensation to form on its internal surfaces UJ 144 If you d...

Page 144: ...eo Heads o When the message HEADS DIRTY USE CLEANING CASSETTE appears or when the playback picture becomes distorted the video heads need to be cleaned o To maintain the best picture quality we recommend cleaning the video heads frequently with the Canon DVM CL Digital Video Head Cleaning Cassette or a commercially available dry cleaning cassette o Tapes already recorded with dirty video heads may...

Page 145: ...assette place the camcorder in an airtight plastic bag and let it adjust to temperature changes slowly before removing it from the bag When condensation is detected The camcorder stops operating and the warning message CONDENSATION HAS BEEN DETECTED appears for approx 4 seconds and i starts flashing o If a cassette is loaded the warning message REMOVE THE CASSETTE appears and o starts flashing Rem...

Page 146: ...erformance we recommend to discharge the battery pack fully and to store it in a dry place at temperatures no higher than 86 of 30 cC If you do not use the battery pack for long periods charge and discharge it fully at least once a year If you have more than 1 battery pack perform these precautions at the same time for all battery packs Although the battery pack s operating temperature range is fr...

Page 147: ...e tab on the cassette to the left This switch position is usually labeled SAVE or ERASE OFF If you load a protected cassette in CAMERA mode the message THE TAPE IS SET FOR ERASURE PREVENTION appears for approx 4 seconds and starts flashing If you wish to record on that cassette slide the tab back to the right Memory C ardHandlingPrecautiqns Format new memory cards with the camcorder Memory cards f...

Page 148: ...mpact power adapter to operate the camcorder and to charge battery packs in any country with power supply between 100 and 240 V AC 50 60 Hz Consult the Canon Service Center for information on plug adapters for overseas use Playback on a TV Screen You can only play back your recordings on TVs with NTSC system The NTSC system is used in the following countries areas American Samoa Antigua Aruba Baha...

Page 149: ... or charge the 13 on and off battery pack Battery pack will not Battery packs will not Charge the battery pack in charge charge outside the temperatures between 32 OF temperature range of 32 OF and 104 OF DOC and 40 C and 104 OF 0 C and 4O C Battery packs become hot Wait until the battery pack with use and may not temperature is below 104 F charge 40 C and retry charging The battery pack is Use a ...

Page 150: ...es on the screen the position of the protect switch Camcorder is set to a mode Set the camcorder to 24 other than the CAMERA mode CAMERA mode Camcorder will not Autofocus does not work on Focus manually 52 focus that subject Viewfinder is not adjusted Adjust the viewfinder with 18 the dioptric adjustment lever Lens is dirty Clean the lens 142 A vertical light bar Bright light in a dark scene I app...

Page 151: ...nserted the correct direction and reinsert it Memory card cannot be Memory card is full Replace the memory card or 92 recorded erase images Memory card is not Format the memory card 1 117 formatted I Memory card is not inserted Insert a memory card 92 File number reached Set FILE NUMBERS to 95 maximum value RESET and insert a new memory card SO Memory Card is Change the position of the 92 protecte...

Page 152: ...ctBridge compliant printers mmerCiallY ailable u DV Cable Digital Device SDC 128 PC Card Adapter h SD Mir L USB Reader Writer I MultiMediaCard tJI 0 IFC 300PCU Computer USB Cable SC A50 Soft Carrying Case r CA 570Compact Power Adapter O N BP 2L12 BP 2L14 c Battery Pack iii S 50 S video ble lill III c L TV STV 250N 0 I Stereo Video Cable VCR SC 2000 Soft Carrying Case D BP 900 Senes VL 10Li Battery...

Page 153: ...plosion of a battery pack Please note that this warranty does not apply to repairs arising out of the malfunction of non genuine Canon accessories although you may request such repairs on a chargeable basis I a 1 1 _ IL __ 9_ _ _ _ _ _ _ __ 6_ _ _ _ _ l CB 2lT Battery Charg er Use the battery charger for charging the battery packs It plugs directly into a power outlet without a cable Battery Pack ...

Page 154: ... shots or panoramic views When the Wide converter is attached a shadow may appear in the picture when you record with video light ELURA70 ELURA65 or with assist lamp or flash FS 34U Fi Iter Set Neutral density and MC protector filters help you to control difficult lighting conditions VL 10Li Battery Video Light This compact yet powerful video light can be used for both indoor and outdoor shooting ...

Page 155: ...e camcorder s advanced accessory shoe for cable free operation VL 3 Video Light This video light enables you to record brightly in color even in dark places It attaches to the camcorder s advanced accessory shoe for cable free operation OM 50 Directional Stereo Microphone This highly sensitive super directional microphone attaches to the camcorder s advanced accessory shoe It can be used as direct...

Page 156: ... 8 3 1 14x power zoom Lens Configuration 10 elements in 8 groups Filter Diameter 34 mm AF system TIL autofocus manual focusing possible Minimum Focusing Distance 3 3 ft 1 m 0 39 In 1 cm on maximum wide angle White Balance Auto white balance pre set white balance indoor outdoor or custom white balance Minimum Illumination 1 8 Ix using the Night mode Recommended Illumination More than 100 Ix Image S...

Page 157: ... 32 104 OF 0 40 C 2 9 x 3 1 x 5 1 in 74 x 78 x 130 mm excluding protrusions 1 1 lb 500 g CA 5 Z0 CQm pac t PQ er Adapt er Power supply Power consumption Rated output Operating temperature Dimensions Weight 100 240 V AC 50 60 Hz 17W 8 4VDC 15A 32 104 of 0 40 C 2 1 x 3 5 x 1 1 in 52 x 90 x 29 mm 4 8 oz 135 g Battery type Rated voltage Operating temperature Battery capacity Dimensions Weight Recharge...

Page 158: ...Oirectional Stereo Microphone WS 20 Wrist Strap SC 2000 50ft Carrying Case SC 1000 Soft Carrying Case SC A50 Soft Carrying Case VL 10Li Battery Video Light JR 7 2V 10WF Halogen Bulb DVM CL OV Cleaning Cassette 052 0260 000 8468A002AA 9582A002AA 9612A001AA 3067A002AA 082 0590 201 081 1470 000 083 0682 000 6906A001AA 055 0240 000 7871 A002AA 7302A001AA 7303A001AA 7873A002AA 3062A002AA D82 0330 202 9...

Page 159: ...TV 35 Connections VCR 35 Continuous shooting 104 Copyright signals 85 l l Data code 70 Date and time 21 Date format 76 Date search 74 Demo mode 79 Digital effects 62 Digital zoom 30 Direct print function 119 Direct transfer 131 Drive mode 104 DV dubbing 85 DV terminal 82 91 III Easy recording 45 Effects 64 End search 72 Erasing images 112 Exposure 51 iii Faders 62 Fast forward 32 File numbers 95 F...

Page 160: ... card 96 Remote sensor 77 Review 100 Rewind 32 u S1 video terminal 36 Sample images 116 Sand Snow mode 45 Screen displays 136 SO Memory Card 92 Self timer 58 Shoulder strap 19 Shutter speed 56 Skin detail 50 Slide show 109 SP mode 59 Speaker 34 Sports mode 45 Spotlight mode 45 Still image quality 93 Still image size 93 Stitch Assist mode 106 Super Night mode 48 U Tape protection 146 Time code 27 T...

Page 161: ...ilure to follow operating instructions B If the equipment is defective as a result of leaking batteries sand dirt or water damage C If defects or damages are caused by the use of unauthorized parts or by service other than our authorized agent D If the equipment is used for commercial or industrial use This Limited Warranty does not cover cabinet exterior finish video cassette tape head cleanings ...

Page 162: ... video equipment is altereci or removed c The digital Video equipment is used or professional or Industrial purposes ThiS limited warranty does not cover the cablne finish of the digital Video equipment Video cassette tapes head clea 1i1gs nor does It apply to digital video equipment purchased outside Canada TO OBTAIN WARRANTY SERVICE Ship your Canon digital Video equ pment In ItS original carton ...

Page 163: ... CANADA INC MONTREAL 5990 Cote de Liesse Quebec H4T V7 If you have any questions call the Canon Canada Information Center toll free at 1 800 828 4040 Canada only Si vous avez des questions veuillez telephoner sans frais au Canada 1 800 828 4040 Canada seulement MEXICO CANON MEXICANA S DE R L DE c v Periferico Sur No 4124 Col Ex Rancho de Anzaldo C P 01900 MexIco OF Mexico CENTRAL Y SURAMERICA CANO...

Page 164: ...l traite uniquement des procedures d installation et de cannexion Pour les instructions d utilisation repartez vous au manuel au format PDF fourni sur Ie disque DIGITAL VIDEO SOLUTION DISK For Windows Este manual solamente cubre los procedimientos de instalaci6n y conexi6n Para mas instrucciones de operaci6n consulte el manual en formato PDF contenida en el disco DIGITAL VIDEO SOLUTION DISK For Wi...

Page 165: ... voice or video conversation function be used Please consult Microsoft for details on Windows Messenger 1 J I I v I i I 2 This software IS compatible with Windows XP only It cannot be used with other Operating Systems Furthermore Windows Messenger 4 5 4 6 or 4 7 IS required Establish an environment that allows the use of this software Please consult Microsoft for details This software requires tha...

Page 166: ...ter UPnP Universal Plug and Play compatible This software requires an UPnP Universal Plug and Play compatible router It cannot be used with other routers For details consult your Internet service provider telephone carrier or router manufacturer or refer to the manual of the router Follow now the instructions in this manual and install DV Messenger 3 ...

Page 167: ...original for back up purposes provided that you shall reproduce on such backup copy the same copyright notice and other ownership legends exactly as and where they appear on the SOFTWARE as delivered Any other copying of the SOFTWARE is a violation of thiS Agreement 2 RESTRICTIONS You shall not or allow any third party to assign sublicense sell rent lease loan conveyor otherwise use transfer copy ...

Page 168: ... AS TO DESIGN QUALITY MERCHANTABILITY FITNESS FOR A PARTICULAR PURPOSE OR SYSTEM INTEGRATION TO THE MAXIMUM EXTENT PERMIITED BY APPLICABLE LAW IN NO EVENT SHALL CANON CANON S SUBSIDIARIES AND AFFILIATES THEIR DISTRIBUTORS AND DEALERS BE LIABLE FOR ANY LOSS OR DAMAGES WHATSOEVER WHETHER KNOWN FORESEEABLE OR OTHERWISE INCLUDING WITHOUT LIMITATION ANY CONSEQUENTIAL INCIDENTAL DIRECT INDIRECT SPECIAL ...

Page 169: ...ta ku Tokyo 146 8501 Japan 9 SEVERABILITY In the event that any provision of this Agreement IS declared or found to be illegal by any court or tribunal of competent jurisdiction such provision shall be null and void with respect to the jurisdiction of that court or tribunal and all the remaining provisions of this Agreement shall remain In full force and effect 10 CONTROLLING LAW The terms of this...

Page 170: ... DV Network Software 17 Installing the Canon USB Video Driver 20 Installing the AV C Camera Storage Subunit WIA Driver 21 Connecting the Camcorder to a Computer 24 Connecting the Camcorder Using a USB Cable 24 Connecting the Camcorder Using a DV Cable 24 I DV Messenger 1 Preparations for DV Messenger 25 Checking the Camcorder Connection 25 Setting the UPnP Router 27 Videoconferencing 33 Starting D...

Page 171: ...n your computer download it from the follOWing website http www adobe com products acrobatlreadstep2 html OWe recommend copying the PDF file to your computer 1 Set the DIGITAL VIDEO SOLUTION DISK For Windows in the computer s CD ROM drive If the installer panel opens click Exit to close it 2 Select My Computer from the start menu 3 Right cl ick the CD ROM icon and select Open from the displayed me...

Page 172: ...icrosoft and Windows are either registered trademarks or trademarks of Microsoft Corporation in the United Stated and or other countries Adobe Acrobat and Reader are trademarks of Adobe Systems Incorporated Other names and products not mentioned above may be registered trademarks or trademarks of their respective companies AV C Camera Storage Subunit is a standard for downloading and uploading fil...

Page 173: ...ode for playing back images recorded on a memory card NETWORK mode Mode for connecting to the computer for using DV Messenger The explanations in this manual refer to camcorders equipped with the NETWORK mode on the POWER switch of the camcorder If your camcorder is not equipped with the NETWORK mode refer to the instructions in parenthesis Camcorder without NETWORK mode Camcorder with NETWORK mod...

Page 174: ...he requirements outlined above o Do not connect two or more camcorders to the computer at the same time The connection may not work correctly OA CD ROM drive is required to Install the software USB connection o Connect the USB cable directly to one of the computer s main USB ports The interface may not function correctly if the camcorder is connected via a USB hub OThe connection may not operate c...

Page 175: ... use your camcorder as a card reader writer by connecting camcorder and computer both equipped with a DV IEEE 1394 terminal with a DV IEEE1394 cable Downloading files from memory card to computer Uploading files from computer to memory card A vallaple Fl Irt tionsbyCa01cOr jerModels Available functions depend on the camcorder model Refer to the following tables and identify to which category your ...

Page 176: ...video lJ 33 0 0 0 0 0 communication Sharing recorded video 0 0 0 0 0 Camcorder operation 0 0 0 0 x Sharing Images 0 0 0 x x Image Capture 0 0 x x x View Record 0 0 x x x USB Connection 020 1 x x X X J Canon USB Video Driver AV C Camera Storage 021 0 0 0 x x Subunit WIA Driver 13 ...

Page 177: ...L VIDEO SOLUTION DISK For Windows G USB Cable or DV IEEE 1394 Cable If your camcorder is not listed under category A in Camcorder Categories Q 12 use a DV cable Check the manual of your computer for which type of DV cable to use 4 pin Ilr i 6 pin Speaker or Headphones when using DV Messenger 14 ...

Page 178: ... the camcorder to prevent damage D If you leave the camcorder turned on for a long time e g when using the View Record or Image Capture interval mode function observe the following fire precautions Do not use the camcorder in hot or humid places Do not leave the camcorder exposed to direct sunlight Do not cover the camcorder with blankets or clothes Do not leave the camcorder in a box or tight spa...

Page 179: ...P only It cannot be used with other Operating Systems Furthermore Windows Messenger 4 5 4 6 or 4 7 is required Establish an environment that allows the use of this software Please consult Microsoft for details If you use a router to connect to the Internet the router must be UPnP Universal Plug and Play compatible and it must be recognized as Internet Gateway Device 0 27 For details consult your I...

Page 180: ...s Messenger 4 5 4 6 or 4 7 Download Windows Messenger 4 7 from the Microsoft homepage and update your Windows Messenger if necessary Please consult Microsoft for details c Users of Windows XP Professional must first log in as an Administrator to install programs 1 2 3 Close any programs that are running Set the DIGITAL VIDEO SOLUTION DISK For Windows in the computer s CD ROM drive The installer pa...

Page 181: ...nger cannot be installed If you wish to install only the AV C Camera Storage Subunit WIA Driver close the dialog and proceed with the installation If you wish to install DV Messenger close the window and cancel the installation process by clicking Cancel on the Install Shield Wizard Upgrade Windows Messenger and restart installation 6 When the lnstaliShield Wizard appears click Next ThelnslaI1Shie...

Page 182: ...ies CO 12 remove the check mark next to Copy AV C Camera Storage Drivers 8 Read the license agreements and click Yes 9 When the confirmation window appears click Yes 10 Confirm the target folder and click Next If a dialog appears asking you whether you wish to create a shortcut of DV Messenger on the desktop click Yes C PlOg amFiles Canon 11 Click Finish The computer restarts and installation is c...

Page 183: ...is complete And do not interrupt the installation o Users of Windows XP Professional must first log in as an Administrator to install programs 1 2 3 4 5 20 Connect the power adapter to the camcorder Set the camcorder to NETWORK mode Connect the camcorder to the computer using the USB cable OJ 24 The driver installation starts automatically A window appears allowing you to select an application pro...

Page 184: ...must first log in as an Administrator to install programs Connect the power adapter to the camcorder Set the camcorder to NETWORK or CARD PLAY mode Camcorder without NETWORK mode Set the camcorder to CARD PLAY mode Connect the camcorder to the computer using the DV cable CD 24 The driver installation starts automatically Depending on the setting of your computerr a video editing program may start ...

Page 185: ...ing DV Messenger we recommend setting the computer not to start any application 1 2 3 4 5 Connect the power adapter to the camcorder Set the camcorder to NETWORK or CARD PLAY mode Connect the camcorder to the computer using the DV cable IJ 24 From the start menu select My Computer Right click the mouse button on the Canon Camera Storage Device icon and select Properties 6 Click the Events tab 22 ...

Page 186: ...pplication will start automatically when you connect the camcorder to the computer the next time _ 0 To start a WIA compliant application automatically select Start this program and click OK o If the started application displays a message such as TWAIN data source not found Reinstall the scanner software select WIA Canon Camera Storage and use the WIA TWAIN Driver 23 ...

Page 187: ...ied USB cable to the computer s USB port and the camcorder s USB Terminal Refer to your computer manual for the location of the computer s USB ports See your camcorder instruction manual for connecting instructions c flne ting h Car11 rderUsingaDVCable All Categories C Make sure to install the DV Network Software before connecting the camcorder to the computer c Make sure the camcorder is being po...

Page 188: ... the camcorder 2 Set the camcorder to NETWORK mode Camcorder without NETWORK mode Set the camcorder to CAMERA mode 3 Connect the camcorder to the computer rn 24 4 From the start menu select All Programs and Windows Messenger Windows Messenger appears If the NET Passport Wizard appearsl click Cancel 5 From the Tools menu select Audio Tuning Wizard 25 ...

Page 189: ...If you are connecting a w Canon camcorder using a DV cable check if Canon DV Device is displayed If Canon DV Device or Canon Video does not appear click to display the device list and if it is listed If Canon DV Device or Canon USB Video is not listed perform Windows Messenger Audio Update from Windows Update or install Windows XP Service Pack 1 Please consult Microsoft for details 26 ...

Page 190: ...mpliant router to connect to the Internet you need to install UPnP and disable the firewall of Windows XP to use DV Messenger Installing UPnP 1 From the start menu select Control Panel 2 Click Network and Internet Connections 27 ...

Page 191: ...and click Details indowsComponenls You can add or remove components of V indows XP Toadd or remove a componenl click the checkbox A shaded box means that only part of the component will be installed Toseewhat sinc1udedinacomponenl c1ick Details Description Contains a variety of specialized network related services andprotocols O OMB 1782 5MB 28 ...

Page 192: ...pnt _ _ _ ffI i I i1 i i R rs nw v ml u UMtl 1 AR O 2 Description Allows you to find and control Internet connection sharing hardwareand software that uses Universal Plug and Play Total disk space required O OMS Space available on disk 1782 2MS 7 Click Next Installation starts 8 When installation is complete restart your computer After restart repeat steps 1 to 3 and check if an icon appears under...

Page 193: ...ess by other computers on the Internet If you disable the function other computers may be able to access the files on your computer or write files onto your hard disk Disable the firewall before using DV Messenger and make sure to re enable the firewall after use 1 From the start menu select Control Panel 2 Click Network and Internet Connections 30 ...

Page 194: ...3 Click Network Connections 4 Select Local Area Connection right click the mouse button and select Properties 31 ...

Page 195: ...ce If not your router is not correctly recognized by the computer and DV Messenger cannot be used In such case the firewall function of an Internet security software or anti virus software may be active For instructions on how to disable the firewall function consult the software or computer manufacturer To enable the firewall after using DV Messenger repeat steps 1 to 4 and place the checkmark ba...

Page 196: ... UPnP CO 27 and disable Windows Xp s firewall CO 30 1 Set the camcorder to NETWORK mode Camcorder without NETWORK mode Set the camcorder to CAMERA mode 2 Connect the camcorder to the computer fI 24 3 Connect to the Internet 4 Double click the DV Messenger icon on the desktop or select DV Messenger from the start menu If the Internet Sharing Configuration window appears click Yes C Program Files Ca...

Page 197: ... Messenger both you and your contact need to be online If your contact is already online when you sign in A message will be send automatically to your contact notifying that you have signed in Message on the Computer Screen of Your Contact If your contact signs in when you are already online A message appears automatically notifying you that your contact has signed in Message on Your Computer Scre...

Page 198: ...se the microphone of the camcorder 1 Set the camcorder to NETWORK mode Camcorder without NETWORK mode Set the camcorder to CAMERA or PLAY VCR mode When you have set the camcorder to PLAY VCR mode play back the tape 2 Open the Tools menu and select Audio Tuning Wizard IIi II II II 1 II 0 iii z 0 iii iii 0 0 0 iii i 0 0t 0ii1 II i 000 0 0ii1 3 Click Next 35 ...

Page 199: ...NETWORK or CAMERA mode the live video appears In PLAY VCR mode the recorded video appears If you are using a USB cable it may take about 10 seconds until the picture appears 6 Read the explanation for speaker and microphone settings and click Next For best performance arrange your speakers and microphone like this 1 Keep the microphone close to your mouth about 3 to 5 inches for most types 2 Point...

Page 200: ...just the volume and click Next Clicking Click to Test Speakers plays back a test sound Move the volume lever with the mouse to adjust the speaker volume 8 Iftheindicatorgoesintothel ellowareaaslspeak I knowthemicrophonewilibeadjustedproperll lfnot 1 need to move the microphone closer 9 Check if the microphone volume is correctly indicated and click Next In NETWORK or CAMERA mode Speak into the mic...

Page 201: ...our contact o If you connect to the Internet after starting DV Messenger the connection may fail Make sure to connect to the Internet first before starting DV Messenger o An error message may appear and the communication may not work correctly In such case reconfirm your setting in the Audio Tuning Wizard Starting a Videoconference by Inviting a Contact 1 On the DVM panel click I 38 ...

Page 202: ... waiting for response If you click Cancel the request will be cancelled Video picture of your contact s camcorder Video picture of your camcorder u r sa ys 79358 32277 92054 64017 2650298 If your contact accepts the request the above dialog disappears The communication between your and your contact s DV Messenger starts and you can now operate the camcorder of your contact from the DVM panel If yo...

Page 203: ... computer screen When the connecting request dialog appears click Yes The communication between your and your contacfs DV Messenger starts and you can now operate the camcorder of your contact from the DVM panel friendisreQuestingconnection Would ouliketoconnect If ou are giving a right to control our DV camcorder ma be controlled b the contact 40 ...

Page 204: ...h to communicate with another contact click and select a contact from the list Click the DV Messenger icon on the taskbar and select Exit from the displayed menu DV Messenger closes About DV Messenger A Help Topics H Start iew Record R Stop View Record S Connect C I Disconnect D I 41 ...

Page 205: ...NON 1 800 652 2666 Canon Hongkong Co ltd 19 F The Metropolis Tower 10 Metropolis Drive Hunghom Kowloon Hong Kong Phone 852 2170 2828 Fax 852 2723 9684 Printed on 100 reused paper Document realise avec du papier recycle a 100 EI papel aqui utilizado es 100 reciclado PRINTED IN JAPAN PUB DIM 629 0304A Ni14 0 CANON INC 2004 DY8 9120 422 000 IMPRIME AU JAPON IMPRESO EN JAPON ...

Page 206: ... logiciel connecter Ie camescope a I ordinateur et telecharger des images a partir d une carte memoire sur un ordinateur Pour des instructions de fonctionnement plus detaillees reportez vous au manuel au format PDF fournie sur Ie disque DIGITAL VIDEO SOLUTION DISK For Windows ou DIGITAL VIDEO SOLUTION DISK For Macintosh En este manual de instrucciones se explica como instalar el software conectar ...

Page 207: ...HOLE OR IN PART EXCEPT AS EXPRESSLY PROVIDED IN THIS AGREEMENT 2 BACK UP COPY You may make one copy of the SOFTWARE solely for back up purposes or copy the SOFTWARE onto the permanent storage deVice e g a hard disk of your computer and retain the original for back up purposes Any other copying of the SOFTWARE is a violation of this Agreement You must reproduce and include the copyright notice on t...

Page 208: ...the terms of this Agreement and you must then promptly return the SOFTWARE In addition Canon may enforce its other legal rights 6 U S GOVERNMENT RESTRICTED RIGHTS NOTICE The SOFTWARE is a commercial item as that term is defined at 48 C F R 2 101 Oct 1995 consisting of commercial computer software and commefCIal computer software documentation as such terms are used in 48 C F R 12 212 Sept 1995 Con...

Page 209: ...ued to give Canon any ownership rights in any images graphics or textual material that you save in connection with the Software You may not modify remove or delete any or all copyright notices I which are contained in the Software including any copy thereof and ii which are on the original CD ROM and on the medium of a back up copy made pursuant to Section 2 above 11 ACKNOWLEDGEMENT BY USING THE S...

Page 210: ...Downloading Images ZoomBrowser EX 19 Starting Zoom Browser EX 20 Using the Computer to Download Images 22 Using the Camcorder to Download Images Direct Transfer Function 24 Using a PC Card ReaderMJriter 25 Macintosh System Requirements 27 What Can Be Accomplished with the Software 28 Installing the Digital Video Software 29 Connecting the Camcorder to a Computer 32 Downloading Images ImageBrowser ...

Page 211: ... from the following website http www adobe com products acrobatJreadstep2 htmI o We recommend copying the PDF file to your computer 1 Set the DIGITAL VIDEO SOLUTION DISK For Windows or DIGITAL VIDEO SOLUTION DISK For Macintosh in the computer s CD ROM drive If the installer panel opens click Exit to close it 2 Select My Computer from the start menu 3 Right click the CD ROM icon and select Open fro...

Page 212: ...ard not formatted by a Canon camcorder Trademark Acknowledgments Canon is a registered trademark of Canon Inc Macintosh and Mac OS are trademarks of Apple Computer Inc registered in the United States and other countries iPhoto and QuickTime are trademarks of Apple Computer Inc Microsoft and Windows are either registered trademarks or trademarks of Microsoft Corporation in the United States and or ...

Page 213: ...from a memory card to your computer IFC 300PCU USB Cable DIGITAL VIDEO SOLUTION DISK For Windows DIGITAL VIDEO SOLUTION DISK For Macintosh Windows users Move on to p 9 Macintosh users Move on to p 27 The explanations in this manual use mainly Windows XP and Mac OS X version 10 2 screen shots ...

Page 214: ... MB or more IS recommended for editing movies Interface USB only preinstalled Windows 98 Windows Me Windows 2000 Windows XP systems with built in USB ports Free Hard Disk Space Canon Utilities ZoomBrowser EX 200 MB or more Including the PhotoRecord printing program PhotoStltch 40 MB or more Canon DV TWAIN Driver 25 MB or more Canon DV WIA Driver 25 MB or more Display 800 x 600 pixels High Color 16...

Page 215: ...10 Not all operations performed with a connection to a USB 2 0 compatible board can be guaranteed ...

Page 216: ...hments from still images Your e mail software needs to be enabled as MAPI client Exporting images Saving images on CD R RW Disks Windows XP only MovieEdit Task Linking images Inserting text and background music and adding effects MovieExport Task Changing the size or file format of selected movies and saving them as new files PhotoRecord Laying out and printing still images Printing Indexes Creati...

Page 217: ... on the camcorder may lose th IS setting once they are downloaded to the computer 1 Check a camcorder is not connected to the computer While a camcorder is connected to the computer the software cannot be installed normally If a camcorder is connected detach the USB cable from the computer 2 Close any programs that are running 3 Set the DIGITAL VIDEO SOLUTION DISK For Windows in the computerls CD ...

Page 218: ...ftware refer to the DV Network Software Instruction Manual Installer Panel DIGITAL VIDEO Solution Disk If the following dialog appears click Restart to restart the computer After restarting the computer installation automatically continues Exit QuickTime D C 0 DV Network Software Windows XP only 13 ...

Page 219: ...select a USB driver Windows XP The USB driver supplied with the Windows operating system is used You do not need to install a USB driver Windows 98 Windows 2000 Canon DV TWAIN Driver Windows Me Canon DV WIA Driver Setup Type Choose the setup type that best suits your needs 14 Click the type of Setup you prefer c o Installs all the programs We recommend this option for users unfamiliar with the ins...

Page 220: ... the following window appears click OK This window only appears if you installed the TWAIN Driver or the WIA Driver 11 When installation is complete select Yes I want to restart my computer now and click Finish InstallShield Wizard Complete ThelnstalishieldVlizard has successfully installed Solution Disk Before you can use the program you must restart your computer No I will restart my computer la...

Page 221: ...o When installation is complete remove the DIGITAL VIDEO SOLUTION DISK For Windows before you connect the camcorder to the computer o Windows 98NVindows MeNVindows 2000 At this point the files for the TWAIN Driver or WIA Driver have only been copied to your computer To download images via USB connection finish installing the TWAIN Driver or the WIA Driver ...

Page 222: ... in the connected state Some computers will not awaken properly if you disconnect the camcorder while they are in standby mode Please refer to your computer manual for instructions regarding its standby mode 0 Refer to your computer manual for the location of the computer s USB o ports See your camcorder instruction manual for connecting Instructions 1 Insert a memory card containing images into t...

Page 223: ...to start Windows Me The Scanners and Cameras Wizard starts Click Cancel to close the Wizard For instructions on how to start ZoomBrowser EX and download images to the computer see Downloading Images rn 19 USB Cable I 18 USB Terminal on the Camcorder Camcorder End Computer End USB Port on the Computer ...

Page 224: ...re working on it on your computer o For Windows XP Users Do not rotate the image in the Windows Picture and Fax Viewer or in the explorer view The file format of the original image will be changed and the image can no longer be displayed in ZoomBrowser EX or on the camcorder A movie file exceeding 210MB cannot be downloaded If the Server Busy window appears when you connect the camcorder to the co...

Page 225: ...ities CameraWindow and CameraWindow Set Auto Launch Windows 2000 If Canon CameraWindow is not listed click the Windows Start menu and select Programs Canon Utilities CameraWindow and CameraWindow Set Auto Launch Windows Me If the window does not appear click the Windows Start menu and select Programs Canon Utilities CameraWindow and CameraWindow Set Auto Launch If a camcorder and PC card reader ar...

Page 226: ...e software to CameraWindow when you connect this camera to the computer you can change this setting later Do not display this dialog box again Don t Set The CameraWindow Launcher icon appears on the taskbar Windows Me If the following dialog appears click OK To change the settings you need to restart the computer 21 ...

Page 227: ... Window opens displaying the camcorder images as thumbnails small images For details see Downloading Images from the Camera Window II 23 Browse Images with ZoomBrowser EX ZoomBrowser EX starts and the Main Window opens The next time you connect the camcorder to the computer ZoomBrowser EX starts automatically and the CameraWindow Download Image s window opens VII U l to Download Im4aaE S You can s...

Page 228: ...Download image An orange frame appears around the selected image You can select multiple images by continuously clicking on the images Click on the image again to deselect 3 In the Download Settings window confirm the settings and click OK Sets up image dO mloading Save to folder Do not create new folder Create new folder Folder name Shooting date Downloaded date Set as new Designate prefix of ima...

Page 229: ...reen and press the button See your camcorder instruction manual for how to set and operate the camcorder to transfer images The button cannot be used when it is not lighted You can set the action that is carried out for direct transfer Right click the CameraWindow Launcher icon on the taskbar and select an action from the displayed menu 24 It Show image s in fullscreen mode It Launch ZoomBrOINser ...

Page 230: ... its manual 1 Insert a memory card containing images recorded with the camcorder into the reader 2 Windows 98 Windows Me Windows 2000 Double click the ZoomBrowser EX icon on the desktop Windows XP When a window appears allowing you to select an application program to start select Download View Images using ZoomBrowser EX and click OK ZoomBrowser EX starts and the CameraWindow Download Image s wind...

Page 231: ...Select one of the devices to proceed and click OK 5 Select a downloading method Start Image Download ZoomBrowser EX starts The Camera Window opens and images will be downloaded to the computer List Images ZoomBrowser EX starts The Camera Window opens displaying the camcorder images as thumbnails small images Browse Images with ZoomBrowser EX ZoomBrowser EX starts and the Main Window opens Ready to...

Page 232: ...hotoStitch 30 MB or more 800 x 600 pixels 32 OOO colors or better 1024 x 768 pixels 32 000 colors or better is recommended Proper operation is not guaranteed on a user built PC C Proper operation is not guaranteed on any particular system even if it meets the requirements outlined above C ImageBrowser and PhotoStitch do not operate on disks formatted with the Unix File System UFS c A CD ROM drive ...

Page 233: ...g still images Printing indexes MovieEdit Task Linking images Inserting text and background music and adding effects Changing the size or file format of selected movies and saving them as new files PhotoStitch Merging panoramic images This instruction manual explains how to install the software connect the camcorder to a computer and download images from a memory card to a computer For more detail...

Page 234: ...xample MVI_0001 AVI and MVI_0001 THM MVI_0001 THM files cannot be downloaded but movies can still be played back on the computer o Mac OS X version 10 2 You may not be able to download images with iPhoto if the memory card contains an enormous volume of images approx 900 or more The Exif version may change to 2 1 and image Information may be modified when downloading images with Image Capture To d...

Page 235: ...10 1 10 2 Double click the CD ROM icon followed by the Mac OS X and Canon Digital Video Installer icons The installer panel appears 4 Select your language S Click Digital Video Software Install Installer panel I C anon 6 Select Easy Installation and Click Next To install the software individually select Custom Installation Select an nstallation type and click Nextj 30 ...

Page 236: ... and click Next Installation starts Instalfationwill begin usingthesettings listed below Click Next tostartcop dngfiles 9 When the Installation has finished message appears click OK Installation has finished 10 After the installation is complete restart the computer as prompted 31 ...

Page 237: ...o standby sleep mode while a camcorder is connected via the USB interface If it does happen never disconnect the USB cable Try to awaken the computer with the camcorder in the connected state Some computers will not awaken properly if you disconnect the camcorder while they are in standby mode Please refer to your computer manual for instructions regarding its standby mode o Refer to your computer...

Page 238: ...Images recorded onto the memory card or downloaded to the hard disk are important original data files Create a copy of the file first before working on it on your computer Sta tin 1 rnageBrowser Mac as 9 0 9 2 1 Connect the camcorder to the computer OJ 32 ImageBrowser starts and the ImageBrowser Automation Wizard dialog appears In the ImageBrowser Automation Wizard dialog you can select the action...

Page 239: ...Not Start Automatically 1 Click the Apple menu and select Control Panels and Canon ImageBrowser Auto Launch The Settings for USB Connection dialog will display 2 Click The application program below will start to remove the check mark 3 Click the close box at the upper left to close the dialog ImageBrowser will cease to start automatically thereafter Click here to close the dialog ...

Page 240: ...esktop double click the Canon Utilities folder on the drive on which the program was installed followed by the lmageBrowser folder and lmageBrowser icon 3 Click Canon Camera in the Explorer View section The Communications Settings window appears This window only appears the first time the camcorder is connected 4 Confirm that USB port and a Canon camcorder are selected and click Set The Camera Win...

Page 241: ... Mode Explorer View Section 2 Create a new folder for saving images from the memory card in the camcorder Click the File menu and select New Folder A folder with the name I Untitledl will be created Click it to change the folder name as you wish In this example we will input I lOO Canon Camera _ 3 In the Explorer View Section click the newly created folder Browser Wi View Mode 36 Explorer View Sec...

Page 242: ...A blue frame appears around the selected image Downloaded images are saved to the computer and appear in the Browser area Browser area i Explorer View _ Section To disconnect the camcorder click the close box Mac as 9 0 9 2 or the red close box Mac as x version 10 1 10 2 at the upper left of the Camera Window The Camera Window will close 37 ...

Page 243: ...w to connect the PC Card ReaderlWriter please refer to the PC Card Reader Manual 1 Insert a memory card into the reader Mac OS X version 10 1 10 2 If a dialog appears click the red close box 2 Double click the Canon ImageBrowser icon on the desktop ImageBrowser starts If the icon does not appear on the desktop double click the folder in which you installed the program followed by the Canon Utiliti...

Page 244: ...1 800 652 2666 ASIA Canon Hongkong Co ltd 19 F The Metropolis Tower 10 Metropolis Drive Hunghom Kowloon Hong Kong Phone 852 2170 2828 Fax 852 2723 9684 Printed on 100 reused paper Document realise avec du popier recycle a 100 EI pope aqui utilizado es 100 reciclado PUB DIM 627 0304A Ni14 0 CANON INC 2004 DY8 9120 420 000 PRINTED IN JAPAN IMPRIME AU JAPaN IMPRESO EN JAPON ...

Page 245: ...inkelvorsatz WA 34 ist ausschlieBlich fur den Einsatz bei maximaler Weitwinkel Einstellung vorgesehen Wenn Sie in den Telebereich zoomen wird das Bild unscharf Lobiettivo per campo largo WA 34 va utilizzato alia pro pria massima apertura angolare Eseguendo una zoomata in avvicinamento con il teleobiettivo I immagine non apparira a fuoco EI accesorio de objetivo de angulo ancho WA 34 es para utiliz...

Page 246: ...te or a commercially available dry cleaning cassette If the symptoms reappear shortly after the cleaning the videocassette may be defective Stop using the cassette Availability differs from area to area Video heads may become dirty under the following conditions When using the camcorder in humid or hot places When using cassettes with damaged or dirty tape When using the camcorder in dusty places ...

Page 247: ...ra responsable de ningun dana en el producto ni accidentes como fuego etc provocados por un funcionamiento incorrecto de accesorios que no sean originales de Canon por ejemplo fugas y o explosiones de la baterfa Tenga en cuenta que esta garantfa no se aplica a reparaciones como consecuencia de un funcionamiento incorrecto de accesorios que no sean originales de Canon No obstante podra solicitar di...

Page 248: ...stal Ie sur votre ordinateur De plus pour utiliser DV Messenger Ver 2 0 Windows Messenger 4 5 4 6 4 7 doit entre autres conditions fonctionner correctement Pour confirmer ces conditions suivre Ie mode d emploi intituh2 II Avant d installer DV Messenger sur Ie Mode d emploi du DV Network Software Antes de usar el software lea 10 siguiente Este paquete contiene los siguientes CD ROM o DIGITAL VIDEO ...

Page 249: ...0 To help us understand our customers lifestyles please indicate the interests and activities in which you or your spouse enjoy participating on a regUlar basis 01 II Bicycling 21 I Automotive Work 41 U OUf Nation s Heritage 02 L1 Golf 22 Electronics 42 U Real Estate Investments 03 0 Physical Fitness Exercise 23 0 Home WorkshoplDo lt Yourself 43 D StocklBond Investments 04 0 Running Jogging 24 0 R...

Page 250: ...9 04 CarlOn Optics Lens Zoom 1 05 Image Stabilizer 11 I 06 Size 12 LJ Occupation ProfessionalfTechnical Upper Management Executive MidrJle Management Sales Marketing Clerical or Service Worker Tradesman Macfl irle Operator LarJorer You Spouse I I How do you primarily intend to use your camcorder 1 Business Professional Use 2 I Personal Use What type 01 videos do you plan on recording check only 1 ...

Reviews: