Chapter 7
7-51
7.10.19.2 Removing the Wire Cleaner for
the Primary Charging Assembly
0010-8935
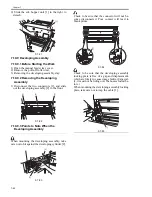
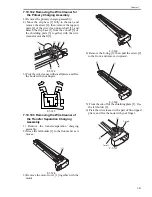
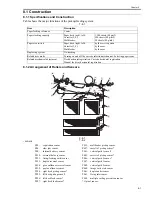
1) Remove the primary charging assembly.
2) Move the clip base [1] fully to the rear, and
remove the screw [2]; then, remove the support
plate [4] of the wire clean motor shaft [3], and
detach the clip base [1] from the cut-off [6] of
the shielding plate [5] together with the wire
cleaner motor shaft [3].
F-7-126
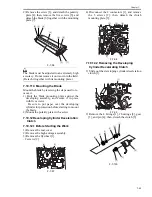
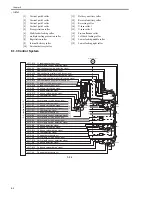
3) Pick the wire cleaner with small pliers, and free
the hook with your fingers.
F-7-127
7.10.19.3 Removing the Wire Cleaner of
the Transfer Separation Charging
Assembly
0010-8940
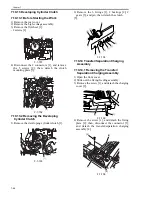
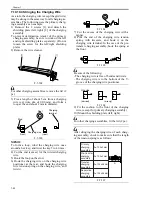
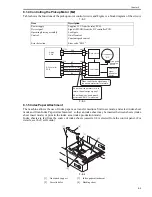
1) Remove the transfer/separation charging
assembly.
2) Move the felt holder [1] to the front as far as it
moves.
F-7-128
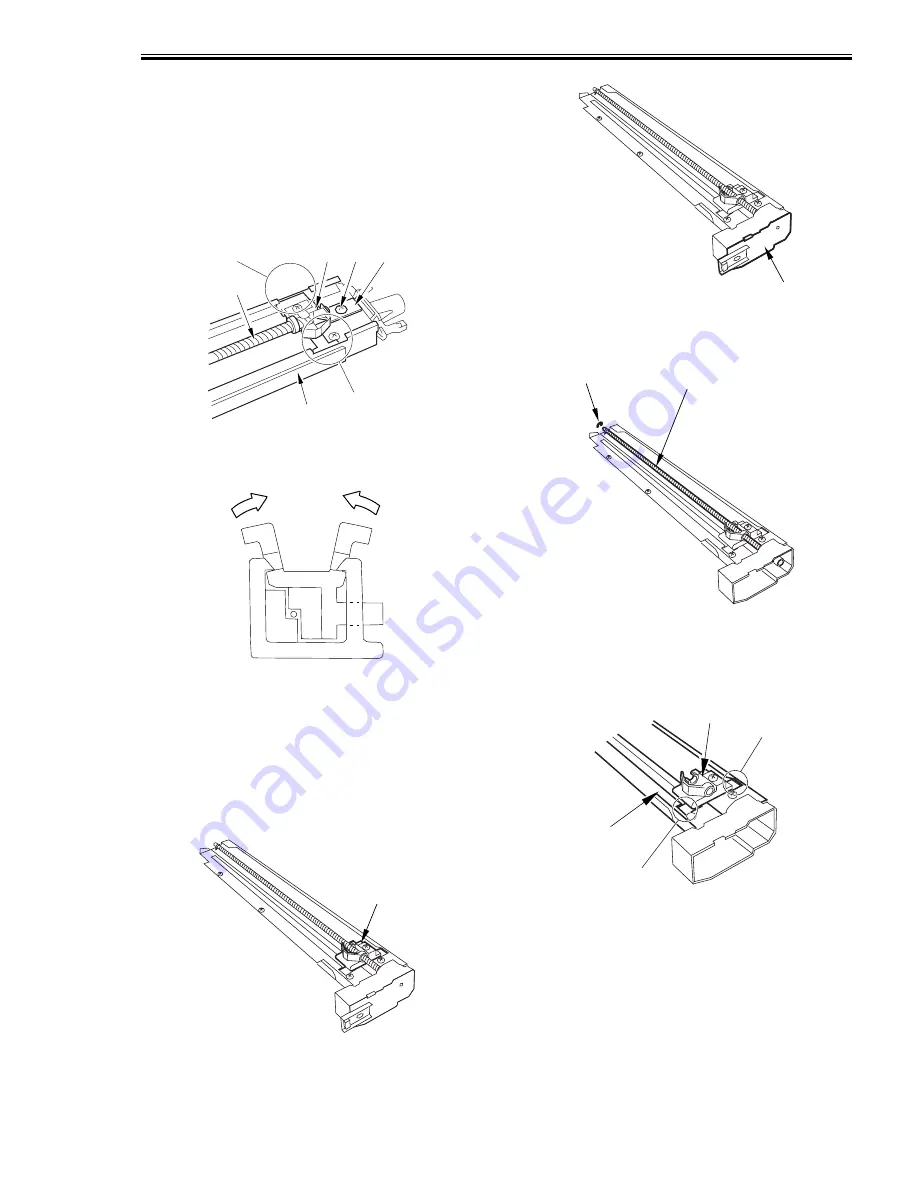
3) Remove the motor cover [1] together with the
motor.
F-7-129
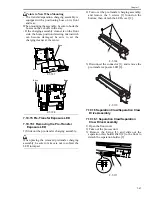
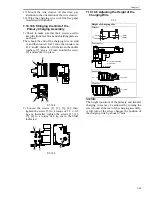
4) Remove the E-ring [1]; then, pull the screw [2]
to the front, and remove it upward.
F-7-130
5) From the cut-off of the shielding plate [1], free
the felt holder [2].
6) Pick the wire cleaner with a pair of fine-tipped
pliers, and free the hook with your finger.
F-7-131
[3]
[2]
[4]
[1]
[5]
[6]
[6]
[1]
[1]
[1]
[2]
[1]
[5]
Cut off
Cut off
Summary of Contents for IMAGERUNNER 7095 PRINTER
Page 20: ...Chapter 1 Introduction...
Page 46: ...Chapter 2 Installation...
Page 88: ...Chapter 3 Basic Operation...
Page 94: ...Chapter 4 Main Controller...
Page 116: ...Chapter 5 Original Exposure System...
Page 165: ...Laser Exposure Chapter 6...
Page 175: ...Chapter 7 Image Formation...
Page 231: ...Chapter 8 Pickup Feeding System...
Page 287: ...Chapter 9 Fixing System...
Page 312: ...Chapter 10 External and Controls...
Page 346: ...Chapter 11 MEAP...
Page 350: ...Chapter 12 RDS...
Page 360: ...Chapter 13 Maintenance Inspection...
Page 375: ...Chapter 14 Standards Adjustments...
Page 407: ...Chapter 15 Correcting Faulty Images...
Page 433: ...Chapter 16 Self Diagnosis...
Page 460: ...Chapter 17 Service Mode...
Page 559: ...Chapter 18 Upgrading...
Page 583: ...Chapter 19 Service Tools...
Page 588: ...APPENDIX...
Page 615: ......


