Log In
Logging into the Machine
4XR3-02E
0YRY-022 1100-022 10XJ-022 1106-022 10YY-022 10H3-022 108A-022 1116-022 10H4-022 0YAS-022
When the login screen is displayed, registered authorized users are required to log in to continue operating the
machine. To log in, each user must enter his or her own user name and password. This ensures the security of the
machine. Also, the users can use the machine as conveniently as possible by customizing (personalizing) the display
and the settings according to their preferences. The items displayed on the login screen vary depending on the user
management settings. Perform the login operation based on the items that are displayed.
When the User List Is Displayed(P. 160)
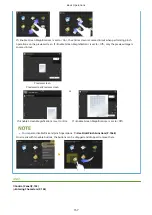
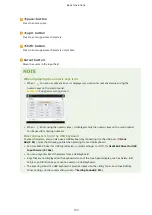
When the User Name and Password Input Screen Is Displayed(P. 161)
●
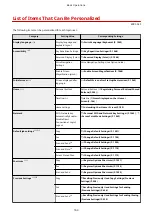
For the functions and settings that can be personalized, see List of Items That Can Be
Personalized(P. 163) .
●
If you are not using the Personalization function, set <Enable Use of Personal Settings> ( <Enable Use of
Personal Settings>(P. 1138) ) to <Off>.
●
If <Auto Reset Time> is set, the user is automatically logged out when no operations are performed for a
specified period. <Auto Reset Time>(P. 1048)
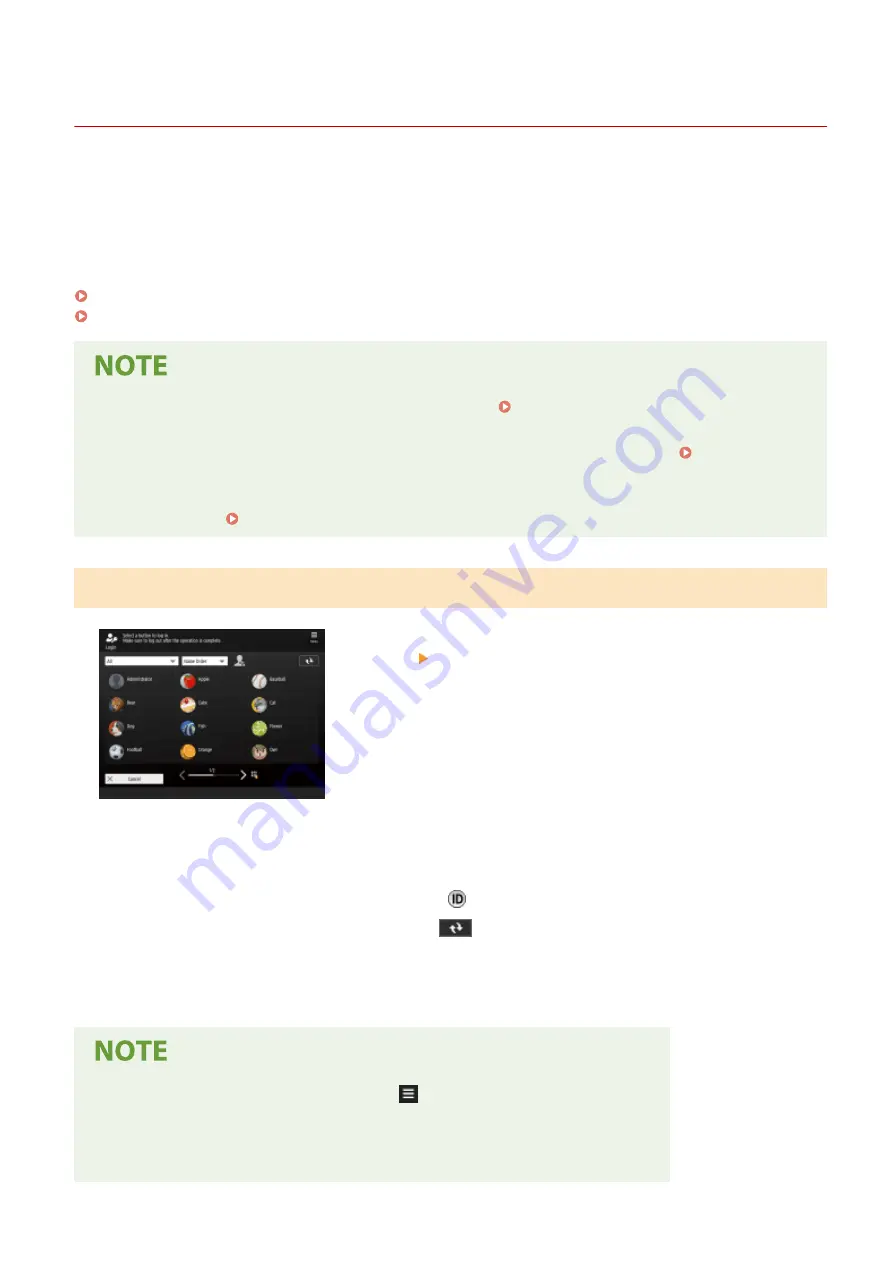
When the User List Is Displayed
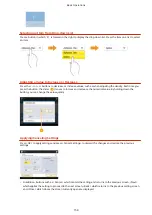
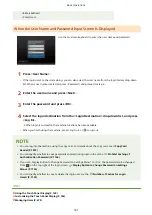
Press your user name. If a PIN code has been set, enter your PIN code and
press <OK> <Log In>.
●
The drop-down lists on the top left of the screen enable you to change the display order or narrow down the user
names. Select <Print> from the drop-down list on the left to display only the users who have a print job that has not
yet been executed.
●
When you finish using the machine, press <Log Out> or
to log out.
●
If the added user is not displayed on the screen, press
on the top-right of the screen.
●
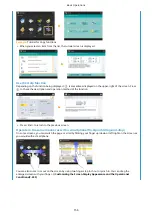
By moving the slider on the bottom center of the login screen, you can turn pages.
●
If you press one of the numeric keys on the control panel while the login screen is being displayed, the <Specify
Page> screen appears. It enables you to display a desired page by specifying its page number.
●
You can edit the following information from
on the top right of the login screen.
- <Display Name>
- <PIN>
- <Password>
Basic Operations
160
Summary of Contents for imageRUNNER ADVANCE C5535i III
Page 16: ...Setting Advanced Box to Public 79 Connecting to the Other Devices 84 Setting Up 2 ...
Page 37: ...LINKS Adapting to the Network Environment P 43 Setting Up 23 ...
Page 65: ...4 Press OK 5 Press Yes Setting Up 51 ...
Page 87: ...LINKS Faxing P 384 Options P 1513 Setting Up 73 ...
Page 119: ...Basic Operations 105 ...
Page 176: ...Starting the Remote UI P 784 Basic Operations 162 ...
Page 184: ...LINKS Hardware Specifications P 1485 Basic Operations 170 ...
Page 222: ... If you do not want to register settings select Unassigned Basic Operations 208 ...
Page 229: ...4 Press OK Basic Operations 215 ...
Page 279: ...7 Press Copying starts Copying 265 ...
Page 294: ...8 Press Start Copying Copying starts Copying 280 ...
Page 298: ... Copying starts Copying 284 ...
Page 322: ...8 Press Copying starts LINKS Making Booklets Booklet Copying P 299 Copying 308 ...
Page 337: ... Copying starts LINKS Inserting Sheets and Chapter Pages Insert Sheets P 317 Copying 323 ...
Page 344: ... Maximum number of job blocks that can be scanned 100 Copying 330 ...
Page 359: ...7 Select the number of sheets and press OK 8 Press Copying starts Copying 345 ...
Page 461: ...3 Click General Settings 4 Click Add Destination Faxing 447 ...
Page 513: ...LINKS Registering Destinations P 218 Scanning 499 ...
Page 543: ...Erasing Dark Borders When Scanning Erase Frame P 523 Scanning 529 ...
Page 549: ...Specifying E Mail Settings P 559 Scanning 535 ...
Page 641: ... N on 1 Print Comments Password to Open Doc Skip Blank Pages Using Storage Space 627 ...
Page 665: ...6 Click Fax Fax sending starts Linking with Mobile Devices 651 ...
Page 747: ...LINKS Specifying IP Addresses in Firewall Settings P 729 Managing the Machine 733 ...
Page 752: ...4 Press Apply Set Changes Yes Managing the Machine 738 ...
Page 782: ...LINKS Configuring the Forced Hold Printing Settings P 761 Managing the Machine 768 ...
Page 787: ...Restricting Copying Using a QR Code P 355 Managing the Machine 773 ...
Page 801: ...Settings Registration P 905 Managing the Machine 787 ...
Page 806: ...Starting the Remote UI P 784 Managing the Machine 792 ...
Page 1124: ... The reception speed set in RX Start Speed RX Start Speed P 1117 Settings Registration 1110 ...
Page 1237: ...6 Press OK Maintenance 1223 ...
Page 1453: ...Managing MEAP Applications P 1443 Managing MEAP Application Licenses P 1448 Appendix 1439 ...
Page 1507: ...Appendix 1493 ...
Page 1580: ...5 Close the right cover of the machine Appendix 1566 ...
Page 1595: ... 5 iproute 284 Squid 295 gst plugins base 341 webkit 352 ...
Page 1650: ... 60 libjpeg this software is based in part on the work of the Independent JPEG Group ...
Page 1663: ... 73 MD4 RSA Data Security Inc MD4 Message Digest Algorithm ...
Page 1850: ... 260 This file is distributed without any expressed or implied warranty ...
Page 2019: ...introduced by others ...


