


Using Image Creation Modes
4-68
4
Spe
c
ial Co
p
y
in
g and
Mai
l
Bo
x F
eatures
■
Copying
1
Place your originals
➞
press [Special Features]
➞
[Image
Creation].
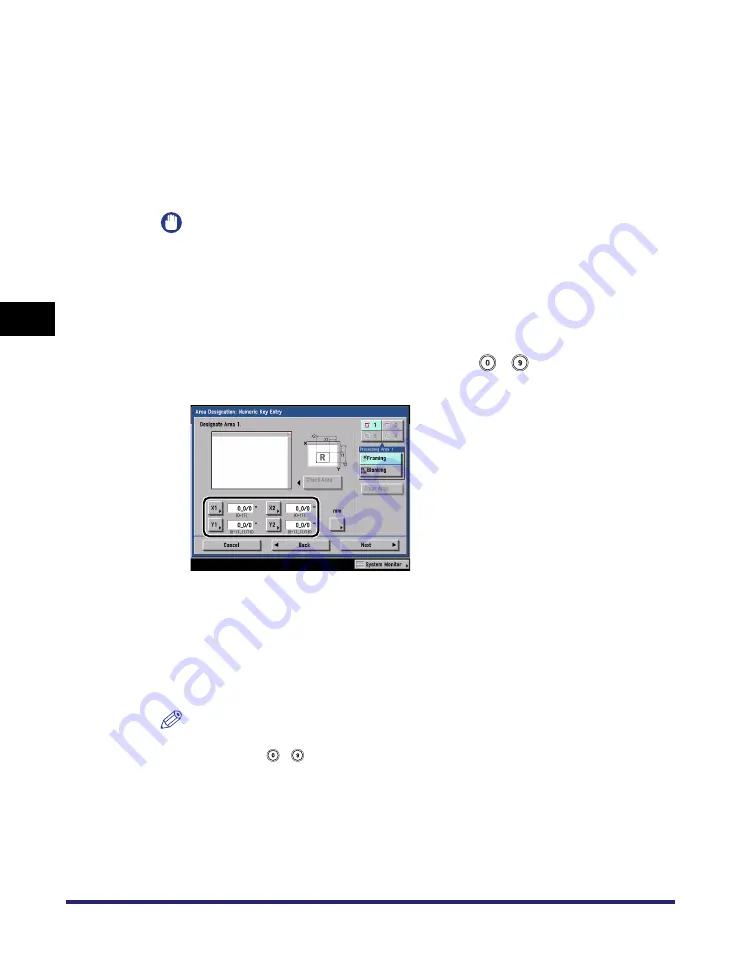
2
Press [Area Designation]
➞
[Numeric Key Entry].
IMPORTANT
•
Before performing the next step, you must manually measure the size and position
of the area that you want to designate on the original.
•
When you measure the XY values, always start measuring from the image out to
the right side edge of the original, and up to the top of the original. These
measurements tell the machine the desired framed area's size and position.
3
Press [X1], [X2], [Y1], and [Y2]
➞
use
-
(numeric keys) to
specify the respective measurements.
[X1]: The distance of the area's right border to the original's right edge.
[X2]: The distance of the area's left border to the original's right edge.
[Y1]: The distance of the area's top border to the original's top edge.
[Y2]: The distance of the area's bottom border to the original's top edge.
You can designate up to four areas.
NOTE
•
To change a value you entered, press [X1], [X2], [Y1], or [Y2]
➞
enter the correct
value using
-
(numeric keys).
•
To check the designated area, press [Check Area].
Summary of Contents for imageRUNNER C3480
Page 2: ......
Page 3: ...Color imageRUNNER C3480 C3480i C3080 C3080i C2550 Copying and Mail Box Guide 0 Ot...
Page 22: ...xx...
Page 316: ...Sending a Document 6 14 6 Sending and Receiving Documents Using the Inboxes...
Page 377: ...Book Page Edit Shift Settings 7 61 7 Using the Express Copy Basic Features Screen 3 Press Done...
Page 446: ...Index 9 20 9 Appendix...
Page 447: ......


