Chapter 4
4-26
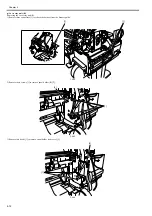
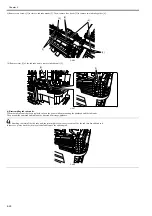
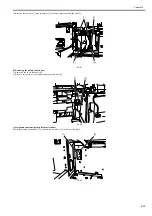
9) Remove two screws [1] to remove ink tube mount [2]. Then, remove four hooks [3] to remove two ink tube guides [4].
F-4-56
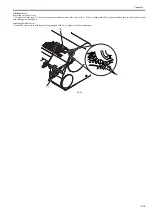
10) Remove joint [1] of the ink tube unit to remove ink tube unit [2].
F-4-57
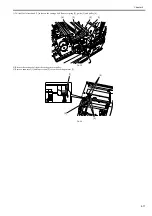
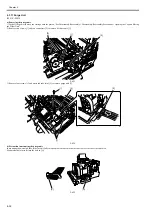
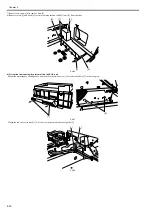
b) Reassembling ink tube units
When the ink tube unit has been replaced, turn on the power without mounting the printhead and the ink tanks.
Then, mount the printhead and ink tanks as directed by message guidance.
After detaching the joint of the ink tube unit, the joint might become easy to come off by the ink that has adhered to it.
In that case, please wash the joint by alcohol and remove the adhering ink.
F-4-58
[3]
[4]
[3]
[2]
[1]
[1]
[2]
Summary of Contents for iPF800 Series
Page 1: ...Aug 13 2008 Service Manual iPF800 series ...
Page 2: ......
Page 6: ......
Page 11: ...Chapter 1 PRODUCT DESCRIPTION ...
Page 12: ......
Page 14: ......
Page 38: ...Chapter 1 1 24 Hold this lever to pull out the lower roll unit ...
Page 100: ...Chapter 1 1 86 ...
Page 101: ...Chapter 2 TECHNICAL REFERENCE ...
Page 102: ......
Page 158: ......
Page 159: ...Chapter 3 INSTALLATION ...
Page 160: ......
Page 162: ......
Page 176: ...Chapter 3 3 14 ...
Page 177: ...Chapter 4 DISASSEMBLY REASSEMBLY ...
Page 178: ......
Page 180: ......
Page 238: ...Chapter 4 4 58 ...
Page 239: ...Chapter 5 MAINTENANCE ...
Page 240: ......
Page 242: ......
Page 246: ...Chapter 5 5 4 5 Close upper cover 1 F 5 6 1 ...
Page 247: ...Chapter 5 5 5 ...
Page 248: ......
Page 249: ...Chapter 6 TROUBLESHOOTING ...
Page 250: ......
Page 252: ......
Page 274: ......
Page 275: ...Chapter 7 SERVICE MODE ...
Page 276: ......
Page 278: ......
Page 301: ......
Page 302: ......
Page 303: ...Chapter 8 ERROR CODE ...
Page 304: ......
Page 306: ......
Page 318: ...Chapter 8 8 12 ...
Page 319: ...Aug 13 2008 ...
Page 320: ......

