Chapter 1
1-67
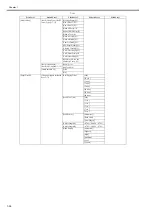
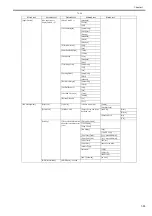
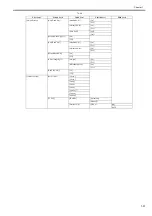
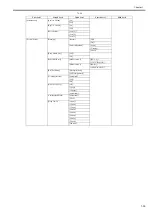
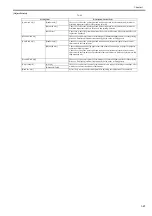
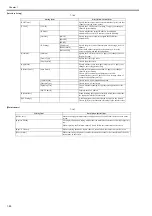
[Adjust Printer]
T-1-45
Setting Item
Description, Instructions
[Auto Head Adj.]
[Standard Adj.]
Choose Yes to have the printer print and read a test pattern for the automatic adjustment of
Printhead alignment relative to the printing direction.
[Advanced Adj.]
Choose Yes to have the printer print and read a test pattern for the automatic adjustment of
Printhead alignment relative to the nozzle and printing direction.
[Auto Print]
Choose On to have the printer automatically execute the Advanced Adj. operations after you
replace the Printhead.
[Manual Head Ad]
Choose Yes to print a test pattern for adjustment of Printhead alignment relative to the printing
direction. Enter the adjustment value manually based on the resulting pattern.
[Auto Band Adj.]
[Standard Adj.]
Choose Yes to have the printer print and read a band adjustment test pattern for automatic
adjustment of the feed amount.
[Advanced Adj.]
Choose this option when using paper other than genuine Canon paper, or paper for purposes
other than checking output.
Choose Yes to have the printer print and read a band adjustment test pattern for automatic
adjustment of the feed amount. Note that this function takes more time and requires more ink
than Standard Adj.
[Manual Head Adj]
Choose Yes to print a test pattern for adjustment of Printhead alignment relative to the printing
direction. Enter the adjustment value manually based on the resulting pattern.
[Adjust Length]
[A:High]
Choose Yes to print a test pattern for adjustment relative to paper stretching or shrinkage, after
which you can enter the amount of adjustment.
[B:Standard/Draft]
[Head Inc. Adj.]
Select [Yes] to print an adjustment pattern for adjusting the inclination of the printhead.
Summary of Contents for iPF800 Series
Page 1: ...Aug 13 2008 Service Manual iPF800 series ...
Page 2: ......
Page 6: ......
Page 11: ...Chapter 1 PRODUCT DESCRIPTION ...
Page 12: ......
Page 14: ......
Page 38: ...Chapter 1 1 24 Hold this lever to pull out the lower roll unit ...
Page 100: ...Chapter 1 1 86 ...
Page 101: ...Chapter 2 TECHNICAL REFERENCE ...
Page 102: ......
Page 158: ......
Page 159: ...Chapter 3 INSTALLATION ...
Page 160: ......
Page 162: ......
Page 176: ...Chapter 3 3 14 ...
Page 177: ...Chapter 4 DISASSEMBLY REASSEMBLY ...
Page 178: ......
Page 180: ......
Page 238: ...Chapter 4 4 58 ...
Page 239: ...Chapter 5 MAINTENANCE ...
Page 240: ......
Page 242: ......
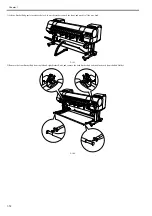
Page 246: ...Chapter 5 5 4 5 Close upper cover 1 F 5 6 1 ...
Page 247: ...Chapter 5 5 5 ...
Page 248: ......
Page 249: ...Chapter 6 TROUBLESHOOTING ...
Page 250: ......
Page 252: ......
Page 274: ......
Page 275: ...Chapter 7 SERVICE MODE ...
Page 276: ......
Page 278: ......
Page 301: ......
Page 302: ......
Page 303: ...Chapter 8 ERROR CODE ...
Page 304: ......
Page 306: ......
Page 318: ...Chapter 8 8 12 ...
Page 319: ...Aug 13 2008 ...
Page 320: ......


