background image

COPYRIGHT© 2001 CANON INC. 

2000 2000 2000 2000

 CANON iR105 REV.0 JULY 2001

SERVICE MODE

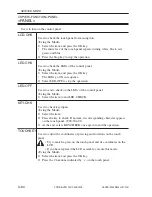
S-85

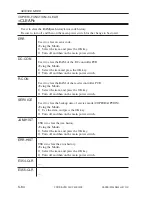
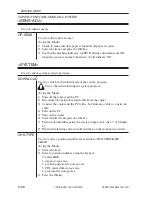
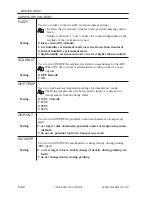
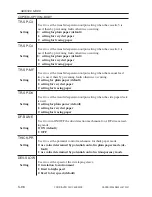
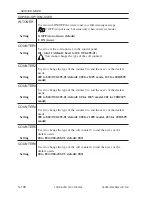
PWD-CLR

Use it to clear the password of the system administrator set in user mode.
<Using the Mode>
1) Select the item, and press the OK key.
2) Turn off and then on the main power switch.

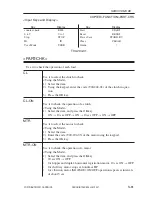
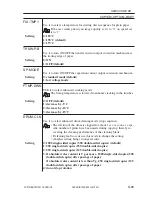
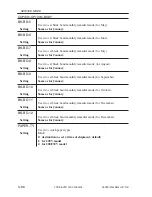
ADRS-BK

Use it to clear all addresses registered in the address book.
<Using the Mode>
1) Select the item, and press the OK key.
2) Turn off and then on the main power switch.

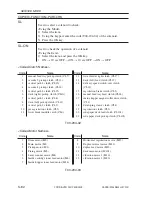
CNT-MCON

Use it to clear the counter readings used for service work on the main con-
troller PCB.
<Using the Mode>
1) Select the item, and press the OK key.
2) Turn off and then on the main power switch.

CNT-DCON

Use it to clear the counter readings for service work on the DC controller
PCB.
<Using the System>
1) Select the item and press the OK key.
2) Turn off and then on the main power switch.

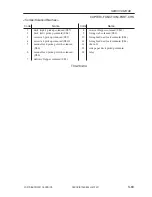
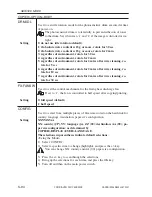
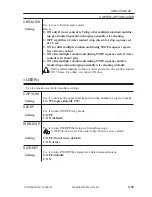
MMI

Use it clear the backup data entered in user mode (machine settings, ID
mode, group ID, mode memory).
<Using the Mode>
1) Select the item, and press the OK key.
2) Turn off and then on the main power switch.

CARD

Use it to clear the group ID of the card reader.
<Using the Mode>
1) Select the item, and press the OK key.
2) Turn off and then on the main power switch.

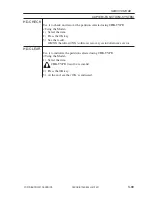
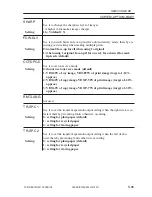
ALARM

Use it to clear the alarm history.
<Using the Mode>
1) Select the mode, and press the OK key.
2) Turn off and then on the main power switch.

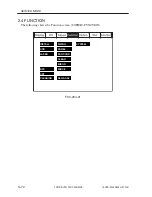
COPIER>FUNCTION>CLEAR

Summary of Contents for iR105 Series

Page 1: ...FY8 13HF 000 iR105 REVISION 0 JULY 2001 COPYRIGHT 2001 CANON INC 2000 2000 2000 2000 CANON iR105 REV 0 JULY 2001 PRINTED IN U S A IMPRIME AU U S A ...

Page 2: ...this manual over a long or short period Canon will issue a new edition of this manual The following paragraph does not apply to any countries where such provisions are inconsistent with local law Trademarks The product names and company names used in this manual are the registered trademarks of the individual companies Copyright This manual is copyrighted with all rights reserved Under the copyrig...

Page 3: ...uiring care to avoid combustion fire Indicates an item prohibiting disassembly to avoid electric shocks or problems Indicates an item requiring disconnection of the power plug from the electric outlet Indicates an item intended to provide notes assisting the understanding of the topic in question Memo Indicates an item of reference assisting the understanding of the topic in ques tion REF Provides...

Page 4: ...ystems Chapter 3 Main Controller outline of the main controller Chapter 4 Installation requirements for the site of installation installation procedure relocation procedures and installation of accessories Chapter 5 Maintenance and Inspection periodically replaced parts consumables and durables tables scheduled servicing chart Chapter 6 Troubleshooting standards adjustments arrangement of electric...

Page 5: ...R105 5 Side Paper Deck N1 6 Finisher K1N K2N 7 DADF J1 standard 8 Trimmer A1 9 Puncher Unit E1 E2 10 Stapler G1 Stapler H1 11 Stapler Cartridge H1 12 Card Reader D1 13 Original Holder D1 14 Index Paper Attachment A1 15 FL Cassette P4 16 Network LIPS Printer Kit 17 NE Controller A1 Copy Data Control ler B1 B2 Copy Data Controller A1 18 Stapler D2 Not all products are necessarily available in all sa...

Page 6: ... plug before disassembly work in addition keep the following in mind 1 If you turn off the main power switch while the printer function is in use the data being processed can be lost Check to make sure that the Operation Memory lamp on the control panel is off before operating the main power switch 2 Do not turn off the main power switch while downloading is taking place otherwise the machine may ...

Page 7: ... long as the machine is used for its in tended functions 4 2 CDRH Ordinances The Center for Devices and Radiological Health CDRH of the US Food and Drum Ad ministration put into force ordinances related to laser products on August 2 1976 These ordinances apply to laser products manufactured on and after August 1 1976 and sale of laser products is prohibited within the US unless they bear a certifi...

Page 8: ...0 2000 CANON iR105 REV 0 JULY 2001 vi F00 402 01 The description may vary from model to model CANON MANUFACTURED 30 2 SHIMOMARUKO 3 CHOME OHTAKU TOKYO 146 JAPAN THIS PRODUCT CONFORMS WITH CQRH RADIATION PERFORMANCE STANDARD 21CFR CHAPTER 1 SUBCHAPTER J ...

Page 9: ...e screwdriver into the laser path Take such precautions as removing the watch and rings before starting the work to pre vent reflection of laser light to the eye The machine s laser light is red and covers that can reflect laser light are identified by the following label Take full care whenever servicing areas of the machine behind these covers This label is attached to all covers inside the mach...

Page 10: ...ATION WHEN OPEN AND INTERLOCKS DEFEATED AVOID DIRECT EXPOSURE TO BEAM ATTENTION RAYONNEMENT LASER DANGEREUX EN CAS D OUVERTURE ET LORSQUE LA SƒCURITƒ EST NEUTRALISƒE EXPOSITION DANGEREUSE AU FAISCEAU VORSICHT LASERSTRAHLUNG WENN ABDECKUNG GE FFNET UND SICHERHEITSVERRIEGELUNG BERBR CKT NICHT DEM STRAHL AUSSETZEN PRECAUCION RADIACION LASER EN EL INTERIOR CIERRE SELLADO EVITE LA EXPOSICION AL HAZ EN ...

Page 11: ...dyes If your skin or clothes have come into contact with toner try removing as much of it as possible with dry paper tissues and wash off with water Do not use warm water as it would turn the toner jelly like and become fused with the fibers of the fabric In addition avoid bringing toner into contact with plastic material as it tends to dissolve easily Do not throw toner into fire to avoid explosi...

Page 12: ... Wiring Diagram of the Major PCBs 2 2 2 Original Exposure System 2 3 2 1 Outline of the Original Exposure System 2 3 2 2 Changes Made to the Original Exposure System 2 4 2 3 Enlargement Reduction 2 5 2 4 Preventing Overheating of the Scanner Motor 2 6 2 5 Arrangement of PCBs 2 7 2 6 Stabilizing the Scanning Lamp 2 8 2 7 Detecting the State open closed of the ADF 2 8 2 8 Detecting Dust in Stream Re...

Page 13: ...e Pickup Assembly 2 94 6 6 3 Vertical Path Roller Assembly 2 96 6 6 4 Registration Feed Assembly 2 99 6 6 5 Duplex Unit 2 100 6 6 6 Others 2 103 7 Fixing System 2 105 7 1 Outline of the Fixing System 2 105 7 2 Changes Made to the Fixing System 2 107 7 3 Fixing Temperature Control 2 109 7 4 Transparency Mode 2 110 7 5 Thick Paper Mode 2 111 7 6 Power Save Mode 2 112 7 7 Detecting an Error 2 113 7 8...

Page 14: ... T BIC 3 9 2 2 7 Binary dither screen method 3 10 2 3 Controlling the Image Memory 3 10 2 3 1 Compression Expansion Rotation and Enlargement Reduction 3 10 2 3 2 SDRAM 3 10 2 4 Output Image Processing 3 11 2 4 1 Smoothing 3 11 2 4 2 Thickening PDL output only 3 11 2 4 3 Binary Binary Conversion read image output only 3 11 3 Soft Counters 3 12 4 Controlling the Power Supply 3 14 4 1 Outline 3 14 4 ...

Page 15: ... A1 NE Controller B1 Copy Data Controller A1 4 46 5 1 Installing the NE Controller A1 NE Controller B1 Copy Data Controller A1 4 46 CHAPTER 5 MAINTENANCE AND INSPECTION 1 Periodically Replaced Parts 5 1 2 Guide to Replacement of Durables 5 3 2 1 Copier 5 3 2 2 Side Paper Deck 5 7 3 Scheduled Service Chart 5 8 4 Scheduled Service Items 5 12 4 1 Copier 5 12 4 2 Scheduled Service Work 5 16 4 2 1 Work...

Page 16: ...anual Feed Tray 6 25 2 4 9 Locations of the Solenoid 6 26 2 4 10 Location of the Fixing Web Solenoid SL2 6 27 2 4 11 Position of the Delivery Flapper Solenoid SL3 6 29 2 4 12 Position the Fixing Feeder Unit Locking Solenoid SL4 6 30 2 4 13 Position of the Multifeeder Latch Solenoid SL6 6 31 2 4 14 Position of the Deck right Pickup Solenoid SL7 6 32 2 4 15 Position of the Deck Left Pickup Solenoid ...

Page 17: ... 2 Sample Faulty Images 6 70 3 3 Troubleshooting Image Faults 6 71 3 3 1 The output is too light halftone area 6 71 3 3 2 The output is too light solid black area 6 72 3 3 3 The output is too light overall considerably 6 72 3 3 4 The output has uneven density darker at the front 6 74 3 3 5 The output has uneven density lighter at the front 6 74 3 3 6 The output is foggy overall 6 75 3 3 7 The outp...

Page 18: ...31 E218 6 104 4 1 32 E219 6 105 4 1 33 E220 6 105 4 1 34 E222 6 105 4 1 35 E226 6 105 4 1 36 E240 6 105 4 1 37 E241 6 106 4 1 38 E243 6 106 4 1 39 E251 6 106 4 1 40 E302 6 107 4 1 41 E315 6 107 4 1 42 E320 6 107 4 1 43 E400 6 108 4 1 44 E402 6 108 4 1 45 E404 6 110 4 1 46 E405 6 111 4 1 47 E410 6 112 4 1 48 E422 6 113 4 1 49 E601 6 114 4 1 50 E602 6 114 4 1 51 E676 6 115 4 1 52 E677 6 115 4 1 53 E...

Page 19: ...ght left 6 139 4 1 90 The Add Paper message fails to go OFF cassette 3 4 6 139 4 1 91 The fixing heater fails to operate 6 140 4 1 92 Pickup fails side paper deck 6 141 4 1 93 The deck lifter fails to move up side paper deck 6 142 5 Troubleshooting Feeding Problems 6 143 5 1 Copy Paper Jams 6 143 5 1 1 Pickup Assembly 6 144 5 1 2 Separation Feeding Assembly 6 145 5 1 3 Fixing Assembly Delivery Ass...

Page 20: ...ing Preparations 6 202 8 2 2 Making Connections 6 202 8 2 3 Backing Up Data 6 203 8 2 4 Downloading Backup Data 6 208 8 2 5 Managing Backup Data 6 212 ERROR CODE 1 Error Codes E 1 APPENDIX 1 GENERAL TIMING CHART A 1 2 LIST OF SIGNALS ABBREVIATIONS A 3 3 GENERAL CIRCUIT DIAGRAM A 7 4 Special Tools Table A 11 5 Solvents Oils A 14 SERVICE MODE 1 Construction of Service Mode S 1 1 1 Outline S 1 1 2 St...

Page 21: ...COPYRIGHT 2001 CANON INC 2000 2000 2000 2000 CANON iR105 REV 0 JULY 2001 CHAPTER 1 INTRODUCTION ...

Page 22: ...machine uses an iR controller mounted on the main controller for parallel pro cessing of multiple tasks thereby ensuring highly efficient control and extremely high speed data processing The machine comes with a built in large capacity of hard disk 10 GB When used as image memory it enables memory sorting The Box function makes storage of large volumes of data possible 1 4 Ease of Operation The la...

Page 23: ... use c Punching A sheet of paper may be punched to open 2 3 or 4 holes and delivered with a Fin isher K2N or Saddle Finisher K3N K4N and Puncher Unit E1 F1 in use Memo Finisher K2N 2 3 holes Saddle Finisher K3N 2 3 holes Saddle Finisher K4N 4 holes d Folding A sheet of paper may be folded into a Z and delivered with a Paper Folding Unit C1 in use e Trimming A booklet which is produced by a Saddle ...

Page 24: ...Corona Exposure Twin laser unit Copy density adjustment Auto or manual 9 settings Development Dry 1 component toner projection Retard center reference Pickup Paper deck 2 cassettes right deck left deck Cassette 2 cassettes cassette 3 caste 4 Manual feed tray 5 5 mm deep approx about 50 sheets of 80 g m2 paper Transfer Corona post charging exposure ON for Jpn OFF for non Jpn Separation Electrostati...

Page 25: ...e 6 min or less at 20 C room temperature rated input First copy time 4 1 sec or less stream reading right deck pick up selected manually Direct A4 LTR non AE straight delivery fluorescent lamp pre activation ON 2 9 sec or less book mode right deck pickup selected manually 1 origi nal Direct A4 LTR non AE straight delivery fluores cent lamp pre activation ON Continuous reproduction 1 to 999 pages S...

Page 26: ...o 200 g m2 A4 B5 LTR 3 hole paper horizontal feed restrictions on orientation LTR Cassette 3 pick up Plain paper 64 to 80 g m2 Cassette 4 pick up A3 B4 A4 B5 A4R B5R A5R 279 4 431 8 mm 11 17 LGL LTR LTRR STMTR Recycled paper 64 to 80 g m2 A3 B4 A4 B5 A4R B5R A5R 279 4 431 8 mm 11 17 LGL LTR LTRR STMTR Eco paper 80 g m2 A3 A4 A4R Colored paper recommended type B4 A4 A4R Thick paper 90 to 200 g m2 A...

Page 27: ...4 A4 B5 A4R B5R A5R 279 4 431 8 mm 11 17 LGL LTR LTRR STMT vertical feed Eco paper 80 g m2 A3 A4 A4R Tracing paper free of curl and adhesion A3 B4 A4 B5 A4R B5R Transparency recommended type horizontal feed mirror image straight delivery A4 A4R LTR LTRR Colored paper recommended type B4 A4 A4R Postcard horizontal feed 4 piece postcard pad Label paper recommended type B4 A4 A4R LTR LTRR Thick paper...

Page 28: ...4 B5 A4R B5R A5R 279 4 431 8 mm 11 17 LGL LTR LTRR STMT vertical feed Eco paper 80 g m2 A3 A4 A4R Tracing paper free of curl and adhesion A3 B4 A4 B5 A4R B5R Transparency recommended type horizontal feed mirror image straight delivery A4 LTR Colored paper recommended type B4 A4 A4R Postcard horizontal feed 4 piece postcard pad Lavel paper recommended type B4 A4 A4R LTR LTRR Thick paper 90 to 200 g...

Page 29: ...per recommended type B4 A4 A4R Postcard horizontal feed 4 piece postcard pad Label paper recommended type B4 A4 A4R LTR LTRR Thick paper 90 to 200 g m2 A3 B4 A4 B5 A4R B5R LTR LTRR 3 hole paper horizontal feed LTR Index paper from cassette A4 LTR Double sided Auto mode Plain paper 64 to 80 g m2 A3 B4 A4 B5 A4R B5R A5R 279 4 431 8 mm 11 17 LGL LTR LTRR STMT vertical feed Recycled paper 64 to 80 g m...

Page 30: ...A3 B4 A4 B5 A4R B5R A5R 279 4 431 8 mm 11 17 LGL LTR LTRR STMT vertical feed Recycled paper 64 to 80 g m2 A3 B4 A4 B5 A4R B5R A5R 279 4 431 8 mm 11 17 LGL LTR LTRR STMT vertical feed Eco paper 80 g m2 A3 A4 A4R Colored paper recommended type B4 A4 A4R Postcard horizontal feed 4 piece postcard pad Thick paper 90 to 200 g m2 A3 B4 A4 B5 A4R B5R LTR LTRR 3 hole paper horizontal feed LTR LTRR ...

Page 31: ...2 5 1 5 mm on left 0 5 mm or more Auto clear Yes 2 min standard may be changed between 0 and 9 min in 1 min incre ments Auto power off No Power save mode Low power mode Yes 15 min standard may be changed in user mode 10 15 20 30 40 50 60 90 min 2 3 4 hr Auto sleep Yes 60 min standard may be changed in user mode 10 15 20 30 40 50 60 90 min 2 3 4 hr Power save mode Yes 10 standard may be changed in ...

Page 32: ...08 V 230 V 3 0 kw or less Noise In operation 78 dB or less In standby 55 dB or less Ozone Initial 0 02 ppm or less avr 0 05 ppm or less max Later after 250 000 pages 0 05 ppm or less avr 0 10 ppm or less max Dimensions 764 W 795 D 1395 H mm approx Weight 280 kg approx including ADF Consumables Paper Keep wrapped to protect against humidity storage Toner Avoid direct sunlight and keep under 40 C 85...

Page 33: ...N Direct A3 297 420 mm A3 50 A4 210 297 mm A4 105 B4 257 364 mm B4 57 B5 182 257 mm B5 105 A4R 297 210 mm A4R 72 B5R 257 182 mm B5R 84 A5R 210 148 mm A5R 105 Reduce II 50 0 A3 A5R A5R 105 III 61 1 A3 B5R B5R 84 IV 70 7 B4 B5R B5R 84 A3 A4R A4R 72 V 81 6 B4 A4R A4R 72 B5R A5R A5R 105 VI 86 5 A4 B5 B5 105 A3 B4 B4 57 Enlarge IV 200 0 A5R A3 A3 50 III 141 4 A4R A3 A3 50 B5R B4 B4 57 II 122 4 A4R B4 B...

Page 34: ...largement reduction Size Paper size Copies min 1 to N Direct 279 4 431 8 mm 279 4 431 8 mm 49 11 17 11 17 LTR LTR 105 LGL LGL 59 LTRR LTRR 77 STMTR STMTR 105 Reduce II 50 0 279 4 431 8 mm STMTR 105 11 17 STMTR III 64 7 279 4 431 8 mm LTRR 77 11 17 LTRR IV 73 3 279 4 431 8 mm LGL 59 11 17 LGL V 78 6 LGL LTRR LTRR 77 Enlarge III 200 0 STMTR 279 4 431 8 mm 49 279 4 431 8 mm 11 17 11 17 II 129 4 LTRR ...

Page 35: ...o 80 g m2 A4 B5 LTR Eco paper 80 g m2 A4 Tracing paper A4 B5 Colored paper recommended type A4 Thick paper 90 to 200 g m2 A4 B5 LTR 3 hole paper horizontal feed restrictions on orientation LTR Stack height 385 mm approx about 3 500 sheets of 80 g m2 paper about 4 000 sheets of 64 g m2 paper Serial number XCB A4 XCE LTR Paper size switch by switching size guide plate multiple settings and size in s...

Page 36: ...External View 1 ADF 2 Original delivery tray 3 Main power switch 4 Control panel power switch 5 Manual feed tray 6 Vertical path cover upper 7 Vertical path cover lower 8 Waste toner box drum protection sheet case 9 Right deck 10 Left deck 11 Cassette 3 12 Cassette 4 13 Front cover 1 2 3 4 5 6 7 8 9 12 11 10 13 F01 301 01 ...

Page 37: ...CTION 1 16 1 Copyboard glass 2 Control panel 3 Grip drum rotation stopper case 4 Service Book Case 5 Feeding assembly releasing lever 6 Cover switch assembly 7 Delivery cover 8 Parallel connector 9 Heater switch 10 Leakage breaker 1 2 3 4 5 6 7 8 9 10 9 Detail view of 9 and 10 10 F01 301 02 ...

Page 38: ...COPYRIGHT 2001 CANON INC 2000 2000 2000 2000 CANON iR105 REV 0 JULY 2001 CHAPTER 1 INTRODUCTION 1 17 Blank page ...

Page 39: ...2000 2000 2000 2000 CANON iR105 REV 0 JULY 2001 CHAPTER 1 INTRODUCTION 1 18 3 2 Cross Section F01 302 01 1 34 35 36 37 38 39 40 41 42 43 44 14 15 16 17 18 19 21 22 23 24 25 26 27 28 29 30 31 32 33 2 5 3 4 6 7 8 9 10 11 12 13 20 ...

Page 40: ...er 19 Manual feed separation roller 20 Pre transfer exposure LED 21 Registration roller 22 Transfer charging assembly 23 Separate charging assembly 24 Right deck pickup roller 25 Right deck feeding roller 26 Right deck separation roller 27 Right deck 28 Cassette 3 pickup roller 29 Cassette 3 feeding roller 30 Cassette 3 separation roller 31 Cassette 4 pickup roller 32 Cassette 4 feeding roller 33 ...

Page 41: ...ol panel power switch It is turned on when the main power switch is turned on to end power save mode low power mode or sleep mode turn on the control panel power switch 3 Display Contrast 1 2 3 C 4 5 6 7 8 9 0 Reset Additional Functions Stop Start Guide Counter Check ID Energy Saver Power Processing Data Clear Error ON OFF 1 2 1 Control panel power switch 2 Main power lamp 3 Main power switch F01 ...

Page 42: ...nter Check Additional Functions Display Contrast 1 2 3 4 5 7 8 9 10 11 12 13 14 15 6 16 1 Control panel power switch 2 Reset key 3 Power Save key 4 Main power lamp 5 Stop key 6 Start key 7 Error lamp 8 Operation Memory lamp 9 Clear key 10 Keypad 11 ID key 12 User Mode key 13 Guide key 14 Image contrast dial 15 Counter Check key 16 Touch panel display Indicates the readings of counters on the touch...

Page 43: ...into 2 or 4 parts for copying on paper of a specified size Bind Margin Use it to create a margin of a specified size on the edge of the copy as binding margin left right top bottom Mixed Sizes Use it when using originals of different sizes in an ADF for printing according to each size The originals must however be of the same length on one side e g A3 and A4 or b4 and B5 Continuous Reading Use it ...

Page 44: ... On Off Set Device as the default screen for Sys tem Monitor On Off Initial Function Selected Function Entry Tone Error Tone Job Done Tone for each On Off On Off 208V model On Off Copy Printer Mail Box Other Bypass On Off each cassette On Off Consider Paper Type On Off Paper Deck left right Side Paper Deck Plain Recycled Color Heavy Tracing Pa per Cassette 3 4 Plain Recycled Color Heavy Tracing Pa...

Page 45: ...t Bot tom Left Top Right Bottom Right Double left right with Finisher K2N Saddle Finisher K3N K4N installed non sort Collate Offset Collate Group Offset Group Staple corner Top Left Bot tom Left Top Right Bottom Right Double left right Hole Punch with Saddle Finisher K3N K4N Paper Folding Unit C1 installed non sort Collate Offset Collate Group Offset Group Staple corner Top Left Bot tom Left Top R...

Page 46: ...x Set Store Photo Mode Standard Scan Settings User s Data List Time Zone GMT 12 00 to GMT 12 00 Daylight Saving Time On Off 10 15 20 30 40 50 min 1 hr 90 min 2 to 4 hr 1 hr increments 0 1 to 9 min 1 min increments 2 min 0 1 to 9 min 1 min increments 1 min Sun Mon Tue Wed Thu Fri Sat 10 15 20 30 40 50 min 1 hr 90 min 2 to 4 hr 1 hr increments X Y each 1 0 to 1 0 in 0 1 incre ments 0 Start position ...

Page 47: ...Manager E mail Address Contact Information Comment On Off Store Dept ID Password Print Totals Ac cept Jobs With Unknown ID On Off Device name Location TCP IP Settings IP Address Setting DNS Server Setting PING Command WINS Configuration LPD Banner Page NetWare Setting Use NetWare On Off AppleTalk Setting Use AppleTalk On Off SMB Setting Server Printer Workgroup Comment LM Announce On Off On Off St...

Page 48: ...COPYRIGHT 2001 CANON INC 2000 2000 2000 2000 CANON iR105 REV 0 JULY 2001 CHAPTER 2 NEW FUNCTIONS ...

Page 49: ... against overheating Pickup Feeding System GP605 iR600 based Supports higher speed Supports index paper Fixing System Fixing roller diameter φ 60 upper φ 50 lower 188ºC temperature control 200V model 198ºC temperature control 208V 230V model curl reduction Externals Auxiliary Control System Color 1 1VGA control panel GP605 iR600 based Laser Exposure System Image Formation System GP605 iR600 based ...

Page 50: ...aser driver PCB 1 Pixel line conversion PCB J507 J526 J510 J516 J516 J516 BD PCB AC driver PCB Main power switch J505 J519 J1551 J1022 J1017 J1024 J105 J1452 J1451 J3701 J1532 J1530 J1022 J1020 J1712 J1718 J1716 J1726 J1701 J701 J1706 J782 J781 J783 J1014 J1015 J9201 J1104 J9202 J1107 J1108 J1502 J1503 J802 J1002 J1102 J1901 J1103 J1109 J1109 J1018 J6801 J6602 J6601 J6605 J6807 J6806 J6805 J6802 J...

Page 51: ...the Original Exposure System The major changes made to the original exposure system are as follows Enlargement Reproduction 4 channel high speed reading CCD see discussions of image processing system CCD adjustment see discussions of image processing system PCB arrangement ADF mechanism new For others see T02 202 01 for a table of differences ...

Page 52: ...tion In the GP605 iR600 scanner 2 3 Enlargement Reduction between 25 and 400 enlargement reduction only Reader unit Added a scanner motor fan To prevent overheating of the scanner motor 2 4 Preventing Overheating of the Scanner Motor Added a transformer PCB To ensure stable inverter power 2 6 Stabilizing the Scanning Lamp Reader controller Located the reader controller PCB where the image 2 5 Arra...

Page 53: ... with the ADF in use is in stream reading however fixed reading is used for reduction between 25 and 49 9 and for all ratios in double sided mode and in book mode The digital method of enlargement reduction is used for the following for fixed reading if between 25 and 49 9 for stream reading if between 25 and 84 9 Change Scanning speed at 100 copying Enlargement reduction according to range GP605 ...

Page 54: ...an to prevent overheating of the scanner motor 1 Scanner motor cooling fan 2 Scanner motor F02 204 01 The scanner motor cooling fan is driven in fixed reading mode under the following condi tions to cool the scanner motor Operating mode Fan rotation control In stream reading mode and standby Stop Between 60 and 68 9 reduction and fixed reading Full speed Other than above in fixed reading Half spee...

Page 55: ... unit are arranged as follows 1 Transformer PCB 2 Light adjustment control PCB 3 Fluorescent lamp inverter PCB 4 Scanner motor driver PCB 5 Original orientation detection PCB 6 Reader controller PCB 7 Laser scanner motor driver PCB 8 CCD AP PCB The reader controller PCB is located where the image processor PCB was found F02 205 01 4 3 2 1 5 6 8 7 ...

Page 56: ...en closed of the ADF If for some reason the state of the ADF sensor cannot be checked detection will be based solely on the state of the sensor in the machine as in the case of the GP605 iR600 F02 207 01 When the ADF Is Opened When the ADF is opened the ADF side sensor goes ON as soon as it is opened 5 or higher 1 causing the machine to assume that the ADF has been opened and that the origi nal ha...

Page 57: ...00 is designed assuming that the ADF is fully closed 3 sec after the machine side sensor is ON It compares the sates of the original size sensors when the machine side sensor goes ON and 3 sec thereafter to identify the size of the original on the copyboard glass If the user there fore does not close the ADF within 3 sec after the machine side sensor goes ON the GP605 iR600 can wrongly identify th...

Page 58: ...the ma chine moves the ADF belt idly when stream reading is selected and identifies any black line as an area of dust When it detects dust it resets the current point of stream reading and uses the point of reference on the leftmost edge for dust detection if dust is detected it moves the point of stream reading to the right by 1 point 0 5 mm for detection of dust for a second time If dust is not ...

Page 59: ...d the machine will not execute dust detection at the end of a job If the ongoing job is cancelled it will execute dust detection at the end of operation F02 208 02 For the following the machine can indicate the cleaning message in the ab sence of dust on the glass The ADF feeding belt is appreciably soiled CCD ADJ LUT ADJ is not executed correctly If the message appears clean the belt using alcoho...

Page 60: ... reversing the steps used to disassemble it 3 Identify the screws by type length diameter and location 4 To protect against static charges one of the mounting screws of the rear cover comes with a toothed washer Be sure not to leave out the washer when assembling the ma chine 5 To ensure electrical continuity the mounting screw for the grounding wire and the varis tor comes with a washer Be sure n...

Page 61: ... Base Assembly a Remove the Scanning Lamp Scanning Lamp Heater 1 Remove the 2 screws 1 and detach the right glass retainer 2 2 Shift the copyboard glass 3 to the right to detach then detach the scan ning lamp cover 4 F02 209 01 3 Remove the 4 screws 1 and detach the original lamp inside cover 2 F02 209 02 3 2 1 4 2 1 1 ...

Page 62: ...2 and detach the anti reflection plate 3 When moving the mirror base be sure not to touch the mirror or the lamp or impose force on them to avoid dirt or damage F02 209 03 When mounting the anti reflec tion plate be sure to fit the plate firmly in the cut in 2 at front 3 at rear of the No 1 mirror base Also be sure that the con nector in step 5 is firmly to the anti reflection plate F02 209 04 F02...

Page 63: ... 2 15 5 Disconnect the connector 1 and re move the 2 screws 2 then detach the scanning lamp 4 from the electrode plate front 3 F02 209 06 6 Remove the scanning lamp 1 w scan ning heater to the front F02 209 07 7 Detach the scanning lamp heater 1 from the scanning lamp 2 F02 209 08 4 2 1 2 3 1 2 1 ...

Page 64: ...ounting the scanning lamp to the machine be sure not to touch the light opening 5 F02 209 09 c When Replacing the Scanning Lamp 1 Check to make sure that the Execute Memory lamp in the control panel is OFF and turn off the main power switch 2 Disconnect the power plug from the power outlet The machine remains powered as long a the power plug is connected Be sure to disconnect the power plug from t...

Page 65: ...ess band 1 6 Remove the 2 screws 2 and detach the rear over support plate 3 F02 209 10 7 Remove the right pocket plate 3 screws 8 Lift the upper rear cover 1 and re move the 2 screws 2 then detach the DF connector unit 3 F02 209 11 9 Disconnect the connector 1 and free the harness from the 2 edge saddles 2 10 Remove the 3 screws 3 and detach the scanner motor 4 REF When mounting it be sure to set ...

Page 66: ...ioning tool FY9 3040 on hand 1 Remove the ADF 2 Remove the copyboard glass see 2 9 1 a 3 Remove the upper front cover unit Se 8 4 1 g 4 Remove the inverter unit See 2 9 3 b 5 Move the No 1 mirror case where the cable fixing 1 of the base is visible from the opening in the side plate of the machine When moving the mirror base be sure not to touch the mirror or the lamp or impose force to avoid dirt...

Page 67: ...ULY 2001 CHAPTER 2 NEW FUNCTIONS 2 19 6 Fit the scanner cable on the pulley and the hook as indicated F02 209 15 Tighten temporarily Wind 7 times Steel ball Put the steel ball in the hole of the pulley Wind the cable so that the gap if any is minimum 5 4 3 8 1 2 6 7 ...

Page 68: ...ANON iR105 REV 0 JULY 2001 CHAPTER 2 NEW FUNCTIONS 2 20 7 Fit the mirror positioning tool 1 be tween the No 1 mirror base and the No 2 mirror base then fit the pin 2 at tached to the mirror positioning tool front F02 209 16 rear F02 209 17 1 2 1 2 ...

Page 69: ...HAPTER 2 NEW FUNCTIONS 2 21 8 Secure the cable fixing 1 that was temporarily fixed in place in step 6 by tightening the 2 screws 2 from the opening in the side plate front F02 209 18 rear F02 209 19 9 Detach the mirror positioning tool 10 Reverse steps 1 through 4 2 2 1 1 2 2 ...

Page 70: ...f the flexible cable un less you are replacing the No 1 mirror base Clean the mirror without detaching the cable 1 Remove the right glass retainer 2 screws 2 Remove the copyboard 3 Move the No 1 mirror base 1 to the center When moving the mirror base be sure not to touch the mirror or the lamp or impose force to avoid dirt or damage F02 209 20 4 Peel off the Warning label 1 from the flexible cable...

Page 71: ... 209 22 6 Using a small screwdriver 1 push the 2 protrusions 3 used to hook the flex ible cable 2 to disconnect the cable from the connector When mounting it butt and keep the flexible cable against the rearmost and push in the fixing plate while holding it level When pushing in the fixing plate take care not to touch the reflecting plate F02 209 23 1 2 before freeing 2 after freeing 1 2 3 3 ...

Page 72: ...oving the Light Adjustment PCB 1 Remove the copyboard glass 2 Remove the screw 1 from the No 1 mirror base assembly then while push ing down the claws 2 detach the light adjustment PCB holder F02 209 24 3 Disconnect the connector J165 1 and remove the screw 2 then detach the light adjustment PCB 3 F02 209 25 2 1 1 2 3 ...

Page 73: ...the rear cover See 8 4 1 e 2 Remove the rear upper cover 2 screws 3 Remove the inverter cooling fan duct See 8 4 3 h 4 Remove the 2 screws 1 and discon nect the 7 connectors 2 F02 209 26 5 Free the left and right hooks 2 1 pc each on the mounting plate of the in verter unit 1 and detach them upward F02 209 27 1 2 2 2 2 1 A 2 1 View from A ...

Page 74: ...28 c Removing the Transformer Unit 1 Remove the rear cover See 8 4 1 e 2 Remove the rear upper cover 2 screws and remove the upper left cover 3 screws 3 Remove the inverter cooling fan duct See 8 4 3 h 4 Remove the 2 screws 1 and free the reader controller communication cable 2 from the wire saddle 3 then de tach the transformer unit 4 F02 209 29 1 1 2 1 1 2 3 4 1 ...

Page 75: ...4 screws 2 then detach the transformer PCB 3 F02 209 30 e Removing the Reader Controller PCB 1 Remove the original size sensor See 2 9 4 a b 2 Remove the reader controller cover See 2 9 4 h 3 Disconnect all connectors on the Reader Controller PCB 4 Disconnect the DDIS cable 1 and the 2 flexible cables 2 then remove the 9 screws 3 and the stepped screw 4 to detach the reader controller PCB 5 in the...

Page 76: ...e machine and connect the power plug to the power outlet then turn on the main power switch 6 Execute the following in service mode COPIER FUNCTION CLEAR R CON 7 Turn off and then on the main power switch 8 Execute the following in service mode COPIER FUNCTION CCD CCD ADJ 9 Enter the settings printed out in step 1 for the following service mode COPIER ADJUST ADJ XY 4 items COPIER ADJUST LAMP 1 ite...

Page 77: ...ors of the reader controller PCB DDIS cable and 2 flexible cables 3 Remove the 8 screws 1 and detach the reader controller PCB unit 2 F02 209 33 2 9 4 Others a Removing the Original Size Sensor 1 2 1 Remove the copyboard glass See 2 9 1 a 2 Move the No 1 mirror base to the right edge 3 Remove the 2 screws 1 and discon nect the connector 2 then detach the original size sensor unit front 3 F02 209 3...

Page 78: ...he connector 1 1 pc each and detach the original size 1 2 2 F02 209 35 b Removing the Original Size Sensor 3 4 1 Remove the copyboard glass See 2 9 1 a 2 Move the No 1 mirror base to the left edge 3 Remove the screw and disconnect the connector 2 then detach the original size sensor unit rear 3 F02 209 36 2 2 1 1 2 3 ...

Page 79: ...e connector 1 1 pc each and detach the original size sen sor 3 4 2 F02 209 37 c Removing the Scanner Home Position Sensor 1 Remove the transformer unit See 2 9 3 c 2 Free the harness from the wire saddle 1 then disconnect the connector 2 remove the screw 3 and detach the sensor mounting plate 4 F02 209 38 2 1 1 2 3 4 ...

Page 80: ...nect the connector 1 and re move the screw 2 then detach the scanner home position sensor 3 F02 209 39 d Removing the Copyboard Glass Sensor 1 Remove the transformer unit See 2 9 3 c 2 Free the harness from the wire saddle 1 and remove the screw 2 then de tach the sensor mounting plate 3 F02 209 40 3 2 1 2 1 3 ...

Page 81: ...nnect the connector 1 and de tach the copyboard glass sensor 2 F02 209 41 e Removing the Image Leading Edge Sensor 1 Remove the transformer unit See 2 9 3 c 2 Free the harness from the wire saddle 1 then disconnect the connector 2 remove the screw 3 and detach the sensor mounting plate 4 F02 209 42 1 2 1 2 3 4 ...

Page 82: ...ve the screw 2 and detach the image leading edge sensor 3 F02 209 43 f Removing the Standard White Plate 1 Remove the copyboard glass See 2 9 1 a 2 Remove the small cover 1 for the stan dard white plate with a flat blade screw driver F02 209 44 3 Remove the 2 screws 1 and detach the standard white plate cover 2 F02 209 45 3 2 1 1 1 1 2 ...

Page 83: ...ower outlet The machine remains powered as long as its power plug is connected Be sure to disconnect the power plug from the power outlet 3 Replace the standard white plate 4 Assemble the machine and connect the power plug then turn on the main power switch 5 Execute the following in service mode in sequence 1 COPIER FUNCTION CCD CCD ADJ 2 COPIER FUNCTION CCD LUT ADJ 6 Inplement the service mode d...

Page 84: ...r Controller Cover 1 Remove the original size sensor unit rear See 2 9 4 b 2 Remove the 2 screws 1 and detach the flexible cable 2 together with the cover sheet 3 3 Disconnect the flexible cable 2 from the connector 4 F02 209 47 4 Remove the 6 screws 1 and detach the reader controller cover 2 F02 209 48 2 3 1 4 1 1 1 1 2 1 ...

Page 85: ...ustment AE executed for each single line in main scanning direction The following is the functional construction of the image processing system F02 301 01 Each PCB of the image processing system has the following functions 1 CCD AP PCB CCD drive analog image processing A D conversion 2 Reader Controller PCB shading correction auto density adjustment AE image data conversion 4 channels 2 channels C...

Page 86: ...hapter 3 Main Controller HDD Changed the HDD capacity to 10 GB To enhance image processing performance In the GP605 iR600 2 GB Binary processing Used the TBIC method as the error diffusion method for To enhance image processing performance In the GP605 iR600 Chapter 3 Main Controller text text photo print photo modes the R ED method Made to use 141 lines for the dither screen method for To enhance...

Page 87: ...ed for reading by half and ultimately enabling high speed reading The image data is divided into 4 channels first half even numbered pixels first half odd numbered pixels last half even numbered pixels and last half odd numbered pixels The following diagram shows how CCD data is transferred F02 303 01 Direction of charge transfer Direction of charge transfer Direction of charge transfer Direction ...

Page 88: ...service mode thereby making the gain around the joint between first half and lat half virtually the same The parameters that occur after adjustment will all be stored in the S RAM on the reader controller PCB The following three methods may be used for adjustment A COPIRE FUNCTION CCD CCD ADJ shading auto correction Use it to execute shading corretion for the CCD same as the GP605 iR600 B COPIRE F...

Page 89: ...ive control Reader controller PCB 10bit J1502 J1501 J1107 J1102 10 10 10 CCD control signal A12V A5V Gain offset correction data 2 1 1 2 Analog signal processing block Gain correction Offset correction A D conversion A D conversion 3 4 5 6 7 8 4 3 1 1st half even numbered pixel analog image signal 2 1st half odd numbered pixel analog image signal 3 2nd half even numbered pixel analog image signal ...

Page 90: ... EEP ROM SRAM CPU IC CCD AP PCB Reader controller PCB 10bit 10 10 10 8bit 8 Target value J1502 J1107 J1103 J1901 1 2 Main controller PCB Original orientation detection PCB 5 6 3 4 Shading correction Auto density correction AE Pixel data conversion from 4 channel to 2 channel Dust detection IC 1 1st half even numbered pixel digital image signal 2 1st half odd numbered pixel digital image signal 3 2...

Page 91: ... margin position stapling position layout orientation for reduced page composition As needed the machine rotates the image thereby reducing waste of paper The time it saves from not having to detect the orientation of all originals also helps increase its produc tivity F02 307 01 Reader controller PCB Flash ROM Text area extraction block Text data storage block Text direction identification block ...

Page 92: ...reversing the steps used to disassemble it 3 Identify the screws by type length diameter and location 4 To protect against static charge one of the mounting screws of the rear cover comes with a toothed washer Be sure not to leave out the washer when assembling the ma chine 5 To ensure electrical continuity the mounting screw for the grounding wire and the varis tor comes with a washer Be sure not...

Page 93: ...he reader controller cover See 2 9 4 h 2 Free the front rear claw 2 of the CCD cover 1 and detach the CCD cover F02 308 01 3 Remove the fixing screw 1 spring 2 and spring plate 3 and disconnect the connector 3 locations then discon nect the 2 flat cables 5 from the reader controller PCB and detach the CCD unit 6 F02 308 02 1 2 6 5 4 1 2 3 1 2 3 1 2 3 ...

Page 94: ...et 3 Replace the CCD unit 4 Assemble the machine and connect the power plug to the power outlet then turn on the main power switch 5 Execute the following in service mode in sequence 1 COPIER FUNCTION CCD CCD ADJ 2 COPIER FUNCTION CCD LUT ADJ 6 All items of the following will be updated record them on the service label COPIER ADJUST CCD COPIER ADJUST LAMP L DATA 7 Turn off and then on the main pow...

Page 95: ...F F02 308 04 9 Execute the following in service mode to print out a service label and store away the service label in the service book case 3 8 2 Hard Disk as Hard Disks are susceptible to vibration handle with care a Removing the Hard disk 1 Remove the main control box 2 Remove the 5 screws 1 and detach the cover 2 F02 308 05 C 2 1 1 1 ...

Page 96: ... detach the hard disk cover 2 F02 308 06 4 Remove the 3 screws 1 and detach the lower cover plate 2 F02 308 07 5 Remove the 4 screws 1 disconnect the 2 connectors 2 and remove the mounting screws 4 of the grounding wires 3 then detach the hard disks 5 together with the mounting base F02 308 08 2 1 1 1 1 2 1 1 5 4 1 2 3 4 1 2 3 1 ...

Page 97: ...nst static charges to protect against static damage 2 Do not subject the hard disk unit to impact 1 Replace the hard disk unit 2 Assemble the machine and connect the power plug to the power outlet 3 Connect a PC to which the Service Support Tool has been installed 4 Turn on the PC and turn on the main power switch while pressing 2 and 8 in the con trol panel at the same time 5 Using the Service Su...

Page 98: ...COPYRIGHT 2001 CANON INC 2000 2000 2000 2000 CANON iR105 REV 0 JULY 2001 CHAPTER 2 NEW FUNCTIONS 2 50 Blank page ...

Page 99: ... laser beams and a polygon mirror It scans the photosensitive drum main scanning direction to create a latent static image It is a twin laser mechanism laser A laser B and its basic construction is as shown in F02 401 01 and T02 401 01 F02 401 01 Photosensitive drum BD PCB BD mirror 8 face mirror Laser scanner motor Collimating lens Laser unit Laser mirror Laser driver PCB 80µm 18 pixels 760 µm La...

Page 100: ...onductor Visible laser light wave length 675 nm output 7 mW twin laser exposure Laser scanner motor M4 DC motor 2 speed control rotation speed 44000 rpm Polygon mirror 8 face BD mirror BD PCB Used to detect laser beams Laser driver PCB Used to control laser activation Scanner motor driver PCB Used to control the rotation of the laser scanner motor ...

Page 101: ... Reference Laser unit Increased the laser output to 7 mW To support higher process speed In the GP605 iR600 5 mW Polygon mirror Increased the rotation speed to about 44000 rpm To support higher process speed In the GP605 iR600 about 27000 rpm full speed In the GP605 iR600 about 20000 rpm in standby about 22000 rpm Made to use full speed mode in standby To support higher process speed For the GP605...

Page 102: ...reversing the steps used to disassemble it 3 Identify the screws by type length diameter and location 4 To protect against static charge one of the mounting screws of the rear cover comes with a toothed washer Be sure not to leave out the washer when assembling the ma chine 5 To ensure electrical continuity the mounting screw for the grounding wire and the varis tor comes with a washer Be sure not...

Page 103: ...emoving the Laser Unit 1 Remove the CCD unit See 3 8 1 a 2 Remove the reader PCB unit 3 Remove the 6 screws 1 and detach the laser driver PCB cover 2 F02 403 01 4 Disconnect the 4 connectors 1 and remove the video cable 2 then re move the 8 screws 3 and detach the laser scanner unit 4 F02 403 02 1 1 2 1 1 2 3 4 3 3 1 3 1 3 ...

Page 104: ... to the power outlet Be sure to disconnect it 3 Replace the laser unit 4 Record the values LA DELAY indicated on the label attached to the new laser unit 5 Assemble the machine and connect the power plug to the power outlet then turn on the main power switch 6 Enter the values recorded in step 4 using service mode COPIER ADJUST LASER LA DELAY 4 3 2 BD Unit a Removing the BD Unit 1 Remove the strea...

Page 105: ... 0 JULY 2001 CHAPTER 2 NEW FUNCTIONS 2 57 4 Mark the position of the BD unit 1 with a scriber for later reference 5 Remove the screw 2 and slide out the BD unit 1 to the front F02 403 04 6 Disconnect the connector 1 and take out the BD unit 2 F02 403 05 2 1 2 1 ...

Page 106: ...COPYRIGHT 2001 CANON INC 2000 2000 2000 2000 CANON iR105 REV 0 JULY 2001 CHAPTER 2 NEW FUNCTIONS 2 58 Blank page ...

Page 107: ...ystem are as follows photosensitive drum pre transfer exposure LED added measures against overheating of developing unit measures for enhanced image quality for developing unit measures against overheating of cleaning blade For others see T02 502 01 for a table of differences F02 501 01 Toner cartridge Developing assembly Hopper Dust collecting roller Pre transfer charging assembly Transfer guide ...

Page 108: ...harging Image exposure Development Pre transfer exposure Pre transfer charging Transfer Separation Fixing Voltage Roller application voltage Roller rotation Main heater Sub heater Main power ON Start key ON Initial multiple rotation started End WMUPR WMUP STBY Image leading edge Trailing edge Trailing edge Leading edge Copying ended Control panel power OFF 100msec 100msec Forward Reverse Cylinder ...

Page 109: ... 6 Modifying the Developing shape assembly Cylinder Cover Modifying the developing cylinder To enhance image quality Changing the developing bias Vp p 1 2 kV To enhance image quality Modifying the developing contrast To enhance image quality Transfer separation Changing the transfer charging wire height to For enhance transfer performance In the GP605 iR600 charging assembly 9 5 0 3 mm 9 6 0 4 mm ...

Page 110: ...weakening the stack bonding between the photosensitive drum and the transfer paper and ultimately encouraging separa tion Timing The LED is turned on 100 msec before the leading edge of an im age reaches a specific point until its trailing edge leaves it See F02 502 02 The pre transfer exposure LED is enabled disabled according to paper type in service mode COPIER OPTION BODY PAPER TY PAPER TY 1 p...

Page 111: ...ned into a heat sink shape to encourage discharge of heat A heat pipe 4 is also laid inside of the developing cylinder cover See F02 506 01 The heat pipe has a high degree of heat conductivity and the air cooled by the developing fan cools the front side of the pipe ultimately cooling the entire developing cylinder cover to present overheating of the developing assembly F02 506 01 4 3 1 2 ...

Page 112: ...hus preventing drum cleaning faults F02 507 01 The blade vibrating units go ON as follows after initial multiple rotation at time of main power on 5 times or once at stop sequence once when cleaning wire pre transfer transfer separation once When vibrating once it remains ON for 0 6 sec When vibrating 5 times it remains ON for 0 6 sec and OFF for 0 3 sec These settings may be changed in service mo...

Page 113: ...reversing the steps used to disassemble it 3 Identify the screws by type length diameter and location 4 To protect against static charge one of the mounting screws of the rear cover comes with a toothed washer Be sure not to leave out the washer when assembling the ma chine 5 To ensure electrical continuity the mounting screw for the grounding wire and the varis tor comes with a washer Be sure not...

Page 114: ...eder unit 5 Disconnect the connector 1 and re lease the stopper lever 2 then detach the primary charging assembly 3 6 Disconnect the connector 4 and re lease the stopper lever 5 then detach the pre transfer charging assembly 6 F02 508 01 7 While using the drum stop 1 found inside the compartment behind the front cover to fix the drum in place remove the screw 2 and detach the drum fix ing block 3 ...

Page 115: ... out the process unit 1 and pull out the grip 2 on the right side 11 Holding the grip 2 on the right and the grip 3 on the left lift it upward F02 508 03 When placing the removed pro cess unit turn the kit support plate 1 counterclockwise and be sure to create a gap from the floor to prevent damage F02 508 04 2 2 1 1 ...

Page 116: ...sure to match the notch 2 found at the tip of the left slide rail against the front plate 3 of the process unit 2 Be sure to match the bend 4 at the front of the right slide rail against the front plate 3 of the process unit Waste toner can drop on the du plex unit when the process unit is removed After mounting the process unit be sure to slide out the duplex unit and remove the waste toner F02 5...

Page 117: ...otosensitive drum protection sheet or by wrapping 6 or more A3 or larger sheets 2 Do not place the process unit or the photosensitive drum in an area ex posed to direct rays of the sun 3 Do not place the process unit or the photosensitive drum in an area sub ject to high temperature humidity or low temperature humidity or rapid changes in temperature or humidly 4 Do not place the process unit or t...

Page 118: ...000 2000 2000 2000 CANON iR105 REV 0 JULY 2001 CHAPTER 2 NEW FUNCTIONS 2 70 4 Remove the 2 screws 1 and detach the positioner holder 2 F02 508 07 5 Remove the 3 screws 1 and detach the drum fixing plate 2 F02 508 08 1 2 1 1 2 1 ...

Page 119: ...2 NEW FUNCTIONS 2 71 6 Remove the screw 1 and detach the bearing stopper 2 then shift the pho tosensitive drum 3 to the front in the direction of the arrow to lift F02 508 09 5 8 2 Drum Cleaner Unit a Construction F02 508 10 1 2 3 Cleaning blade Blade vibration unit Separation claw ...

Page 120: ... Removing the Cleaning Blade 1 Slide out the process unit 2 Remove the screw 1 and detach the reciprocating arm 2 F02 508 11 3 Disconnect the 2 connectors 1 and remove the 5 screws 2 then lift the rear and push it in to detach the clean ing blade together with the mounting plate 3 F02 508 12 1 2 1 1 3 2 ...

Page 121: ...is a different part with a different parts number Do not use the wrong part 1 2 3 F02 508 13 5 Remove the 5 screws 1 and detach the blade retaining plate 2 to detach the cleaning blade 3 F02 508 14 c Mounting the Cleaning Blade See Chapter 5 d Removing the Blade Vibrating Unit 1 Remove the blade unit 2 Disconnect the connector 1 and re move the 2 screws 2 then detach the blade vibrating unit 3 The...

Page 122: ...n diameter b Removing the Wire Cleaner for the Primary Charging Assembly 1 Remove the primary charging assembly 2 Move the clip base 1 fully to the rear and remove the screw 2 then remove the support plate 4 of the wire clean motor shaft 3 and detach the clip base 1 from the cut off 6 of the shielding plate 5 together with the wire cleaner motor shaft 3 F02 508 16 3 Pick the wire cleaner with smal...

Page 123: ...rging assembly To prevent deformation slack of the primary charging assembly be sure to work on the left and right shielding plates separately Do not loosen the screw for the left right shielding plate 2 Remove the wire cleaner For other charging assemblies remove the lid 2 pc 2 1 1 Stud Reel Charging wire Charging terminal front rear F02 508 18 3 Free a length of about 5 cm from a charging wire r...

Page 124: ...ith a nipper 8 Pick the end of the charging wire ten sion spring with tweezers and hook it on the charging wire terminal In the case of the pre transfer charging assem bly hook the spring at the front F02 508 21 Be sure of the following The charging wire is free of bends and twists The charging wire is in the bottom of the V groove of the charging wire positioner F02 508 22 9 Fit the cushion to th...

Page 125: ...re that the length of the tension spring is as follows 11 Mount the wire cleaner At this time pay attention to the orientation of the wire cleaner 12 Wipe the charging wire with lint free paper moistened with alcohol A Primary charging assembly Pre transfer charging assembly Transfer charging assembly Separation charging assembly A 12 0 1mm A 12 0 1mm A 12 0 0 5mm A 12 0 0 5mm ...

Page 126: ...ng plate are not loose Then hook the end of the charging wire on stud A and then route it for 41 runs then hook it on B C and D thereafter fit it between the double washers 1 give a 1 2 turn around the screw 2 and secure it in place F02 508 23 2 Loosen the screws 1 2 3 4 then tighten the screw 5 to a torque of 1 5 0 2 kg cm thereafter tighten the screws 1 2 3 4 to a torque of 8 kg cm in the order ...

Page 127: ... the primary and transfer charging wires may be ad justed by turning the screw found at the rear of the charging assembly A full turn of the screw changes the position of the charging wire by about 0 7 mm Charging assembly Primary Pre transfer Separation Transfer Height of charging wire 7 5 0mm 3mm 7 5 0mm 3mm 13 6 0 3mm No height adjusting mechanism 17 0 0 2mm 15 5 0 2mm 9 0 2 0mm ...

Page 128: ... Slide out the pre transfer charging as sembly When placing the removed pre transfer charging assembly be sure to take care not to subject the LED to impact 2 Turn over the pre transfer charging as sembly and remove the 3 screws 1 found on the bottom then detach the LED cover 2 F02 508 26 3 Disconnect the connector 1 and re move the pre transfer exposure LED 2 F02 508 27 1 2 1 2 ...

Page 129: ...voltage transformer DC assembly See 8 4 7 c 2 Remove the flywheel 3 Disconnect the 2 connectors 1 and remove the 5 screws 2 then detach the clutch mounting plate 3 F02 508 28 4 Remove the heater developing cylinder deceleration clutch 1 F02 508 29 5 Remove the 6 E rings 1 2 bearings 2 gear 3 and pin 4 then detach the clutch 5 F02 508 30 2 2 3 2 1 1 1 1 1 2 5 1 1 4 3 2 1 1 ...

Page 130: ...APTER 2 NEW FUNCTIONS 2 82 c Remove the Developing Cylinder Clutch 1 Remove the clutch mounting plate 2 Take out the developing cylinder clutch 1 F02 508 31 3 Remove the 8 E rings 1 2 beatings 2 2 gears 3 and pin 4 then de tach the clutch 5 F02 508 32 1 5 2 1 1 3 4 1 3 1 1 1 2 ...

Page 131: ...ges made to the pickup feeding system are as follows To support the increased speed in the process 500 mm sec an optical sensor is used instead of a photointerrupter for the following right let deck pickup sensor right left feed sensor cassette 3 4 pickup sensor vertical path 3 4 sensor The use of index paper is allowed as a transfer medium For others see T02 602 01 and T02 602 02 ...

Page 132: ...ration brake clutch To use a set screw for the joint between shaft assembly and clutch thereby preventing variation in the leading edge registration during high speed operation Changed the shape of the registration cover roller To accommodate the change in the speed of the shaft caused by the use of a set screw stop clutch Changed the shape of the registration clutch cover To accommodate the shape...

Page 133: ...tical path 3 4 sensors Eliminated the U turn sensor To support the design in which the duplex outlet sensor is used as the point of reference Eliminated the reversal sensor To support the design in which the duplex re versal sensor is used as the point of reference Added a duplex outlet sensor To ensure accurate movement of paper coming from the vertical path assembly at high accuracy by correctly...

Page 134: ...nsors in the pickup feeding assembly thus ensuring correct detection of paper For the position of the sensors see F02 604 01 F02 603 01 6 4 Image Write Start Sensor The image write start sensor is used to support the increased speed of operation It detects the leading edge of paper before it reaches the registration roller preparing the printer for printing operation The presence of this sensor en...

Page 135: ...h 3 sensor PS42 cassette 4 pickup sensor PS46 vertical path 4 sensor PS47 vertical path 1 sensor PS49 vertical path 2 sensor PS60 image write start sensor PS61 duplex outlet sensor Optical sensor F02 604 01 PS10 PS11 PS12 PS26 PS25 PS49 PS47 PS20 PS35 PS9 PS5 PS27 PS37 PS41 PS42 PS46 PS14 PS15 PS6 Pre registration roller Vertical path 1 roller Vertical path 2 roller Vertical path 3 roller Vertical...

Page 136: ...se lect index paper copy mode and fit an Index Paper Attachment A1 option F02 605 01 so that an index sheet may be inserted between copy sheets index sheet insert mode or print in the index area index production mode Index sheets are fed from the source of index sheets cassette 3 4 selected from the con trol panel For details see the User Guide F02 605 01 Index paper attachment Index sheets Fixing...

Page 137: ...y reversing the steps used to disassemble it 3 Identify the screws by type length diameter and location 4 To protect against static charge one of the mounting screws of the rear cover comes with a toothed washer Be sure not to leave out the washer when assembling the ma chine 5 To ensure electrical continuity the mounting screw for the grounding wire and the varis tor comes with a washer Be sure n...

Page 138: ...ch the door tape 3 from the machine side 5 Remove the screw 4 and detach the connector cover 5 6 Disconnect the connector 6 and de tach the manual feed tray unit 1 up ward while it is kept open at about 90 F02 606 01 b Fitting the Side Guide Timing Belt for the Manual Feed Tray Assembly 1 Butt the rack plate 1 of the manual feed tray against section A in open state 2 Move the slide volume 2 in the...

Page 139: ...and re move the door tape from the machine side 2 Remove the mounting screw 1 and detach the solenoid cover 3 A claw 2 is hooked on the L shaped opening pull it down lightly and move it as if to open it F02 606 03 3 Disconnect the connector 1 4 Remove heater mounting screw 2 and detach the pickup roller releasing sole noid 3 together with the support plate F02 606 04 1 3 2 1 2 3 ...

Page 140: ...the screw 1 and detach the connector cover 2 then disconnect the connector 3 F02 606 05 6 Open the manual feed tray 7 Remove the 11 mounting screws 1 and detach the manual feed tray pickup assembly 2 F02 606 06 8 Remove the 2 mounting screws 1 and detach the upper guide plate 2 F02 606 07 3 1 2 1 1 1 1 1 2 1 2 1 ...

Page 141: ...ER 2 NEW FUNCTIONS 2 93 9 Remove the 2 mounting screws 1 found at the bottom and detach the lower cover 2 F02 606 08 10 Remove the 2 mounting screws 1 and detach the middle guide plate 2 F02 606 09 11 Remove the 2 mounting screws 2 of the sensor unit 1 F02 606 10 1 2 1 2 1 1 2 2 ...

Page 142: ...ing the Left Deck Pickup Sensor 1 Remove the front deck left pickup as sembly 2 Remove the screw 1 and detach the pickup sensor unit 2 F02 606 12 3 Disconnect the connector 1 and de tach the left deck pickup sensor 2 When removing the scanner sensor be sure to remove the paint used to lock the claw in place in advance to prevent breaking the claw When mount ing it be sure the claw is not displaced...

Page 143: ... the stack eliminator 2 4 Remove the 2 screws 3 and detach the pickup assembly sensor base 4 F02 606 15 5 Disconnect the connector 1 1 pc each and free the claw then detach the right deck feed sensor 2 and the right deck pickup sensor 3 When removing the scanner sensor be sure to remove the paint used to lock the claw in place in advance to prevent breaking the claw When mount ing it be sure the c...

Page 144: ...rew 3 and detach the pickup assembly sensor base F02 606 17 4 Disconnect the connector 1 1 pc each and free the claw then detach the vertical path 3 4 sensor 2 and the cassette 3 4 pickup sensor 3 F02 606 18 6 6 3 Vertical Path Roller Assembly a Removing the Vertical Path Roller 1 3 4 1 Remove the deck right cassette pickup assembly 2 Remove the E ring 1 and the bearing 2 from the front and remove...

Page 145: ...2 NEW FUNCTIONS 2 97 3 Remove the E ring 1 of the front and the rear of the roller shaft and move the bearings 2 toward the inside then de tach the guide plate 3 F02 606 20 4 Remove the E ring 1 and remove the bearing 2 to detach the vertical path roller 3 F02 606 21 3 1 2 1 2 3 1 2 ...

Page 146: ...deck right and the caste 3 4 2 Remove the 3 screws 1 and detach the right lower front cover 2 F02 606 22 3 Disconnect the connector 1 and the screw 2 then detach the guide plate 3 F02 606 23 4 Remove the E ring 1 at the front of the roller shaft and move the bearing 2 toward the inside then detach the vertical path roller 2 3 F02 606 24 2 1 1 1 3 1 2 1 2 3 ...

Page 147: ...he releasing lever 3 Disconnect the connector 1 and de tach the harness of the clutch from the clutch cover 2 4 Remove the screw 3 and detach the clutch cover 2 and the bearing 4 F02 606 25 5 Loosen the 2 adjusting screws 1 and detach the registration clutch 2 F02 606 26 When mounting the registration clutch be sure to hook the clutch stop A on the protru sion B of the clutch cover F02 606 27 1 3 ...

Page 148: ...en the 2 screws 2 w hex hole then detach the registration brake clutch 3 F02 606 28 6 6 5 Duplex Unit a Removing the Reversal Motor 1 Remove the duplex feed fan unit See 8 4 3 r 2 Loosen the screw 1 then while pull ing the tension support plate 2 in the direction of the arrow tighten the screw 1 to loosen the tension of the belt 2 3 Disconnect the connector 4 and re move the 2 screws 5 then detach...

Page 149: ... tension of the belt 3 3 Disconnect the connector 4 and re move the 2 screws 5 then detach the duplex left feed motor 6 F02 606 30 c Removing the Duplex Right Feed Motor 1 Remove the front cover of the duplex unit 4 screws 3 knobs 2 Loosen the screw 1 then while pull ing the tension support plate 2 in the direction of the arrow tighten the screw 1 to loosen the tension of the belt 3 3 Disconnect t...

Page 150: ... Remove the screw 1 and detach the sensor base 2 F02 606 32 3 Disconnect the connector 1 and free the claw to detach the left deck feed sensor 2 When removing the scanner sensor be sure to remove the paint used to lock the claw in place in advance to prevent breaking the claw When mount ing it be sure the claw is not displaced or the sensor is not disoriented 1 2 2 1 F02 606 33 ...

Page 151: ...ULY 2001 CHAPTER 2 NEW FUNCTIONS 2 103 6 6 6 Others a Removing the Fixing Feed Unit 1 Slide out the fixing feed unit 2 Remove the 2 stepped screws 1 F02 606 34 3 Remove the fixing feed unit 1 from the slide rail 2 Be sure to work as a group of two F02 606 35 1 1 2 1 ...

Page 152: ...COPYRIGHT 2001 CANON INC 2000 2000 2000 2000 CANON iR105 REV 0 JULY 2001 CHAPTER 2 NEW FUNCTIONS 2 104 Blank page ...

Page 153: ...stem fixing temperature control while paper is on the move 188 C for 200V model 198 C for 208V 230V model fixing heater power For others see T02 702 01 The major components of the fixing system are shown in F02 701 01 and F02 701 02 F02 701 01 Cleaning web unit Cleaning web Main thermistor TH1 Sub thermistor TH2 Thermal switch TP1 Inlet guide Fixing upper roller Fixing lower roller Separation claw...

Page 154: ...ler Pressure roller 50 mm dia Fixing motor M3 DC motor 33 W Main heater H1 200V model 1150 W 208V model 1220 W 230V model 1185 W Sub heater H2 200V model 565 W 208V model 600 W 230V model 645 W Main thermistor TH1 Temperature control error detection Sub thermistor TH2 Error detection Thermal switch TP1 Operating temperature 228 C Cleaning web Driven by web drive solenoid SL2 for large size paper B...

Page 155: ...e swing mechanism in place To enhance feeding performance and prevent wrinkling Changed the distance of the pressure roller static To reduce soiling of the back of paper by the eliminator from 1 5 to 4 mm pressure roller Made to use temperature control for standby and paper 7 3 Fixing Temperature Control passage 200V model 188 C 208V 2 30V model 198 C Thermal switch To accommodate the change in th...

Page 156: ...xternal delivery rollers To reduce curling from 4 to 6 Changed the shape of the roller in the curl reducing To reduce curling mechanism Delivery roller material Changed the material internal delivery reversal To increase durability auxiliary curl reducing roller Delivery Eliminated the curl guide To accommodate the use of an external delivery roller with a collar Duplex Made to use the leading edg...

Page 157: ...xing motor M3 Main heater H1 Sub heater H2 SLEEP WMUP WMUPR STBY INTR PSTBY PRINT LSTR STBY Main power switch ON Control panel switch ON 200ºC 198ºC 195ºC 190ºC Start key ON Drops because of passage of paper Both main and sub are turned ON to return to 190ºC 200V or 200ºC 208V 230V fast 200V 185ºC 208V 230V 195ºC 200V 190ºC 208V 230V 200ºC 200V controlled to 188ºC 208V 230V controlled to 198ºC 200...

Page 158: ...ion used in transparency mode F02 704 01 COPIRE OPTION BODY OHP TEMP changing the temperature settings for the transparency mode 0 198 C default 1 193 C 2 188 C 3 183 C WAIT message GREEN GREEN RED Fixing motor M3 Main heater H1 Sub heater H2 STBY INTR PRINT LSTR STBY Transparency mode selected Start key ON 205ºC 200ºC 198ºC 193ºC Transparency temperature Controlled to 198ºC Controlled to 198ºC Id...

Page 159: ...k pa per moves past it the down sequence shift temperature increased If thick paper is selected when registering paper type in user mode common settings the down sequence for thick mode will be executed COPIRE OPTION BODY FIX TEMP setting the down sequence start temperature for thick paper mode Setting 86 cpm 74 cpm Suspend Resume 0 194 C 193 C 183 C 198 C 1 189 C 188 C 178 C 193 C 2 184 C 183 C 1...

Page 160: ...tion used in power save mode F02 706 01 Main heater H1 Sub heater H2 25 save rate 50 save rate 200ºC 195ºC 170ºC 105ºC STBY SLEEP STBY WMUP Power save mode set in user mode Power Save key ON Power Save key OFF Temperature control according to selected save rate WMUPR omitted Returns to normal temperature control when Power Save key is turned OFF 200V 185ºC 208V 230V 195ºC 200V 190ºC 208V 230V 200º...

Page 161: ...rmal switch TP1 F02 707 01 DC Controller PCB 17 17 16 J508B 1 7 8 10 20 S TEMP 0V 0V M TEMP Voltage suited to reading of main thermistor When 1 main heater ON Fixing upper roller Main heater Sub thermistor Main thermistor Thermal switch 9 J505A 1 12 11 0V SHDTC ZEROCROSS 200 V detection MHDTC SH ON 0V MH ON 15 J512A 1 1 11 10 24 V Relay OFF Voltage suited to reading of sub thermistor AC line cut a...

Page 162: ...P1 setting the down sequence Select setting 0 if priority is on image quality select setting 2 if priority is on speed Main heater H1 Sub heater H2 Copying speed 200ºC 195ºC 190ºC 185ºC 180ºC 175ºC 170ºC 165ºC 160ºC 105cpm 105cpm 86cpm 74cpm Suspend STBY PRINT PRINT STOP Start key ON At 178ºC dropped to 86 cpm At 175ºC dropped to 74 cpm If 168ºC suspends printing At 183ºC automatically resume prin...

Page 163: ...y reversing the steps used to disassemble it 3 Identify the screws by type length diameter and location 4 To protect against static charge one of the mounting screws of the rear cover comes with a toothed washer Be sure not to leave out the washer when assembling the ma chine 5 To ensure electrical continuity the mounting screw for the grounding wire and the varis tor comes with a washer Be sure n...

Page 164: ... 2 screws 1 and detach the fixing connector unit 2 then remove the screw 3 and the terminal plate 4 at the rear to pull out the faston 5 2 locations F02 709 01 3 Remove the 2 screw 1 and detach the heater positioning plate rear 2 F02 709 02 4 Remove the 2 fastons 1 at the front and remove the screw 2 to detach the heater positioning plate front 3 F02 709 03 5 Remove the main sub heater 1 1 2 3 5 4...

Page 165: ...ch the surface of the heater b For both mount the heater so that the side with the longer harness is to the front c Viewing from the front of the fixing as sembly mount the main heater 1 to the right and the sub heater 2 to the left F02 709 04 c Removing the Thermal Switch Unit 1 Remove the fixing assembly 2 Remove the fixing web then remove the 2 screws 1 and the oil pan 2 and detach the fixing h...

Page 166: ...ermal switch holder 4 F02 709 06 4 Remove the 4 screws 1 and detach the thermal switch unit 2 F02 709 07 d Mounting the Thermal Switch Unit When mounting the thermal switch 1 be sure that it is in contact with the fixing roller 2 as shown The thermal switch must be replaced as the thermal switch unit Do not use again the thermal switch wolse contact point become open F02 709 08 3 2 2 4 1 1 1 2 2 1...

Page 167: ...he oil pan 3 Remove the fixing harness cover 4 Disconnect the connector 1 of the thermistor Remove the screw 2 and shift the thermistor assembly 3 to the rear to detach When shifting the thermistor assembly to the rear take care not to damage the fixing roller with the thermistor F02 709 09 5 Remove the 2 thermistor retaining springs 1 and detach the main ther mistor 2 F02 709 10 2 3 1 1 1 2 ...

Page 168: ... f Mounting the Main Thermistor When mounting the main thermistor to the fixing assembly be sure that the tie wrap 1 is as shown The tie wrap serves as a stopper by butting against the claw 2 Check also to be sure that the main thermistor and the fixing roller are not away from each other F02 709 11 1 2 ...

Page 169: ...oving the Sub Thermistor 1 Slide out the fixing assembly 2 Remove the fixing web and the oil pan 3 Remove the fixing harness cover 4 Disconnect the connector 1 and re move the screw 2 then detach the sub thermistor assembly 3 F02 709 12 5 Remove the screw 1 and detach the sub thermistor 2 F02 709 13 3 2 1 1 2 ...

Page 170: ...2 Remove the fixing web and clean the oil pan 3 Remove the 2 fixing heaters 4 Remove the screw 1 and detach the pressure support plate 2 at the front F02 709 14 5 Remove the screw and detach the pres sure support plate 2 at the rear F02 709 15 6 Open the fixing upper unit 1 When opened the fixing upper unit becomes unstable Be sure to use a screwdriver as shown to support it F02 709 16 2 1 1 2 1 ...

Page 171: ...UNCTIONS 2 123 7 Remove the stopper 1 from the front and the rear F02 709 17 F02 709 18 8 While paying attention to the thermal switch and the thermistor remove the upper roller assembly 9 Remove the C ring 1 at the front and remove the gear 2 bushing 3 and bearing 4 F02 709 19 1 1 4 3 2 1 ...

Page 172: ... bushing 5 F02 709 20 b Mounting the Fixing Upper Roller Mount the upper roller by reversing the steps used to remove it a To prevent the surface of the roller from dirt or damage wrap paper after removing it b Be sure that the longer cut off A shown in F02 709 21 is toward the rear c When mounting clean the electrode plate 1 and the electrode terminal 2 F02 709 21 F02 709 22 4 3 5 2 1 A 2 1 ...

Page 173: ...e the fixing assembly 2 Remove the 3 screws 1 then while opening the upper delivery assembly 2 remove the delivery roller guide 3 F02 709 23 3 Remove the E ring 1 at the front slide the bearing 2 in the direction of the gear F02 709 24 4 Remove the E ring 1 and slide the bearing 2 toward the rear then detach the external delivery roller assembly 3 F02 709 25 3 2 1 2 1 2 1 3 ...

Page 174: ...ollers 5 of each roller Take care not to lose the parallel pin used in each roller F02 709 26 b Removing the Internal Delivery Roller 1 Remove the fixing assembly 2 Remove the internal delivery roller 1 bearing 2 3 E rings 3 and bushing holder 4 then detach the drive gear 5 F02 709 27 3 Remove the E ring 1 and the bushing 2 at the rear of the shaft then detach the internal delivery roller 3 F02 70...

Page 175: ...t 2 Remove the fixing motor 3 Remove the 3 screws 1 and detach the fixing front support base 2 F02 709 29 4 Disconnect the 2 connectors 1 and remove the 2 screws 2 then detach the delivery speed switching clutch 3 When detaching the delivery speed switching clutch take care not to lose the bearings on both ends of the clutch shaft and the washer at the rear F02 709 30 2 1 1 3 2 1 2 ...

Page 176: ...ch the lower separation claw assembly 3 Detach the claw jam sensor 1 from the right side of the lower delivery assem bly F02 709 31 b Remove the External Delivery Sensor 1 Remove the external delivery roller 2 Remove the 2 screws 1 and discon nect the connector 2 then detach the external sensor assembly 3 F02 709 32 3 Disconnect the connector 1 and de tach the external delivery sensor 2 F02 709 33...

Page 177: ...ONS 2 129 c Removing the Internal Delivery Sensor 1 Remove the fixing assembly 2 Open the upper delivery assembly and remove the 2 screws 1 then detach the internal delivery sensor assembly 2 F02 709 34 3 Disconnect the connector 1 and de tach the internal delivery senor 2 F02 709 35 2 1 1 1 2 ...

Page 178: ... 130 d Remove the Fixing Feeder Unit Outlet Sensor 1 Slide out the fixing feed unit 2 Remove the screw 1 from the bottom face of the fixing feeder unit then de tach the fixing feed outlet sensor 2 F02 709 36 3 Disconnect the connector 1 and de tach the fixing feed outlet sensor 2 F02 709 37 2 1 1 2 ...

Page 179: ... separation assembly and to enhance separation performance Eliminated the primary charging assembly fan To accommodate the use of the laser motor cooling fan Eliminated the feeding fan To accommodate the use of the separation fan Eliminated the laser scanner motor cooling fan To accommodate the use of the laser motor cooling fan Externals Changed the design of the system cover To improve the servi...

Page 180: ... direction of air for each for the name and function of each see T02 801 01 The fans added to the machine are as follows 1 Laser motor cooling fan FM1 13 Developing fan FM15 14 System fan FM16 15 Delivery adhesion preventing fan FM17 16 Scanner motor fan FM18 17 Duplex feeding fan FM19 18 Separation heat discharge fan FM20 F02 802 01 2 3 5 6 9 16 18 1 17 10 11 13 15 14 7 12 8 4 ...

Page 181: ...ion cools laser scanner motor insulates heat for fixing assembly prevents soiling of wire in primary charging wire discharges heat from around fixing assembly cools laser scanner unit cools copyboard glass in stream reading mode cools laser driver PCB cools paper draws and cools ozone around drum and stray toner cools control panel inverter discharges ozone from around pre transfer charg ing assem...

Page 182: ... State of the Printer Unit F02 803 01 Curl reducing fan FM6 Drum suction fan FM8 Post fan FM10 Power supply cooling fan 1 FM11 Power supply cooling fan 2 FM12 Separation fan FM13 Developing fan FM15 Delivery adhesion fan FM17 Full speed Half speed Primary polygon fan FM20 Fixing heat discharge fan FM2 Laser cooling fan 1 FM3 Laser cooling fan 2 FM5 Duplex feeding fan FM21 Separation heat discharge...

Page 183: ... Fans Operating in Keeping with the State of the Scanning Lamp F02 803 02 Main power switch ON Stcanning lamp Optical cooling fan FM3 Stream reading fan FM4 Inverter cooling fan FM9 Power supply cooling fan 1 2 FM11 FM12 Full speed Half speed Lamp ON Lamp OFF Standby Jam Pre heat Scanner ON Scanner OFF ...

Page 184: ...y reversing the steps used to disassemble it 3 Identify the screws by type length diameter and location 4 To protect against static charge one of the mounting screws of the rear cover comes with a toothed washer Be sure not to leave out the washer when assembling the ma chine 5 To ensure electrical continuity the mounting screw for the grounding wire and the varis tor comes with a washer Be sure n...

Page 185: ...screws are omit ted from the discussions number of screws indicated 1 Upper front cover 8 4 1 g 2 Copyboard glass 3 Left glass retainer 2 screws 4 Left pocket plate 8 4 1 5 Upper rear cover 8 4 1 h 6 Right pocket plate 3 screws 7 Original delivery tray 8 4 2 a 8 Manual feed tray 6 6 1 a 9 Lower vertical path cover 10 Toner cartridge cover 2 screws 11 Front cover 8 4 1 b F02 804 01 a 1 2 3 4 5 6 7 ...

Page 186: ...ss retainer 2 screws 13 Scanning lamp cover 14 Control panel 8 4 2 a 15 Upper right cover 8 4 2 a 16 Right rear cover 8 4 2 a 17 Waste toner cover 1 screw 18 Right lower cover 2 screws 19 Upper vertical path cover 8 4 1 f 20 Manual feed tray unit 6 6 1 a 21 Face plate cover F02 804 01 b 21 20 12 13 14 15 16 17 18 19 ...

Page 187: ...2 Control panel unit 8 4 2 a 23 Upper front cover unit 8 4 1 g 24 Upper left cover 3 screws 25 Left upper cover 9 screws after re moving left lower cover 26 Left lower cover 4 screws 27 System connector cover 2 screws 28 Rear cover 8 4 1 e 29 Rear upper cover 2 screws F02 804 02 a 22 23 24 25 26 27 28 29 ...

Page 188: ...rging assembly cover 1 screw 35 Transfer saparation charging assembly cover 1 screw 36 Inside right lower cover 2 screws 1 screw used in common with front cover tape 37 Duplex unit cover 4 screws 3 knobs 38 Fixing feeder unit cover 6 6 6 a F02 804 02 b 39 ADF 40 Drum protective sheet after removing waste toner cover 41 Right deck 42 Cassette 4 43 Cassette 3 44 Left deck F02 804 02 c 31 32 33 34 35...

Page 189: ...er and remove the mounting screw 3 for the cover type 2 3 Push up the hinge pin 4 found on the front cover an turn it to the front 90 to pull it off downward 4 Pull off the front cover at an angle F02 804 03 c Removing the Inside Upper Cover 1 The toner cartridge cover 2 Open the front cover 3 Remove the mounting screw 1 and detach the primary charging assembly cover 2 4 Shift down the fixing feed...

Page 190: ...upper cover 3 F02 804 05 d Removing the Fixing Feeder Unit Cover 1 Open the front cover and shift down the fixing feeding lever to slide out the fix ing feeding unit 2 Remove the mounting screw 2 of the releasing lever 1 then pushing the releasing lever link 3 found at the rear of the fixing feeder unit remove the re leasing lever while keeping it shifted up F02 804 06 1 1 2 2 2 2 3 3 1 2 ...

Page 191: ...ew 1 and detach the fixing knob 2 4 Remove the mounting screw 3 and detach the transfer separation charging assembly cover 4 5 Remove the 2 mounting screws 5 and detach the fixing feeder unit cover 6 F02 804 07 e Removing the Rear Cover 1 Remove the 11 mounting screws 1 and detach the rear cover 2 F02 804 08 4 3 1 6 5 5 2 1 1 2 ...

Page 192: ...eed tray unit 1 slightly up pull out the upper vertical path cover 2 upward F02 804 09 g Removing the Upper Front Cover Unit 1 Remove the inside upper cover 2 Remove the flat headed screw 1 1 pc each and detach the 2 magnet catches 2 3 Remove the face plate 3 and remove the 3 screws 4 then detach the upper front cover unit 5 F02 804 10 If the card reader is mounted be sure to disconnect the connec...

Page 193: ... pocket plate 2 3 Remove the 3 screws 3 and detach the left pocket plate 4 Mark the position of the screw 3 so that the left pocket plate 4 may be mounted back to its original position F02 804 12 4 Remove the upper rear cover 5 8 4 2 Control Panel a Removing the Control Panel Unit 1 Disconnect the connector 1 F02 804 13a If for a 230V model detach the ferrite core 2 F02 804 13b 5 4 1 1 2 3 3 1 2 ...

Page 194: ...ing screw 1 and de tach the lower arm cover 2 3 Remove the 2 binding screws 4 used to keep the upper arm cover 3 in place F02 804 14 4 Remove the binding screw 1 and de tach the rear support cover 2 5 Remove the double washer screw 3 and the flat headed screw 4 and de tach the control panel 5 F02 804 15 1 5 4 3 2 4 1 2 3 ...

Page 195: ...as it will not ad versely affect any function F02 804 16 8 Free the control panel harness 2 from the 2 wire saddles 1 9 Remove the 4 binding screws 3 and the positioning binding screw 4 then while paying attention to the claw 6 detach the upper arm 5 At this time be sure to take a note of the position of the binding screw 4 When mounting be sure to match the marking 7 of the control panel harness ...

Page 196: ...TER 2 NEW FUNCTIONS 2 148 10 Remove the 2 RS tightening screws 1 and detach the original delivery tray 2 F02 804 18 11 Open the toner cartage 1 and remove the 3 RS tightening screws 2 then while paying attention to the claw 4 detach the upper right cover 3 F02 804 19 2 1 2 1 4 3 ...

Page 197: ...Y 2001 CHAPTER 2 NEW FUNCTIONS 2 149 12 Remove the 6 RS tightening screws 1 then while paying attention to the claw 3 detach the lower arm 2 F02 804 20 13 Open the 2 edge saddles 1 and pull out the control panel harness 3 from the lower arm 2 F02 804 21 2 1 3 1 1 2 3 ...

Page 198: ...emove the 2 screws 1 and detach the support front cover 2 2 Remove the 5 screws 3 and detach the control panel rear cover 4 F02 804 22 3 Remove the 2 screws 1 2 connector fixing screws 2 and 2 spring washers 3 then detach the connector cover 4 4 Remove the 9 screws 5 and detach the control panel support unit 6 F02 804 23 1 2 3 3 4 3 5 6 5 3 2 4 5 1 ...

Page 199: ...l support unit 2 Disconnect the 3 connectors 1 and detach the 2 flat cables 2 3 Remove the 4 screws 3 and detach the control panel controller CPU PCB 4 F02 804 24 d Removing the Control Panel Inverter PCB 1 Remove the control panel support unit 2 Disconnect the 3 connectors 1 3 Remove the 4 screws 2 and detach the control panel inverter PCB 3 F02 804 25 1 1 1 2 2 3 1 2 3 3 4 ...

Page 200: ...the control panel inverter PCB 3 Remove the W washer screw 1 and detach the grounding sheet 2 4 Remove the screw 3 and detach the LCD panel unit 4 F02 804 26 5 Remove the 4 screws 1 and detach the LCD panel 2 F02 804 27 f Removing the Control Panel PCB 1 Remove the LCD panel unit 2 Remove the harness sheet 1 3 Remove the 10 screws 2 and detach the control panel PCB 3 F02 804 28 1 2 1 3 2 2 1 2 ...

Page 201: ... 1 and re move the harness lock 2 from the plate 3 Remove the 4 screws 3 and detach the laser motor cooling fan 4 F02 804 29 b Removing the Fixing Heat Discharge Fan FM2 1 Remove the rear cover See 8 4 1 e 2 Remove the 2 screws 1 and discon nect the connector 2 then detach the fixing heat discharge fan 3 When mounting the fan be sure that the direction of air current is as indicated by the arrow F...

Page 202: ...ve the 2 screws 2 then detach the laser cooling fan 1 3 When mounting the fan be sure that the direction of air current is as indicated by the arrow F02 804 31 d Removing the Stream Reading Fan FM4 1 Remove the upper front cover unit See 8 4 1 g 2 Remove the 2 screws 1 and detach the stream read fan dust 2 When mounting the fan be sure that the direction of air current is as indicated by the arrow...

Page 203: ...n detach the stream read fan unit 3 F02 804 33 4 Remove the 2 screws 1 and detach the stream read fan 2 F02 804 34 e Removing the Laser Cooling Fan 2 FM5 1 Remove the reader controller PCB See 2 9 3 e 2 Remove the 2 screws 1 and discon nect the connector then detach the la ser driver cooling fan 3 together with the mounting base F02 804 35 3 1 2 2 1 1 2 1 2 3 1 ...

Page 204: ...oving the Curl Reducing Fan FM6 1 Remove the fixing feeding unit cover See 8 4 1 d 2 Disconnect the 4 connectors 1 and remove other 4 screws 2 then detach the fixing motor base 3 F02 804 37 3 Remove the 2 screws 1 and discon nect the 2 connectors 2 then detach the delivery speed switching clutch 3 When removing the delivery speed switching clutch take care not to lose the bearings and the washers ...

Page 205: ...TIONS 2 157 4 Disconnect the connector 1 and re move the 2 screws 2 them detach the curl reducing fan 3 F02 804 39 g Removing the Drum Fan FM8 1 Remove the HV DC PCB See 8 4 7 c 2 Remove the 2 screws 1 and discon nect that connector 2 then detach the drum fan unit 3 F02 804 40 1 2 2 3 3 1 1 2 ...

Page 206: ... 158 3 Disconnect the connector 1 and re move the 3 screws 2 then detach the drum fan 3 F02 804 41 h Removing the Inverter Cooling Fan FM9 1 Remove the rear cover See 8 4 1 e 2 Remove the rear upper cover 2 screws 3 Remove the screw 1 and detach the inverter cooling fan duct 2 F02 804 42 1 3 2 2 2 1 ...

Page 207: ...he fan be sure that the direction of air current is as indicated by the arrow F02 804 43 5 Disconnect the connector 1 and de tach the inverter cooling fan 2 F02 804 44 i Removing the Pre Transfer Charging Assembly Fan FM10 1 Remove the process unit cover 4 screws 2 Remove the 2 screws 1 and discon nect the 2 connectors 2 then detach the fan motor 3 F02 804 45 2 1 1 1 2 1 3 2 ...

Page 208: ...n detach the pre transfer charging assembly fan 3 When mounting the fan be sure that the direction of air current is as indicated by the arrow F02 804 46 j Removing the Power Supply Cooling Fan 1 FM11 1 Remove the left lower cover 4 screw 2 Remove the power supply unit See 8 4 7 a 3 Remove the 3 screws 1 and detach the fan mounting base 2 F02 804 47 1 3 2 2 1 1 ...

Page 209: ...n mounting the fan be sure that the direction of air current is as indicated by the arrow F02 804 48 k Removing the Power Supply Cooling Fan 2 FM12 1 Remove the fan mounting base 8 4 3 j 2 Remove the 2 screws 1 and discon nect the connector 2 then detach the power supply cooling fan 2 3 When mounting the fan be sure that the direction of air current is as indicated by the arrow F02 804 49 1 3 1 2 ...

Page 210: ...1 and detach the fixing feeding lower cover 1 2 and the fixing feeding lower cover 2 3 F02 804 50 3 Disconnect the connector 1 and re move the heater 3 screws 2 then de tach the separation fan 3 F02 804 51 m Removing the Developing Fan FM15 1 Remove the primary charging assembly 2 Disconnect the connector 1 and re move the 2 screws 2 then detach the fan unit 3 F02 804 52 1 1 3 2 1 3 1 2 2 2 3 1 ...

Page 211: ...ated by the arrow F02 804 53 n Removing the System Fan FM16 1 Remove the rear cover See 8 4 1 e 2 Disconnect the connector 1 3 Remove the 2 screws 2 and detach the system connector cover 3 F02 804 54 4 Remove the main controller box cover 5 Disconnect the connector 1 and re move the 2 screws 2 then detach the system fan 3 When mounting the fan be sure that the direction of air current is as indica...

Page 212: ...ews 2 Disconnect the connector 1 and re move the 2 screws 2 then detach the fan unit 3 F02 804 56 3 Remove the 2 screws 1 and detach the fan 2 F02 804 57 q Removing the Scanner Motor Cooling Fan FM18 1 Remove the rear cover See 8 4 1 e 2 Disconnect the connector 1 on the ma chine side 3 Remove the 2 screws 2 and detach the scanner motor cooling fan unit 3 F02 804 58 2 1 3 1 2 3 2 2 1 ...

Page 213: ...ed by the arrow F02 804 59 r Removing the Duplex Feed Fan FM19 1 Remove the duplex unit cover 4 screws 3 knobs 2 Disconnect the connector 1 and re move the 3 screws 2 then detect the duplex feed fan unit 3 At this time keep in mind that the shift assembly 4 will also come off F02 804 60 3 Remove the 2 screws 1 and detach the duplex feed fan 2 When mounting the fan be sure that the direction of air...

Page 214: ...ion heat discharge fan 3 F02 804 62 8 4 4 Drive Assembly a Removing the Drive Assembly 1 Remove the HV DC PCB See 8 4 7 c 2 Remove the 2 screws 1 and detach the flywheel 2 F02 804 63 3 Loosen the 2 screws 1 w hex hole and remove the binding screw 2 w spring then detach the gear 3 of the drum shaft When removing the screw from the drum shaft gear be sure to pay attention to the direction of gear ro...

Page 215: ...0 2000 2000 2000 CANON iR105 REV 0 JULY 2001 CHAPTER 2 NEW FUNCTIONS 2 167 4 Remove the water toner case then re move the 5 screws 1 and disconnect the 4 connectors 2 to detach the waste toner case base 3 F02 804 65 1 1 1 3 2 2 2 ...

Page 216: ... CHAPTER 2 NEW FUNCTIONS 2 168 5 Remove the E ring 2 at the tip of the waste toner pipe 1 and shift the bush ing 3 up to remove the 2 screws 4 then detach the waste toner pipe 1 F02 804 66 6 Remove the screw 1 and detach the drum cleaner pipe cover 2 F02 804 67 2 3 4 1 1 2 ...

Page 217: ...onnectors 1 and remove the 5 screws 2 then detach the drum drive assembly 3 F02 804 68 b Removing the Cassette Pickup Drive Assembly 1 Remove the waste toner case base 2 Remove the cassette pickup assembly upper lower 3 Remove the 5 screws 1 and detach the cassette pickup drive assembly 2 F02 804 69 2 1 1 1 2 2 3 1 1 1 1 2 ...

Page 218: ... FUNCTIONS 2 170 8 4 5 Switches a Removing the Front Cover Switch Assembly 1 Remove the upper front cover unit See 8 4 1 g 2 Remove the 3 screws 1 and detach the cover switch assembly 2 F02 804 70 3 Disconnect the 3 connectors 1 and detach the cover switch assembly 2 F02 804 71 1 1 2 2 1 ...

Page 219: ...cover 4 screws 2 Remove the 2 screws 1 and discon nect the 2 connectors 2 then detach the pre transfer charging assembly fan 3 F02 804 72 3 Disconnect the 3 connectors 1 and remove the screw 2 then detach the potential sensor PCB 3 F02 804 73 4 Remove the screw 1 and disconnect the 2 connectors 2 then detach the manual feed tray switch assembly 3 F02 804 74 1 3 2 3 2 1 1 3 1 2 ...

Page 220: ... 7 connectors 2 then de tached power cord base 3 thereafter free the fixing claw to detach the drum heat switch 4 F02 804 75 8 4 6 PCBs For the following see their appropriate sections transformer PCB 2 Original Exposure System reader controller PCB 2 Original Exposure System hard disk 3 Image Processing System control panel controller CPU PCB 8 4 2 Control Panel control panel inverter PCB 8 4 2 C...

Page 221: ... CANON iR105 REV 0 JULY 2001 CHAPTER 2 NEW FUNCTIONS 2 173 a Removing the DC Controller PCB 1 Remove the rear cover See 8 4 1 e 2 Disconnect all connectors of the PCB and remove the 4 screws 1 then de tach the DC controller PCB 2 F02 804 76 1 1 2 ...

Page 222: ...R ADJUST DEVELOP all items COPIER ADJUST DENS all items COPIER ADJUST BLANK all items COPIER ADJUST V CONT all items COPIER ADJUST HV PRI all items COPIER ADJUST HV TR all items COPIER ADJUST HV SP all items COPIER ADJUST FEED ADJ all items COPIER ADJUST CST ADJ all items COPIER ADJUST EXP LED all items 6 Execute the following in service mode COPIER FUNCTION MISC P CL ADJ all items COPIER FUNCTION...

Page 223: ...ial PCB 1 Remove the rear cover See 8 4 1 e 2 Disconnect the reader controller com munications cable 1 F02 804 78 3 Remove the 2 screws 1 and detach the left stop fixing 2 then detach the main controller box cover 3 F02 804 79 4 Disconnect the main controller commu nications cable 1 and the connector 2 F02 804 80 1 1 3 1 2 1 2 ...

Page 224: ...NS 2 176 5 Remove the 4 screws 1 and detach the differential PCB 2 together with the mounting base F02 804 81 d Removing the Pixel Line Conversion PCB 1 Remove the rear cover See 8 4 1 2 Remove the main control box cover 3 Remove the 3 screws 1 and detach the PCB base 2 F02 804 82 1 1 2 1 2 1 1 ...

Page 225: ...ther with the mounting base F02 804 83 5 Remove the 6 screws 1 and detach the pixel line conversion PCB 2 from the mounting base F02 804 84 e Removing the Main Controller PCB 1 Remove the system connector cover 2 Remove the differential PCB 8 4 6 c 3 Remove the pixel line conversion PCB 8 4 6 4 Disconnect all connectors from the main controller PCB 1 5 Disconnect the connector 2 F02 804 85 1 3 2 2...

Page 226: ...0 2000 CANON iR105 REV 0 JULY 2001 CHAPTER 2 NEW FUNCTIONS 2 178 6 Remove the 4 screws 1 and open the main controller box 2 F02 804 86 7 Remove the 3 screws 1 and detach the lower cover 2 for the main controller box F02 804 87 1 1 1 2 2 1 1 ...

Page 227: ...2 and detach the main controller PCB 3 F02 804 88 f When Replacing the Main Controller PCB 1 Replace the main controller PCB 2 Detach the following from the existing PCB and mount them to the new PCB SD RAM 1 BOOT ROM 2 counter memory PCB 3 F02 804 89 3 Assemble the machine then connect the power plug to the power outlet and turn on the main power switch 3 2 2 1 2 2 1 2 3 ...

Page 228: ...an mounting base See 8 4 6 i 2 Remove the mounting screw 2 of the grounding wire 1 3 Disconnect the 8 connectors 3 and remove the 3 screws 4 then detach the AC driver PCB 5 F02 804 90 h Removing the HV AC PCB 1 Remove the rear cover See 8 4 1 e 2 Disconnect the 2 connectors 1 and remove the 4 screws 2 then detach the HV AC PCB 3 F02 804 91 4 4 4 3 3 5 1 2 2 1 3 1 2 ...

Page 229: ...CB 1 Remove the left lower cover 4 screws and remove the left upper cover 9 screws 2 Disconnect the connector 1 and re move the 6 screws 2 then detach the delivery anti adhesion fan mounting case 3 F02 804 92 3 Disconnect the 5 connectors 1 and remove the 4 screws 2 then detach the all night power supply PCB 3 F02 804 93 1 2 2 3 1 1 1 2 2 2 3 ...

Page 230: ...ove the rear upper cover 2 screws left lower cover 2 screw left upper cover 9 screws and upper left cover 3 screws 3 Disconnect the 3 connectors 1 F02 804 94 4 Remove the screw 1 and detach the harness fixing plate 2 F02 804 95 5 Remove the 2 screws 1 and detach the positioning pin 2 6 Remove the 5 screws 3 and detach the Bi centronics PCB unit 4 F02 804 96 1 1 2 1 3 3 1 4 2 3 ...

Page 231: ... PCB 3 together with the connector cover F02 804 97 8 Remove the 2 connector fixing screws 1 and detach the connector cover 3 from the Bi centronics PCB 2 F02 804 98 k Removing the Relay PCB 1 Remove the left lower cover 4 screws 2 Disconnect the connector from the PCB then remove the screw 1 and detach the relay PCB 1 from the four PCB holders 2 F02 804 99 1 1 1 3 2 1 1 3 2 1 2 2 2 2 ...

Page 232: ...ers a Removing the Power Supply Unit 1 Remove the left lower cover 4 screws 2 Disconnect the 2 connectors 1 and disconnect the connector from the relay PCB 2 F02 804 100 3 Remove the 2 screws 1 and detach the cover plate 2 them remove the 2 screws 3 and detach the power supply unit 4 F02 804 101 1 1 2 1 1 2 3 3 4 ...

Page 233: ...e Transformer Assembly AC 1 Remove the rear cover See 8 4 1 e 2 Disconnect the 2 connectors 1 and remove the 2 screws 2 then detach the HV AC PCB 3 together with the mounting base F02 804 102 3 Disconnect the 3 connectors 1 and remove the screw 2 then detach the high voltage transformer assembly AC 3 F02 804 103 1 3 1 2 2 1 1 2 3 ...

Page 234: ...offs of the rails F02 804 104 d When Replacing the HV DC PCB 1 Replace the HV DC PCB 2 Check to make sure that the slide switch SW101 on the PCB is on the UP side 3 Assemble the machine then connect the power plug to the power outlet and turn on the main power switch 4 Enter the values 4 types indicated on the label attached to the new HV DC PCB in ser vice mode F02 804 105 5 Turn off and then on ...

Page 235: ...605 iR600 in relation to the rota tion speed of motors to support higher speed of operation In addition the machine uses op tical sensors instead of the GP605 iR600 s photointerrupters for its pickup feeding as sembly and uses a more durable material for its pickup separation roller as extra consider ations for higher speed of operation F02 901 01 M102 Paper M101 Deck pickup feeding roller Deck se...

Page 236: ...e proper Side deck paper PCB Deck feed detection signal DPFD Deck pickup clutch drive signal DPUCD Deck pickup roller releasing solenoid drive signal DPRSD Deck main motor drive signal Deck pickup detection signal DPPD side paper deck INTR LSTR STBY ON SCAN PRINT Start key Deck main motor M101 Deck pickup clutch CL102 Deck pickup roller releasing solenoid SL101 Deck pickup sensor PS101 Deck feed s...

Page 237: ...eased feeding speed To support higher speed of operation Deck feeding roller Changed the material To support higher speed of operation Deck separation roller Changed the material To support higher speed operation Deck feed sensor Made to use optical sensors Support higher speed of operation In the GP605 iR600 photointerrupters Deck pick up sensor Made to use optical sensors To support higher speed...

Page 238: ...COPYRIGHT 2001 CANON INC 2000 2000 2000 2000 CANON iR105 REV 0 JULY 2001 CHAPTER 2 NEW FUNCTIONS 2 190 9 3 Optical Sensors For discussions on optical sensors see Pickup Feeding System ...

Page 239: ...ff the main power switch and disconnect the power plug 2 Unless otherwise specifically instructed assemble the machine by reversing the steps used to disassemble it 3 Identify the screws by type length diameter and location 4 To protect against static charges some mounting screws are equipped with toothed washers Be sure not to leave them behind 5 As a rule do not operate the machine with any of i...

Page 240: ...e the screw 1 and detach the deck pickup sensor unit 2 F02 904 01 3 Disconnect the connector 1 and free the claw to detach the deck pickup sen sor 2 When removing the scanner sensor be sure to remove the paint used to lock the claw in place in advance to prevent breaking the claw When mount ing it be sure the claw is not displaced or the sensor is not disoriented 2 1 2 1 F02 904 02 ...

Page 241: ...ove the screw 1 and detach the deck feed sensor unit 2 F02 904 03 3 Disconnect the connector 1 and free the claw to remove the deck feed sensor 2 When removing the scanner sensor be sure to remove the paint used to lock the claw in place in advance to prevent breaking the claw When mount ing it be sure the claw is not displaced or the sensor is not disoriented F02 904 04 2 1 2 1 ...

Page 242: ...COPYRIGHT 2001 CANON INC 2000 2000 2000 2000 CANON iR105 REV 0 JULY 2001 CHAPTER 3 MAIN CONTROLLER ...

Page 243: ... 3 MAIN CONTROLLER 3 1 1 Basic Operation 1 1 Functional Construction The machine may be broadly divided into the following functional blocks controller area in the shaded block F03 101 01 Control panel Printer unit Main controller PCB Reader unit HDD Options boards Controller block ...

Page 244: ...itself 1 2 2 Main Controller PCB T03 102 01 List of Functions 1 2 3 Hard Disk Drive T03 102 02 Name Description CPU Controlling image processing of input image data from the reader unit Controlling image processing of output image data to the printer unit Controlling the hard disk drive Controlling the following network interface DMA controller PCI interface ROM RAM interface RAM Storing temporari...

Page 245: ...ON INC 2000 2000 2000 2000 CANON iR105 REV 0 JULY 2001 CHAPTER 3 MAIN CONTROLLER 3 3 F03 102 01 Arrangement of Major PCBs Main controller PCB Printer unit Reader unit Control panel CPU RAM Options boards CPU DIMM ROM HDD ...

Page 246: ... software from the HDD to write to the SDRAM mounted on the DIMM socket of the main controller PCB requiring time before the control panel becomes ready for operation after the main power switch is turned on While the CPU reads the system software from the HDD to the SDRAM the following screen remains in the control panel with the progress bar on the screen indicating the changing stages of the st...

Page 247: ...program stored in the boot ROM The self diagnosis program checks the condition of the SDRAM and the HDD if a fault is found it will indicate an error code in the control panel F03 103 02 E601 0000 0001 Indicates an error in image transfer data E602 0001 0002 Indicates a write read error Self diagnosis program Boot program Boot ROM CPU SD RAM System area Image data area Main controller PCB HDD Acce...

Page 248: ... change from red to green to indicate that the machine is ready to accept a job The system software of the machine consists of multiple modules and specific modules as needed at specific times are called into the system area of the SDRAM for execution F03 103 03 1 3 3 Construction of the System Software The system software of the machine can broadly be divided into system modules for con trol and ...

Page 249: ...er unit HDD Reader unit Differntial PCB Card Reader D1 option Copy Data Controller option Image line conversion PCB J1024 J1022 J1015 J1017 J6801 J1018 J1104 J9202 J9201 J1551 J1532 J1451 J1014 J1530 LCD panel LCD Inverter PCB Control panel CPU PCB J6808 J6807 J6804 J6803 J6802 J6605 J6901 J6601 J6805 J6602 J1 J3 Key PCB B Key PCB A J6806 Key PCB C The symbol in the diagram indicates the connectio...

Page 250: ... Density conversion LUT Binary processing error diffusing method text text photo print print photo Image memory control Binary processing dither screen film photo 8 Density correction γ conversion 8 8 8 Edge emphasis 1 Compression expansion rotation enlargement reduction SDRAM I O control HDD 4 or 2 Thickening 4 or 2 1 Smoothing 1 Binary binary density conversion Printer unit Printer PG 1 8 8 Main...

Page 251: ... fold repeat 2 2 5 Density Conversion LUT In this block intensity signals are converted into density signals in addition processing is also performed so that the output density curve best suited to each mode is obtained a LOG Conversion Using a LOG conversion table the intensity signals are converted into toner density sig nals in relation to reflected light b Density Adjustment F value conversion...

Page 252: ...are converted into 1 bit image density signals binary Although binary images are produced in 144 gradations owing to the 12 12 dither screen processing 2 3 Controlling the Image Memory The binary image data is controlled in image memory as follows 2 3 1 Compression Expansion Rotation and Enlargement Reduction Binary images are processed for compression expansion for electronic sorting rotation or ...

Page 253: ...xels in question Notch processing is also performed in this block as a pattern unique to read images b Printer PDL Image Output Smoothing most suited to PDL is performed converting 300 300 dpi or 600 600 dpi data into 2400 equivalent 600 dpi data 2 4 2 Thickening PDL output only If selected using a printer driver thickening is performed to thicken fine lines for better reproduction PDL output imag...

Page 254: ... or printing T03 300 01 The counter mechanism consists of 16 items for large size and small size sheet each with 8 mode items T03 300 02 1 At time of shipment from the factory B4 or smaller to count B4 as large size use service mode 2 Not counted the machine is not equipped with fax functions Copying printing operation Counter sensor Single sided Finisher delivery sensor Double sided 1st side PS14...

Page 255: ...300 02 2 To change the contents of a counter or to enable disable indication use service mode This however does not apply to counter 1 whose data cannot be changed Counter Description 1 Default Default change 2 100V model 208V 230V model Counter 1 Total A through L ON ON Fixed Counter 2 Total large ACEGIK OFF ON May be changed Counter 3 Copy 1 ABGH OFF ON May be changed Counter 4 Copy 1 large AG O...

Page 256: ... 402 01 4 3 Standby Mode normal operation In standby mode the machine is in normal operation or is ready to start normal operation at any moment in other words most of power supplied are in operation Not only the main controller PCB but also the reader unit printer unit and control panel are all ready for communication and control 4 4 Power Save Mode Most of power supplies are in operation same as...

Page 257: ...ight 3 3 VB power supply is ON In this mode the CPU on the main controller PCB is also at rest in wait for an interrupt and not running the program to reduce power consumption This mode is used only when the machine is configured as a printer equipped with a net work print option and a PDL print option 4 6 1 Shift from Standby Mode standby sleep A shift from standby mode to sleep mode is made on t...

Page 258: ...de low power OFF mode A shift from low power mode to OFF mode is made on the following condition The control panel power switch soft switch is off Low power mode has lasted for a specific period of time i e a specific period of time as selected in user mode 4 7 3 Return to Standby Mode OFF mode standby In OFF mode a command from outside cannot cause a shift to standby the control panel power switc...

Page 259: ...COPYRIGHT 2001 CANON INC 2000 2000 2000 2000 CANON iR105 REV 0 JULY 2001 CHAPTER 4 INSTALLATION ...

Page 260: ... and between 5 and 80 in hu midity Particularly be sure to avoid areas near water faucets water boilers humidifiers and refrigerators 3 The site must not be near a source of fire subject to dust or ammonium gas or exposed to direct rays of the sun As necessary provide curtains 4 The level of ozone generated by the machine will not affect the health of individuals around it Some however may find it...

Page 261: ...alled in particular be sure that the exhaust of another will not be drawn by the machine Be sure also not to install a machine near an air vent F04 100 01 In general the silicon gas vapor of silicone oil from the fixing assembly tends to soil the corona charging wire reducing its life This is particularly true of a low humidity environment F04 100 02 Exhaust Wrong 1 Wrong 2 ...

Page 262: ...tline of the Work Space Use the following as a guide when considering space for service work Copier Finisher F04 100 03 Copier Finisher Side Paper Deck F04 100 04 250 cm min 120 cm min 10 cm min 50 cm min Copier 200 cm min 50 cm min 310 cm min 120 cm min 10 cm min 110 cm min Copier 200 cm min 50 cm min ...

Page 263: ...installa tion keep the following in mind a Take out the ADF fixing feeding assembly holding tray assembly and copy paper and carry them separately from the main body b When lifting the machine do not use the grips on the pickup assembly delivery assembly Instead be sure to support the machine at four cor ners of its bottom 3 Shift up the 2 adjusters front found on the bottom of the machine to be s...

Page 264: ...ttachment 1 pc K Backing 1 pc L Attachment sheet 1 pc M Deck locking plate 1 pc N Copyboard base 208V model only 1 pc P User s Guide 1 pc Q Copier Manual 1 pc R Box Guide 1 pc S QR sheet 200V model only 1 pc T Service Book 200V model only 1 pc U User Card 200 V model only 1 pc V Warranty Card English 208V model only 1 pc W Warranty Card French 208V model only 1 pc X Drum Warranty Card English 208V...

Page 265: ...nsert a flat blade screwdriver into the top of the grip cover 1 2 pc front rear on the left of the machine and remove it Shift up the grips at the front 2 and the rear 3 2 Remove the grip cover rear 1 from the right of the machine with a flat blade screwdriver and shift up the grip 2 at the rear 3 Remove the grip 1 from the box that comes with the machine No Work Checks remarks 1 3 2 1 2 1 ...

Page 266: ... copier lift the machine slightly and remove the pad 1 At this time move the plastic bag 2 toward the pad side F04 202 05 No Work Checks remarks 4 Open the right upper cover and slide the face cover small 1 to the rear to detach then detach the face cover large 2 Fit the grip 3 removed in step 3 to the front Close the right upper cover F04 202 04 1 3 2 2 1 ...

Page 267: ...cks remarks F04 202 06 7 Shift up the 2 adjusters front 1 found on the bottom of the copier and check to make sure that they are unlocked F04 202 07 6 Holding the grips on the delivery side front rear of the copier lift the machine slightly and remove the remaining pad and the plastic bag 1 at the same time 1 1 ...

Page 268: ...slope plate then fit the pin 2 1 pc each Holding the grips front rear on the delivery side of the copier slide the copier down the slope plates to move it off the skid 10 For the cardboard box that comes with the machine take out the parts and the attachments Check to make sure that none of the foregoing items is missing F04 202 09 8 Take out the two slope plates 1 from the center of the skid 2 F0...

Page 269: ...ound continue the work F04 202 10 11 Open the front cover and then open the compartment cover 1 put the grip 2 used in step 4 inside the compartment found behind the front cover 3 for storage Close the compartment cover 1 and then close the front cover 3 12 Mount the removed face covers to the right side and the left side of the machine Open the right upper cover and mount the face cover small and...

Page 270: ... Remove the packing tape from the copier 2 Open the ADF Remove the copyboard glass protective pad 3 Remove the packing tape 1 from the scanner fixing Slide the scanner fixing 2 to the front to detach Store away the fixing as you will need it to secure the scanner when relocating the machine F04 203 01 No Work Checks remarks 2 1 ...

Page 271: ...Remove the double sided tape 1 from the inside cover and the tape 2 used to keep the tag 3 in place F04 204 01 F04 204 02 No Work Checks remarks 1 2 3 1 Shift the fixing feeding assembly releasing lever 1 in the direction of the arrow left to release the transfer separation charging assembly 2 4 Installing the Fixing Assembly ...

Page 272: ...easing member 3 Remove all foreign matter e g tape glue from the feed belt F04 204 03 F04 204 04 No Work Checks remarks 4 Remove the tape used to keep the tag in place then open the fixing feeding unit top 1 and remove the two screws 2 from the front and the rear fixing nip release Close the fixing feeding unit top 1 Slide out the fixing feeding unit 1 to the front 1 2 3 1 F04 204 05 2 1 ...

Page 273: ...1 CHAPTER 4 INSTALLATION 4 14 2 5 Mounting the Charging Assemblies No Work Checks remarks 1 Remove the screw 1 and detach the transfer separation charging assembly front cover 2 2 Remove the fixing 1 1 screw 2 and disconnect the connector 3 F04 205 01 F04 205 02 1 2 3 1 2 ...

Page 274: ...cohol clean the transfer separation charging wire 4 While observing the following mount the transfer separation charging assembly The solvent must be fully dry The gut wire is not brought into contact with the transfer guide 1 to avoid a cut The ground plate 2 is found outside the charging assembly 3 frame as shown F04 205 03 F04 205 05 No Work Checks remarks 1 F04 205 04 5 Connect the connector o...

Page 275: ...e and shift the fixing feeding assembly releasing lever 1 to SET position 7 Remove the screw 1 and detach the primary charging assembly front cover 2 8 Disconnect the connector 1 and release the locking lever 2 of the primary charging assembly then take out the charging assembly 3 Using alcohol clean the primary charging wire and grid wire REF Do not mount it until the solvent is fully dry Wait un...

Page 276: ...e assembly front cover 2 10 Disconnect the connector 1 and release the locking lever 2 of the pre transfer charging assembly then take out the charging assembly 3 Using alcohol clean the pre transfer charging wire 11 With the lock released fit the primary charging assembly and connect the connector Check to make sure that the solvent is fully dry F04 205 09 F04 205 10 1 2 3 2 1 ...

Page 277: ...e transfer charging assembly and connect the connector Check to make sure that the solvent is fully dry Check to make sure that the one way arm 1 of the pre transfer charging assembly is on the eccentric cam 2 F04 205 11 13 Mount the primary charging assembly cover and the pre transfer charging assembly cover with a screw 1 pc each 14 Close the front cover 1 2 ...

Page 278: ...may tear F04 206 01 2 Take out the developing assembly from the package that comes with the machine Turn the developing cylinder by hand to check it for scratches 3 Holding the developing assembly 1 as shown mount it to the machine When mounting the developing assembly fit it from a high position and take care not to bring the developing cylinder into contact with the plate of the developing assem...

Page 279: ...h the 6 TP screws 2 M4x6 black that come with the machine Be sure that the developing assembly locking unit is firmly in contact and is free of displacement to avoid image faults Particularly it must not ride overt the boss found at the bottom F04 206 04 5 Fit the previously removed screw to the door tape of the manual feed tray cover Keep the manual tray cover open 2 2 2 1 ...

Page 280: ...eleasing spacer 2 Close the manual feed tray unit 3 F04 207 01 2 Open the right upper cover and the right lower cover and push the release buttons of the front deck right and cassette 3 4 then slide them halfway out 3 Remove the three pickup roller releasing spacers 1 Close the upper vertical path cover 2 and the lower vertical path cover 3 Fit the front deck right and the cassette 3 4 back in No ...

Page 281: ...001 CHAPTER 4 INSTALLATION 4 22 4 Press the releasing button of the front deck left and slide it to the front Secure the deck locking plate 1 to the front deck left with an RS tightening screw 2 M4x10 white Close the front deck left F04 207 03 No Work Checks remarks 2 1 ...

Page 282: ...en detach the upper right cover 3 while paying attention to the three claws 4 found inside the upper right cover When detaching it be sure to lift the claw side of the upper right cover 2 Open the 2 edge saddles 1 of the lower arm 2 and thread the control panel harness 3 through the lower arm At this time keep the control panel harness routed to the connector side so that it will not be slack Clos...

Page 283: ...o the copier Fit the RS tightening screw 2 M4x10 of the right rear after positioning fit the remaining 5 RS tightening screws 3 M4x10 to secure the lower arm 4 4 Mount the upper right cover 1 with 3 RS tightening screws 2 At this time check to make sure that the 3 claws 3 inside are fully engaged and the over is firmly in contact Close the toner cartridge cover 4 F04 208 04 3 3 2 4 1 2 3 1 4 ...

Page 284: ...ower arm and hook the 2 claws 2 found at the bottom for the original delivery tray in the notches of the right upper cover check that there is no gap and then secure it in place with 2 RS tightening screws 3 M4x10 6 Hook the claw 1 of the upper arm 2 on the hole in the lower arm and temporarily fix the upper arm in place with 4 binding screws 3 M4x14 F04 208 06 1 2 3 3 2 2 3 3 1 ...

Page 285: ...e 2 wire saddles 4 At this time check to make sure that the wire saddle 5 at the rear matches the marking 6 on the control panel harness 8 Pinch the control panel harness with a harness clip 1 and fit it to the upper arm Hook the claw 2 found on the left side of the fate upper arm cover 3 and put it over the upper arm Keep the harness clip 1 so that the side with a protrusion thicker side is at th...

Page 286: ...marks F04 208 09 9 Remove the binding screw 1 and detach the rear support cover 2 of the control panel unit 3 10 Put the control panel unit 1 on the upper arm and secure it in place with a flat head screw 2 M4x10 and a W sems screw 3 M4x12 Mount the rear support cover 4 with a binding screw 5 F04 208 10 2 3 1 5 1 2 3 4 ...

Page 287: ...s 11 Secure the upper arm cover 1 with 2 P tightening screws 2 M4x10 Mount the lower arm cover 3 with a binding screw 4 M4x6 12 Connect the connector 1 of the control panel harness to the control panel unit 13 If for a 230V model fit a ferrite core 1 to the control panel harness F04 208 11 F04 208 12 F04 208 13 2 4 3 1 1 1 ...

Page 288: ...00 2000 2000 2000 CANON iR105 REV 0 JULY 2001 CHAPTER 4 INSTALLATION 4 29 2 9 Supplying the Toner No Work Checks remarks 1 Take out the toner cartridge 1 for the packaging box 2 Remove the fixing tape 1 F04 209 01 F04 209 02 1 1 ...

Page 289: ...TALLATION 4 30 No Work Checks remarks 3 Open the toner cartridge cover 1 and fit the toner cartridge 2 from the front of the copier Be sure to insert the toner cartridge so that the marking 3 on it matches the marking 4 on the copier 4 Close the hoper cover F04 209 04 4 3 F04 209 03 1 2 ...

Page 290: ...ANON iR105 REV 0 JULY 2001 CHAPTER 4 INSTALLATION 4 31 2 10 Mounting the ADF No Work Checks remarks 1 Remove the face plate for the ADF connector from the copier 2 Fit the ADF connector 1 into the socket found at the back of the copier F04 210 01 1 ...

Page 291: ...buttons of the cassette 3 and 4 and slide out the cassettes to the front then take out the packing material 2 Set the side guide plate 1 of the cassette 3 4 against the hole A4 A3 identified by the marking M Fit the non inch block 2 that comes with the machine into the following hole making sure that it will not be pushed up from inside the cassette Hole with marking A 3 STMT R Hole with marking H...

Page 292: ... use for index paper Press the releasing button for the cassette and slide it out to the front Peel the backing sheet 2 and the protective sheet 3 from the attachment sheet 1 and attach the attachment sheet to the area 4 indicated in the figure 2 Place the index paper attachment 5 over the attachment sheet 3 Fit the base sheet 6 in the cassette Slid out the cassette F04 212 01 2 1 5 4 3 6 ...

Page 293: ...ontrast of the control panel display using the Image Contrast dial for the best view and advise the user on the use of the dial Check to see that the Add Paper message goes ON Press the keys on the keypad and the Clear key to see that the copy count is correctly indicated 1 Check to make sure that the front deck and the cassette are free of any packing material 2 Connect the power plug to the powe...

Page 294: ...2 of the cassette and set it to the cassette cover F04 213 05 8 Press the release button and slide out the cassette 3 4 9 Attach the 3 Hole Paper Set labels 1 No Work Checks remarks 11 Push in the cassettes into the copier 12 Attach the universal cassette label 1 to the cassette to suit the user s needs F04 213 04 1 F04 213 03 2 1 FL cassette W1 set 1 ...

Page 295: ...ay by count down At the end make the following selections to generate 2 A3 solid black copies to ensure stable images COPIER TEST PG PG_PICK Enter the number of the source of paper containing A3 paper and press the OK key 3 for cassette 3 or 4 for cassette 4 Make the following selections COPIER TEST PG TYPE Enter 6 and press the OK key 6 for solid black PG TYPE6 Preset the Start key twice to gener...

Page 296: ...glass and check the copy image Check to make sure that pickup from each source of paper is normal Make 3 test copies each from the decks and the cassettes The first 10 copies or so may show soiled images because of toner dropping from the drum separation claw This symptom will disappear as more and more copies are made 15 Make double sided copies and check the operation 16 Make user mode and servi...

Page 297: ...ew 1 1 pc each from the left and right of the guide plate 2 and secure the guide plate 2 to the desired position F04 214 02 1 Press the release button and slide out the deck 2 Remove the screw 1 of the rear end guide plate 2 and secure the guide plate 2 to the desired position No Work Checks remarks 4 Put paper in the deck 5 Slide the deck inside the copier F04 214 01 2 1 2 1 ...

Page 298: ...arks 6 Attach the new Deck Size labels 1 to the paper size plate of the deck F04 214 03 1 7 Start service mode and register the paper size of the front deck Thereafter turn off and then on the main power switch Right deck COPIER OPTION CST P SZ C1 Left deck COPIER OPTION CST P SZ C2 A4 6 200V model default B5 15 LTR 18 ...

Page 299: ... check to make sure that they are unlocked Take care as the adjusters can slip out of the machine because of vibration while in transit C Be sure to remove the accessories side paper deck finisher when mov ing the copier into or out of the user s place Check to make sure that the No 2 mirror base does not move Carry the develop ing assembly in a separate box 1 Make a copy in Direct 2 Take out all ...

Page 300: ...der D1 as follows No Work Checks remarks 1 Start service mode COPIER FUNCTION INSTALL CARD and enter the lowest card number from 1 to 2001 As many as 1000 cards starting with the number may be used 2 Turn off the main power switch of the copier and disconnect the power plug 3 Open the front cover 4 Remove the screw 1 and detach the primary charging assembly front cover 2 F04 401 01 2 1 ...

Page 301: ...R 4 INSTALLATION 4 42 No Work Checks remarks 5 While supporting the card reader base 1 remove the screw w washer 2 You will need the screw and the washer later F04 401 03 6 Push in the face plate 1 lightly and take out the card reader base assembly 2 from below F04 401 02 2 1 2 1 ...

Page 302: ...bly 3 You will use the removed parts later F04 401 05 8 Remove the 2 screws that remain on the top of the card reader 1 Mount the card reader 2 using the 2 removed screws 3 and the 2 screws 4 used to keep the face plate in place At this time be sure to route the harness 5 and the grounding wire 6 under the card reader as indicated Route the harness through the edge saddle 7 F04 401 04 3 2 1 1 1 2 ...

Page 303: ...ing wire 2 with the removed screw w washer 1 F04 401 07 10 Remove the 2 screws 1 from the front of the card reader base Secure the face plate 2 removed in step 4 with 2 screws 1 as shown F04 401 06 1 2 2 1 1 11 Connect the connector 1 of the copier and the harness of the card reader to which a relay post heater is attached Push the harness into the copier and fit in the card reader assembly 2 F04 ...

Page 304: ...Checks remarks 12 While supporting it mount the card reader assembly 1 with the screw w washer 2 removed in step 5 F04 401 10 13 Mount the primary charging assembly front cover 1 with a screw 2 F04 401 09 14 Close the front cover 15 Connect the power plug of the copier and turn on the main power switch 1 2 1 2 ...

Page 305: ...ata Controller A1 Here the instructions are limited to installation to an iR105 For how to make various settings checks to make and points to note see the Installa tion Procedure that comes with a specific controller No Work Checks remarks 1 Remove the 4 screws 1 that come with the rear cover of the host machine and remove the face cover 2 If you are installing a Copy Data Controller A1 to a 230V ...

Page 306: ...000 CANON iR105 REV 0 JULY 2001 CHAPTER 4 INSTALLATION 4 47 No Work Checks remarks 2 Connect the connector J525 1 of the host machine with the cable 3 of the controller F04 501 03 3 Mount the controller 2 with 4 screws 1 F04 501 02 2 1 1 2 1 1 ...

Page 307: ...lling a Copy Data Controller A1 to a 230V Model Remove the connector fixing screw bottom 1 Bend the terminal of the grounding wire 2 that comes with the machine to the outside and mount it using a connector fixing screw 1 F04 501 05 5 Connect the connector J525 1 of the host machine and the cable 3 of the controller F04 501 04 1 2 1 1 2 ...

Page 308: ...00 CANON iR105 REV 0 JULY 2001 CHAPTER 4 INSTALLATION 4 49 No Work Checks remarks 6 Mount the controller 2 using 4 screws At this time be sure to tighten the other terminal 3 of the grounding wire using the right lower screw F04 501 06 2 1 1 3 ...

Page 309: ...COPYRIGHT 2001 CANON INC 2000 2000 2000 2000 CANON iR105 REV 0 JULY 2001 CHAPTER 5 MAINTENANCE AND INSPECTION ...

Page 310: ...ENANCE AND INSPECTION 5 1 1 Periodically Replaced Parts Some parts of the machine must be replaced on a periodical basis to ensure a specific level of product performance once they fail the consequences will be appreciable If possible plan the replacement to coincide with a scheduled visit ...

Page 311: ... tion charging wire Primary charging wire 2 Primary grid wire 3 Main thermistor 4 Sub thermistor 5 Thermal switch unit 6 Ozone filter drum 7 Ozone filter separation 8 Ozone filter fixing Life pages 500 000 500 000 500 000 500 000 500 000 1 000 000 1 000 000 1 000 000 1 000 000 Remarks If high temperature humidity every 250 000 pages If high temperature humidity every 250 000 pages If normal temper...

Page 312: ...g assem bly 9 Primary charging wire cleaner 1 10 Primary charging wire cleaner 2 11 Transfer charging wire cleaner 1 12 Transfer charging wire cleaner 2 13 Separation charging wire cleaner Life pages 200 hr or 150 000 activa tions 1 000 000 1 000 000 500 000 1 000 000 1 000 000 1 000 000 1 000 000 500 000 500 000 500 000 500 000 500 000 Remarks Check in service mode Period of Activation COPIER COU...

Page 313: ... deck cassette 25 Delivery roller deck cas sette Life pages 500 000 500 000 500 000 500 000 500 000 500 000 1 000 000 1 000 000 500 000 1 000 000 500 000 500 000 Remarks Replace together with fixing upper roller Actual number of pages 2 pc each Number may be checked in service mode left deck LD PU RL right deck RD PU RL cassette 3 C3 PU RL cassette 4 C4 PU RL Actual number of pages 2 pc each Numbe...

Page 314: ...0 000 120 000 1 000 000 1 000 000 Remarks Actual number of pages processed 1 pc for each holder May be checked in service mode left deck LD SP RL right deck RD SP RL cassette 3 C3 SP RL cassette 4 C4 SP RL Actual number of pages processed May be checked in service mode M UP RL Actual number of pages processed May be checked in service mode MM FD RL Actual number of pages processed May be checked i...

Page 315: ... 2000 2000 2000 CANON iR105 REV 0 JULY 2001 CHAPTER 5 MAINTENANCE AND INSPECTION 5 6 F05 201 01 1 2 3 3 4 5 24 24 24 24 25 25 25 26 26 26 25 26 26 27 28 29 13 12 11 10 10 9 9 14 15 6 7 8 16 17 18 19 20 19 20 22 23 21 22 F05 201 02 ...

Page 316: ... 1 Side Paper Deck Feed Roller 2 Side Paper Deck Delivery Roller 3 Side Paper Deck Separation Roller Life pages 500 000 500 000 500 000 Remarks Actual number may be checked in service mode PD PU RL Actual number may be checked in service mode PD FD RL Actual number may be checked in service mode PD SP RL Q ty 2 2 1 Parts No FF5 7829 front FF5 7830 rear FB6 0615 FB5 6586 As of May 2001 1 2 3 ...

Page 317: ...y a fire can occur owing to the build up of moist dust Be sure to disconnect the power plug on a periodical basis and wipe the area and the power plug clean with a dry cloth As of May 2001 T05 300 01 No Work 1 Meet the person in charge 2 Record the counter readings 3 Make test copies 4 Clean the charging assemblies Charging wire primary pre transfer transfer separation Grid wire primary charging a...

Page 318: ...re or Replacing the Charging Wire Cleaner At the end of the following work check to be sure that the charging wire is in the middle of the charging wire cleaner otherwise image faults can oc cur a Cleaning the charging wire b Replacing the charging wire c Moving the charging wire cleaner by hand d Replacing the charging wire cleaner F05 300 01 F05 300 02 Correct Wrong ...

Page 319: ...r upper lower Feeding belt Feeding rollers Scanner sensor cleaning prism 11 Clean the fixing delivery assem bly Separation claw upper lower Feed rollers Inlet guide Web check Web oil receptacle Thermistor Sub thermistor Thermal switch Checks Check the tension of the cable Clean the sliding ar eas and apply silicone oil FY9 6011 If the case is more than half full dispose of the toner in a plastic b...

Page 320: ...ake sure that the grounding is cor rect Otherwise pos sible leakage will not turn on the leakage breaker 18 Put the sample copies into order and clean up the area around the machine 19 Record the last counter readings 20 Fill out the Service Book and report to the person in charge Checks With the power switch set to ON and in addition the le ver 1 of the leakage breaker in ON state press the test ...

Page 321: ...oard glass Ozone filter FM2 FM8 FM19 Dust filter FM1 2 pc FM3 FM10 front cover upper front cover Scanner wire Scanner rail No 1 to No 3 mir rors Dust proof glass Reflecting plate Standard white plate Pre transfer expo sure LED Service interval every 1 000 000 z Unit Externals and con trols Scanner system Optical system Remarks Remove dust from the filter surface See F05 401 01 Remove dust from the...

Page 322: ...rum Develop ing as sembly Cleaner Remarks If high temperature humid ity every 250 000 pages If high temperature humid ity every 250 000 pages If high temperature humid ity every 250 000 pages If normal temperature low humidity every 400 000 pages If high temperature humid ity every 250 000 pages If high temperature humid ity every 250 000 pages Clean with alcohol and drum cleaning powder CK 0429 F...

Page 323: ... toner case Transfer guide Registration roller upper lower Feeding belt Feeding rollers Duplex horizontal registration sensor Duplex roller Service interval every 1 000 000 z Unit Fixing assembly Scanner sensor Waste toner collect ing as sembly Pickup feeding assembly Duplex assembly Remarks If high temperature humid ity every 250 000 pages If high temperature humid ity every 250 000 pages Check a...

Page 324: ...CHAPTER 5 MAINTENANCE AND INSPECTION 5 15 F05 401 01 Dust proof filter for FM10 Dust proof filter for FM1 Dust proof filter for FM8 Ozone filter for FM19 Ozone filter for FM2 Dust proof filter for FM3 Dust proof filter for front cover Dust proof filter for upper front cover ...

Page 325: ...r receptacle During the work take care not to rotate the magnet roller drive assembly Otherwise waste toner will drop from the cleaner assembly 1 Slide out the process unit See 5 8 1 in Chapter 2 Be sure to place a protective sheet over the fixing feeder unit 2 Take out the photosensitive drum 3 Take out the cleaner blade assembly 4 While keeping the magnet roller 1 and the scraper 2 at the front ...

Page 326: ...cks 1 of the slide rail and draw the fixing feeding unit 2 farthr to the front F05 402 02 6 With the cleaner assembly 1 halfway slid put remove the screw 2 1 each and detach the two toner receptacle fix ing plates 3 7 Remove the front toner receptacle and remove the toner from the front toner receptacle 4 F05 402 03 1 1 2 1 4 2 3 2 ...

Page 327: ...1 CHAPTER 5 MAINTENANCE AND INSPECTION 5 18 8 Slide out the cleaner assembly 1 and remove the screw 2 1 each then de tach the two toner receptacle fixing plates 3 9 Remove the rear toner receptacle and remove the toner from the rear toner re ceptacle 4 F05 402 04 1 4 3 2 3 ...

Page 328: ... blade During the work take care not to turn the magnet roller drive assembly Otherwise waste toner can drop from the cleaner assembly 1 Slide out the process unit See 5 7 1 in Chapter 2 Be sure to place a drum protec tive sheet over the fixing feed ing unit 2 Remove the photosensitive drum 3 Moisten lint free paper 1 with 5 to 10 cc of alcohol 2 and collect 0 2 to 0 3 g of drum cleaning powder CK...

Page 329: ... in widths of 5 to 10 cm in peripheral direc tion For a single width you may force the lint free paper back and forth 15 to 20 times with out damaging the drum F05 402 06 5 Wait until the alcohol has evaporated then dry wipe the drum with lint free paper If traces remain repeat step 4 and increase the number of trips made 6 Rorate the drum so that that new areas may be cleaned 5 to 10 cm Repeat st...

Page 330: ...at the coating of waste toner is even If as follows repeat step 8 The surface of the magnet roller is coated in distinct lines The surface has dents in some areas The surface has lumps of toner F05 402 07 10 Remove the cleaning blade from the cleaning blade assembly See 5 8 2 b in Chapter 2 11 Butt the edge of the cleaning blade 7 that has been turned over or newly mounted against the rear of the ...

Page 331: ... of the cleaning blade coming into contact with the pho tosensitive drum and mount the clean ing blade When mounting the cleaning blade be sure to put the blade sub plate between the blade sup port plate and the blade back plate After mounting the cleaning blade rotate the drum if the toner is not colleted by the cleaning blade repeat the fore going steps If it is not corrected after tightening th...

Page 332: ...COPYRIGHT 2001 CANON INC 2000 2000 2000 2000 CANON iR105 REV 0 JULY 2001 CHAPTER 6 TROUBLESHOOTING ...

Page 333: ...ltage present at the outlet NO The problem is not of the copier Advise the user 4 Is the rated voltage present between J1 1 and J1 2 J1 is found near the power cord base YES Go to step 6 Rest omitted To find out the possible cause faulty part of a specific problem see the Cause column of the table In the case of the above i e absence of AC power suspect that the power plug may be disconnected the ...

Page 334: ...ive probe of the meter while the symbol indicatingthe negative probe of the meter In the case of the example you are expected to connect the positive probe to J109 1 and the negative probe to J109 2 Is the power plug connected to the power outlet Connect the plug Checks Results Action NO 1 Step Are the front cover and other covers closed properly Close the all covers NO 2 Is the rated voltage pres...

Page 335: ... test prints of the following 1 PG4 blank reader 2 PG5 halftone reader 3 PG6 solid black reader Go to 1 1 3 to make checks on the scanner side Pre Checks Clean the following 1 Grid wire 2 Primary charging wire 3 Pre transfer charging wire 4 Transfer charging wire Check the following 1 Charging wire for height If the test prints have a fault If only copy images have a fault Output Conditions n F va...

Page 336: ...he following of the developing system 1 Developing bias 2 Toner coating on sleeve Checking the Density Slope Checking the Solid Black Density YES NO YES NO YES NO NO YES NO YES YES NO Does the image have a vertical line Does the image have a vertical line Checking the Images n Use PG4 PG7 and PG8 YES YES NO NO Execute potential control Check the image using PG4 Check PG8 solid black Caution Moving...

Page 337: ...ng in service mode ADJUST DEVELOP DE OFST n A lower value makes images lighter Checking for fogging Checking Halftone Density NO YES NO YES NO YES Check PG6 blank Check PG4 halftone End Make the following in service mode COPIER DISPLAY DPOT VDM Make the following selections in service mode COPIER DISPLAY DPOT VL1M A Compared with No 6 and No 7 halftone is the density about the same NO YES Check th...

Page 338: ...te plate is mounted if not in firm contact mount it correctly Making Initial Checks Checking the Density Slope Checking the Solid Black Checking Halftone Density Checking for Fogging YES YES NO NO NO YES NO NO YES YES NO NO Increase the value of the following in service mode COPIER ADJUST DENS DENS ADJ End YES YES NO NO Make a copy of the A3 Chart in text photo mode YES Go to Checking the Density ...

Page 339: ...loping assembly base Registration roller Moist cloth Note 1 Alcohol and lint free paper Lint free paper Alcohol and lint free paper Alcohol and lint free paper Alcohol and lint free paper Cleaning Dry wiping then cleaning with lit free paper moistened with alcohol Dry wiping then cleaning with lint free paper moistened with alcohol Dry wiping then cleaning with lint free paper moistened with alcoh...

Page 340: ...COPYRIGHT 2001 CANON INC 2000 2000 2000 2000 CANON iR105 REV 0 JULY 2001 CHAPTER 6 TROUBLESHOOTING 6 8 ...

Page 341: ...image position adjustment for copier output ADF mode 2 1 1 Adjusting the Image Position for Printer Output Image Position Standards F06 201 01 1 Adjusting the Image Position in Main Scanning Direction Check to make sure that the value for the following matches that indicated on the ser vice label COPIER ADJUST LASER PVE OFST If different enter the value indi cate on the service label The value is ...

Page 342: ...ck the image leading edge margin COPIER TEST PG5 Standard 4 1 5 mm 1 0 mm Adjustment COPIER ADJUST FEED ADJ REGIST A higher value increases the margin A lower value decreases the margin F06 201 02 4 Adjusting the Image Trailing Edge Margin Generate output of the following to check the image trailing edge margin COPIER TEST PG5 Standard 2 5 1 5 mm Adjustment COPIER ADJUST BLANK BLANK B A higher val...

Page 343: ...n COPIER TEST PG56 Likewise make the following selections to select 2 3 4 and 8 COPIER TEST PG5 Then generate COPIER TEST PG5 to check the image front margin Standard 2 5 1 5 mm PG PICK 1 right deck PG PICK 2 left deck PG PICK 3 cassette 3 PG PICK 4 cassette 4 F06 201 04 Adjustment Adjusting the Fixing Position of Each Source of Paper Front Deck left right 1 Slide out the deck and loosen the 4 scr...

Page 344: ... REV 0 JULY 2001 CHAPTER 6 TROUBLESHOOTING 6 12 2 Move the cassette guide assembly front 4 to the front or the rear to make adjustments F06 201 06 Cassette 3 4 1 Slide out the cassette and remove the 2 screws 2 for the cassette front cover 1 F06 201 07 4 1 2 ...

Page 345: ...t of the cassette and adjust the position using the fixing screw 4 F06 201 08 If you have adjusted the cassette 3 or cassette 4 be sure to execute the fol lowing If you have replaced the cassette 3 COPIER ADJUST CST ADJ C3 STMTR COPIER ADJUST CST ADJ C3 A4R If you have replaced the cassette 4 COPIER ADJUST CST ADJ C4 STMTR COPIER ADJUST CST ADJ C4 A4R 3 3 4 ...

Page 346: ...rd glass and make a copy to check the image leading edge non image width Standard 4 1 5 mm 1 0 mm Adjustment COPIER ADJUST ADJ XY ADJ X A higher value increases the margin A lower value decreases the margin F06 201 09 2 Adjusting the Image Front Non Image Width Place the NA3 Test Chart on the copyboard glass and make a copy to check the image front non image width Standard 2 5 1 5 mm Adjustment CO...

Page 347: ...non image width of the 2nd side Standard 2 5 2 0 mm Adjustment COPIER ADJUST FEED ADJ ADJ REFER A higher value increases the margin A lower value decreases the margin F06 201 11 4 Adjusting the Image Front Margin for the Manual Feed Tray and the Side Paper Deck accessory Place the NA3 Test Chart on the copyboard glass and make a double sided copy to check the front non image width of the 2nd side ...

Page 348: ... Paper Manual Feed Tray 1 Loosen the 2 mounting screws 1 of the manual feed tray to adjust the manual feed tray position F06 201 13 Side Paper Deck accessory 1 Slide out the compartment and adjust the position of the latch plate 1 of the deck open solenoid using the 2 screws 2 At this time use the index 3 on the latch plate as a reference F06 201 14 1 1 2 1 3 ...

Page 349: ... and an A4 test chart on the ADF original tray and make a copy to check the image leading edge non image width Standard 4 1 5 mm 1 0 mm Adjustment FEEDER ADJUST STRD S A4 original FEEDER ADJUST STRD L A3 original A higher value increases the margin A lower value decreases the margin F06 201 15 2 Adjusting the Image Front Non Image Width Place an A3 size test chart in the ADF original tray and make...

Page 350: ...r Drive Cable See 2 9 2 b Scanner Drive Cable in Chapter 2 2 2 2 Adjusting the Scanner Mirror Base See 2 9 2 b Scanner Drive Cable in Chapter 2 2 2 3 When Replacing the Standard White Plate See 2 9 4 g When Replacing the Standard White Plate in Chapter 2 2 2 4 When Replacing the Scanning Lamp See 2 9 1 c When Replacing the Scanning Lamp in Chapter 2 ...

Page 351: ...em 2 3 1 Stringing the Grid Wire of the Primary Charging Assembly See 5 8 3 d Stringing the Grid Wire of the Primary Charging Assembly in Chapter 2 2 3 2 Stringing the Charging Wire of the Charging Assemblies See 5 8 3 c Stringing the Charging Wire in Chapter 2 2 3 3 Mounting the Drum Cleaning Blade See 4 2 2 Work 2 in Chapter 5 ...

Page 352: ...e machine is gold colored When mounting the pickup roller 1 to the pickup assembly be sure that the round mark ing 2 found on the side of the roller and the round marking 3 on the collar gold colored are toward the front of the machine F06 204 01 The collar of the pickup roller used at the rear is silver colored When mounting the pickup roller 4 to the pickup assembly be sure that the round markin...

Page 353: ...n F06 204 03 2 4 3 Orientation of the Feeding Roller of the Deck Cassette Pickup Assem bly When mounting the feeding roller assembly to the deck cassette pickup assembly be sure that the belt pulley 2 is to the front of the machine When mounting the feeding roller 3 to the feeding roller shaft 4 be sure that the round marking 5 is toward the front of the machine F06 204 04 Wider notch Narrower not...

Page 354: ...en mounting the pickup roller 1 to the pickup assembly be sure that the round mark ing 2 of the color silver colored is toward the front of the machine 1 Pickup roller 2 Marking collar F06 204 05 The collar of the pickup roller used at the rear of the machine is gold colored When mounting the pickup roller 4 to the pickup assembly be sure that the round mark ing 5 on the side of the roller and the...

Page 355: ...g the feed ing roller 3 to the feeding roller shaft 4 be sure that the round marking 5 is toward the front of the machine F06 204 07 2 4 6 Orientation of the Feeding Roller of the Side Paper Deck When mounting the feeding roller assembly 1 to the side paper deck pickup assembly be sure that the belt pulley 2 is toward the front of the machine When mounting the feed ing roller 3 to the feeding roll...

Page 356: ...f double feeding or pickup failure occurs during pickup adjust the position of the pres sure spring of the separation roller If double feeding occurs move the hook of the spring in the direction of arrow B If pickup failure occurs move the hook of the spring in the direction of A 1 Feeding roller 2 Separation roller 3 Locking lever 4 Pressure spring F06 204 09 1 2 3 4 A B ...

Page 357: ...Pickup Feeding Roller of the Manual Feed Tray If double feeding or pickup failure occurs during pickup adjust the position of the pres sure spring of the separation roller If double feeding occurs move the hook of the spring in the direction of arrow A If pickup failure occurs move the hook of the spring in the direction of B F06 204 10 B A ...

Page 358: ...11 SL9 SL10 SL7 SL8 SL6 SL11 SL3 SL4 SL2 SL1 SL 2 SL 3 SL 8 SL 7 SL 9 10 SL 4 SL 11 SL 101 Side paper deck Solenoid SL 2 Solenoid SL 2 10 5 0 5mm Solenoid SL 4 Solenoid SL 3 8 2mm 49 5 0 5mm 35 5 0 5mm 34 0 0 5mm No adjustment required Screws Solenoid SL 101 0 4 0 2mm Solenoid SL 6 SL 6 Push fully A if fixing web is new if fixing web is not new ...

Page 359: ...N iR105 REV 0 JULY 2001 CHAPTER 6 TROUBLESHOOTING 6 27 2 4 10 Location of the Fixing Web Solenoid SL2 a If the Fixing Web Is New Use the position of the solenoid 1 using the screw 2 so that the travel of the drive lever is 8 2 mm F06 204 12 8 2mm 1 2 ...

Page 360: ...OTING 6 28 b If the Fixing Web Is Not New Before removing the solenoid check the position A of the drive lever when the solenoid 1 is ON After replacing the solenoid make adjustments using the screw 2 so that the po sition of the drive lever is the same when the solenoid is ON F06 204 13 A 1 2 ...

Page 361: ...2001 CHAPTER 6 TROUBLESHOOTING 6 29 2 4 11 Position of the Delivery Flapper Solenoid SL3 Use the screw 2 to adjust the position of the solenoid 1 so that the drive lever is fully pushed when the solenoid is ON i e when the steel core is drawn F06 204 14 1 2 Fully pushed ...

Page 362: ...TROUBLESHOOTING 6 30 2 4 12 Position the Fixing Feeder Unit Locking Solenoid SL4 Use the screw 3 to adjust the position of the solenoid 1 so that the locking lever 2 is 10 5 0 5 mm away from the frame when the solenoid is ON i e when the steel core is drawn F06 204 15 10 5 0 5mm 1 2 3 ...

Page 363: ...HAPTER 6 TROUBLESHOOTING 6 31 2 4 13 Position of the Multifeeder Latch Solenoid SL6 Slide the solenoid in the direction of A so that the gap between the shutter 1 and the shutter plate 2 is 0 4 0 2 mm when the solenoid is drawn F06 204 16 F06 204 17 A 1 2 0 4 0 2mm 0 4 0 2mm ...

Page 364: ...ckup unit bottom of each cassette holder and the bushing bottom edge of the A roller support plate is 34 0 0 5 mm when the plunger of the pickup roller releasing solenoid is drawn as occurring when 1 and 2 are operated as shown After adjustment make sure that the distance between the paper face and the A roller is 2 5 0 5 mm when the A roller is in UP position F06 204 18 1 1 2 2 A View from A 34 0...

Page 365: ...from the pickup unit bottom face to the bushing bot tom edge of the A roller support plate is 49 5 0 5 mm when the plunger of the pickup re leasing solenoid is drawn as occurring when 1 and 2 are operated as shown After ad justment make sure that the distance between the paper face and the A roller is 2 5 0 5 mm when the A roller is in UP position F06 204 19 2 1 1 2 A View from A 49 5 0 5mm 3 ...

Page 366: ...ckup unit bottom face of each cassette holder and the bushing bottom edge of the A roller support plate is 35 5 0 5 mm when the plunger of the pickup roller releasing solenoid is drawn as occurring when 1 and 2 are operated as shown After adjustment make sure that the distance between the paper face and the A roller is 2 5 0 5 mm when the A roller is in UP position F06 204 20 1 2 1 2 A View from A...

Page 367: ...screws 2 of the solenoid with reference to the index on the support plate Or mark the position of the solenoid on the support plate with a scriber If you are replacing the solenoid on its own you must secure it in its initial position F06 204 21 2 4 18 Fitting the Side Guide Timing Belt of the Manual Feed Tray Assembly Butt the rack plate 1 of the manual feed tray against section A open state Move...

Page 368: ...ANON iR105 REV 0 JULY 2001 CHAPTER 6 TROUBLESHOOTING 6 36 2 4 19 Fitting the Drive Belt Fit the drive belt to the pulleys and rollers as follows F06 204 23 Pickup motor Pickup drive belt Main drive belt Main motor Developing waste toner drive belt ...

Page 369: ...odel 1185 W and the sub heater on the left for 200V model 565 W for 208V model 600 W for 230V model 645 W 4 Viewing from the rear connect the right side of the faston of the heater at the rear to the main heater and connect the top side to the sub heater Height of the Fixing Inlet Guide F06 205 01 Do not loosen the fixing screw on the inlet guide as you will have to adjust the position of the inle...

Page 370: ...g Output for Nip Width Measurement Wait for 15 min after the copier ends its warm up period make 20 A4 copies and mea sure the nip 1 Place A3 copy paper in the manual feed tray 2 Make the following selections in service mode to generate output COPIER FUNCTION FIXING NIP CHK The A3 paper will be picked up and a copy like the one shown in F06 205 02 will be de livered Feed direction c a Middle of pa...

Page 371: ... b When Replacing the Laser Unit in Chapter 2 2 6 2 Checking the Laser Power 1 Check to make sure that the Data lamp in the control panel is OFF and turn off the main power switch 2 Disconnect the power plug from the power outlet 3 Remove the copyboard glass 4 Open the laser power checker slot cover 1 F06 206 01 5 Shift the switch of the laser power checker FY9 40008 to 2 1 ...

Page 372: ...HT 2001 CANON INC 2000 2000 2000 2000 CANON iR105 REV 0 JULY 2001 CHAPTER 6 TROUBLESHOOTING 6 40 6 White orienting the laser power checker so that its light receiving face 1 is as shown fit it in F06 206 02 1 ...

Page 373: ...let and turn on the main power switch 9 Make the following selections in service mode COPIER FUNCTION LASER 10 Select POWER A and press the OK key 11 Check to see that the reading of the digital multimeter is 9 to 11 mV indicating that the power of the laser A is correct 12 Select POWER B and press the OK key 13 Check to see that the reading of the digital multimeter is 9 to 11 mV indicating that ...

Page 374: ... 2 2 7 5 When Replacing the Main Controller PCB See 8 4 6 f When Replacing the Main Controller PCB in Chapter 2 2 7 6 When Replacing the HDD Unit See 3 8 2 b When Replacing the Hard Disk in Chapter 2 2 7 7 When Replacing the DC Controller PCB See 8 4 6 b When Replacing the DC Controller PCB in Chapter 2 2 7 8 When Replacing the HV DC PCB See 8 4 7 d When Replacing the HV DC PCB in Chapter 2 2 7 9 ...

Page 375: ...g from the power outlet The machine remains powered after the main power switch is turned off as long as the power plug is connected to the power outlet Be sure to discon nect the power plug from the power outlet 3 Replace the potential sensor potential control PCB The potential sensor and the potential control PCB are adjusted as a pair Be sure to replace them at the same time 4 Remove the develo...

Page 376: ...05 REV 0 JULY 2001 CHAPTER 6 TROUBLESHOOTING 6 44 6 Remove the 2 screws 1 and detach the potential sensor support plate 2 F06 207 02 7 Put back the developing assembly and the process unit 8 Connect the connector 1 of the potential sensor F06 207 03 2 1 1 ...

Page 377: ...6 TROUBLESHOOTING 6 45 9 Fit the potential checker electrode FY9 3041 2 to the potential sensor 1 F06 207 04 When fitting the checker electrode to the potential sensor make sure that the magnet of the checker electrode will not come into contact with the po tential sensor cover 1 2 ...

Page 378: ...indow F06 207 05 11 Fit the door switch actuator in the door switch assembly 12 Connect the power plug to the power outlet and turn on the main power switch 13 Execute the following in service mode COPIER FUNCTION DPC OFST 14 Record the value of OFST on the service label 15 Turn off the main power switch 16 Disconnect the power plug from the power outlet 17 Detach the potential sensor checker elec...

Page 379: ...le the auto control mechanisms hereafter non auto control mode As a first aid measure when a fault exists in the auto control mechanism you may use non auto control mode keep in mind that all outputs in non auto control mode are fixed to standard values 1 Procedure 1 Make the following selections in service mode and enter 0 COPIER OPTION BODY PO CNT 2 Press the Reset key twice In non auto control ...

Page 380: ...croprocessor registers 0 V when the surface potential of the drum is 0 V Using the result of the check you can find out if the microprocessor on the DC controller PCB or the measurement unit is good or not a zero level check may take either of the fol lowing two methods 1 Method 1 1 Turn off the power switch 2 Short the connectors J522 1 and 2 on the DC controller PCB with a jumper wire and discon...

Page 381: ...ng initial rotation COPIER DISPLAY DPOT DPOT K If the reading is not as indicated you may suspect a fault in the DC controller PCB 5 Turn off the power switch and detach the door switch actuator 6 Detach the jumper wire from the DC controller PCB 7 Connect the connector to J3 of the potential control PCB 8 Turn on the power switch 2 Method 2 1 Turn off the power switch 2 Remove the developing asse...

Page 382: ...05 REV 0 JULY 2001 CHAPTER 6 TROUBLESHOOTING 6 50 4 Remove the 2 screws 1 and detach the potential sensor support plate 2 F06 207 08 5 Put back the developing assembly and the process unit 6 Connect the connector 1 of the potential sensor F06 207 09 2 1 1 ...

Page 383: ...ting the checker electrode to the potential sensor be sure that the magnet of the checker electrode will not come into contact with the poten tial sensor cover F06 207 10 8 Connect the cable 1 of the potential sensor checker electrode to the frame GND 2 of the machine Never bring the clip into contact with the sensor cover Be sure to keep it fully away from the sensor window F06 207 11 1 2 1 2 ...

Page 384: ...ng is between 0 and 30 during initial rotation COPIER DISPLAY DPOT DPOT K REF 1 If the reading is as indicated in Method 1 but is not in Method 2 sus pect dirt on the sensor or a fault in the potential measurement unit 2 If the reading is as indicated in both Method 1 and Method 2 assume that the signal path and the operation from the potential sensor unit to the microprocessor on the DC controlle...

Page 385: ...490 41 21 44 55 3 60 1480 45 23 48 60 3 65 1470 48 25 52 65 3 70 1460 52 27 56 70 3 75 1450 56 29 60 75 3 80 1440 60 30 65 80 3 85 1430 63 32 69 85 3 90 1420 67 34 73 90 3 95 1410 71 36 77 95 4 00 1400 75 38 81 100 4 05 1390 78 40 85 105 4 10 1380 82 42 89 110 4 15 1370 86 44 93 115 4 20 1360 90 45 97 120 4 25 1350 93 47 101 125 4 30 1340 97 49 105 130 4 35 1330 101 51 109 135 4 40 1320 105 53 113...

Page 386: ...211 260 5 65 1070 198 100 215 265 5 70 1060 202 102 219 270 5 75 1050 206 104 223 275 5 80 1040 210 105 227 280 5 85 1030 213 107 231 285 5 90 1020 217 109 235 290 5 95 1010 221 111 239 295 6 00 1000 225 113 243 300 6 05 990 228 115 247 305 6 10 980 232 117 251 310 6 15 970 236 119 255 315 6 20 960 240 120 260 320 6 25 950 243 122 264 325 6 30 940 247 124 268 330 6 35 930 251 126 272 335 6 40 920 ...

Page 387: ...175 377 465 7 70 660 352 177 381 470 7 75 650 356 179 385 475 7 80 640 360 180 390 480 7 85 630 363 182 394 485 7 90 620 367 184 398 490 7 95 610 371 186 402 495 8 00 600 375 188 406 500 8 05 590 378 190 410 505 8 10 580 382 192 414 510 8 15 570 386 194 418 515 8 20 560 390 195 422 520 8 25 550 393 197 426 525 8 30 540 397 199 430 530 8 35 530 401 201 434 535 8 40 520 405 203 438 540 8 45 510 408 ...

Page 388: ...40 665 9 70 260 502 252 544 670 9 75 250 506 254 548 675 9 80 240 510 255 552 680 9 85 230 513 257 556 685 9 90 220 517 259 560 690 9 95 210 521 261 564 695 10 00 200 525 263 568 700 10 05 190 528 265 572 705 10 10 180 532 267 576 710 10 15 170 536 269 580 715 10 20 160 540 270 585 720 10 25 150 543 272 589 725 10 30 140 547 274 593 730 10 35 130 551 276 597 735 10 40 120 555 278 601 740 10 45 110...

Page 389: ...witch and leave the machine alone for 5 min 5 Make the following selections in service mode and check and record the temperature humidity indicated on the screen in the control panel COPIER DISPLAY ANALOG Data B RTMP C data B1 RHUM data B2 6 Compare data A and data B difference between data A 1 and data B1 is 0 5 difference between data A2 and data B2 is 0 20 If the difference between data A and d...

Page 390: ...nterrupters a Using a Meter 1 Set the meter range to 30 VDC 2 Connect the probe of the meter to GND of the DC controller PCB 3 Connect the probe of the meter to the terminal DC controller PCB indicated in the table that follows 4 Make checks as indicated b Using Service Mode 1 Start service mode CPEOR I O and check the corresponding address Take full care The sensor goes on and off at times causin...

Page 391: ...anner by hand in standby Move the scanner by hand in standby Move the copyboard cover by hand in standby Put paper over PS5 in standby Put paper over PS6 in standby Move the detecting lever of PS7 by hand in standby Move the detecting lever of PS8 in standby Put paper over the detect ing lever assembly of PS9 in standby Put paper over the detect ing lever of PS10 in standby Put paper over the dete...

Page 392: ...over the detect ing lever of PS19 in standby Move the detecting lever by hand in standby Move the detecting lever by hand in standby Move the detecting lever by hand in standby Move the detecting lever by hand in standby Move the detecting lever by hand in standby Move the detecting lever by hand in standby Paper is put Paper is not put Paper is put Paper is not put Paper is over PS18 Paper is not...

Page 393: ...ver by hand in standby Move the detecting lever by hand in standby Move the detecting lever by hand in standby Move the detecting lever by hand in standby Move the detecting lever by hand in standby The light blocking plate is at PS32 The light blocking plate is not at PS32 The light blocking plate is at PS33 The light blocking plate is not at PS33 The light blocking plate is at PS34 The light blo...

Page 394: ...ever by hand in standby Move the detecting lever by hand in standby Move the detecting lever by hand in standby Move the detecting lever by hand in standby Move the detecting lever by hand in standby Move the detecting lever by hand in standby The light blocking plate is at PS47 The light blocking plate is not a PS47 The light blocking plate is at PS48 The light blocking plate is not at PS48 The l...

Page 395: ... I O address age PS59 Toner cartridge cover open closed sensor PS61 Duplex output sensor J512 B2 P005 12 J519 B11 P002 2 Move the detecting lever by hand in standby Put paper over the detect ing assembly of PS61 in standby The light blocking plate is at PS59 The light blocking plate is not at PS59 Paper is put Paper is removed 1 0 1 0 5 V 0 V 5 V 0 V ...

Page 396: ...010 1 J519 B16 P010 9 J511 B10 P010 8 J515 B6 P010 2 J515 B10 P010 6 J517 B6 P010 3 J517 B10 P010 7 J503 B8 P002 5 Put paper over PS20 in standby Put paper over PS25 in standby Put paper over PS26 in standby Put paper over PS27 in standby Put paper over PS37 in standby Put paper over PS41 in standby Put paper over PS42 in standby Put paper over PS46 in standby Put paper over PS60 in standby PS20 R...

Page 397: ...site must not be subject to ammonium gas d The site must not be subject to direct rays of the sun As necessary curtains must be pro vided e The site must be well ventilated f The machine must be kept level g The machine must remain powered throughout the night 3 1 2 Checking the Originals Check the originals to find out whether the problem is caused by the originals used or is in the machine a The...

Page 398: ... for rusting f Check the charging wire cleaning pad of each charging assembly for displacement 3 1 5 Checking the Developing Assembly a Check to make sure that the rolls on both ends of the developing assembly are in contact with the drum b Check to make user that the surface of the developing cylinder is coated with an even layer of toner c Check the connectors between the developing assembly and...

Page 399: ...a Condensation in the scanning system glass mirrors lenses will produce darker images b Condensation in the charging system will cause electrical leakage c Condensation on the pickup feeding guide will cause feeding faults If condensation is found dry wipe the part or leave the machine alone and powered for 60 min If the density is uneven different between front and rear or the image is too light ...

Page 400: ...CHAPTER 6 TROUBLESHOOTING 6 68 COPYRIGHT 2001 CANON INC 2000 2000 2000 2000 CANON iR105 REV 0 JULY 2001 Blank page ...

Page 401: ...CHAPTER 6 TROUBLESHOOTING 6 69 COPYRIGHT 2001 CANON INC 2000 2000 2000 2000 CANON iR105 REV 0 JULY 2001 ...

Page 402: ...000 CANON iR105 REV 0 JULY 2001 3 2 Sample Faulty Images Note These samples have been prepared artificially They may appear somewhat different from actual faulty images because they have been generated using A3 copies made of the NA3 Test Sheet and reducing them to about 19 ...

Page 403: ... the standard white plate for dirt 2 Execute the following in service mode COPIER FUNCTION CDD CCD ADJ AE adjustment 3 Make copies in AE mode Is the density normal YES End Developing assembly 4 Are the rolls of the developing assembly in firm contact with the drum NO Check the mounting of the developing assembly locking mecha nism YES Check to see if the coating of toner on the developing cylinder...

Page 404: ...rum before transfer more or less normal NO The cause is before transfer Go to step 8 Transfer fault 4 Is the transfer separation charging assembly fully fitted NO Fit the charging assembly fully 5 Make copies by varying the setting of the following in service mode between 1 and 3 to suit the environment COPIER OPTION BODY FUZZY Is the problem corrected YES End The problem is caused by the environm...

Page 405: ...s the pre transfer charging assembly fully fitted NO Fit the charging assembly fully Potential control Photosensitive drum Developing bias control 9 Turn off and then on the power switch Then check the setting of the following in service mode COPIER DISPLAY DPOT VL1M VDM Is it as follows VL1M 50 to 90 VDM 390 to 460 NO Check the power supply system if normal replace the photosensi tive drum YES Ch...

Page 406: ...ting plate side reflecting plate mir rors lenses and dust proofing glass Is the problem corrected Pre exposure lamp 4 Does the pre exposure lamp ON evenly during copying operation NO 1 Replace the pre exposure lamp 2 Replace the DC controller PCB Developing assembly Charging assembly Copy paper 5 Is the developing cylinder coated with an even layer of toner NO 1 Clean the edge of the blade of the ...

Page 407: ...ff potential control COPIER OPTION BODY PO CNT Is the problem corrected YES The cause is in the potential control system Make checks as in structed for checking the surface potential control system 2 7 12 Cleaner assembly 5 Is the cleaning blade mounted correctly NO Mount the cleaning blade correctly Pre exposure lamp DC controller PCB 6 Does the pre exposure lamp remain ON during copying NO 1 Rep...

Page 408: ...ontrol system in Chapter 2 standards and adjustments Primary charging assembly 3 Clean the primary charging wire grid wire and shielding plate Is the problem corrected YES End Pre exposure lamp 4 Clean the pre exposure lamp Is the problem corrected YES End Fixing assembly 5 Using the door switch actuator make a copy with the front cover open Turn off the power switch when the copy paper is in the ...

Page 409: ...es and black lines 2 Check the web for dirt 3 Check the thermistor and the separation claw for dirt Check the reciprocating movement Primary charging assembly dirt 3 Clean the primary charging assembly Is the problem cord YES End Photosensitive drum cleaner assembly 4 Is foreign matter e g paper trapped by the cleaning blade of the cleaner unit YES Remove the foreign matter and clean the cleaning ...

Page 410: ...ive drum 4 Is there a scratch on the surface of the photosensitive drum in pe ripheral direction corresponding to the problem in the images YES Find out the cause of the problem and replace the photosensitive drum Developing assembly 5 Is the surface of the developing cylinder coated with an even layer of toner NO 1 Check if paper lint is trapped on the edge of the blade of the developing assembly...

Page 411: ...arging assembly and the transfer separa tion charging assembly Is the problem corrected YES End NO Perform the following 1 Vary the setting of the following in service mode COPIER OPTION TRNSG SW 2 Vary the setting for the following in service mode COPIER OPTION BODY FUZZY Charging wire cleaner 8 Is the charging wire cleaning pad stopped midway YES Execute wire pad cleaning in user mode adjust cle...

Page 412: ...cylinder replace the developing cylinder Drum 2 Does the problem occur at intervals of about 340 mm YES 1 Clean the drum especially where the developing rolls are in contact on both ends 2 If there is a scratch on the surface of the drum replace the drum Copy paper 3 Try paper fresh out of package Is the problem corrected YES The copy paper is moist Advise the user on the place of storage and the ...

Page 413: ... roller 2 Clean the inlet guide of the fixing assembly 3 Check the fixing upper roller and the web for dirt NO Perform the following 1 Check the registration roller for dirt 2 Check the delivery roller and the separation claw for dirt 3 3 14 The output has a fixing fault Copy paper 1 Is the paper of a type that adversely affect fixing e g thick pa per YES Select thick paper in user mode common set...

Page 414: ...ly 2 Make copies using the following sources of paper do they show dif ferent results of displacement 1 left right front deck 2 cassette 3 side paper deck 4 duplex feeding assembly YES Check the source of paper with displacement of the following 1 life of the rollers 2 paper lint on the rollers 3 dirt in the power path Registration clutch Registration roller 3 Make adjustments in the following ser...

Page 415: ... NO Clean the surface of the scanner rail with alcohol Thereafter apply a small amount of silicone oil S 20 Photosensitive drum 3 Does the problem occur at intervals of about 340 mm YES 1 Check the drum gear 2 Check the drum ends where the developing rolls are in con tact for scratches and bumps Drum drive gear 4 Does the problem occur at intervals of about 4 mm YES Check the drum drive gear Devel...

Page 416: ...Check the feeding system 4 Does the problem occur at intervals of about 79 mm YES If the dirt is in the form of dots dry wipe the surface of the devel oping cylinder If it is spread go to 1 1 3 checks on printer side 2 2 F06 101 03 3 3 20 The output has poor sharpness Copyboard glass 1 Is there adhesion of oil or the like on the copyboard glass YES Clean the copyboard glass Mirror position 2 Is th...

Page 417: ...it the transfer charging assembly fully to the rear 4 Do electrical leakage occur in the transfer charging assembly YES Check the transfer charging assembly CCD unit Relay PCB 5 Is the voltage supplied to the CCD unit as rated NO 1 Check the relay PCB 2 Check the power path between the CCD unit and the relay PCB if normal replace the CCD unit Laser unit reader controller PCB Drum unit 6 Is the las...

Page 418: ... Connect it Primary charging assembly 3 Make the following selections in service mode COPIER DISPLAY DPOT Is the setting of VDM between 390 and 460 NO Check the primary charging assembly 4 Is the connection among the following normal 1 reader controller PCB 2 CCD unit 3 DC controller PCB 4 relay PCB NO Connect them correctly Reader controller PCB CCD unit 5 Does the problem occur only in copy imag...

Page 419: ...ngs of both FIX C and FIX E indicate an increase in temperature YES The cause is in the thermistor Check the following thermistor for how it is mounted thermistor for dirt on its surface connection DC controller PCB 2 Turn off the power switch and let the fixing upper roller cool suffi ciently Then turn on the power switch Reset E000 and turn off and then on the power switch Make the following sel...

Page 420: ...ur face mounting and connection Turn on the power switch and reset E001 by making the following selections in service mode and turn off and then on the power switch COPIER FUNCTION CLEAR ERR Make the following selections in service mode COPIER DISPLAY ANALOG Are the readings of both FIX C and FIX E 198 C or higher YES Replace the AC driver PCB Thermistor TH1 TH2 faulty DC controller PCB 2 Try repl...

Page 421: ...the connectors inside the fixing assembly good Also is the wiring from the thermistor to the DC controller PCB good NO Make corrections Main thermistor TH1 mounting 3 Is the thermistor in even contact with the fixing upper roller NO Mount it correctly Main thermistor TH1 dirt 4 Clean the contact face of the thermistor Is the problem corrected YES End Main thermistor TH1 faulty 5 Try replacing the ...

Page 422: ...s YES Replace the DC controller PCB NO Replace the sensor 4 1 7 E010 1 Are the connectors J611 and J612 of the main motor connected NO Connect the connectors 2 Is the connector J1720 of the relay PCB connected NO Connect the connector Relay PCB 3 Close all doors Is the voltage between connectors J1720 1 and 2 on the relay PCB about 38 V when the power switch is tuned on NO Replace the relay PCB DC...

Page 423: ...nor mal replace the DC controller PCB Connector 3 Are the connectors J601 an J602 of the drum motor connected firmly NO Connect them firmly YES Replace the drum motor 4 1 9 E013 Waste toner feedscrew locked 1 Is the waste tone feedscrew drive gear pushing the waste toner feedscrew lock detecting switch MSW2 NO The feedscrew inside the waste toner pipe is likely to be stuck Re move the waste toner ...

Page 424: ...nnectors J508 A18 and J508 A16 on the DC controller PCB change from 0 to about 5 V when the Start key is pressed NO Replace the DC controller PCB YES Replace the fixing motor 4 1 11 E015 1 Are the connectors J621 and J622 of the pickup motor connected NO Connect the connectors Relay PCB 2 Is 38 V present between J1721 11 and 11 of the relay PCB when all doors are closed NO Replace the relay PCB DC...

Page 425: ... toner case full sensor PS19 NO Replace the DC controller PCB 4 1 13 E020 Toner feedscrew Toner sensor TS3 1 Remove the developing assembly and detach the top cover of the assembly Is there toner inside the assembly YES Check the rotation of the toner feedscrew inside the developing as sembly if normal replace the toner sensor TS3 2 Make the following selections in service mode COPIER FUNCTION PAR...

Page 426: ...ors J525 and J526 on the DC controller PCB NO Connect it firmly DC controller PCB Copy data controller or NE controller 2 Try replacing the copy data controller or the NE controller Is the problem corrected NO Replace the DC controller PCB YES Make corrections 4 1 16 E043 Side deck drive PCB 1 Is there electrical continuity between the following connectors on the side deck drive PCB NO Replace the...

Page 427: ...kless feed driver PCB Is there electri cal continuity between the following pins of the jacks on the motor side J3603 B4 and B5 and B3 J3603 B2 and B6 and B1 NO Replace the horizontal registration motor M15 anual feed tray open closed detecting switch MSW5 3 Is the mounting of the manual feed tray open closed detecting switch MSW5 normal NO Correct the mounting Stackless feed driver PCB DC control...

Page 428: ...y Mounting 2 Is the primary charging assembly mounted firmly NO Mount it firmly Contact 3 Is the contact of the primary charging assembly clean NO Clean or correct it Connection 4 Is the connection of the following on the HV DC PCB firm See F06 401 01 T601 J723 J730 NO Connect them firmly Wiring HV DC PCB 5 Is the wiring from the HV DC PCB to the primary charging assem bly normal NO Correct the wi...

Page 429: ...DC PCB and the screws connected and tightened firmly See F05 401 02 J721 J723 J730 NO Connect or tighten firmly Wiring 3 Is the wiring from the HV DC PCB to each charging assembly and the wiring from the HV AC PCB to each charging assembly nor mal NO Corrected the wiring HV AC PCB HV DC PCB 4 Disconnect the connector J722 of the HV DC PCB and execute copying Is E067 indicated NO Replace the HV AC ...

Page 430: ...DC PCB and HV AC PCB and the screws connected and tightened firmly See F06 401 03 NO Connect and tighten them firmly Separation charging assembly 3 Disconnect the connector T1 S from the transformer assembly of the HV AC PCB and execute copying Is E068 indicated See F06 401 04 NO Clean the separation charging assembly If E068 still is indicated when executing copying replace the separation chargin...

Page 431: ...onnect the connector T1 Q from the transformer assembly of the HV AC PCB and execute copying Is E068 indicated See F06 401 04 NO Clean the pre transfer charging assembly If E068 is still indicated when copying is executed replace the pre transfer charging assem bly YES Replace the HV AC PCB J722 J723 J734 J730 T1 S J742 J741 T1 Q F06 401 03 F06 401 04 ...

Page 432: ...n the HV DC PCB and the screws connected and tightened firmly T701 J723 J730 NO Connect and tighten them firmly Wiring 3 Is the wiring from the HV DC PCB to the transfer separation charging assembly transfer charging assembly side normal NO Correct the wiring HV DC PCB Transfer separation charging assembly 4 Try replacing the transfer separation charging assembly NO Replace the transfer separation...

Page 433: ...l replace the BD PCB Laser output DC controller PCB 2 Is the reading of VDM between 360 and 420 YES Check the following laser output laser path for foreign matter NO Replace the DC controller PCB 4 1 23 E110 Connector 1 Is the connector J762 on the laser scanner motor driver PCB con nected firmly NO Connect it firmly Connector 2 Is the connector J503 on the DC controller PCB connected firmly NO Co...

Page 434: ... scanner fan FM14 DC controller PCB 3 Try replacing the laser scanner motor fan FM14 Is the problem corrected YES End NO Replace the DC controller PCB 4 1 25 E121 0001 Foreign matter 1 Is there foreign matter that prevents the rotation of the scanner cooling fan YES Remove the foreign matter Connector 2 Is the connector J503 on the reader controller PCB connected firmly NO Connector it firmly Scan...

Page 435: ...e laser drive cooling fan FM5 Is the problem cor rected NO End YES Replace the DC controller PCB 4 1 27 E202 The keys in the control panel are locked 1 Is the scanner in home position when E202 is indicated NO See The scanner fails to move forward Connector 2 Is the connector J1702 on the relay PCB connected firmly NO Connect it firmly Scanner home position sensor PS1 Reader controller PCB 3 Is th...

Page 436: ...211 4 1 30 E215 Connector 1 Are the connectors J852 and J853 on the light control PCB firmly connected NO Connector them firmly Fluorescent lamp heater 2 Try replacing the fluorescent lamp heater Is the problem cor rected YES End Light control PCB Reader controller PCB 3 Try replacing the light control PCB Is the problem corrected YES End NO Replace the reader controller PCB 4 1 31 E218 Mounting 1...

Page 437: ...g the light control PCB YES End NO Replace the rear controller PCB 4 1 35 E226 Foreign matter 1 Is there foreign matter that prevents the rotation of the scanner cooling fan YES Remove the foreign matter Connector 2 It the connector J503 on the reader controller PCB connected firmly NO Connect them firmly Scanner cooling fan FM3 Reader controller PCB 1 Try replacing the scanner cooling fan FM3 Is ...

Page 438: ...1 Turn off and then on the power switch YES End NO Replace the controller PCB Control panel PCB 2 Try replacing the control panel PCB Is the problem corrected YES End 4 1 39 E251 Foreign matter 1 Is there foreign matter that prevents the rotation of the inverter cooling fan YES Remove the foreign matter Connector 2 Is the connector J1110 on the reader controller PCB connected firmly NO Connect it ...

Page 439: ...orrected YES End NO Replace the reader controller PCB 4 1 41 E315 Rear controller PCB 1 Try replacing the reader controller PCB Is the problem corrected YES End Main controller PCB 2 Try replacing the main controller PCB Is the problem corrected YES End 4 1 42 E320 Connector 1 Are the connectors J1502 and J1503 on the CCD PCB and the J1107 and J1108 on the reader controller PCB connected firmly NO...

Page 440: ...tion cable between ADF and the machine normal NO Correct it ADF controller PCB 2 Try replacing the ADF controller PCB Is the problem corrected YES End 4 1 44 E402 1 Set the bits of the DIP switch SW1 on the ADF controller PCB as follows F06 401 06 Does the belt motor M2 rotate when the push switch SW2 is pressed To stop press the push switch SW2 once again YES Go to step 3 ...

Page 441: ... meter range to 10 VDC Does the voltage between the con nectors J12 2 and J12 1 on the ADF controller PCB alternate between 0 and 5 V when the belt motor is turned by hand NO Replace the belt motor clock sensor PI1 Cable 4 Is the cable between the belt motor driver PCB and the ADF con troller PCB connected correctly NO Connect it correctly Belt motor drive PCB ADF controller PCB 5 Try replacing th...

Page 442: ...the connector J2 from the ADF controller PCB Set the meter range to 1Ω Ω Ω Ω Ω and connect the meter probes to the connectors on the cable side Is the resistance about 15Ω Ω Ω Ω Ω F06 401 09 NO Replace the delivery motor M5 After replacement be sure to perform adjustment of the sensors and the delivery motor Delivery motor clock sensor PI11 ad controller PCB 3 Set the meter range to 10 VDC Does th...

Page 443: ...ector J8 on the ADF controller PCB Set the meter range to 1Ω Ω Ω Ω Ω and connect the meter probes to the connectors on the cable side Is the resistance about 5 0Ω Ω Ω Ω Ω F06 401 11 NO Replace the separation motor M4 Separation motor clock sensor PI2 ADF controller PCB 3 Set the meter range to 10 VDC Does the voltage between the con nectors J12 5 and J12 4 on the ADF controller PCB alternate betwe...

Page 444: ...2 is pressed and then push switch SW3 SW4 is pressed To stop press the push switch SW2 once again YES Go to step 3 Pickup motor M3 2 Disconnect the connector J11 of the ADF controller PCB Set the meter range to 1Ω Ω Ω Ω Ω and connect the meter probes to the connectors on the cable side Is the resistance about 74Ω Ω Ω Ω Ω F06 401 13 NO Replace the pickup motor M3 2 4 2 6 1 3 1 5 1 2 3 4 5 6 1 2 3 4...

Page 445: ...he pickup roller height sensor 2 PI9 Pickup roller home position sensor PI7 5 Set the meter range to 10 VDC Is there voltage of the connectors J14 A5 and J14 A4 on the ADF controller PCB about 5 V when the pickup roller is moved back to home position by hand NO Replace the pickup roller home position sensor PI7 ADF controller PCB 6 Try replacing the ADF controller PCB Is the problem corrected YES ...

Page 446: ... the DC controller PCB Is there problem corrected YES End NO Replace the main controller PCB 4 1 50 E602 System software installation 1 Is the installation of the system software complete NO Install the system software Connector 2 Are the connectors and the cables between the HDD and the main controller PCB correct NO Correct them HDD Main controller PCB 3 Using the Service Support Tool format the...

Page 447: ...eplace the main controller PCB E677 5802 4 Machine types are not compatible between Boot ROM and System e g Boot ROM for the iR8500 Copy model is mounted on the sys tem for the iR8500 PS PCL model YES Replace Boot ROM with an appropriate one 4 1 53 E710 0001 reader controller E710 0002 DC controller E710 0003 main controller 4 1 54 E711 0001 reader controller E711 0002 DC controller E711 0003 main...

Page 448: ...DF controller PCB Reader controller PCB 3 Try replacing the ADF controller PCB Is the problem corrected YES End NO Replace the reader controller PCB 4 1 56 E713 Malfunction 1 Turn off and then on the power switch Is the problem corrected YES End Connector 2 Is the connector J152 used to connector the finisher and the copier connected firmly to the copier NO Replace the DC controller PCB Finisher c...

Page 449: ...TION CLEAR ERR Copy data controller or NE controller 3 Try replacing the copy data controller or the NE controller Is the problem corrected YES End 4 1 58 E732 Wiring 1 Are the connectors and the cables for the main controller PCB and the reader controller PCB normal NO Correct them Reader controller PCB 2 Try replacing the reader controller PCB Is the problem corrected YES End NO Replace the main...

Page 450: ...he problem corrected YES End NO Replace the main controller PCB 4 1 61 E740 Ethernet card mounting 1 Is the Ethernet card mounted correctly NO Correct it Ethernet card 2 Try replacing the Ethernet card Is the problem corrected NO Replace the main controller PCB 4 1 62 E741 Riser board mounting 1 Is the riser board mounted correctly NO Correct it LIPS board mounting 2 Is the LIPS board mounted corr...

Page 451: ...appropriate one E744 2000 4 HDD stored the system for another machine model is connected e g HDD for the iR8500 Copy model is changed the HDD for the iR105 Copy model YES Replace HDD with the one in which appropriate system is stored 4 1 64 E800 Malfunction 1 Turn off and then on the power switch Is the problem corrected YES End J24 2 Is the connector J505 on the DC controller PCB and then connect...

Page 452: ...pply cooling fan 1 2 FM11 12 DC controller PCB 3 Try replacing the power supply fan 1 2 Is the problem corrected NO End YES Replace the DC controller PCB 4 1 66 E805 Foreign matter 1 Is there foreign matter that prevents the rotation of the fixing as sembly heat discharge fan YES Remove the foreign matter Connector 2 Is the connector J503 on the controller PCB connected firmly NO Connect it firmly...

Page 453: ...DC controller PCB 3 Try replacing the drum fan FM8 Is the problem corrected NO End YES Replace the DC controller PCB 4 1 68 E823 Foreign matter 1 Is there foreign matter that prevents the rotation of the pre transfer charging assembly fan YES Remove the foreign matter Connector 2 Is the connector J504 on the DC controller PCB firmly con nected NO Connect it firmly Pre transfer charging assembly fa...

Page 454: ...firmly Primary charging assembly fan FM1 DC controller PCB 3 Try replacing the primary charging fan FM1 Is the problem cor rected NO End YES Replace the DC controller PCB 4 1 70 E830 Foreign matter 1 Is there foreign matter that prevents the rotation of the separation fan YES Remove the foreign matter Connector 2 Is the connector J509 on the DC controller PCB connected firmly NO Connect it firmly ...

Page 455: ... and the AC driver PCB Is AC power supplied YES End NO Check the wiring for AC power and check the connectors for poor contact Connector 5 Turn on the control panel power switch Is the power supplied to the connector J28 on the DC power supply PCB NO Check the connection between the main controller PCB J1021 and the all night power supply PCB J785 All night power supply PCB 6 Turn on the control p...

Page 456: ...emove the cause and replace the fuse Wiring DC load DC power supply PCB 5 Turn off the main power switch When the main power switch is turned on in about 3 min is the voltage between the following ter minals of the relay PCB normal However the output voltages in the table are based on a tolerance in AC input of 10 YES Turn off the power switch and disconnect the following connectors of the relay P...

Page 457: ...O Check the locking spring Vertical path 1 clutch CL8 Vertical path 2 clutch CL9 Vertical path 3 clutch CL13 Vertical path 4 clutch CL15 Pre registration roller clutch CL5 5 Open the right upper cover and the right lower cover then put pa per over the cover open closed sensor assembly and press the Start key Does the vertical path rollers 1 2 3 and 4 and the pre regis tration roller rotate NO Chec...

Page 458: ... change from 24 to 0 V when the Start key is pressed YES Check the wiring if normal replace the clutch NO Replace the DC controller PCB Sensor Pickup assembly 9 In service mode COPIER I O IP find out which sensor has de tected the jam Is the sensor normal NO Check the wiring and the lever if normal replace the sensor YES Remove the pickup assembly and check the springs and the like Cassette Clutch...

Page 459: ...bout 5 V when the deck is slid in right deck PS25 J511 B5 left deck PS33 J518 B2 NO Check the sensor flag and the wiring if normal replace the sensor Deck limit sensor 4 Is the voltage of the following connectors on the DC controller about 0 V right deck PS24 J511 B8 left deck PS34 J518 B5 NO Check the sensor flag and the wiring if normal replace the sensor Lifter motor DC controller PCB 5 Turn on...

Page 460: ...ly and check the spring and the lever Cassette open closed sensor 4 Is the voltage of the following connectors on the DC controller about 5 V when the cassette is slid in cassette 3 PS40 J515 B5 cassette 4 PS45 J517 B5 NO Check the sensor flag and the wiring if normal replace the sensor Lifter motor DC controller PCB 5 Turn on the power switch and the control panel power switch and set the meter r...

Page 461: ...the following service mode Does the bit change from 0 to 1 when paper is placed in the multifeeder assembly COPIER I O DC CON P004 bit 12 NO Check the wiring and the sensor flag if normal replace the sensor PS17 DC controller PCB J510 B7 B8 B9 Manual feed tray pickup clutch CL7 5 Execute the following in service mode Is the sound of the clutch CL7 operating heard COPIER FUNCTION PART CHK CL1 OK CO...

Page 462: ...wing in service mode Does the multifeeder pickup roller move up and down COPIER FUNCTION PART CHK SL5 up COPIER FUNCTION PART CHK SL6 down OK COPIER FUNCTION PART CHK LS ON OK NO Check the wiring and the like if normal replace the solenoid SL6 DC controller PCB J510 10 11 12 DC controller PCB 8 Try replacing the DC controller PCB Is the problem corrected YES End ...

Page 463: ...ART CHK CL7 OK COPIER FUNCTION PART CHK CL ON OK NO Check the wiring if normal replace the clutch CL8 DC controller PCB J511 A3 A4 Vertical path 2 clutch 3 Execute the following in service mode Is the sound of the clutch CL9 heard COPIER FUNCTION PART CHK CL9 OK COPIER FUNCTION PART CHK CL ON OK NO Check the wiring if normal replace the clutch CL9 DC controller PCB J514 A6 A7 Vertical path 3 clutc...

Page 464: ...32 Vertical path 4 clutch DC controller PCB 5 Execute the following in service mode Is the sound of the clutch CL15 heard COPIER FUNCTION PART CHK CL5 OK COPIER FUNCTION PART CHK CL ON OK NO Check the wiring if normal replace the clutch CL15 DC controller PCB J517 A3 A4 YES Replace the DC controller PCB ...

Page 465: ...xecute the following in service mode Does the state of bit 11 change from 0 to 1 when paper is placed over the registration paper sensor COPIER I O DC CON P001 NO Check the wiring and the sensor flag if normal replace the sensor DC controller PCB J509 A1 A2 A3 Registration clutch CL2 DC controller PCB 3 Execute the following in service mode Is the sound of the clutch CL2 heard COPIER FUNCTION PART...

Page 466: ...atter 4 Is the scanner rail free of dirt and does the scanner move smoothly when pushed by hand NO Check the surface of the scanner rail for dirt and foreign matter and for an object that comes into contact with the scanner as necessary clean lubricate or repair Reference If the rail is soiled clean it with alcohol and apply a small amount of silicone oil FY9 6010 Relay PCB 5 Measure the voltage o...

Page 467: ...B to the pre exposure lamp PCB if normal replace the pre exposure lamp PCB 4 1 81 The scanning lamp fails to go ON Connector 1 Make the following selections in service mode COPIER FUNCTION MISC R SCANLAMP Does the scanning lamp remain ON for 3 sec when the OK key is pressed YES The connector may have poor contact Check the connector Lamp 2 Is the scanning lamp LA1 mounted correctly NO Disconnect t...

Page 468: ... Is the voltage between J512 B4 and J512 B5 on the DC controller PCB 24 V NO Replace the DC controller PCB YES Check the connection of the relay connectors J243 and J245 4 1 83 The feed motor M18 inside the hopper fails to operate 1 Execute the following in service mode COPIER FUNCTION PART CHK MTR Does the toner feed motor inside the hopper rotate NO Go to step 3 DC controller PCB Connector J138 ...

Page 469: ...the problem corrected YES End Drum heater H3 drum heater controller PCB 4 Remove the drum Set the meter range to Wx1 Does the index of the meter swing when the probes are connected to both terminals of the heater NO Replace the drum heater YES Replace the drum heater controller PCB 4 1 85 The Add Toner message fails to go ON 1 Is toner inside the hopper assembly NO Go to step 2 Toner sensor hopper...

Page 470: ...the DC controller PCB 2 Replace the control panel 4 1 87 The Set Card Reader message fails to go ON Card reader 1 Check to see that the card reader has been installed Enter 1 using the following service mode COPIER FUNCTION INSTALL CARD Turn off and then on the power switch Does the message go ON YES Check the connector of the card reader for a short circuit Control panel Main controller PCB 2 Try...

Page 471: ...t the sensor correctly 4 1 90 The Add Paper message fails to go OFF cassette 3 4 Cassette paper sensor cassette 3 PS39 cassette 4 PS44 1 Is the cassette paper sensor mounted correctly Is the movement of the sensor flag normal NO Mount the sensor correctly Cassette pickup assembly 2 Is the gear engagement between the output gear of the lifter motor and the gear in the cassette pickup assembly fault...

Page 472: ...ounted correctly NO Mount the fixing feeding unit releasing lever sensor YES Replace the fixing feeding unit releasing lever sensor Thermal switch TP1 4 Slide out the fixing assembly and connect the meter probes across both terminals of the thermal switch TP1 Is there electrical conti nuity NO Replace the thermal switch unit Fixing heater H1 H2 5 Slide out the fixing assembly and connect the meter...

Page 473: ...er is soiled clean it with alcohol If it is deformed be cause of wear replace it Belt displacement 4 Is the belt used to transmit drive to the pickup roller attached cor rectly NO Attach the belt correctly Drive belt Gear Coupling 5 Is the drive from the deck main motor transmitted to the pickup assembly through the drive belt gear and coupling NO Check the drive belt gear and coupling Side deck d...

Page 474: ...check the spring and lever Deck lifter motor M102 4 Does the deck lifter motor rotate YES Go to step 6 Deck lifter driver PCB Deck open detecting switch SW101 5 Does the voltage between J109 3 on the side deck driver PCB and GND change from about 0 to 5 V when the deck is closed NO Replace the side deck driver PCB YES Check the wiring up to the switch if normal replace the switch Deck lifer lower ...

Page 475: ...achine may be grouped according to their locations as fol lows 1 pickup assembly 2 separation feeding assembly 3 fixing delivery assembly 4 drum cleaner assembly 5 holding tray assembly 6 feeding assembly The descriptions that follow are also given in reference to the locations of jams The loca tion or type of jam may be checked in service mode COPIER DISPLAY JAM F06 501 01 1 2 3 4 5 6 ...

Page 476: ...d YES Advise the user to use recommended paper DC controller PCB Pickup clutch 3 During copying does the pickup roller of the selected source of pa per cassette deck manual feed tray rotate NO See Pickup fails for each source of paper Pickup roller Guide plate Optical sensor prism 4 Is the pickup roller deformed or worn YES Replace the pickup roller NO Check the guide plate for deformation Check t...

Page 477: ...the transfer guide for foreign matter and deformation Registration clutch 5 Is the operation of the registration clutch normal NO Check the registration clutch Transfer separation charging assembly 6 Is the transfer separation charging assembly fitted firmly YES Check the transfer separation charging assembly 7 Are there burrs on the paper guide of the transfer separation charging assembly YES Rem...

Page 478: ...ght Nip 5 Is the lower roller pressure nip as indicated NO Correct it Delivery assembly Web 6 Is the web taken up correctly NO Check the fixing cleaner assembly Sensor lever 7 Does each sensor lever move smoothly NO Adjust the lever so that it moves smoothly Delivery sensor 8 Are the external delivery sensor PS10 and the claw jam sensor PS6 normal NO Replace the sensor Delivery reflecting plate 9 ...

Page 479: ...ate at the correct timing NO Replace the reversal motor M11 YES If the timing belt is worn or torn replace it If it is slack or dis placed attach it correctly 5 1 5 Cleaner assembly Transfer separation charging assembly Pre transfer charging assembly 1 Is the transfer separation charging assembly and the pre transfer charging assembly fitted correctly NO Fit the transfer separation charging assemb...

Page 480: ...mbly fitted correctly NO Fit it correctly Lower feeding middle clutch CL16 Lower feeding right clutch CL17 2 Does the roller inside the lower feeding assembly rotate correctly NO Replace the CL16 or CL17 Pre confluence sensor PS14 Post confluence sensor PS15 3 Are the pre confluence sensor PS14 and the post confluence sen sor PS15 normal NO Replace PS14 or PS15 ...

Page 481: ... the pickup assembly Check the registration roller Cop paper 2 Try paper fresh out of package Is the problem corrected YES The paper is likely to be moist Advise the user on the correct method of storing paper 3 Try paper of a recommended type Is the problem corrected YES Advise the user to use recommended paper Fixing assembly Paper guide 4 Is the paper guide soiled with foreign matter e g toner ...

Page 482: ...2000 2000 CANON iR105 REV 0 JULY 2001 CHAPTER 6 TROUBLESHOOTING 6 150 6 Arrangement and Function of Electrical Parts 6 1 Clutches F06 601 01 CL18 CL7 CL5 CL6 CL1 CL4 CL9 CL2 CL17 CL16 CL19 CL14 CL15 CL13 CL12 CL8 CL10 CL11 CL21 CL3 CL20 ...

Page 483: ... Notation CL1 CL2 CL3 CL4 CL5 CL6 CL7 CL8 CL9 CL10 CL11 CL12 CL13 CL14 CL15 CL16 CL17 CL18 CL19 CL20 CL21 T06 601 01 Function Drives the inside hopper magnet roller Drives the registration roller Drives the registration brake Drives the developing cylinder 1 Drives the pre registration roller Drives the pre registration brake Drives the manual feed tray pickup roller Drives the vertical path 1 rol...

Page 484: ...COPYRIGHT 2001 CANON INC 2000 2000 2000 2000 CANON iR105 REV 0 JULY 2001 CHAPTER 6 TROUBLESHOOTING 6 152 6 2 Solenoids F06 602 01 SL9 SL10 SL7 SL8 SL6 SL11 SL3 SL4 SL2 ...

Page 485: ... Fixing web solenoid Delivery flapper solenoid Fixing feeder unit locking sole noid Manual feed pickup latch sole noid Deck right pickup solenoid Deck left pickup solenoid Cassette 3 pickup solenoid Cassette 4 pickup solenoid Reversing flapper solenoid Notation SL2 SL3 SL4 SL6 SL7 SL8 SL9 SL10 SL11 T06 602 01 ...

Page 486: ...COPYRIGHT 2001 CANON INC 2000 2000 2000 2000 CANON iR105 REV 0 JULY 2001 CHAPTER 6 TROUBLESHOOTING 6 154 6 3 Motors F06 603 01 M6 M5 M18 M4 M0 M1 M2 M13 M14 M11 M16 M17 M7 M8 M9 M15 M19 M10 M20 M3 M12 ...

Page 487: ...ging wire cleaner motor Primary charging wire cleaner motor Transfer separation charging wire cleaner motor Vibration motor Duplex reversal motor Duplex feeder motor left Deck right lifter motor Deck left lifter motor Horizontal registration motor Cassette 3 lifter motor Cassette 4 lifter motor Inside hoper toner feeder motor Duplex feeder motor right Notation M0 M1 M2 M3 M4 M5 M6 M7 M8 M9 M10 M20...

Page 488: ...PYRIGHT 2001 CANON INC 2000 2000 2000 2000 CANON iR105 REV 0 JULY 2001 CHAPTER 6 TROUBLESHOOTING 6 156 6 4 Fans F06 604 01 FM8 FM5 FM9 FM2 FM13 FM19 FM4 FM10 FM18 FM6 FM11 FM12 FM16 FM17 FM15 FM20 FM3 FM1 ...

Page 489: ...Laser cooling fan 2 Curl reducing fan Drum fan Inverter cooling fan Pre transfer charging assembly fan Power supply cooling fan 1 Power supply cooling fan 2 Separation fan Developing fan System fan Delivery anti adhesion fan Scanner motor cooling fan Duplex feeder fan Separation heat discharge fan Notation FM1 FM2 FM3 FM4 FM5 FM6 FM8 FM9 FM10 FM11 FM12 FM13 FM15 FM16 FM17 FM18 FM19 FM20 T06 604 01...

Page 490: ...OOTING 6 158 6 5 Sensor 1 F06 605 01 PS47 PS59 PS35 PS12 PS5 PS8 PS34 PS7 PS31 PS10 PS32 PS9 PS33 PS6 PS25 PS11 PS15 PS14 PS52 PS24 PS51 PS21 PS55 PS22 PS54 PS23 PS49 PS20 PS41 PS27 PS37 PS26 PS28 PS38 PS39 PS17 PS40 PS46 PS48 PS42 PS58 PS45 PS56 PS44 PS43 PS19 PS1 PS4 PS3 PS57 PS18 PS60 PS61 ...

Page 491: ...en closed sensor Left deck open closed sensor Manual feed feeder inlet sensor Cassette 3 pickup sensor Cassette 3 lifter sensor Cassette 3 paper sensor Cassette 3 open closed sensor Vertical path 3 paper sensor Cassette 4 pickup sensor Cassette 4 lifter sensor Cassette 4 paper sensor Cassette 4 open closed sensor Vertical path 4 paper sensor Vertical path 1 paper sensor Right lower cover open clos...

Page 492: ...COPYRIGHT 2001 CANON INC 2000 2000 2000 2000 CANON iR105 REV 0 JULY 2001 CHAPTER 6 TROUBLESHOOTING 6 160 6 6 Sensor 2 F06 606 01 TS2 TS3 TS1 SIZE2 SIZE1 SVR1 DP1 SIZE4 SIZE3 SVR2 SV1 SVR3 SV2 ...

Page 493: ...r 4 Cassette 3 paper length sensor Cassette 4 paper length sensor Manual feed tray paper width de tecting volume Cassette 3 paper width detecting volume Cassette 4 paper width detecting volume Inside hopper toner sensor Inside hopper toner lower limit sensor Inside developing assembly toner sensor Potential sensor Notation SIZE1 SIZE2 SIZE3 SIZE4 SV1 SV2 SVR1 SVR2 SVR3 TS1 TS2 TS3 DP1 T06 606 01 ...

Page 494: ...COPYRIGHT 2001 CANON INC 2000 2000 2000 2000 CANON iR105 REV 0 JULY 2001 CHAPTER 6 TROUBLESHOOTING 6 162 6 7 Switches F06 607 01 MSW5 SW1 MSW1 SW3 MSW8 SW2 MSW2 MSW7 ...

Page 495: ...6 163 Name Main switch Front cover switch Drum heater switch Cartridge detecting switch Waste toner clog detecting switch Manual feed tray cover open closed detecting switch Front cover open closed detecting switch Cartridge motor drive switch Notation SW1 SW2 SW3 MSW1 MSW2 MSW5 MSW7 MSW8 T06 607 01 ...

Page 496: ...COPYRIGHT 2001 CANON INC 2000 2000 2000 2000 CANON iR105 REV 0 JULY 2001 CHAPTER 6 TROUBLESHOOTING 6 164 6 8 Counters There Fuses and Others F06 608 01 FL1 LED1 H5 H3 HD1 H4 TH1 TH2 TP1 H1 H2 LED2 ELCB1 ...

Page 497: ...ter Scanning amp heater Fixing heater main thermistor Fixing heater sub thermistor edge Fixing heater thermal switch Leakage breaker Drum pre exposure Pre transfer exposure Hard disk Notation FL1 H1 H2 H3 H4 H5 TH1 TH2 TP1 ELCB1 LED1 LED2 HD1 Name Scanning lamp fluorescent lamp Heater Thermistor Thermal switch Leakage breaker Pre exposure lamp Pre transfer exposure lamp Hard disk T06 608 01 ...

Page 498: ...GHT 2001 CANON INC 2000 2000 2000 2000 CANON iR105 REV 0 JULY 2001 CHAPTER 6 TROUBLESHOOTING 6 166 6 9 PCBs F06 609 01 14 10 13 20 23 25 24 22 19 18 17 26 1 7 8 9 29 2 16 27 28 34 35 33 6 5 4 3 12 11 15 32 31 ...

Page 499: ...ly Controls panel CPU PCB Control panel PCB Control panel inverter PCB T06 609 01 Function Drives the CCD processes analog images Controls the reader unit Executes pixel line conversion Executes communication signal conversion Controls the system Controls the printer unit Drives the laser diode Controls the laser intensity Drives the scanner motor Supplies DC power Generates high voltage DC compon...

Page 500: ...NON INC 2000 2000 2000 2000 CANON iR105 REV 0 JULY 2001 CHAPTER 6 TROUBLESHOOTING 6 168 6 10 Side Paper Deck N1 F06 610 01 F06 610 02 PS1 PS3 PS2 PS4 PS6 PS5 PS8 PS9 SW2 SW100 SW1 PS7 M2 SL2 CL2 CL1 SL1 PCB1 M1 H1 PCB2 ...

Page 501: ...er upper limit sensor Deck lift position sensor Deck set sensor Deck feed sensor Deck paper supply position sensor Deck paper level sensor Compartment open sensor Compartment open detecting switch Deck lifter lower limit detecting switch Compartment open switch Deck main motor Deck lifter motor Deck feeding clutch Deck pickup clutch Deck pickup roller releasing sole noid Compartment open solenoid ...

Page 502: ...of leakage current this is a normal condition and must be kept in mind 2 VRs that may be used in the field VRs that must not be used in the field Do not touch the VRs and check pins not discussed herein They are exclu sively for use at the factory and require special tools and high precision 6 11 1 Main Controller PCB F06 611 01 J1010 J1028 J1002 J1013 J1011 J1019 J1018 J1044 J1017 J1014 J1023 J10...

Page 503: ...ontroller PCB F06 611 02 6 11 3 DC controller PCB F06 611 03 J1101 J1104 J1110 J1109 J1112 J1108 J1107 J1102 J1106 J1116 J1113 J1114 J1103 SW1 BAT1 LED4 LED3 LED2 LED1 J503 J504 J522 J502 J501 J519 J505 J506 J526 J527 J525 J507 J520 J508 J509 J523 J510 J511 J512 J513 J514 J515 J516 J521 VR101 BAT101 J517 J526 J524 J518 ...

Page 504: ...LY 2001 CHAPTER 6 TROUBLESHOOTING 6 172 6 11 4 HV DC PCB F06 611 04 Normally keep the slide switch SW101 in UP position Keep this in mind when replacing the PCB J732 J737 J733 SW101 up J731 J734 J721 J722 J723 3 1 2 1 3 1 2 1 2 1 1 4 1 5 1 16 Factory Default settings ...

Page 505: ... The machine provides two types of download modes although any of the two may be used to download all files select with care if you want to format the hard disk select the HD Format as a specific partition must be selected You can use any of the two when using a parallel cable however the use of a network cable will require you to start up the machine s network environment necessitating the use of...

Page 506: ...cal print job and accordingly will increment the job count When you use the Service Support Tool be sure to switch the machine to download mode in advance by following the instructions on the screen 7 1 2 Making Pre Checks Prepare the following PC to which the Service Support Tool version 1 28 or later has been installed System CD Connection cable The type of cable depends on how the machine is to...

Page 507: ... REV 0 JULY 2001 CHAPTER 6 TROUBLESHOOTING 6 175 If you are using a straight Ethernet cable and a HUB you are encouraged to connect the machine with the PC on a one on one basis outside the user s network environment F06 701 02 Straight Cable Straight Cable ...

Page 508: ...erface You can not use high speed mode on Windows NT or Windows 2000 Connection with a Network Cable Advantages It is relatively high speed It is less dependent on the PC to be used The use of a cross cable enables direct connection Disadvantages You must change the network settings of the machine or the PC to suit the user s network environment More importantly you must change the ma chine back t...

Page 509: ...105 REV 0 JULY 2001 CHAPTER 6 TROUBLESHOOTING 6 177 7 2 Data Control You must install the files to use System RUI HD Format BOOT Language before ex ecuting downloading 1 Start up the Service Support Tool 2 Under Controlling Data select To Next F06 702 01 ...

Page 510: ...00 2000 2000 CANON iR105 REV 0 JULY 2001 CHAPTER 6 TROUBLESHOOTING 6 178 3 From the Control Work screen of the firmware select Registering Firmware F06 702 02 4 From the following screen select Register from selected folder F06 702 03 ...

Page 511: ...N INC 2000 2000 2000 2000 CANON iR105 REV 0 JULY 2001 CHAPTER 6 TROUBLESHOOTING 6 179 5 Select the drive to which you have inserted the System CD 6 Select the folder of the suitable version and click Register F06 702 04 ...

Page 512: ...s main power switch and disconnect the power plug and the network cable 2 Using a parallel cable connect the PC to the parallel connector on the left side of the controller At this time the PC must remain OFF Connect the 25 pin connector of the cable to the PC and the 36 pin connector to the ma chine 3 Turn on the power switch of the PC and start up the Service Support Tool 4 Connect the machine s...

Page 513: ...modules in user mode common settings display language At time of shipment five modules languages are installed The modules will be lost once you format the had disk requiring you to install them once again to suit the needs of the user To check the version of the modules make the following selections COPIER DISPLAY VERSION LANG XX Check to make sure that the version of each language module matches...

Page 514: ...tion in the upper right of the screen is High Speed go to step 6 if Low Speed go to step 5 F06 703 03 5 Click Switch operation mode to bring up the Centronics Communication Mode Change screen Select High Speed and press OK to move to step 6 Memo High speed mode is not supported on Windows NT and Windows 2000 F06 703 04 ...

Page 515: ...001CANON INC 2000 2000 2000 2000 CANON iR105 REV 0 JULY 2001 CHAPTER 6 TROUBLESHOOTING 6 183 6 Click OK to start connection F06 703 05 7 When connection is done the following screen will appear Click OK F06 703 06 ...

Page 516: ...1 CHAPTER 6 TROUBLESHOOTING 6 184 8 Select System Software Download of the Service Support Tool screen F06 703 07 9 Select the files suited to the language and the country in question from the list of soft ware on the Service Support Tool screen and click Start F06 703 08 ...

Page 517: ...ade existing system software by means of down loading unless the old and new systems have the same functions an attempt to do so will result in an error If the user obtains the official Upgrading kit and follow the appropriate procedure however such upgrading is possible for details see the Installation Procedure that comes with the Upgrading kit 11 Check the progress bar which indicates the progr...

Page 518: ... machine s BOOT ROM you will directly replace the contents of the ROM DIMM Take full care 1 Check to see that the machine s Data lamp is OFF 2 Turn off the machine s main power switch and disconnect the power plug and the net work cable Memo Limits on Preparing the BOOT ROM You will not be able to prepare the BOOT ROM unless the following condi tions are met The model of the machine is the same e ...

Page 519: ...by way of the network and check to make sure that all are ready for communication by sending a PING command from the PC or the machine 1 Connect the machine s network connector RJ 45 and the network connector of the PC using a network cable cross cable 2 Turn on the PC and start up the Service Support Tool 3 Connect the machine s power plug to the power outlet and start service mode make the follo...

Page 520: ... TROUBLESHOOTING 6 188 2 Select the correct BOOT and select an interface bi Centronics or Network The ex ample selects iR8500 for BOOT and Network is selected for Interface F06 704 02 3 To enter the IP address or the host name of the machine to connect click Set host name F06 704 03 ...

Page 521: ... TROUBLESHOOTING 6 189 4 Enter the IP address or the host name here 172 16 1 1 and click Save Then click OK F06 704 04 5 Check to see that the notation in the upper right indicates the IP address or the host name of the machine to connect then click OK to start connection F06 704 05 ...

Page 522: ...2000 2000 2000 2000 CANON iR105 REV 0 JULY 2001 CHAPTER 6 TROUBLESHOOTING 6 190 6 When connection is done the following screen appears Click OK F06 704 06 7 Select BOOT ROM Download on the Service Support Tool screen F06 704 07 ...

Page 523: ...lace Otherwise they may fail to start up 10 When downloading ends turn off the PC by making the following selections OK To Unit Selection Screen OK To Main Menu Ending the Service Support Tool End 7 4 4 After Downloading 1 Turn off the machine s main power switch and disconnect the power plug 2 Turn off the PC 3 Disconnect the network cable cross cable and the PC from the machine 4 If a network ca...

Page 524: ... Using a parallel cable connect the PC to the parallel connector on the left side of the controller At this time the PC must remain OFF Connect the 25 pin connector of the bi Centronics cable to the PC and the 36 pin con nector to the machine 2 Turn on the PC and start up the Service Support Tool 3 Connect the machine s power plug to the power outlet while holding down 2 and 8 of the keypad at the...

Page 525: ...2000 CANON iR105 REV 0 JULY 2001 CHAPTER 6 TROUBLESHOOTING 6 193 2 Select HD Format and select Connect F06 705 02 3 At this time if the notation in the upper right of the screen is High Speed go to step 5 if Low Speed go to step 4 F06 705 03 ...

Page 526: ...iR105 REV 0 JULY 2001 CHAPTER 6 TROUBLESHOOTING 6 194 4 Click change operation mode so that the Centronics Communication Mode change screen will appear Select high speed and click OK then go to step 6 F06 705 04 5 Click OK to start connection F06 705 05 ...

Page 527: ... INC 2000 2000 2000 2000 CANON iR105 REV 0 JULY 2001 CHAPTER 6 TROUBLESHOOTING 6 195 6 When connection is done the following screen will appear Select OK F06 705 06 7 When the Check screen appears select Format F06 705 07 ...

Page 528: ...000 2000 2000 CANON iR105 REV 0 JULY 2001 CHAPTER 6 TROUBLESHOOTING 6 196 8 When the Start Check screen appears select Start to format all partitions F06 705 08 9 When the Start Check screen appears once again select Start F06 705 09 ...

Page 529: ...105 REV 0 JULY 2001 CHAPTER 6 TROUBLESHOOTING 6 197 10 When formatting is done the message Format Finished appears Click OK F06 705 10 11 To continue downloading system select To Unit Selection Screen and click OK Then start downloading system F06 705 11 ...

Page 530: ...disk may still be formatted or the system software may be downloaded in download mode Connecting to the Network using network cable 2 If you want to install the Language module after installing the system software you must be sure that its version is compatible with the version of the system software If you install a Language module not compatible with the system software in question and in additi...

Page 531: ...Copier Reader controller PCB by replacement of flash ROM DIMM 1 J1106 DC controller PCB by replacement of flash ROM DIMM 2 J521 Main controller PCB by replacement of BOOT ROM 7 J1010 see MEMO DADF J1 ADF controller PCB by replacement of ROM 4 IC1 DIP type Finisher K1N K2N by replacement of ROM 5 IC110 DIP type Saddle Finisher K3N K4N Finisher controller PCB by replacement of ROM 5 IC110 DIP type S...

Page 532: ...OM of the finisher controller PCB contains programs for the slave CPU requiring you to up grade the slave CPU software whenever you have replaced the ROM For details see the Service Manual of the finisher The BOOT ROM 7 on the main controller PCB may be upgraded using a PC For details see the descriptions under 7 4 Upgrading the BOOT ROM F06 706 01 7 2 1 5 4 6 ...

Page 533: ... contains the following items of data Service mode settings User mode settings Various MACHINE DATA Once you have backed up the data you may write it to the main controller PCB after re placing the PCB or you can simplify the work involved in entering service mode or user mode settings It is recommended to back up the data whenever possible using the Service Support Tool when you have updated the ...

Page 534: ... assume the use of a parallel cable 1 Using a parallel cable connect the PC to the parallel connector on the right side of the controller At this time the PC must remain OFF Connect the 25 point connector of the parallel cable to the PC and the 36 pin connector to the machine 2 Turn on the power switch of the PC and start up the Service Support Tool 3 Connect the machine s power plug to the power ...

Page 535: ... REV 0 JULY 2001 CHAPTER 6 TROUBLESHOOTING 6 203 8 2 3 Backing Up Data 1 Under Downloading Uploading select To Next F06 802 01 2 Select SYSTEM and select Connect The discussions that follow assume the use of a bi Centronics cable as the interface F06 802 02 ...

Page 536: ...SHOOTING 6 204 3 At this time if the notation in the upper right of the screen is High Speed go to step 5 if Low Speed go to step 4 F06 802 03 4 Click Switch operation mode to bring up the Centronics Communication Mode Change screen Select High Speed and click OK to move to step 5 F06 802 04 ...

Page 537: ... 2001CANON INC 2000 2000 2000 2000 CANON iR105 REV 0 JULY 2001 CHAPTER 6 TROUBLESHOOTING 6 205 5 Click OK to start connection F06 802 05 6 When connection is done the following screen appears Click OK F06 802 06 ...

Page 538: ...CANON INC 2000 2000 2000 2000 CANON iR105 REV 0 JULY 2001 CHAPTER 6 TROUBLESHOOTING 6 206 7 Select Upload the Backup Data on the Service Support Tool screen F06 802 07 8 Select ALL and select Start Storing F06 802 08 ...

Page 539: ...e save operation 10 Select the drive to save the data to and enter the file name the select Save F06 802 09 11 When the selected file has been stored on the selected drive the following screen will appear make the following selections to end the Service Support Tool OK To Unit Se lection Screen OK To Main Menu Ending the Service Support Tool End F06 802 10 ...

Page 540: ...NON INC 2000 2000 2000 2000 CANON iR105 REV 0 JULY 2001 CHAPTER 6 TROUBLESHOOTING 6 208 8 2 4 Downloading Backup Data 1 Under Downloading Uploading select To Next F06 802 11 2 Select SYSTEM and select Connect F06 802 12 ...

Page 541: ...2001CANON INC 2000 2000 2000 2000 CANON iR105 REV 0 JULY 2001 CHAPTER 6 TROUBLESHOOTING 6 209 3 Select OK and start connection F06 802 13 4 When connection is done the following screen appears Click OK F06 802 14 ...

Page 542: ...HT 2001 CANON INC 2000 2000 2000 2000 CANON iR105 REV 0 JULY 2001 CHAPTER 6 TROUBLESHOOTING 6 210 5 Select Download the backup Data F06 802 15 6 Select the file to download and select Start Writing F06 802 16 ...

Page 543: ...OTING 6 211 7 See the progress bar indicating the progress of the downloading operation At the end the following screen will appear Select OK F06 802 17 8 Make the following selections to end the Service Support Tool To Unit Selection Screen OK To Main Menu Ending the Service Support Tool End ...

Page 544: ...001 CHAPTER 6 TROUBLESHOOTING 6 212 8 2 5 Managing Backup Data You can delete backup data that has become obsolete as follows You need not connect a PC to the machine to do so 1 Under Controlling Data select To Next F06 802 18 2 Select Controlling Backup Data F06 802 19 ...

Page 545: ...0 JULY 2001 CHAPTER 6 TROUBLESHOOTING 6 213 3 Select the file to delete from the list of Backup Data Stored on Computer then select Remove F06 802 20 4 When the Delete Check screen appears check the description for the selected file and select Remove F06 802 21 ...

Page 546: ...105 REV 0 JULY 2001 CHAPTER 6 TROUBLESHOOTING 6 214 5 When the Delete Finish screen appears click OK Make the following selections to end the Service Support Tool Return to Previous Screen Return to Main Menu Ending the Service Support Tool End F06 802 22 ...

Page 547: ...COPYRIGHT 2001 CANON INC 2000 2000 2000 2000 CANON iR105 REV 0 JULY 2001 APPENDIX ...

Page 548: ...e start sensor PS60 Laser scanner motor M4 Laser Picking up 1st sheet Picking up 2nd sheet Forming 1st sheet image A4 2 Originals Single Sided Copy Registration paper sensor PS5 Internal delivery sensor PS9 External delivery sensor PS10 Delivery speed switching clutch CL21 Registration brake clutch CL3 Fixing inlet guide solenoid SL1 Developing clutch CL4 Pre registration clutch CL5 Registration c...

Page 549: ...utch CL10 Right deck pickup solenoid SL7 Right deck paper sensor PS22 Vertical path 1 paper sensor PS47 Registration paper sensor PS5 Image write start sensor PS60 Internal delivery sensor PS9 External delivery sensor PS10 Delivery speed switching clutch CL21 Registration brake clutch CL3 Fixing inlet guide solenoid SL1 Developing clutch CL4 Pre registration clutch CL5 Registration clutch CL2 Pre ...

Page 550: ...r internal toner sensor detection signal Cassette 3 pickup clutch drive command Cassette 3 pickup sensor detection signal Cassette 3 paper length sensor detection signal Cassette 3 lifter sensor detection signal Cassette 3 lifter motor drive command Cassette 3 open closed sensor detection signal Cassette 3 paper sensor detection signal Cassette 3 pickup solenoid drive command Cassette 3 paper leve...

Page 551: ...ignal Pickup motor frequency signal Pickup motor drive command Fixing feeding unit outlet sensor detection signal Scanning lamp thermal sensor detection signal Delivery flapper solenoid drive command Stream reading fan lock detection signal Front cover open closed detecting switch detection signal Pre confluence sensor detection signal Fixing motor lock detection signal Fixing motor drive command ...

Page 552: ...aper width volume detection signal Vibration motor drive command Manual feed tray cover open closed detecting sensor detection signal Scanner home position sensor detection signal Scanner moter cooling fan lock detection signal Original size sensor ON OFF detection signal Original size sensor detection signal 1 Original size sensor detection signal 2 Original size sensor detection signal 3 Origina...

Page 553: ... right paper level middle sensor detection signal Front deck right paper level high sensor detection signal Front deck right feeding sensor detection signal Registration brake clutch drive command Registration clutch drive command Registration paper sensor detection signal Fixing feeding unit releasing lever sensor detection signal Upper right cover open closed sensor detection signal Scanner moto...

Page 554: ... To RS232C I F J344 B 2 From DC Controller J523 D 1 J240 PCB32 J1901 1 J1901 2 J1901 3 J1901 4 MT7 J1551 CN901 CN902 1 2 3 4 5 6 7 8 9 10 11 12 13 14 15 16 17 18 19 20 21 22 23 24 25 26 27 28 29 30 31 32 33 34 35 36 37 38 39 40 41 42 43 44 45 46 47 48 49 50 1 2 3 4 5 6 7 8 9 10 11 12 13 14 15 16 17 18 19 20 21 22 23 24 25 26 27 28 29 30 31 32 33 34 35 36 37 38 39 40 41 42 43 44 45 46 47 48 49 50 J...

Page 555: ..._ON 0V LASER2_FAN_STOP LASER2_FAN_VCC 0V LASER1_FAN_STOP LASER1_FAN_VCC 0V PRIM_FAN_VCC VCC GND STOP PRIM_FAN_STOP 0V 0V 5V KAKIKOMI_PS LOCK VCC GND LOCK VCC GND OUT_A OUT_B OUT_C HC HC HB HB HA HA VCC pull up GND N C LOCK VCC GND LOCK VCC GND PRE_EXPOSURE_VCC 0V POST_FAN_STOP 0V POST_FAN_VCC DEV_FAN_STOP 0V DEV_FAN_VCC POST_M C_FW POST_M C_BK POST_EXPOSURE_VCC 0V N C N C N C N C 5V 0V 0V 0V 24VU ...

Page 556: ...gital multimeter Laser power checker Door switch Mirror positioning tool front rear NA 3 test sheet Tool No FY9 2002 FY9 4008 TKN 0093 FY9 3040 FY9 9196 Rank A A A B A Remarks For adjusting the laser intensity together with the laser power checker for electrical checks For adjusting the light intensity together with the digital multimeter For adjusting the distance between No 1 and No 2 mirrors Fo...

Page 557: ... To RS232C I F J344 B 2 From DC Controller J523 D 1 J240 PCB32 J1901 1 J1901 2 J1901 3 J1901 4 MT7 J1551 CN901 CN902 1 2 3 4 5 6 7 8 9 10 11 12 13 14 15 16 17 18 19 20 21 22 23 24 25 26 27 28 29 30 31 32 33 34 35 36 37 38 39 40 41 42 43 44 45 46 47 48 49 50 1 2 3 4 5 6 7 8 9 10 11 12 13 14 15 16 17 18 19 20 21 22 23 24 25 26 27 28 29 30 31 32 33 34 35 36 37 38 39 40 41 42 43 44 45 46 47 48 49 50 J...

Page 558: ... Tester extension pin Tester extension Pin L tipped D 10 Test Sheet Tool No FY9 3041 FY9 3014 FY9 3038 FY9 3039 FY9 9129 000 Rank B B A A B Remarks For checking the zero level of the surface poten tial sensor For checking the environ ment sensor For making electrical checks attachment to the meter For making electrical checks attachment to the meter For adjusting images Shape ...

Page 559: ... 0 JULY 2001 APPENDIX A 13 Rank A Each service person is expected to carry one B Each five or so service persons is expected to carry one C Each workshop is expected to carry one No 11 Tool name Loupe Tool No CK 0056 000 Rank B Remarks For checking images Shape ...

Page 560: ...s Cleaning e g photosensitive drum Lubricating e g scanner rail Drum heater contact Composition Hydrocarbon of the fluorine family alcohol surface activating agent water Hydrocarbon of fluo rine family hydrocar bon of chlorine family alcohol Lithium soap of mineral family molybdenum disulfide Mineral oil paraffin family Silicone oil Selenium oxide Silicone oil Fluorine poly ethyl Poly tetra fluori...

Page 561: ...Service Mode COPYRIGHT 2001 CANON INC 2000 CANON iR105 REV 0 JULY 2001 ...

Page 562: ...in a 3 level construction Initial screen Level 1 2 screen Level 3 screen F00 101 01 Initial screen Level 1 2 screen Level 3 screen Level 3 screen Level 3 screen User screen From Level 1 2 screen Reset key Previous Next page Previous Next page Previous Next page 2 8 Reset key Level 1 item selected at screen top Level 2 item selected from list Level 3 screen Item selected ...

Page 563: ... the keypad 3 Press the User Mode key in the control panel The following Initial screen will appear as a result F00 102 01 COPIER FEEDER SORTER BOARD DISPLAY I O ADJUST FUNCTION OPTION TEST COUNTER Control display mode Input output display mode Adjustment mode Operation inspection mode Settings mode Test print mode Counter mode COPIER FEEDER SORTER BOARD Accessory board service mode ADF service mo...

Page 564: ...ine is adjusted and the adjustment values are recorded in the Service Sheet found in the service book case behind the front cover If you have replaced the reader controller PCB or the DC controller PCB or if you have executed RAM clear for each the ADJUST and OPTION adjustment values will be initial ized to their default settings If you have made adjustments in the field be sure to print out a ser...

Page 565: ...rvice Mode 1 5 1 Initial Screen F00 105 01 1 5 2 Level 1 2 Screen F00 105 02 COPIER FEEDER SORTER BOARD Initial items Press an item to select SERVICE MODE VERSION USER ANALOG CST STS ACC STS JAM ERR HV STS ALARM 2 DPOT SENSOR MISC Level 1 item Press an item to select Press an item to select Level 2 item ...

Page 566: ...y JAM paper jam SERVICE service operation under way WAITING in operation e g initial rotation DOOR door open COPYING copy under way ERROR error NO TONER toner absent WTNR FUL waste toner case full xxxxx yyyyy aaaaa bbbbb OK ADJ X ADJ XY 1 1 READY ADJ X key press to stop ongoing operation To accept input To switch between and Press an item to highlight Input range Value before change Stop key press...

Page 567: ...2000 2000 2000 2000 CANON iR105 REV 0 JULY 2001 SERVICE MODE S 6 2 COPIER 2 1 DISPLAY The following shows the Display screen COPIER DISPLAY F00 201 01 VERSION USER ANALOG CST STS ACC STS JAM ERR HV STS DPOT SENSOR ALARM 2 MISC ...

Page 568: ...version of the control panel CPU PCB FEEDER Indicates the ROM version of the ADF controller PCB SORTER Indicates the ROM version of the finisher controller PCB NIB Indicates the version of the network interface board PS PCL Indicates the version of the printer board PS PCL LIPS Indicates the version of the printer board LIPS SDL STCH Indicates the ROM version of the saddle stitcher controller PCB ...

Page 569: ...on of the Italian language module LANG JP Indicates the version of the Japanese language module LANG CS Indicates the version of the Czech language module LANG DA Indicates the version of the Danish language module LANG EL Indicates the version of the Greek language module LANG ES Indicates the version of the Spanish language module LANG ET Indicates the version of the Estonian language module LAN...

Page 570: ... of the Polish language module LANG PT Indicates the version of the Portuguese language module LANG RU Indicates the version of the Russian language module LANG SL Indicates the version of the Slovenian language module LANG SV Indicates the version of the Swedish language module LANG TW Indicates the version of the Chinese classic language module LANG ZH Indicates the version of the Chinese simpli...

Page 571: ...e used paper size configuration Indication LANGUAGE xxyy zz aa xx upper 2 digits country code yy lower 2 digits language code zz destination code 00 Canon 01 OEM aa paper size configuration code 00 AB 01 inch 02 A 03 all sizes COUNTER Indicates the type of count control for the soft counter 00 100 V 01 208 230 V MODEL Indicates the type of model 1 iR8500 2 iR105 COPIER DISPLAY USER ...

Page 572: ... 0 puncher unit absent 1 2 hole 2 2 3 hole 3 4 hole FRN 4 4 hole SWDN DECK Indicates the connection of a paper deck accessory 0 absent 1 present CARD Indicates the presence absence of a card reader if no card reader is con nected 1 0 absent 1 present DATA CON Indicates the connection of a self diagnostic device 0 absent 1 copy data controller 2 NE controller RAM Indicates the capacity of the memor...

Page 573: ...irmware 0 absent 1 installed ANALOG Indicates the reading from the analog sensor TEMP Indicates the machine internal temperature environment sensor C HUM Indicates the machine internal humidity environment sensor ABS HUM Indicates the machine internal absolute humidity absolute water content g OPTICS Indicates the temperature of the scanner C FIX C Indicates the temperature of the middle of the fi...

Page 574: ...cates the paper size of the cassette and the manual feed tray WIDTH C3 Indicates the width of paper in the cassette 3 in terms of paper size WIDTH C4 Indicates the width of paper in the cassette 4 in terms of paper size WIDTH MF Indicates the width of paper in the manual feed tray COPIER DISPLAY CST STS ...

Page 575: ...er FFff Jam code FF type of copier jam T00 201 01 ff copier sensor T00 201 02 FF type of finisher jam T00 201 03 ff finisher jam sensor T00 204 04 FFff ADF jam code T00 201 05 G Source of paper T00 201 06 HHHHHH Source soft counter IIIII Paper size COPIER DISPLAY JAM JAM 1 7 READY AA BBBB CCCC DDDD E FFff G HHHHHH IIIII AA BBBB CCCC DDDD E FFff G HHHHHH IIIII AA BBBB CCCC DDDD E FFff G HHHHHH IIII...

Page 576: ... deck feed sensor PS106 xx16 manual feed sensor PS35 xx17 side paper deck pickup sensor PS101 T00 201 02 FF Type of Finisher Jam Code Jam 10xx delay jam 11xx stationary jam 13xx power on residual jam 14xx front cover open jam 15xx staple jam 16xx punch jam 17xx other T00 201 03 COPIER DISPLAY JAM ff Finisher Jam Sensor Code Sensor xx00 no sensor in particular xx11 fold path paper residual sensor 1...

Page 577: ... 003C 1st sheet pre reversal stationary 1 003D 1st sheet pre reversal stationary 2 003E 1st sheet pre reversal stationary 3 003F 1st sheet pre reversal stationary 4 0041 reversal stationary 004A 1st sheet reversal stationary T00 201 05 1 3 Code Sensor xx27 buffer path rear paper sensor stationary jam PI3 xx28 non sort delivery sensor stationary jam PI6 xx29 sort delivery sensor stationary jam PI4 ...

Page 578: ...ary 00A2 manual feed reversal stationary 00A3 manual feed delivery stationary 00A4 manual feed delivery delay 00A5 manual feed residual original 00A6 manual feed original size error 00E1 ADF open 00E2 cover open 00E3 cycle NG 00E4 initial stay 00E5 timing error 00E6 original size error 00E7 user ADF open 00E8 user cover open 00E9 power down 00EA time leading edge error 00EB 1st sheet image leading...

Page 579: ...overy 24 hr notation if no recovery FFFF EEEE Error code See the chapter on error code FFff Detail code If none 00000 G Location 0 copier main controller 1 feeder 2 finisher 3 not used 4 reader 5 printer 6 PDL HH not used COPIER DISPLAY ERR ERR 1 7 READY AA BBBB CCCC DDDD EEEE FFff G HH AA BBBB CCCC DDDD EEEE FFff G HH AA BBBB CCCC DDDD EEEE FFff G HH AA BBBB CCCC DDDD EEEE FFff G HH AA BBBB CCCC ...

Page 580: ... Indicates the level of current of primary charging µA PRI GRID Indicates the grid voltage of primary charging V PRE TR Indicates the level of current of pre transfer charging µA TR Indicates the level of current of transfer charging µA SP Indicates the level of current of separation charging µA BIAS Indicates the level of developing bias V COPIER DISPLAY HV STS ...

Page 581: ...pier V VL1M Indicates the reading of the light area potential VL1 for the copier V reference optimum VL1T 6 V VDT Indicates the target value of the dark area potential VD for the copier V VDM Indicates the reading of the dark area potential VD for the copier V reference optimum VDT 6 V VDM P Indicates the reading of the dark area potential VD for printer PDL images V reference optimum VDT P 6 V VD...

Page 582: ... size sensor 2 DOC SZ3 Indicates the sensor output detected by the original size sensor 3 DOC SZ4 Indicates the sensor output detected by the original size sensor 4 MISC Indicates other states FL LIFE Indicates the duty ratio of when the scanning lamp is ON STM P L Indicates the lamp stop position for stream reading mode large size 0 to 6 STM P S Indicates the lamp stop position for stream reading...

Page 583: ...covery 24 hr notation if no recovery FFFF EE Location code T00 201 07 ffff Alarm code T00 201 07 GGGG Detail code HHHHHHHH Total counter reading at time of alarm COPIER DISPLAY ALARM 2 ALARM 2 1 7 READY AA BBBB CCCC DDDD EEffff GGGG HHHHHHHH AA BBBB CCCC DDDD EEffff GGGG HHHHHHHH AA BBBB CCCC DDDD EEffff GGGG HHHHHHHH AA BBBB CCCC DDDD EEffff GGGG HHHHHHHH AA BBBB CCCC DDDD EEffff GGGG HHHHHHHH AA...

Page 584: ...13 dust detection large 4 0014 dust detection large 5 0015 dust detection large 6 0016 dust detection large 7 0017 small position stream reading prohibit 0018 large position stream reading prohibit 0019 scanner lamp intensity low 0001 right deck lifter alarm 0002 left deck lifer alarm 0003 cassette 3 lifter alarm 0004 cassette 4 lifter alarm 0007 manual feed tray lifter alarm 0008 side paper deck ...

Page 585: ...system 62 saddle stitcher system 65 sorter finisher puncher system T00 201 07 2 2 ffff Code 0001 delivery assembly curl reducing fan alarm 0005 scanner motor fan alarm 0006 developing fan alarm 0007 delivery adhesion prevention fan alarm 0009 duplex feeding fan alarm 0010 stream reading fan alarm 0001 staple absent 0001 stitch staple absent 0001 punch waste case full ...

Page 586: ...e Input Output screen COPIER I O F00 202 01 Guide to the Screen P001 xxxxxxxxxxxxxxxx Bit 0 Bit 15 Address DC CON R CON FEEDER SORTER MN CON I O port of the DC controller PCB I O port of the Reader controller PCB I O port of the ADF controller PCB I O port of the Finisher controller PCB I O port of the Main controller PCB ...

Page 587: ...stop 8 power supply cooling fan 1 stop detection signal FM11 1 stop 9 power supply cooling fan 2 stop detection signal FM12 1 stop 10 separation fan stop detection signal FM13 1 stop 11 not used 12 delivery adhesion prevention fan stop detection signal 13 developing fan stop detection signal FM15 1 stop 14 not used 15 not used P002 0 not used 1 duplex reversal sensor PS12 1 paper present 2 duplex ...

Page 588: ...aper level middle sensor PS51 1 paper present 5 right deck paper level high sensor PS52 1 paper present 6 left deck paper level middle sensor PS54 1 paper present 7 left deck paper level high sensor PS55 1 paper present 8 right deck paper sensor PS22 1 paper present 9 left deck paper sensor PS32 1 paper present 10 cassette 3 paper sensor PS39 1 paper present 11 cassette 4 paper sensor PS44 1 paper...

Page 589: ...ction PCB11 1 error 6 inside hopper toner feed motor error detection 1 error E020 7 inside cartridge toner feed motor error detection 1 error E025 8 not used 9 separation heat discharge fan stop detection 1 stop 10 not used 11 duplex feed fan stop detection 1 stop 12 not used 13 AC relay shut off open circuit detection 1 error 14 overcurrent notice 24 V PCB14 1 overcurrent 15 overcurrent notice 38...

Page 590: ...10 1 ON 13 pre transfer charging assembly fan half speed FM10 1 ON 14 laser scanner motor cooling fan full speed FM14 1 ON 15 duplex feeding fan full speed FM19 1 ON P009 0 not used 1 not used 2 separation fan full speed FM13 1 ON 3 not used 4 curl reducing fan full speed FM6 1 ON 5 developing fan full speed FM15 1 ON 6 developing fan half speed FM15 1 ON 7 not used 8 fixing heat discharge fan ful...

Page 591: ...r PS6 1 paper present P011 0 not used 1 right deck pickup clutch CL10 1 ON 2 left deck pickup clutch CL11 1 ON 3 cassette 3 pickup clutch CL12 1 ON 4 cassette 4 pickup clutch CL14 1 ON 5 vertical path 1 clutch CL8 1 ON 6 vertical path 2 clutch CL9 1 ON 7 vertical path 3 clutch CL13 1 ON P012 0 not used 1 vertical path 4 clutch CL15 1 ON 2 manual feed tray pickup clutch CL7 1 ON 3 manual feed tray ...

Page 592: ...eeder unit lock solenoid draw SL4 1 ON 5 not used 6 not used 7 not used P016 0 not used 1 pre exposure lamp LED1 1 ON 2 potential sensor PCB19 1 ON 3 HVT DC component HVT 0 high voltage output ON 4 HVT developing AC component HVT 0 ON 5 HVT pre transfer AC separation AC component HVT 0 ON 6 paper feed guide bias PCB11 0 ON 7 paper feed guide bias switch over PCB11 0 200V 1 600V P017 0 not used 1 n...

Page 593: ...not used 4 not used 5 not used 6 not used 7 not used P021 0 not used 1 not sued 2 not used 3 not used 4 not used 5 not used 6 waste toner case full detection reset 0 reset 7 shut off SW1 1 shut off P022 0 not used 1 not used 2 DDI spare 3 DDI spare 4 printer power ready L READY H Not READY 5 printer command reception ready L ready 6 not used 7 not used P023 0 not used 1 not used 2 right deck lifer...

Page 594: ...r Deck pickup roller release solenoid 2 Paper Deck drawing clutch 3 Paper Deck pickup clutch 4 Paper Deck pickup motor 5 Paper Deck lifter motor 6 Paper Deck lifter motor up down 7 Paper Deck open solenoid 8 Paper Deck chip select H CL etc L sensor 9 Paper Deck latch IC control ON only at power on 10 Paper Deck sensor switch over L pickup H draw 11 Paper Deck sensor LED H forced OFF L ON 12 Paper ...

Page 595: ...osed H closed 12 Paper Deck lifter motor overcurrent detection H detected 13 not used 14 Paper Deck connection detection H detected 15 Paper Deck connection detection L detected P028 0 not used 1 not used 2 not used 3 not used 4 not used 5 not used 6 not used 7 not used 8 not used 9 not used 10 not used 11 not used 12 not used 13 not used 14 not used 15 not used P029 0 not used 1 not used 2 not us...

Page 596: ...en 14 not used 15 not used R CON Indicates the input output ports of the reader controller PCB R CON 1 3 Address Bit Description Notation Remarks P001 0 original size detection 1 0 detected 1 original size detection 2 0 detected 2 original size detention 3 0 detected 3 original size detection 4 0 detected 4 copyboard open closed detection 1 closed 5 not used 6 not used 7 not used P002 0 fluorescen...

Page 597: ...fan ON 1 ON 24V 5 not used 6 image leading select 1 copier 0 ADF 7 size detection on off 1 ON P005 0 scanner motor D0 1 scanner motor D1 2 scanner motor D2 3 scanner motor D3 4 scanner motor CDWN0 5 scanner motor CDWN1 6 scanner motor CDWN2 7 not used P006 0 scanner motor CW CCW 1 CW 0 CCW 1 scanner motor OFF 0 OFF 2 not used 3 not used 4 fluorescent lamp pre heat ON 0 ON 5 fluorescent lamp heater...

Page 598: ...versal solenoid SL3 1 ON 1 belt motor cooling fan 0 ON 2 reversal solenoid SL1 1 ON 3 delivery solenoid position 1 SL4 1 ON 4 delivery solenoid position 2 SL4 1 ON 5 stopper plate solenoid position 1 SL2 1 ON 6 stopper plate solenoid position 2 SL2 1 ON 7 solenoid timer 0 ON IO P02 0 not used 1 not used 2 not used 3 not used 4 pickup roller home position PI7 1 HP 5 pickup roller height sensor 2 PI...

Page 599: ...s 0 and 1 3 registration roller rear paper sensor S3 0 original present 4 manual feed registration roller paper sensor S9 1 original present 5 not used 6 not used 7 not used IO P06 0 serial data output 1 transmit 1 D A load path 1 transmit 2 EEPROM serial input 1 receive 3 EEPROM chip select 0 select EEPROM 4 serial reference clock during outputs repeats 0 and 1 5 separation motor clock detection ...

Page 600: ...AD trigger 1 output present IO P09 0 not used 1 separation clutch CL 1 ON 2 skew sensor S5 1 original present 3 original delivery sensor PI13 1 original present 4 manual feed set sensor PI12 1 original present 5 not used 6 reversal sensor S1 1 original present 7 registration roller rotation detection PI5 during outputs repeats 0 and 1 IO P10 0 DIP switch DIPSW1 0 ON 1 signal DIP switch DIPSW2 sign...

Page 601: ...separation rear sensor analog input AD P03 read sensor analog input AD P04 delivery reversal sensor analog input AD P05 not used AD P06 not used AD P07 not used AD P08 not used DA P01 reversal motor hereafter analog ports DA P02 belt motor DA P03 original sensor adjustment DA P04 trailing edge sensor adjustment DA P05 separation rear sensor adjustment DA P06 skew sensor adjustment DA P07 pre regis...

Page 602: ...pper path switch over solenoid SL2 0 ON 7 buffer path switch over solenoid SL1 1 wrap 0 release P002 0 front aligning plate motor B M4 during output repeats 0 and 1 1 front aligning plate motor A M4 during output repeats 0 and 1 2 inlet motor brake M1 1 braking 3 buffer path rear paper sensor PI3 1 paper present 4 rear aligning plate motor B M5 during output repeats 0 and 1 5 rear aligning plate m...

Page 603: ...0 accelerate 2 inlet motor On M1 1 OFF 0 ON 3 inlet motor CW CCW M1 1 CCW 0 CW 4 not used 5 not used 6 not used 7 not used P006 0 trimmer connection detected 1 connected 1 DRAM chip select 0 cs 2 stapler interference position detection 1 interfere 0 ready 3 staple cartridge indication 1 50 sheets 0 100 sheets 4 punch path sensor S1 0 paper present 5 stack delivery motor FG PI11 during output repea...

Page 604: ...resent 1 READY detection 1 NO 0 ready 2 stack tray approach detection 0 ON 3 door 24V down detection 1 down 4 feed path paper detection 1 PI76 1 paper present 5 feed path paper detection 2 S7 1 paper present 6 feed path paper detection 3 S8 1 paper present 7 feed path paper detection 4 PI75 1 paper present P011 0 inserter cover open closed detection 1 open 1 stack wall safety detection 1 error 2 i...

Page 605: ... 1 OFF 0 ON 4 rear aligning plate motor ON M5 1 OFF 0 ON 5 tray sub plate motor A 6 tray sub plate motor B 7 tray sub plate motor ON 1 OFF 0 ON P014 0 knurled belt motor phase A M20 1 knurled belt motor phase B M20 2 knurled belt motor ON M20 1 OFF 0 ON 3 paddle motor A M9 4 paddle motor B M9 5 paddle motor ON M9 1 OFF 0 ON 6 folder motor gain switch over M71 1 high speed 0 low speed 7 not used P0...

Page 606: ...n PI20 1 paper prevent 0 paper absent 5 swing guide closed detection PI14 0 closed 6 swing guide home position detection PI15 1 HP 7 handling tray paper detection PI32 1 paper present 0 paper absent P018 0 punch waste case detection PI26 1 set 1 punch waste feed motor error detection PI27 1 normal 0 error 2 feed cooling fan error detection FM2 1 error 0 normal 3 knurled belt home position detectio...

Page 607: ...upper 1 ON P022 0 not used 1 inserter motor speed switch over 1 M61 2 inserter motor speed switch over 2 M61 1 ON 3 inserter separation sensor PI61 62 1 paper present 0 paper absent 4 inserter paper set sensor S9 1 paper present 0 paper absent 5 inserter pickup solenoid SL61 1 ON 6 inserter stopper plate solenoid SL62 0 ON 7 inserter separation clutch CL61 1 ON P023 0 fold feed motor ON 1 ON 1 fol...

Page 608: ... 1 tray B lift motor B M12 2 tray B lift motor A M12 3 tary B lift motor B M12 4 tray A lift motor A M13 5 tray A lift motor B M13 6 tray A lift motor A M13 7 tray A lift motor B M13 P026 0 stack tray position detection 1 1 light block 1 stack tray position detection 2 1 light block 2 stack tray position detection 3 1 light block 3 stapler home position detection 0 HP 4 not used 5 not used 6 not u...

Page 609: ...th sensor PI3 P029 0 punch paper edge detection 1 PI21 1 punch paper edge detection 2 PI21 2 tray B idle rotation detection PI18 3 tray A idle rotation detection PI19 4 punch position detection PI25 1 rear 0 front 5 not used 6 not used 7 not used P030 0 D A serial output 1 flash serial output 2 punch motor ON M18 1 OFF 0 ON 3 flash serial input 4 D A serial lock 5 not used 6 not used 7 not used P0...

Page 610: ...rear CCW signal M46 0 CCW 2 stitch motor front CW signal M47 0 CW 3 stitcher motor front CCW signal M47 0 CCW 4 paper fold motor CW drive signal M42 0 CW 5 paper fold motor CCW drive signal M42 0 CCW 6 No 1 paper deflect solenoid drive signal SL41 0 ON 7 No 2 paper deflect solenoid drive signal SL42 0 ON P034 0 not used 1 not used 2 not used 3 not used 4 not used 5 feed roller contact drive signal...

Page 611: ...on 3 not used 4 feed roller phase detection PI53 1 flag present 5 aligning plate home position detection PI48 0 HP connection 6 not used 7 not used P038 0 paper positioning plate motor phase A M44 1 paper positioning plate motor phase B M44 2 paper pushing plate motor PWM M48 3 feed motor M41 0 ON 4 feed motor phase A M41 5 feed motor phase B M41 6 feed motor reference clock M41 7 paper pushing pl...

Page 612: ... not used 2 outlet cover open detection connector PI46 1 connected connection 3 not used 4 paper pushing plate leading edge position PI56 1 connected detection connector connection 5 paper pushing plate home position detection PI55 1 connected connector connection 6 saddle tray paper detection 2 PI43 1 paper present 7 saddle tray paper detection 3 PI44 1 paper present P042 0 not used 1 LED1 drive ...

Page 613: ...ed P055 DA8 not used P056 DA9 not used P057 DA10 not used P058 DA11 not used P059 DA12 not used P060 AN0 staple present rear MS31 if 92 or higher staple present P061 AN1 staple present front MS33 if 92 or higher staple present P062 AN2 not used P063 AN3 inlet over open detection connector connection PI51 if 128 or higher connected P064 AN4 saddle tray home position detection connector PI41 if 128 ...

Page 614: ...P004 0 DDI S general purpose output not used 1 DDI S general purpose output not used 2 3 3V emergency power off signal 0 normal ON 1 5W OFF sleep mode 3 SSCNST signal SP0 not used P005 0 DDI P general purpose output not used 1 DDI P general purpose output not used 2 DDI P general purpose output not used 3 PPRTST signal PP0 0 printer image start P006 0 battery alarm 0 normal 1 error 1 parallel EEPR...

Page 615: ...8 pickup count 1 count 9 delivery count 1 count 10 coin robot pickup count 1 count not used 11 coin robot delivery count 1 count not used 12 LCD back light control 1 ON 13 not used 14 parallel EEPROM write protect 0 Write 1 Protect 15 not used P008 0 not used 1 not used 2 not used 3 color UI detection 0 color UI present 4 B W UI detection 0 B W UI present 5 BAT board detection 0 present 6 not used...

Page 616: ... 2 3 ADJUST The following shows the Adjust screen COPIER ADJUST F00 203 01 A change to any of the items under COPIER ADJUST becomes valid when the main power switch is turned off and then on again HV PRI V CONT ADJ XY CCD AE LASER EXP LED HV SP DENS DEVELOP HV TR FEED ADJ CST ADJ LAMP BLANK ...

Page 617: ...sity A lower input value decreases the intensity If the output shows faulty images after execution of the following enter the values indicated on the service sheet COPIER FUNCTION CCD CCD ADJ AE Use it to make AE adjustments AE TBL Use it to adjust the density of the text for image density adjustment Range of adjustment 1 to 9 default 5 F00 203 02 White White Original density A lower value makes t...

Page 618: ...ust the image read start position main scanning direction Range of adjustment 0 to 2970 unit 0 1 mm Be sure to execute it before adjusting the margin Be sure not to use it to create a margin F00 203 03 ADJ Y Use it to adjust the image read start position sub scanning direction Range of adjustment 0 to 1000 unit 0 1 mm F00 203 04 Horizontal size plate Standard white plate Lower value Higher value C...

Page 619: ... so that the machine reads the standard white plate while avoiding the area F00 203 05 ADJ Y DF Use it to adjust the read start position in main scanning direction ADF horizontal registration adjustment Range of adjustment 0 to 1000 unit 0 1 mm F00 203 06 Memo Vertical size plate Standard white plate Higher value Lower value Copyboard glass HP sensor Feed direction Lower value Higher value Print i...

Page 620: ...value for the first half even numbered pixels of the CCD 0 to 1023 GAIN O F Use it to enter the gain value for the first half odd numbered pixels of the CCD 0 to 1023 OFST E R Use it to enter the offset value for the last half even numbered pixels of the CCD 0 to 1023 OFST O R Use it to enter the offset value for the last half odd numbered pixels of the CCD 0 to 1023 OFST E F Use it to enter the o...

Page 621: ...s of the CCD 0 to 1023 LUT E R3 Use it to enter the link correction data value for the last half even numbered pixels of the CCD 0 to 1023 LUT E R4 Use it to enter the link correction data value for the last half even numbered pixels of the CCD 0 to 1023 LUT E R5 Use it to enter the link correction data value of the last even numbered pix els of the CCD 0 to 1023 LUT O F1 Use it to enter the link ...

Page 622: ... the CCD 0 to 1023 LUT E F2 Use it to enter the link correction data value for the first half even num bered pixels of the CCD 0 to 1023 LUT E F3 Use it to enter the link correction data value for the first half even num bered pixels of the CCD 0 to 1023 LUT E F4 Use it to enter the link correction data value for the first half even num bered pixels of the CCD 0 to 1023 LUT E F5 Use it to enter th...

Page 623: ... it to adjust the delay line of the pixel used to coordinate the laser A and laser B in main scanning direction If you have replaced the laser unit enter the values indicated on the label attached to the laser unit LA PWR A Use it to enter the power adjustment value for the laser A Range of adjustment 0 to 255 If you have replaced the laser unit enter the power adjustment value for the laser A ind...

Page 624: ... you have replaced the high voltage unit be sure to enter the value indicated on the label attached to the new high voltage unit If you have replaced the DC controller PCB or cleared the RAM on the DC controller PCB be sure to enter the value indicated on the service sheet D HV DE Use it to enter the offset value for the developing high voltage output of the DC controller PCB Range of adjustment 1...

Page 625: ...efault 5 F00 203 07 BLANK Use it to adjust the non image width If you have replaced the DC controller PCB or cleared the RAM of the DC controller PCB enter the value indicated on the service sheet BLANK T Use it to enter a value for the image leading edge non image width Range of adjustment 0 to 2392 BLANK B Use it to enter a value for the image trailing edge non image width Range of adjustment 0 ...

Page 626: ...t to enter an offset value for the voltage potential sensor Range of adjustment 0 to 30 VL OFST Use it to enter an offset value for the voltage potential control light area tar get voltage potential Range of adjustment 50 to 50 unit 1 V VD OFST Use it to enter an offset value for the voltage potential control dark area tar get voltage potential Range of adjustment 50 to 50 unit 1 V DE OFST Use it ...

Page 627: ...nt or on the 1st side of a double sided print using plain paper Range of adjustment 650 to 0 If you have replaced the DC controller PCB or cleared the RAM on the DC controller be sure to enter the value indicated on the service sheet TR N2 Use it to enter an output adjustment value for the transfer charging current for printing on 2nd side of a double sided print using plain paper Range of adjustm...

Page 628: ...he new high Voltage unit If you have replaced the DC controller PCB or cleared the RAM on the DC controller PCB be sure to enter the value indicated on the service sheet D PRE TR Use it to enter an offset value for the pre transfer high voltage output of the DC controller PCB Range of adjustment 100 to 100 If you have replaced the DC controller PCB be sure to enter the value indicated on the label...

Page 629: ...ou have replaced the controller PCB or cleared the RAM of the DC controller PCB be sure to enter the value indicated on the service sheet HVT SP Use it to enter an offset value for the separation high voltage output of the high voltage unit Range of adjustment 100 to 100 If you have replaced the high voltage unit be sure to enter the value indicated on the label attached to the new high voltage un...

Page 630: ...o adjust the timing at which the registration roller clutch goes ON A higher value delays the timing at which the registration roller clutch goes ON thus decreasing the leading edge margin Range of adjustment 100 to 100 unit 0 1 mm ADJ REFE Use it to adjust the horizontal registration for re pickup If the image is displaced to the front increase the value Range of adjustment 100 to 100 unit 0 1 mm...

Page 631: ... 3 A4R Range of adjustment 0 to 255 If you have replaced the paper width detecting VR execute the fol lowing in service mode FUNCTION CST C4 STMTR Use it to enter a paper width basic value for the cassette 4 STMTR Range of adjustment 0 to 255 If you have replaced the paper width detecting VR execute the fol lowing in service mode FUNCTION CST C4 A4R Use it to enter a paper width basic value for th...

Page 632: ...N CST C3 LVOL Use it to enter a stack height for the cassette 3 50 sheets Range of adjustment 0 to 255 C3 HVOL Use it to enter a stack height for the cassette 3 250 sheets Range of adjustment 0 to 255 C4 LVOL Use it to enter a stack height for the cassette 4 50 sheets Range of adjustment 0 to 255 C4 HVOL Use it to enter a stack height for the cassette 4 250 sheets Range of adjustment 0 to 255 EXP ...

Page 633: ...000 2000 2000 CANON iR105 REV 0 JULY 2001 SERVICE MODE S 72 2 4 FUNCTION The following shows the Function screen COPIER FUNCTION F00 204 01 INSTALL CCD LASER DPC CST CLEANING FIXING SYSTEM PANEL CLEAR PART CHK MISC R MISC P SENS ADJ ...

Page 634: ...he message Copier Ready Never turn off the power while the machine is operating Using the Mode 1 Select the item and press the OK key 2 See that the machine performs toner supply about 8 to 10 min While the machine supplies toner it indicates a countdown of the sup ply time in sec starting at 600 sec 3 See the machine automatically stops at the end of toner supply CARD Use it to set a number for t...

Page 635: ...rter PCB copyboard glass standard white plate light adjustment PCB light adjustment sensor PCB Use the whitest of all papers not for color processing used by the user as the standard white paper Using the Mode 1 Place the standard white paper 10 sheet or more on the copyboard glass 2 Select an item and press the OK key 3 Execute auto adjustment about 1 min 4 See that the machine automatically stop...

Page 636: ...heet and store it away COPIER ADJUST LAMP COPIER ADJUST CCD LUT ADJ2 Use it to execute CCD gain detail correction If the density is not corrected using LUT ADJ CCD gain simplified cor rection execute this mode using the 10 gradation chart Using the Mode 1 As shown place the 10 gradation chart D 10 Test Sheet on the copyboard glass 2 Select the item and press the OK key 3 See that the machine execu...

Page 637: ...e that the message goes OFF automatically in about 60 sec and the display indicates OK POWER B Use it to turn on the laser B Using the Mode 1 See the instructions under POWER A DPC Use it to make voltage potential sensor related adjustments OFST Use it to execute offset adjustment of the potential sensor This mode is part of the procedure to be performed when replacing the potential sensor unit do...

Page 638: ...e guide plate to STMTR width 2 Select C3 STMTR C4 STMTR and press the OK key The machine performs auto adjustment and stores the value 3 Likewise repeat steps 1 and 2 to enter a basic value MF A4R MF A6R MF A4 Use it to enter a paper width basic value for the manual feed tray A4R width 210 mm A6R width 105 mm A4 width 297 mm To make fine adjustments after registering the basic value execute the fo...

Page 639: ...ging wire 5 tines continuously round trip If you have replaced the primary charging wire or the transfer charg ing wire be sure to execute this mode Using the Mode 1 Select the item and press the OK key 2 See that the machine performs auto cleaning of the charging wire 5 times continuously 3 See that the machine automatically stops after cleaning COPIER FUNCTION CLEANING ...

Page 640: ...the test sheet 2 Place A4 paper in the tray 3 Select the item to highlight and press the OK key The paper will be picked up and is stopped between the fixing rollers once and then will be delivered in about 20 sec 4 Measure the width of the area shaded in the figure F00 204 04 a and b are measurements at 10 mm from either edge of paper Feed direction Standards a c 0 5mm or less Standards 200V 9 0m...

Page 641: ...D OFF to stop the operation LED OFF Use it to end a check on the LEDs of the control panel Using the Mode 1 Select the item to end LED CHECK KEY CHK Use it to check key inputs Using the Mode 1 Select the item 2 Press the key to check If normal its corresponding character appears on the touch panel T00 204 01 3 At the end select KEY CHECK once again to end the operation TOUCHKEY Use it to adjust th...

Page 642: ...FF ON 10 sec OFF ON OFF MTR Use it to select the motor to check Using the Mode 1 Select the item 2 Enter the code T00 204 03 of the motor using the keypad 3 Press the OK key MTR ON Use it to check the operation of a motor Using the Mode 1 Select the item and press the OK key 20 sec ON OFF for hopper and duplex horizontal registration motor 10 sec ON OFF for shift tray motor stops at front rear HP ...

Page 643: ...L8 8 deck left pickup clutch CL11 9 vertical path 2 clutch CL9 10 pre registration clutch CL5 11 lower feeder middle cutch CL6 Code Name 12 lower feeder right clutch CL17 13 deck left feed clutch CL19 14 delivery speed switch over clutch CL21 15 registration brake clutch CL3 16 manual feed tray feed clutch CL18 17 inside hopper magnet roller drive clutch CL1 18 developing sleeve clutch CL4 19 regi...

Page 644: ...assette 3 pickup solenoid SL9 4 cassette 4 pickup solenoid SL10 5 manual feed pickup clutch solenoid SL6 6 manual feed pickup clutch solenoid SL6 7 delivery flapper solenoid SL3 Code Name 8 reversal flapper solenoid SL11 9 fixing web solenoid SL2 10 fixing feed unit lock solenoid SL4 11 fixing feed unit lock solenoid SL4 12 shut off 13 side paper deck pickup solenoid 14 relay COPIER FUNCTION PART ...

Page 645: ... off and then on the main power switch R CON Use it to clear the RAM of the reader controller PCB Using the Mode 1 Select the item and press the OK key 2 Turn off and then on the main power switch SERVICE Use it to clear the backup data of service mode COPIER OPTION Using the Mode 1 Use the item and press the OK key 2 Turn off and then on the main power switch JAM HIST USE it to clear the jam hist...

Page 646: ...m and press the OK key 2 Turn off and then on the main power switch CNT DCON Use it to clear the counter readings for service work on the DC controller PCB Using the System 1 Select the item and press the OK key 2 Turn off and then on the main power switch MMI Use it clear the backup data entered in user mode machine settings ID mode group ID mode memory Using the Mode 1 Select the item and press ...

Page 647: ... COUNTER Using the Mode 1 Select the item and press the OK key See that a list of service mode settings is printed out KEY HIST Use it to print out the history of key inputs made from the control panel Using the Mode 1 Select the item and press the OK key See that the history of key inputs is printed out HIST PRT Use it to print out the jam history error history and alarm history of service mode U...

Page 648: ... sheet in the service book case behind the front cover PRE EXP Use it to check the activation of the pre exposure lamp Using the Mode 1 Select the item and press the OK key See that the pre exposure lamp goes ON 2 See that the pre exposure lamp goes OFF automatically in several sec onds CL ADJ Use it to measure the clutch lock unlock mechanism Using the Mode 1 Place 2 or more sheets of paper in th...

Page 649: ...ystem program Using the Mode 1 Turn off the copier and the PC 2 Disconnect the network related cable from the copier 3 Connect the copier and the PC with a bi Centronics cable or a network cable 4 Turn on the PC 5 Turn on the copier 6 Select the item and press the OK key 7 Perform downloading using the service support tool See 7 of Chapter 6 8 When downloading ends turn off and then on the main po...

Page 650: ...sing CHK TYPE Using the Mode 1 Select the item 2 Press the OK key 3 See the result OK NG hardware NG software recovery sector alternative sector HD CLEAR Use it to initialize the partition selected using CHK TYPE Using the Mode 1 Select the item CHK TYPE 0 and 4 are invalid 2 Press the OK key 3 At the end see that OK is indicated COPIER FUNCTION SYSTEM ...

Page 651: ...V 0 JULY 2001 SERVICE MODE S 90 2 5 OPTION The following shows the Option screen COPIER OPTION F00 205 01 Be sure to turn off and then on the main power switch so that changes made to any of the items under COPIER OPTION are effective BODY USER CST ACC INT FACE ...

Page 652: ...ute water content of 14 g or more 600 V for others MODEL SZ Use it to switch default reproduction ratio display and ADF original size detection Setting 0 AB 6R5E 1 INCH 5R4E 2 A 3R3E 3 AB INCH 6R5E FIX TEMP Use it to set the down sequence start temperature for thick paper mode Setting 0 194 C 1 189 C default 2 184 C IDL MODE Use it to select idle rotation mode for the developing assembly Set it to...

Page 653: ... the ADF When ON the scan size is determined according to the size of an original Setting 0 OFF default 1 ON OHP TEMP Use it to switch among temperature settings for transparency mode The fixing temperature will be lowered to improve separation of transparencies from the fixing roller Setting 0 198 C default 1 193 C 2 188 C 3 183 C OHP CNT Use it to turn ON OFF the potential control mechanism for ...

Page 654: ...ing 0 OFF default 1 decrease by 5 C 2 decrease by 10 C 3 decrease by 15 C DRUM CLN Use it to select enhanced drum cleaning mode stop sequence The rotation of the drum is stopped for about 1 sec as soon as a spe cific number of prints have been made during copying thereby re covering the cleaning performance of the cleaning blade If cleaning faults occur use this mode to change the setting A higher...

Page 655: ...ec 7 regardless of environment rotate for 2 min after wire cleaning ro tate for 30 sec FX FANSW Use it to set the control mechanism for the fixing heat discharge fan If set to 1 the fan is controlled to half speed after copying printing Setting 0 full speed default 1 half speed CONFIG Use it to select from multiple pieces of firmware stored on the hard disk for country language destination paper s...

Page 656: ...oner save mode default 1 VDT 20V of coy image VDT P25V of print image target of 10 approx 2 VDT 40V of copy image VDT P 50V of print image target of 20 approx 3 VDT 60V of copy image VDT P 75V of print image target of 30 approx RMT LANG not used TR SP C1 Use it to set the transfer separation output setting when the right deck is se lected thereby preventing faults otherwise occurring Setting 0 set...

Page 657: ... is used thereby preventing faults otherwise occurring Setting 0 setting for plain paper default 1 setting for recycled paper 2 setting for tracing paper TR SP DK Use it to set the transfer separation output setting when the side paper deck is used Setting 0 setting for plain power default 1 setting for recycled paper 2 setting for tracing paper DF BLINE Use it to turn ON OFF the dust detection me...

Page 658: ...r more were made on previous day and in addition ab solute water content is 16 g or more default 1 execute black band developing idle rotation sequence at power on at all times BK BD 1 Use it to set black band monthly remedial mode for January Setting 0 do not execute if absolute water content is less than 9 g execute every 200 copies if absolute water content is 9 g or more de fault 1 execute bla...

Page 659: ...thly remedial mode for August Setting Same as for January BK BD 9 Use it to set black band monthly remedial mode for September Setting Same as for January BK BD 10 Use it to set black band monthly remedial mode for October Setting Same as for January BK BD 11 Use it to set black band monthly remedial mode for November Setting Same as for January BK BD 12 Use it to set black band monthly remedial m...

Page 660: ... after multiple rotation and during STOP sequence and for transfer separation charging assembly wire cleaning default During initial multiple rotation at first power on the mode is turned ON 5 times for others it is tuned ON once USER Use it to make user related machine settings COPY LIM Use it to change the upper limit imposed on the number of copies to make Setting 1 to 999 copies default 999 SL...

Page 661: ...etting 000 to 804 T00 205 01 default 000 for 100V mode 103 for 208 230V model COUNTER3 Use it to change the type of the counter 3 to suit the user s or the dealer s needs Setting 000 to 804 T00 205 01 default 00 for 100V model 201 for 208 230V model COUNTER4 Use it to change the type of the counter 4 to suit the user s or the dealer s needs Setting 000 to 804 T00 205 01 default 000 for 100V model ...

Page 662: ...s enabled but is changed default 2 for remote disable operation No print job may be sent PR D SEL Use it to set the density for printing PDL input Setting 0 light 4 standard default 8 dark CONTROL Use it to enable disable the PDL count function not used in the copier in question Setting 0 do not count PDL output 1 count PDL output if control card is connected B4 L CNT Use it to specify whether sof...

Page 663: ...lt 1 disable PH D SEL Use it to see the number of lines in photo mode printing Setting 0 141 lines default 1 134 lines COPY JOB Use it to disable copy job auto start when a card reader and the coin robot is used Setting 0 enable copy job auto start default 1 disable copy job auto start NW SCAN Use it to enable disable the network scan function You cannot make a change in the 100V model You can mak...

Page 664: ...0 CANON iR105 REV 0 JULY 2001 SERVICE MODE S 103 ORG ODR Use it to set the sequence in which double sided originals are read when the original orientation detection mechanism is enabled Setting 0 back face default 1 face back COPIER OPTION USER ...

Page 665: ...as B4 COPIER OPTION USER B4 L CNT T00 205 01 Support No Counter 000 not indicated 101 total 1 102 total 2 103 total L 104 total S 105 total 4C1 106 total 4C2 107 total Mono 108 total Bk1 109 total Bk2 110 total Mono L 111 total Mono S 112 total Bk L 113 total Bk S 114 total 4C Mono Bk double sided total 1 double sided 115 total 2 double sided 116 L double sided 117 S double sided 201 copy total 1 ...

Page 666: ... 1 325 print 4C L double sided 326 print 4C S double sided 327 print Mono L double sided 328 print Mono S double sided 329 print Bk L double sided 330 print Bk S double sided Support No Counter 331 PDL print total 1 332 PDL print total 2 333 PDL print L 334 PDL print S 401 copy print 4C L 402 copy print 4C S 403 copy print Bk L 404 copy print Bk S 405 copy print Bk2 406 copy print Bk1 407 copy pri...

Page 667: ...No Counter 601 box print total 1 602 box print total 2 603 box print L 604 box print S 701 reception print total 1 702 reception print total 2 Support No Counter 703 reception print L 704 reception print S 801 report print total 1 802 report print total 2 803 report print L 804 report print S COPIER OPTION USER ...

Page 668: ...er name selected under CST U1 through CST U4 indicated CST U1 Use it to select a paper name to be used for paper size group U1 Setting 22 K LGL 31 G LTR default CST U2 Use it to select a paper name to be used for paper size group U2 Setting 24 FOOLSCAP default 26 OFFICIO 27 E OFFI 28 B OFI 33 A LGL 36 A OFI 37 M OFI CST U3 Use it to select a paper name to be used for paper size group U3 Setting 25...

Page 669: ...8 A5R A5R 09 B1 B1 10 B2 B2 11 B3 B3 12 B4R B4R 13 B4 B4 14 B5R B5R 15 B5 B5 16 11x17 11x17 17 LTRR LETTERR 18 LTR LETTER 19 STMT STATEMENT 20 STMTR STATEMENTR 21 LGL LEGAL Code Notation Name 22 K LGL Korean Government 23 K LGLR Korean Government R 24 FLSC FOOLSCAP 25 A FLS Australian FOOLSCAP 26 OFI OFFICIO 27 E OFI Ecuadorian OFFICIO 28 B OFI Bolivian OFFICIO 29 A LTR Argentine LETTER 30 A LTRR ...

Page 670: ...ed in the control panel will be replaced with the Coin Vendor notation Setting 0 OFF default 1 ON for coin vendor DK P Use it to select a paper size to be used for the side paper deck Setting 0 A4 default 1 B5 2 LTR INT FACE Use it to make settings if an external controller is connected IMG CONT Use it to enable disable the external controller detection switch Setting 0 external controller absent ...

Page 671: ...t TYPE Select the item enter the type No of the test print and press the Start key to print it out Setting 0 normal print 1 to 9 T00 206 01 TXPH Use it to switch between text mode and photo mode for test printing Setting 0 text mode 1 photo mode PG_PICK Use it to select the source of paper for test printing Setting 1 right deck default 2 left deck 3 cassette 3 4 cassette 4 5 side paper deck 6 to 8...

Page 672: ...Input No Description 0 image from CCD normal printing 1 grid 2 17 gradations with image correction 3 17 gradation without image correction Input No Description 4 blank 5 halftone 6 solid black 7 vertical straight lines 8 horizontal straight lines 9 halftone for laser delay check Check on Orthogonal Angle displacement in laser beam Gradation fault in laser system Uneven density primary charging ass...

Page 673: ...of the image formation system such density correction mechanisms as AE affect the result F00 206 06 COPIER TEST PG Gradation fault in laser system Uneven density primary charging assembly fault in developing system Check for Fogging fault in photosensitive drum fault in developing system fault in laser system 1 Black Line scratch on drum dirt on primary charging wire 2 Vertical White Spot transfer...

Page 674: ...7 Vertical Lines PG TYPE7 F00 206 08 8 Horizontal Lines PG TYPE8 F00 206 09 1 White Spot transfer fault 2 White Line shading fault e g dirt on standard white plate Straight lines sub scanning direction BD fault Feeding direction Straight lines main scanning direction displacement in laser beam Feeding direction COPIER TEST PG ...

Page 675: ...B scanning Line F00 206 10 Memo Laser Delay Check Use a magnifying glass CK 0056 000 to make sure that the intervals be tween a and b in the figure are even otherwise adjust the setting using the following COPIER ADJUST LASER DLY FINE COPIER ADJUST LASER DLY FINE Range of adjustment 16 to 16 in 1 16 pixel 1 pixel equals to sum of a and b B A a b B A A COPIER TEST PG ...

Page 676: ...network F00 206 11 Using the Mode at time of installation and connection fault 1 Turn off the main power switch 2 Connect the network cable and turn on the main power switch 3 Inform the user s system administrator that the copier has been in stalled and ask him her to set up the network 4 Inform the system administrator that you are going to check the net work connection and obtain the remote add...

Page 677: ...key If NG is indicated suspect a fault in the TCP IP setting go back to step 3 If OK is indicated assume that the sender s TCP IP is free of a fault Instead suspect a fault in the connection of the network interface board NIC or on the NIC itself go to step 7 The signal returns without reaching the NIC enabling a check on the sender s TCP IP setting 7 Make the following selections in service mode ...

Page 678: ...07 01 Clearing the Counter Reading 1 Select to highlight the item to clear 2 Press the Clear key in the control panel The counter will be initialized to 00000000 Distinguishing Between Small Size and Large Size in the Mode Large L size larger than A4 LTR Small S size A4 LTR or smaller TOTAL PICK UP FEEDE PRDC 1 DRBL 1 DRBL 2 PICK UP FEEDER JAM TOTAL MISC SCANNER ...

Page 679: ... indicates an exclamation mark if the ratio is between 90 and 100 2 marks if 100 or higher in the example no mark will be indicated 6 indicates the number of days to the time of replacement in the example 82 days List of COUNTER Items Level 1 COUNTER Mode Level 2 TOTAL Level 3 SERVICE1 total counter 1 for service SERVICE2 total counter 2 for service COPY copy counter PDL PRT PDL print counter RMT ...

Page 680: ...T TNR waste toner counter Be sure to clear the reading after disposing of the waste toner R PD SEN right deck pickup sensor L PD SEN left deck pickup sensor C3 SEN cassette 3 pickup sensor C4 SEN cassette 4 pickup sensor SDPD SEN deck pickup sensor RK F SEN right deck draw sensor LK F SEN left deck draw sensor VPT3 SEN vertical path 3 sensor VPT4 SEN vertical path 4 sensor SP F SEN deck feed senso...

Page 681: ...nter DRM MTR drum motor counter DRM FAN drum fan counter CLN BLD cleaner blade counter SP CLAW cleaner separation claw counter DVG CYL developing cylinder counter DVG ROLL developing assembly roll counter TNR F CL developing assembly magnet roller clutch counter DEV 1CL developing cylinder clutch counter DEV 2CL developing assembly cylinder clutch counter TNR FD M toner feed motor counter VBR MTR ...

Page 682: ...ght deck pickup solenoid counter M PU SL manual feed tray pickup solenoid counter RV FP SL reversing flapper solenoid counter DUP R CL lower feed right clutch counter DUP C CL lower feed middle clutch counter DUP RV M duplex reversal motor counter DUP FD M duplex feed motor counter DP FAN duplex feed fan counter FX UP RL fixing upper roller counter FX LW RL fixing lower roller counter FX MTR fixin...

Page 683: ...PD PU MR side paper deck pickup motor counter PD PU SL side paper deck pickup solenoid counter NON SORT non sort path counter SORT sort path counter FIN STPR finisher staple counter SADDLE saddle counter FOLD folder fold path counter SDL STPL saddle staple counter PUNCH punch counter INSERTER inserter counter U L PTH1 finisher upper lower path counter 1 U L PTH2 finisher upper lower path counter 2...

Page 684: ...er PCB Range of adjustment 30 to 30 unit 0 5 mm Using the Mode 1 Place an original in the original tray 2 Select the item check the setting and press the OK key 3 Press the OK key The original will be picked up 4 Open the ADF and check the original stop position 5 Press the OK key The original will be delivered F00 302 01 DOCST M Use it to adjust the original stop position when the ADF is used man...

Page 685: ...canner stop position for stream reading mode small size Range of adjustment 25 to 25 unit 0 1 mm F00 302 02 STRD L Use it to adjust the scanner stop position for stream reading mode large size Range of adjustment 25 to 25 unit 0 1 mm Using the Mode Same as in FEEDER ADJUST STRD S RVM SPD Use it to adjust the speed of the reversal motor A higher value increases the speed Range of adjustment 30 to 3...

Page 686: ... machine stops automatically after adjustment BLT CLN Use it to clean the separation belt of the ADF Using the Mode 1 Select the item and press the OK key 2 Set that the machine drives the separation belt Press the Stop key to stop the operation REG CLN Use it to clean the registration roller of the ADF Using the Mode 1 Select the mode and press the OK key 2 Set that the machine rotates the regist...

Page 687: ...m reading for small size only 2 disable stream reading SIZE SW Use to turn ON OFF detection of a mix of AB and Inch paper sizes Setting 0 disable detection default 1 enable detection Detection is enabled only when 3 AB INCH is selected under COPIER OPTION BODY MODEL SZ SLW SPRT Use it to decelerate the separation speed for original pickup Setting 0 normal mode default 1 deceleration mode Memo FEED...

Page 688: ...nch hole toward the leading edge of pa per middle of paper Range of adjustment 23 to 23 unit about 0 5 mm Using the Mode 1 Make a print of the Test Chart and check the position of the holes 2 Select the item and change the setting to adjust 3 Press the OK key 4 Make a print of the Test Chart once again and check to see if the posi tion of the holes is as indicated F00 401 01 Memo Feed direction Hi...

Page 689: ...NON iR105 REV 0 JULY 2001 SERVICE MODE S 128 4 2 OPTION BLNK SW Use it to set the margin width W for both sides of the folding line when the saddle stitcher is used Setting 0 normal width 5 mm default 1 larger width 10 mm F00 402 01 W SORTER OPTION ...

Page 690: ...t 1 enable display MENUE 4 Use it to display Level 4 of the Printer Settings menu Setting 0 disable display default 1 enable display PCI1 OFF Use it to turn OFF the function of the slot 1 PCI when the board fitted to it goes out of order Setting 0 normal default 1 OFF do not use board function PCI2 OFF Use it to turn OFF the function of the slot 2 PCI when the board fitted to it goes out of order ...

Page 691: ...Error Code COPYRIGHT 2001 CANON INC 2000 CANON iR105 REV 0 JULY 2001 ...

Page 692: ... error code related to the inserter E518 error code related to the paper folding unit E530 to E595 error code related to the finisher E5F0 to E5F9 error code related to the saddle stitch assembly E601 to E830 error code related to the copier When the self diagnostic mechanism has gone ON the machine may be re set by turning its power switch This however does not apply to E000 E001 E002 E003 E004 E...

Page 693: ...70 C within 3 min 30 sec 0010 The power is turned off and then on without clearing the error Caution You must clear the error in service mode COPIER FUNCTION CLEAR ERR E001 Main cause The main thermistor TH1 has a short circuit The sub thermistor TH2 detects overheating The SSR is faulty The DC controller PCB is faulty Condition 0001 The hardware port detects a fault 0002 Either the main thermisto...

Page 694: ...l have to clear the error in service mode COPIER FUNCTION CLEAR ERR E003 Main cause The main thermistor TH1 has poor contact or an open circuit The thermal switch TP1 has an open circuit The fixing heater has an open circuit The SSR is faulty The DC controller PCB is faulty Condition 0000 The reading of the main thermistor is 70 C or lower for 2 sec or more after it has reached 100 C 0010 The powe...

Page 695: ...controller PCB is faulty Condition 0000 No clock pulse arrive for 2 sec or more after the main motor drive signal MMFG has been generated E012 Main cause The drum motor M0 is faulty The DC controller PCB is faulty Condition 0000 No clock pulse arrives for 2 sec or more after the drum motor drive signal DMFG has been generated E013 Main cause The waste toner feedscrew is faulty The waste toner clog...

Page 696: ...ause The hopper connector is disconnected The toner feed motor M18 inside the hopper is faulty The magnet roller drive clutch CL1 inside the hopper is faulty The toner sensor TS3 inside the developing assembly is faulty The DC controller PCB is faulty Condition 0000 Although the developing assembly is supplied with toner the ab sence of toner inside it is detected for 3 sec or more 0010 The power ...

Page 697: ...ted E051 Main cause The horizontal registration sensor PS18 is faulty The horizontal registra tion motor M15 is faulty The DC controller PCB is faulty Condition 0001 Departure from home position is not detected within 5 sec during a horizontal registration home position search 0002 Home position is not detected within 5 sec during a horizontal reg istration home position search 0003 The horizontal...

Page 698: ...ing is faulty short circuit open circuit Condition 0000 An error leakage to the high voltage output to the separation charging assembly is detected E069 Main cause The HV DC PCB is faulty The HV AC PCB is faulty The transfer charging assembly is faulty The wiring is faulty short circuit open circuit Condition 0000 An error leakage is detected in the high voltage output to the transfer charging ass...

Page 699: ...otor cooling fan FM1 is being driven E121 Main cause The laser cooling fan 1 FM3 or the laser cooling fan 2 FM5 is faulty The DC controller PCB is faulty The wiring is faulty short circuit open circuit Condition 0001 The lock signal arrives for 5 sec or more although the laser cooling fan 1 FM3 is being driven 0002 The lock signal arrives for 5 sec or more although the laser cooling fan 2 FM5 is b...

Page 700: ...faulty The light adjustment control PCB is faulty The reader controller PCB is faulty The wiring is faulty short circuit open circuit Condition 0000 While the power is ON the ambient temperature of the fluorescent lamp does not exceed 10 C 2 min after the florescent heater has gone ON or after the power is turned on the reading of the ambi ent temperature of the fluorescent lamp is 0 C or lower E2...

Page 701: ...or lower within 60 sec Or the ON detection signal FL DTCT does not go OFF within 5 sec after the fluorescent lamp is turned off during shading adjustment the ON detection signal FL DTCT does not go ON within 60 sec after the fluorescent lamp is turned on E222 Main cause The lamp heater H5 is faulty The light adjustment control PCB is faulty The reader controller PCB is faulty The wiring is faulty ...

Page 702: ...n is not communicated by the original orientation detection PCB until the next original is read 0002 The result of detection of the last original is not communicated 5 sec after the end of reading the last original E243 Main cause The control panel CPU PCB is faulty The main controller PCB is faulty Condition 0000 A communication fault exists between the CPUs of the control panel CPU PCB and the m...

Page 703: ...r PCB is faulty Condition 0000 During image rotation the encoding decoding has a fault E320 Main cause The CCD AP PCB is faulty The wiring is faulty short circuit open cir cuit The reader controller PCB is faulty Condition 0000 While an image is being read the image read end notice does not arrive at the reader controller PCB within 60 sec from the CCD AP PCB ...

Page 704: ...de the ADF is faulty The belt motor clock sensor PI1 is faulty The ADF controller PCB is faulty Condition 0000 The clock signal does not occur for 100 msec when the belt motor drive signal is generated E404 Main cause The delivery motor M5 is faulty The delivery motor clock sensor PI11 is faulty The ADF controller PCB is faulty Condition 0000 The clock signal does not occur for 200 msec when the d...

Page 705: ... after the pickup motor is driven E412 Main cause The cooling fan FM1 is faulty The ADF controller PCB is faulty Condition 0000 The lock signal arrives for 100 msec or more although the cooling fan is being driven E420 Main cause The EEPROM is faulty The ADF controller PCB is faulty Condition 0000 The backup data of the EEPROM cannot be read when the con nected device is tuned on Or the data that ...

Page 706: ...roller PCB is faulty data communication with the slave CPU Condition 0000 The communication between the master CPU IC106 and the slave CPU IC125 is disrupted E503 Main cause The saddle stitcher controller PCB is faulty The finisher controller PCB is faulty data communication with the saddle Condition 0000 The communication between saddle stitcher controller PCB and the finisher controller PCB is d...

Page 707: ...tor M1 is faulty The finisher controller PCB is faulty Condition 00FF A condition is detected for 1 sec or more in which the clocks from the inlet motor are 50 mm sec or less while the motor is in opera tion E514 Main cause The stack delivery motor M7 is faulty The stack delivery motor clock sensor PI12 is faulty The finisher controller PCB is faulty Condition 00FF A condition is detected for 1 se...

Page 708: ...e position sensor inside the stapler is faulty The stapler motor M11 is faulty The swing guide safety switch MSW2 is faulty The stapler safety switch front MSW6 is faulty The stapler safety switch rear MSW7 is faulty The finisher controller PCB is faulty Condition 0001 The stapler does not return to stapling home position when the sta pler motor is driven for 0 5 sec 0002 The stapler does not leav...

Page 709: ...r controller PCB is faulty Condition 0001 The aligning plate does not return to home position when the front aligning plate motor is driven for 4 sec 0002 The aligning plate does not leave home position when the front aligning plate motor is driven for 4 sec E540 Main cause The tray A lift motor M13 is faulty The tray A idle rotation sensor PI19 is faulty The tray A paper sensor PI 20 is faulty Th...

Page 710: ...n the tray B lift motor is driven E551 Main cause Power supply fan FM1 is faulty The feeder cooling fan FM2 is faulty Condition 0001 The power supply fan is at rest for 2 sec or more 0002 The feeder cooling fan is at rest for 2 sec or more E577 Main cause The paddle motor M9 is faulty The paddle home position sensor PI14 is faulty Condition 0001 The paddle home position sensor does not detect the ...

Page 711: ...s not return to home position when the paddle mo tor is driven for 1 sec or more 0002 The shutter does not leave home position when the paddle motor is driven for 1 sec or more E590 Main cause The punch home position sensor PI24 is faulty The punch 2 3 home sheet sensor PI33 is faulty The punch motor clock sensors PI34 is faulty The punch motor M18 is faulty The punch driver PCB is faulty Conditio...

Page 712: ...od of time E594 Main cause The punch sensor home position sensor PI23 is faulty The punch sensor slide motor M19 is faulty The punch driver PCB is faulty Condition 0001 The punch paper edge sensor PI21 does not return to home posi tion when the punch sensor slide motor is driven for a specific pe riod of time 0002 The punch paper edge sensor PI21 does not leave home position when the punch sensor ...

Page 713: ...stitcher controller PCB is faulty Condition 0001 The number of detection pulses of the fold motor clock sensor drops below a specific value E5F2 Main cause The guide home position sensor PI54 is faulty The guide motor M43 is faulty The saddle stitcher controller PCB is faulty Condition 0001 The guide home position sensor does not go ON when the guide motor is driven for 0 4 sec or more 0002 The gu...

Page 714: ...the saddle front motor is driven clockwise for 0 5 sec or more 0002 The saddle front home position switch does not go OFF when the saddle front motor is driven counterclockwise for 0 5 sec or more E5F6 Main cause The paper pushing plate motor clock sensor PI45 is faulty The paper pushing plate leading edge sensors PI56 is faulty The paper pushing plate home position sensor PI55 is faulty The paper...

Page 715: ... is faulty The saddle stitcher controller PCB is faulty Condition 0001 The connector of the guide home position sensor is disconnected 0002 The connector for the paper pushing plate home position sensor is disconnected 0003 The connector of the paper pushing plate lading edge sensor is dis connected E5F9 Main cause The inlet cover open closed sensor PI51 is faulty The outlet cover open sensor PI46...

Page 716: ...connection The installed system file is faulty The hard disk drive is faulty The main controller PCB is faulty Condition 0001 A fault in the mounting of the hard disk is detected when the boot ROM starts up the system on the hard disk 0002 No appropriate system is found on the hard disk when the boot ROM tries to start up the system on the hard disk 0003 A sector error occurs on the hard disk when...

Page 717: ...e of a specific timing interval needed to initialize the copier and the printer board Be sure to wait for 5 sec or more before turning the main power switch back on If it occurs during normal use If it occurs during printing and can be corrected after canceling the print job and turning off and then on the power switch suspect an overload on the CPU If an overload was imposed on the CPU of the pri...

Page 718: ...r PCB is faulty Condition 0001 Data has been written to the error register of the IPC IC5 on the reader controller PCB 4 times or more within 1 5 sec 0002 Data has been written to the error register of the IPC IC40 on the DC controller PCB 4 times or more within 2 sec 0003 Data has been written to the error register of the IPC IC1003 on the main controller PCB 4 times or more within 2 sec E712 Mai...

Page 719: ...ller PCB is faulty Condition 0002 The communication between coin vendor and controller PCB is disrupted Caution You must clear the error in service mode COPIER FUNCTION CLEAR ERR E732 Main cause The cable connector is not connected properly The reader controller PCB is faulty Condition 0001 The main controller PCB detects a fault in the communication be tween rear controller PCB and main controlle...

Page 720: ...de do not match 0002 The size of the downloaded language module exceeds a specific size 0003 The display language module selected in user mode does not exit or it is not an appropriate language module 0004 Downloading of the language module fails Caution In response to the error the machine will automatically cancel the language selection of user mode as such when the machine is turned off and the...

Page 721: ...ower cooling fan 2 FM12 is faulty The DC controller PCB is faulty The main controller PCB is faulty Condition 0000 The lock signal is detected for 5 sec or more although the power supply cooling fan 1 and 2 is being driven 0004 The reading of the ambient temperature of the main controller is 80 C or higher Caution In the case of a fault in the system fan the data will be indicated in the form of a...

Page 722: ... Main cause The wiring is faulty short circuit open circuit The pre transfer charging assembly fan FM10 is faulty The deck controller PCB is faulty Condition 0000 The lock signal is detected for 5 sec or more although the pre transfer charging assembly fan is being driven E830 Main cause The wiring is faulty short circuit open circuit The separation fan FM13 is faulty The DC controller PCB is faul...

Page 723: ...0 CANON iR105 REV 0 JULY 2001 PRINTED IN U S A IMPRIME AU U S A Prepared by Office Imaging Products Quality Assurance Center CANON INC Printed in U S A REVISION 0 JULY 2001 21767 32205 23715 5 1 Hakusan 7 chome Toride shi Ibaraki 302 8501 Japan ...

Page 724: ...PRINTED IN U S A IMPRIME AU U S A 0701AB0 67 0 This publication is printed on 100 recycled paper ...

Page 725: ...TALOG REVISION 0 AUG 2001 FY8 31FJ 000 200V 50 60Hz F14 1611 MHP00001 230V 50Hz F14 1621 QSH00001 208V 60Hz F14 1631 MPT00001 230V 50Hz F14 1641 QSJ00001 230V 50Hz F14 1651 QEL00001 230V 50Hz F14 1661 REL00001 230V 50Hz F14 1671 SDL00001 230V 50Hz F14 1681 TEB00001 230V 50Hz F14 1691 UHQ00001 I 1 ...

Page 726: ...mation pertaining to each item Be sure to include in the Parts Request the full item description the item part number and the quantity Canon Inc Office Imaging Products Quality Assurance Center 5 1 Hakusan 7 chome Toride city Ibaraki 302 8501 Japan COPYRIGHT 2001 CANON INC Printed in U S A Imprimé au U S A Use of this manual should be strictly supervised to avoid disclosure of confidential informa...

Page 727: ......

Page 728: ...UP ASSEMBLY 312 FRONT DECK RIGHT PICK UP ASSEMBLY 313 FRONT DECK LEFT PICK UP ASSEMBLY 315 MULTI FEED ASSEMBLY 316 MULTI FEED TRAY ASSEMBLY 320 FIXING FEEDER FRAME ASSEMBLY 325 REGISTRATION TRANSFER ASSEMBLY 330 FEEDER ASSEMBLY 350 INTERNAL DELIVERY UPPER ASSEMBLY 351 EXTERNAL DELIVERY UPPER ASSEMBLY 360 DUPLEXING FEEDER ASSEMBLY 420 MIRROR ASSEMBLY 1 430 MIRROR ASSEMBLY 2 460 SCANNER ASSEMBLY 510...

Page 729: ...s The parts and assemblies identified as NPN do not have parts numbers or are not in stock i e they are not available for ordering Note The last three digits suffix of the Parts Number are called the Revision Number The Revision Number is changed if the part is modified Information regarding such changes will be provided by Service Infor mation Bulletins These Bulletins should be read carefully 3 ...

Page 730: ...mbers for the contact Connectors that are mounted on PCBs are indicated as PCB in the connector column The part numbers for these connectors should be looked for in the PCB parts list List of Standard Fasteners This specifications list incorporates screws nuts washers and shim washers retaining rings pins and spacers that are used in all copiers including optional equipment Numerical Index There i...

Page 731: ......

Page 732: ...LY 210 SCANNER MOUNT ASSEMBLY 215 FRONT DECK RIGHT PICK UP ASS Y 312 CASSETTE PICK UP ASSEMBLY 311 FRONT DECK LEFT PICK UP ASS Y 313 430 MIRROR ASS Y 2 420 MIRROR ASS Y 1 SCANNER ASSEMBLY 460 トナーカートリッジ駆動部 操作部 一次ポリゴンレーザファン部 1 5K右収納庫部 カセット 1 5K左収納庫部 ドアスイッチ台部 レンズ台部 スキャナ台部 フロントデッキ 右 給紙部 カセット給紙部 フロントデッキ 左 給紙部 第2ミラー台部 第1ミラー台部 スキャナ部 FIGURE A ASSEMBLY LOCATION DIAGRAM 1 5 主要部品配置図 1 5 COPYRIGHT 2001 CANON ...

Page 733: ...R SEPARATE CORONA ASS Y 580 REGISTRATION TRANSFER ASS Y 325 FEEDER ASSEMBLY 330 FIXING FEEDER FRAME ASSEMBLY 320 351 EXTERNAL DELIVERY UPPER ASS Y 350 INTERNAL DELIVERY UPPER ASS Y FIXING ASSEMBLY 810 305 CASSETTE HEATER ASSEMBLY FIGURE A ASSEMBLY LOCATION DIAGRAM 2 5 主要部品配置図 2 5 COPYRIGHT 2001 CANON INC CANON iR105 REV 0 AUG 2001 A 2 ...

Page 734: ...ASSEMBLY 550 PRE TRANSFER CORONA ASSEMBLY 570 SEPARATION CLAW DRIVE ASSEMBLY 720 AP KIT ASSEMBLY 600 PHOTO SENSITIVE DRUM ASSEMBLY 510 バッファ部 現像器 両面搬送部 一次帯電器 転写前帯電器 分離爪駆動部 APキット部 感光ドラム部 FIGURE A ASSEMBLY LOCATION DIAGRAM 3 5 主要部品配置図 3 5 COPYRIGHT 2001 CANON INC CANON iR105 REV 0 AUG 2001 A 3 ...

Page 735: ...MBLY 110 111 SEPARATION FIXING FAN ASSEMBLY 190 WASTE TONER DRIVE ASSEMBLY 280 MULTI FEED DRIVE ASSEMBLY 264 PAPER PICK UP DRIVE ASSEMBLY 260 WASTE TONER PIPE ASSEMBLY 775 WASTE TONER ASSEMBLY 770 CONTROLLER BOX ASSEMBLY 900 ドラム駆動部 現像駆動部 ドラム吸引ファン部 縦パス駆動部 左給紙駆動部 カセット給紙駆動部 リフタ駆動部 メイン駆動部 電源コード台部 分離定着ファン部 廃トナー駆動部 マルチ給紙駆動部 給紙駆動部 廃トナーパイプ部 廃トナー部 コントローラ ボックス部 FIGURE A ASSEMBLY LOCATION DIAGRAM 4 5 主要部品配置図...

Page 736: ...S Y 960 DC POWER SUPPLY PCB ASS Y 910 H V DC TRANSFORMER PCB ASS Y 985 H V AC TRANSFORMER PCB ASS Y 980 DC CONTROLLER PCB ASSEMBLY 930 CONTROL PANEL PCB ASSEMBLY 926 操作部インバータ回路基板 電位測定回路基板 操作CPU回路基板 原稿向き検出回路基板 インバータ回路基板 リーダコントローラ回路基板 ACドライバ回路基板 DC電源回路基板 高圧DCトランス回路基板 高圧ACトランス回路基板 DCコントローラ回路基板 操作部回路基板 FIGURE A ASSEMBLY LOCATION DIAGRAM 5 5 主要部品配置図 5 5 COPYRIGHT 2001 CANON INC CANON iR105 REV 0 AUG 20...

Page 737: ......

Page 738: ... 020 NPN RF SPECIAL TOOLS 特殊工具 1 FY9 3014 000 1 ENVIRONMENT SENSOR TOOL 環境センサ チェック工具 2 FY9 3040 020 1 MIRROR POSITIONING TOOLS ミラー位置決め工具 3 FY9 3041 000 1 TERMINAL POTENTIAL SENSOR 電位センサ チェック電極 FIGURE 020 SPECIAL TOOLS 特殊工具 COPYRIGHT 2001 CANON INC CANON iR105 REV 0 AUG 2001 020 1 ...

Page 739: ......

Page 740: ... 32 34 3 31 4 87 21 86 200V 208V 208V 208V 208V 502 1 13 38 10 60 79 46 39 67 67A 61A 84 85 35 35 66B 66A 503 11 14 58 57 83 10 75 76 55 70 70 82 51 50 65 52 80 43 47 44 45 56 42 48 62 63 64 61 5 40 8 8 7 7 7 7 68 77 77 77 FIGURE 100 EXTERNAL COVERS PANELS ETC 外装カバー COPYRIGHT 2001 CANON INC CANON iR105 REV 0 AUG 2001 100 1 ...

Page 741: ...PORT GLASS RIGHT 右ガラス押え 1 4 FB4 1359 000 1 COVER REAR UPPER 後上カバー 1 5 FB4 1391 000 1 CASE OZONE FILTER DRUM オゾン フィルタ ケース ドラム 1 6 FB4 1423 000 1 COVER RIGHT LOWER 右下カバー 1 7 FB4 1437 000 1 ACTUATOR アクチュエータ 1 8 FB4 1558 000 1 COVER CONNECTOR コネクタ カバー 1 9 FB4 1717 000 1 COVER TOOL 工具カバー 2 0 FB4 1727 000 1 COVER SERVICE BOOK サービス ブック カバー 2 1 FB4 1735 000 1 PLATE MIRROR MOUNT STOP ミラー台ストッパ 2 2 FB4 1960 ...

Page 742: ...ン フィルタ 定着 4 2 FB6 0404 000 1 PANEL REAR 後カバー 4 3 FB6 0442 000 1 TRAY ADF DELIVERY ADF排紙トレイ 4 4 FB6 0443 000 1 TRAY DELIVERY 1 排紙トレイ 1 4 5 FB6 0444 000 1 TRAY DELIVERY 3 排紙トレイ 3 4 6 FB6 0446 000 1 COVER RIGHT UPPER 右上カバー 4 7 FB6 0448 000 1 TRAY DELIVERY 2 排紙トレイ 2 4 8 FB6 0500 000 1 COVER FILTER フィルタ カバー 4 9 FB6 0528 000 1 GUIDE REGISTRATION SWING レジスト前揺動ガイド 5 0 FB6 0589 000 1 GUIDE AIR 1 エア ガイド 1 5...

Page 743: ...E FS7 8319 000 1 PLATE LENGTH INDEX 横サイズ プレート A INCH SIZE FS7 8318 000 1 PLATE LENGTH INDEX 横サイズ プレート A SIZE FS7 8320 000 1 PLATE LENGTH INDEX 横サイズ プレート AB INCH SIZE 6 6 B FB3 9907 000 1 PLATE GROUNDING アース板 6 7 FF6 1850 000 1 SUPPORT GLASS LEFT ガラス押え 左 AB SIZE FF6 2002 000 1 SUPPORT GLASS LEFT ガラス押え 左 A INCH SIZE FF6 2001 000 1 SUPPORT GLASS LEFT ガラス押え 左 A SIZE FF6 2003 000 1 SUPPORT GLASS LEFT ガ...

Page 744: ...0605 000 15 SCREW M4X8 タイト ネジ 8 0 XA9 0606 000 6 SCREW P M4X10 P タイト ネジ 8 1 XA9 0615 000 8 SCREW M4X8 タイト ネジ 8 2 XA9 0628 000 2 SCREW RS M4X8 RS タイト ネジ 8 3 XA9 0629 000 11 SCREW RS M4X8 RS タイト ネジ 8 4 XA9 0629 000 1 SCREW RS M4X8 RS タイト ネジ 8 5 XA9 0629 000 1 SCREW RS M4X8 RS タイト ネジ 8 6 XA9 0643 000 AR SCREW RS M4X10 RS タイト ネジ 8 7 XA9 0721 000 2 SCREW RS M4X10 RS タイト ネジ 5 0 1 XB1 2400 606 3 SCREW MA...

Page 745: ......

Page 746: ... SEE FIGURE 940 J293 J301 J342 J294 J291 J302 J303 J290 SEE FIGURE 940 SEE FIGURE 600 32 501 21 5 26 22 27 2 1 28 Z Y X 25 18 18A 23 15 8 4 23 6 25 18 18A 33 20 31 19A 34 19A 19B 19B 19B 13 19 9 22A 19C 19C 19C 19C 7 20A 20A 30 505 14 16 503 FIGURE 101 MACHINE FRONT PLATE 本体前側板 COPYRIGHT 2001 CANON INC CANON iR105 REV 0 AUG 2001 101 1 ...

Page 747: ...カバー 転写前 1 3 FF5 8139 000 3 PLATE POSITIONING FRONT 給紙位置決め板 前 1 4 FF5 8152 000 1 PLATE LOCK RIGHT 右ロック板 1 5 FF6 1336 000 1 COVER INTERNAL AP KIT 内カバー APキット 1 6 FF6 1501 000 1 COVER INTERNAL UPPER 内カバー 上 1 7 FF6 1529 000 1 COVER FILTER フィルタ カバー 1 7 A FB6 0582 000 1 FILTER PRIMARY FAN 1次ファン フィルタ 1 8 FG6 1892 000 2 CABLE RIGHT DOOR OPEN CLOSE 右扉開閉束線 J146 147 J291 292 1 8 A VS1 5057 004 2 CONNECTOR SNA...

Page 748: ...D M4 ダン ビス 2 9 FS5 9216 000 1 SCREW RS STEPPED M4 RS タイト 段ビス 3 0 FS6 8821 000 1 LABEL WARNING LASER レーザ注意ラベル 200 208V FS6 8822 000 1 LABEL WARNING LASER レーザ注意ラベル 220 240V 3 1 VS1 6319 022 1 CONNECTOR SNAP TIGHT チュウケイ コネクタ J290 3 2 WC4 5153 000 1 MICRO SWITCH マイクロ スイッチ MSW5 J47 3 3 XA9 0630 000 18 SCREW RS M4X10 RS タイト ネジ 3 4 XA9 0643 000 AR SCREW RS M4X10 RS タイト ネジ 5 0 1 XB1 2230 809 2 SCREW MACH ...

Page 749: ......

Page 750: ...5 33 6 33 36 512 512 44 35 12 10 11 11 10 12 36 7 45 7 45 508 21 37 34 5 34 513 513 38 16 19 38 37 49 14 511 23 46 C B C A A D D B 47 30 514 47 509 48 4 510 515 32 9 13 504 505 506 506 40 3 42 43 502 41 18 17 15 501 507 28 27 FIGURE 102 INTERNAL COMPONENTS 1 本体機械内部 1 COPYRIGHT 2001 CANON INC CANON iR105 REV 0 AUG 2001 102 1 ...

Page 751: ...4 3823 000 1 PLATE HOLDER REAR 固定板 後 1 5 FB4 5093 020 1 PLATE HORIZON PATH GROUNDING 横パス アース板 1 6 FB4 7839 000 1 PLATE SHAFT STOP 軸止め板 1 7 FB5 8723 000 1 GUIDE VERTICAL PASS 縦パス ガイド 1 8 FB6 0529 000 1 GUIDE VERTICAL PATH 2 縦パス ガイド 2 1 9 FF5 7667 000 1 ARM RELEASE REAR 解除アーム 後 2 0 FF5 8141 000 1 GUIDE DELIVERY 排紙ガイド 2 0 A FB4 3743 000 1 SHEET GUIDE ガイド シート 2 1 FF5 8147 000 1 ARM RELEASE FRONT 解除アーム...

Page 752: ...シング 4 1 XA9 0628 000 4 SCREW RS M4X8 RS タイト ネジ 4 2 XA9 0628 000 1 SCREW RS M4X8 RS タイト ネジ 4 3 XA9 0643 000 AR SCREW RS M4X10 RS タイト ネジ 4 4 XG3 6012 405 2 BEARING BALL ボール ベアリング 4 5 XG3 6012 405 2 BEARING BALL ボール ベアリング 4 6 XG9 0249 000 1 BEARING BALL ボール ベアリング 4 7 XG9 0250 000 2 BEARING BALL ボール ベアリング 4 8 XG9 0250 000 1 BEARING BALL ボール ベアリング 4 9 XG9 0250 000 4 BEARING BALL ボール ベアリング 5 0 1 XB1 230...

Page 753: ... XD2 1100 642 3 RING E E リング 5 1 1 XD2 1100 642 4 RING E E リング 5 1 2 XD3 1200 142 2 PIN SPRING スプリング ピン 5 1 3 XD3 1200 142 2 PIN SPRING スプリング ピン 5 1 4 XD3 2200 122 1 PIN DOWEL ヘイコウ ピン 5 1 5 XD3 2200 122 1 PIN DOWEL ヘイコウ ピン 5 1 6 XD3 2200 122 1 PIN DOWEL ヘイコウ ピン COPYRIGHT 2001 CANON INC CANON iR105 REV 0 AUG 2001 102 4 ...

Page 754: ... 3 11 506 6 PS47 J145 J144 SEE FIGURE 215 22 29 5 19 8 7 12 18 507 21 21A A A 17 13 17 28 7 505 26 2 501 15 503 504 27 30 502 31 FIGURE 103 INTERNAL COMPONENTS 2 本体機械内部 2 COPYRIGHT 2001 CANON INC CANON iR105 REV 0 AUG 2001 103 1 ...

Page 755: ...33 000 1 COVER CONNECTOR MULTI コネクタ カバー マルチ 1 4 FB4 7845 000 1 RAIL SLIDE FIXING FEEDER スライド レール 定着 搬送 1 5 FB5 6862 000 1 DUCT AIR BLOW エア吹き付けダクト 1 6 FF5 2930 000 1 MOUNT MAGNET マグネット台 1 7 FF5 7655 000 2 PLATE LENS MOUNT POSITIONING レンズ台位置決め板 1 8 FF5 8194 000 1 MOUNT PAPER SENSOR 紙検知台 1 9 FF5 8661 000 1 RAIL PRIMARY RIGHT 一次レール 右 2 0 FF5 8895 030 2 SPRING LEAF イタ バネ 2 1 FG6 1896 000 1 CABLE PATH S...

Page 756: ...0 609 5 SCREW MACH TRUSS HEAD M3X6 バインド ネジ 5 0 2 XB1 2400 409 6 SCREW MACH TRUSS HEAD M4X4 バインド ネジ 5 0 3 XB1 2400 409 3 SCREW MACH TRUSS HEAD M4X4 バインド ネジ 5 0 4 XB1 2400 409 3 SCREW MACH TRUSS HEAD M4X4 バインド ネジ 5 0 5 XB1 2400 609 8 SCREW MACH TRUSS HEAD M4X6 バインド ネジ 5 0 6 XB1 2400 609 8 SCREW MACH TRUSS HEAD M4X6 バインド ネジ 5 0 7 XB1 2400 609 2 SCREW MACH TRUSS HEAD M4X6 バインド ネジ COPYRIGHT 2001 CANON ...

Page 757: ......

Page 758: ... J364 SEE FIGURE 305 J294 J342 SEE FIGURE 300 SEE FIGURE 300 23 27 37 5 11 504 8 8 46 8 13 45 C D C D E E V W A B A B 39 40 29A 29A 19 501 44 14 15 22 21 33 43 38 506 6 4 508 25 42 48 24 503 FIGURE 104 INTERNAL COMPONENTS 3 本体機械内部 3 COPYRIGHT 2001 CANON INC CANON iR105 REV 0 AUG 2001 104 1 ...

Page 759: ...B4 1342 000 1 RAIL SLIDE RIGHT スライド レール 右 1 4 FB4 1355 000 1 PLATE LIFTING リフタ板 1 5 FB4 2019 000 1 PLATE GEAR SUPPORT 扇ギア支板 1 6 FB4 2023 000 1 HOLDER PAPER SENSOR PCB 残量検知基板ホルダ 1 7 FB4 2024 000 1 COUPLING カップリング 1 8 FB4 5335 000 2 ROLLER CAM カム コロ 1 9 FB4 7834 000 1 COVER CONNECTOR CURL コネクタ カバー カール付け 2 0 FB5 3351 000 1 BUTTON カセット解除ボタン 2 1 FB5 8735 000 1 GEAR 16T 16T ギア 2 2 FB6 2369 000 1 SHAFT C...

Page 760: ...28 000 1 SCREW RS M4X8 RS タイト ネジ 4 1 XA9 0628 000 1 SCREW RS M4X8 RS タイト ネジ 4 2 XA9 0628 000 1 SCREW RS M4X8 RS タイト ネジ 4 3 XA9 0630 000 1 SCREW RS M4X10 RS タイト ネジ 4 4 XA9 0643 000 AR SCREW RS M4X10 RS タイト ネジ 4 5 XG9 0224 000 1 BEARING ベアリング 4 6 XG9 0224 000 1 BEARING ベアリング 4 7 XG9 0302 000 1 BEARING ベアリング 4 8 XG9 0302 000 1 BEARING ベアリング 5 0 1 XB1 2400 409 7 SCREW MACH TRUSS HEAD M4X4 バインド ネジ 5 0 ...

Page 761: ......

Page 762: ... J348 FM17 J118 FU1 13 15 19 24 29 A B C A B C 501 12A 20 3 21 28 509 22 26 18 1 6 12 15A 23 5 14 506 508 505 2 13A 507 7 9 10 502 17 16 8 510 504 503 27 FIGURE 105 INTERNAL COMPONENTS 4 本体機械内部 4 COPYRIGHT 2001 CANON INC CANON iR105 REV 0 AUG 2001 105 1 ...

Page 763: ...OCK SHUTTER SLIDE シャッタ スライド 1 3 FG6 7208 000 1 CABLE MAIN SWITCH メイン スイッチ束線 J13 16 1 3 A WT2 5565 000 5 CLAMP CABLE ソクセン オサエ 1 4 FG6 7221 000 1 CABLE GROUNDING アース線 1 5 FG6 7268 000 1 ALL DAY POWER PCB ASSEMBLY 常夜電源回路基板 1 5 A VD7 0642 001 1 FUSE 250V 2A ヒューズ FU1 1 6 FG9 3878 000 1 COVER ARM アーム カバー 1 7 FG9 3879 000 1 PANEL ARM LOWER アーム下カバー 1 8 FH6 1740 000 1 FAN ファン モータ FM18 J348 1 9 FH6 1877 000...

Page 764: ... S バインドビス M4 8 5 0 3 XB1 2401 009 6 SCREW MACH TRUSS HEAD M4X10 バインド ネジ 5 0 4 XB1 2401 409 5 SCREW MACH TRUSS HEAD M4X14 バインド ネジ 5 0 5 XB1 2403 509 2 SCREW MACH TRUSS HEAD M4X35 バインド ネジ 5 0 6 XB2 8401 007 4 SCREW W WASHER M4X10 バネツキ バインド ネジ 5 0 7 XB2 8401 007 5 SCREW W WASHER M4X10 バネツキ バインド ネジ 5 0 8 XB3 6400 805 2 SCREW RS M4X8 RS タイト ネジ 5 0 9 XB6 7400 609 6 SCREW TP M4X6 TP ネジ 5 1 0 XD1 1105 235...

Page 765: ......

Page 766: ... 775 SEE FIGURE 980 SEE FIGURE 190 SEE FIGURE 110 111 J17 J14 SEE FIGURE 264 SEE FIGURE 280 SEE FIGURE 270 J272 J271 J25 J26 J1 J2 5 28 1 A A 9 18 4 23 14 19 11 15 16 13 29 501 3 8 2 10 22 24 25 27 20 11A 12 26 26 21 7 17 FIGURE 106 MACHINE REAR PLATE 1 本体後側板 1 COPYRIGHT 2001 CANON INC CANON iR105 REV 0 AUG 2001 106 1 ...

Page 767: ...1 1 A WT2 5565 000 4 CLAMP CABLE ソクセン オサエ 1 2 FG6 7211 000 1 CABLE AC INPUT AC入力束線 J1 2 25 26 1 3 FH2 6807 000 1 HOLDER CONNECTOR コネクタ ホルダ 1 4 FH2 9232 000 1 JOINT CONNECTOR UNIT 1 連結コネクタ 1 1 5 FH2 9233 000 1 JOINT CONNECTOR UNIT 2 連結コネクタ 2 1 6 FH2 9235 000 1 JOINT CONNECTOR UNIT 4 連結コネクタ 4 1 7 FS5 1467 020 1 BUSHING 3 ブッシング 3 1 8 FS7 0011 000 1 GEAR 90T 90T ギア 1 9 XA9 0207 000 1 SCREW M4X12 セムス ネ...

Page 768: ... NUMBER R A N K Q T Y DESCRIPTION SERIAL NUMBER REMARKS 106 2 9 XG9 0248 000 1 BEARING BALL 6004ZZNR C3 ボール ベアリング 5 0 1 XD2 3100 202 1 RING C EXTERNAL C リング ジクヨウ COPYRIGHT 2001 CANON INC CANON iR105 REV 0 AUG 2001 106 3 ...

Page 769: ......

Page 770: ...J15 SEE FIGURE 230 SEE FIGURE 195 20 507 31 28 25 507 19 20 32 22 29 26 38 507 36 37 35 15 3 21 4 18 510 17 505 9 24 2 1 10 10A 14 13 5 11 11A 23 15 48 44 506 506 506 43 11B 7 45 46 504 6 503 34 47 501 41 509 502 49 12 508 40 FIGURE 107 MACHINE REAR PLATE 2 本体後側板 2 COPYRIGHT 2001 CANON INC CANON iR105 REV 0 AUG 2001 107 1 ...

Page 771: ...000 1 CABLE FIXING DRAWER CONNECT 定着ドロア中継束線 J11 15 1 1 A FS5 2964 000 2 SPRING COMPRESSION アッシュク バネ 1 1 B FS5 9282 000 2 SCREW STEPPED 段ビス 1 2 FG6 8604 000 1 BICENTRO DISPLAY PCB ASSEMBLY バイセントロ ディスプレイ回路基板 1 3 FS2 9327 000 4 SCREW STEPPED M4 ダン ビス 1 4 FS3 2044 000 4 SPRING COMPRESSION アッシュク バネ 1 5 FS5 1468 020 2 BUSHING 2 ブッシング 2 1 6 FS5 1804 000 1 BUSHING ブッシング 1 7 FS5 2322 000 2 SPRING TENSION ヒ...

Page 772: ...3 5607 000 4 SOCKET CONTACT 20 24AWG コンタクト J197 4 0 WS3 5607 000 4 SOCKET CONTACT 20 24AWG コンタクト J322 4 1 WT2 5546 000 1 COVER DUST ダストカバー 4 2 WT2 5565 000 3 CLAMP CABLE ソクセン オサエ 4 3 XA9 0265 000 1 SCREW W WASHER TRUSS HEAD ザツキ バインド ネジ 4 4 XA9 0629 000 3 SCREW RS M4X8 RS タイト ネジ 4 5 XA9 0630 000 10 SCREW RS M4X10 RS タイト ネジ 4 6 XA9 0643 000 AR SCREW RS M4X10 RS タイト ネジ 4 7 XA9 0643 000 1 SCREW RS M4X...

Page 773: ...R R A N K Q T Y DESCRIPTION SERIAL NUMBER REMARKS 107 5 0 8 XD1 1106 235 1 SHIM ヒョウジュン ワッシャ 5 0 9 XD1 3100 307 2 WASHER SPRING バネ ザガネ 5 1 0 XD2 1100 502 2 RING E E リング COPYRIGHT 2001 CANON INC CANON iR105 REV 0 AUG 2001 107 4 ...

Page 774: ... 2 PLATE ADJUSTING FRONT アジャスタ固定板 5 FB4 1339 000 2 PLATE PIVOT アジャスタ揺動板 6 FB4 1340 000 16 SCREW ALLEN HEAD M8X10 ロッカク アナツキ ボルト 7 FB4 7846 000 1 PLATE WASTE TONER FIXED 廃トナー固定板 8 XA9 0628 000 2 SCREW RS M4X8 RS タイト ネジ 9 XA9 0628 000 10 SCREW RS M4X8 RS タイト ネジ 1 0 XA9 0643 000 AR SCREW RS M4X10 RS タイト ネジ 1 1 XZ9 0367 000 4 CASTER キャスタ 5 0 1 XD1 3100 805 16 WASHER SPRING バネ ザガネ 5 0 2 XD2 1100 502 2 R...

Page 775: ......

Page 776: ...oes not include the part shown with key No 6 J24 J25 J26 OLT2 PLG1 5 8 注 このユニットにKey No 6の部品は含まれません 10 9 10 9 6 12 502 503 501 506 504 505 11 4 7 3 FIGURE 110 200V POWER CORD TERMINAL ASSEMBLY 電源コード台部 200V COPYRIGHT 2001 CANON INC CANON iR105 REV 0 AUG 2001 110 1 ...

Page 777: ...3 J24 6 FH2 6552 000 1 COVER CONNECTOR コネクタ カバー SEE NOTE 7 FH2 6877 000 1 CORD POWER 電源コード PLG1 8 FH7 7574 000 1 BREAKER ELECTRIC LEAKAGE 漏電ブレーカ CB1 9 WS3 5610 000 2 CONNECTOR 1P FEMALE コネクタ メス 1 0 WS3 5613 000 2 SOCKET CONTACT 10 14AWG ソケット コンタクト 1 1 WT1 0580 000 1 TERMINAL RING マルガタ タンシ 1 2 XA9 0739 000 1 SCREW TP M4X8 タッピン ネジ 5 0 1 XB1 2301 407 2 SCREW MACH TRUSS HEAD M3X14 バインド ネジ 5 0 2 XB1 24...

Page 778: ...bly does not include the part shown with key No 5 J24 208V PLG1 J25 J26 OLT2 4 10 注 このユニットにKey No 5の部品は含まれません 12 11 12 11 5 14 502 503 501 506 504 505 13 6 7 8 9 3 FIGURE 111 208 220 240V POWER CORD TERMINAL ASSEMBLY 電源コード台部 208 220 240V COPYRIGHT 2001 CANON INC CANON iR105 REV 0 AUG 2001 111 1 ...

Page 779: ... 6 FH2 6901 000 1 CORD POWER 250V 15A 電源コード 208V PLG1 7 FH2 6919 000 1 CORD POWER 250V 16A 電源コード 220V PLG1 8 FH2 6920 000 1 CORD POWER 250V 13A 電源コード 240V QEL PLG1 9 FH2 6921 000 1 CORD POWER 250V 15A 電源コード 240V REL PLG1 1 0 FH7 7574 000 1 BREAKER ELECTRIC LEAKAGE 漏電ブレーカ CB1 1 1 WS3 5610 000 2 CONNECTOR 1P FEMALE コネクタ メス 1 2 WS3 5613 000 2 SOCKET CONTACT 10 14AWG ソケット コンタクト 208V WS3 5612 000 2 SOC...

Page 780: ... MSW7 NOTE This assembly does not include the part shown with key No 9 11 5 4 3 10 503 注 このユニットにKey No 9の部品は含まれません 501 502 9 FIGURE 120 DOOR SWITCH MOUNT ASSEMBLY ドアスイッチ台部 COPYRIGHT 2001 CANON INC CANON iR105 REV 0 AUG 2001 120 1 ...

Page 781: ...VER CRANK クランク レバー 6 FG6 1817 000 1 CABLE FRONT DOOR SWITCH DC 前ドア スイッチ束線 DC J21 111 112 7 FH7 6253 000 1 SWITCH DOOR ドア スイッチ SW2 8 FS5 2928 000 1 SPRING TENSION ヒッパリ バネ 9 VS1 5057 002 1 CONNECTOR SNAP TIGHT チュウケイ コネクタ SEE NOTE J111 1 0 WC4 0153 000 1 MICRO SWITCH マイクロ スイッチ MSW7 J112 1 1 XZ9 0251 000 1 CATCH MAGNET マグネット キャッチ 5 0 1 XB1 2230 809 1 SCREW MACH TRUSS HEAD M2 3X8 バインド ネジ 5 0 2 XB3 6300...

Page 782: ... and 506 注1 このユニットはFigure920 925 926のユニットを含みます 注 このユニットにKey No 2 3 4 21 25 26 27 28 29 32 36 39 501 503 504 505 506の部品は含まれません 3 1 504 4 27 26 25 29 28 21 501 39 505 23 5 11 13 24 7 8 9 12 34 SEE FIGURE 925 SEE FIGURE 920 SEE FIGURE 926 CN1 J6804 J6801 J7001 J9802 CN2 CN3 J6803 220 240V 14 2 38 30 10 22 36 40 506 503 32 A A 31 35 FIGURE 130 CONTROL PANEL ASSEMBLY 操作部 COPYRIGHT 2001 CANON INC CANON ...

Page 783: ... FB5 2169 000 1 KEY TOP ENERGY SAVING 節電キー 1 1 FB5 2170 000 1 KEY TOP MODE モード キー 1 2 FB5 2171 000 1 KEY TOP POWER 電源キー 1 3 FB5 2172 000 1 KEY TOP COPY コピー キー 1 4 FB5 2173 000 1 KEY TOP STOP ストップ キー 1 5 FB5 2176 000 1 PANEL FRONT 前カバー 1 6 FB5 2177 000 1 PANEL REAR 後カバー 1 7 FB5 2178 000 1 PANEL ARM REAR アーム カバー 後 1 8 FB5 2179 000 1 PANEL ARM FRONT アーム カバー 前 1 9 FB5 2180 000 1 COVER LOCK HINGE ロック ヒ...

Page 784: ...SCREW W WASHER M4X8 キクザツキ バインド ネジ SEE NOTE 2 3 7 XA9 0591 000 26 SCREW M3X8 タイト ネジ 3 8 XA9 0596 000 3 SCREW P M3X6 P タイト ネジ 3 9 XA9 0615 000 10 SCREW M4X8 タイト ネジ SEE NOTE 2 4 0 XA9 0670 000 1 SCREW M3X6 セムス ネジ 4 1 XA9 0940 000 8 SCREW W WASHER M4X12 バネツキ バインド ネジ 5 0 1 XB1 2300 605 6 SCREW MACH TRUSS HEAD M3X6 バインド ネジ SEE NOTE 2 5 0 2 XB1 2300 607 29 SCREW MACH TRUSS HEAD M3X6 バインド ネジ 5 0 3 XB1 240...

Page 785: ...XING FAN ASS Y 分離定着ファン部 1 FG6 1898 000 2 CABLE EXHAUST FAN CONNECTING 定着排熱ファン中継束線 J114 115 J122 2270 1 A VS1 5057 003 2 CONNECTOR SNAP TIGHT チュウケイ コネクタ J114 2270 2 FH6 1545 000 2 FAN COOLING 冷却ファン FM2 20 J115 122 3 XA9 0189 000 4 SCREW M4X50 タッピン ネジ FIGURE 190 SEPARATION FIXING FAN ASSEMBLY 分離定着ファン部 COPYRIGHT 2001 CANON INC CANON iR105 REV 0 AUG 2001 190 1 ...

Page 786: ... FF6 1502 000 1 FAN PRIMARY POLYGON 1次ポリゴン ファン FM1 J133 3 FG6 8622 000 1 CABLE PRI CORONA FAN CONNECT 一次帯電ファン中継束線 J127 132 3 A VS1 5057 003 1 CONNECTOR SNAP TIGHT チュウケイ コネクタ J127 4 FH6 1546 000 1 FAN COOLING 冷却ファン FM3 J132 5 WT2 5565 000 1 CLAMP CABLE ソクセン オサエ 5 0 1 XB4 5400 805 6 SCREW P M4X8 P タイト ネジ FIGURE 194 PRIMARY POLYGON LASER FAN ASSEMBLY 一次ポリゴンレーザファン部 COPYRIGHT 2001 CANON INC CANON iR105...

Page 787: ...5 FG6 1987 000 1 DRUM INTAKE FAN ASSEMBLY ドラム吸引ファン部 1 FH6 1550 000 1 FAN INTAKE 吸引ファン FM8 J241 2 VS1 5057 003 1 CONNECTOR SNAP TIGHT チュウケイ コネクタ J241 3 XA9 0628 000 6 SCREW RS M4X8 RS タイト ネジ FIGURE 195 DRUM INTAKE FAN ASSEMBLY ドラム吸引ファン部 COPYRIGHT 2001 CANON INC CANON iR105 REV 0 AUG 2001 195 1 ...

Page 788: ... EXCEPT A INCH SIZE J137 J1003 J162 EXCEPT A INCH SIZE J120 J119 FU10 J1001 J56 J943 38 37 510 509 30 21 3 4 4 516 39 25A 30A 57 517 64 53 18 64 14 503 19 63 53 15 29 3 5 51 506 512 7 13 45 42 44 43 27 41 28 42 27A 27A 28A 28B 28A 27B 59 60 5 514 62 42 515 34 51 24 FIGURE 210 LENS MOUNT ASSEMBLY 1 2 レンズ台部 1 2 COPYRIGHT 2001 CANON INC CANON iR105 REV 0 AUG 2001 210 1 ...

Page 789: ... J801 J168 J851 J159 J853 J175 J32 J35 J1107 J1501 J1502 FM4 J103 PS57 J159 J347 J348 J1503 J1108 J346 J1102 25 56 65 507 36G 33 36D 22A 22B 52 54 26 511 57 50 35C 22 59 54 50 50 36B 54 501 36C 36A 36A 36 20 1 35B 504 35A 16 36F 36E 58 32 502 35 52 52 49 35D 23 17 2 FIGURE 210 LENS MOUNT ASSEMBLY 2 2 レンズ台部 2 2 COPYRIGHT 2001 CANON INC CANON iR105 REV 0 AUG 2001 210 2 ...

Page 790: ...T SCANNER DRIVE 光学駆動軸 1 5 FB4 2384 000 2 LOCK PULLEY プーリ ロック 1 6 FB5 7054 000 1 SEAL DUST PROOF FRONT 防塵シール 前 1 7 FB6 0591 000 1 DUCT INVERTER COOLING インバータ冷却ダクト 1 8 FB6 2724 000 1 WIRE SCANNER FRONT 光学ワイヤ 前 1 9 FB6 2725 000 1 WIRE SCANNER REAR 光学ワイヤ 後 2 0 FF5 2173 000 2 PLATE POSITIONING 位置決め板 2 1 FF5 7883 000 1 PLATE SENSOR ARM SUPPORT 検知アーム支板 2 2 FF5 7938 000 1 COVER CCD CCDカバー 2 2 A FB4 1712 0...

Page 791: ...CB ASSEMBLY 高圧回路基板 3 3 FG6 7213 000 1 CABLE CCD POWER CONNECTING CCD電源中継束線 J32 35 1102 3 4 FG6 7260 000 1 CABLE INV POWER CONNECTING インバータ電源中継束線 J56 943 1001 3 5 FG6 7332 000 1 DF CONNECTOR MOUNT UNIT DFコネクタ台ユニット 3 5 A FG6 6902 000 1 CABLE LATTICE RF ラティス束線 RF J23 172 240 3 5 B FG6 7223 000 1 CABLE OPT MOTOR CONNECTING 光学モータ中継束線 J347 348 3 5 C VS1 5057 007 1 CONNECTOR SNAP TIGHT チュウケイ コネクタ J172 3 ...

Page 792: ...ING CCDバネ受け 5 1 FS5 9219 000 2 SCREW STEPPED M4 段ビス 5 2 FS5 9491 000 3 SCREW STEPPED M4 段ビス 5 3 FS6 2737 000 2 SPRING TENSION ヒッパリ バネ 5 4 FS6 2761 000 3 SPRING COMPRESSION アッシュク バネ 5 5 FS6 2894 000 1 SPRING TENSION ヒッパリ バネ 5 6 VS1 5057 003 1 CONNECTOR SNAP TIGHT チュウケイ コネクタ J103 5 7 XA9 0271 000 6 SCREW M4X6 ネジ 5 8 XA9 0520 000 2 BOLT HEX SKT M4X8 六角穴付ボルト ダブルセムス M4 8 5 9 XA9 0628 000 34 SCREW RS M4...

Page 793: ...W MACH TRUSS HEAD M4X14 バインド ネジ 5 0 9 XB1 2403 009 2 SCREW MACH TRUSS HEAD M4X30 バインド ネジ 5 1 0 XB2 4300 607 6 SCREW W WASHER M3X6 バネツキ ナベ ネジ 5 1 1 XB2 7400 607 1 SCREW W WASHER M4X6 バネツキ バインド ネジ 5 1 2 XB4 7300 809 1 SCREW TAPPING TRUSS HEAD M3X8 バインド タッピン ネジ 5 1 3 XB4 7303 009 2 SCREW TAPPING TRUSS HEAD M3X30 バインド タッピン ネジ 5 1 4 XB6 7300 609 4 SCREW TP M3X6 TP ネジ 5 1 5 XB6 7400 609 2 SCREW TP M4X6 ...

Page 794: ...24 3 22A 15 13 1 1 1 1 6 22 23 22B 22C 14 J37 J116 J213 J214 J343 J761 J762 J1113 J214 J3701 FM5 J113 503 28 26 3 31 502 17 16 17 18 27 22B 30 504 505 FIGURE 215 SCANNER MOUNT ASSEMBLY スキャナ台部 COPYRIGHT 2001 CANON INC CANON iR105 REV 0 AUG 2001 215 1 ...

Page 795: ... FB4 1564 000 1 COVER IMAGE PROCESSOR CABLE イメージ プロセッサ束線カバー 1 6 FB5 4346 000 1 SPRING TORSION ネジリ バネ 1 7 FB5 4347 000 2 WASHER SHUTTER シャッタ ワッシャ 1 8 FB5 7042 000 2 SPACER CABLE SUPPORT ケーブル サポート スペーサ 1 9 FB5 8809 000 1 SPRING LEAF FRONT 板バネ 前 2 0 FB5 8810 000 1 SPRING LEAF REAR 板バネ 後 2 1 FF5 7717 000 1 MIRROR BEAM DETECTOR ビーム ディテクタ ミラー 2 2 FG6 1826 000 1 CABLE LENS MOUNT INTERNAL レンズ台内部中継束線 J37 1...

Page 796: ...M4X8 ロッカク アナツキ トメネジ 3 0 XA9 0870 000 2 SCREW M4X10 タイト ネジ 3 1 XA9 1091 000 2 SETSCREW M4X8 ロッカク アナツキ トメネジ 5 0 1 XB1 2400 609 17 SCREW MACH TRUSS HEAD M4X6 バインド ネジ 5 0 2 XB1 2401 409 6 SCREW MACH TRUSS HEAD M4X14 バインド ネジ 5 0 3 XB4 7303 007 2 SCREW TAPPING TRUSS HEAD M3X30 バインド タッピン ネジ 5 0 4 XB6 7400 609 4 SCREW TP M4X6 TP ネジ 5 0 5 XD1 1108 221 1 SHIM ヒョウジュン ワッシャ COPYRIGHT 2001 CANON INC CANON iR105...

Page 797: ... 8623 000 1 CABLE CLUTCH クラッチ束線 J264 3 FH6 5043 000 1 CLUTCH ELECTROMAGNETIC 電磁クラッチ CL9 4 FS1 1189 000 1 BUSHING ブッシング 5 FS3 0165 000 1 GEAR 40T 40T ギア 6 FS5 0398 000 1 GEAR 40T 40T ギア 7 VS1 5057 002 1 CONNECTOR SNAP TIGHT チュウケイ コネクタ SEE NOTE J264 8 XA9 0628 000 3 SCREW RS M4X8 RS タイト ネジ 9 XG9 0249 000 1 BEARING BALL ボール ベアリング 5 0 1 XD2 1100 642 2 RING E E リング 5 0 2 XD3 2200 162 1 PIN DOWEL ヘイコウ ピ...

Page 798: ...ER SENSOR 紙検知アーム 2 FB5 0553 000 2 SPRING TORSION ネジリ バネ 3 FG6 1888 000 1 CABLE DECK SENSOR デッキ残量検知束線 J258 260 J268 270 3 A VS1 5057 006 1 CONNECTOR SNAP TIGHT チュウケイ コネクタ J258 268 4 FH6 1541 000 1 MOTOR DC 19 2W DCモータ M13 14 J263 267 5 FH7 7462 000 2 PHOTO INTERRUPTER フォトインタラプタ PS51 52 54 55 J259 260 269 270 6 WT2 5565 000 1 CLAMP CABLE ソクセン オサエ SEE NOTE 7 XA9 0628 000 1 SCREW RS M4X8 RS タイト ネジ 5 0...

Page 799: ......

Page 800: ... 21 28 8 10 28 5 12 504 28 1 11 7 508 501 19 5 502 4 505 20 28 26 M1 J611 612 MSW2 J251 27 15 503 8A 6 24 28 23 13 22 28 25 3 506 505 9 2 FIGURE 250 MAIN DRIVE ASSEMBLY メイン駆動部 COPYRIGHT 2001 CANON INC CANON iR105 REV 0 AUG 2001 250 1 ...

Page 801: ... 000 1 PULLEY プーリ 1 1 FS5 2978 000 1 SPRING COMPRESSION アッシュク バネ 1 2 FS5 3609 000 1 PULLEY 22T 22T プーリ 1 3 FS5 3612 000 1 PULLEY プーリ 1 4 FS5 3890 000 1 PULLT 18T 18T プーリ 1 5 FS5 6487 000 1 SHIM ワッシャ 1 6 FS7 0012 000 1 GEAR 50T 24T 18T 50T 24T 18T ギア 1 7 FS7 0014 000 1 GEAR 24T 24T ギア 1 8 FS7 0016 000 1 GEAR 20T 20T ギア 1 9 FS7 0017 000 1 GEAR 18T 27T 18T 27T ギア 2 0 FS7 0018 000 1 GEAR 24T 24T ギア 2 ...

Page 802: ... バインド ネジ 5 0 2 XD2 1100 502 1 RING E E リング 5 0 3 XD2 1100 642 18 RING E E リング 5 0 4 XD3 2200 122 2 PIN DOWEL ヘイコウ ピン 5 0 5 XD3 2200 142 2 PIN DOWEL ヘイコウ ピン 5 0 6 XD3 2200 162 2 PIN DOWEL ヘイコウ ピン 5 0 7 XD3 2200 182 2 PIN DOWEL ヘイコウ ピン 5 0 8 XD3 2300 142 1 PIN DOWEL ヘイコウ ピン COPYRIGHT 2001 CANON INC CANON iR105 REV 0 AUG 2001 250 3 ...

Page 803: ... 分離爪中継束線 J271 737 4 FG6 6885 000 1 CABLE DRUM MOTOR DRIVE ドラムモータ駆動中継束線 J43 250 251 601 602 4 A VS1 5057 002 1 CONNECTOR SNAP TIGHT チュウケイ コネクタ J251 5 FH6 1934 000 1 MOTOR BRUSHLESS ブラシレス モータ M0 J601 602 6 FS7 0010 000 1 GEAR 19T 63T 19T 63T ギア 7 RS6 0057 000 1 GEAR 49T 49T ギア 8 XA9 0628 000 7 SCREW RS M4X8 RS タイト ネジ 9 XA9 0813 000 1 SCREW RS M3X8 RS タイト ネジ 1 0 XA9 0962 000 4 SCREW RS M3X10 RS タイト ネ...

Page 804: ...1 505 2 17 4 22 13 19 503 19 7 506 14 15 7 23 18 501 14 506 22 19 19 10 22 504 19 22 12 16 9 12 12 8 8 20 J621 J622 M2 504 21 502 3 504 502 6 1 501 FIGURE 260 PAPER PICK UP DRIVE ASSEMBLY 給紙駆動部 COPYRIGHT 2001 CANON INC CANON iR105 REV 0 AUG 2001 260 1 ...

Page 805: ...0 3 PULLEY IDLER アイドラ プーリ 1 3 FS6 0056 000 1 GEAR 32T 32T ギア 1 4 FS6 0062 000 2 GEAR 25T 25T ギア 1 5 FS6 0096 000 1 GEAR 20T 32T 20T 32T ギア 1 6 FS6 2776 000 1 SPRING TENSION ヒッパリ バネ 1 7 FS6 2999 000 1 SPRING COMPRESSION アッシュク バネ 1 8 FS7 0035 020 1 GEAR 68T 68T ギア 1 9 FS7 0036 000 9 GEAR 50T 50T ギア 2 0 XA9 0628 000 12 SCREW RS M4X8 RS タイト ネジ 2 1 XA9 1030 000 4 SCREW RS M4X12 RS タイト ネジ 2 2 XG9 0249 0...

Page 806: ... 1 FLANGE フランジ 4 FS2 3494 020 1 PULLEY 39T 39T プ リ 5 FS4 0014 000 2 GEAR 36T 36T ギア 6 FS4 0145 000 4 GEAR 20T 20T ギア 7 FS6 0055 000 2 GEAR 76T 76T ギア 8 FS6 0056 000 1 GEAR 32T 32T ギア 9 XA9 0628 000 3 SCREW RS M4X8 RS タイト ネジ 1 0 XG9 0208 000 1 BEARING BALL ボール ベアリング 5 0 1 XD2 1100 642 15 RING E E リング 5 0 2 XD3 2200 142 5 PIN DOWEL ヘイコウ ピン 5 0 3 XD3 2200 162 1 PIN DOWEL ヘイコウ ピン FIGURE 261 CASSETTE P...

Page 807: ...3 FS5 0514 000 2 GEAR 20T 20T ギア 4 FS6 0056 000 1 GEAR 32T 32T ギア 5 XA9 0628 000 5 SCREW RS M4X8 RS タイト ネジ 6 XG9 0249 000 2 BEARING BALL ボール ベアリング 5 0 1 XD1 1108 219 1 SHIM ヒョウジュン ワッシャ 5 0 2 XD2 1100 642 6 RING E E リング 5 0 3 XD3 2200 122 2 PIN DOWEL ヘイコウ ピン 5 0 4 XD3 2200 142 1 PIN DOWEL ヘイコウ ピン 5 0 5 XD3 2200 162 1 PIN DOWEL ヘイコウ ピン FIGURE 263 LEFT PICK UP DRIVE ASSEMBLY 左給紙駆動部 COPYRIGHT 2001 CAN...

Page 808: ...ly does not include the part shown with key No 12 J271 14 8 504 14 8 504 10 6 503 11 2 9 13 502 注 このユニットにKey No 12の部品は含まれません 7 3A 3 12 12 12 501 501 5 4 4 1 FIGURE 264 MULTI FEED DRIVE ASSEMBLY マルチ給紙駆動部 COPYRIGHT 2001 CANON INC CANON iR105 REV 0 AUG 2001 264 1 ...

Page 809: ... FH6 5016 000 1 CLUTCH ELECTROMAGNETIC 電磁クラッチ CL5 J255 7 FH6 5043 000 2 CLUTCH ELECTROMAGNETIC 電磁クラッチ CL7 18 8 FS4 0014 000 2 GEAR 36T 36T ギア 9 FS6 0053 020 1 GEAR 20T 20T ギア 1 0 FS7 0033 000 1 GEAR 24T 30T 24T 30T ギア 1 1 FS7 0034 000 1 GEAR 20T 20T ギア 1 2 VS1 5057 002 3 CONNECTOR SNAP TIGHT チュウケイ コネクタ SEE NOTE J252 253 255 1 3 XA9 0628 000 7 SCREW RS M4X8 RS タイト ネジ 1 4 XG9 0249 000 3 BEARING BALL...

Page 810: ...2 16 504 16 10 16 503 J217 CL20 J242 CL4 J217 J216 J249 J42 J43 J250 501 5 16 3 1 8 9 16 6 504 12 7 2B 2A 2B 2C 2 13 16 14 4 504 FIGURE 270 DEVELOPING DRIVE ASSEMBLY 現像駆動部 COPYRIGHT 2001 CANON INC CANON iR105 REV 0 AUG 2001 270 1 ...

Page 811: ...7 5 FS2 0485 000 1 GEAR 32T 32T ギア 6 FS3 0046 000 1 GEAR 20T 20T ギア 7 FS4 0157 000 1 GEAR 20T 20T ギア 8 FS5 3889 000 1 PULLEY 20T 20T プーリ 9 FS5 6488 000 1 WASHER ワッシャ 1 0 FS6 0056 000 3 GEAR 32T 32T ギア 1 1 FS7 0015 000 1 GEAR 23T 23T ギア 1 2 FS7 0072 000 1 GEAR 27T 27T ギア 1 3 VS1 5057 002 1 CONNECTOR SNAP TIGHT チュウケイ コネクタ J242 1 4 XA9 0628 000 11 SCREW RS M4X8 RS タイト ネジ 1 5 XG9 0249 000 1 BEARING BA...

Page 812: ...6 MSW1 J245 J243 J244 J247 J248 J246 NOTE This assembly does not include the part shown with key No 47 11 10 29 51 37 30 24 43 23 36 510 50 31 505 511 47 注 このユニットにKey No 47の部品は含まれません 8 25 504 25 507 FIGURE 275 TONER CARTRIDGE DRIVE ASSEMBLY 1 2 トナーカートリッジ駆動部 1 2 COPYRIGHT 2001 CANON INC CANON iR105 REV 0 AUG 2001 275 1 ...

Page 813: ...J247 J244 PS59 34 35 513 46 513 34 45 45 45 44 21 34 34 511 19 42 514 18 505 9 32 508 50 54 27 1 FIGURE 275 TONER CARTRIDGE DRIVE ASSEMBLY 2 2 トナーカートリッジ駆動部 2 2 COPYRIGHT 2001 CANON INC CANON iR105 REV 0 AUG 2001 275 2 ...

Page 814: ...SHAFT SUPPORT 軸支え板 1 3 FB4 1913 000 1 MOUNT RUBBER LEFT ゴム台 左 1 4 FB4 1915 000 1 SHUTTER シャッタ 1 5 FB4 1916 000 1 LEVER SHUTTER シャッタ レバー 1 6 FB4 1924 000 1 LEVER SENSOR 検知レバー 1 7 FB4 1925 000 1 MOUNT LEVER レバー支持台 1 8 FB4 1926 000 1 COUPLING カップリング 1 9 FB4 1927 000 1 SUPPORT SPRING ばね押さえ 2 0 FB4 5309 000 1 PLATE HINGE ADJUSTING ヒンジ調整板 2 1 FB4 5310 000 1 MOUNT SHAFT 軸支え板 2 2 FB4 9026 000 1 PLATE DAMP...

Page 815: ...NSION ヒッパリ バネ 4 2 FS6 2887 000 1 SPRING COMPRESSION アッシュク バネ 4 3 FS6 2998 000 1 SPRING COMPRESSION アッシュク バネ 4 4 FS7 0043 000 1 GEAR 36T 36T ギア 4 5 FS7 0044 000 3 GEAR 16T 28T 16T 28T ギア 4 6 FS7 0051 000 1 GEAR 36T 36T ギア 4 7 VS1 5057 007 1 CONNECTOR SNAP TIGHT チュウケイ コネクタ SEE NOTE J243 4 8 WC4 5153 000 1 MICRO SWITCH マイクロ スイッチ MSW1 J248 4 9 WC4 5157 000 1 MICRO SWITCH マイクロ スイッチ MSW8 J246 5 0 XA9 06...

Page 816: ...5 バインド ネジ 5 0 7 XB2 8400 809 2 SCREW W WASHER M4X8 バネツキ バインド ネジ 5 0 8 XB6 7300 809 2 SCREW TP M3X8 TP ネジ 5 0 9 XD2 1100 322 2 RING E E リング 5 1 0 XD2 1100 502 6 RING E E リング 5 1 1 XD2 1100 642 15 RING E E リング 5 1 2 XD2 2100 302 1 RING GRIP グリップ リング 5 1 3 XD3 2200 142 2 PIN DOWEL ヘイコウ ピン 5 1 4 XD3 2300 122 1 PIN DOWEL ヘイコウ ピン COPYRIGHT 2001 CANON INC CANON iR105 REV 0 AUG 2001 275 5 ...

Page 817: ......

Page 818: ...2 5 507 16 502 11 12 13 505 10 501 18 15 506 14 9 7 504 4 6 503 12 506 19 8 19 8 3 19 8 17 1 FIGURE 280 WASTE TONER DRIVE ASSEMBLY 廃トナー駆動部 COPYRIGHT 2001 CANON INC CANON iR105 REV 0 AUG 2001 280 1 ...

Page 819: ... 1 1 FS7 0021 000 1 GEAR 24T 40T 24T 40T ギア 1 2 FS7 0022 000 2 GEAR 24T 48T 24T 48T ギア 1 3 FS7 0023 000 1 GEAR 28T 48T 28T 48T ギア 1 4 FS7 0024 000 1 GEAR 36T 36T ギア 1 5 FS7 0025 000 1 GEAR 36T 36T ギア 1 6 FS7 0026 000 1 GEAR 18T 18T ギア 1 7 XA9 0628 000 4 SCREW RS M4X8 RS タイト ネジ 1 8 XG9 0250 000 1 BEARING BALL ボール ベアリング 1 9 XG9 0350 000 3 BALL BEARING MF106ZZ1MC3 ボール ベアリング 5 0 1 XD1 1108 222 1 SHIM ...

Page 820: ...0 503 6 4 36 2 33 504 3 18 17 39 9 31A 31A 31 31B 40 49 21 1 30A 43 5 41 41 10 502 42 19 37 50 11 15 16 25 52 15 14 48 29C 24 49 29C 505 22 22 44 46 53 501 51 506 30 23 29 45 26 35 27 34 32 28 FIGURE 300 CASSETTE カセット COPYRIGHT 2001 CANON INC CANON iR105 REV 0 AUG 2001 300 1 ...

Page 821: ...15 000 1 SHAFT RELEASE LEVER 解除レバー軸 1 4 FB3 9316 000 3 CLAW SENSING 誤検知防止爪 1 5 FB3 9319 000 2 BUSHING ブッシング 1 6 FB3 9320 000 1 PLATE COVER LOWER カバー支板 下 1 7 FB3 9322 020 1 KNOB SIDE GUIDE 1 サイド規制板つまみ 1 1 8 FB3 9323 030 1 KNOB SIDE GUIDE 2 サイド規制板つまみ 2 1 9 FB3 9326 000 1 PLATE END GUIDE LOWER 後端規制支板 下 2 0 FB3 9327 000 1 COVER END GUIDE PLATE 後端規制板カバー 2 1 FB3 9335 000 1 RING GEAR STOP ギア押え 2 2 FB3 93...

Page 822: ...BUTTON PUSH プッシュ ボタン 3 6 FF6 1333 000 1 SPRING LEAF 2 板バネ 2 3 7 FS5 0532 000 1 GEAR 15T 42T 15T 42T ギア 3 8 FS5 2328 000 1 SPRING TENSION ヒッパリ バネ 3 9 FS5 2650 000 1 SPRING COMPRESSION アッシュク バネ 4 0 FS6 2691 000 1 SPRING TENSION ヒッパリ バネ 4 1 FS6 2692 000 2 SPRING TENSION ヒッパリ バネ 4 2 FS6 2693 000 1 SPRING TENSION ヒッパリ バネ 4 3 FS6 2694 000 1 SPRING COMPRESSION アッシュク バネ 4 4 FS6 8411 000 1 LABEL UNIVERSAL ...

Page 823: ...REW MACH TRUSS HEAD M3X6 バインド ネジ 5 0 2 XB1 2400 609 1 SCREW MACH TRUSS HEAD M4X6 バインド ネジ 5 0 3 XB4 7300 607 2 SCREW TAPPING TRUSS HEAD M3X6 バインド タッピン ネジ 5 0 4 XB4 7300 607 2 SCREW TAPPING TRUSS HEAD M3X6 バインド タッピン ネジ 5 0 5 XD1 1108 235 1 SHIM ヒョウジュン ワッシャ 5 0 6 XD2 1100 502 2 RING E E リング COPYRIGHT 2001 CANON INC CANON iR105 REV 0 AUG 2001 300 4 ...

Page 824: ...A A 19 4 505 1 508 36 46 3 9 5 48 501 7 6 12 5 28 9 504 41 29 27 38 46 37 507 2 13 40 505 NOTE This assembly does not include the part shown with key No 42 504 14 44 32 15 16 506 42 33A 34 33 18 FIGURE 302 1 5K RIGHT PAPER STOCK ASSEMBLY 1 5K右収納庫部 COPYRIGHT 2001 CANON INC CANON iR105 REV 0 AUG 2001 302 1 ...

Page 825: ...0 1 SUPPORT SHAFT REAR 軸支板 後 1 3 FB4 9509 000 1 PLATE SEPARATION 分離板 1 4 FB5 3365 000 1 SPRING COMPRESSION アッシュク バネ 1 5 FB5 3370 000 1 LEVER HOOK RELEASE フック解除レバー 1 6 FB5 3569 000 1 LEVER HOOK RELEASE フック解除レバー 1 7 FB5 5606 000 1 HOOK WIRE FRONT ワイヤ掛け 前 1 8 FB5 5607 000 1 HOOK WIRE REAR ワイヤ掛け 後 1 9 FB5 5608 000 1 SUPPORT FRONT 支え板 前 2 0 FB5 5609 000 1 SUPPORT REAR 支え板 後 2 1 FB6 2719 000 4 PAD 消音パッド...

Page 826: ... 1 FS6 2984 000 1 SPRING COMPRESSION アッシュク バネ 4 2 FS6 8981 000 2 LABEL PAPER SIZE 紙サイズ ラベル SEE NOTE 4 3 XA9 0605 000 2 SCREW M4X8 タイト ネジ 4 4 XA9 0685 000 28 SCREW RS M4X6 RS タイト ネジ 4 5 XA9 0721 000 10 SCREW RS M4X10 RS タイト ネジ 4 6 XD9 0104 000 2 PIN DOWEL ヘイコウ ピン 4 7 XG9 0439 000 2 BEARING ROLLER ロ ラ ベアリング 4 8 XH9 0082 000 1 DAMPER OIL オイル ダンパ 5 0 1 XB1 2200 409 2 SCREW MACH TRUSS HEAD M2X4 バインド ネジ...

Page 827: ......

Page 828: ...8 21 30 19 12 4 1 9 503 43 20 4 506 1 510 2 40 51 3 10 7 54 501 6 14 5 32 10 505 33 31 42 51 41 45 5 8 44 505 506 509 49 38 24 16 36 17 22 507 52 23 47 23 508 502 46 FIGURE 303 1 5K LEFT PAPER STOCK ASSEMBLY 1 5K左収納庫部 COPYRIGHT 2001 CANON INC CANON iR105 REV 0 AUG 2001 303 1 ...

Page 829: ...26 000 1 LEVER SLIDE スライド レバー 1 3 FB4 5267 000 1 LEVER SEPARATION RELEASE 分離解除レバー 1 4 FB4 5268 000 1 SUPPORT SHAFT REAR 軸支板 後 1 5 FB4 9509 000 1 PLATE SEPARATION 分離板 1 6 FB5 3365 000 1 SPRING COMPRESSION アッシュク バネ 1 7 FB5 3370 000 1 LEVER HOOK RELEASE フック解除レバー 1 8 FB5 5606 000 1 HOOK WIRE FRONT ワイヤ掛け 前 1 9 FB5 5607 000 1 HOOK WIRE REAR ワイヤ掛け 後 2 0 FB5 5608 000 1 SUPPORT FRONT 支え板 前 2 1 FB5 5609 000...

Page 830: ...4 2136 000 1 SPRING COMPRESSION アッシュク バネ 4 3 FS5 8618 000 1 LABEL MAXIMUM LOAD 積載制限ラベル 4 4 FS6 2983 000 1 SPRING TENSION ヒッパリ バネ 4 5 FS6 2984 000 1 SPRING COMPRESSION アッシュク バネ 4 6 FS7 0662 000 2 PULLEY 25T 25T プーリ 4 7 FS7 5687 000 1 SHAFT RELEASE 解除支軸 4 8 XA9 0605 000 2 SCREW M4X8 タイト ネジ 4 9 XA9 0685 000 31 SCREW RS M4X6 RS タイト ネジ 5 0 XA9 0721 000 10 SCREW RS M4X10 RS タイト ネジ 5 1 XD9 0104 000 2 PIN...

Page 831: ...5 XB6 2300 408 4 SETSCREW M3X4 ロッカク アナツキ トメネジ 5 0 6 XD1 1108 239 2 SHIM ヒョウジュン ワッシャ 5 0 7 XD2 1100 402 2 RING E E リング 5 0 8 XD2 1100 502 2 RING E E リング 5 0 9 XD2 1100 642 5 RING E E リング 5 1 0 XD3 1200 122 1 PIN SPRING スプリング ピン COPYRIGHT 2001 CANON INC CANON iR105 REV 0 AUG 2001 303 4 ...

Page 832: ...ER CABLE ヒータ ガイド 1 B FG5 9419 000 1 CABLE HEATER ヒータ中継束線 J18 19 2 FG2 9812 000 N 1 HEATER ASSEMBLY ヒータ ユニット 3 FH7 4585 000 1 HEATER CASSETTE カセット ヒータ H4 J19 4 WT2 5041 000 1 CLAMP CABLE ケーブル クランプ 5 XA9 0628 000 2 SCREW RS M4X8 RS タイト ネジ 5 0 1 XB1 2400 409 4 SCREW MACH TRUSS HEAD M4X4 バインド ネジ 5 0 2 XB6 7300 409 1 SCREW TP M3X4 TP ネジ 5 0 3 XB6 7400 609 1 SCREW TP M4X6 TP ネジ FIGURE 305 CASSETTE HEATE...

Page 833: ......

Page 834: ...not include the parts shown with key No 29 73 and 79 J298 J351 505 56 53A 22 66 515 2 27 68 46 502 45 77 8 32 32 2 37 50 34 42 16 503 81 57 53A 14 59 5 6 25 49 60 2 13 2 2 19 30 80 25 25 48 62 514 60 10 59 59 11 4 72 36 12 21 18 2 47 64 41 63 58 58 58 29 2 7 24 76 31 61 514 43 44 20 55 67 2 69 70 26 71 9 65 3 53A 28 74 78 504 507 508 509 510 511 17 1 513 52 52A 35 506 501 75 79 38 15 38 23 33 73 5...

Page 835: ...2 7641 000 1 PLATE PICK UP ピックアップ板 1 4 FB2 7642 000 1 ARM PAPER カミ アリ ア ム 1 5 FB2 7696 000 1 COLLAR PAPER FEED ROLLER ハンソウ ローラ コロ 1 6 FB2 8266 000 1 PLATE PICK UP REAR ピックアップ バン ウシロ 1 7 FB2 8410 000 1 SHEET PICK UP ピックアップ シ ト 1 8 FB2 8436 000 1 BUSHING ブッシング 1 9 FB2 8512 000 1 SPACER スペーサ 2 0 FB3 8333 000 1 CAM PICK UP RELEASE 給紙解除カム 2 1 FB4 1202 000 1 FLAG PAPER 紙面フラッグ 2 2 FB4 1982 000 1 GUIDE OP...

Page 836: ...ソレノイド台 4 5 FF5 6889 000 1 MOUNT SEPARATION ROLLER 分離ローラ支台 4 6 FF5 6904 000 1 LEVER SEPARATION RELEASE 1 分離解除レバー 1 4 7 FF5 6905 000 1 SUPPORT LIFTER GEAR リフタ ギア支持板 4 8 FF5 7829 000 1 ROLLER PICK UP 給紙ローラ FRONT 4 9 FF5 7830 000 1 ROLLER PICK UP 給紙ローラ REAR 5 0 FF5 9784 000 1 SHAFT SEPARATION ROLLER 分離ローラ軸 5 1 FF6 1533 000 1 GUIDE PICK UP INLET RIGHT 給紙入口ガイド 右 5 2 FG6 2335 000 1 CABLE SOLENOID CONNECT...

Page 837: ...PRING TENSION ヒッパリ バネ 7 0 FS6 2678 000 1 SPRING TENSION ヒッパリ バネ 7 1 FS6 2742 000 1 SPRING TENSION ヒッパリ バネ 7 2 FS6 2996 000 1 SPRING TORSION ネジリ バネ 7 3 VS1 6319 026 2 CONNECTOR SNAP TIGHT チュウケイ コネクタ SEE NOTE J281 305 7 4 XA9 0265 000 2 SCREW W WASHER TRUSS HEAD ザツキ バインド ネジ 7 5 XA9 0591 000 2 SCREW M3X8 タイト ネジ 7 6 XA9 0605 000 4 SCREW M4X8 タイト ネジ 7 7 XA9 0628 000 9 SCREW RS M4X8 RS タイト ネジ 7 8 XA9 06...

Page 838: ...1100 242 2 RING E E リング 5 0 8 XD2 1100 322 1 RING E E リング 5 0 9 XD2 1100 372 1 RING E E リング 5 1 0 XD2 1100 502 7 RING E E リング 5 1 1 XD2 1100 642 11 RING E E リング 5 1 2 XD2 2100 802 1 RING GRIP グリップ リング 5 1 3 XD3 0300 082 1 PIN SPRING スプリング ピン 5 1 4 XD3 2200 102 2 PIN DOWEL ヘイコウ ピン 5 1 5 XD3 2200 122 1 PIN DOWEL ヘイコウ ピン COPYRIGHT 2001 CANON INC CANON iR105 REV 0 AUG 2001 311 5 ...

Page 839: ......

Page 840: ... 502 42 63 25 29 29 75 1 35 47 32 41 15 504 13 8 9 55 55 2 55 21 21 43 507 60 512 56 56 44 21 72 27 17 1 1 6 5 1 64 508 3 34 54 11 10 53 49A 19 1 62 52 49A 70 20 28 512 57 68 22 58 49A 510 74 67 26 54 30 69 7 74 54 23 73 33 73 54 12 18 506 16 501 66 45 注 このユニットにKey No 26 65 71の部品は含まれません 46 511 71 511 36 14 36 503 31 51 65 48 37 40 49B 505 39 38 FIGURE 312 FRONT DECK RIGHT PICK UP ASSEMBLY フロントデッキ ...

Page 841: ...PAPER カミ アリ ア ム 1 4 FB2 7696 000 1 COLLAR PAPER FEED ROLLER ハンソウ ローラ コロ 1 5 FB2 8266 000 1 PLATE PICK UP REAR ピックアップ バン ウシロ 1 6 FB2 8410 000 1 SHEET PICK UP ピックアップ シ ト 1 7 FB2 8512 000 1 SPACER スペーサ 1 8 FB4 1989 000 1 SHAFT PAPER FEED ROLLER 搬送ローラ軸 1 9 FB4 2000 000 1 CAM PICK UP RELEASE REAR 給紙解除カム 後 2 0 FB4 2004 000 1 PLATE GROUNDING アース板 2 1 FB4 2007 000 3 RING RETAINING 止め輪 2 2 FB4 2009 000 1 P...

Page 842: ...ラ FRONT 4 4 FF5 7830 000 1 ROLLER PICK UP 給紙ローラ REAR 4 5 FF5 7832 000 1 SUPPORT PLATE RIGHT 入力支持板 右 4 6 FF5 7833 000 1 MOUNT SOLENOID RIGHT ソレノイド台 右 4 7 FF5 9784 000 1 SHAFT SEPARATION ROLLER 分離ローラ軸 4 8 FF6 1534 000 1 GUIDE PICK UP INLET RIGHT 給紙入口ガイド 右 4 9 FG6 8591 000 1 CABLE RIGHT DECK 右デッキ給紙束線 J229 237 276 278 4 9 A VS1 5057 002 3 CONNECTOR SNAP TIGHT チュウケイ コネクタ J230 231 234 4 9 B VS1 5057 008...

Page 843: ...A9 0643 000 1 SCREW RS M4X10 RS タイト ネジ SEE NOTE 7 2 XF9 0525 000 1 BELT TIMING 59T タイミング ベルト 7 3 XG9 0211 000 2 BALL BEARING MF128ZZ1MC3D4M ボール ベアリング 7 4 XG9 0250 000 2 BEARING BALL ボール ベアリング 7 5 XG9 0407 000 2 BEARING BALL UGF106P12ZZD4ML ボール ベアリング 5 0 1 XB1 2300 407 2 SCREW MACH TRUSS HEAD M3X4 バインド ネジ 5 0 2 XB1 2300 409 1 SCREW MACH TRUSS HEAD M3X4 バインド ネジ 5 0 3 XB1 2300 609 2 SCREW MACH TRUSS ...

Page 844: ...FIGURE KEY NO PART NUMBER R A N K Q T Y DESCRIPTION SERIAL NUMBER REMARKS 312 5 1 3 XD3 2200 122 1 PIN DOWEL ヘイコウ ピン COPYRIGHT 2001 CANON INC CANON iR105 REV 0 AUG 2001 312 5 ...

Page 845: ......

Page 846: ...23 18 35 25 2 2 9 42 42 10 42 508 13 29 14 4 42 502 11 12 41 41 41 38 5 36 1 3 18 52 47 513 43 41 18 21 16 2 2 2 7 43 18 15 510 39 45 45 513 22 37A 44 511 19 37A 40 501 37C 37B 506 512 31 51 503 509 507 505 27 6 27 34 32 33 504 17 37D 37E 26 50 28 37 FIGURE 313 FRONT DECK LEFT PICK UP ASSEMBLY フロントデッキ 左 給紙部 COPYRIGHT 2001 CANON INC CANON iR105 REV 0 AUG 2001 313 1 ...

Page 847: ...000 1 SHAFT PAPER LEVER 紙面レバー軸 1 3 FB2 7722 000 1 LEVER PAPER SENSOR 紙無しレバー 1 4 FB2 7723 000 1 LEVER LIMITER リミッタ レバー 1 5 FB2 7724 000 1 GUIDE CABLE ソクセン ガイド 1 6 FB2 8512 000 1 SPACER スペーサ 1 7 FB4 1990 000 1 SHAFT FEED ROLLER 搬送ローラ軸 1 8 FB4 2007 000 3 RING RETAINING 止め輪 1 9 FB4 2031 000 1 CAM PICK UP RELEASE REAR 給紙解除カム 後 2 0 FB4 6227 000 1 SHAFT COUNTER カウンタ軸 2 1 FB4 9029 000 1 CLUTCH ONE WAY ワンウ...

Page 848: ...ヤ サドル 3 7 E WT2 5565 000 1 CLAMP CABLE ソクセン オサエ 3 8 FG6 8605 000 1 OPTICAL SENSOR PCB ASSEMBLY 光学センサ回路基板 PS25 J355 3 9 FH6 5043 000 1 CLUTCH ELECTROMAGNETIC 電磁クラッチ CL11 4 0 FH7 5827 000 1 SOLENOID ソレノイド SL8 J321 4 1 FH7 7462 000 4 PHOTO INTERRUPTER フォトインタラプタ PS31 34 J315 316 318 319 4 2 FS1 1512 000 4 BUSHING ブッシング 4 3 FS1 1569 000 2 BUSHING ブッシング 4 4 FS2 0544 000 1 GEAR 24T 24T ギア 4 5 FS5 0338 00...

Page 849: ... 0 5 XD1 1108 226 1 SHIM ヒョウジュン ワッシャ 5 0 6 XD2 1100 242 2 RING E E リング 5 0 7 XD2 1100 322 1 RING E E リング 5 0 8 XD2 1100 502 9 RING E E リング 5 0 9 XD2 1100 642 13 RING E E リング 5 1 0 XD2 2100 802 1 RING GRIP グリップ リング 5 1 1 XD3 1200 102 1 PIN SPRING スプリング ピン 5 1 2 XD3 1300 102 1 PIN SPRING スプリング ピン 5 1 3 XD3 2200 102 2 PIN DOWEL ヘイコウ ピン 5 1 4 XD3 2200 122 1 PIN DOWEL ヘイコウ ピン COPYRIGHT 2001 CANON INC C...

Page 850: ... This assembly includes the assembly shown in Figure 316 22 22 13 18 18 52 45 504 26 26A 505 25 37 24 507 5 506 4 44 9 509 8 48 39 507 10 39 12 17 509 38 2 38 46 50 42 47 28 35 49 19 43 20 502 503 7 508 35A 注1 このユニットはFigure316のユニットを含みます 注2 このユニットにKey No 49の部品は含まれません 15 11 15 6 3 32 32 33 34 16 502 53 FIGURE 315 MULTI FEED ASSEMBLY マルチ手差し部 COPYRIGHT 2001 CANON INC CANON iR105 REV 0 AUG 2001 315 1 ...

Page 851: ... 1 3 FB2 8384 000 1 ROLLER PICK UP ピックアップ コロ 1 4 FB4 2007 000 1 RING RETAINING 止め輪 1 5 FB4 2035 000 2 ROLLER FEED ROLLER 搬送ローラ 1 6 FB4 3747 000 1 SHAFT FEEDER ROLLER 搬送ローラ軸 1 7 FB4 3750 000 1 MOUNT SEPARATION ROLLER 分離ローラ台 1 8 FB4 3759 000 2 GUIDE POSITIONING 位置決めガイド 1 9 FB4 3772 000 1 HANDLE MULTI FEED DOOR マルチ扉ハンドル 2 0 FB4 7840 000 1 TAPE SUPPORT 支えテ プ 2 1 FB5 2837 000 2 SHUTTER シャッタ 2 2 FB5 283...

Page 852: ... 1 PULLEY 14T 14T プ リ 4 1 FS5 6581 000 2 SPACER PICK UP SHAFT 給紙軸スペーサ 4 2 FS6 2892 000 1 SPRING TENSION ヒッパリ バネ 4 3 FS6 2893 000 1 SPRING TENSION ヒッパリ バネ 4 4 FS6 2985 000 1 SPRING TENSION ヒッパリ バネ 4 5 FS7 0039 000 1 GEAR 16T 16T ギア 4 6 FS7 0040 000 1 GEAR 20T 20T ギア 4 7 FS7 0041 000 1 GEAR 16T 20T 16T 20T ギア 4 8 FS7 2057 000 1 SPRING TENSION ヒッパリ バネ 4 9 VS1 5057 012 1 CONNECTOR SNAP TIGHT チュウケイ コネク...

Page 853: ...NG E E リング 5 0 5 XD2 1100 502 11 RING E E リング 5 0 6 XD3 1200 102 1 PIN SPRING スプリング ピン 5 0 7 XD3 1200 122 2 PIN SPRING スプリング ピン 5 0 8 XD3 2200 082 1 PIN DOWEL ヘイコウ ピン 5 0 9 XD3 2200 102 3 PIN DOWEL ヘイコウ ピン 5 1 0 XD3 2200 122 1 PIN DOWEL ヘイコウ ピン COPYRIGHT 2001 CANON INC CANON iR105 REV 0 AUG 2001 315 4 ...

Page 854: ...2 This assembly does not include the part shown with key No 13 6 14 15 14 2 5 16 3 4 12 2 17 8 10A 10 17 11 502 501 13 注1 このユニットはFigure315のユニットに含まれます 注2 このユニットにKey No 13の部品は含まれません 7 9 1 FIGURE 316 MULTI FEED TRAY ASSEMBLY 手差し給紙トレイ部 COPYRIGHT 2001 CANON INC CANON iR105 REV 0 AUG 2001 316 1 ...

Page 855: ... 8709 000 1 LABEL LIMIT PAPER HEIGHT 用紙積載限界ラベル 1 1 FG5 1958 000 1 MULTI VR PCB ASSEMBLY マルチ VR キバン ブ SVR1 J225 1 2 FS5 3177 000 1 PULLEY IDLER アイドラ プーリ 1 3 FS7 8289 000 1 LABEL SIZE 手差しサイズ ラベル AB SIZE SEE NOTE 2 FS6 8706 000 1 LABEL PAPER SIZE 紙サイズ ラベル A INCH SIZE SEE NOTE 2 FS6 8707 000 1 LABEL PAPER SIZE 紙サイズ ラベル A SIZE SEE NOTE 2 FS6 8708 000 1 LABEL PAPER SIZE 紙サイズ ラベル AB INCH SIZE SEE NOTE 2 ...

Page 856: ... 58 504 12 65 10 65A 120 93 93 100 9 8 6 537 7 60 522 75 89 31 122 144 注1 このユニットはFigure325 330 350 351 810のユニットを含みます 注2 このユニットにKey No 43 66 120 141の部番は含まれません 57 84 133 135 129 132 134 128 130 58A 43 84 91 532 539 143 513 142 66 136 137 508 514 521 506 527 529 42 59 72 518 81 538 520 70 111 141 511 61 139 140 92 501 53 52 54 512 69 62 131 502 526 56 77 125 FIGURE 320 FIXING FEEDER FRAME ASSEMBLY 1 ...

Page 857: ...6 34 118 118 119 33 117 84 38 117 84 507 B B 104 118 108 110 85 41 41 19 39 49 39 19 67 119 34 503 103 146 40 522 99 533 533 99 63 82 106 79 107 40 524 102 530 20 506 534 102 146 103 139 525 508 526 140 44 124 516 145 123 145 502 519 124 96 96 FIGURE 320 FIXING FEEDER FRAME ASSEMBLY 2 3 定着 搬送基台部 2 3 COPYRIGHT 2001 CANON INC CANON iR105 REV 0 AUG 2001 320 2 ...

Page 858: ... J2031 115 515 535 50 29 94 26 25 90 536 109 28 27 116 114 5 87 47 14 535 121 113 526 528 84 13 11 16 15 101 C C D D 4 139 521 98 510 147 150 523 149 517 150 509 137 137 522 529 46 45 80 2 531 51 507 502 78 74 FIGURE 320 FIXING FEEDER FRAME ASSEMBLY 3 3 定着 搬送基台部 3 3 COPYRIGHT 2001 CANON INC CANON iR105 REV 0 AUG 2001 320 3 ...

Page 859: ...AM REGISTRATION レジスト回転カム 1 0 FB2 8213 000 1 COVER HANDLE REAR ハンドル裏カバー 1 1 FB2 8214 000 1 SPRING COMPRESSION アッシュク バネ 1 2 FB2 8217 020 1 SPRING LEAF 板バネ 1 3 FB2 8376 000 1 GUIDE SHAFT 軸調整ガイド 1 4 FB3 2331 000 1 SPACER スペーサ 1 5 FB3 8398 000 1 GUIDE HANDLE ハンドル ガイド 1 6 FB3 8457 000 1 SHAFT HANDLE LOCK ハンドル ロック軸 1 7 FB4 2061 000 1 PLATE LATCH ラッチ板 1 8 FB4 2062 000 1 SPRING TORSION ネジリ バネ 1 9 FB4 2067 ...

Page 860: ...4 000 2 BELT TIMING タイミング ベルト 4 1 FB4 2317 000 2 SPRING LEAF 板バネ 4 2 FB4 2327 000 1 TERMINAL BIAS バイアス接点 4 3 FB4 7878 000 1 COVER TRANSFER 転写カバー SEE NOTE 2 4 4 FB4 9797 020 1 COVER FIXING FEEDER LOWER 定着 搬送カバー 下 4 5 FB5 0527 000 1 DUCT COOLING 冷却ダクト 4 6 FB5 0539 000 1 SHAFT SENSOR 検知軸 4 7 FB5 3407 000 6 ROLLER DELIVERY OUTER 外排紙ローラ 4 8 FB5 7075 000 1 SHAFT DELIVERY 排紙ローラ軸 4 9 FB5 7076 000 2 ROLLER...

Page 861: ...モータ ギア ユニット 7 0 FF6 1509 000 1 LINK LOCK RELEASE ロック解除リンク 7 1 FG6 1871 000 1 CABLE EXT DELIVERY SENSOR 外排紙センサ束線 J184 210 7 1 A VS1 5057 003 1 CONNECTOR SNAP TIGHT チュウケイ コネクタ J210 7 2 FG6 1876 000 1 CABLE FIXING HIGH VOLTAGE 定着高圧束線 7 3 FG6 1879 000 1 CABLE LOCK SOLENOID ロック ソレノイド中継束線 J204 205 7 3 A VS1 5057 003 1 CONNECTOR SNAP TIGHT チュウケイ コネクタ J205 7 3 B VS1 5057 004 1 CONNECTOR SNAP TIGHT チュウケイ コ...

Page 862: ...グ 9 5 FS5 2907 020 1 SPRING TORSION ネジリ バネ 9 6 FS5 2947 000 2 SPRING TENSION ヒッパリ バネ 9 7 FS5 2949 000 1 SPRING TORSION ネジリ バネ 9 8 FS5 2967 000 1 SPRING TENSION ヒッパリ バネ 9 9 FS5 3615 000 2 PULLEY 18T 18T プーリ 1 0 0 FS5 6329 000 1 SHIM HANDLE ハンドル ワッシャ 1 0 1 FS5 6487 000 1 SHIM ワッシャ 1 0 2 FS5 6487 000 2 SHIM ワッシャ 1 0 3 FS5 6488 000 4 WASHER ワッシャ 1 0 4 FS5 6575 000 1 ROLLER BACKLASH バックラッシュ コロ 1 0 5 FS...

Page 863: ...NAP TIGHT チュウケイ コネクタ J209 1 2 7 VS1 5057 003 1 CONNECTOR SNAP TIGHT チュウケイ コネクタ J2030 1 2 8 VS1 6313 013 1 CONNECTOR 13P FEMALE コネクタ メス J197 1 2 9 VS1 6313 020 1 CONNECTOR 20P FEMALE コネクタ メス J180 1 3 0 VS1 6314 013 1 CONNECTOR 13P FEMALE コネクタ メス J197 1 3 1 VS1 6314 020 1 CONNECTOR 20P FEMALE コネクタ メス J180 1 3 2 VS1 6327 026 1 CONNECTOR 26P FEMALE コネクタ メス J197 1 3 3 VS1 6327 040 1 CONNECTOR 40P FEMAL...

Page 864: ... SCREW MACH TRUSS HEAD M4X4 バインド ネジ 5 0 6 XB1 2400 409 4 SCREW MACH TRUSS HEAD M4X4 バインド ネジ 5 0 7 XB1 2400 609 46 SCREW MACH TRUSS HEAD M4X6 バインド ネジ 5 0 8 XB1 2400 609 5 SCREW MACH TRUSS HEAD M4X6 バインド ネジ 5 0 9 XB1 2401 409 3 SCREW MACH TRUSS HEAD M4X14 バインド ネジ 5 1 0 XB1 2404 009 2 SCREW MACH TRUSS HEAD M4X40 バインド ネジ 5 1 1 XB2 7400 806 1 SCREW W WASHER M4X8 バネツキ バインド ネジ 5 1 2 XB2 8401 009 4 SCREW ...

Page 865: ...2 9 XD2 1100 802 15 RING E E リング 5 3 0 XD2 2100 802 1 RING GRIP グリップ リング 5 3 1 XD3 1200 102 1 PIN SPRING スプリング ピン 5 3 2 XD3 1300 082 1 PIN SPRING スプリング ピン 5 3 3 XD3 2200 102 3 PIN DOWEL ヘイコウ ピン 5 3 4 XD3 2200 122 1 PIN DOWEL ヘイコウ ピン 5 3 5 XD3 2200 142 7 PIN DOWEL ヘイコウ ピン 5 3 6 XD3 2200 162 1 PIN DOWEL ヘイコウ ピン 5 3 7 XD3 2200 202 1 PIN DOWEL ヘイコウ ピン 5 3 8 XD3 2300 202 1 PIN DOWEL ヘイコウ ピン 5 3 9 XD3 2...

Page 866: ...s assembly is included in the assembly shown in Figure 320 J200 J201 J199 J198 PS5 J199 注 このユニットはFigure320のユニットに含まれます 29A 29 29B 30 33 24 34 A A 40 34 507 505 7 14 14 38 39 41 508 16 26 4 503 506 21A 22A 24A 20 19 18 37 FIGURE 325 REGISTRATION TRANSFER ASSEMBLY レジスト 転写部 COPYRIGHT 2001 CANON INC CANON iR105 REV 0 AUG 2001 325 1 ...

Page 867: ... 1 4 FB4 3860 000 2 BUSHING ブッシング 1 5 FB4 9033 000 1 PLATE PIN フロート ピン 1 6 FB4 9515 000 1 COVER TERMINAL 接点カバー 1 7 FB5 7676 000 2 COLLAR REGISTRATION LOWER レジスト カラー 下 1 8 FB6 0473 000 1 RETAINER DUCT 1 ダクト押え 1 1 9 FB6 0474 000 1 RETAINER DUCT 2 ダクト押え 2 2 0 FB6 2372 000 1 COVER REGISTRATION CLUTCH レジスト クラッチ カバー 2 1 FF5 7872 000 1 GUIDE REGISTRATION LOWER レジスト前ガイド 下 2 1 A FB4 3853 000 1 SHEET PROTEC...

Page 868: ...ワッシャ 3 5 FS6 0056 000 1 GEAR 32T 32T ギア 3 6 FS7 0901 000 1 GEAR 38T 38T ギア 3 7 XA9 0253 000 7 SCREW MACH PAN HEAD M3X8 ナベ ネジ 3 8 XA9 0626 000 2 SCREW RS M3X6 RS タイト ネジ 3 9 XA9 0628 000 21 SCREW RS M4X8 RS タイト ネジ 4 0 XA9 0633 000 1 SCREW RS M4X8 RS タイト ネジ 4 1 XA9 1030 000 3 SCREW RS M4X12 RS タイト ネジ 4 2 XG9 0472 000 2 BALL BEARING MF128ZZ1MC3EECZZ ボール ベアリング 5 0 1 XB1 2300 409 4 SCREW MACH TRUSS HEAD...

Page 869: ...000 2 ROLLER FEEDER BELT DRIVE 駆動ローラ 3 FB4 2093 000 1 ROLLER FEEDER BELT DRIVE 駆動ローラ 4 FB4 2094 000 1 ROLLER IDLER 従動ローラ 5 FB6 0484 000 2 BELT PAPER FEED 搬送ベルト 6 FB6 0485 000 1 BELT PAPER FEED 搬送ベルト 7 XA9 0605 000 5 SCREW M4X8 タイト ネジ 8 XG9 0250 000 2 BEARING BALL ボール ベアリング 5 0 1 XD2 1100 642 2 RING E E リング 5 0 2 XD2 1100 802 2 RING E E リング 5 0 3 XD3 2200 142 1 PIN DOWEL ヘイコウ ピン 5 0 4 XD3 2200 162 ...

Page 870: ...2 18 11 504 25 7 25 1 NOTE This assembly is included in the assembly shown in Figure 320 注 このユニットはFigure320のユニットに含まれます 502 27 501 9 503 13 5 21 FIGURE 350 INTERNAL DELIVERY UPPER ASSEMBLY 内排紙上部 COPYRIGHT 2001 CANON INC CANON iR105 REV 0 AUG 2001 350 1 ...

Page 871: ...6 MOUNT CLAW UPPER 分離爪台 上 1 3 FB5 6976 000 6 SUPPORT SEPARATION CLAW 爪支板 1 4 FB5 7666 000 6 HOLDER FEEDER ROLLER 搬送コロ ホルダ 1 5 FB5 7668 000 4 GUIDE UPPER 1 上ガイド 1 1 6 FB5 8717 000 2 GUIDE UPPER 2 上ガイド 2 1 7 FB5 8729 000 6 ROLLER INSIDE DELIVERY 内排紙コロ 1 8 FB6 0599 000 6 SPRING TORSION ネジリ バネ 1 9 FF5 5914 000 1 SHAFT RECIPROCATION レシプロ軸 2 0 FS1 1401 000 1 BUSHING ブッシング 2 1 FS1 9199 000 2 SCREW STEPPE...

Page 872: ...BER R A N K Q T Y DESCRIPTION SERIAL NUMBER REMARKS 350 5 0 3 XB6 7300 609 2 SCREW TP M3X6 TP ネジ 5 0 4 XD2 1100 242 18 RING E E リング 5 0 5 XD2 1100 502 2 RING E E リング COPYRIGHT 2001 CANON INC CANON iR105 REV 0 AUG 2001 350 3 ...

Page 873: ......

Page 874: ...key No 3 27 and 32 31 18 19 注1 このユニットはFigure320のユニットに含まれます 注2 このユニットにKey No 3 27 32の部品は含まれません 1 20 25 2 12 20 28 5 26 A A B B 23 30 21 503 6 24 11 8 10 18 24 502 29 27 9 4 7 7 30 19 15 501 17 504 17 3 32 13 22D 22C 22A 22B 22 FIGURE 351 EXTERNAL DELIVERY UPPER ASSEMBLY 外排紙上部 COPYRIGHT 2001 CANON INC CANON iR105 REV 0 AUG 2001 351 1 ...

Page 875: ...1 2 FB5 2508 000 1 PLATE LOCK REAR ロック爪 後 1 3 FB5 3395 000 4 ROLLER CURL カール付けコロ 1 4 FB5 3410 000 6 ROLLER EXTERNAL DELIVERY 外排紙コロ 1 5 FB5 3421 000 4 ROLLER CURL 2 カール付けコロ 2 1 6 FB5 7657 000 6 HOLDER FEEDER ROLLER 搬送コロ ホルダ 1 7 FB5 7662 000 4 HOLDER ROLLER ローラ ホルダ 1 8 FB5 7663 000 4 SPRING LEAF 板バネ 1 9 FB5 7664 000 4 SPRING LEAF 板バネ 2 0 FC1 7438 000 2 BUSHING ブッシング 2 1 FF6 1029 000 1 GUIDE EXTERNAL...

Page 876: ...ビス 2 9 FS6 2885 000 1 SPRING TENSION ヒッパリ バネ 3 0 FS6 2886 000 2 SPRING TENSION ヒッパリ バネ 3 1 XA9 0626 000 8 SCREW RS M3X6 RS タイト ネジ 3 2 XA9 0628 000 1 SCREW RS M4X8 RS タイト ネジ SEE NOTE 2 5 0 1 XB1 2300 609 7 SCREW MACH TRUSS HEAD M3X6 バインド ネジ 5 0 2 XD2 1100 402 1 RING E E リング 5 0 3 XD2 2100 502 1 RING GRIP グリップ リング 5 0 4 XD2 2300 242 4 RING TOOTHED LOCK ハツキ トメワ COPYRIGHT 2001 CANON INC CANON iR105 RE...

Page 877: ......

Page 878: ...19 J333 CL16 J332 CL17 J331 SL11 J3604 32 32 38 36 75 46 119 116 89 98 118 89 119 119 49 120 119 97 122 21 20 515 516 26 26 121 90 90 26 108 110 501 514 19 114 511 511 74 74 112 55 53 81 87 87 86 88 37 36 113 40 106 117 90 508 55A FIGURE 360 DUPLEXING FEEDER ASSEMBLY 1 3 両面搬送部 1 3 COPYRIGHT 2001 CANON INC CANON iR105 REV 0 AUG 2001 360 1 ...

Page 879: ... 517 85 2 517 80 100 43 100 52 17 30 96 78 8 16 84 93 2 13 13 13 77 118 89 104 27 517 44 62 67 44 105 68A 6 105 30 9 105 105 513 39 6 108 110 112 503 514 515 33 72 39 39 73 505 73 41 42 35 35 57 77 83 506 63 70 67A 118 89 79 118 62A 68A 68 69 64A 107 504 507 FIGURE 360 DUPLEXING FEEDER ASSEMBLY 2 3 両面搬送部 2 3 COPYRIGHT 2001 CANON INC CANON iR105 REV 0 AUG 2001 360 2 ...

Page 880: ... J326 J327 J334 M15 J329 J329 J326 J336 J366 J323 J3601 J3602 J3603 J335 PS18 J335 J330 J322 J3605 J338 J340 J3609 J3608 J3607 J381 J380 59 59A 59A 105 44 59A 59D 59C 61 108 34 510 76 504 71 502 109 105 91 110 503 512 94 509 11 1 111 66A 66B 66B 60A FIGURE 360 DUPLEXING FEEDER ASSEMBLY 3 3 両面搬送部 3 3 COPYRIGHT 2001 CANON INC CANON iR105 REV 0 AUG 2001 360 3 ...

Page 881: ... 2124 000 1 GUIDE SIDE REGISTRATION SLIDE 横レジ スライド ガイド 1 3 FB4 2131 000 5 GUIDE HINGE ヒンジ ガイド 1 4 FB4 2132 000 2 ROLLER FEED 搬送ローラ 1 5 FB4 2133 000 2 HOLDER ROLLER ローラ ホルダ 1 6 FB4 2135 000 1 DEFLECTOR フラッパ 1 7 FB4 2136 000 1 SUPPORT DEFLECTOR フラッパ支持板 1 8 FB4 2145 000 1 ROLLER STEEL 鉄ローラ 1 9 FB4 2149 000 1 ARM SOLENOID ソレノイド アーム 2 0 FB4 2150 000 1 LINK SOLENOID ソレノイド リンク 2 1 FB4 2151 000 1 PLATE FL...

Page 882: ... 000 1 GUIDE DUPLEXING OUTLET 両面出口ガイド 4 4 FB6 2397 000 4 ROLLER コロ 4 5 FF5 7734 000 2 PLATE LOCK ロック板 4 6 FF5 7736 000 1 ROLLER REVERSE 1 反転ローラ 1 4 7 FF5 7737 020 2 PLATE SENSOR SUPPORT センサ支板 4 8 FF5 7948 000 1 PLATE POSITIONING FRONT 位置決め板 前 4 9 FF5 7949 000 1 PLATE POSITIONING REAR 位置決め板 後 5 0 FF5 8200 000 1 GUIDE LOWER FEEDER UPPER 下搬送ガイド 上 5 1 FF5 8201 000 1 GUIDE REVERSING 反転ガイド 5 2 FF5 8202 ...

Page 883: ... 6 5 FG6 8605 000 1 OPTICAL SENSOR PCB ASSEMBLY 光学センサ回路基板 PS26 J328 6 6 FG6 8616 000 1 CABLE THROUGH PATH DRAWER スルーパス ドロア束線 J322 323 326 329 330 J336 338 340 366 380 J381 3601 3603 3605 J3607 3609 6 6 A VS1 5057 006 1 CONNECTOR SNAP TIGHT チュウケイ コネクタ J329 6 6 B WT2 5565 000 5 CLAMP CABLE ソクセン オサエ 6 7 FG6 8617 000 1 CABLE OUTLET SENSOR CONNECT 出口センサ中継束線 J338 339 6 7 A VS1 5057 003 1 CONNECTOR SNAP ...

Page 884: ...ワッシャ 9 0 FS5 6488 000 4 WASHER ワッシャ 9 1 FS5 9221 000 1 SCREW RS STEPPED M3 RS タイト 段ビス 9 2 FS6 0070 000 1 GEAR 40T 40T ギア 9 3 FS6 0145 000 1 GEAR 16T 16T ギア 9 4 FS6 0557 000 1 GEAR 12T 36T 12T 36T ギア 9 5 FS6 2769 000 4 SPRING COMPRESSION アッシュク バネ 9 6 FS6 2770 000 1 SPRING TENSION ヒッパリ バネ 9 7 FS6 2771 000 2 SPRING TENSION ヒッパリ バネ 9 8 FS6 2772 000 2 SPRING TENSION ヒッパリ バネ 9 9 FS6 2773 000 2 SPRING CO...

Page 885: ... ボール ベアリング 1 2 1 XG9 0291 000 2 BEARING BALL ボール ベアリング 1 2 2 XG9 0362 000 2 BEARING BALL DDL 1260ZZR ボール ベアリング 5 0 1 XB1 2300 409 2 SCREW MACH TRUSS HEAD M3X4 バインド ネジ 5 0 2 XB1 2300 409 4 SCREW MACH TRUSS HEAD M3X4 バインド ネジ 5 0 3 XB1 2400 609 2 SCREW MACH TRUSS HEAD M4X6 バインド ネジ 5 0 4 XB1 2400 609 19 SCREW MACH TRUSS HEAD M4X6 バインド ネジ 5 0 5 XB1 2401 009 6 SCREW MACH TRUSS HEAD M4X10 バインド ネジ 5 0 6 X...

Page 886: ... XD2 1100 642 34 RING E E リング 5 1 6 XD3 1300 082 1 PIN SPRING スプリング ピン 5 1 7 XD3 2200 122 3 PIN DOWEL ヘイコウ ピン 5 1 8 XD3 2200 142 3 PIN DOWEL ヘイコウ ピン 5 1 9 XD3 2200 162 2 PIN DOWEL ヘイコウ ピン 5 2 0 XD3 2200 182 1 PIN DOWEL ヘイコウ ピン COPYRIGHT 2001 CANON INC CANON iR105 REV 0 AUG 2001 360 9 ...

Page 887: ......

Page 888: ... J166 NOTE This assembly does not include the part shown with key No 15 4 11 5 14 4 4 11 5 10 3 3 19 3 2 3 1 505 502 23 A A 503 504 4 15 注 このユニットにKey No 15の部品は含まれません 505 12 13 FIGURE 420 MIRROR ASSEMBLY 1 第1ミラー台部 COPYRIGHT 2001 CANON INC CANON iR105 REV 0 AUG 2001 420 1 ...

Page 889: ...AF MIRROR ミラー押えバネ 1 5 FB4 0867 000 1 LABEL WARNING サービス注意ラベル SEE NOTE 100V FB4 0868 000 1 LABEL WARNING サービス注意ラベル SEE NOTE 208 220 240V 1 6 FB4 2385 000 1 FLAG SENSOR センサ フラグ 1 7 FF5 6579 000 1 MIRROR 1 第1ミラー 1 8 FG6 1943 000 1 EXPOSURE SENSOR PCB ASSEMBLY 調光センサ基板 J165 1 9 FG6 2326 000 1 CABLE EXPOSURE SENSOR 調光センサ中継束線 J164 165 2 0 FH2 6453 000 1 CABLE FLUORESCENT LAMP 蛍光灯束線 J163 164 166 2 1 FH7 3...

Page 890: ...FIGURE KEY NO PART NUMBER R A N K Q T Y DESCRIPTION SERIAL NUMBER REMARKS 420 5 0 6 XD2 2300 202 4 RING TOOTHED LOCK ハツキ トメワ COPYRIGHT 2001 CANON INC CANON iR105 REV 0 AUG 2001 420 3 ...

Page 891: ......

Page 892: ...3 503 12 5 7 6 9 10 9 10 2 501 4 504 502 1 5 5 11 11 5 8 1 8 13 13 6 7 6 6 505 FIGURE 430 MIRROR ASSEMBLY 2 第2ミラー台部 COPYRIGHT 2001 CANON INC CANON iR105 REV 0 AUG 2001 430 1 ...

Page 893: ... 2 PAD OIL オイル パッド 8 FB4 0825 000 2 PAD OIL LEFT オイル パッド 左 9 FB4 0831 000 2 SPRING LEAF 板バネ 1 0 FB4 0864 000 2 SPRING LEAF MIRROR ミラー押えバネ 1 1 FF5 6581 000 2 MIRROR 2 3 第2 第3ミラー 1 2 FS1 9009 000 2 SCREW STEPPED M3 ダンビス 1 3 XA9 0425 000 3 SETSCREW HEX SOCKET ロッカク アナツキ トメネジ 5 0 1 XB1 2300 409 3 SCREW MACH TRUSS HEAD M3X4 バインド ネジ 5 0 2 XB6 7300 409 9 SCREW TP M3X4 TP ネジ 5 0 3 XD2 1100 642 1 RING E E リ...

Page 894: ...03の部品は含まれません J763 J764 SEE FIGURE 935 NOTE This assembly does not include the parts shown with key No 1 2 3 4 9 501 502 and 503 501 6 9 2 7 502 3 4 503 FIGURE 460 SCANNER ASSEMBLY スキャナ部 COPYRIGHT 2001 CANON INC CANON iR105 REV 0 AUG 2001 460 1 ...

Page 895: ...MOTOR ポリゴン モータ束線 J763 764 6 FG6 8601 000 1 POLYGON MOTOR DRIVER PCB ASS Y ポリゴン モータ ドライバ基板 7 FS6 8820 000 1 LABEL WARNING LASER レーザ注意ラベル 100 208V FS5 8623 000 1 LABEL WARNING LASER レーザ注意ラベル 220 240V 8 XA9 0385 000 6 SCREW W WASHER TRUSS HEAD バネツキ ネジ 9 XA9 0643 000 4 SCREW RS M4X10 RS タイト ネジ SEE NOTE 5 0 1 XB1 2301 209 2 SCREW MACH TRUSS HEAD M3X12 バインド ネジ SEE NOTE 5 0 2 XB1 2400 609 2 SCREW MACH TR...

Page 896: ...7A 501 7C 7 504 2 10 7B 10 7B 6 4 503 8 9 505 3 11 5 1 H3 502 FIGURE 510 PHOTO SENSITIVE DRUM ASSEMBLY 感光ドラム部 COPYRIGHT 2001 CANON INC CANON iR105 REV 0 AUG 2001 510 1 ...

Page 897: ...子 1 7 B FA3 2395 000 2 BRUSH 摺電ブラシ 7 C FB3 6117 000 1 TERMINAL 2 摺電ブラシ端子 2 8 FH6 3994 000 1 HEATER CONTROL PCB ASSEMBLY ヒータ制御回路基板 9 FH7 4714 000 1 HEATER DRUM ドラム ヒータ 200 208V H3 FH7 4715 000 1 HEATER DRUM ドラム ヒータ 220 240V H3 1 0 FS2 2036 020 2 SPRING COMPRESSION アッシュク バネ 1 1 XG9 0307 000 1 BEARING BALL ボール ベアリング 5 0 1 XA1 6260 409 2 SCREW M2 6X4 ナベ ネジ 5 0 2 XB1 2300 609 2 SCREW MACH TRUSS HEAD M3...

Page 898: ...13 5 4 6 508 506 15 507 3 3 18 17 501 507 24 22 505 8 3 3 8 23 14 21 19 NOTE This assembly does not include the part shown with key No 21 注 このユニットにKey No 21の部品は含まれません FIGURE 550 PRIMARY CORONA ASSEMBLY 一次帯電器 COPYRIGHT 2001 CANON INC CANON iR105 REV 0 AUG 2001 550 1 ...

Page 899: ...7705 000 1 BLOCK PRIMARY CORONA FRONT 一次帯電器ブロック 前 1 5 FF5 7706 000 1 BLOCK PRIMARY CORONA REAR 一次帯電器ブロック 後 1 6 FG6 1858 000 1 CABLE MOTOR CONNECTING モータ中継束線 J104 105 1 7 FH6 1135 000 1 MOTOR DC 1 36W DCモ タ M8 J105 1 8 FS6 0115 000 1 GEAR 18T 18T ギア 1 9 FY1 0883 000 AR WIRE GRID 0 1MM 100M グリッド ワイヤ 2 0 VS1 5057 002 1 CONNECTOR SNAP TIGHT チュウケイ コネクタ J105 2 1 VS1 5057 002 1 CONNECTOR SNAP TIGHT チュウケイ...

Page 900: ... R A N K Q T Y DESCRIPTION SERIAL NUMBER REMARKS 550 5 0 6 XB6 7300 609 1 SCREW TP M3X6 TP ネジ 5 0 7 XD1 2100 307 1 WASHER PLAIN ヒラ ザガネ 5 0 8 XD2 1100 242 1 RING E E リング COPYRIGHT 2001 CANON INC CANON iR105 REV 0 AUG 2001 550 3 ...

Page 901: ......

Page 902: ... 4 504 9 6 15 16 1 12 8 23 21 22 J149 J149 M7 J130 J150 LED2 J150 19 503 11 505 10 2 25 24 501 18 502 23 5 20 FIGURE 570 PRE TRANSFER CORONA ASSEMBLY 転写前帯電器 COPYRIGHT 2001 CANON INC CANON iR105 REV 0 AUG 2001 570 1 ...

Page 903: ... 1 4 FB5 9354 000 1 PLATE SCRAPER RETAINING スクレーパ押え板 1 5 FF5 2942 020 1 PLATE PRESSURE 加圧板 1 6 FF5 9552 000 1 CLEANER WIRE ワイヤ クリーナ 1 7 FF6 1031 000 1 MOUNT PRE TRANSFER SCRAPER 転写前スクレーパ 1 8 FG6 7185 000 1 PRE TRANSFER EXPOSURE UNIT 転写露光ユニット LED2 J150 1 9 FG6 7203 000 1 CABLE PRE TRANSFER CONNECTING 転写前中継束線 J130 149 150 2 0 FG9 3863 000 1 PRE TRANSFER SUB UNIT 転写前サブ ユニット 2 1 FH6 1135 000 1 MOTOR D...

Page 904: ...FIGURE KEY NO PART NUMBER R A N K Q T Y DESCRIPTION SERIAL NUMBER REMARKS 570 5 0 5 XD2 1100 242 1 RING E E リング COPYRIGHT 2001 CANON INC CANON iR105 REV 0 AUG 2001 570 3 ...

Page 905: ......

Page 906: ...17 4 5 1 11 7 25 1 14 12 15 14 15 6 14 25 8 25 14 503 1 24 26 28 3 1 10 13 29 30 10 27 23 501 M9 J206 16 10 502 2 FIGURE 580 TRANSFER SEPARATE CORONA ASSEMBLY 転写 分離帯電器 COPYRIGHT 2001 CANON INC CANON iR105 REV 0 AUG 2001 580 1 ...

Page 907: ... 1 3 FB5 0530 000 1 BLOCK SEPARATION REAR 分離ブロック 後 1 4 FB5 2394 000 4 BLOCK ADJUSTING 調整コマ 1 5 FB5 2515 000 2 PAD CUSHION 防振パッド 1 6 FB5 3105 000 1 TERMINAL TRANSFER SEPARATION 転写 分離接点板 1 7 FB5 9648 000 2 GUIDE CORONA WIRE 高さ調整コマ 1 8 FB6 0502 000 1 GUIDE PAPER SEPARATION 分離紙ガイド 1 9 FF5 6883 000 1 BLOCK WIRE CLEANING PAD 帯電線清掃パッド ブロック 2 0 FF5 6884 000 1 BLOCK WIRE CLEANING PAD 帯電線清掃パッド ブロック 2 1 FF5 ...

Page 908: ...A9 0228 000 4 SCREW MACH C S HEAD M4X18 サラ ネジ 3 1 XA9 0915 000 1 SCREW M3X6 タイト ネジ 5 0 1 XB1 2300 609 8 SCREW MACH TRUSS HEAD M3X6 バインド ネジ 5 0 2 XB2 7300 607 1 SCREW W WASHER M3X6 バネツキ バインド ネジ 5 0 3 XD2 1100 242 1 RING E E リング COPYRIGHT 2001 CANON INC CANON iR105 REV 0 AUG 2001 580 3 ...

Page 909: ......

Page 910: ...y does not include the parts shown with key No 10 19 26 and 506 J272 NOTE1 This assembly includes the assembly shown in Figure 720 29 512 509 注2 このユニットにKey No 10 19 26 506の部品は含まれません 注1 このユニットはFigure720のユニットを含みます 32 31 34 33 53 51A A A 503 36 89 38 507 36 37 506 59 518 80 511 515 FIGURE 600 AP KIT ASSEMBLY 1 2 APキット部 1 2 COPYRIGHT 2001 CANON INC CANON iR105 REV 0 AUG 2001 600 1 ...

Page 911: ...29 J5031 J5032 J5032 41 74 45 83 504 11 522 18 52 9 2 47 15 43 84 514 75 61 75 520 22 21 19 16 502 67 23 76 515 518 54 73 78 71 507 39 91 86 54A 503 10 508 71 X 40 513 85 506 35 81 87 510 516 501 46 42 60 44 46 56 56A 57 88 5 505 FIGURE 600 AP KIT ASSEMBLY 2 2 APキット部 2 2 COPYRIGHT 2001 CANON INC CANON iR105 REV 0 AUG 2001 600 2 ...

Page 912: ...3 FB4 1585 000 1 SPRING TORSION ネジリ バネ 1 4 FB4 1590 000 2 SUPPORT CORONA FIXING 帯電器固定板 1 5 FB4 1592 000 1 PLATE BLADE BACKING ブレード背板 1 6 FB4 1594 000 1 HOLDER PRECONDITIONING A 前露光ホルダ A 1 7 FB4 1595 000 1 HOLDER PRECONDITIONING B 前露光ホルダ B 1 8 FB4 1600 000 1 HOLDER CONNECTOR コネクタ ホルダ 1 9 FB4 1607 000 1 HOLDER POSITIONING FRONT 位置決めホルダ 前 SEE NOTE 2 2 0 FB4 1609 000 1 LIMITER TORQUE トルク リミッタ 2 1 FB4 ...

Page 913: ...R スクレーパ シート 下 4 2 FB6 2380 000 2 HOUSING MOTOR モータ ハウジング 4 3 FB6 2385 000 1 SPRING LEAF 板バネ 4 4 FB6 2390 000 2 COVER MOTOR モータ カバー 4 5 FB6 2400 000 1 ARM RECIPROCATING レシプロ アーム 4 6 FB6 2402 000 2 RETAINER SWING PLATE 揺動板押さえ 4 7 FB6 2720 000 1 BLADE CLEANING クリーニング ブレード 4 8 FF2 2891 000 1 BUSHING ブッシング 4 8 A XG9 0111 000 1 SEAL OIL オイル シール 4 9 FF5 2986 000 1 SHUTTER WASTE TONER ハイトナ シャッタ 4 9 A FB2 ...

Page 914: ... FS5 1800 000 1 BUSHING ブッシング 6 5 FS5 1801 000 1 BUSHING ブッシング 6 6 FS6 0121 000 1 GEAR 14T 14T ギア 6 7 FS6 0136 000 1 GEAR 18T 18T ギア 6 8 FS6 0138 000 2 GEAR 30T 30T ギア 6 9 FS6 0972 000 1 GEAR 14T 14T ギア 7 0 FS6 0973 000 1 GEAR 14T 26T 14T 26T ギア 7 1 FS6 0975 000 2 GEAR 24T 24T ギア 7 2 FS6 0976 000 1 GEAR 20T 20T ギア 7 3 FS6 0977 000 1 GEAR 14T 26T 14T 26T ギア 7 4 FS6 0978 000 1 GEAR 14T 14T ギア 7 5 FS...

Page 915: ... SCREW MACH TRUSS HEAD M3X6 バインド ネジ 5 0 4 XB1 2300 809 4 SCREW MACH TRUSS HEAD M3X8 バインド ネジ 5 0 5 XB1 2301 007 4 SCREW MACH TRUSS HEAD M3X10 バインド ネジ 5 0 6 XB1 2400 609 7 SCREW MACH TRUSS HEAD M4X6 バインド ネジ SEE NOTE 2 5 0 7 XB1 2400 609 36 SCREW MACH TRUSS HEAD M4X6 バインド ネジ 5 0 8 XB1 2401 609 2 SCREW MACH TRUSS HEAD M4X16 バインド ネジ 5 0 9 XB2 7300 607 1 SCREW W WASHER M3X6 バネツキ バインド ネジ 5 1 0 XB2 8300 6...

Page 916: ...R R A N K Q T Y DESCRIPTION SERIAL NUMBER REMARKS 600 5 2 0 XD2 1100 802 2 RING E E リング 5 2 1 XD2 2100 802 1 RING GRIP グリップ リング 5 2 2 XD2 2300 602 3 RING GRIP グリップ リング COPYRIGHT 2001 CANON INC CANON iR105 REV 0 AUG 2001 600 7 ...

Page 917: ......

Page 918: ...29 30 28 14 31 27 24 21 34 26 11 12 19 505 4 508 15 10 9 TS3 J142 NOTE This assembly includes the assembly shown in Figure 645 509 注 このユニットはFigure645のユニットを含みます 501 502 504 510 506 507 503 5 3 FIGURE 640 DEVELOPING ASSEMBLY 現像器 COPYRIGHT 2001 CANON INC CANON iR105 REV 0 AUG 2001 640 1 ...

Page 919: ...B4 1837 000 1 TERMINAL BIAS バイアス電極 1 3 FB4 1862 000 2 ARM PRESSURE 加圧アーム 1 4 FB4 1866 000 2 MOUNT PRESSURE SLIDE 加圧スライド台 1 5 FB6 2370 000 1 CYLINDER DEVELOPING 現像シリンダ 1 6 FF5 7698 000 1 MOUNT TONER SENSOR トナー センサ台 1 7 FF5 7701 000 1 ROD STIRRING 3 撹拌棒 3 1 7 A FB4 1830 000 2 RUBBER STIRRING 攪拌ゴム 1 8 FF6 1041 000 1 MOUNT BLADE SUPPORT ブレード台 1 8 A FB5 6853 000 1 SHEET シート 1 9 FG6 1854 000 1 CABLE HV ...

Page 920: ...9 0120 000 2 BEARING BALL ボール ベアリング 5 0 1 XB1 2300 402 5 SCREW MACH TRUSS HEAD M3X4 バインド ネジ 5 0 2 XB1 2300 409 28 SCREW MACH TRUSS HEAD M3X4 バインド ネジ 5 0 3 XB1 2300 604 4 SCREW MACH TRUSS HEAD M3X6 バインド ネジ 5 0 4 XB2 7300 407 3 SCREW W WASHER M3X4 バネツキ バインド ネジ 5 0 5 XB4 7300 809 2 SCREW TAPPING TRUSS HEAD M3X8 バインド タッピン ネジ 5 0 6 XD1 1103 139 2 SHIM ヒョウジュン ワッシャ 5 0 7 XD1 1106 222 1 SHIM ヒョウジュン ワッシャ 5...

Page 921: ......

Page 922: ... 640 NOTE2 This assembly does not include the part shown with key No 502 2 3 503 4 7 6 509 506 9 502 20 15 13 13 5 8 16 18 17 19 20 1 14 12 508 507 501 11 10A 10B 10B 10B 10A 10 注1 このユニットはFigure640のユニットに含まれます 注2 このユニットにKey No 502の部品は含まれません 504 505 505 10C FIGURE 645 BUFFER ASSEMBLY バッファ部 COPYRIGHT 2001 CANON INC CANON iR105 REV 0 AUG 2001 645 1 ...

Page 923: ...42 1 0 C WT2 5565 000 1 CLAMP CABLE ソクセン オサエ 1 1 FH6 1543 000 1 MOTOR DC 16 8W DCモータ M18 J143 1 2 FH7 5840 000 1 CLUTCH ELECTROMAGNETIC 電磁クラッチ CL1 J141 1 3 FH7 7337 000 2 SENSOR TONER トナー センサ TS1 2 J139 140 1 4 FS1 1202 000 1 BUSHING ブッシング 1 5 FS1 1503 000 1 BUSHING ブッシング 1 6 FS2 0875 000 1 GEAR 16T 16T ギア 1 7 FS6 0988 000 1 GEAR 14T 27T 14T 27T ギア 1 8 FS6 0989 000 1 GEAR 18T 19T 18T 19T ギア 1 9 FS...

Page 924: ...MBER R A N K Q T Y DESCRIPTION SERIAL NUMBER REMARKS 645 5 0 7 XD2 1100 502 2 RING E E リング 5 0 8 XD2 1100 642 2 RING E E リング 5 0 9 XD2 2100 602 3 RING GRIP グリップ リング COPYRIGHT 2001 CANON INC CANON iR105 REV 0 AUG 2001 645 3 ...

Page 925: ......

Page 926: ... 10 10 17 8 7 17 2 502 16 1 18 3 NOTE This assembly is included in the assembly shown in Figure 600 注 このユニットはFigure600のユニットに含まれます FIGURE 720 SEPARATION CLAW DRIVE ASSEMBLY 分離爪駆動部 COPYRIGHT 2001 CANON INC CANON iR105 REV 0 AUG 2001 720 1 ...

Page 927: ... ミギ 8 FA3 2478 000 1 LEVER LEFT キリカエ レバ ヒダリ 9 FA3 2479 000 1 RACK ラツク 1 0 FA3 2480 000 2 SPRING LEAF イタ バネ 1 1 FA3 2481 000 1 SPRING LEAF クリック イタ バネ 1 2 FS2 0088 000 1 GEAR 20T 20T ギア 1 3 FS2 0089 000 2 GEAR 20T 20T ギア 1 4 FS2 0090 000 2 GEAR 25T 25T ギア 1 5 FS2 0091 000 1 GEAR 60T 60T ギア 1 6 FS2 2001 000 1 SPRING TORSION ネジリ バネ 1 7 FS2 2002 000 2 SPRING TENSION ヒッパリ バネ 1 8 FS2 2058 000 1 SPRING CO...

Page 928: ...J228 J239 PS19 J262 NOTE This assembly does not include the part shown with key No 9 12 1 7A 3 501 6 503 8 8B 4 502 9 注 このユニットにKey No 9の部品は含まれません 5 504 FIGURE 770 WASTE TONER ASSEMBLY 廃トナー部 COPYRIGHT 2001 CANON INC CANON iR105 REV 0 AUG 2001 770 1 ...

Page 929: ... コネクタ J239 8 FG6 1820 000 1 CABLE WASTE TONER SENSOR 廃トナー検知束線 J261 262 8 A VS1 5057 003 1 CONNECTOR SNAP TIGHT チュウケイ コネクタ J261 8 B WT2 5565 000 4 CLAMP CABLE ソクセン オサエ 9 FH2 6552 000 1 COVER CONNECTOR コネクタ カバー SEE NOTE 1 0 FH7 7462 000 1 PHOTO INTERRUPTER フォトインタラプタ PS19 J262 1 1 FS2 9410 000 1 SCREW STEPPED M4X12 7 段ビス 1 2 FS5 9398 000 1 SCREW SIDE REGIST M3X8 横レジ ビス 1 3 FS6 2760 000 1 SPRING COMPR...

Page 930: ...AP WASTE TONER 1 廃トナー キャップ 1 6 FB4 1794 000 1 PIPE WASTE TONER 廃トナー パイプ 7 FB4 1795 000 1 SHAFT WASTE TONER 廃トナー軸 8 FB4 1797 000 1 SUPPORT SPRING バネ受け 9 FS6 2756 000 1 SPRING COMPRESSION アッシュク バネ 1 0 FS7 0027 000 1 GEAR 26T 26T ギア 1 1 X62 7921 000 2 CLAMP CABLE 束線バンド 1 2 XG9 0211 000 2 BALL BEARING MF128ZZ1MC3D4M ボール ベアリング 5 0 1 XD2 1100 642 4 RING E E リング 5 0 2 XD3 2200 182 1 PIN DOWEL ヘイコウ ピン FIG...

Page 931: ......

Page 932: ...Figure 320 50 21 40 96 96 27 81 50 18 70 65 1 48 28 47 2 22 46 95 31 60 59 31 95 25 2 47 49 56 87 61 504 516 74 73 注 このユニットはFigure320のユニットに含まれます 80 518 56A 503 517 38 38 37 16 93 71 71 92 FIGURE 810 FIXING ASSEMBLY 1 2 定着器 1 2 COPYRIGHT 2001 CANON INC CANON iR105 REV 0 AUG 2001 810 1 ...

Page 933: ...0 J189 J188 J15 33 67 42 66 69 43 30 68 45 4 4 58 11 15 10 12 5 3 41 13 19 29 32 502 51 62 34 55D 55 55A 55C 54 9 53 24 23 79 514 14 36 508 91 90 507 72 512 86 86 506 515 516 510 501 94 503 511 39 505 64 89 35 63 63 17 52 52 6 509 513 FIGURE 810 FIXING ASSEMBLY 2 2 定着器 2 2 COPYRIGHT 2001 CANON INC CANON iR105 REV 0 AUG 2001 810 2 ...

Page 934: ...5 MOUNT ROWEL ハクシャ ダイ 1 1 FB2 7261 000 1 BUSHING レシプロ ジク ウケ 1 2 FB2 7264 000 5 ROWEL 拍車 1 3 FB3 8409 000 1 HOLDER THERMISTOR 2 サ ミスタ ホルダ 2 1 4 FB3 8412 000 1 COVER CROSSMEMBER ステイ カバー 1 5 FB3 9372 000 1 BLOCK MOUNTING 束線固定ブロック 1 6 FB4 2159 000 1 HOLDER BUSHING 軸受ホルダ 1 7 FB4 2183 000 1 MOUNT AC CONNECTOR 1 ACコネクタ台 1 1 8 FB4 2191 000 1 LEVER PAPER JAM SENSOR 滞留センサ レバー 1 9 FB4 2195 020 1 BLOCK CLAW S...

Page 935: ...ホルダ 1 4 2 FB5 6973 000 1 LEVER PAPER SENSOR ウェブ残量検知レバー 4 3 FB5 7077 000 1 PLATE LIMIT LEVER レバー規制板 4 4 FB5 7558 000 1 TERMINAL HEATER LARGE ヒータ端子 大 4 5 FB5 7559 000 1 TERMINAL HEATER SMALL ヒータ端子 小 4 6 FB5 7560 000 1 COLLAR FIXING ROLLER 定着ローラ カラー 4 7 FB5 7562 000 2 SUPPORT BEARING ベアリング押さえ 4 8 FB5 7660 000 1 GUIDE DELIVERY LOWER 排紙ガイド 下 4 9 FF5 7860 000 1 PIN POSITIONING 位置決めピン 5 0 FF6 1082 000 2 ...

Page 936: ...462 000 3 PHOTO INTERRUPTER フォトインタラプタ PS6 7 8 J194 188 189 6 2 FH7 7464 000 1 SUB THERMISTOR ASSEMBLY サブ サーミスタ部 TH2 J191 6 3 FS1 1449 000 2 BUSHING ブッシング 6 4 FS1 1569 000 1 BUSHING ブッシング 6 5 FS1 2834 000 2 SPRING TENSION ヒッパリ バネ 6 6 FS1 9051 000 1 SCREW STEPPED M3 段ビス 6 7 FS2 1256 000 2 BUSHING ブッシング 6 8 FS3 2053 000 1 SPRING TORSION ネジリ バネ 6 9 FS5 2940 000 1 SPRING TENSION ヒッパリ バネ 7 0 FS5 2950 00...

Page 937: ...406 000 1 BEARING BALL ボール ベアリング 9 5 XG9 0421 000 2 BEARING BALL ボール ベアリング 9 6 XG9 0447 000 2 BEARING BALL ボール ベアリング 5 0 1 XB1 2300 409 4 SCREW MACH TRUSS HEAD M3X4 バインド ネジ 5 0 2 XB1 2300 609 3 SCREW MACH TRUSS HEAD M3X6 バインド ネジ 5 0 3 XB1 2400 409 7 SCREW MACH TRUSS HEAD M4X4 バインド ネジ 5 0 4 XB1 2400 609 34 SCREW MACH TRUSS HEAD M4X6 バインド ネジ 5 0 5 XB1 2400 809 3 SCREW MACH TRUSS HEAD M4X8 バインド ネジ 5 ...

Page 938: ...10 5 1 5 XD2 1100 502 10 RING E E リング 5 1 6 XD2 1100 642 6 RING E E リング 5 1 7 XD2 1100 802 1 RING E E リング 5 1 8 XD2 1200 902 2 RING E E リング 5 1 9 XD3 1300 142 1 PIN SPRING スプリング ピン 5 2 0 XD3 2200 122 2 PIN DOWEL ヘイコウ ピン COPYRIGHT 2001 CANON INC CANON iR105 REV 0 AUG 2001 810 7 ...

Page 939: ......

Page 940: ...02 J405 J407 J1302 J1452 BAT1 NOT SERVICE PART 25 9 10 12 18 3 15 22 29 30 4 29 30 27 4 30 29 30 29 28 30 29 11A 7 21 8 6 13 6D 6A 6C 6B 23 20 19 21 5A 5B 11 501 504 24 5 2 502 503 16 14 17 26 1 NOTE This assembly does not include the part shown with key No 16 注 このユニットにKey No 16の部品は含まれません 505 FIGURE 900 CONTROLLER BOX ASSEMBLY コントローラ ボックス部 COPYRIGHT 2001 CANON INC CANON iR105 REV 0 AUG 2001 900 1 ...

Page 941: ... SNAP TIGHT チュウケイ コネクタ J121 7 FG6 7218 000 1 CABLE CONTROL PANEL 操作部束線 J405 407 1018 1019 8 FG6 7222 000 1 CABLE DDI S POWER SUPPLY DDI S電源束線 J1061 9203 9 FG6 7258 000 1 CABLE FLAT フラット ケーブル J1014 9201 1 0 FG6 7266 000 1 LVDS PCB ASSEMBLY 差動ボード回路基板 1 1 FG6 7278 000 1 MAIN CONTROLLER PCB ASS Y メイン コントローラ回路基板 1 1 A WK1 5019 000 1 BATTERY LITHIUM CR2477 HE6H 3V バッテリ BAT1 1 2 FG6 7281 000 1 PIXEL LINE...

Page 942: ...P M3X6 TP ネジ 2 7 XA9 1207 000 4 SCREW M4X12 ユニファイ セムス ビス 2 8 XA9 1208 000 4 SCREW M3X12 セムス ビス 2 9 XH9 0110 000 8 RUBBER CUSHION クッション ゴム 3 0 XZ9 0503 000 8 SPACER スペーサ 5 0 1 XB1 2300 607 1 SCREW MACH TRUSS HEAD M3X6 バインド ネジ 5 0 2 XB1 2300 607 2 SCREW MACH TRUSS HEAD M3X6 バインド ネジ 5 0 3 XB1 2400 607 16 SCREW MACH TRUSS HEAD M4X6 バインド ネジ 5 0 4 XB1 2402 009 2 SCREW MACH TRUSS HEAD M4X20 バインド ネジ 5 0 5...

Page 943: ......

Page 944: ...01 J155 NOTE This assembly does not include the parts shown with key No 4 and 501 3A 3 4 501 503 2 502 注 このユニットにKey No 4 501の部品は含まれません 6 FIGURE 910 DC POWER SUPPLY PCB ASSEMBLY DC電源回路基板 COPYRIGHT 2001 CANON INC CANON iR105 REV 0 AUG 2001 910 1 ...

Page 945: ...SUPPORT PCB ロッキング サポート 5 0 1 XB1 2300 607 1 SCREW MACH TRUSS HEAD M3X6 バインド ネジ SEE NOTE 5 0 2 XB1 2300 607 1 SCREW MACH TRUSS HEAD M3X6 バインド ネジ 5 0 3 XB1 2403 009 4 SCREW MACH TRUSS HEAD M4X30 バインド ネジ CT 1 1 1 FH3 0666 000 1 TRANSFORMER トランス 208 220 240V FH3 0666 000 1 TRANSFORMER トランス CT 3 0 1 FH3 0665 000 1 TRANSFORMER トランス F U1 0 1 VD7 0646 301 1 FUSE ヒューズ L 4 FH3 7195 000 1 CHOKE COIL SN14 800...

Page 946: ... in the assembly shown in Figure 130 注 このユニットはFigure130のユニットに含まれます 920 FG3 2142 000 1 CONTROL PANEL CPU PCB ASSEMBLY 操作部CPU回路基板 SEE NOTE Q6 8 2 2 FH4 1380 000 1 IC N010 0559 V123 MPU マイクロ コンピュータ FIGURE 920 CONTROL PANEL CPU PCB ASSEMBLY 操作部CPU回路基板 COPYRIGHT 2001 CANON INC CANON iR105 REV 0 AUG 2001 920 1 ...

Page 947: ...own in Figure 130 注 このユニットはFigure130のユニットに含まれます 925 FG6 7738 000 1 C PANEL INVERTER PCB ASSEMBLY 操作部インバータ回路基板 SEE NOTE F U1 VD7 1622 001 1 FUSE 2A 60V ヒューズ T 1 FH3 0961 000 1 TRANSFORMER INVERTER インバータ トランス FIGURE 925 CONTROL PANEL INVERTER PCB ASSEMBLY 操作部インバータ回路基板 COPYRIGHT 2001 CANON INC CANON iR105 REV 0 AUG 2001 925 1 ...

Page 948: ...000 1 HOLDER LED LEDホルダ 3 FG3 2144 000 1 CABLE KEY KEY束線 J6802 CN901 4 FG3 2145 000 1 CABLE LED LED束線 J6805 CN902 L ED9 0 7 FH6 0768 000 1 LED UNIT LEDユニット L ED9 0 8 FH6 0768 000 1 LED UNIT LEDユニット L ED9 0 9 FH6 0767 000 1 LED UNIT LEDユニット L ED9 1 0 FH6 0767 000 1 LED UNIT LEDユニット VR9 0 1 FH6 0786 000 1 RESISTOR VARIABLE 操作部コントラストVR MB FIGURE 926 CONTROL PANEL PCB ASSEMBLY 操作部回路基板 COPYRIGHT 2001 C...

Page 949: ...X6 バネツキ バインド ネジ BAT 1 WK1 0084 000 1 BATTERY 3V 550 MAH バッテリ F U1 0 3 VD5 0323 501 1 FUSE 125V 3 5A ヒューズ F U1 0 4 VD5 0323 501 1 FUSE 125V 3 5A ヒューズ F U1 0 5 VD5 0323 501 1 FUSE 125V 3 5A ヒューズ I C1 0 7 FH4 6156 000 1 IC HG71G046A2R09FE GATE ARRAY ゲート アレイ I C1 0 8 FH4 6123 000 1 IC M38871M2 010GP MCU MCU I C1 1 9 FH4 6104 000 1 IC SLA517TH GATE ARRAY ゲート アレイ FIGURE 930 DC CONTROLLER PCB ASSEMBLY DC...

Page 950: ...ADER CONTROL PCB ASSEMBLY リーダ コントローラ回路基板 3 XA9 0265 000 2 SCREW W WASHER TRUSS HEAD ザツキ バインド ネジ BAT 1 WK1 0084 000 1 BATTERY 3V 550 MAH バッテリ I C 4 FH4 6135 000 1 IC UPD65454GN 121 GATE ARRAY ゲート アレイ I C 5 FH4 6123 000 1 IC M38871M2 010GP MCU MCU I C1 8 FH4 6136 000 1 IC MB87L1870 GATE ARRAY ゲート アレイ FIGURE 935 READER CONTROL PCB ASSEMBLY リーダコントローラ回路基板 COPYRIGHT 2001 CANON INC CANON iR105 REV 0 AUG ...

Page 951: ......

Page 952: ...IGURE 101 NOTE This assembly does not include the parts shown with key No 4 5 9 and 11 DP1 注 このユニットにKey No 4 5 9 11の部品は含まれません Y A A Z 11 502 4 9 4 5 504 503 FIGURE 940 POTENTIAL MEASURING PCB ASSEMBLY 電位測定回路基板 COPYRIGHT 2001 CANON INC CANON iR105 REV 0 AUG 2001 940 1 ...

Page 953: ...SENSOR 電位センサ束線 J1 2 108 7 A VS1 5057 006 1 CONNECTOR SNAP TIGHT チュウケイ コネクタ J108 8 FH4 6019 000 1 POTENTIAL SENSOR UNIT 電位センサ ユニット DP1 J109 9 FN5 4002 000 1 GLASS DUST PROOF 防塵ガラス SEE NOTE 1 0 FS6 2759 000 1 SPRING TENSION ヒッパリ バネ 1 1 XA9 0643 000 2 SCREW RS M4X10 RS タイト ネジ SEE NOTE 5 0 1 XB1 2300 609 4 SCREW MACH TRUSS HEAD M3X6 バインド ネジ 5 0 2 XB1 2300 609 2 SCREW MACH TRUSS HEAD M3X6 バインド ネジ 5 0 3...

Page 954: ... 60V ヒューズ F U1 0 0 2 VD7 1621 001 1 FUSE 60V 1A ヒューズ L 1 0 0 1 FH3 7203 000 1 INDUCTOR インダクタ L 1 0 0 2 FH3 7202 000 1 INDUCTOR インダクタ T 1 0 0 1 FH3 0879 000 1 TRANSFORMER トランス T 1 0 0 2 FH3 0666 000 1 TRANSFORMER トランス T 1 0 0 3 FH3 0881 000 1 TRANSFORMER トランス FIGURE 945 INVERTER PCB ASSEMBLY インバータ回路基板 COPYRIGHT 2001 CANON INC CANON iR105 REV 0 AUG 2001 945 1 ...

Page 955: ...0 1 INDUCTOR インダクタ L 2 FH3 0938 000 1 INDUCTOR インダクタ RL 1 FH7 6331 000 1 RELAY リレー SK1 RH6 3434 000 1 FILTER NOISE ノイズ フィルタ SK2 RH6 3434 000 1 FILTER NOISE ノイズ フィルタ SK3 RH6 3434 000 1 FILTER NOISE ノイズ フィルタ SK4 RH6 3434 000 1 FILTER NOISE ノイズ フィルタ T 1 FH3 0936 000 1 INDUCTOR インダクタ FIGURE 960 AC DRIVER PCB ASSEMBLY ACドライバ回路基板 COPYRIGHT 2001 CANON INC CANON iR105 REV 0 AUG 2001 960 1 ...

Page 956: ...FH4 5904 000 1 IC MBCG46833 119 GATE ARRAY ゲート アレイ I C 3 FH4 5905 000 1 IC MB87D119 GATE ARRAY ゲート アレイ I C 5 FH4 6154 000 1 IC MB87L1890 GATE ARRAY ゲート アレイ I C1 2 FH4 3882 000 1 IC MR27V402E 013TP MASK ROM MASK ROM I C1 3 FH4 3883 000 1 IC MR27V402E 038TP MASK ROM MASK ROM FIGURE 970 DOCUMENT DETECT PCB ASSEMBLY 原稿向き検出回路基板 COPYRIGHT 2001 CANON INC CANON iR105 REV 0 AUG 2001 970 1 ...

Page 957: ...art shown with key No 1 1 注 このユニットにKey No 1の部品は含まれません 980 FG6 7249 000 1 H V AC TRANSFORMER PCB ASS Y 高圧ACトランス回路基板 1 FG6 7220 000 1 CABLE H V CONNECTING 高圧中継束線 J722 741 SEE NOTE T 1 FH3 5237 000 1 TRANSFORMER トランス FIGURE 980 H V AC TRANSFORMER PCB ASSEMBLY 高圧ACトランス回路基板 COPYRIGHT 2001 CANON INC CANON iR105 REV 0 AUG 2001 980 1 ...

Page 958: ... J733 J732 J731 1 2 501 FIGURE 985 H V DC TRANSFORMER PCB ASSEMBLY 高圧DCトランス回路基板 COPYRIGHT 2001 CANON INC CANON iR105 REV 0 AUG 2001 985 1 ...

Page 959: ... FH6 3337 000 1 RESISTOR 3MOHM 1 3W 抵抗 R5 7 1 FH6 3337 000 1 RESISTOR 3MOHM 1 3W 抵抗 R5 8 1 FH6 3337 000 1 RESISTOR 3MOHM 1 3W 抵抗 R8 5 1 FH6 3337 000 1 RESISTOR 3MOHM 1 3W 抵抗 R8 5 7 FH6 3337 000 1 RESISTOR 3MOHM 1 3W 抵抗 T 1 0 1 FH3 0893 000 1 TRANSFORMER トランス T 2 0 2 RH3 0071 000 1 TRANSFORMER トランス T 3 0 1 FH3 0894 000 1 TRANSFORMER トランス T 4 0 1 FH3 0894 000 1 TRANSFORMER トランス T 5 0 1 FH3 0893 000 ...

Page 960: ...4 J283 J252 J305 J253 J350 J264 J359 J621 J308 J622 J309 J251 J311 J250 J313 J602 J365 J601 J306 J43 J307 J42 J317 J249 J319 J242 J315 J24 J316 J243 J318 J241 J321 J274 J314 J222 J320 J224 J325 J229 J324 J281 J333 J305 J332 J244 J331 J248 J334 J246 J335 J245 J329 J247 J339 J243 J341 J336 J338 J326 J340 J366 J3606 J330 J3605 J323 J328 J322 J337 J3601 J327 J3603 J3604 J3602 J519 J217 J216 J278 J355 ...

Page 961: ...03 J1702 J1701 J1705 J1704 J1706 J1 J26 J2 J24 J25 J158 J1002 J348 J347 J346 J35 J137 J136 J113 J135 J213 J37 J116 J177 J114 J115 J197 J180 J1452 J40 J41 J155 J156 J157 J1712 J1714 J1719 J1715 J1721 J1720 J1723 J214 J120 J119 J21 J103 J3701 J763 J762 J761 J1108 J1107 J32 J1503 J1502 J1501 J1302 J1301 J1303 J1101 J55 J1114 J1102 J1112 J507 J508 J509 J764 J1304 J2031 J122 J2270 FIGURE B LIST OF CONN...

Page 962: ...172 J23 J851 J852 J167 J175 J171 J159 J169 J170 J168 J1001 J1110 J1003 J111 J112 J122 J123 J34 J151 J48 J152 J118 J1723 J1718 J1728 J504 J503 J502 J147 J149 J150 J149 J130 J165 J166 J164 J163 J801 J501 J1713 J127 J902 J901 J7001 CN902 CN901 J6805 J6802 CN1 J6804 CN2 CN3 J6801 J6803 J9802 FIGURE B LIST OF CONNECTORS 3 4 コネクタ一覧 3 4 COPYRIGHT 2001 CANON INC CANON iR105 REV 0 AUG 2001 B 3 ...

Page 963: ...J6809 J345 J1103 J1901 J1902 J1104 J402 J401 J50 J1461 J1551 J1091 J405 J407 J1019 J1018 J506 J9202 J9201 J121 J9203 J1014 J1453 J1451 J1015 J1061 J1454 J1020 J1058 J1027 J1006 J1021 J1028 J783 J785 J784 J1727 J1716 J1724 J1017 J7002 FIGURE B LIST OF CONNECTORS 4 4 コネクタ一覧 4 4 COPYRIGHT 2001 CANON INC CANON iR105 REV 0 AUG 2001 B 4 ...

Page 964: ...ING 電位制御 VS1 0279 005 1 CONNECTOR 5P FEMALE コネクタ メス WS3 0437 000 3 SOCKET CONTACT 20 30AWG ソケット コンタクト PCB AC DRIVER ACドライバ VS1 6380 003 1 CONNECTOR 3P MALE コネクタ オス WS3 5472 000 2 SOCKET CONTACT 12AWG ソケット コンタクト J 2 PCB POTENTIAL MEASURING 電位制御 VS1 0279 004 1 CONNECTOR 4P FEMALE コネクタ メス WS3 0469 000 3 SOCKET CONTACT 26 30AWG ソケット コンタクト PCB AC DRIVER ACドライバ VS3 5083 007 1 CONNECTOR 7P FEMALE コネクタ メス...

Page 965: ...000 4 SOCKET CONTACT ソケット コンタクト J 1 3 VS1 6380 004 1 CONNECTOR 4P MALE コネクタ オス VS3 5121 004 1 CONNECTOR 4P FEMALE コネクタ メス WS3 5291 000 4 PIN CONTACT ピン コンタクト WS3 5292 000 4 SOCKET CONTACT ソケット コンタクト J 1 4 FG6 7201 000 1 CABLE DRUM HEATER CONNECTING ドラム ヒータ中継束線 VS4 0002 003 1 CONNECTOR 3P FEMALE コネクタ メス WS4 0217 000 2 SOCKET CONTACT 22 18AWG ソケット コンタクト J 1 5 FG6 1875 000 1 CABLE AC FIXING FEEDER 定着...

Page 966: ...2 PIN CONTACT 22 26AWG ピン コンタクト J 2 3 VS1 5729 002 1 CONNECTOR 2P MALE コネクタ オス VS3 5083 002 1 CONNECTOR 2P FEMALE コネクタ メス WS3 5160 000 2 SOCKET CONTACT 18 24AWG ソケット コンタクト WS3 5301 000 2 PIN CONTACT ピン コンタクト J 2 4 VS1 6380 004 1 CONNECTOR 4P MALE コネクタ オス VS3 5121 004 1 CONNECTOR 4P FEMALE コネクタ メス WS3 5291 000 3 PIN CONTACT ピン コンタクト WS3 5292 000 3 SOCKET CONTACT ソケット コンタクト J 2 5 VS4 0001 003 1 CONN...

Page 967: ...8P FEMALE コネクタ メス WS3 5598 000 8 PIN CONTACT ピン コンタクト WS3 5680 000 8 SOCKET CONTACT 20 24AWG ソケット コンタクト J 3 7 VS1 6372 002 1 CONNECTOR 2P MALE コネクタ オス VS1 6373 002 1 CONNECTOR 2P FEMALE コネクタ メス WS3 5598 000 2 PIN CONTACT ピン コンタクト WS3 5680 000 2 SOCKET CONTACT 20 24AWG ソケット コンタクト J 4 0 VS4 0001 006 1 CONNECTOR 6P MALE コネクタ オス VS4 0002 006 1 CONNECTOR 6P FEMALE コネクタ メス WS4 0217 000 5 SOCKET CONTACT ...

Page 968: ...NPN MULTI DOOR INTERLOCK SWITCH マルチ扉インターロック スイッチ MSW5 RH2 5283 000 1 CONNECTOR 3P FEMALE コネクタ メス WS3 5419 000 2 SOCKET CONTACT 22 26AWG ソケット コンタクト J 4 8 VS1 5057 002 1 CONNECTOR SNAP TIGHT チュウケイ コネクタ VS1 5824 002 1 CONNECTOR 2P FEMALE コネクタ メス VS1 6321 002 1 CONNECTOR 2P FEMALE コネクタ メス WS3 5358 000 2 SOCKET CONTACT 22 26AWG ソケット コンタクト J 5 0 VS1 6694 030 1 CONNECTOR 30P MALE コネクタ オス VS1 6695 030 1 C...

Page 969: ...LE コネクタ メス J 1 0 8 VS1 0842 006 1 CONNECTOR 6P FEMALE コネクタ メス VS1 5057 006 1 CONNECTOR SNAP TIGHT チュウケイ コネクタ VS1 5824 006 1 CONNECTOR 6P FEMALE コネクタ メス WS3 5358 000 6 SOCKET CONTACT 22 26AWG ソケット コンタクト J 1 0 9 NPN VOLTAGE SENSOR 電位センサ DP1 VS3 5203 005 1 CONNECTOR 5P MALE コネクタ オス WS3 5365 000 5 PIN CONTACT 28 32AWG ピン コンタクト J 1 1 1 VS1 5057 002 1 CONNECTOR SNAP TIGHT チュウケイ コネクタ VS1 6321 002 2 CONNE...

Page 970: ... FEMALE コネクタ メス J 1 2 1 VS1 6313 014 2 CONNECTOR 14P FEMALE コネクタ メス VS1 6314 014 2 CONNECTOR 14P FEMALE コネクタ メス VS1 6319 028 1 CONNECTOR SNAP TIGHT チュウケイ コネクタ VT2 5161 028 1 HOLDER CONNECTOR 28P コネクタ ホルダ J 1 2 2 NPN FIXING EXHAUST FAN 定着排熱ファン FM20 VS1 6321 003 1 CONNECTOR 3P FEMALE コネクタ メス J 1 2 4 VS1 6314 014 2 CONNECTOR 14P FEMALE コネクタ メス VS1 6318 014 1 CONNECTOR SNAP TIGHT 中継コネクタ J 1 2 5 NPN PR...

Page 971: ...ENSOR 4 紙サイズ検知 4 SIZE4 VS1 5057 003 1 CONNECTOR SNAP TIGHT チュウケイ コネクタ VS1 6321 003 1 CONNECTOR 3P FEMALE コネクタ メス J 1 3 8 VS1 6314 013 2 CONNECTOR 13P FEMALE コネクタ メス VS1 6318 013 1 CONNECTOR SNAP TIGHT チュウケイ コネクタ J 1 3 9 NPN BUFFER TONER SENSOR バッファ残量検知 TS1 VS1 5057 003 1 CONNECTOR SNAP TIGHT チュウケイ コネクタ VS1 6321 003 1 CONNECTOR 3P FEMALE コネクタ メス J 1 4 0 NPN BUFFER TONER EMPTINESS SENSOR バッファ空検知 TS2...

Page 972: ... 5 0 NPN POST EXPOSURE LED ポスト露光LED LED2 VS1 6321 002 1 CONNECTOR 2P FEMALE コネクタ メス J 1 5 1 VS1 5057 005 1 CONNECTOR SNAP TIGHT チュウケイ コネクタ VS1 6321 005 2 CONNECTOR 5P FEMALE コネクタ メス J 1 5 2 SYS TO FINISHER フィニッシャ ACCESSORY FH2 6480 000 1 CONNECTOR FEMALE コネクタ メス VS1 5452 007 1 CONNECTOR 7P FEMALE コネクタ メス J 1 5 5 VS1 6314 006 2 CONNECTOR 6P FEMALE コネクタ メス VS1 6318 006 1 CONNECTOR SNAP TIGHT チュウケイ コ...

Page 973: ...P 蛍光灯束線 J 1 6 7 VS1 6313 010 2 CONNECTOR 10P FEMALE コネクタ メス VS1 6314 010 2 CONNECTOR 10P FEMALE コネクタ メス VS1 6319 020 1 CONNECTOR SNAP TIGHT チュウケイ コネクタ VT2 5161 020 2 HOLDER CONNECTOR 20P コネクタ ホルダ J 1 6 8 VS1 5057 006 1 CONNECTOR SNAP TIGHT チュウケイ コネクタ VS1 6321 006 2 CONNECTOR 6P FEMALE コネクタ メス J 1 6 9 NPN SCANNER HOME POSITION SENSOR 光学ホーム ポジション センサ PS1 VS1 6321 003 1 CONNECTOR 3P FEMALE コネクタ メス J ...

Page 974: ...VERY SENSOR 内排紙センサ PS9 VS1 6321 003 1 CONNECTOR 3P FEMALE コネクタ メス J 1 8 4 NPN EXTERNAL DELIVERY SENSOR 外排紙センサ PS10 VS1 6321 003 1 CONNECTOR 3P FEMALE コネクタ メス J 1 8 5 NPN FIXING EXIT SENSOR 定着出口センサ PS11 VS1 6321 003 1 CONNECTOR 3P FEMALE コネクタ メス J 1 8 6 NPN DELIVERY SPEED CHANGE CLUTCH 排紙速度切換クラッチ CL21 VS1 5057 002 1 CONNECTOR SNAP TIGHT チュウケイ コネクタ VS1 6321 002 1 CONNECTOR 2P FEMALE コネクタ メス J 1 8 7 ...

Page 975: ... FEMALE コネクタ メス VS1 6314 013 2 CONNECTOR 13P FEMALE コネクタ メス VS1 6327 026 1 CONNECTOR 26P FEMALE コネクタ メス VS1 6328 026 1 CONNECTOR 26P FEMALE コネクタ メス VT2 5161 026 2 HOLDER CONNECTOR 26P コネクタ ホルダ WS3 5607 000 4 SOCKET CONTACT 20 24AWG コンタクト WS3 5609 000 4 SOCKET CONTACT 12 14AWG ソケット コンタクト J 1 9 8 VS1 5057 007 1 CONNECTOR SNAP TIGHT チュウケイ コネクタ VS1 6321 007 2 CONNECTOR 7P FEMALE コネクタ メス J 1 9 9 NPN RE...

Page 976: ...コネクタ メス J 2 1 1 VS1 5057 006 1 CONNECTOR SNAP TIGHT チュウケイ コネクタ VS1 6320 006 1 CONNECTOR 6P FEMALE コネクタ メス VS1 6321 006 1 CONNECTOR 6P FEMALE コネクタ メス J 2 1 3 VS1 5057 006 1 CONNECTOR SNAP TIGHT チュウケイ コネクタ VS1 6321 006 2 CONNECTOR 6P FEMALE コネクタ メス J 2 1 4 VS1 5057 006 1 CONNECTOR SNAP TIGHT チュウケイ コネクタ VS1 6321 006 2 CONNECTOR 6P FEMALE コネクタ メス J 2 1 6 VS1 6314 002 2 CONNECTOR 2P FEMALE コネクタ メス VS1 ...

Page 977: ...AWG ピン コンタクト J 2 2 9 VS1 6313 014 2 CONNECTOR 14P FEMALE コネクタ メス VS1 6314 014 2 CONNECTOR 14P FEMALE コネクタ メス VS1 6319 028 1 CONNECTOR SNAP TIGHT チュウケイ コネクタ VT2 5161 028 2 HOLDER CONNECTOR 28P コネクタ ホルダ J 2 3 0 VS1 5057 002 1 CONNECTOR SNAP TIGHT チュウケイ コネクタ VS1 6320 002 1 CONNECTOR 2P FEMALE コネクタ メス VS1 6321 002 1 CONNECTOR 2P FEMALE コネクタ メス J 2 3 1 NPN VERTICAL PATH 1 CLUTCH 縦パス 1 クラッチ CL8 VS1 5057...

Page 978: ...VS1 6321 003 1 CONNECTOR 3P FEMALE コネクタ メス J 2 4 2 NPN DEVELOPING SLEEVE CLUTCH 現像スリーブ クラッチ CL4 VS1 5057 002 1 CONNECTOR SNAP TIGHT チュウケイ コネクタ VS1 6321 002 1 CONNECTOR 2P FEMALE コネクタ メス J 2 4 3 VS1 5057 007 1 CONNECTOR SNAP TIGHT チュウケイ コネクタ VS1 5824 007 1 CONNECTOR 7P FEMALE コネクタ メス VS1 6321 007 1 CONNECTOR 7P FEMALE コネクタ メス WS3 5358 000 7 SOCKET CONTACT 22 26AWG ソケット コンタクト J 2 4 4 NPN CARTRIDGE D...

Page 979: ...コネクタ メス J 2 5 2 VS1 5057 002 1 CONNECTOR SNAP TIGHT チュウケイ コネクタ VS1 6321 002 2 CONNECTOR 2P FEMALE コネクタ メス J 2 5 3 VS1 5057 002 1 CONNECTOR SNAP TIGHT チュウケイ コネクタ VS1 6321 002 2 CONNECTOR 2P FEMALE コネクタ メス J 2 5 4 VS1 5057 002 1 CONNECTOR SNAP TIGHT チュウケイ コネクタ VS1 6321 002 2 CONNECTOR 2P FEMALE コネクタ メス J 2 5 5 NPN FRONT REGISTRATION CLUTCH レジ前クラッチ CL5 VS1 5057 002 1 CONNECTOR SNAP TIGHT チュウケイ コネクタ V...

Page 980: ...R カセット 4 紙幅検知 SVR3 VS1 5057 003 1 CONNECTOR SNAP TIGHT チュウケイ コネクタ VS1 6321 003 1 CONNECTOR 3P FEMALE コネクタ メス J 2 6 6 NPN CASSETTE 4 PAPER LENGTH SENSOR カセット 4 長さ検知 SV2 VS1 5057 004 1 CONNECTOR SNAP TIGHT チュウケイ コネクタ VS1 6321 004 1 CONNECTOR 4P FEMALE コネクタ メス J 2 6 7 NPN LEFT DECK LIFTER MOTOR 左デッキ リフタ モータ M14 VS1 6321 002 1 CONNECTOR 2P FEMALE コネクタ メス J 2 6 8 VS1 5057 006 1 CONNECTOR SNAP TIGHT チュウ...

Page 981: ...VT2 5161 026 2 HOLDER CONNECTOR 26P コネクタ ホルダ J 2 8 2 VS1 5057 002 1 CONNECTOR SNAP TIGHT チュウケイ コネクタ VS1 6321 002 2 CONNECTOR 2P FEMALE コネクタ メス J 2 8 3 NPN CASSETTE 3 VERT PATH CLUTCH カセット 3 縦パス クラッチ CL13 VS1 5057 002 1 CONNECTOR SNAP TIGHT チュウケイ コネクタ VS1 6320 002 1 CONNECTOR 2P FEMALE コネクタ メス J 2 8 4 NPN CASSETTE 3 LIFTER SENSOR カセット 3 リフタ センサ PS38 VS1 6321 003 1 CONNECTOR 3P FEMALE コネクタ メス J 2 8 ...

Page 982: ...NNECTOR 3P FEMALE コネクタ メス J 2 9 5 PCB CASSETTE 3 PAPER DETECT カセット 3 紙残量検知 VS1 6321 003 1 CONNECTOR 3P FEMALE コネクタ メス J 2 9 6 PCB CASSETTE 4 PAPER DETECT カセット 4 紙残量検知 VS1 6321 003 1 CONNECTOR 3P FEMALE コネクタ メス J 2 9 8 NPN CASSETTE 3 VERT PATH SENSOR カセット 3 縦パス センサ PS41 VS1 6314 004 1 CONNECTOR 4P FEMALE コネクタ メス J 3 0 1 NPN CASSETTE 4 LIFTER MOTOR カセット 4 リフタ モータ M17 VS1 5057 002 1 CONNECTOR SNAP TI...

Page 983: ...ECTOR 3P FEMALE コネクタ メス J 3 1 3 NPN CASSETTE 4 PICK UP SOLENOID カセット 4 給紙ソレノイド SL10 VS1 5057 002 1 CONNECTOR SNAP TIGHT チュウケイ コネクタ VS1 6321 002 1 CONNECTOR 2P FEMALE コネクタ メス J 3 1 4 VS1 6313 010 2 CONNECTOR 10P FEMALE コネクタ メス VS1 6314 010 2 CONNECTOR 10P FEMALE コネクタ メス VS1 6319 020 1 CONNECTOR SNAP TIGHT チュウケイ コネクタ VT2 5161 020 2 HOLDER CONNECTOR 20P コネクタ ホルダ J 3 1 5 NPN LEFT DECK LIFTER SENSOR 左デ...

Page 984: ...FEMALE コネクタ メス WS3 5720 000 12 SOCKET CONTACT 22 28AWG ソケット コンタクト J 3 2 4 NPN DUPLEXING FEED MOTOR 両面搬送モータ M12 VS1 6702 006 1 CONNECTOR 6P FEMALE コネクタ メス WS3 5720 000 6 SOCKET CONTACT 22 28AWG ソケット コンタクト J 3 2 5 NPN DUPLEXING INVERT MOTOR 両面反転モータ M11 VS1 6702 007 1 CONNECTOR 7P FEMALE コネクタ メス WS3 5720 000 6 SOCKET CONTACT 22 28AWG ソケット コンタクト J 3 2 6 FG6 8616 000 1 CABLE THROUGH PATH DRAWER スルーパス ド...

Page 985: ...コネクタ メス VS1 6321 003 1 CONNECTOR 3P FEMALE コネクタ メス WS3 5358 000 3 SOCKET CONTACT 22 26AWG ソケット コンタクト J 3 3 5 NPN SIDE REGISTRATION SENSOR 横レジ センサ PS18 VS1 0279 003 1 CONNECTOR 3P FEMALE コネクタ メス WS3 0469 000 3 SOCKET CONTACT 26 30AWG ソケット コンタクト J 3 3 6 FG6 8616 000 1 CABLE THROUGH PATH DRAWER スルーパス ドロア束線 VS1 5057 003 1 CONNECTOR SNAP TIGHT チュウケイ コネクタ VS1 6321 003 1 CONNECTOR 3P FEMALE コネクタ メス J 3 3...

Page 986: ...VS1 6318 003 1 CONNECTOR SNAP TIGHT チュウケイ コネクタ J 3 4 8 NPN SCANNER MOTOR COOLING FAN 光学モータ冷却ファン FM18 VS1 6321 004 1 CONNECTOR 4P FEMALE コネクタ メス J 3 5 0 VS1 5057 008 1 CONNECTOR SNAP TIGHT チュウケイ コネクタ VS1 6321 008 2 CONNECTOR 8P FEMALE コネクタ メス J 3 5 1 NPN CASSETTE 4 VERT PATH SENSOR カセット 4 縦パス センサ PS46 VS1 6314 004 1 CONNECTOR 4P FEMALE コネクタ メス J 3 5 5 NPN LEFT DECK PICK UP SENSOR 左デッキ給紙センサ PS25 VS1...

Page 987: ...702 006 1 CONNECTOR 6P FEMALE コネクタ メス WS3 5720 000 6 SOCKET CONTACT 22 28AWG ソケット コンタクト J 3 8 3 NPN DUPLEXING FEEDER FAN 両面搬送ファン FM19 VS1 5057 003 1 CONNECTOR SNAP TIGHT チュウケイ コネクタ VS1 6321 003 1 CONNECTOR 3P FEMALE コネクタ メス J 4 0 1 VS1 6314 004 2 CONNECTOR 4P FEMALE コネクタ メス VS1 6318 004 1 CONNECTOR SNAP TIGHT チュウケイ コネクタ J 4 0 2 VS1 6314 009 2 CONNECTOR 9P FEMALE コネクタ メス VS1 6318 009 1 CONNECTOR SN...

Page 988: ... 6313 011 1 CONNECTOR 11P FEMALE コネクタ メス VS1 6314 011 1 CONNECTOR 11P FEMALE コネクタ メス VT2 5161 022 1 HOLDER CONNECTOR 22P コネクタ ホルダ J 5 0 3 PCB DC CONTROLLER DCコントローラ VS1 6313 010 1 CONNECTOR 10P FEMALE コネクタ メス VS1 6314 010 1 CONNECTOR 10P FEMALE コネクタ メス VT2 5161 020 1 HOLDER CONNECTOR 20P コネクタ ホルダ J 5 0 4 PCB DC CONTROLLER DCコントローラ VS1 6313 014 1 CONNECTOR 14P FEMALE コネクタ メス VS1 6314 014 1 CONNECTO...

Page 989: ...26 1 HOLDER CONNECTOR 26P コネクタ ホルダ J 5 1 0 PCB DC CONTROLLER DCコントローラ VS1 6313 016 1 CONNECTOR 16P FEMALE コネクタ メス VS1 6314 016 1 CONNECTOR 16P FEMALE コネクタ メス VT2 5161 032 1 HOLDER CONNECTOR 32P コネクタ ホルダ J 5 1 1 PCB DC CONTROLLER DCコントローラ VS1 6313 014 1 CONNECTOR 14P FEMALE コネクタ メス VS1 6314 014 1 CONNECTOR 14P FEMALE コネクタ メス VT2 5161 028 1 HOLDER CONNECTOR 28P コネクタ ホルダ J 5 1 2 PCB DC CONTROLLER DCコ...

Page 990: ...13 1 CONNECTOR 13P FEMALE コネクタ メス VS1 6314 013 1 CONNECTOR 13P FEMALE コネクタ メス VT2 5161 026 1 HOLDER CONNECTOR 26P コネクタ ホルダ J 5 1 8 PCB DC CONTROLLER DCコントローラ VS1 6313 010 1 CONNECTOR 10P FEMALE コネクタ メス VS1 6314 010 1 CONNECTOR 10P FEMALE コネクタ メス VT2 5161 020 1 HOLDER CONNECTOR 20P コネクタ ホルダ J 5 1 9 PCB DC CONTROLLER DCコントローラ VS1 6313 016 1 CONNECTOR 16P FEMALE コネクタ メス VS1 6314 016 1 CONNECTOR 16P F...

Page 991: ...3 002 1 CONNECTOR 2P FEMALE コネクタ メス WS3 5160 000 2 SOCKET CONTACT 18 24AWG ソケット コンタクト J 6 2 2 NPN PAPER PICK UP MOTOR 給紙モータ VS1 6321 005 1 CONNECTOR 5P FEMALE コネクタ メス J 6 5 1 NPN FIXING DRIVE MOTOR 定着駆動モータ M3 VS3 5083 002 1 CONNECTOR 2P FEMALE コネクタ メス WS3 5160 000 2 SOCKET CONTACT 18 24AWG ソケット コンタクト J 6 5 2 NPN FIXING DRIVE MOTOR 定着駆動モータ M3 VS1 6321 006 1 CONNECTOR 6P FEMALE コネクタ メス J 7 0 1 PCB M...

Page 992: ...002 1 CONNECTOR 2P FEMALE コネクタ メス WS3 5160 000 1 SOCKET CONTACT 18 24AWG ソケット コンタクト J 7 4 1 PCB HIGH VOLTAGE AC TRANSFORMER 高圧ACトランス VS1 6302 005 1 CONNECTOR 5P FEMALE コネクタ メス WS3 5569 000 5 SOCKET CONTACT 22 28AWG ソケット コンタクト J 7 4 2 PCB HIGH VOLTAGE AC TRANSFORMER 高圧ACトランス NPN AC TRANSFORMER ACトランス J 7 6 1 PCB POLYGON MOTOR DRIVER ポリゴン モータ ドライバ VS3 5083 003 1 CONNECTOR 3P FEMALE コネクタ メス WS3 5160 ...

Page 993: ...FEMALE コネクタ メス J 7 9 1 PCB AC DRIVER ACドライバ VS1 6302 004 1 CONNECTOR 4P FEMALE コネクタ メス WS3 5569 000 4 SOCKET CONTACT 22 28AWG ソケット コンタクト J 7 9 2 PCB AC DRIVER SUB ACドライバ サブ VS1 6321 012 1 CONNECTOR 12P FEMALE コネクタ メス J 8 0 1 PCB SCANNER MOTOR DRIVER 光学モータ ドライバ VS3 5083 007 1 CONNECTOR 7P FEMALE コネクタ メス WS3 5160 000 7 SOCKET CONTACT 18 24AWG ソケット コンタクト J 8 0 2 PCB SCANNER MOTOR DRIVER 光学モータ ドライバ VS...

Page 994: ...NNECTOR 2P FEMALE コネクタ メス WS3 5160 000 2 SOCKET CONTACT 18 24AWG ソケット コンタクト J 1 0 0 2 PCB FLUORESCENT LAMP INVERTER 蛍光灯インバータ VS1 6321 008 1 CONNECTOR 8P FEMALE コネクタ メス J 1 0 0 3 PCB FLUORESCENT LAMP INVERTER 蛍光灯インバータ FH2 6574 000 1 CABLE FLUORESCENT 蛍光灯束線 J 1 0 0 6 PCB MAIN CONTROLLER メイン コントローラ VS1 6314 009 1 CONNECTOR 9P FEMALE コネクタ メス J 1 0 1 4 PCB MAIN CONTROLLER メイン コントローラ VS1 6407 080 1 CONN...

Page 995: ...010 1 CONNECTOR 10P FEMALE コネクタ メス J 1 0 2 7 PCB MAIN CONTROLLER メイン コントローラ VS1 6302 002 1 CONNECTOR 2P FEMALE コネクタ メス WS3 5680 000 2 SOCKET CONTACT 20 24AWG ソケット コンタクト J 1 0 2 8 PCB MAIN CONTROLLER メイン コントローラ NPN SYSTEM FAN システム ファン FM16 J 1 0 5 8 PCB MAIN CONTROLLER メイン コントローラ VS1 6302 004 1 CONNECTOR 4P FEMALE コネクタ メス WS3 5680 000 4 SOCKET CONTACT 20 24AWG ソケット コンタクト J 1 0 6 0 PCB MAIN CONTROLL...

Page 996: ...NNECTOR 13P FEMALE コネクタ メス VS1 6314 013 1 CONNECTOR 13P FEMALE コネクタ メス VT2 5161 026 1 HOLDER CONNECTOR 26P コネクタ ホルダ J 1 1 1 0 PCB READER CONTROLLER リーダ コントローラ VS1 6313 010 1 CONNECTOR 10P FEMALE コネクタ メス VS1 6314 010 1 CONNECTOR 10P FEMALE コネクタ メス VT2 5161 020 1 HOLDER CONNECTOR 20P コネクタ ホルダ J 1 1 1 2 PCB READER CONTROLLER リーダ コントローラ VS1 6314 012 1 CONNECTOR 12P FEMALE コネクタ メス J 1 1 1 3 PCB READER ...

Page 997: ...VS1 6314 014 1 CONNECTOR 14P FEMALE コネクタ メス VT2 5161 028 1 HOLDER CONNECTOR 28P コネクタ ホルダ J 1 4 5 4 PCB PIXEL LINE CHANGE 画素 ライン変換 VS3 5083 004 1 CONNECTOR 4P FEMALE コネクタ メス WS3 5160 000 4 SOCKET CONTACT 18 24AWG ソケット コンタクト J 1 4 6 1 PCB BICENTRO DISPLAY INTERFACE バイセントロ ディスプレイ インターフェース VS1 6313 017 1 CONNECTOR 17P FEMALE コネクタ メス VS1 6314 017 1 CONNECTOR 17P FEMALE コネクタ メス VT2 5161 034 1 HOLDER CON...

Page 998: ... SOCKET CONTACT 20 24AWG ソケット コンタクト J 1 7 1 3 PCB RELAY リレー VS3 5083 015 1 CONNECTOR 15P FEMALE コネクタ メス WS3 5160 000 15 SOCKET CONTACT 18 24AWG ソケット コンタクト J 1 7 1 4 PCB RELAY リレー VS1 6302 012 1 CONNECTOR 12P FEMALE コネクタ メス WS3 5680 000 12 SOCKET CONTACT 20 24AWG ソケット コンタクト J 1 7 1 5 PCB RELAY リレー VS1 6302 003 1 CONNECTOR 3P FEMALE コネクタ メス WS3 5680 000 2 SOCKET CONTACT 20 24AWG ソケット コンタクト J 1 7 1 6...

Page 999: ... メス WS3 5569 000 8 SOCKET CONTACT 22 28AWG ソケット コンタクト J 1 7 2 4 PCB RELAY リレー VS3 5083 008 1 CONNECTOR 8P FEMALE コネクタ メス WS3 5160 000 8 SOCKET CONTACT 18 24AWG ソケット コンタクト J 1 7 2 7 PCB RELAY リレー VS1 6321 003 1 CONNECTOR 3P FEMALE コネクタ メス J 1 7 2 8 PCB RELAY リレー VS1 6314 003 1 CONNECTOR 3P FEMALE コネクタ メス J 1 9 0 1 PCB DOCUMENT DETECT 原稿向き検知 PCB READER CONTROLLER リーダ コントローラ J 2 0 3 0 VS1 6302 004 1 ...

Page 1000: ...ス ドロア束線 J 3 6 0 7 PCB THROUGH PATH スルーパス FG6 8616 000 1 CABLE THROUGH PATH DRAWER スルーパス ドロア束線 J 3 6 0 8 PCB THROUGH PATH スルーパス FG6 8616 000 1 CABLE THROUGH PATH DRAWER スルーパス ドロア束線 J 3 6 0 9 PCB THROUGH PATH スルーパス FG6 8616 000 1 CABLE THROUGH PATH DRAWER スルーパス ドロア束線 J 3 7 0 1 PCB BEAM DETECT ビーム ディテクタ VS1 6314 005 1 CONNECTOR 5P FEMALE コネクタ メス J 5 0 2 9 VS1 6314 004 2 CONNECTOR 4P FEMALE コネクタ メス VS...

Page 1001: ...クタ メス J 7 0 0 1 PCB BICENTRO DISPLAY INTERFACE バイセントロ ディスプレイ インターフェース FH2 6791 000 1 CABLE CONTROL 操作部束線 J 7 0 0 2 PCB BICENTRO DISPLAY INTERFACE バイセントロ ディスプレイ インターフェース VS1 6313 018 1 CONNECTOR 18P FEMALE コネクタ メス VS1 6314 018 1 CONNECTOR 18P FEMALE コネクタ メス VT2 5161 036 1 HOLDER CONNECTOR 36P コネクタ ホルダ J 9 0 0 1 PCB SERIAL NUMBER シリアル ナンバ VS1 6314 011 1 CONNECTOR 11P FEMALE コネクタ メス J 9 2 0 1 PCB LVD...

Page 1002: ......

Page 1003: ...et head cap screws C 4 II NUTS C 4 M Hexagon nuts C 4 III WASHER AND SHIM WASHERS C 5 N S T Shim washers C 5 U Plain Washers spring washers toothed lock washers C 6 IV RETAINING RINGS C 7 V E rings C 7 W Grip rings C 7 X C rings C 8 V PINS C 9 Y Spring and dowel pins C 9 VI SPACERS C 9 Z Spacers C 9 I ネジ C 2 A 精密機器用小ネジ C 3 B ナベ小ネジ C 3 E バインド小ネジ C 3 F サラ小ネジ C 3 G タッピンネジ C 3 H バネ座金付き十字ナベ小ネジ C 3 K TP...

Page 1004: ...cation symbol Socket head cap screw 類別番号 六角穴付きボルト Nominal diameter d M8 呼び径 d Length 40mm 長さ Material and surface Steel black zinc plated See table 1 treatment 鋼材 黒色亜鉛メッキ 材料および表面処理 表1参照 Material and surface treatment 材料および表面処理 No Material Surface treatment Color 1 2 3 4 5 6 7 8 9 Stainless Brass Steel Blackened Without surface treatment Nickel plated Black nickel plated Zinc plated Nickel and chro...

Page 1005: ...INDING HEAD MACHINE SCREWS BINDING HEAD MACHINE SCREWS BINDING HEAD MACHINE SCREWS バインド小ネジ F F F F F FLAT HEAD MACHINE SCREWS FLAT HEAD MACHINE SCREWS FLAT HEAD MACHINE SCREWS FLAT HEAD MACHINE SCREWS FLAT HEAD MACHINE SCREWS サラ小ネジ H H H H H PAN HEAD MACHINE SCREWS WITH PAN HEAD MACHINE SCREWS WITH PAN HEAD MACHINE SCREWS WITH PAN HEAD MACHINE SCREWS WITH PAN HEAD MACHINE SCREWS WITH CAPTIVE SPRIN...

Page 1006: ...ND SOCKET HEAD CAP SCREWS AND SOCKET HEAD CAP SCREWS AND SOCKET HEAD CAP SCREWS AND SOCKET HEAD CAP SCREWS 六角穴付き止めネジおよび六角穴付きボルト Hex socket setscrews 六角穴付き止めネジ Socket head cap screws 六角穴付きボルト I I I I I I I I I I N U N U N U N U N U T T T T T S S S S S ナット ナット ナット ナット ナット M M M M M HEXAGON NUTS HEXAGON NUTS HEXAGON NUTS HEXAGON NUTS HEXAGON NUTS 六角ナット XB7 2100 309 Nominal diameter d M3 呼び径 d Hexagon...

Page 1007: ...T SHIM WASHERS S T SHIM WASHERS S T SHIM WASHERS 標準ワッシャ How to read Part Numbers 部品番号の見方 XD1 1102 625 Inner diameter d 2 6mm 内径 d Thickness code t 0 5mm 板厚番号 t See table 3 表 3 参照 Shim washer 標準ワッシャ Material Brass 材 料 黄 銅 Thickness code 板厚番号 0 1 2 3 4 5 6 7 8 9 0 05 0 1 0 2 0 3 0 4 0 5 0 6 0 7 0 8 1 t mm d mm D mm Class 1 1 種 Class 3 3 種 1 5 1 8 2 1 2 3 2 6 3 1 3 6 4 1 4 6 5 2 5 7 6 2 6 7 7 2 7 7 8...

Page 1008: ...付き座金 How to read Part Numbers 部品番号の見方 XD1 2100 307 Inner diameter d 3 0mm 呼び径 d Plain washer 平座金 Plain washers 平座金 Material and surface treatment Steel nickel plated 材料および表面処理 鋼材 ニッケルメッキ How to read Part Numbers 部品番号の見方 XD1 3100 507 Inner diameter d 5 0mm 呼び径 d Spring washer バネ座金 Spring washers バネ座金 Material and surface treatment Stainless without 材料および表面処理 surface treatment ステンレス 表面処理なし How to re...

Page 1009: ...N G N G S S S S S 止め輪 止め輪 止め輪 止め輪 止め輪 V V V V V E RINGS E RINGS E RINGS E RINGS E RINGS E形止め輪 How to read Part Numbers 部品番号の見方 XD2 1100 172 Inner diameter d 1 7mm 呼び径 d E ring E形止め輪 Material and surface treatment 材料および表面処理 XD2 110 class 1 1種 XD2 120 class 2 2種 2 Stainless without surface treatment ステンレス 表面処理なし 7 Steel nickel plated 鋼材 ニッケルメッキ W W W W W GRIP RINGS GRIP RINGS GRIP RINGS GRIP RINGS G...

Page 1010: ...用 Nominal diameter 呼び径 d1 mm d3 mm 10 12 14 15 16 17 18 20 22 25 28 30 32 35 9 3 11 1 12 9 13 8 14 7 15 7 16 5 18 5 20 5 23 2 25 9 27 9 29 6 32 2 Table 4 表4 010 012 014 015 016 017 018 020 022 025 028 030 032 035 Nominal diameter 呼び径 d1 mm d3 mm 10 11 12 14 16 18 19 20 22 25 28 30 32 35 37 10 7 11 8 13 15 1 17 3 19 5 20 5 21 5 23 5 26 9 30 1 32 1 34 4 37 8 39 8 Table 5 表5 010 011 012 014 016 018 0...

Page 1011: ...0 122 Nominal diameter D 2 0mm 呼び径 D Spring pin スプリングピン Spring pins スプリングピン Material and surface treatment Stainless without surface treatment 材料および表面処理 ステンレス 表面処理なし How to read Part Numbers 部品番号の見方 Length 8mm 長さ XD3 2200 082 Nominal diameter d 2 0mm 呼び径 d Dowel pin 平行ピン Dowel pins 平行ピン Material and surface treatment Steel zinc plated 材料および表面処理 鋼 亜鉛メッキ VI VI VI VI VI S P A C E R S P A C E R S P A ...

Page 1012: ...C 10 COPYRIGHT C 2001 CANON INC STANDARD FASTENERS REV 0 FEB 1992 ...

Page 1013: ...B2 7261 000 FB2 7264 000 FB2 7515 020 FB2 7521 000 FB2 7537 000 FB2 7542 000 FB2 7545 000 FB2 7558 000 FB2 7559 000 FB2 7560 000 FB2 7593 000 FB2 7603 000 FB2 7605 000 FB2 7606 000 FB2 7607 020 FB2 7614 000 FB2 7616 000 FB2 7620 000 FB2 7623 000 FB2 7624 000 FB2 7625 000 FB2 7630 000 251 260 264 275 360 580 600 640 810 311 316 420 430 430 430 810 360 313 210 210 210 100 316 316 316 316 107 107 100...

Page 1014: ...FB4 1682 000 FB4 1683 000 FB4 1693 000 FB4 1694 000 FB4 1695 000 FB4 1696 000 FB4 1712 000 FB4 1713 000 FB4 1714 000 FB4 1715 000 FB4 1717 000 FB4 1719 000 FB4 1727 000 FB4 1734 000 FB4 1735 000 FB4 1740 000 FB4 1750 000 FB4 1753 000 FB4 1762 000 FB4 1766 000 FB4 1781 000 FB4 1792 000 FB4 1794 000 FB4 1795 000 FB4 1797 000 FB4 1806 000 FB4 1820 020 FB4 1821 020 215 215 215 215 215 215 215 215 215 ...

Page 1015: ...4 9027 000 FB4 9028 000 FB4 9029 000 FB4 9032 000 FB4 9033 000 FB4 9034 000 FB4 9035 000 FB4 9043 000 FB4 9346 000 FB4 9355 000 FB4 9360 000 FB4 9361 000 FB4 9509 000 FB4 9511 000 FB4 9514 000 FB4 9515 000 FB4 9517 000 FB4 9518 000 FB4 9524 000 FB4 9525 000 FB4 9526 000 FB4 9797 020 FB4 9799 000 FB5 0527 000 FB5 0529 000 315 264 315 102 316 103 102 102 102 102 102 325 325 325 325 325 325 325 130 1...

Page 1016: ...5 000 FB6 2416 000 FB6 2719 000 FB6 2720 000 FB6 2724 000 FB6 2725 000 FB6 2726 000 FB6 2727 000 FB6 2728 000 FB6 2887 000 FB6 4057 000 FB6 4059 000 FC1 1117 000 FC1 5049 000 FC1 5051 000 FC1 5052 000 FC1 5055 000 FC1 5056 000 FC1 5061 000 FC1 5080 000 FC1 5081 000 FC1 6853 000 FC1 7438 000 311 312 311 312 313 313 360 100 102 360 360 360 360 360 360 360 250 101 100 100 210 130 350 100 130 130 130 ...

Page 1017: ...0 FG6 1871 000 FG6 1872 000 FG6 1873 000 FG6 1874 000 FG6 1875 000 FG6 1876 000 FG6 1879 000 FG6 1880 000 FG6 1881 000 FG6 1882 000 FG6 1884 000 FG6 1885 000 FG6 1887 000 FG6 1888 000 FG6 1889 020 FG6 1891 000 FG6 1892 000 FG6 1893 000 FG6 1896 000 FG6 1898 000 FG6 1901 000 FG6 1904 000 FG6 1906 000 FG6 1941 000 FG6 1942 000 FG6 1943 000 FG6 1971 000 FG6 1987 000 FG6 1996 000 FG6 2011 000 100 100 ...

Page 1018: ...B B B B 110 111 770 210 B B B 900 B B 130 B B 106 130 110 210 B B 210 B B 900 B B 111 111 111 111 985 B B B 106 106 106 580 940 910 910 910 945 910 910 985 985 910 945 945 910 910 910 985 985 985 985 985 960 960 960 925 980 910 945 945 920 970 970 970 970 940 910 930 930 935 935 935 970 930 985 J 1 6 3 J 1 6 4 J 1 6 6 J 1 5 2 J 2 2 8 6 5 9 3 8 J 1 6 2 J 8 5 2 J 1 0 0 3 1 6 J 1 1 0 4 J 9 2 0 2 3 2 ...

Page 1019: ...00 FS5 2964 000 FS5 2965 000 FS5 2967 000 FS5 2978 000 FS5 2982 000 FS5 3177 000 FS5 3314 000 FS5 3331 000 FS5 3333 000 FS5 3337 020 FS5 3609 000 770 302 303 270 275 230 260 107 810 320 600 302 303 261 264 260 261 270 302 303 320 302 303 311 312 313 360 230 102 263 360 300 360 360 351 350 106 320 107 320 104 275 105 600 600 275 320 107 107 107 300 300 275 320 312 312 313 100 100 100 100 120 810 35...

Page 1020: ...1 000 FS7 0022 000 FS7 0023 000 FS7 0024 000 FS7 0025 000 FS7 0026 000 FS7 0027 000 FS7 0033 000 FS7 0034 000 FS7 0035 020 FS7 0036 000 FS7 0039 000 FS7 0040 000 FS7 0041 000 FS7 0043 000 FS7 0044 000 FS7 0048 000 FS7 0050 000 FS7 0051 000 FS7 0072 000 FS7 0662 000 FS7 0891 000 FS7 0893 000 FS7 0894 000 FS7 0895 000 FS7 0896 000 FS7 0897 000 FS7 0898 000 FS7 0899 000 FS7 0901 000 FS7 2057 000 FS7 ...

Page 1021: ...A 2 2 A 3 7 B 7 3 B 5 4 A J 1 1 6 J 1 3 0 J 1 4 6 J 2 0 4 J 2 5 7 J 2 6 6 J 2 9 1 J 3 1 7 2 B 2 B J 1 5 1 2 6 A 2 2 B 3 A 6 6 A 5 5 C 7 A J 1 0 8 J 1 6 8 J 2 1 1 J 2 1 3 J 2 1 4 J 2 5 8 J 2 6 8 3 5 C 2 B 4 7 2 9 B 7 A J 1 7 2 J 1 9 8 J 2 3 9 J 2 4 3 J 2 4 9 J 2 5 0 5 3 B 4 9 B J 2 3 5 J 2 8 6 J 3 5 0 5 9 C J 3 3 0 4 9 J 2 2 4 J 1 5 2 J 2 4 0 J 2 2 8 J 2 3 J 4 2 J 4 3 J 4 6 J 5 6 J 2 7 1 J 2 8 J 4 ...

Page 1022: ... B 900 B B 900 B 810 B 900 B B B B 313 B B 101 B 311 B B B 312 900 B B B B B B B B B B B B B B B B B B B B B B B B B B B B B B B B B B B B B B B B B B B B B B B 5 A J 3 4 3 J 3 6 6 J 4 0 1 J 5 0 2 9 8 8 6 A J 4 0 8 J 5 0 3 0 2 8 B 5 6 A 3 A J 1 3 5 J 1 5 5 J 1 9 2 6 B J 1 7 3 J 3 4 4 5 B J 4 0 2 5 5 D J 1 8 7 6 C J 4 0 4 J 1 3 8 J 4 0 3 J 1 2 4 3 7 C J 1 6 7 J 3 1 4 3 1 J 2 9 0 7 3 J 1 5 8 J 2 8 1...

Page 1023: ...B B B B B B B B B B B B B B B B B B B B B B B B B B B B B B B B B B B B B B B B B B B B B B B B B B B B B B B B B B B B B B B 910 107 B B B B B B B B B 107 320 B B B B B B B B J 9 2 0 1 J 3 2 J 1 0 1 7 J 1 5 5 1 J 5 0 J 5 0 J 5 1 J 2 0 3 0 J 3 2 4 J 3 8 0 J 3 8 2 J 3 2 5 J 3 2 3 J 7 6 4 J 2 3 J 4 2 J 4 3 J 4 6 J 5 6 J 6 0 1 J 6 1 1 J 6 2 1 J 6 5 1 J 7 3 7 J 1 0 0 1 J 3 J 7 6 1 J 8 5 1 J 9 4 3 J 1 ...

Page 1024: ...27 000 XA9 0465 000 XA9 0520 000 XA9 0591 000 XA9 0592 000 XA9 0596 000 XA9 0605 000 XA9 0606 000 XA9 0615 000 XA9 0625 000 B B B B B 110 111 102 305 104 210 313 550 315 107 101 105 106 107 194 231 250 313 320 360 600 645 770 970 B 775 600 640 645 600 510 580 190 106 106 106 550 580 360 325 107 215 311 312 935 130 210 312 106 460 430 215 900 210 130 300 311 570 360 104 130 420 570 100 100 275 300 ...

Page 1025: ...0 940 985 105 101 130 810 105 360 810 210 105 210 215 320 600 110 111 360 5 0 3 5 0 2 5 0 1 5 0 2 5 0 4 5 0 4 5 0 3 5 0 5 5 0 4 5 0 3 5 0 2 5 0 1 5 0 1 5 0 1 5 0 1 5 0 3 5 0 4 5 0 5 5 0 4 5 0 2 5 0 3 5 0 4 5 0 1 5 0 2 5 0 3 5 0 1 5 0 6 5 0 3 5 0 1 5 0 2 5 0 2 5 0 2 5 0 2 5 0 1 5 0 3 5 0 4 5 0 2 5 0 3 5 0 3 5 0 4 5 0 5 5 0 6 5 0 7 5 0 4 5 0 5 5 0 6 5 0 1 5 0 5 5 0 2 5 0 3 5 0 4 5 0 4 5 0 4 5 0 3 5 ...

Page 1026: ... 264 270 275 280 302 303 311 312 313 320 320 320 320 325 330 360 430 430 600 645 775 810 320 330 600 810 810 275 351 645 311 312 313 320 600 640 420 430 351 100 600 640 106 311 312 313 315 320 302 303 315 102 102 320 360 313 810 315 280 311 312 313 5 0 7 5 0 5 5 1 4 5 1 8 5 0 8 5 0 7 5 0 2 5 0 5 5 1 5 5 2 4 5 0 9 5 1 0 5 1 1 5 1 2 5 0 3 5 1 6 5 1 7 5 0 1 5 0 3 5 0 1 5 0 2 5 0 1 5 0 2 5 0 2 5 0 2 5...

Page 1027: ...2 000 XH9 0090 000 XH9 0110 000 XZ9 0251 000 XZ9 0367 000 XZ9 0407 000 XZ9 0472 000 XZ9 0503 000 263 264 270 360 102 102 102 250 260 270 280 312 320 320 320 330 360 600 360 104 104 510 280 360 810 275 270 810 311 312 313 810 302 303 810 325 210 302 303 275 900 120 108 316 275 900 6 1 4 1 5 1 1 9 4 7 4 8 4 9 2 8 2 3 1 6 1 8 7 4 1 4 8 1 4 9 1 5 0 8 1 2 0 9 4 1 2 1 4 7 4 8 1 1 1 9 1 2 2 9 3 5 2 1 7 9...

Page 1028: ...Prepared by OFFICE IMAGING PRODUCTS QUALITY ASSURANCE CENTER CANON INC Printed in U S A REVISION 0 AUG 2001 5 1 Hakusan 7 chome Toride city Ibaraki 302 8501 Japan ...

Page 1029: ...PRINTED IN U S A IMPRIME AU U S A This publication is printed on 100 recycled paper ...

Reviews: