background image

Please read this guide before operating this equipment.
After you finish reading this guide, store it in a safe place for future reference. 

ENGLISH

Copying and Mail Box Guide 

Summary of Contents for iR2230

Page 1: ...Please read this guide before operating this equipment After you finish reading this guide store it in a safe place for future reference ENGLISH Copying and Mail Box Guide ...

Page 2: ......

Page 3: ...iR3530 iR2230 Copying and Mail Box Guide 0 Frontmatter ...

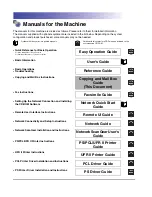
Page 4: ...tion User s Guide Basic Operations Troubleshooting Reference Guide CD ROM Copying and Mail Box Instructions Copying and Mail Box Guide This Document CD ROM Fax Instructions Facsimile Guide CD ROM Setting Up the Network Connection and Installing the CD ROM Software Network Quick Start Guide Remote User Interface Instructions Remote UI Guide CD ROM Network Connectivity and Setup Instructions Network...

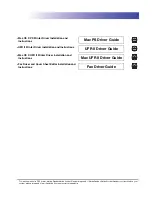
Page 5: ... II Printer Driver Installation and Instructions Mac UFR II Driver Guide CD ROM Fax Driver and Cover Sheet Editor Installation and Instructions Fax Driver Guide CD ROM To view the manual in PDF format Adobe Reader Adobe Acrobat Reader is required If Adobe Reader Adobe Acrobat Reader is not installed on your system please download it from the Adobe Systems Incorporated website ...

Page 6: ... Copying and Mail Box Features Chapter 5 Memory Features Chapter 6 Customizing Settings Chapter 7 Appendix Includes the index How This Manual Is Organized Considerable effort has been made to ensure that this manual is free of inaccuracies and omissions However as we are constantly improving our products if you need an exact specification please contact Canon ...

Page 7: ...served Copying 1 29 Reserving Copy Jobs 1 29 Using the Stack Bypass 1 31 Interrupt Mode 1 42 Sample Set 1 44 Confirming Changing Cancelling Selected Settings 1 47 Chapter 2 Introduction to the Mail Box Functions Various Mail Box Functions 2 2 Flow of Mail Box Operations 2 9 Storing Originals into an Inbox 2 9 Printing Documents Stored in an Inbox 2 17 Paper Selection 2 26 Cancelling a Job 2 32 Whi...

Page 8: ...11 Zoom by Percentage 3 11 Copying 3 12 Mail Box 3 12 Auto Zoom 3 13 Copying 3 14 Mail Box 3 15 Entire Image 3 16 Reducing Enlarging Using the Original and Copy Record Sizes 3 17 Making Copies Scanning with the Same XY Copy Zoom Ratio Zoom 3 18 Making Copies Scanning with Different XY Copy Zoom Ratios XY Zoom 3 21 Setting the X and Y Axes Independently 3 25 Copying 3 27 Mail Box 3 30 Collating Cop...

Page 9: ...ase 4 45 Different Size Originals 4 48 Job Build 4 50 Inverting Images 4 54 Image Repeat 4 55 Mirror Image 4 58 Adjusting the Contrast 4 59 Chapter 5 Memory Features Recalling Previous Copy Jobs 5 2 Memory Keys 5 4 Storing Scan Print Copy Settings 5 4 Naming a Memory Key 5 7 Recalling Scan Print Copy Settings 5 9 Erasing Scan Print Copy Settings 5 10 Chapter 6 Customizing Settings What Are Additio...

Page 10: ...Storing an Inbox 6 12 Initializing an Inbox 6 14 Setting the Photo Mode for the Mail Box Function 6 15 Standard Scan Settings 6 15 Storing the Standard Scan Settings 6 16 Initializing the Standard Scan Settings 6 17 Chapter 7 Appendix Index 7 2 ...

Page 11: ...tions that may lead to death or injury to persons if not performed correctly In order to use the machine safely always pay attention to these warnings CAUTION Indicates a caution concerning operations that may lead to injury to persons or damage to property if not performed correctly In order to use the machine safely always pay attention to these cautions IMPORTANT Indicates operational requireme...

Page 12: ...iR3530 Feeder DADF N1 Super G3 FAX Board Multi PDL Printer Kit iR System Expansion Kit Finisher S1 Additional Finisher Tray B1 and Cassette Feeding Unit Y2 Note that functions that cannot be used depending on the model or options are not displayed on the touch panel display The keys which you should press are marked with a as shown below When multiple keys can be pressed on the touch panel display...

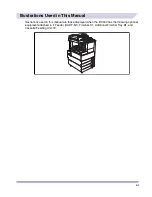
Page 13: ...d in This Manual Illustrations used in this manual are those displayed when the iR3530 has the following optional equipment attached to it Feeder DADF N1 Finisher S1 Additional Finisher Tray B1 and Cassette Feeding Unit Y2 ...

Page 14: ...g or by any information storage or retrieval system without the prior written permission of Canon Inc Disclaimers The information in this document is subject to change without notice CANON INC MAKES NO WARRANTY OF ANY KIND WITH REGARD TO THIS MATERIAL EITHER EXPRESS OR IMPLIED EXCEPT AS PROVIDED HEREIN INCLUDING WITHOUT LIMITATION THEREOF WARRANTIES AS TO MARKETABILITY MERCHANTABILITY FITNESS FOR ...

Page 15: ...ing Features 1 2 Flow of Copy Operations 1 8 Paper Selection 1 17 Cancelling a Copy Job 1 25 Using the Touch Panel Display 1 25 Using the Stop Key 1 26 Using the System Monitor Screen 1 27 Reserved Copying 1 29 Reserving Copy Jobs 1 29 Using the Stack Bypass 1 31 Interrupt Mode 1 42 Sample Set 1 44 Confirming Changing Cancelling Selected Settings 1 47 ...

Page 16: ...sages displayed on the touch panel display Various Copying Features Copy Basic Features Screen The screen on the left which appears when is selected is called the Copy Basic Features screen See p 1 17 Press to select the paper size type and the paper source See p 3 9 Press to reduce or enlarge the copy size See p 3 9 Press to make copies in the same size as your original See p 3 31 Collate Is Sele...

Page 17: ...automatic exposure control See p 3 3 Press to select the image quality Text only Text Photo or Photo only of your original You can also select the type of photo Printed Img or Photo if you have already set the Photo mode in Copy Settings from the Additional Functions screen See Chapters 4 through 5 Press to select a Special Features mode See the Reference Guide Press to check the progress of a cop...

Page 18: ...e Special Features screen and return to the Copy Basic Features screen press Done Pressing after selecting a mode displays a help screen containing guidance information This is useful when you want to learn more about the selected mode See p 4 9 Press to select or cancel the Two page Separation mode This mode enables you to copy facing pages of an opened book onto separate copy sheets See p 4 11 F...

Page 19: ... sided copy sheet See p 4 31 Press to shift the position of the original image on the copy sheet See p 4 35 Press to create margins along the sides of a copy sheet See p 4 38 Original Frame Erase Is Selected Press to eliminate dark border areas and lines that appear around original images or shadows from binding holes Original Frame Erase Mode Selected Original Frame Erase Mode Not Selected ...

Page 20: ... This mode enables you to divide the originals into several parts scan them and then print them all together This is convenient when you cannot place all of the originals that you want to copy at one time See p 4 59 Press to sharpen or soften the image of the original in the copy See p 5 4 Press to store or recall copy modes See p 5 2 Press to recall previously set copy modes A3 Original A4 Origin...

Page 21: ...appears if you press on the Special Features screen See p 4 54 Press to make copies with the black white of the entire image inverted See p 4 55 Press to copy an original with the image repeated in the vertical or horizontal direction See p 4 58 Press to copy an original with the image reversed as in a reflection in a mirror ...

Page 22: ...in the Reference Guide Routine maintenance See Chapter 7 Routine Maintenance in the Reference Guide 1 Press the appropriate keys in accordance with the messages displayed on the touch panel display If there are no messages displayed proceed to step 2 If the message You must insert a control card appears Insert a control card into the optional Card Reader C1 The Basic Features screen is displayed N...

Page 23: ...rd using the numeric keys appears Press Department ID enter the Department ID using numeric keys Press Password enter the password using numeric keys Press The Basic Features screen is displayed NOTE For instructions on using Department ID Management see Chapter 6 System Manager Settings in the Reference Guide 2 Press ...

Page 24: ...gs from the Additional Functions screen is set to On the Collate or the Offset Collate mode is automatically set when you place your originals in the feeder See Auto Collate on p 6 6 4 Gently close the feeder platen cover The paper size is recognized automatically If the paper size recognized automatically is different from the paper size you want press Paper Select select the copy paper size See ...

Page 25: ...d copy modes on the Copy Basic Features screen NOTE On the Copy Basic Features screen you can select the paper size and type copy exposure original type copy ratio two sided mode and the desired Finisher mode 6 Set the desired copy modes on the Special Features screen Press Special Features ...

Page 26: ...ecial Features screen see Chapters 4 through 5 7 Press numeric keys to enter the desired copy quantity 1 to 999 If you make a mistake when entering values press enter the correct value The copy quantity appears on the right side of the Copy Basic Features screen IMPORTANT You cannot change the copy quantity while the machine is copying NOTE If there is a current job the machine scans the original ...

Page 27: ...anel display press once for each original When scanning is complete press Done Copying starts IMPORTANT You cannot change copy mode settings such as the copy quantity paper size and copy ratio while the machine is copying NOTE If there is a current job the machine scans the original and waits to print it Printing starts when the current job is complete ...

Page 28: ...w If you want to stop a copy job Press NOTE Several copies may be output even after you press You can also cancel a copy job from the System Monitor screen See Cancelling a Copy Job on p 1 25 If you want to interrupt a copy job To Interrupt a copy job when you need to make priority copies press NOTE For instructions on interrupting a copy job see Interrupt Mode on p 1 42 ...

Page 29: ...ng Press Done place your originals press NOTE For instructions on reserving a copy job see Reserved Copying on p 1 29 10 When copying is complete remove your originals 11 If the optional Card Reader C1 is attached remove the control card NOTE For instructions on using the optional Card Reader C1 see Chapter 3 Optional Equipment in the Reference Guide ...

Page 30: ...perations 1 16 1 Introduction to the Copying Functions 12 If Department ID Management is set press NOTE For instructions on using Department ID Management see Chapter 6 System Manager Settings in the Reference Guide ...

Page 31: ...tically reduced slightly based on the copy paper size and the image size As a result the entire original image is reproduced on the copy without being cut off See Entire Image on p 3 16 If you select Envelope Tracing Paper Transparency or Labels make sure that you do not specify any Finisher modes Collate Group or Staple If Stack Bypass Standard Settings in Common Settings from the Additional Func...

Page 32: ... Paper Selection mode You cannot use the Automatic Paper Selection mode when copying the following types of originals Copy these originals using the Manual Paper Selection mode Nonstandard size originals Highly transparent originals such as transparencies Originals with an extremely dark background A6R and smaller originals NOTE If Drawer Eligibility For APS ADS in Common Settings from the Additio...

Page 33: ...wers Icons indicating the type of paper loaded in each paper drawer can be displayed on paper selection screens if you store that information into the machine beforehand See Chapter 4 Customizing Settings in the Reference Guide indicates that the paper is loaded vertically and indicates that the paper is loaded horizontally The suffix R such as in A4R used in paper size designations indicates that...

Page 34: ... Next NOTE To select an inch paper size press Inch size Select the desired paper type press OK If you are copying onto the back side of a previously printed sheet press 2nd Side of 2 Sided Page IMPORTANT When printing on special types of paper such as heavy paper or transparencies be sure to correctly set the paper type especially if you are using heavy paper If the type of paper is not set correc...

Page 35: ...uide To copy on nonstandard size paper loaded in the stack bypass Press Stack Bypass If you want to select the stack bypass when a paper size type is already selected for the current or reserved job press StackBypass Setting to specify the desired paper size type Press Free Size Next Select the desired paper type press OK If you are copying onto the back side of a previously printed sheet press 2n...

Page 36: ...may be needed If you select a nonstandard size paper Auto Zoom Entire Image Finisher mode 1 2 Sided 2 2 Sided Book 2 Sided Two page Separation Cover Sheet Insertion Image Combination Shift Transparency Interleaving or Image Repeat mode cannot be specified NOTE For more information on paper types see Chapter 2 Basic Operations in the Reference Guide To copy on envelope loaded in the stack bypass Pr...

Page 37: ... the paper size selection screen IMPORTANT If the envelope type is not selected correctly a paper jam will occur If you select an envelope size Finisher mode 1 2 Sided 2 2 Sided Book 2 Sided Two page Separation Cover Sheet Insertion Image Combination or Transparency Interleaving modes cannot be specified Press OK 2 Press Done ...

Page 38: ...Paper Selection 1 24 1 Introduction to the Copying Functions The display returns to the Copy Basic Features screen and the selected paper size and type are displayed ...

Page 39: ...celling a Copy Job Using the Touch Panel Display 1 Press Cancel on the pop up screen that appears while the machine is scanning printing or waiting to print The copy job is cancelled NOTE If you cancel a copy job during scanning be sure to remove the original for that job ...

Page 40: ... job that which is being printed press Cancel on the pop up screen that appears during printing 2 Select the copy job that you want to cancel press Cancel You cannot select multiple jobs and cancel them all at once Select and cancel one job at a time The copy job is cancelled 3 Press Resume Copy Copying resumes ...

Page 41: ...Cancelling a Copy Job 1 27 1 Introduction to the Copying Functions Using the System Monitor Screen 1 Press System Monitor 2 Press Copy ...

Page 42: ...press Cancel You cannot select multiple jobs and cancel them all at once Select and cancel one job at a time 4 Press Yes If you do not want to cancel the job press No The copy job is cancelled NOTE The cancelled job is displayed as NG No Good on the Log screen 5 Press Done The display returns to the Copy Basic Features screen ...

Page 43: ...be specified in the following cases While the Machine Is Waiting You can specify copy settings or scan originals while the machine is in the waiting state such as when the power is just turned ON or after a paper jam is cleared Copying automatically begins when the machine is ready The message Reservation copies can be made appears on the machine when it is able to process reserved copying NOTE Yo...

Page 44: ...the job displayed on the touch panel display is from a function other than the Copy function press Done to display the Copy Basic Features screen This part of the procedure is not necessary if the machine is in the waiting state 2 Place your originals set the desired copy modes and paper source NOTE To cancel a previously set copy mode press ...

Page 45: ...n perform reserved copying from the stack bypass by specifying in advance the paper to be loaded for the next job However this is possible only if paper is being fed from the stack bypass for the current job The following example assumes that A3 plain paper is being fed from the stack bypass for the current job and that you are selecting A4 plain paper to be fed from the stack bypass for a reserve...

Page 46: ...er size NOTE If you select Envelope Tracing Paper Transparency or Labels make sure that you do not specify any Finisher modes Collate Group or Staple If Stack Bypass Standard Settings in Common Settings from the Additional Functions screen is set to On StackBypass Setting is grayed out See Chapter 4 Customizing Settings in the Reference Guide If you want to select a standard paper size Select the ...

Page 47: ... correctly set the paper type especially if you are using heavy paper If the type of paper is not set correctly it could adversely affect the quality of the image Moreover the fixing unit may become dirty or the paper could jam and a service repair may be needed NOTE Transparency can be selected only if A4 is selected as the paper size For more information on the paper types see Chapter 2 Basic Op...

Page 48: ...s heavy paper or transparencies be sure to correctly set the paper type especially if you are using heavy paper If the type of paper is not set correctly it could adversely affect the quality of the image Moreover the fixing unit may become dirty or the paper could jam and a service repair may be needed NOTE For more information on the paper types see Chapter 2 Basic Operations in the Reference Gu...

Page 49: ... as shown on the screen below NOTE If there is more than one reserved job waiting to print only the last paper size type specified for the reserved copy job is shown on the Paper Select screen and Copy Basic Features screen 4 Press Done This completes the settings for a reserved copy job using the stack bypass The subsequent steps show you how to load paper into the stack bypass and complete the s...

Page 50: ...d the specified paper into the stack bypass then lower the paper retaining lever NOTE The specified paper size type is displayed on the screen when it is time for the reserved copy job to be printed Make sure to load the same paper size and type selected in step 3 into the stack bypass Printing does not start if paper of a different size or type is loaded Paper Retaining Lever ...

Page 51: ...press OK If the following screen is displayed adjust the width of the slide guides to match the paper size stored in Stack Bypass Standard Settings or set Stack Bypass Standard Settings to Off in Common Settings from the Additional Functions screen See Chapter 4 Customizing Settings in the Reference Guide IMPORTANT Set the paper size to the same size as the paper loaded in the stack bypass ...

Page 52: ... copying onto the back side of a previously printed sheet press 2nd Side of 2 Sided Page IMPORTANT When printing on special types of paper such as heavy paper or transparencies be sure to correctly set the paper type especially if you are using heavy paper If the type of paper is not set correctly it could adversely affect the quality of the image Moreover the fixing unit may become dirty or the p...

Page 53: ...previously printed sheet press 2nd Side of 2 Sided Page IMPORTANT When printing on special types of paper such as heavy paper or transparencies be sure to correctly set the paper type especially if you are using heavy paper If the type of paper is not set correctly it could adversely affect the quality of the image Moreover the fixing unit may become dirty or the paper could jam and a service repa...

Page 54: ... Functions If you want to select an envelope size Press Envelope Select the desired envelope type press OK The display returns to the paper size selection screen IMPORTANT If the envelope type is not selected correctly a paper jam will occur Press Next ...

Page 55: ...Reserved Copying 1 41 1 Introduction to the Copying Functions 8 Confirm that the paper retaining lever is securely set press OK The selected mode is set and printing starts ...

Page 56: ...pies after changing the Department ID while Department ID Management is enabled press enter the Department ID and password using numeric keys See Chapter 2 Basic Operations in the Reference Guide NOTE The current job does not stop printing immediately after you press Printing of the current job stops only when the actual printing of the priority or interrupt copy starts 2 Place your originals set ...

Page 57: ...rts stops blinking 4 Once the originals are scanned remove them from the machine When the interrupt copy job is complete the interrupted job resumes IMPORTANT If you want to continue making interrupt copies wait until the current interrupt copy job is complete end of printing Then repeat steps 2 to 4 ...

Page 58: ...llate Staple Cover Sheet Insertion or Transparency Interleaving modes Sample Set does not appear if the Group mode is set NOTE The machine s counter counts the sample print as a print 1 Place your originals set the desired copy modes 2 Press Sample Set If the original is placed on the platen glass follow the instructions that appear on the touch panel display press once for each original When scan...

Page 59: ...Sample Set 1 45 1 Introduction to the Copying Functions 3 Check the sample set select Start Print Cancel or Change Settings To print the remaining prints Press Start Print To cancel copying Press Cancel ...

Page 60: ... To change the paper size press Paper Select See Paper Selection on p 1 17 To collate the copies press Finisher See Collating Copies Prints on p 3 31 To set a margin for binding press Margin See Margin Mode on p 4 35 To make two sided copies press 2 Sided Copy See Two Sided Copying Printing on p 3 44 If you print one sample set and then change the setting pressing Sample Set prints the first set w...

Page 61: ...gs You can use the Setting Confirmation screen to confirm change or cancel selected copy modes 1 Press Setting Confirmation The Setting Confirmation screen is displayed showing the selected copy mode settings 2 Check the settings If the desired modes are set skip to step 4 Otherwise press the key of the copy mode to be changed or cancelled ...

Page 62: ...displayed NOTE A right triangle on a copy mode setting key indicates that more setting screens are available by pressing the key 3 Change or cancel the selected copy mode for example Sharpness To change a copy mode Perform the same steps used for setting the mode Change the setting as you desire press OK The display returns to the Setting Confirmation screen To cancel a copy mode Press Cancel The ...

Page 63: ...Confirming Changing Cancelling Selected Settings 1 49 1 Introduction to the Copying Functions 4 Press Done The display returns to the Copy Basic Features screen ...

Page 64: ...Confirming Changing Cancelling Selected Settings 1 50 1 Introduction to the Copying Functions ...

Page 65: ...2 9 Printing Documents Stored in an Inbox 2 17 Paper Selection 2 26 Cancelling a Job 2 32 While Scanning 2 32 While Printing 2 33 Reserving Jobs 2 36 Storing Originals While Printing 2 36 Reserving Print Jobs 2 38 Sample Print 2 51 Arranging Documents Stored in an Inbox 2 55 Changing the Name of a Document 2 55 Checking a Document s Detailed Information 2 57 Erasing a Document 2 57 Moving a Docume...

Page 66: ...s in binders The documents data stored in an inbox can be kept confidential by setting a password and printed at any time with your desired print setting Also if you select the Merge Documents mode you can print multiple documents as one document IMPORTANT The Mail Box function is available only when the optional iR System Expansion Kit is installed For more information on the iR System Expansion ...

Page 67: ...change the print settings See Printing Documents Stored in an Inbox on p 2 17 Allow you to make various settings for the scanning of originals See Storing Originals into an Inbox on p 2 9 Scanned originals and documents sent form computers are stored and displayed here Scan Screen Print Screen You can store a name and or password for an inbox in Mail Box Settings from the Additional Functions scre...

Page 68: ...together They can also be sent to computers or by Fax at anytime using the desired settings Inbox Selection Screen The screen on the left which appears when you select is called the Inbox Selection screen Inbox numbers names and available memory are displayed for each inbox In addition an icon appears on the key of each inbox to indicate its status is the icon for an empty inbox is the icon for an...

Page 69: ...Press to print the selected document See p 2 9 Press to scan an original and store it in the selected inbox Print Screen The screen on the left which appears when you select a document and press Print on a Document Selection screen is called the Print screen Display this screen when you want to print documents that are stored in an inbox See p 1 17 Press to change the print settings See p 2 17 Pre...

Page 70: ...o start printing Change Print Settings Screen The screen on the left which appears when you press Change P Settings on the Print screen of an inbox is called the Change Print Settings screen Display this screen when you want to change the print settings for a document See p 1 17 Press to select the paper size type and the paper source See p 3 31 Press to select or cancel the Collate Group or Stapl...

Page 71: ...chine to Standard Local Print Settings Scan Screen The screen on the left which appears when you press Scan on the Document Selection screen of an inbox is called the Scan screen Display this screen when you want to scan an original and store it as a document in the selected inbox See p 3 9 Press to scan your document in the same size as your original See p 3 9 Press to reduce or enlarge the scann...

Page 72: ... to set or cancel the automatic exposure control See p 2 9 Press to assign the document a name See Chapters 4 through 5 Press to select and use Special Features modes available for scanning See p 3 3 Press to select the type of original Text Text Photo or Photo Press to cancel all settings and restore the machine to the Standard Scan settings ...

Page 73: ... You Start Using This Machine in the Reference Guide Routine maintenance See Chapter 7 Routine Maintenance in the Reference Guide Storing Originals into an Inbox Place the original that you want to scan in the feeder or on the platen glass the same as when you are using the Copy function NOTE If the machine is used as a network printer you can store data directly into an inbox from a computer 1 Pr...

Page 74: ...sing the optional Card Reader C1 see Chapter 3 Optional Equipment in the Reference Guide If the message Enter the Department ID and Password using the numeric keys appears Press Department ID enter the Department ID using numeric keys Press Password enter the password using numeric keys Press The Basic Features screen is displayed NOTE For instructions on using Department ID Management see Chapter...

Page 75: ...eric keys make sure to enter a two digit number press OK If you make a mistake when entering the inbox number press enter the correct number NOTE If a document is stored in an inbox that inbox is displayed with the documents icon If an inbox is set with a password a locked icon is displayed next to the icon of that inbox If you make a mistake when selecting an inbox press Done select the correct i...

Page 76: ...appears enter the password using numeric keys press OK Enter the password set for the selected inbox See Setting Storing an Inbox on p 6 12 If a password is not set for the selected inbox this step is not necessary 5 Place your originals NOTE For instructions on placing originals see Chapter 2 Basic Operations in the Reference Guide ...

Page 77: ...xposure and Original Type Settings on p 3 2 To change zoom ratio see Changing the Copy Zoom Ratio on p 3 9 To scan two sided originals see Scanning Two Sided Originals on p 3 56 Additional scan settings are available by pressing Special Features You can set various modes when scanning originals similar to the Copy function If you want to give the document a name press Document Name ...

Page 78: ...s the document a name using the year month day and time the document was scanned To specify a document size Press Doc Size Select Select the document size press Done IMPORTANT The Auto Automatic Document Size Selection mode cannot be used with the Original Frame Erase Book Frame Erase or Image Combination mode You cannot select Auto when scanning the following types of originals Specify the size o...

Page 79: ... Mail Box Functions 8 Press If the following screen is displayed follow the instructions on the touch panel display press once for each original When scanning is complete press Done When scanning is complete the scanned data is stored in the selected inbox ...

Page 80: ...g can be changed to any time period between 1 hour and 30 days Also data can be stored indefinitely if the time period is set to 0 Off See Setting Storing an Inbox on p 6 12 NOTE If you want to cancel scanning press Cancel or 9 When scanning is complete remove your originals 10 If the optional Card Reader C1 is installed remove the control card NOTE For instructions on using the optional Card Read...

Page 81: ...nts you can select and print up to 100 documents However if there are reserved jobs in the inbox the number of documents you can select and print varies depending on the number of documents reserved You can only select multiple documents when the documents are stored in the same inbox To print multiple documents stored in different inboxes you need to move the documents to one inbox beforehand See...

Page 82: ...sing the optional Card Reader C1 see Chapter 3 Optional Equipment in the Reference Guide If the message Enter the Department ID and Password using the numeric keys appears Press Department ID enter the Department ID using numeric keys Press Password enter the password using numeric keys Press The Basic Features screen is displayed NOTE For instructions on using Department ID Management see Chapter...

Page 83: ...ric keys make sure to enter a two digit number press OK If you make a mistake when entering the inbox number press enter the correct number NOTE If a document is stored in an inbox that inbox is displayed with the documents icon If an inbox is set with a password a locked icon is displayed next to the icon of that inbox If you make a mistake when selecting an inbox press Done select the correct in...

Page 84: ...n Inbox on p 6 12 If a password is not set for the selected inbox this step is not necessary 5 Select the documents to print in the order that you want to print them press Print If there are five or more stored documents press or to display the other documents You can select multiple documents stored in the an inbox To select all of the documents in the inbox press Select All If a document is alre...

Page 85: ...he document again To cancel all documents press Clear Selection Clear Selection changes to Select All 6 If you want to change the print settings press Change P Settings To change the number of prints enter the desired number using numeric keys If multiple documents are selected you can change the number of prints by pressing Change The Copies If you do not want to change the print settings proceed...

Page 86: ...ngs for documents received from a computer are returned to the settings specified at the computer and the settings for documents scanned and recorded at the machine are returned to Standard Local Print Settings See Chapter 4 Customizing Settings in the Reference Guide You can set the paper selection two sided printing finisher and special features on the Change Print Settings screen ...

Page 87: ...tiple documents are selected If you want to print a sample of the document press Sample Print See Sample Print on p 2 51 If you want to automatically delete the selected document after it is printed press Print Erase If there is a current or reserved print job the machine will start printing your document after that job is complete ...

Page 88: ...Cleaning from the Additional Functions screen See Chapter 4 Customizing Settings in the Reference Guide You can change the print density or cancel printing while the machine is printing To cancel printing press Cancel You cannot cancel printing by pressing To reserve the next print job press Done select the inbox containing the document you want to print select the document press Print See Reservi...

Page 89: ... Operations 2 25 2 Introduction to the Mail Box Functions 10 If Department ID Management is set press NOTE For instructions on using Department ID Management see Chapter 6 System Manager Settings in the Reference Guide ...

Page 90: ... 1 to 6 of Printing Documents Stored in an Inbox on p 2 17 The Change Print Settings screen is displayed 2 Press Paper Select NOTE If you press Original Settings the settings for documents received from a computer are returned to the settings specified at the computer and the settings for documents scanned and recorded at the machine are returned to the Standard Local Print Settings See Chapter 4 ...

Page 91: ...of the Finisher modes e g Collate Group and Staple modes If Stack Bypass Standard Settings in Common Settings from the Additional Functions screen is set to On StackBypass Setting is grayed out See Chapter 4 Customizing Settings in the Reference Guide If you want to set the machine to automatically select a paper size Press Auto If you want to select a paper size manually Select the desired paper ...

Page 92: ...gs in the Reference Guide indicates that the paper is set vertically and indicates that the paper is set horizontally The suffix R such as in A4R used in paper size designations indicates that the paper is loaded in a paper drawer or the stack bypass horizontally If you want to select a standard paper size Press Stack Bypass If you want to select the stack bypass when a paper size type is already ...

Page 93: ... fixing unit dirty and the paper may be clang to it If this happens you may have to call your local authorized Canon dealer to fix the machine NOTE Transparency can be selected only if A4 is selected as the paper size For more information on paper types see Chapter 2 Basic Operations in the Reference Guide If you want to select a nonstandard paper size Press Stack Bypass If you want to select the ...

Page 94: ...dirty and the paper may be clang to it If this happens you may have to call your local authorized Canon dealer to fix the machine If you select a nonstandard paper size Finisher mode Two sided Printing or Cover Job Separator mode cannot be specified NOTE For more information on the paper types see Chapter 2 Basic Operations in the Reference Guide To select an envelope size Press Stack Bypass If yo...

Page 95: ...Cover Job Separator mode cannot be specified Press OK 4 Press Done The display returns to the Change Print Settings screen and the selected paper size and type are displayed 5 Press Start Print If there is a current or reserved print job the document is placed in the queue and is printed after the current or reserved job is complete Printing starts NOTE To cancel all settings and return the machin...

Page 96: ...inbox from the touch panel display or by pressing on the control panel However the printing of a document stored in an inbox can only be cancelled from the touch panel display While Scanning Using the Touch Panel Display 1 Press Cancel on the pop up screen that appears while the machine is scanning The job is cancelled 2 Remove the original ...

Page 97: ...o the Mail Box Functions Using the Stop Key 1 Press The job is cancelled 2 Remove the original While Printing Using the Touch Panel Display 1 Press Cancel on the pop up screen that appears while the machine is printing The job is cancelled ...

Page 98: ...Cancelling a Job 2 34 2 Introduction to the Mail Box Functions Using the System Monitor Screen 1 Press System Monitor 2 Press Print ...

Page 99: ...press Cancel You cannot select multiple jobs and cancel them all at once Select and cancel one job at a time 4 Press Yes If you do not want to cancel the job press No The print job is cancelled NOTE The cancelled job is displayed as NG No Good on the Log screen 5 Press Done The display returns to the Inbox Selection screen ...

Page 100: ...g the current job You can set different modes and paper sources including the stack bypass for each reserved job Storing Originals While Printing You can scan and store an original while the machine is printing 1 Press Done on the pop up screen that appears while the machine is printing If the job displayed on the touch panel display is from a function other than the Mail Box function press Done t...

Page 101: ... 00 has one document stored in it already 3 Place your originals specify the desired scan modes press Scanning starts NOTE You can assign a document name before scanning or you can change the time coded assigned name after you scan the document See step 7 of Storing Originals into an Inbox on p 2 9 or Changing the Name of a Document on p 2 55 ...

Page 102: ... that the machine is turned ON and when it is ready to print After a paper jam is cleared After a cover on the main unit or an optional unit such as a finisher is opened and closed While the Machine Is Printing You can specify print settings for a new job while the machine is printing Printing of the new job automatically begins when the current job is complete Reserving Print Jobs 1 Press Done on...

Page 103: ...ge Print Settings screen Select the desired inbox number and the document to print Press Print If necessary see the screen shots in steps 1 to 5 of Printing Documents Stored in an Inbox on p 2 17 The Print screen appears 3 Print the selected document If you want to print without changing any settings Press Start Print ...

Page 104: ...machine can no longer accept any more reserved jobs the screen below is displayed Press OK try reserving the job again after the current job is complete If you specify a reserved print job while the machine is in the waiting state printing automatically begins when the machine is ready If you specify a reserved print job while the machine is printing printing of the new job automatically begins wh...

Page 105: ...nting can be performed only for the registered paper size and type See Chapter 4 Customizing Settings in the Reference Guide 1 Press Paper Select on the Change Print Settings screen press StackBypass Setting Normally when reserved copying is not being set the Stack Bypass Setting screen is automatically displayed when paper is loaded into the stack bypass 2 Select the desired paper size NOTE If yo...

Page 106: ... Page IMPORTANT When printing on special types of paper such as heavy paper or transparencies be sure to correctly set the paper type especially if you are using heavy paper If the type of paper is not set correctly it could adversely affect the quality of the image Moreover the fixing unit may become dirty or the paper could jam and a service repair may be needed NOTE Transparency can be selected...

Page 107: ...Page IMPORTANT When printing on special types of paper such as heavy paper or transparencies be sure to correctly set the paper type especially if you are using heavy paper If the type of paper is not set correctly it could adversely affect the quality of the image Moreover the fixing unit may become dirty or the paper could jam and a service repair may be needed NOTE For more information on the p...

Page 108: ...x Functions If you want to select an envelope size Press Envelope Select the desired envelope type press OK The display returns to the paper size selection screen IMPORTANT If the envelope type is not selected correctly a paper jam will occur Press OK ...

Page 109: ...ved job waiting to print only the last paper size type specified for the reserved print job is shown on the Paper Select screen 3 Press Done This completes the settings for reserving a print job using the stack bypass The subsequent steps show you how to start printing and load paper into the stack bypass 4 Press Start Print The last paper size type specified for the reserved print job The paper s...

Page 110: ...NOTE The specified paper size type is displayed on the screen when it is time for the reserved print job to be printed Make sure to load the same paper size and type selected in step 2 into the stack bypass Printing does not start if paper of a different size or type is loaded 6 Select the desired paper size If the following screen is displayed adjust the width of the slide guides specify the pape...

Page 111: ...d Settings or set Stack Bypass Standard Settings to Off in Common Settings from the Additional Functions screen See Chapter 4 Customizing Settings in the Reference Guide IMPORTANT Set the paper size to the same size as the paper loaded in the stack bypass If you want to select a standard paper size Select the desired paper size press Next NOTE To select an inch paper size press Inch size ...

Page 112: ...inting on special types of paper such as heavy paper or transparencies be sure to correctly set the paper type especially if you are using heavy paper If the type of paper is not set correctly it could adversely affect the quality of the image Moreover the fixing unit may become dirty or the paper could jam and a service repair may be needed If you want to select a nonstandard paper size Press Fre...

Page 113: ... When printing on special types of paper such as heavy paper or transparencies be sure to correctly set the paper type especially if you are using heavy paper If the type of paper is not set correctly it could adversely affect the quality of the image Moreover the fixing unit may become dirty or the paper could jam and a service repair may be needed If you want to select an envelope size Press Env...

Page 114: ... envelope type press OK The display returns to the paper size selection screen IMPORTANT If the envelope type is not selected correctly a paper jam will occur Press Next 7 Confirm that the paper retaining lever is securely set press OK The selected mode is set and printing starts ...

Page 115: ...ess Merge Documents and select the Collate Offset Collate Rotate Collate or Staple mode Sample Print is grayed out if the Group mode is set NOTE You can make a sample print even when one print is specified 1 Select the document stored in an Inbox display the Change Print Settings screen Select the desired inbox number and the document to print Press Print If necessary see the screen shots in steps...

Page 116: ...ple Print 2 52 2 Introduction to the Mail Box Functions 3 Check the sample print select Start Print Cancel or Change Settings To print the remaining prints Press Start Print To cancel printing Press Cancel ...

Page 117: ...isplayed if only one document is selected and sample printing is performed without changing the print settings The screen above is displayed if only one document is selected and sample printing is performed with changes in the print settings The screen above is displayed if multiple documents are selected and sample printing is performed with changes in the print settings ...

Page 118: ...ies Prints on p 3 31 To make two sided prints press Two sided Printing See Two Sided Copying Printing on p 3 44 If you want to check the changes that you have made press Sample Print repeat step 3 NOTE To cancel all settings and restore Standard Local Print Settings press Initial Settings Press Change P Settings to change the print settings If there is a current or reserved print job the machine w...

Page 119: ...ge the document s name check a document s detailed information move a document and view the contents of the inboxes Changing the Name of a Document 1 Select the desired inbox number select the document whose name you want to change press Details NOTE If you select multiple documents and press Details only the details of the selected highlighted document are displayed ...

Page 120: ... The maximum number of characters that you can enter for the document s name is 24 IMPORTANT You cannot press OK if the entry box is left blank NOTE For instructions on entering characters see Chapter 2 Basic Operations in the Reference Guide To cancel changing the document s name press Cancel 4 Press Done repeatedly until the Inbox Selection screen appears ...

Page 121: ...ed highlighted document are displayed 2 Check the detailed information press Done repeatedly until the Inbox Selection screen appears If necessary see the screen shot in step 4 of Changing the Name of a Document on p 2 55 Erasing a Document 1 Select the desired Inbox select the document that you want to erase press Erase To select all of the documents in the selected inbox press Select All If a do...

Page 122: ...ss Done The display returns to the Inbox Selection screen Moving a Document 1 Select the desired inbox number select the document that you want to move press Move Document To select all of the documents in the selected inbox press Select All If a document is already selected this key changes to Clear Selection NOTE You can cancel a selection by selecting the document again To cancel all documents ...

Page 123: ... moved to the selected inbox it remains in the original inbox If an error occurs while multiple documents are being moved the number of documents that are moved successfully is displayed If you select the document to move the following screen is displayed The document has been moved NOTE The name of the moved document is the same as that of the original document If the control panel power switch i...

Page 124: ...Arranging Documents Stored in an Inbox 2 60 2 Introduction to the Mail Box Functions 3 Press Done The display returns to the Inbox Selection screen ...

Page 125: ...nting 3 8 Changing the Copy Zoom Ratio 3 9 Preset Zoom 3 9 Zoom by Percentage 3 11 Auto Zoom 3 13 Entire Image 3 16 Reducing Enlarging Using the Original and Copy Record Sizes 3 17 Setting the X and Y Axes Independently 3 25 Collating Copies Prints 3 31 Page Order Collate 3 35 Same Page Group 3 38 Page Order Staple 3 41 Two Sided Copying Printing 3 44 1 to 2 Sided 3 44 2 to 2 Sided 3 49 2 to 1 Sid...

Page 126: ...ure Adjustment You can manually adjust the exposure to the most appropriate level for the original Copying 1 Place your originals press Light or Dark Press Light to move the indicator to the left to make the exposure lighter or press Dark to move it to the right to make the exposure darker 2 Press Copying starts NOTE To cancel all settings and return the machine to the Standard mode press ...

Page 127: ...Initial Settings To return to the Inbox Selection screen press Original Type Selection You can manually select the original type according to the type of image The following three original type modes are available IMPORTANT Combinations of these three modes Text Text Photo or Photo cannot be selected at the same time If you select one of these modes the previously set mode is cancelled If you make...

Page 128: ...djust the exposure to the most appropriate level for the original Text Mode This mode is best suited for text originals Blueprints or pencil drawn originals can also be copied scanned clearly Text Photo Mode This mode is best suited for originals containing both text and photos Photo Mode This mode is best suited for photos printed on photographic paper Copying 1 Place your originals press the ori...

Page 129: ...fy an inbox Select the desired inbox number to display the Document Selection screen Press Scan If necessary see the screen shots in steps 1 to 6 of Storing Originals into an Inbox on p 2 9 The Scan screen is displayed 2 Select the original type in accordance with Copying on p 3 4 NOTE If Photo Mode in Mail Box Setting from the Additional Functions screen is set to On you can select Printed Img or...

Page 130: ... the quality of the original Copying 1 Place your originals press A The machine automatically adjusts the exposure to the level best suited to the quality of the original NOTE An automatic copy exposure adjustment may not work with transparencies In this case adjust the exposure manually by pressing Light or Dark 2 Press Copying starts NOTE To cancel all settings and return the machine to the Stan...

Page 131: ...ocument Selection screen Press Scan If necessary see the screen shots in steps 1 to 6 of Storing Originals into an Inbox on p 2 9 The Scan screen is displayed 2 Set the Automatic Exposure Adjustment mode in accordance with Copying on p 3 6 NOTE To cancel all settings and return the machine to the Standard Scan mode press Initial Settings To return to the Inbox Selection screen press ...

Page 132: ...make the exposure lighter or press Dark to move it to the right to make the exposure darker The exposure is changed When printing is complete the display returns to the Copy Basic Features screen for the Copy function or the Inbox Selection screen for the Mail Box function NOTE If the copy exposure has been changed on the Copy Basic Features screen for the Copy function or while the document is be...

Page 133: ...nlarging A4 originals to A3 If you are enlarging A5 originals to A3 only when the original is placed on the platen glass If you are reducing A3 originals to A4 with Auto Orientation in Copy Settings from the Additional Functions screen set to Off load A4R paper in a paper drawer or the stack bypass NOTE Placing an original horizontally means setting the original with the longer side sideways See C...

Page 134: ...t to Auto To do so press Paper Select Auto Done 2 To reduce the original image select a preset reduction ratio To enlarge the original image select a preset enlargement ratio Following your selection press Done The selected mode is set the display returns to the Copy Basic Features screen and the selected copy ratio is displayed Enlargement Ratios Reduction Ratios ...

Page 135: ... Storing Originals into an Inbox on p 2 9 The Scan screen is displayed 2 Specify the zoom ratio in accordance with Copying on p 3 10 NOTE To cancel all settings and return the machine to the Standard Scan mode press Initial Settings To return to the Inbox Selection screen press Zoom by Percentage You can reduce or enlarge originals by any copy zoom ratio in 1 increments The available copy ratios a...

Page 136: ...value appears on the screen The selected mode is set the display returns to the Copy Basic Features screen and the specified copy ratio is displayed 3 Press Copying starts NOTE To return the copy ratio to 100 press 1 1 To cancel all settings and return the machine to the Standard mode press Mail Box 1 Follow the procedure below to specify an inbox Select the desired inbox number to display the Doc...

Page 137: ...5 to 200 when the original is placed in the feeder IMPORTANT The Auto Zoom mode cannot be used with the following mode s Copy Automatic Paper Selection Image Repeat Auto You cannot scan copy highly transparent originals such as transparencies using the Auto setting on the Copy Ratio screen Use the preset Zoom or Zoom by Percentage mode instead To use the Auto setting on the Copy Zoom Ratio screen ...

Page 138: ...ess Auto Done The selected mode is set the display returns to the Copy Basic Features screen and the copy ratio generated by the machine is displayed 3 Press Copying starts NOTE If the original is placed on the platen glass the copy ratio automatically appears when the feeder platen cover is closed provided that the original size can be detected If the original is placed in the feeder the copy rat...

Page 139: ...ct a record size by pressing Auto press OK NOTE To select an inch paper size press Inch size 4 Press Scanning starts NOTE If the original is placed on the platen glass the zoom ratio automatically appears when the feeder platen cover is closed provided that the original size can be detected If the original is placed in the feeder the zoom ratio appears when is pressed To cancel this setting press ...

Page 140: ...t the entire image is copied without being cut off IMPORTANT The Entire Image mode cannot be used with the following mode s Copy Frame Erase Image Combination Image Repeat Mirror Image NOTE The Entire Image mode is available for the Copy function only The reduction ratios when the Entire Image mode is specified are A3 98 1 A4 97 3 A5 96 2 1 Place your originals press Copy Ratio If necessary see th...

Page 141: ...and copy paper record size The available copy ratios are from 25 to 400 when the original is placed on the platen glass and from 25 to 200 when the original placed in the feeder The following two Zoom Programme modes are available NOTE The specified sizes are converted into a copy zoom ratio by the machine using the formula below The result is rounded to the closest integer Copy zoom ratio copy re...

Page 142: ...You can set different copy zoom ratios for the horizontal X and vertical Y axes Making Copies Scanning with the Same XY Copy Zoom Ratio Zoom Copying 1 Place your originals press Copy Ratio If necessary see the screen shot in step 1 of Copying in Preset Zoom on p 3 9 2 Press Other Zoom Original Copy X 100 mm Y 120 mm Y 180 mm X 80 mm A4 A4 ...

Page 143: ... 3 19 3 Basic Copying and Mail Box Features 3 Press Zoom Program 4 Use the numeric keys on the touch panel display to enter values for the original size and copy size Press Original Size enter a value Press Copy Size enter a value ...

Page 144: ... platen glass If the computation results in a zoom ratio less than 25 or greater than 400 a message appears telling you that values below 25 will be set to 25 and values above 400 will be set to 400 The selected mode is set the display returns to the Copy Basic Features screen and the copy zoom ratio generated by the machine is displayed NOTE For instructions on entering values in inches see Chapt...

Page 145: ...the Mail Box function enter the Original Size and Record Size NOTE To cancel this setting press Copy Ratio Other Zoom Zoom Program Cancel To cancel all settings and return the machine to the Standard Scan mode press Initial Settings To return to the Inbox Selection screen press Making Copies Scanning with Different XY Copy Zoom Ratios XY Zoom Copying 1 Place your originals press Copy Ratio If nece...

Page 146: ...g and Mail Box Features 3 Press XY Zoom 4 Use the numeric keys on the touch panel display to enter values for the original size and copy record size Press X horizontal axis for Orig Size enter a value Press Y vertical axis for Orig Size enter a value ...

Page 147: ... than 200 place your original on the platen glass If the computation results in a zoom ratio less than 25 or greater than 400 a message appears telling you that values below 25 will be set to 25 and values above 400 will be set to 400 The selected mode is set the display returns to the Copy Basic Features screen and the copy ratios generated by the machine for the X and Y axes are displayed NOTE F...

Page 148: ...in steps 1 to 6 of Storing Originals into an Inbox on p 2 9 The Scan screen is displayed 2 Specify the Zoom Programme XY Zoom mode in accordance with Copying on p 3 21 For the Mail Box function enter the Original Size and Record Size NOTE To cancel this setting press Copy Ratio Other Zoom Zoom Program Cancel To cancel all settings and return the machine to the Standard Scan mode press Initial Sett...

Page 149: ...der The following two XY Zoom modes are available Manually Specifying the Copy Zoom Ratio XY Zoom You can manually set different copy zoom ratios for the horizontal X and vertical Y axes expressed in percentages and in 1 increments NOTE If you set the copy zoom ratio with the XY Zoom mode the image of the original may be rotated before being printed on the paper depending on the outcome of the com...

Page 150: ...he Auto XY Zoom mode select the paper size using the Manual Paper Selection mode If you do not select a paper size paper drawer 1 is automatically selected and the copy zoom ratio is set to match the size of the paper loaded in that drawer If you set the copy zoom ratio in the Auto XY Zoom mode Auto Orientation is not performed NOTE The Auto XY Zoom mode is available for the Copy function only If ...

Page 151: ... step 1 of Copying in Preset Zoom on p 3 9 2 Press Other Zoom If necessary see the screen shot in step 2 of Copying in Making Copies Scanning with the Same XY Copy Zoom Ratio Zoom on p 3 18 3 Press XY Zoom 4 Specify the desired copy ratios To manually specify the copy ratios XY Zoom Press X horizontal axis enter a value Press Y vertical axis enter a value ...

Page 152: ...en and the specified copy ratios are displayed To have the copy ratios automatically specified Auto XY Zoom Press Auto XY Zoom OK The selected mode is set the display returns to the Copy Basic Features screen and the specified copy ratios are displayed IMPORTANT If you select Auto XY Zoom make sure that you select a paper size other than Auto If you do not specify a paper size paper drawer 1 is au...

Page 153: ...on the Copy Basic Features screen When the original is placed in the feeder When the machine is not able to detect the size of the original placed on the platen glass 5 Press Copying starts NOTE To return the copy zoom ratio to 100 press 1 1 To cancel this setting press Copy Ratio Other Zoom XY Zoom Cancel To cancel all settings and return the machine to the Standard mode press ...

Page 154: ...Press Scan If necessary see the screen shots in steps 1 to 6 of Storing Originals into an Inbox on p 2 9 The Scan screen is displayed 2 Specify XY Zoom mode in accordance with Copying on p 3 27 NOTE To cancel this setting press Copy Ratio Other Zoom XY Zoom Cancel To cancel all settings and return the machine to the Standard Scan mode press Initial Settings To return to the Inbox Selection screen ...

Page 155: ...ructions on using optional Finisher S1 see Chapter 3 Optional Equipment in the Reference Guide The table below shows all the finishing features that are available with each different optional unit and the paper sizes that can be used Available Unavailable Optional Unit Offset Rotate Staple Hole Punch None A4 A4R Finisher S1 A3 A4 A4R A3 A4R 30 sheets A4 50 sheets Finisher S1 Puncher Unit Q1 Copy T...

Page 156: ...t is as follows IMPORTANT The Group mode cannot be used with the following mode s Copy Sample Set Cover Sheet Insertion Transparency Interleaving Mail Box Sample Print Cover Job Separator If the Staple Mode Is Set The copies are automatically collated into sets arranged in page order and stapled in the top left corner The output is as follows Originals Set 2 Set 3 Set 1 Three Copies of Each Page C...

Page 157: ...f the Collate Group and Staple modes are not set copies are output as follows If the Hole Punch Mode Is Set The machine punches two holes in the output IMPORTANT The Hole Punch mode cannot be used with the following mode s Copy Transparency Interleaving The machine automatically selects how many holes to punch depending on the selected paper size Two holes A3 A4 A4R Four holes A3 A4 for France onl...

Page 158: ...as follows IMPORTANT The Rotate mode cannot be used with the following mode s Copy Automatic Paper Selection Cover Sheet Insertion Transparency Interleaving Mail Box Automatic Paper Selection Cover Job Separator If the Offset Mode Is Set The copies are slightly offset vertically in the output tray as follows IMPORTANT The Offset mode cannot be used with the following mode s Copy Transparency Inter...

Page 159: ...e your originals press Finisher NOTE If Auto Collate in Copy Settings from the Additional Functions screen is set to On the Collate or Offset Collate mode is automatically set when you place your originals in the feeder See Auto Collate on p 6 6 2 Press Collate If the optional Finisher S1 is attached ...

Page 160: ...Box Features If the optional Finisher S1 and Puncher Unit Q1 are attached If a finisher is not attached or only the optional Inner 2 Way Tray D1 is attached If you want to hole punches made press Hole Punch If you select Rotate Press Next select A4 or A4R ...

Page 161: ...atic Paper Selection for the Remote Mode make sure to select a paper size which can be rotated Otherwise output will not be rotated If there is no paper which can be rotated output will be collated without being rotated 3 Press OK The selected mode is set and the display returns to the Copy Basic Features screen 4 Press If the original is placed on the platen glass follow the instructions that app...

Page 162: ...f there is a current or reserved print job the document is placed in the queue and is printed after the current or reserved job is complete Printing starts NOTE To cancel this setting press Finisher Cancel To cancel all settings and return the machine to Standard Local Print Settings press Initial Settings To return to the Inbox Selection screen press Same Page Group Copying 1 Place your originals...

Page 163: ...ox Features 2 Press Group If the optional Finisher S1 is attached If the optional Finisher S1 and Puncher Unit Q1 are attached If a finisher is not attached or only the optional Inner 2 Way Tray D1 is attached If you want hole punches made press Hole Punch ...

Page 164: ...e Guide When you have selected Automatic Paper Selection for the Remote Mode make sure to select a paper size which can be rotated Otherwise output will not be rotated If there is no paper which can be rotated output will be collated 3 Press OK The selected mode is set and the display returns to the Copy Basic Features screen 4 Press If the original is placed on the platen glass follow the instruc...

Page 165: ... accordance with Copying on p 3 38 3 Press Start Print If there is a current or reserved print job the document is placed in the queue and is printed after the current or reserved job is complete Printing starts NOTE To cancel this setting press Finisher Cancel To cancel all settings and return the machine to Standard Local Print Settings press Initial Settings To return to the Inbox Selection scr...

Page 166: ...te mode is automatically set when you place your originals in the feeder See Auto Collate on p 6 6 2 Press Staple OK If the optional Finisher S1 is attached If the optional Finsher S1 and Puncher Unit Q1 are attached If you want hole punches made press Hole Punch You cannot select the staple position The selected mode is set and the display returns to the Copy Basic Features screen ...

Page 167: ...acing originals follow the procedure below Select the desired inbox number and the document to print Press Print Press Change P Settings If necessary see the screen shots in steps 1 to 6 of Printing Documents Stored in an Inbox on p 2 17 The Change Print Settings screen is displayed 2 Specify the Staple settings in accordance with Copying on p 3 41 3 Press Start Print If there is a current or rese...

Page 168: ...the original with the back edge of the platen glass by the arrow in the top left corner or with the back edge of the feeder The Two sided mode you have selected is displayed above Two sided on the Copy Basic Features screen Paper used to make two sided copies prints must conform to the following specifications Paper size A3 A4 A4R A5R envelopes cannot be used for two sided copying printing Paper w...

Page 169: ...n NOTE If there are an odd number of originals the back side of the last copy is left blank The machine s counter does not count the blank page as a copy If the Two sided mode is used with the Different Size Originals mode the copies of different size originals will be printed as one sided copies on paper of their respective sizes If you want to make two sided copies with different size originals ...

Page 170: ...reen and 1 2 Sided is displayed above Two sided 4 Press If the original is placed on the platen glass follow the instructions that appear on the touch panel display press once for each original When scanning is complete press Done Copying starts NOTE To cancel this setting press Two sided Cancel To cancel all the settings and return the machine to the Standard mode press Book Type The front and ba...

Page 171: ... different size the different sized documents will be printed as one sided prints on paper of their respective sizes If you want such pages to be printed as two sided documents select the desired paper size beforehand 1 When using the Mail Box function instead of placing originals follow the procedure below Select the desired inbox number and the document to print Press Print Press Change P Settin...

Page 172: ...de is set and the display returns to the Change Print Settings screen 4 Press Start Print If there is a current or reserved print job the document is placed in the queue and is printed after the current or reserved job is complete Printing starts NOTE To cancel this setting press Two sided Printing Cancel To cancel all settings and return the machine to Standard Local Print Settings press Initial ...

Page 173: ... copying is available only if the optional Feeder DADF N1 is attached The 2 2 Sided mode cannot be used with the following mode s Copy Two page Separation Image Combination Transparency Interleaving NOTE The 2 2 Sided mode is available for the Copying function only 1 Place your originals in the feeder press Two sided NOTE If Auto Collate in Copy Settings from the Additional Functions screen is set...

Page 174: ...e Original Copy The display returns to the Two sided feature selection screen Book Type The front and back sides of the original have the same top bottom orientation Calendar Type The front and back sides of the original have opposite top bottom orientations Book Type The front and back sides of the copy will have the same top bottom orientation Calendar Type The front and back sides of the copy w...

Page 175: ... two sided originals placed in the feeder to make one sided copies on different sheets of paper IMPORTANT 2 1 Sided copying is available only if the optional Feeder DADF N1 is attached The 2 1 Sided mode cannot be used with the following mode s Copy Two page Separation Image Combination Transparency Interleaving Make sure to place originals with a horizontal landscape orientation such as A4R and A...

Page 176: ...riginals in the feeder See Auto Collate on p 6 6 2 Press 2 1 Sided To set the orientation of the originals press Option select the orientation of the originals press Done Details of each item are shown below The display returns to the Two sided feature selection screen 3 Press OK The display returns to the Copy Basic Features screen and 2 1 Sided is displayed above Two sided Book Type The front an...

Page 177: ...d mode press Book to 2 Sided This feature enables you to make two sided copies from facing pages or from the front and back sides of a page in bound originals such as books and magazines Left Right Two sided This setting makes two sided copies from facing pages Front Back Two sided This setting makes two sided copies from the front and back sides of a page Original Copies 2 2 1 1 Original Copies 2...

Page 178: ...t blank The machine s counter does not count the blank pages as copies Place your original on the platen glass The Book 2 Sided mode cannot be used when the original is placed in the feeder NOTE The Book 2 Sided mode is available for the Copying function only 1 Place your original on the platen glass press Two sided If necessary see the screen shot in step 1 of 1 to 2 Sided on p 3 44 To make copie...

Page 179: ...our original on the platen glass press Scanning starts 5 When scanning is complete press Done Copying starts NOTE To cancel this setting press Two sided Cancel To cancel all settings and return the machine to the Standard mode press Left Right Two sided The facing pages of a book or bound original are copied onto the front and back sides of a single sheet of paper Front Back Two sided The front an...

Page 180: ...ination When you are scanning originals with a horizontal landscape orientation such as A4R or A5R make sure to place them horizontally in the feeder If these originals are placed vertically the back sides of the originals are scanned upside down NOTE The 2 Sided Original mode is available for the Mail Box function only 1 Follow the procedure below to specify an inbox Select the desired inbox numb...

Page 181: ...screen 4 Press Scanning starts NOTE To cancel this setting press 2 Sided Original Cancel To cancel all settings and return the machine to the Standard Scan mode press Initial Settings To return to the Inbox Selection screen press Book Type The front and back sides of the original have the same top bottom orientation Calendar Type The front and back sides of the original have opposite top bottom or...

Page 182: ...gle document Documents combining cutout artwork transparencies and data sent from one or more computers using the Two sided Printing mode IMPORTANT You can set the Merge Documents mode only if you select multiple documents NOTE The Merge Document mode is available for the Mail Box function only If you use the Merge Documents mode to combine and print multiple documents the documents are printed us...

Page 183: ...key changes to Clear Selection To cancel all documents press Clear Selection Clear Selection changes to Select All The Change Print Settings screen is displayed 2 Press Merge Documents Merge Documents is displayed only when multiple documents are selected 3 Press Start Print If there is a current or reserved print job the document is placed in the queue and is printed after the current or reserved...

Page 184: ...Merging Documents 3 60 3 Basic Copying and Mail Box Features ...

Page 185: ...x Features for Printing 4 6 Two Page Separation 4 9 Cover Sheet Insertion 4 11 Cover Job Separator 4 17 Transparency Interleaving 4 21 Image Combination 4 25 Copying 4 27 Mail Box 4 30 Shifting the Original Image 4 31 Using the Arrow Keys 4 31 Using the Numeric Keys 4 33 Margin Mode 4 35 Frame Erase 4 38 Original Frame Erase 4 38 Book Frame Erase 4 42 Binding Erase 4 45 Different Size Originals 4 ...

Page 186: ...Build modes are modes for performing various kinds of editing according to your needs when copying printing or storing documents in an inbox IMPORTANT Depending on the mode some combinations of modes will not be available See the corresponding section on each mode Specifying the Special Copying Features 1 Place your originals 2 Press Special Features ...

Page 187: ...eatures screen Special Features 1 2 Special Features 2 2 IMPORTANT Depending on the mode you may have to place your original on the platen glass or in the feeder See the corresponding section on each mode for detailed information NOTE If the desired setting is not displayed press or to scroll to the desired setting ...

Page 188: ...procedure below For modes which have a right triangle on the bottom right of their key Example Frame Erase Press Special Features Frame Erase Cancel For modes which do not have a right triangle on the bottom right of their key Example Job Build Press Special Features Job Build To cancel all settings and return the machine to the Standard mode press Specifying the Special Mail Box Features for Scan...

Page 189: ...Features screen IMPORTANT Depending on the mode you may have to place your original on the platen glass or in the feeder See the corresponding section on each mode for detailed information 4 Set the desired mode For more information on setting each mode see the corresponding section To set other modes at the same time repeat steps 3 and 4 ...

Page 190: ...ancel For modes which do not have a right triangle on the bottom right of their key Example Job Build Press Special Features Job Build To cancel all settings and return the machine to the Standard Scan mode press Initial Settings To return to the Inbox Selection screen press Specifying the Special Mail Box Features for Printing 1 Select the document stored in an Inbox display the Change Print Sett...

Page 191: ...Mail Box Features 2 Press Special Features 3 Select the desired mode from the Special Features screen 4 Set the desired mode For more information on setting each mode see the corresponding section To set other modes at the same time repeat steps 3 and 4 ...

Page 192: ... queue and is printed after the current or reserved job is complete Printing starts NOTE To cancel this setting follow the procedure below Example Cover Job Separator Press Special Features Cover Job Separator Cancel To cancel all settings and return the machine to Standard Local Print Settings press Initial Settings To return to the Inbox Selection screen press ...

Page 193: ...he platen glass The Two page Separation mode cannot be used when the original is placed in the feeder NOTE The procedure for storing documents in an inbox is the same as for copying To make two sided copies of books or bound originals use the Book 2 Sided copying feature of the Two sided mode See Book to 2 Sided on p 3 53 1 On the Special Features screen press Two page Separation Done When placing...

Page 194: ...l on the platen glass The Two page Separation mode cannot be used when the original is placed in the feeder 2 Press To scan the next two facing pages turn the page of the original place your original on the platen glass press Scanning starts 3 When scanning is complete press Done Copying starts ...

Page 195: ...entation is not performed You cannot select the Cover Sheet Insertion mode when the Different Size Originals mode is set with the Automatic Paper Selection mode If you select the Staple mode when the optional Finisher S1 is attached you cannot staple more than 30 sheets of A3 or A4R paper or 50 sheets of A4 paper including sheet insertions NOTE The Cover Sheet Insertion mode is available for the C...

Page 196: ...t of copies You may also copy on the back cover sheet Sheet Insertion This setting inserts a sheet of paper between copies This feature is useful when you want to use a blank sheet to help sort out the copies You may also copy on the sheet insertions Originals Copies Printed Back Cover Originals Copies Printed Sheet Insertion ...

Page 197: ...the copies by chapter 1 On the Special Features screen press Cover Sheet Insertion 2 Select the desired Cover Sheet Insertion feature press Next If you select only Chapter Page proceed to the bullet in step 4 that reads If you select Sheet Insertion or Chapter Page You cannot select the Sheet Insertion and Chapter Page features at the same time NOTE To cancel a selected feature press that key agai...

Page 198: ... cover back cover or sheet insertion press Next If you are setting for two sided copying press Option select the side to be copied on press Done NOTE The screens that appear on your machine may differ from those shown here depending on the setting in step 2 A chapter page is always copied on only one side ...

Page 199: ...ront Cover Proceed to step 5 If you select Back Cover Select the side to be copied on press Next If you select Sheet Insertion or Chapter Page Set all positions where the sheet is to be inserted into copies press Next Specify the sheet insertion positions using numeric keys IMPORTANT You cannot set the sheet insertion position or chapter page on the first page Set the position starting from the se...

Page 200: ...ired page press 5 Select the paper source press OK The selected mode is set IMPORTANT Select the same size paper for Front Cover Back Cover and Sheet Insertion or Chapter Page If you try to set a different paper size for one feature the paper sizes for the other features are automatically changed to the new paper size However if you are only changing the paper source with the same paper size the s...

Page 201: ...tate Group You can set the Cover Job Separator mode only if you select multiple documents and set the Merge Documents mode See Merging Documents on p 3 58 You cannot print on the front cover back cover or job separator sheets If you select the Staple mode when the optional Finisher S1 is attached you cannot staple more than 30 sheets of A3 or A4R paper or 50 sheets of A4 paper including sheet inse...

Page 202: ...tting adds a back cover sheet to each set of prints You cannot print on the back cover sheet Job Separator This setting inserts a sheet of paper between documents You cannot print on the job separator sheets Selected Documents Prints Back Cover Selected Documents Prints Job Separator ...

Page 203: ...b Separator 2 Select the desired Cover Job Separator feature s press Next IMPORTANT You cannot print on the front cover back cover or job separator sheets NOTE To cancel a Cover Job Separator feature press the feature key again 3 Select the paper source for each selected feature press OK The selected mode is set ...

Page 204: ... different paper size for one feature the paper sizes for the other features are automatically changed to the new paper size However if you are switching to another paper source with the same paper size the settings for the other features will not change NOTE The screens that appear on your machine may differ from those shown here depending on the setting in step 2 ...

Page 205: ...her Two sided Two page Separation Cover Sheet Insertion Image Combination Image Repeat Mirror Image Even if an optional finisher is attached you cannot use any of the Finisher modes with the Transparency Interleaving mode Only A4 is available for the Transparency Interleaving mode NOTE The Transparency Interleaving mode is available for the Copying function only The machine s counter does not coun...

Page 206: ... Blank setting outputs a printed transparency and a blank interleaf sheet alternately If You Want to Print on the Interleaf Sheets The Print setting outputs a printed transparency and a printed interleaf sheet alternately Originals Copies Transparencies Blank Interleaf Sheets Originals Copies Transparencies Printed Interleaf Sheets ...

Page 207: ... Interleaving 4 23 4 Special Copying and Mail Box Features 1 On the Special Features screen press Transparency Interleaving 2 Load transparencies into the stack bypass 3 Select the size of transparencies press Next ...

Page 208: ...s OK The selected mode is set NOTE If you are copying onto the interleaf sheets these sheets are included in the count of the total number of copies made The copies are output with the copied side face down alternating between transparency and interleaf sheet In the Transparency Interleaving mode transparencies are loaded from the stack bypass while interleaf sheets are loaded from a paper drawer ...

Page 209: ...ferent Size Originals Original Frame Erase Book Frame Erase Originals copied scanned in the Image Combination mode must all be the same size You cannot use the Image Combination mode with the Different Size Originals mode For the Copying function you can change the number of copies or settings for the 2 Sided Original mode before scanning the next original between jobs if the original is one of th...

Page 210: ...is setting reduces four 1 sided or two 2 sided originals to fit onto one side or both sides of one sheet of paper 8 On 1 This setting reduces eight 1 sided or four 2 sided originals to fit onto one side or both sides of one sheet of paper Originals or Copy Originals Copy or ...

Page 211: ...ded original press OK Next Details of each item are shown below NOTE 2 Sided Original is available only if the optional Feeder DADF N1 is attached To select an inch paper size press Inch size 2 Sided Original cannot be selected if A6R is the selected original size Book Type The front and back sides of the original have the same top bottom orientation Calendar Type The front and back sides of the o...

Page 212: ...t the type of two sided orientation press OK Next Details of each item are shown below If you want to specify the image order press Option select the image order press Done Next 2 On 1 4 On 1 and 8 On 1 Book Type The front and back sides of the original have the same top bottom orientation Calendar Type The front and back sides of the original have opposite top bottom orientations ...

Page 213: ...r size press OK The selected mode is set IMPORTANT You cannot use Automatic Paper Selection in the Image Combination mode NOTE The machine automatically selects the copy ratio depending on the selected paper size If you set the Image Combination mode the Center Shift mode is also automatically set 2 On 1 Left Right 4 On 1 and 8 On 1 Upper Left Upper Right Lower Left Lower Right ...

Page 214: ...mage Combination mode in accordance with steps 1 to 3 of Copying on p 4 27 2 Select the record size press OK The selected mode is set NOTE To select an inch paper size press Inch size The original is scanned with the reduction ratio automatically set depending on the selected record size ...

Page 215: ... mode If the original and the copy paper are the same size and the copy ratio is set at 100 the image of the original is not shifted The default setting is Center If you use the numeric keys to enter the shift position the original image may be partially cut off on the copy depending on the size of the original the size of the copy paper and the amount of shift specified NOTE The Shift mode is ava...

Page 216: ...press Shift 2 Press Center Shift Corner Shift select the shift direction with an arrow key press OK The shift direction is the direction that you want the original image moved to if you first visualize the original image as being face up and appearing in the centre of the copy page The selected mode is set ...

Page 217: ...osition Press No Key Entry Select the shift direction Enter the shift value If you enter a value using numeric keys outside the setting range a message prompting you to enter an appropriate value appears on the screen NOTE To change a value you entered select the shift direction enter the correct value using numeric keys For instructions on entering values in inches see Chapter 2 Basic Operations ...

Page 218: ...riginal image to the left Press the left Enter the shift value Example To move the original image in a diagonal direction Press the top Enter the shift value Press the right Enter the shift value A diagonal arrow pointing in the direction of the shift appears 3 Press OK The selected mode is set ...

Page 219: ...ifts the entire original image by the designated width Therefore an original whose image extends all the way to the edges of the sheet may be partially cut off on the copy NOTE The Left Margin and Right Margin modes enable you to add a margin to only the back sides of the copies Therefore originals that already have a margin can be copied in the 1 2 sided mode or 2 1 Sided mode The Margin mode is ...

Page 220: ...n mode for the back only If you are using the Margin and Two sided modes together and copying a document that already has a left or right margin follow the instructions below 1 2 Sided Set the Margin mode for both the front and back 2 2 Sided Set the Margin mode for both the front and back 2 1 Sided Set the Margin mode for both the front and back NOTE The default setting is 10 mm For instructions ...

Page 221: ...f you select Top Margin or Bottom Margin Press or to set the desired margin width If you enter a value using numeric keys outside the setting range a message prompting you to enter an appropriate value appears on the screen 3 Press OK The selected mode is set ...

Page 222: ...TANT Combinations of the three Frame Erase modes cannot be set If you select one of these modes the previously set mode is cancelled Original Frame Erase This mode erases the dark borders and frame lines that appear around the copy scanned image if the original is smaller than the selected paper size You can also use this mode to create a blank border around the edge of the copy recorded page Orig...

Page 223: ...he following mode s Copy Entire Image Image Combination Image Repeat Mirror Image Mail Box Doc Size Select Auto Different Size Originals Image Combination NOTE The procedure for storing documents in an inbox is the same as for copying 1 On the Special Features screen press Frame Erase 2 Press Original Frame Erase Next ...

Page 224: ... select an inch paper size press Inch size 4 Press or to set the frame erase width If you enter a value using numeric keys outside the setting range a message prompting you to enter an appropriate value appears on the screen NOTE The default setting is 4 mm The maximum original frame erase width that you can set is 50 mm For instructions on entering values in inches see Chapter 2 Basic Operations ...

Page 225: ...frame erase width If you want to set the top left right and bottom widths independently Press Adjust Each Dim Select the desired frame erase borders press or to set their respective frame erase widths To return to the screen for setting the same width for all four borders press Adjust All At Once 5 Press OK The selected mode is set ...

Page 226: ...et of paper recorded page IMPORTANT The Book Frame Erase mode cannot be used with the following mode s Copy Entire Image Image Combination Image Repeat Mirror Image Mail Box Doc Size Select Auto Different Size Originals Image Combination NOTE The procedure for storing documents in an inbox is the same as for copying 1 On the Special Features screen press Frame Erase Original Book Frame Erase Selec...

Page 227: ...ext IMPORTANT You can set the Book Frame Erase mode only for the original paper sizes shown on the touch panel display NOTE To select an inch paper size press Inch size 4 Press or to set the frame erase widths If you enter using numeric keys a value outside the setting range a message prompting you to enter an appropriate value appears on the screen ...

Page 228: ...ons in the Reference Guide If you want to set the same width for all four borders Press Sides and Center press or to set their respective frame erase widths If you want to set the top left centre right and bottom widths independently Press Adjust Each Dim Select the desired frame erase borders press or to set their respective frame erase widths To return to the screen for setting the same width fo...

Page 229: ...ration Image Repeat Mirror Image Mail Box Two page Separation Do not place originals with binding holes in the feeder as this may damage the originals When using the Binding Erase mode the borders you do not select are also erased by 4 mm NOTE The procedure for storing documents in an inbox is the same as for copying 1 On the Special Features screen press Frame Erase IMPORTANT Place your original ...

Page 230: ...ing and Mail Box Features 2 Press Binding Erase Next 3 Select the border where the binding holes are located press Next The border is where the binding holes are located on the original if you visualize the original as being face up ...

Page 231: ...g numeric keys outside the setting range a message prompting you to enter an appropriate value appears on the screen The selected mode is set NOTE The default setting is 18 mm The maximum binding erase width that you can set is 20 mm For instructions on entering values in inches see Chapter 2 Basic Operations in the Reference Guide ...

Page 232: ...cannot be fed together If you place originals with different widths in the feeder the originals may move slightly when fed to the platen glass As a result the images may be scanned and copied as slanted If the Different Size Originals mode is set the scanning speed may be slower than normal When copying if the Different Size Originals mode is set in combination with the Shift mode or the Cover She...

Page 233: ...Different Size Originals 4 49 4 Special Copying and Mail Box Features 1 On the Special Features screen press Different Size Originals The selected mode is set ...

Page 234: ...the feeder remove the originals from the original output area when the scanning of each batch is complete When copying you can change or specify the following settings before scanning the next batch of originals i e between batches the number of copies Two sided Original mode original type and copy exposure However if you specify the Image Combination mode with the Job Build mode you cannot change...

Page 235: ...ided and two sided originals as two sided copies divide the originals into one sided and two sided batches For example if the first batch of originals to be copied consists of two sided originals set the Two sided Original mode accordingly Thereafter you have to manually set or cancel the Two sided Original mode for each batch of originals that you scan When storing a document in an inbox if you w...

Page 236: ...ial Copying and Mail Box Features 3 When scanning is complete place your next batch of originals press If you want to change the scan settings change them before pressing If the original is two sided Press 2 Sided Original ...

Page 237: ...ce next To cancel the Two sided Original mode press 2 Sided Original Cancel Repeat this step as necessary NOTE 2 Sided Original is available only if the optional Feeder DADF N1 is attached 4 After the last batch of originals is scanned press Done Copying starts Book Type The front and back sides of the original have the same top bottom orientation Calendar Type The front and back sides of the orig...

Page 238: ...es This mode enables you to make copies of or scan and record the original image by inverting black and white NOTE The procedure for storing documents in an inbox is the same as for copying 1 On the Special Features screen press Nega Posi The selected mode is set Original Copy ...

Page 239: ...ailable for the Copying function only Automatic Setting The original image is copied so that the maximum possible number of repeats fit onto the selected paper size IMPORTANT The Image Repeat Auto mode cannot be used with the following mode s Copy Automatic Paper Selection Auto Zoom Auto XY Zoom Entire Image Book 2 Sided Two page Separation Cover Sheet Insertion Image Combination Shift Transparenc...

Page 240: ...wo page Separation Cover Sheet Insertion Image Combination Shift Transparency Interleaving Margin Different Size Originals Frame Erase Mirror Image 1 On the Special Features screen press Image Repeat 2 Set the number of times that you want the image to repeat for both the vertical and horizontal directions If you want to set the number of repeats automatically Press Auto Original Copy Example If 3...

Page 241: ...aximum possible number of repeats fit onto the selected paper size If you want to set the number of repeats manually Press or to set the number of times that you want the image to repeat You can set the number of repeats from 1 to 20 IMPORTANT The repeated images may overlap or have gaps between them depending on the number of repeats that you set 3 Press OK The selected mode is set ...

Page 242: ...mirror IMPORTANT The Mirror Image mode cannot be used with the following mode s Copy Entire Image Cover Sheet Insertion Image Combination Shift Transparency Interleaving Margin Frame Erase Image Repeat NOTE The Mirror Image mode is available for the Copying function only 1 On the Special Features screen press Mirror Image The selected mode is set Original Copy ...

Page 243: ...storing documents in an inbox is the same as for copying Low If you make copies or scan an original containing halftones such as a printed photograph using the Photo mode the moiré effect a shimmering wavy pattern may occur However you can lessen this moiré effect by using Low as the setting to produce a clearer copy image High This setting enhances the edges of original images so that faint or fi...

Page 244: ...cial Features screen press Sharpness 2 Press Low or High to adjust the sharpness press OK To copy text or lines clearly the setting should be towards High To copy originals containing printed photographs or other halftones the setting should be towards Low The selected mode is set ...

Page 245: ... This chapter describes the memory features Recalling Previous Copy Jobs 5 2 Memory Keys 5 4 Storing Scan Print Copy Settings 5 4 Naming a Memory Key 5 7 Recalling Scan Print Copy Settings 5 9 Erasing Scan Print Copy Settings 5 10 ...

Page 246: ... up a copy job stored in memory If one of these keys was not pressed or if the Auto Clear function is not active calling up a copy job by pressing Recall is not possible The Standard mode is not stored in Recall memory Identical copy settings are stored only once in Recall memory NOTE The Recall mode is available for the Copying function only Once stored the last three copy jobs are kept in memory...

Page 247: ...atures 3 Verify the settings press OK The selected mode is set NOTE If there are more stored copy settings than are currently displayed you can scroll through the list by pressing or You can change the recalled copy settings before making copies ...

Page 248: ...emory key is the same in both the Copying and Mail Box functions The scan print and copy settings stored in memory are not erased even if the power is turned OFF Storing Scan Print Copy Settings NOTE You can store any function or mode in a memory key except for the Interrupt mode 1 Specify the copy settings on the Copy Basic Features screen and or Special Features screen The mode for storing docum...

Page 249: ...Memory Keys 5 5 5 Memory Features 3 Press Store Erase 4 Press Store 5 Select a key M1 to M9 for storing the settings press Next ...

Page 250: ... to store the settings Press Yes To cancel storing the settings press No The message Stored in memory appears for approximately two seconds on the touch panel display The key in which you stored the settings is displayed with a black square in the lower right corner and the stored settings are displayed If you select a key that already has settings stored in it A screen appears asking for your con...

Page 251: ...ng a Memory Key 1 On the Special Features screen press Mode Memory 2 Press Store Erase If necessary see the screen shot in step 3 of Storing Scan Print Copy Settings on p 5 4 3 Press Register Name 4 Select a key M1 to M9 to name press Next ...

Page 252: ... stored in them If there are more stored copy settings than are currently displayed you can scroll through the list by pressing or 5 Enter a name press OK The maximum number of characters that you can enter for a key name is 10 The assigned name appears on the key NOTE For instructions on entering characters see Chapter 2 Basic Operations in the Reference Guide If you press OK without entering any...

Page 253: ...settings press OK If you select a key that does not have settings stored in it OK is grayed out and you cannot press it You can select another key that has copy settings stored in it or press Cancel The selected mode is set NOTE Recalling settings from memory cancels the current settings You can make changes to the recalled settings If you press another key the settings stored in that key are reca...

Page 254: ... screen press Mode Memory 2 Press Store Erase If necessary see the screen shot in step 3 of Storing Scan Print Copy Settings on p 5 4 3 Press Erase 4 Select the key containing the copy settings that you want to erase press Next A screen appears asking for your confirmation to erase the settings ...

Page 255: ...ady has settings stored in it the settings are displayed If there are more stored settings than are currently displayed you can scroll through the list by pressing or 5 Press Yes To cancel erasing the settings press No The message Erased appears for approximately two seconds on the touch panel display The stored copy settings are erased NOTE Key names are not erased For instructions on changing a ...

Page 256: ...Memory Keys 5 12 5 Memory Features ...

Page 257: ...s Table 6 4 Specifying Standard Keys 6 5 Auto Collate 6 6 Auto Orientation 6 7 Setting the Photo Mode for the Copying Function 6 8 Changing the Current Standard Settings 6 8 Restoring the Default Copy Settings 6 10 Customizing Mail Box Settings 6 11 Mail Box Settings Table 6 11 Setting Storing an Inbox 6 12 Initializing an Inbox 6 14 Setting the Photo Mode for the Mail Box Function 6 15 Standard S...

Page 258: ...l Functions enable you to customize the machine s various settings NOTE Settings specified from the Additional Functions screen are never changed when you press 1 Press The Additional Functions screen is displayed 2 Select an Additional Functions setting 3 Press a mode key to specify its settings ...

Page 259: ...l Functions screen see Copy Settings Table on p 6 4 and Mail Box Settings Table on p 6 11 NOTE The Copy Settings screen consist of a list of individual settings Press or to scroll to the desired setting 4 Specify the desired mode press OK The selected mode is set 5 Press Done repeatedly until the Basic Features screen appears ...

Page 260: ...the modes not described in this manual refer to the other manuals listed in the front of this Copying and Mail Box Guide See Manuals for the Machine on p ii The Copy Settings screen consists of a list of individual settings Press or to scroll to the desired setting Item Settings Applicable Page Standard Key 1 Settings Various mode no settings p 6 5 Standard Key 2 Settings Various mode no settings ...

Page 261: ...res screen or the memory keys containing copy settings stored in Mode Memory It is useful to have keys that directly access frequently used settings on the Copy Basic Features screen because they are always displayed while the Copy function is selected 1 Press Copy Settings Standard Key 1 Settings To set Standard Key 2 press Standard Key 2 Settings 2 Press or to display the desired setting group s...

Page 262: ...ets the Collate Offset Collate mode when originals are placed in the feeder This is useful when making multiple sets of copies because you do not need to remember to select the Finisher mode IMPORTANT The Auto Collate mode is available only if the optional Feeder DADF N1 is attached NOTE If Auto Collate is set to On and an optional finisher is attached the Offset Collate mode is set However if no ...

Page 263: ...if necessary NOTE The default setting is On 1 Press Copy Settings Auto Orientation 2 Select On or Off press OK The selected mode is set NOTE If A4 or A5 originals are enlarged onto A3 copy paper Auto Orientation is not performed even if you select On Only the images of standard size originals up to A4 paper can be rotated when the copy ratio is set to 100 If Automatic Paper Selection is set and th...

Page 264: ...default setting is Off 1 Press Copy Settings Photo Mode 2 Select On or Off press OK The selected mode is set Changing the Current Standard Settings The Standard Settings refers to a combination of copy modes that the machine automatically returns after the power is turned ON or when is pressed The Standard Settings can be changed to suit your needs or restored to their default settings NOTE The de...

Page 265: ... and then follow the procedure below 1 Press Copy Settings Standard Settings 2 Press Store 3 Press Yes To cancel storing the currently displayed settings as the Standard Settings press No The message Stored in memory appears for approximately two seconds on the touch panel display The displayed settings are stored as the Standard Settings NOTE The settings displayed are the currently set copy sett...

Page 266: ... for approximately two seconds on the touch panel display The Standard Settings are initialized Restoring the Default Copy Settings Modes that have been changed in Copy Settings from the Additional Functions screen can be restored to their default settings See Customizing Copy Settings on p 6 4 1 Press Copy Settings Initialize Copy Settings 2 Press Yes To cancel initializing the Copy Settings pres...

Page 267: ...OTE For instructions on how to set the modes or settings not described in this manual refer to the other manuals that come with this machine See Manuals for the Machine on p ii Item Settings Applicable Page Inbox Settings Inbox Number 00 to 99 Register Name 24 characters maximum Password Seven digit number Doc Auto Erase 1 2 3 6 12 hours 1 2 3 7 30 days 0 no limit Initialize p 6 12 Photo Mode On O...

Page 268: ...OTE You can create up to 100 inboxes The numbers for inboxes are 00 to 99 Setting a name for an inbox is optional Setting a password for an inbox is optional 1 Press Mail Box Settings Inbox Settings 2 Select the desired inbox number If you enter inbox number using numeric keys make sure to enter a two digit number press OK If you select an inbox set with a password enter the password using numeric...

Page 269: ...password with only zeros as the number such as 0000000 Doc Auto Erase Press or to set the time that has to elapse before documents in the selected inbox are automatically erased The selected mode is set IMPORTANT Since there is no way to check a stored password make sure that you write down the password that you enter and keep it in a safe place NOTE For instructions on entering characters see Cha...

Page 270: ... Press Mail Box Settings Inbox Settings 2 Select the inbox that you want to initialize If you enter inbox number using numeric keys make sure to enter a two digit number press OK If you select an inbox set with a password enter the password using numeric keys press OK 3 Press Initialize 4 Press Yes To cancel initializing the selected inbox press No The message Initialized appears for approximately...

Page 271: ...uments in a user inbox NOTE The default setting is Off 1 Press Mail Box Settings Photo Mode 2 Select On or Off press OK The selected mode is set Standard Scan Settings The Standard Scan Settings refer to a combination of scan settings that the machine automatically returns to after the power is turned ON or when is pressed The Standard Scan Settings can be changed to suit your needs or restored to...

Page 272: ...Originals into an Inbox on p 2 9 1 Press Mail Box Settings Standard Scan Settings 2 Press Store 3 Press Yes To cancel storing the currently displayed settings as the Standard Scan Settings press No The message Stored in memory appears for approximately two seconds on the touch panel display The displayed settings are stored as the Standard Scan Settings NOTE The settings displayed are the currentl...

Page 273: ...can Settings to their default settings 1 Press Mail Box Settings Standard Scan Settings 2 Press Initialize 3 Verify the settings press Yes To cancel initializing the Standard Scan Settings press No The message Initialized appears for approximately two seconds on the touch panel display The Standard Scan Settings are initialized ...

Page 274: ...Customizing Mail Box Settings 6 18 6 Customizing Settings ...

Page 275: ...7 1 CHAPTER 7 Appendix This chapter provides the index Index 7 2 ...

Page 276: ...33 While scanning 2 32 Center Corner Shift 4 31 Change Print Setting Screen 2 6 Changing the name of a document 2 55 Chapter Page 4 13 Checking a document s detailed information 2 57 Collate 3 32 3 35 Confirming selected settings 1 47 Copy Basic Features Screen 1 2 Copying with different XY copy ratio 3 18 3 21 Copying with the same XY copy ratio 3 17 3 18 Copy Ratio Auto XY Zoom 3 13 Entire Image...

Page 277: ...anual setting 4 56 4 57 Inbox 2 4 Inbox Selection Screen 2 4 Initialize Copy Settings 6 10 Initializing an Inbox 6 14 Initializing the Standard Scan settings 6 17 Interrupting copy print jobs 1 14 1 42 Inverting images 4 54 J Job separator 4 17 4 18 L Left Margin 4 35 M Mail Box function 2 2 Mail Box settings table 6 11 Making scanning with different XY zoom ratio 3 21 Making scanning with the sam...

Page 278: ...4 59 Low 4 59 Sheet insertion 4 12 Shift Using the arrow keys 4 31 Using the numeric keys 4 33 Shifted to a corner 4 31 Shifting the original image 4 31 Shifted to a corner 4 31 Shifted to centre 4 31 Special Feature Screen 1 2 1 4 Special Feature Screen 2 2 1 7 StackBypass Setting 1 32 Standard Key Settings 6 5 Standard scan settings 6 15 6 16 Standard settings 6 8 Staple 3 32 3 41 Finisher S1 3 ...

Page 279: ...Index 7 5 7 Appendix X XY Zoom 3 25 automatically 3 26 manually 3 25 Z Zoom 3 17 Zoom by percentage 3 11 Zoom programme 3 17 Different XY copy zoom ratio 3 18 3 21 Same XY copy zoom ratio 3 17 3 18 ...

Page 280: ...Index 7 6 7 Appendix ...

Page 281: ......

Page 282: ...a N V 2005 Canon Canon Inc 30 2 Shimomaruko 3 chome Ohta ku Tokyo 146 8501 Japan Europe Africa and Middle East Canon Europa N V P O Box 2262 1180 EG Amstelveen Netherlands Canon Middle East FZ LLC P O Box 27616 Dubai United Arab Emirates email info canon me com ...

Reviews: