Chapter 15
15-17
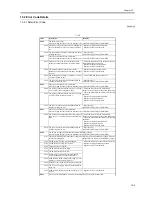
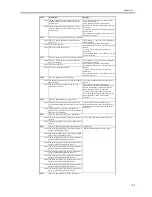
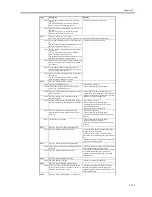
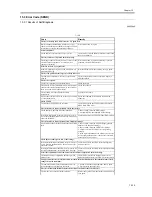
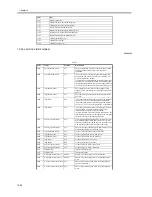
There is a shortage of memory, not permitting
transmission.
1. Decrease the resolution, and try once again.
2. Remove unnecessary files to increase available space.
# 701
The group ID set when the job was introduced no longer
exits. Or, the password has been changed.
Type in the correct group ID or the ID No. (using the
keypad); then, start over.
# 702
The memory is full, not permitting transmission.
1. Wait a while. Try again until the ongoing transmission
of a job ends.
2. Try not to transmit to too many addresses at once;
rather, try dividing the address into smaller groups.
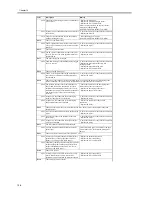
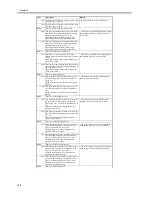
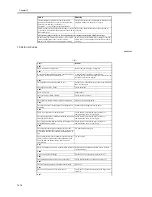
# 703
The memory image area is full, not permitting further
writing.
1. Wait a while. Try transmitting after the ongoing
transmission of a job ends.
2. Remove files from the Box; if the operation still fails
to return to normal, turn off and then back on the main
power.
# 704
An error has occurred while an attempt is made to obtain
address information from the address book.
Check the settings of the address, and try once again; if
the operation is still not normal, try turning off and then
back on the main power.
# 705
The image data size is in excess of the upper limit
imposed on transmission data size set in user mode, thus
causing suspension of transmission.
Try changing the upper limit imposed on transmission
data size as part of the communication control settings of
system control settings (user mode). When selecting low
resolution mode or using i-fax, try decreasing the
number of images to send at one time so that the
transmission will not be in excess of the upper limit
imposed on transfer data size.
# 706
An address table is being imported from or to the remote
UI; or, a different transmission component is being used.
Start over once again.
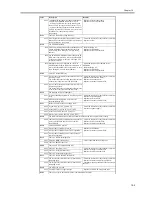
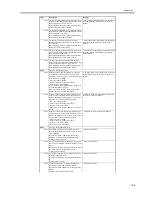
# 711
All memory of the Box is used.
Delete files from the Box.
# 712
The Box is full of files.
Remove file from the Box.
# 713
The file has been removed from the Box before
transmitting the URL.
Put the file in question back into the Box, and start over.
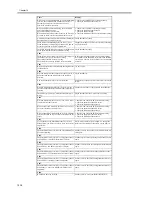
# 751
The server is yet to start up. The network is
disconnected. (The connection to the target may have
failed, or the connection may have been cut in the
middle.)
Check the target. Check the network.
# 752
The SMTP server name of the e-main/i-fax in question
may be wrong, or the server in question is yet to start up.
Or, the appropriate domain name or e-mail address has
not been set. Or, the network has been disconnected.
Using the network settings of the system control setup
(user mode), check the SMTP server name, domain
name, and e-mail address. Check to see that the SMTP
server is operating normally. Check the connection of
the network.
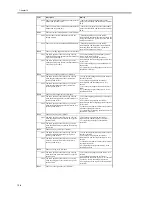
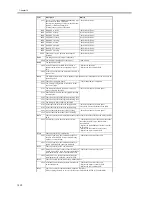
# 753
A TCP/IP error has occurred in the course of e-mail
transmission. (e.g., socket, select error)
Check the condition of the network cable and the
connector. If the operation does not return to normal, try
turning off and then back on the main power of the
machine.
# 754
The server has not been started up for transmission, or
the network is disconnected. Or, the target settings are
wrong.
Check the server and the network. Check the settings of
the target.
# 755
The TCP/IP settings are not operating normally, thus not
permitting transmission.
In user mode, check the TCP/IP settings.
The appropriate IP address has not been set up.
In user mode, check the TCP/IP settings.
When the machine is started up, its IP address is not
assigned by means of DHCP, RARP, or BOOTP.
In user mode, check the TCP/IP settings.
# 756
In system control setup (user mode), 'use NetWare' is set
to 'off' in NetWare settings.
In network settings of system control setup (user mode),
set 'use NetWare' to 'on'.
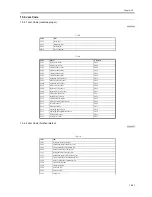
# 801
Cause
Remedy
Summary of Contents for iR5570 Series
Page 1: ...Mar 29 2005 Service Manual iR6570 5570 Series ...
Page 2: ......
Page 6: ......
Page 26: ...Contents ...
Page 27: ...Chapter 1 Introduction ...
Page 28: ......
Page 30: ......
Page 55: ...Chapter 2 Installation ...
Page 56: ......
Page 58: ...Contents 2 9 3 Mounting the Cassette Heater 2 34 ...
Page 98: ......
Page 99: ...Chapter 3 Basic Operation ...
Page 100: ......
Page 102: ......
Page 110: ......
Page 111: ...Chapter 4 Main Controller ...
Page 112: ......
Page 114: ......
Page 135: ...Chapter 5 Original Exposure System ...
Page 136: ......
Page 181: ...Chapter 6 Laser Exposure ...
Page 182: ......
Page 184: ......
Page 192: ......
Page 193: ...Chapter 7 Image Formation ...
Page 194: ......
Page 198: ......
Page 259: ...Chapter 8 Pickup Feeding System ...
Page 260: ......
Page 350: ......
Page 351: ...Chapter 9 Fixing System ...
Page 352: ......
Page 401: ...Chapter 10 External and Controls ...
Page 402: ......
Page 406: ......
Page 448: ......
Page 449: ...Chapter 11 MEAP ...
Page 450: ......
Page 452: ......
Page 455: ...Chapter 12 Maintenance and Inspection ...
Page 456: ......
Page 458: ......
Page 468: ......
Page 469: ...Chapter 13 Standards and Adjustments ...
Page 470: ......
Page 505: ...Chapter 14 Correcting Faulty Images ...
Page 506: ......
Page 508: ......
Page 537: ...Chapter 15 Self Diagnosis ...
Page 538: ......
Page 540: ......
Page 565: ...Chapter 16 Service Mode ...
Page 566: ......
Page 568: ......
Page 633: ...Chapter 17 Upgrading ...
Page 634: ......
Page 636: ......
Page 641: ...Chapter 17 17 5 F 17 4 HDD Boot ROM Flash ROM System Software ...
Page 646: ...Chapter 17 17 10 F 17 11 8 Click START F 17 12 ...
Page 675: ...Chapter 17 17 39 F 17 59 2 Select the data to download F 17 60 3 Click Start ...
Page 677: ...Chapter 18 Service Tools ...
Page 678: ......
Page 680: ......
Page 683: ...Mar 29 2005 ...
Page 684: ......

