3-5
Installing the CAPT Software
Setting Up the Pr
inting En
vironment
3
Installing the CAPT Software
This section describes the procedure for installing the CAPT software when
connecting this printer to your computer with a USB cable.
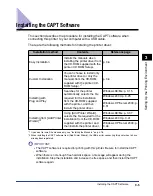
There are the following methods for installing the printer driver:
*1 If you want to install the manuals only, see "Installing the Manuals," on p. 4-78.
*2 When installing the CAPT software from [Add Printer Wizard], the USB port for connecting this printer has to have
already been registered.
IMPORTANT
•
The CAPT software is required for printing with this printer. Be sure to install the CAPT
software.
•
When there is not enough free hard disk space, a message will appear during the
installation. Stop the installation and increase the free space, and then install the CAPT
software again.
Installation method
Contents
Reference page
Easy Installation
Installs the manuals when
installing the printer driver from
the CD-ROM supplied with the
printer (CD-ROM Setup).
Custom Installation
You can choose to install only
the printer driver or only the
manuals from the CD-ROM
supplied with the printer (CD-
ROM Setup).*
1
Installing with
Plug and Play
Searches for the printer
automatically, selects the file
required for the installation
from the CD-ROM supplied
with the printer, and then
installs the printer driver.
Windows 98/Me: p. 3-15
Windows 2000: p. 3-25
Windows XP/Server 2003: p.
3-31
Installing from [Add Printer
Wizard]*
2
Using [Add Printer Wizard],
selects the file required for the
installation from the CD-ROM
supplied with the printer, and
then installs the printer driver.
Windows 98/Me: p. 3-37
Windows 2000: p. 3-41
Windows XP/Server 2003: p.
3-46
Summary of Contents for laser Shot LBP 3300
Page 2: ...LBP3300 Laser Printer User s Guide ...
Page 25: ...xxii ...
Page 45: ...1 20 Before You Start 1 Connecting to a Computer ...
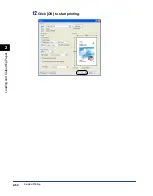
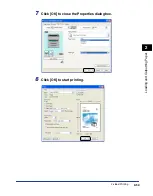
Page 99: ...2 sided Printing 2 54 Loading and Outputting Paper 2 12 Click OK to start printing ...
Page 105: ...2 sided Printing 2 60 Loading and Outputting Paper 2 ...
Page 305: ...5 32 Routine Maintenance 5 Handling the Printer ...
Page 391: ...7 52 Troubleshooting 7 Confirming the Printer Features ...
Page 397: ...8 6 Appendix 8 Dimensions of Each Part Paper Feeder Unit PF 35 117 4 116 6 369 7 421 1 mm ...
Page 413: ...8 22 Appendix 8 Location of the Serial Number ...
Page 414: ...R IE 700AC CANON INC 2005 ...

