4-86
Pr
inting a Document
Printer Status Window
4
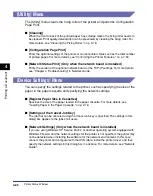
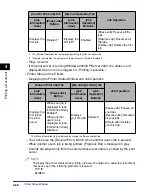
[Utility] Menu
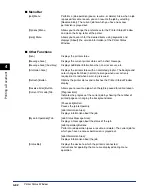
The [Utility] menu cleans the fixing roller of the printer and performs Configuration
Page Print.
■
[Cleaning]
When the front or back of the printed paper has smudge marks, the fixing roller needs to
be cleaned. Print quality deterioration can be prevented by cleaning the fixing roller. For
more details, see "Cleaning the Fixing Roller," on p. 5-18.
■
[Configuration Page Print]
Prints the optional settings of the printer or current printer status such as the total number
of printed pages. For more details, see "Confirming the Printer Features," on p. 7-50.
■
[Network Status Print] (Only when the network board is installed)
Prints the version of the optional network board or the TCP/IP settings. For more details,
see "Chapter 4 Troubleshooting" in Network Guide.
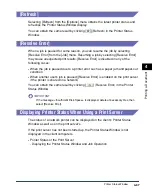
[Device Settings] Menu
You can specify the settings related to the printer, such as specifying the size of the
paper in the paper cassette and specifying the network settings.
■
[Register Paper Size in Cassettes]
Specifies the size of the paper loaded in the paper cassette. For more details, see
"Loading Paper in the Paper Cassette," on p. 2-18.
■
[Settings of the Cancel Job Key]
The job that can be canceled using the Cancel Job key is specified. The settings in this
dialog box applies to the jobs of all users.
■
[Network Settings] (Only when the network board is installed)
If you are using Windows XP Service Pack 2 or another operating system equipped with
Windows Firewall, and the network settings for the printer is not specified, the printer may
not be detected when installing the software for the network environment. In this case,
connect the printer and computer with the USB cable, install the printer driver, and then
specify the network settings in this dialog box in advance. For more details, see "Network
Guide".
Summary of Contents for laser Shot LBP 3300
Page 2: ...LBP3300 Laser Printer User s Guide ...
Page 25: ...xxii ...
Page 45: ...1 20 Before You Start 1 Connecting to a Computer ...
Page 99: ...2 sided Printing 2 54 Loading and Outputting Paper 2 12 Click OK to start printing ...
Page 105: ...2 sided Printing 2 60 Loading and Outputting Paper 2 ...
Page 305: ...5 32 Routine Maintenance 5 Handling the Printer ...
Page 391: ...7 52 Troubleshooting 7 Confirming the Printer Features ...
Page 397: ...8 6 Appendix 8 Dimensions of Each Part Paper Feeder Unit PF 35 117 4 116 6 369 7 421 1 mm ...
Page 413: ...8 22 Appendix 8 Location of the Serial Number ...
Page 414: ...R IE 700AC CANON INC 2005 ...

