background image

Uninstalling the CAPT software

3-72

Setting Up the Pr

inting En

vironment

3

Uninstalling the CAPT software

The process of removing software to restore the computer to the same state as 
before the software was installed is referred to as uninstalling. Use the following 
procedure to uninstall the CAPT software.

IMPORTANT

If the software was installed with administrative permissions on Windows 2000/XP/
Server 2003, then it cannot be uninstalled by anyone that does not have administrative 
permissions. Make sure you log on as a member of the Administrators group before 
uninstalling.

If you are using Windows XP Service Pack 2 or another operating system equipped with 
Windows Firewall, this printer is registered in the [Exceptions] sheet in the [Windows 
Firewall] dialog box. When you uninstall the CAPT software using the uninstaller, the 
settings for this printer are also deleted from the [Exceptions] sheet in the [Windows 
Firewall] dialog box.

1

Make sure to close all the files and programs listed below:

Help files

Printer Status Window

Control Panel

Other applications

2

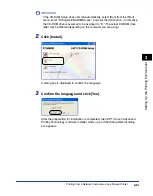
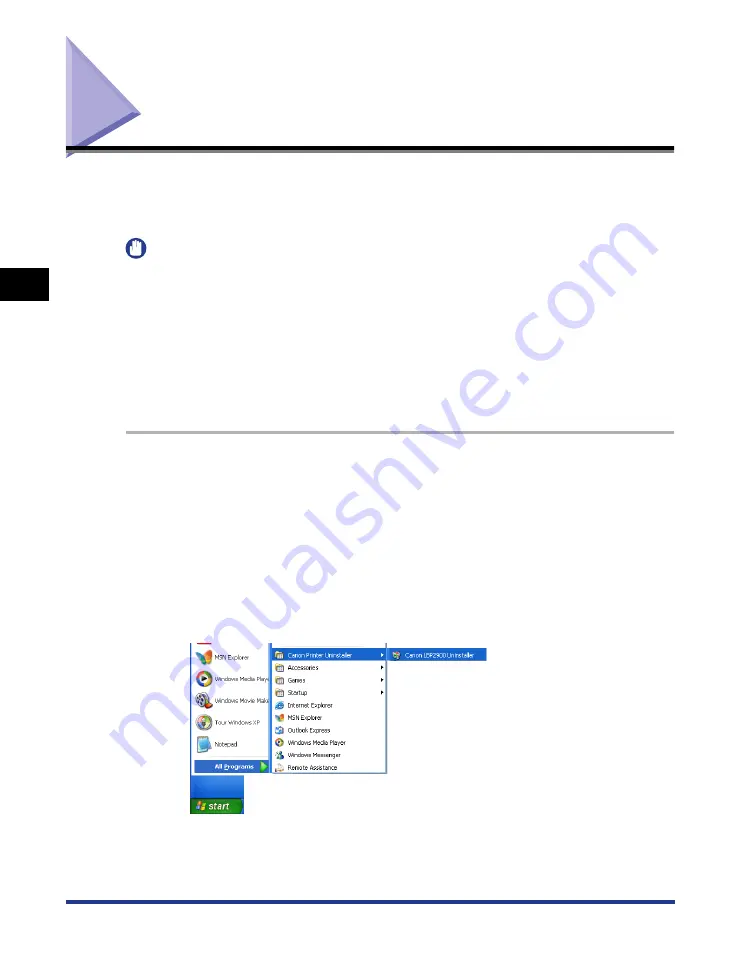
From the [Start] menu, select [All Programs] 

 [Canon Printer 

Uninstaller] 

 [Canon LBP2900 Uninstaller].

For Windows 98/Me/2000: From the [Start] menu, select [Programs] 

 [Canon 

Printer Uninstaller] 

 [Canon LBP2900 Uninstaller].

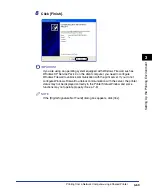
The [Delete Printer] dialog box is displayed.

Summary of Contents for LBP 2900i

Page 1: ...ENG IMPORTANT Read this manual carefully before using your printer Save this manual for future reference User s Guide User s Guide...

Page 2: ...LBP2900 2900i Laser Printer User s Guide...

Page 3: ...ng CD ROM Installation Connecting to a Computer Printing Methods Getting Started Guide CD ROM Basic Operations Troubleshooting User s Guide This Manual CD ROM To view the manual in PDF format Adobe Re...

Page 4: ...t Routine Maintenance Troubleshooting Appendix Chapter 1 Make sure you read this Chapter 2 Chapter 3 Chapter 4 Chapter 5 Chapter 6 Chapter 7 Considerable effort has been made to ensure that this manua...

Page 5: ...he Usage of Your Product and the Use of Images xiii Important Safety Instructions xiv Installation xiv Power Supply xv Handling xvi Maintenance and Inspections xviii Consumables xix Other xix Chapter...

Page 6: ...ting 2 22 Printing on Index Card 2 26 Loading Index Cards 2 26 Loading Index Card into the Manual Feed Tray 2 26 Selecting Printer Driver Settings and Printing 2 29 Printing on Envelopes 2 33 Loading...

Page 7: ...the CAPT software 3 72 Chapter 4 Printing a Document Printing from an Application 4 2 Specifying Printing Preferences 4 7 For Windows 98 Me 4 7 Opening the Document Properties Dialog Box from an Appl...

Page 8: ...Grayscale Settings 4 46 Working with Profiles 4 47 Adding a Profile 4 48 Editing Deleting a Profile 4 50 Editing Print Jobs 4 52 Viewing Printer Settings Restoring the Default Settings 4 54 Viewing P...

Page 9: ...the USB Class Driver 6 30 Problems During Local Installation 6 34 Problems Installing a Shared Printer 6 34 Miscellaneous Problems 6 35 Chapter 7 Appendix Specifications 7 2 Hardware Specifications 7...

Page 10: ...ous personal injury To use the product safely be sure to adhere to these warnings CAUTION Indicates cautions that if followed incorrectly may lead to personal injuries or damage to property To use the...

Page 11: ...ct the button that suits your needs Abbreviations In this manual product names and model names are abbreviated as follows Microsoft Windows 95 operating system Windows 95 Microsoft Windows 98 operatin...

Page 12: ...ments of EMC Directive Use of shielded cable is necessary to comply with the technical requirements of EMC Directive The product is in conformity with the EMC directive at nominal mains input 230 V 50...

Page 13: ...aser product under IEC60825 1 1993 EN60825 1 1994 and as for the U S A it is classified as Class 1 under the Code of Federal Regulations 1040 10 of Title 21 This printer has been classified under IEC6...

Page 14: ...your household waste according to the WEEE Directive 2002 96 EC and your national law This product should be handed over to a designated collection point e g on an authorized one for one basis when y...

Page 15: ...or mechanical including photocopying and recording or by any information storage or retrieval system without the prior written permission of Canon Inc Disclaimers The information in this manual is sub...

Page 16: ...print or otherwise reproduce any particular document and or of the use of the images scanned printed or otherwise reproduced you should consult in advance with your legal advisor for guidance Paper Mo...

Page 17: ...rs or other flammable substances If an inflammable substance comes into contact with the electrical unit inside the printer it may ignite or cause an electrical shock Do not put any of the following t...

Page 18: ...her product You may be injured if your hands etc are pinched by the printer When connecting the USB cable connect the cable correctly by following the directions in this manual Failure to properly con...

Page 19: ...other than that indicated Doing so may cause fire or electrical shock When you unplug the power cord make sure you hold the cord by the plug If you pull on the cord itself the cord may experience dama...

Page 20: ...the connector Doing so may cause an electrical shock CAUTION Do not put any heavy objects on top of this product If a heavy object topples over or falls it can cause personal injuries If you are not...

Page 21: ...er plug periodically and wipe away any dust or dirt that has built up around the power outlet If the power plug is left connected for a long period of time in a dusty humid or smoky environment dust t...

Page 22: ...d entering your eyes or mouth If the toner enters your eyes or mouth wash them immediately with cold water and immediately consult a physician Consumables WARNING Do not put spent toner cartridges int...

Page 23: ...xx...

Page 24: ...er Printer Features 1 2 Component Names and Functions 1 4 Front View 1 5 Rear View 1 6 Inside the Printer 1 7 Indicators and the Paper Key 1 8 Connecting the Power Cord 1 9 Connecting the Power Cord 1...

Page 25: ...600 dpi is made possible through the Automatic Image Refinement which is unique to Canon Furthermore because the grayscale makes use of a dithering pattern photographs and graphics can be printed wit...

Page 26: ...se it even in the middle of the night without having to be concerned about those around you Simple Maintenance and Printer Status Window The toner cartridges made for this printer Canon genuine part a...

Page 27: ...printer properly and make full use of all of the printer s features CAUTION Do not install this printer in a location where a wall or other object will block the ventilation slots in the printer If th...

Page 28: ...the paper allowing the paper to feed straight d d d d Small Paper Guide When you are loading small sized custom paper sizes this should be attached to the rear paper guide e e e e Rear Paper Guide Adj...

Page 29: ...the printer on and off See p 1 15 c c c c Power Socket Connect the supplied power cord to this socket See p 1 9 d d d d Rating Label This also shows the electrical current rating and average electric...

Page 30: ...Cartridge Guide When you install the toner cartridge make sure that the protrusions on the edges of the cartridge align with this guide while you push the cartridge in See p 5 6 b b b b Transfer Roll...

Page 31: ...tors and the Paper Key a a a a Power Indicator This light turns on when the power is on b b b b Paper Indicator Paper Key This flashes when the printer runs out of paper or when the paper does not fee...

Page 32: ...tlet If the plug is not fully inserted fire and electrical shock may result Do not use any electrical cables other than the supplied cord Doing so may cause fire or electrical shock In principle you s...

Page 33: ...r electrical shock Whenever you pull out the power plug make sure there are no objects around the power plug Do not pull out the power plug in an emergency IMPORTANT Do not plug the power cord into th...

Page 34: ...1 11 Before You Start Using This Printer 1 Connecting the Power Cord 3 Plug the power plug into the AC power outlet...

Page 35: ...the printer when connected via unidirectional communication equipment has not been tested As a result Canon cannot guarantee printer operation when the printer is connected using unidirectional print...

Page 36: ...fore You Start Using This Printer 1 Connecting to a Computer 2 Open the USB cover 3 Connect the B type square end of the USB cable to the USB connector on the rear side of the printer and close the US...

Page 37: ...u Start Using This Printer 1 4 Connect the A type flat end of the USB cable to the USB port on the computer NOTE If you are not sure about the USB cable that is supported by your computer contact the...

Page 38: ...iagnostic check the printer is ready to print IMPORTANT Do not turn the printer on again immediately after turning the printer off If you want to turn the printer on again after turning it off wait at...

Page 39: ...rinting data from another computer before turning the power off When the printer is turned off any remaining print data in the printer s memory is erased If you need the print data wait for the printe...

Page 40: ...0 Paper Output 2 11 Output Tray Types 2 11 Output Tray Capacities 2 12 Printing on Plain Paper Heavy Paper Label Paper and Transparencies 2 13 Loading the Paper 2 13 Selecting Printer Driver Settings...

Page 41: ...or Executive size paper the printing speed may drop to 3 9 ppm Use the paper capacity for each type of paper as a guide to the number of sheets of paper that can be printed continuously Paper Sizes Y...

Page 42: ...ain paper with width in the range of 76 2 to 215 9 mm length in the range of 127 0 to 355 6 mm and weight in the range of 64 to 90 g m2 including the standard paper sizes A4 B5 A5 Legal Letter and Exe...

Page 43: ...lopes cannot be used with this printer Using any of these envelopes may result in paper jams that are difficult to clear or may cause damage to the printer Envelopes with fasteners or snaps Envelopes...

Page 44: ...es The following abbreviations are used for the sizes displayed on the multi purpose tray and manual feed tray Printable Area The printable area of this printer is as follows Plain Paper Heavy Paper T...

Page 45: ...ed or creased paper Specially coated paper coated paper for ink jet printers etc Labels that peel off from the backing sheet too easily Paper that has already been printed on using a copy machine or o...

Page 46: ...IMPORTANT Store paper away from moisture since paper quality deteriorates in a moist environment The paper wrapper around new paper acts to prevent dampness and drying Leave the wrapper intact until...

Page 47: ...o dissolve When you first use an adhesive test it on an unneeded printout before use Whenever you stack printouts check that the documents are completely dry If the printouts are stacked when they are...

Page 48: ...heet Multi Purpose Tray Approx 150 sheets Plain paper 64 g m2 IMPORTANT When you are printing from the multi purpose tray make sure that there is no paper in the manual feed tray If there is any paper...

Page 49: ...Paper Type Paper Source Multi Purpose Tray Manual Feed Tray Plain Paper 64 g m2 Approx 150 sheets 1 sheet Heavy Paper 128 g m2 Approx 60 sheets 1 sheet Transparency Approx 100 sheets 1 sheet Label Pa...

Page 50: ...e printed side facing down Open the output tray when you are printing to the output tray Close the output tray when you are not using the printer CAUTION Keep your hands or clothing away from the roll...

Page 51: ...00 sheets of plain paper 64 g m2 The paper capacity varies depending on the paper type and paper size Refer to Output Tray Capacities on p 2 12 for more details Output Tray Capacities Actual paper cap...

Page 52: ...y make sure that there is no paper in the manual feed tray If there is any paper in the manual feed tray paper will feed from the manual feed tray because manual feed tray has priority over the multi...

Page 53: ...y IMPORTANT Do not touch or pull paper out of the multi purpose tray during printing Doing so may cause the printer to malfunction If you are refilling the multi purpose tray when there is still paper...

Page 54: ...er IMPORTANT Make sure you thoroughly fan through transparencies and label paper before loading them If you do not sufficiently fan the sheets multiple sheets will feed at once causing paper jams When...

Page 55: ...lows Check that there is sufficient clear space between the paper limit guides and the paper If there is no free space slightly reduce the amount of paper Plain Paper Approx 150 sheets 64 g m2 Heavy P...

Page 56: ...aligned it may result in misfeeds or paper jams If the paper is curled or folded at the corners flatten it out before loading NOTE To print on letterhead paper or paper with a logo already printed on...

Page 57: ...aper guides match the width of the paper If the paper guides are too loose or too tight the paper will not feed properly and this will cause paper jams 6 Adjust the rear paper guide to match the paper...

Page 58: ...in the manual feed tray You cannot print from the manual feed tray if the printer settings are set to multiple copies or multiple pages If you start a print job set for multiple copies or multiple pag...

Page 59: ...side facing up until it touches the back of the tray Make sure that the paper passes under the paper limit guides CAUTION When loading paper take care not to cut your hands with the edges of the paper...

Page 60: ...2 21 Loading and Delivering Paper 2 NOTE To print on letterhead paper or paper with a logo already printed on it load the paper so that the printed side is facing up and the top of the paper is at th...

Page 61: ...aper guides match the width of the paper If the paper guides are too loose or too tight the paper will not feed properly and this will cause paper jams Selecting Printer Driver Settings and Printing T...

Page 62: ...the document that you created in the application 3 Set the Output Size setting to the size of the paper loaded in the printer as needed Select A4 or Letter if you are printing transparencies or label...

Page 63: ...per Type to the type of paper loaded in the printer Set this to Plain Paper for regular paper and labels Heavy Paper for thick paper and Transparency for transparencies NOTE If the paper curls excessi...

Page 64: ...Printing on Plain Paper Heavy Paper Label Paper and Transparencies 2 25 Loading and Delivering Paper 2 5 Click OK to close the Properties dialog box 6 Click OK to start printing...

Page 65: ...ay IMPORTANT You can only load a single sheet of index card in the manual feed tray You cannot print from the manual feed tray if the printer settings are set to multiple copies or multiple pages If y...

Page 66: ...When loading index card take care not to cut your hands with the edges of the paper IMPORTANT If the index card is warped make sure you fix the warp before loading the card Load the index card so that...

Page 67: ...g Paper 2 NOTE To print on index card with a logo already printed on it load the index card so that the printed side is facing up and the top of the index card is at the far end 3 Slide the paper guid...

Page 68: ...idth of the index card If the paper guides are too loose or too tight the index card will not feed properly and this will cause paper jams Selecting Printer Driver Settings and Printing This section d...

Page 69: ...r 2 2 Display the Page Setup sheet then set the Page Size setting to the size of the document that you created in the application NOTE When you set the page size to Index Card the following message is...

Page 70: ...set to Match Page Size when the page size and the size of the paper loaded in the multi purpose tray are the same since there is no need to change the setting IMPORTANT If the Page Size and Output Siz...

Page 71: ...Printing on Index Card 2 32 Loading and Delivering Paper 2 5 Click OK to start printing...

Page 72: ...paper in the manual feed tray If there is any paper in the manual feed tray paper will feed from the manual feed tray because manual feed tray has priority over the multi purpose tray Do not load pap...

Page 73: ...ding the envelopes push down on the stack of envelopes to release any remaining air and press down firmly along the folded edges of the envelopes Do not print on the reverse side glued side of envelop...

Page 74: ...ently insert them all the way to the back of the tray Make sure that the envelopes passes under the paper limit guides CAUTION When loading envelopes be careful not to cut your hands with the edges of...

Page 75: ...surface the side you want to print on facing up and the envelope flap on the left side 4 Slide the paper guides to meet both sides of the envelopes IMPORTANT Always make sure the paper guides match th...

Page 76: ...feed tray Always load envelopes lengthways into the manual feed tray IMPORTANT You can only load a single envelope in the manual feed tray You cannot print from the manual feed tray if the printer se...

Page 77: ...de then gently insert them all the way to the back of the tray Be sure that the envelope passes beneath the paper limit guides CAUTION When loading envelope be careful not to cut your hands with the e...

Page 78: ...ap on the left side 3 Slide the paper guides to meet both sides of the envelope IMPORTANT If you run out of envelopes and then refill the paper tray the Paper Indicator will flash Press the Paper Key...

Page 79: ...Settings and Printing This section describes how to set the printer driver settings 1 Select Print from the File menu in the application Select the name of your printer from the Name or Printer Name...

Page 80: ...eet then set the Page Size setting to the size of the document that you created in the application NOTE If you set the page size to any of Envelope DL Envelope COM10 Envelope C5 or Envelope Monarch th...

Page 81: ...e the setting set to Match Page Size when the page size and the size of the paper loaded in the multi purpose tray are the same since there is no need to change the setting IMPORTANT If the Page Size...

Page 82: ...Printing on Envelopes 2 43 Loading and Delivering Paper 2 5 Click OK to start printing...

Page 83: ...re printing from the multi purpose tray make sure that there is no paper in the manual feed tray If there is any paper in the manual feed tray paper will feed from the manual feed tray because manual...

Page 84: ...re is still paper in the tray take out the remaining paper and align it properly with the new paper before loading it into the tray Use the paper capacity for each type of paper as a guide to the numb...

Page 85: ...clear space between the paper limit guides and the paper If there is no free space slightly reduce the number of envelopes Plain Paper Approx 150 sheets 64 g m2 Heavy Paper Approx 60 sheets 128 g m2...

Page 86: ...er is curled or folded at the corners flatten it out before loading NOTE To print on letterhead paper or paper with a logo already printed on it load the paper so that the printed side is facing up an...

Page 87: ...too loose or too tight the paper will not feed properly and this will cause paper jams 5 Adjust the rear paper guide to match the paper If the custom paper that you are using is over 190 mm in length...

Page 88: ...the custom paper that you are using is less than 190 mm in length Move the rear paper guide to the position shown in the diagram Remove the small paper guide from the multi purpose tray Insert the sma...

Page 89: ...m paper into the manual feed tray Always load custom paper lengthways into the manual feed tray IMPORTANT You can only load a single sheet of paper in the manual feed tray You cannot print from the ma...

Page 90: ...load the paper with the printing side facing up until it touches the back of the tray Make sure that the paper passes under the paper limit guides CAUTION When loading paper take care not to cut your...

Page 91: ...ading and Delivering Paper 2 NOTE To print on letterhead paper or paper with a logo already printed on it load the paper so that the printed side is facing up and the top of the paper is at the far en...

Page 92: ...ides match the width of the paper If the paper guides are too loose or too tight the paper will not feed properly and this will cause paper jams Selecting Printer Driver Settings and Printing This sec...

Page 93: ...you created in the application NOTE When you are using a custom paper size you need to register the size of the custom paper in advance Refer to Specifying a Custom Paper Size Non Standard Paper on p...

Page 94: ...d Leave the setting set to Match Page Size when the page size and the size of the paper loaded in the multi purpose tray the name of the custom paper size are the same since there is no need to change...

Page 95: ...Printing on Custom Paper Sizes Non Standard Sizes 2 56 Loading and Delivering Paper 2 5 Click OK to start printing...

Page 96: ...twork Introduction 3 2 After Installing the Printer 3 2 Each Time You Print 3 2 System Requirements 3 3 Installing the CAPT Software 3 4 For Windows 98 Me 3 4 For Windows 2000 3 19 For Windows XP Serv...

Page 97: ...on a network and use it from a computer on the network you must specify the settings for the computer and install the printer driver on the client computers Each Time You Print The following shows th...

Page 98: ...nly USB Full Speed USB 1 1 equivalent NOTE If you want to use the sounds from the printer driver a PC synthesizer and the PCM synthesizer driver needs to be installed in your computer Do not use the P...

Page 99: ...during the installation Abort the installation and create more space on the disk before beginning the installation again NOTE For details on the procedure for installing this software when the printer...

Page 100: ...g the CAPT Software 3 5 Setting Up the Printing Environment 3 2 Open the USB cover 3 Connect the B type square end of the USB cable to the USB connector on the rear side of the printer and close the U...

Page 101: ...lowing procedure 6 Insert the supplied LBP2900 2900i User Software CD ROM into the CD ROM drive If the CD ROM is already in the drive eject the CD ROM and reinsert it into the drive again The CD ROM S...

Page 102: ...is displayed to confirm the language 8 Confirm the language and click Yes After the preparation for installation is completed the CAPT Canon Advanced Printing Technology software installer starts up...

Page 103: ...ext 11 Confirm that there is a checkmark next to Install Printer Driver through a USB Connection then click Next Depending on your system a message may appear prompting you to restart your computer If...

Page 104: ...own below is displayed then turn the printer on Press the side of the power switch to turn the printer on Installation of the USB class driver and the printer driver starts automatically NOTE If the c...

Page 105: ...form you that the installation is complete Select Restart my computer now then click Exit Windows restarts This completes the installation of the USB class driver and printer driver Installing with Pl...

Page 106: ...ing Up the Printing Environment 3 3 Connect the B type square end of the USB cable to the USB connector on the rear side of the printer and close the USB cover 4 Connect the A type flat end of the USB...

Page 107: ...ess the side of the power switch to turn the printer on 6 Turn the computer on and start up Windows 98 Me The Add New Hardware Wizard dialog box appears For Windows Me If the following dialog box appe...

Page 108: ...xt then proceed to Step 7 If the following dialog box appears click Next then proceed to Step 14 7 Select Specify the location of the driver Advanced then click Next For Windows 98 Select Search for t...

Page 109: ...ckmark from Removable Media Floppy CD ROM place a checkmark next to Specify a location For Windows 98 Remove the checkmarks from Floppy disk drives and CD ROM drive place a checkmark next to Specify a...

Page 110: ...Environment 3 11 Make sure that the correct path is displayed in the Specify a location field and then click Next 12 Click Next Installation of the USB class driver starts 13 Click Finish The compute...

Page 111: ...the driver Advanced then click Next For Windows 98 Select Search for the best driver for your device Recommended then click Next A dialog box is displayed that allows you to specify the search locatio...

Page 112: ...e a checkmark next to Specify a location For Windows 98 Remove the checkmarks from Floppy disk drives and CD ROM drive place a checkmark next to Specify a location 17 Click Browse and then select a fo...

Page 113: ...ation field and then click Next 19 Click Next 20 Enter a new name in the Printer name field if you want to change the name of the printer If another printer driver has been already installed in the co...

Page 114: ...will begin copying files 22 Once the installation complete dialog is displayed click OK 23 Click Finish This completes the installation of the USB class driver and printer driver For Windows 2000 Ins...

Page 115: ...g the CAPT Software 3 20 Setting Up the Printing Environment 3 2 Open the USB cover 3 Connect the B type square end of the USB cable to the USB connector on the rear side of the printer and close the...

Page 116: ...roup NOTE Full Control Permissions are required for the installation of the printer driver 7 Insert the supplied LBP2900 2900i User Software CD ROM into the CD ROM drive If the CD ROM is already in th...

Page 117: ...is displayed to confirm the language 9 Confirm the language and click Yes After the preparation for installation is completed the CAPT Canon Advanced Printing Technology software installer starts up...

Page 118: ...terms in the license agreement and then click Next 12 Confirm that there is a checkmark next to Install Printer Driver through a USB Connection then click Next 13 The message Installation cannot be st...

Page 119: ...is displayed turn the printer on Press the side of the power switch to turn the printer on Installation of the USB class driver supplied with the OS and the printer driver starts automatically NOTE I...

Page 120: ...at the installation is complete Select Restart my computer now then click Exit Windows restarts This completes the installation of the USB class driver supplied with the OS and printer driver Installi...

Page 121: ...ing Up the Printing Environment 3 3 Connect the B type square end of the USB cable to the USB connector on the rear side of the printer and close the USB cover 4 Connect the A type flat end of the USB...

Page 122: ...power switch to turn the printer on 6 Turn the computer on and start up Windows 2000 7 Log on as a user who is a member of the Administrators group The Found New Hardware Wizard dialog box appears NOT...

Page 123: ...3 9 Select Search for a suitable driver for my device recommended then click Next NOTE Unknown may be displayed as the name of the device 10 Remove the checkmarks from Floppy disk drives and CD ROM dr...

Page 124: ...12 Select D English Win2K_XP Select CNAB4STK INF and click Open In this case the CD ROM drive is assumed to be assigned to D The actual CD ROM drive letter may be different depending on the computer...

Page 125: ...will begin copying files When it has finished the Completing the Found New Hardware Wizard dialog is displayed NOTE If the Digital Signature Not Found dialog box appears click Yes 15 Click Finish Inst...

Page 126: ...ing Up the Printing Environment 3 For Windows XP Server 2003 The screen shots used in this section are from Windows XP Installing from CD ROM Setup 1 Make sure that the computer and printer are turned...

Page 127: ...ing Up the Printing Environment 3 3 Connect the B type square end of the USB cable to the USB connector on the rear side of the printer and close the USB cover 4 Connect the A type flat end of the USB...

Page 128: ...n of the printer driver 7 Insert the supplied LBP2900 2900i User Software CD ROM into the CD ROM drive If the CD ROM is already in the drive eject the CD ROM and reinsert it into the drive again The C...

Page 129: ...ation for installation is completed the CAPT Canon Advanced Printing Technology software installer starts up and the Setup Wizard dialog box appears 10 Click Next The License Agreement dialog box is d...

Page 130: ...ing window is displayed Click Yes or No Click Yes to configure Windows Firewall to unblock communication with client computers Select this option if the computer you are currently installing is a prin...

Page 131: ...ress the side of the power switch to turn the printer on Installation of the USB class driver supplied with the OS and the printer driver starts automatically NOTE If the computer does not automatical...

Page 132: ...at the installation is complete Select Restart my computer now then click Exit Windows restarts This completes the installation of the USB class driver supplied with the OS and printer driver Installi...

Page 133: ...ing Up the Printing Environment 3 3 Connect the B type square end of the USB cable to the USB connector on the rear side of the printer and close the USB cover 4 Connect the A type flat end of the USB...

Page 134: ...er 2003 7 Log on as a user who is a member of the Administrators group The Found New Hardware Wizard dialog box appears NOTE Full Control Permissions are required for the installation of the printer d...

Page 135: ...mark from Search removable media floppy CD ROM place a checkmark next to Include this location in the search 10 Click Browse and then select a folder Select D English Win2K_XP and then click OK In thi...

Page 136: ...the Found New Hardware Wizard dialog is displayed NOTE If the Hardware Installation dialog box appears click Continue Anyway 12 Click Finish IMPORTANT If you are using Windows XP Service Pack 2 or ano...

Page 137: ...ompleting Installation When the installation of the CAPT software is complete an icon and folder will be created for the printer For Windows 98 Me 2000 The icon for the printer is displayed in the Pri...

Page 138: ...allation 3 43 Setting Up the Printing Environment 3 For Windows XP Server 2003 The icon for the printer is displayed in the Printers and Faxes folder Canon Printer Uninstaller is added to All Programs...

Page 139: ...re taken from Windows XP Home Edition 1 Open the Printers and Faxes or Printers folder For Windows 98 Me 2000 Select Settings Printers from the Start menu For Windows XP Professional Server 2003 Selec...

Page 140: ...rinting Environment 3 2 Select the icon for the printer then select Properties from the File menu The Properties dialog box for the printer is displayed 3 Click Print Test Page on the General sheet Th...

Page 141: ...Printing a Test Page 3 46 Setting Up the Printing Environment 3 4 If the test page prints correctly click OK or Yes NOTE If test page does not print correctly refer to Chapter 6 Troubleshooting...

Page 142: ...tion In this section the computer that is directly connected to the printer is called the print server and other computers that access the printer over the network are called client computers Network...

Page 143: ...figuring the Print Server For Windows 98 Me The screen shots used in this section are from Windows Me Preparing the Print Sharing Settings 1 Double click My Computer Control Panel the Network icon The...

Page 144: ...y the Configuration sheet then click Add The Select Network Component Type dialog box is displayed 3 Click the Service icon then click Add 4 Select File and printer sharing for Microsoft Networks then...

Page 145: ...e and Print Sharing 6 Make sure that I want to be able to allow others to print to my printer s is selected then click OK 7 Go to the Access Control sheet and select either Share level access control...

Page 146: ...51 Setting Up the Printing Environment 3 8 Click OK then restart Windows Printer Sharing Settings 1 From the Start menu select Settings Printers The Printers folder is displayed 2 Right click the icon...

Page 147: ...NOTE If you selected User level access control in Step 7 of the Network Settings procedure See p 3 50 click Add and select the users that can use the printer Do not enter blank or special characters i...

Page 148: ...ns Network Connections For Windows 2000 Select Settings Network and Dial up Connections from the Start menu For Windows Server 2003 From the Start menu select Control Panel Network Connections Local A...

Page 149: ...nstallation To use the printer sharing settings you need to run Network Setup Wizard and enable printer sharing For more details see the Windows online help 1 Open the Printers and Faxes or Printers f...

Page 150: ...a Shared Printer 3 55 Setting Up the Printing Environment 3 2 Right click the icon for your printer then select Sharing from the pop up menu 3 Select Share this printer Update the share name as requi...

Page 151: ...local installation Do not enter blank or special characters in Share name 4 If you are using Windows 98 Me on the client computer click Additional Drivers If you are using Windows 98 Me on the client...

Page 152: ...Windows 95 or 98 and then click OK For Windows Server 2003 Place a checkmark next to Windows 95 Windows 98 and Windows Millennium Edition and then click OK 6 Insert the supplied LBP2900 2900i User Sof...

Page 153: ...to clear the settings that were previously registered with Windows Firewall See p 7 10 Configuring Windows Firewall Settings If you are using Windows XP Service Pack 2 or another operating system equ...

Page 154: ...ethod other than CD ROM Setup you need to use the CAPT Windows Firewall Utility software to configure Windows Firewall to unblock communication with the client computers See p 7 8 Installing the Clien...

Page 155: ...tions may not operate correctly 1 Select Control Panel from the Start menu then click Network and Internet Connections Windows Firewall 2 On the Exceptions sheet in the Windows Firewall dialog box pla...

Page 156: ...he OK button In this case the CD ROM drive is assumed to be assigned to D The actual CD ROM drive letter may be different depending on the computer you are using 2 Click Install A dialog box is displa...

Page 157: ...ng a Shared Printer 3 62 Setting Up the Printing Environment 3 4 Click Next The License Agreement dialog box is displayed 5 Confirm the contents of the agreement and select I accept the terms in the l...

Page 158: ...Environment 3 6 If there is a checkmark next to Install Printer Driver through a USB Connection remove the checkmark then click Next NOTE Do not place a checkmark next to Install Printer Driver throug...

Page 159: ...Shared Printer 3 64 Setting Up the Printing Environment 3 8 Select the icon for the printer that is shared on the printer server then click OK 9 Select whether or not to use this printer as the defaul...

Page 160: ...d Click Yes The installation of the printer driver starts 12 A window is displayed to inform you that the installation is complete Select Restart my computer now then click Exit Windows restarts IMPOR...

Page 161: ...Select Printers and Faxes from the Start menu For Windows XP Home Edition Select Control Panel from the Start menu then click Printers and Other Hardware Printers and Faxes The Printers and Faxes or...

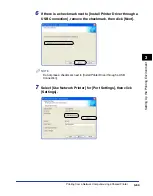
Page 162: ...Setting Up the Printing Environment 3 4 Select A network printer or a printer attached to another computer then click Next For Windows 98 Me 2000 Select Network Printer then click Next 5 Select Browse...

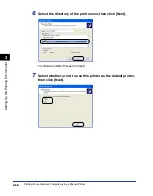
Page 163: ...a Shared Printer 3 68 Setting Up the Printing Environment 3 6 Select the directory of the print server then click Next For Windows 98 Me Proceed to Step 8 7 Select whether or not to use this printer...

Page 164: ...P Service Pack 2 on the client computer you need to configure Windows Firewall to unblock communication with the print server If you do not configure Windows Firewall to unblock communication with the...

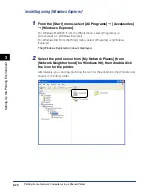
Page 165: ...2000 From the Start menu select Programs Accessories Windows Explorer For Windows 98 From the Start menu select Programs Windows Explorer The Windows Explorer window is displayed 2 Select the print se...

Page 166: ...stem equipped with Windows Firewall such as Windows XP Service Pack 2 on the client computer you need to configure Windows Firewall to unblock communication with the print server If you do not configu...

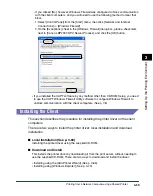
Page 167: ...oup before uninstalling If you are using Windows XP Service Pack 2 or another operating system equipped with Windows Firewall this printer is registered in the Exceptions sheet in the Windows Firewall...

Page 168: ...e A confirmation message is displayed NOTE Even if Canon LBP2900 is not in the list in the Delete Printer dialog box you can delete all of the files and data related to this printer by clicking the De...

Page 169: ...Uninstalling the CAPT software 3 74 Setting Up the Printing Environment 3 NOTE If you are unable to uninstall the CAPT software refer to If Uninstallation Fails on p 6 28...

Page 170: ...ew 4 33 Printing Multiple Pages on One Sheet 4 34 Scaling Printer Output 4 36 Poster Printing 4 38 Specifying a Custom Paper Size Non Standard Paper 4 39 Specifying the Finishing Method 4 41 Specifyin...

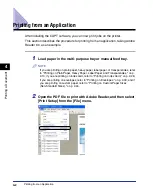
Page 171: ...y NOTE If you are printing on plain paper heavy paper label paper or transparencies refer to Printing on Plain Paper Heavy Paper Label Paper and Transparencies on p 2 13 if you are printing on index c...

Page 172: ...nting from an Application 4 3 Printing a Document 4 3 Specify the paper size of the document and the printing orientation then click OK 4 Select Print from the File menu The Print dialog box is displa...

Page 173: ...and select your printing preferences NOTE The printer name displayed in this dialog box can be changed from the Printers and Faxes folder the Printers folder for Windows 98 Me 2000 6 If you want to s...

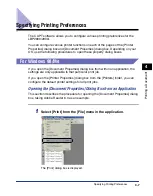
Page 174: ...is recommended that you verify the information in the Page Setup sheet and the Paper Source sheet The default settings for all files can be configured using the following dialog box For Windows 98 Me...

Page 175: ...not print properly refer to Chapter 6 Troubleshooting Refer to Using the Printing Functions on p 4 19 for an explanation on using the features of the printer and printer driver To ensure that a docum...

Page 176: ...property dialog boxes For Windows 98 Me If you open the Document Properties dialog box from within an application the settings are only applicable to that particular print job If you open the Printer...

Page 177: ...4 NOTE The print command is different depending on the application you are using Refer to the users manual supplied with your application for further details 2 Confirm the printer name then click Pro...

Page 178: ...ing a Document 4 Opening the Printer Properties Dialog Box from the Printers Folder 1 From the Start menu select Settings Printers The Printers folder is displayed 2 Select the icon for your printer t...

Page 179: ...icular print job If you open the Document Properties dialog box from the Printers and Faxes or Printers folder you can specify the default settings used by all print jobs If you open the Printer Prope...

Page 180: ...s the procedure for opening the Document Properties dialog box taking Adobe Reader 6 0 as an example 1 Select Print from the File menu in the application The Print dialog box is displayed NOTE The pri...

Page 181: ...Specifying Printing Preferences 4 12 Printing a Document 4 2 Confirm the printer name then click Properties The Document Properties dialog box is displayed...

Page 182: ...ters and Faxes or Printers folder For Windows 2000 Select Settings Printers from the Start menu For Windows XP Professional Server 2003 Select Printers and Faxes from the Start menu For Windows XP Hom...

Page 183: ...or your printer then select Printing Preferences from the File menu The Document Properties dialog box is displayed NOTE The Document Properties dialog box can also be displayed by right clicking the...

Page 184: ...ters and Faxes or Printers folder For Windows 2000 Select Settings Printers from the Start menu For Windows XP Professional Server 2003 Select Printers and Faxes from the Start menu For Windows XP Hom...

Page 185: ...t the icon for your printer then select Properties from the File menu The Printer Properties dialog box is displayed NOTE The Printer Properties dialog box can also be displayed by right clicking the...

Page 186: ...ears NOTE The Printer Status Window may not appear depending on the Display Printer Status Window setting in the Preferences menu See Setting Preferences on p 4 60 2 To delete or pause a print job cli...

Page 187: ...4 18 Printing a Document 4 3 Click the button corresponding to the operation you would like to perform from among the Job Operation buttons Deleting the job Click Delete Job Pausing the job Click Paus...

Page 188: ...the display to that sheet This section describes the types of printing preferences that can be specified in each sheet For Windows 98 Me Document Properties Dialog Box Page Setup Sheet Finishing Sheet...

Page 189: ...e following procedure To close any online help that is currently displayed click somewhere inside the online help window Press the Tab key on your keyboard to select the item that you want help with t...

Page 190: ...Envelopes Envelope C5 Envelope COM10 Envelope DL Envelope Monarch Custom Paper Size See p 4 39 NOTE When printing on paper that is the same size as Page Size select Match Page Size If you select a pap...

Page 191: ...Order setting is displayed if the number of pages per sheet is 2 4 6 8 9 or 16 Manual Scaling The scale factor is automatically adjusted if the Page Size and Output Size are different If you want to...

Page 192: ...ch page is printed repeatedly to give the desired number of copies Collate The entire document is printed repeatedly to produce the desired number of copies Finishing Details See p 4 41 Click Finishin...

Page 193: ...u change the Output Size setting in the Page Setup sheet You can only select Transparency if the Output Size in the Page Setup sheet is set to either A4 or Letter size Printer Driver Setting Paper Typ...

Page 194: ...s and graphics It produces printouts that match what you see on the screen Text Lines This mode is best suited to printing color text and fine color lines Color text and fine color lines are printed i...

Page 195: ...ings See p 4 46 Check this box if you want to customize the grayscale settings To configure the grayscale settings in detail click the Grayscale Settings button to open the Grayscale Settings dialog b...

Page 196: ...nting a Document 4 General Sheet This sheet displays the printer name and allows you to print a test page Details Sheet Windows 98 Me only This sheet allows you to configure printer port settings add...

Page 197: ...e Sharing sheet does not appear if File and printer sharing for Microsoft Networks has not been added in the network settings See p 3 48 For Windows 2000 XP Server 2003 the Sharing sheet does not appe...

Page 198: ...Windows 2000 XP Server 2003 only This sheet allows you to specify detailed settings such as the times when the printer is available and the spooling settings Color Management Sheet Windows 2000 XP Se...

Page 199: ...rofessional the Security sheet is not displayed if the Use simple file sharing Recommended checkbox is checked in the View sheet of the Windows Folder Options settings On Windows XP Home Edition the S...

Page 200: ...r displaying the Printer Status Window appears in the Windows Taskbar Profile Sheet Windows 2000 XP Server 2003 only This sheet allows you to create and add new Profiles and to edit existing Profiles...

Page 201: ...lick Edit to open the dialog box shown below This dialog box allows you to enter the Name Icon Comment and printing preferences for a newly added Profile or a Profile that you are editing Delete See p...

Page 202: ...Finishing settings by right clicking on the Preview panel The Preview panel functions differently depending on which icon is selected or at the upper left of the Preview panel When is selected You can...

Page 203: ...ons 4 34 Printing a Document 4 Printing Multiple Pages on One Sheet Multiple pages can be printed on one sheet of paper 1 For Windows 2000 XP Server 2003 display the Device Settings sheet and select A...

Page 204: ...he Page Layout setting to the number of pages to print on each sheet of paper The number of pages that can be selected is 1 2 4 6 8 9 or 16 Pages per Sheet 3 The Page Order setting is displayed if the...

Page 205: ...then click OK Scaling Printer Output You can choose to scale your document if Page Layout is set to 1 Page per Sheet The scale factor is automatically adjusted if the Page Size and Output Size settin...

Page 206: ...tor will be set automatically depending on the sizes specified in Page Size and Output Size Scaling a Document Manually 1 Display the Page Setup sheet and set the Page Size setting 2 Specify the paper...

Page 207: ...magnify a single page image and print it out over several sheets of paper You can then create a large poster sized printout by taping the multiple sheets of paper together 1 For Windows 2000 XP Serve...

Page 208: ...le pages becomes Upper Left to Right When you perform poster printing the Page Order setting is disabled Specifying a Custom Paper Size Non Standard Paper It is possible to configure custom paper size...

Page 209: ...es and existing custom paper sizes Name of Custom Paper Size Enter a name to use for the new custom paper size You can enter up to 31 characters Unit Specify the unit Millimeter or Inch to use when en...

Page 210: ...can be added In Windows 2000 XP Server 2003 the number depends on your system environment 4 Confirm the settings then click OK Specifying the Finishing Method You can specify a variety of options for...

Page 211: ...han the paper currently loaded in the printer reload the new paper then click Resolve Error in the Printer Status Window However the first job that you print straight after turning the printer off and...

Page 212: ...dialog box reappears Image Refinement This setting specifies whether or not to apply Image Refinement When Image Refinement is applied jagged lines in text and graphics are printed smoothly EMF Spooli...

Page 213: ...ode is best suited to printing documents containing a mixture of text photographs and graphics This lets you produce printouts that are relatively close to what you see on the screen Text Lines This m...

Page 214: ...es and graphs may appear even lighter or less smooth than Pattern 1 using this setting None Solid Prints all colors in black except for white Print Colored Text and Lines in Black Check this box when...

Page 215: ...ting a Document 4 Grayscale Settings You can customize the grayscale settings 1 Display the Quality sheet place a checkmark next to Manual Grayscale Settings and then click Grayscale Settings The Gray...

Page 216: ...on is selected in the User Profiles sheet of the Windows password settings double click My Computer Control Panel Passwords then you can create up to 50 profiles for each user For Windows 2000 XP Ser...

Page 217: ...rce and Quality sheets 2 Click Add Profile The Add Profile dialog box is displayed 3 Enter the name of the Profile in the Name field You can select an icon for the profile using the Icon setting If yo...

Page 218: ...nting a Document 4 Confirming the Printer Settings Click View Settings Click OK to return to the Add Profile dialog box 4 Click OK The Properties dialog box reappears Check that the name of the Profil...

Page 219: ...s 4 50 Printing a Document 4 Editing Deleting a Profile You can change or save Profile information or delete it from the Profile List 1 Click Edit Profile The Edit Profile dialog box is displayed 2 Ed...

Page 220: ...ill be able to use it again even after you delete it from the list of profiles If the Apply Settings from Application checkbox is ticked the Page Size Orientation and Copies selected in the applicatio...

Page 221: ...or printing You can also edit jobs from different applications and preview print jobs Make sure that any one of the Page Setup Finishing Paper Source or Quality sheet is displayed in the Document Prop...

Page 222: ...alog box is displayed and the job is displayed on a list 5 Repeat Step 1 to 4 for each of the jobs that you want to edit 6 In the Canon PageComposer dialog box you can edit the jobs in the list NOTE F...

Page 223: ...Quality and Configuration Device Settings sheets or restore the settings to their default values Make sure that any one of the Page Setup Finishing Paper Source and Quality sheets is displayed then p...

Page 224: ...previous sheet reappears Restoring the Default Settings Click Restore Defaults to restore the printer settings to their default values The Restore Defaults button only restores to default the setting...

Page 225: ...us Window shows status information about the LBP2900 2900i such as operating status and job information using messages animations sounds and icons NOTE In order to use the sounds your computer must be...

Page 226: ...can resume the job by selecting Resolve Error The buttons appears grayed out if you do not have access permissions to the current print job Options Menu Allows you to change the preferences for the Pr...

Page 227: ...me a job when the job is paused for some reason Current Print Job Tab Progress Bar Indicates the progress of the current job by showing the number of pages printed and changing the background color Pa...

Page 228: ...ay Printer Status Window in locations such as the Page Setup sheet in the Printer Properties dialog box Check the Show Icon in the Taskbar box in the Configuration Device Settings sheet in the Printer...

Page 229: ...ting Default Value The Printer Status Window appears automatically each time printing starts Only when Errors Occur The Printer Status Window appears automatically only when an error occurs during pri...

Page 230: ...inting a Document 4 1 Select Preferences from the Options menu The Preferences dialog box is displayed 2 Confirm the settings then click OK NOTE For detailed information on using the Printer Status Wi...

Page 231: ...ror If a job is paused for some reason you can resume the job by selecting Resolve Error from the Job menu However resuming a job by selecting Resolve Error may cause unexpected print results You cann...

Page 232: ...print now Printer Status at the Client Printer Status Window Display and Job Operation The My Job Operation tab is displayed when you click the Pause Job button Current Print Job Tab My Job Operation...

Page 233: ...g printed the progress bar is displayed in gray Sounds are only played on the clients that match the user name NOTE To display the printer status when printing a job over the network a network environ...

Page 234: ...Toner Cartridge 5 2 Before Replacing the Toner Cartridge 5 2 Replacing the Toner Cartridge 5 7 Cleaning 5 14 Precautions for Handling the Toner Cartridge 5 16 Storing Toner Cartridges 5 18 Clean the o...

Page 235: ...e approx 5 print density factory default setting The level of toner consumption varies depending on the type and content of documents printed Because documents that contain few areas of white space su...

Page 236: ...nce 5 IMPORTANT Never touch any of the high voltage parts inside the top cover Doing so may damage the printer 1 Open the top cover Grasp the groove on the right side of the top cover and open the cov...

Page 237: ...it out b b b b IMPORTANT If you touch the inner drum with your hand or scratch it the printing quality will be degraded Do not touch or open the protective shutter of the drum under any circumstances...

Page 238: ...tribute the toner inside Be careful not to spill the toner IMPORTANT If toner is not distributed evenly the printing quality may be reduced Make sure you perform this step Rotate the toner cartridge g...

Page 239: ...ne Maintenance 5 4 Align the protrusions on the left and right ends of the toner cartridge with the toner cartridge guides in the main printer and push the cartridge all the way to the back a a a a th...

Page 240: ...Toner Cartridge Use the following procedure to replace the toner cartridge with a new cartridge You should clean the printer after you replace the toner cartridge Refer to Cleaning on p 5 14 for deta...

Page 241: ...ntenance 5 Never touch any of the high voltage parts inside the top cover Doing so may damage the printer 1 Open the top cover Grasp the groove on the right side of the top cover and open the cover un...

Page 242: ...then pull it out b b b b 3 Take the new toner cartridge out of the protective bag As there is a notch cut into the protective bag near the arrow you can tear open the bag by hand However if you are u...

Page 243: ...any circumstances Be careful not to hold or touch any parts other than as directed Doing so may damage the toner cartridge Do not expose the toner cartridge to direct sunlight or strong light 4 Hold...

Page 244: ...tion of the arrow CAUTION If you pull on the sealing tape with excessive force or stop pulling midway toner may spray from the tape If toner gets into your eyes or mouth wash it out immediately with c...

Page 245: ...out the sealing tape be careful not to hold the drum protective shutter with your hands After removing the packing materials install the toner cartridge in the printer as soon as possible Dispose of t...

Page 246: ...ne Maintenance 5 6 Align the protrusions on the left and right ends of the toner cartridge with the toner cartridge guides in the main printer and push the cartridge all the way to the back a a a a th...

Page 247: ...y be damaged Do not leave the top cover open for a long time after installing the toner cartridge You should now clean the printer See Cleaning on p 5 14 Cleaning You should clean the printer after yo...

Page 248: ...er Cartridge 5 15 Routine Maintenance 5 2 Open the Printer Status Window Refer to Displaying the Printer Status Window on p 4 59 for details on opening the Printer Status Window 3 Select Cleaning from...

Page 249: ...ructed from precision mechanical parts Handling the cartridge roughly can damage it or cause deterioration of printing quality Whenever you are installing or removing toner cartridges take care of the...

Page 250: ...as directed Doing so may damage the toner cartridge Do not expose the toner cartridge to direct sunlight or strong light Be careful not to hold or touch sensitive areas such as the sensor or electrica...

Page 251: ...a new toner cartridge out of the protective bag until it is ready to be used If you take the toner cartridge out of the printer to remove a paper jam or service the printer place the toner cartridge i...

Page 252: ...e fire or electrical shock Do not use alcohol benzene thinners or any other inflammable substance If an inflammable substance comes into contact with the electrical unit inside the printer it may igni...

Page 253: ...t diluted with water and wipe off the dirt If you use a mild detergent for cleaning be sure to wipe away the detergent with a soft cloth dampened with water 3 After wiping off the dirt wipe the printe...

Page 254: ...e USB cable If you move the printer without unplugging the cables the electrical cord and USB cable may be damaged causing a fire or electrical shock CAUTION The printer weighs approximately 6 3 kg wh...

Page 255: ...the printer 1 Turn the printer and computer off a a a a remove the USB cable b b b b and disconnect the power plug from the power outlet c c c c 2 Remove the power cord 3 Clear out any paper that is...

Page 256: ...while the rear paper guide is sticking out of the tray you may damage the printer Always check to make sure that rear paper guide is pushed all the way back into the multi purpose tray before you clos...

Page 257: ...ter with your hands as shown in the diagram and firmly hold onto the printer when you carry it 7 Put the printer down carefully at the installation site CAUTION Put the printer down slowly and careful...

Page 258: ...n Custom Paper Sizes Non Standard Sizes on p 2 44 for information on loading custom paper sizes 11 Connect the power cord 12 Plug the power plug into the AC power outlet 13 Connect the USB cable Trans...

Page 259: ...llow your printer to consistently produce high quality printing IMPORTANT Do not place any heavy objects on top of the printer output tray or other part of the printer Doing so may damage the printer...

Page 260: ...rinter to cool down sufficiently before covering the printer If you do not plan to use the printer for a long period of time unplug the power cord from the AC power outlet Do not use or store the prin...

Page 261: ...Handling the Printer 5 28 Routine Maintenance 5...

Page 262: ...6 18 When a Fixing Unit Error Appears 6 19 When a Scanner Error or Service Error Appears 6 20 Print Quality Problems 6 22 Paper Problems 6 25 When Nothing Prints 6 26 Installation Problems 6 27 If Uni...

Page 263: ...Window to resolve the problem Chapter 4 Printer Status Window p 4 56 The power cord is not connected The power switch is off Chapter 1 Turning the Printer On and Off p 1 15 The printer driver is not...

Page 264: ...ful to avoid staining your clothes or hands with toner while you are clearing a paper jam If you get any toner on your hands or clothes wash it off immediately with cold water Do not rinse with hot wa...

Page 265: ...n of the roller may catch your hands or clothing resulting in personal injury IMPORTANT Never touch any of the high voltage parts inside the top cover Doing so may damage the printer If you tug too ha...

Page 266: ...paper feed roller under any circumstances Doing so may cause the paper feed mechanism to malfunction The area around the output tray becomes very hot during printing and directly after printing When y...

Page 267: ...oove on the right side of the top cover and open the cover until it stops IMPORTANT Even if you can see the jammed paper from the output tray do not pull on the paper Make sure you open the top cover...

Page 268: ...b IMPORTANT If you touch the inner drum with your hand or scratch it the printing quality will be degraded Do not touch or open the protective shutter of the drum under any circumstances Be careful n...

Page 269: ...artridge to direct sunlight or strong light Be careful not to hold or touch sensitive areas such as the sensor or electrical contacts Doing so may damage the printer 3 Place the toner cartridge into t...

Page 270: ...4 Remove any paper from the multi purpose tray Pull out the rear paper guide a and then remove the paper b IMPORTANT Even if the paper is jammed in the multi purpose tray do not clear the jam but cont...

Page 271: ...5 Removing the jammed paper If you can see the leading edge of the paper inside the printer Gently pull the paper up to clear the jam If the jam is difficult to clear pull the paper out from the multi...

Page 272: ...ed paper out from the multi purpose tray or manual feed tray excess toner may stain the next sheet of paper that you print on If you can see the tail edge of the paper inside the printer Hold the pape...

Page 273: ...pull out pull on the leading edge of the paper as shown in the diagram a then remove the paper from the output tray side b IMPORTANT If you are pulling jammed paper out from the output tray side exces...

Page 274: ...6 If you cannot see the leading edge or the tail edge of the paper Pull out the back end of the paper as shown in the diagram a then hold the paper by both edges and feed it slowly down to clear the...

Page 275: ...pull out pull on the leading edge of the paper as shown in the diagram a then remove the paper from the output tray side b IMPORTANT If you are pulling jammed paper out from the output tray side exces...

Page 276: ...oting 6 6 Load the paper so that the paper meets the rear paper guide If the paper jam occurred while feeding from the manual feed tray load paper into the manual feed tray 7 Take the toner cartridge...

Page 277: ...ing 6 8 Align the protrusions on the left and right ends of the toner cartridge with the toner cartridge guides in the main printer and push the cartridge all the way to the back a a a a then pull it...

Page 278: ...ORTANT If you cannot close the top cover check that the toner cartridge is installed properly in the printer If you close the top cover forcefully the printer may be damaged Do not leave the top cover...

Page 279: ...displayed as follows Service Call Cause Resolution The fixing unit is malfunctioning Follow the procedure see When a Fixing Unit Error Appears on p 6 19 and contact the store where you purchased the...

Page 280: ...and disconnect the power plug from the power outlet c c c c IMPORTANT If a fixing unit error appears do not turn the printer on again after you have turned it off 2 Contact your local authorized Cano...

Page 281: ...the printer using the following procedure This may clear the message 1 Turn the power off wait for at least 10 seconds then turn the printer on again If the message does not reappear continue using t...

Page 282: ...ff a a a a remove the USB cable b b b b and disconnect the power plug from the power outlet c c c c 4 Contact your local authorized Canon dealer When you contact your Canon dealer please describe the...

Page 283: ...idge If the same problem persists replace the toner cartridge with a new cartridge See Replacing the Toner Cartridge on p 5 2 The overall printing is faint Cause 1 The Toner Density setting is not app...

Page 284: ...e paper is loaded in the wrong position Remedy Load the paper properly See Printing on Plain Paper Heavy Paper Label Paper and Transparencies on p 2 13 Printing on Index Card on p 2 26 Printing on Env...

Page 285: ...align the stack of paper and load it again See Printing on Plain Paper Heavy Paper Label Paper and Transparencies on p 2 13 Printing on Index Card on p 2 26 Printing on Envelopes on p 2 33 Printing o...

Page 286: ...w ream The paper curls Cause 1 The paper is inappropriate Remedy Replace the paper with paper that can be used with this printer See Paper Requirements on p 2 2 Cause 2 The Paper Type setting does not...

Page 287: ...s given in the message If there are no error messages proceed to the next step 2 Print a test page Click Print Test Page in the General sheet in the Printer Properties dialog box If the test page prin...

Page 288: ...apter 6 If Uninstallation Fails p 6 28 Reinstall the software Chapter 3 Installing the CAPT Software p 3 4 Reinstall the software Chapter 3 Installing the CAPT Software p 3 4 Canon Printer Uninstaller...

Page 289: ...0 From the Start menu select Settings Control Panel and then click Add Remove Programs 2 Select Canon LBP2900 in the Add or Remove Programs dialog box then click Change Remove For Windows 2000 Select...

Page 290: ...blems 6 29 Troubleshooting 6 3 Select the name of your printer then click Delete 4 Click Yes The uninstallation process begins Please wait a moment 5 Click Exit The Delete Printer dialog box closes 6...

Page 291: ...ws 98 Me 2000 From the Start menu select Settings Control Panel and then click Add Remove Programs 3 Make sure that Canon LBP2900 does not appear in the Add or Remove Programs dialog box and then clic...

Page 292: ...t menu select Control Panel and then click Performance and Maintenance System For Windows 98 Me 2000 From the Start menu select Settings Control Panel and then double click the System icon For Windows...

Page 293: ...ollers For Windows 98 Me Display the System Properties dialog box click the Device Manager tab and then double click Universal Serial Bus controllers 6 Select USB Printing Support then select Uninstal...

Page 294: ...e the wrong thing by mistake Windows may not be able to startup properly If the USB Class Driver is not installed properly USB Printing Support on Windows 2000 XP Server 2003 Canon CAPT USB Device on...

Page 295: ...d Remedy Use a USB cable that matches the USB interface on the printer The USB interface on this printer is USB 2 0 High Speed Windows 2000 XP Server 2003 only USB Full Speed USB 1 1 equivalent Cause...

Page 296: ...Only use fonts that can be used with this printer CD ROM Setup does not appear automatically Cause 1 The Always Display when CD ROM is Inserted option is not selected in CD ROM Setup Remedy Right cli...

Page 297: ...purpose Tray setting in the Finishing Details dialog box by clicking Finishing Details in the Finishing sheet If you are using the printer sharing function on your computer it takes a long time for t...

Page 298: ...7 4 Optional Accessories 7 5 Network Adapter 7 5 NetSpot Device Installer 7 7 Windows Firewall 7 8 Configuring Windows Firewall to unblock communication with client computers 7 9 Configuring Windows...

Page 299: ...printed and fixing mode settings This is a safety feature that prevents damage due to overheating Warm up time 0 seconds 10 seconds or less when the printer is on First print time 9 3 seconds or less...

Page 300: ...SB1 1 equivalent Power 220 to 240 V 10 50 60 Hz 2 Hz Power consumption at 20 C or 68 F Average during operation approx 259W Average during standby approx 2W Maximum 726W or less Consumables Toner Cart...

Page 301: ...Printer Dimensions 7 4 Appendix 7 Printer Dimensions Printer mm 216 7 281 1 mm 369 8 63 9 132 250 5 Front View Front View Output Tray Multi Purpose Tray...

Page 302: ...AXIS1650 For details about the AXIS1650 refer to the Axis Communications homepage http www axis com Network Adapter You can use the optional network adapter by connecting it to the LBP2900 2900i usin...

Page 303: ...ith the network adapter for details on the network adapter Contact the store where you purchased your LBP2900 2900i for inquiries on purchasing the network adapter LBP2900 2900i AXIS 1650 TCP IP Clien...

Page 304: ...ce Installer does not need to be installed on your computer but is simply used to initialize the network connection settings of the printer For detailed information on the NetSpot Device Installer ref...

Page 305: ...opy the CAPT Windows Firewall Utility to your hard disk to run it copy all of the files CNAB4FW EXE CAPTRGFW DLL CNAB4FW INI from the WF_UTIL folder on the supplied LBP2900 2900i User Software CD ROM...

Page 306: ...popup menu 3 Double click English then WF_UTIL then CNAB4FW EXE The CAPT Windows Firewall Utility starts IMPORTANT You can also start the utility by selecting Run from the Start menu then entering D...

Page 307: ...irewall Confirm that there is a checkmark next to Canon LBP2900 RPC Server Process on the Exceptions sheet in the Windows Firewall dialog box Windows Firewall is now configured to unblock communicatio...

Page 308: ...e utility by selecting Run from the Start menu then entering D English WF_UTIL CNAB4FW EXE and clicking OK In this case the CD ROM drive is assumed to be assigned to D The actual CD ROM drive letter m...

Page 309: ...isplayed correctly in the Printer Status Window and some functions may not operate properly 1 Select Control Panel from the Start menu 2 Click Network and Internet Connections then click Windows Firew...

Page 310: ...22 4 39 D Details Sheet 4 27 Device Settings Sheet 4 30 Dimensions 7 4 E Editing Print Jobs 4 52 Envelopes 2 4 2 6 2 33 F Finishing Method 4 41 Finishing Sheet 4 23 Firewall 7 8 Fixing Unit 6 4 G Gene...

Page 311: ...8 Paper Output 2 11 Paper Problems 6 25 Paper Size Setting 2 23 2 42 2 55 Paper Sizes Abbreviations 2 5 List 2 2 Paper Source Capacities 2 10 Paper Source Sheet 4 24 Paper Source Types 2 9 Paper Sourc...

Page 312: ...ity Sheet 4 30 Serial Number 7 16 Service Call Display 6 18 Sharing Settings 3 51 3 54 Sharing Sheet 4 28 Small Paper Guide 1 5 Sounds 4 56 Specifications 7 2 Storing Printouts 2 8 System Requirements...

Page 313: ...ter serial number consists of four alphabetic characters and a six digit number IMPORTANT The labels are required for a service engineer to check the serial number for service or maintenance Do not pe...

Page 314: ...CANON INC 2005 R IE 709AB...

Reviews: