019A-022
See "
" also.
IMPORTANT
Protecting the printer from condensation
To prevent condensation from forming inside the printer in the following cases, adjust the printer to the ambient
temperature and humidity for at least two hours before use.
When the room where the printer is installed is heated rapidly
When the printer is moved from a cool or dry location to a hot or humid location
If water droplets (condensation) form inside the printer, this can result in paper jams or poor print quality.
When using an ultrasonic humidifier
When you are using an ultrasonic humidifier, we therefore recommend that you use purified water or other water that is
free of impurities.
If you use tap water or well water, impurities in the water will be dispersed through the air. This can be trapped inside
the printer, causing degradation in print quality.
Precautions for the power supply
Use an AC power outlet exclusively for the printer. Do not use the other sockets of the AC power outlet.
Do not plug the power plug into the auxiliary outlet on a computer.
Do not use the same AC power outlet for both the printer and any of the following equipment.
Copy machine
Air conditioner
Shredder
Equipment that consumes a large amount of electricity
Equipment that generates electrical noise
The maximum power consumption of the printer is 868 W or less.
Electrical noise or a dramatic drop in mains voltage may cause the printer or computer to operate incorrectly or lose
data.
Do not install the printer in the following locations, as this may result in damage to the printer.
A location subject to dramatic changes in temperature or humidity
A location subject to condensation
A poorly ventilated location
(If you use the printer for a long time or to perform a large amount of printing in a poorly ventilated room, the ozone
or other odors generated by the printer may create an uncomfortable working environment. In addition, chemical
particles are dispersed during printing. Therefore, it is important to provide adequate ventilation.)
A location near equipment that generates magnetic or electromagnetic waves
A laboratory or location where chemical reactions occur
A location exposed to salt air, corrosive gases, or toxic gases
A location, such as on a carpet or mat, that may warp from the weight of the printer or where the printer is liable to
sink
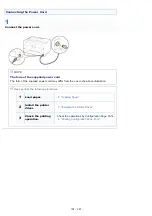
Precautions when connecting the power cord
Do not plug the power plug of the printer into an auxiliary outlet on a computer.
One AC power outlet should be used exclusively for the printer.
Do not connect this printer to an uninterruptible power source.
This may cause printer malfunction or breakdown in the event of a power failure.
When turning ON the printer for the first time after the printer installation
Although a sheet of blank paper may be output, this is not an error.
NOTE
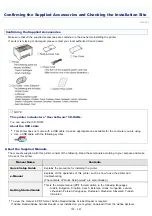
About the consumables included with this printer
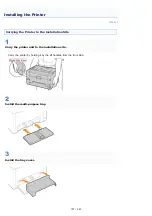
Attention (Printer Installation)
㻝㻜㻜㻌㻛㻌㻟㻠㻟
Summary of Contents for LBP7018C
Page 1: ......
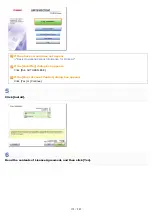
Page 19: ...7 Click Exit When the following screen appears you can remove the CD ROM...
Page 35: ...If the laser beam should escape and enter your eyes exposure may cause damage to your eyes...
Page 85: ...NOTE Calibration time It takes approximately 57 seconds...
Page 92: ......
Page 106: ...Close the covers after you finish checking Next install the printer Installing the Printer...
Page 111: ...019A 027 Installing the Printer Driver Uninstalling the Printer Driver Driver Installation...
Page 135: ...17 Click Exit When the following screen appears you can remove the CD ROM...
Page 137: ...If the User Account Control dialog box appears Click Yes or Continue...
Page 156: ......
Page 177: ...3 Click OK For details on the basic printing procedure see Basic Printing Procedure...
Page 181: ...For details on the basic printing procedure see Basic Printing Procedure...
Page 183: ...3 Click OK For details on the basic printing procedure see Basic Printing Procedure...
Page 186: ...3 Click OK Then the Page Setup sheet reappears...
Page 197: ...4 Click OK For details on the basic printing procedure see Basic Printing Procedure...
Page 201: ...3 Click OK For details on the basic printing procedure see Basic Printing Procedure...
Page 203: ...4 Click OK For details on the basic printing procedure see Basic Printing Procedure...
Page 207: ...4 Click OK For details on the basic printing procedure see Basic Printing Procedure...
Page 211: ...Low...
Page 221: ...4 Confirm the settings then click OK The printer folder reappears...
Page 273: ...4 Click OK...
Page 282: ...For details on the procedure for loading paper see Loading Paper...
Page 316: ...If you specify Special Settings C4 printing speed drops...
Page 341: ......


