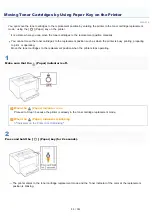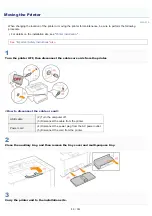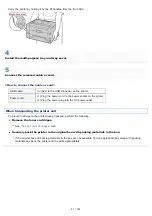
Carry the printer by holding it by the lift handles from the front side.
4
Install the multi-purpose tray and tray cover.
5
Connect the removed cable or cord.
<How to connect the cable or cord>
USB cable
Connect to the USB connector on the printer.
Power cord
(1) Plug the power cord to the power socket on the printer.
(2) Plug the power plug into the AC power outlet.
When transporting the printer unit
To prevent damage to the printer during transport, perform the following.
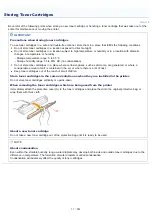
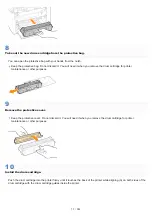
Remove the toner cartridges.
See "
" also.
Securely pack the printer in the original box with packing materials in the box.
If the original box and packing materials in the box are not available, find an appropriate box along with packing
materials and pack the printer and the parts appropriately.
㻤㻝㻌㻛㻌㻟㻠㻟
Summary of Contents for LBP7018C
Page 1: ......
Page 19: ...7 Click Exit When the following screen appears you can remove the CD ROM...
Page 35: ...If the laser beam should escape and enter your eyes exposure may cause damage to your eyes...
Page 85: ...NOTE Calibration time It takes approximately 57 seconds...
Page 92: ......
Page 106: ...Close the covers after you finish checking Next install the printer Installing the Printer...
Page 111: ...019A 027 Installing the Printer Driver Uninstalling the Printer Driver Driver Installation...
Page 135: ...17 Click Exit When the following screen appears you can remove the CD ROM...
Page 137: ...If the User Account Control dialog box appears Click Yes or Continue...
Page 156: ......
Page 177: ...3 Click OK For details on the basic printing procedure see Basic Printing Procedure...
Page 181: ...For details on the basic printing procedure see Basic Printing Procedure...
Page 183: ...3 Click OK For details on the basic printing procedure see Basic Printing Procedure...
Page 186: ...3 Click OK Then the Page Setup sheet reappears...
Page 197: ...4 Click OK For details on the basic printing procedure see Basic Printing Procedure...
Page 201: ...3 Click OK For details on the basic printing procedure see Basic Printing Procedure...
Page 203: ...4 Click OK For details on the basic printing procedure see Basic Printing Procedure...
Page 207: ...4 Click OK For details on the basic printing procedure see Basic Printing Procedure...
Page 211: ...Low...
Page 221: ...4 Confirm the settings then click OK The printer folder reappears...
Page 273: ...4 Click OK...
Page 282: ...For details on the procedure for loading paper see Loading Paper...
Page 316: ...If you specify Special Settings C4 printing speed drops...
Page 341: ......


