12
Basic Preparations
IMPORTANT
•
The battery pack will be charged only when the camcorder is off.
•
Do not connect to the camcorder’s DC IN terminal or to the compact power adapter any electrical
equipment that is not expressly recommended for use with this camcorder.
•
Do not connect the supplied compact power adapter to voltage converters or special power sources such
as those on aircraft, DC-AC inverters, etc.
NOTES
•
We recommend charging the battery pack in temperatures between 10 °C and 30 °C. If either the ambient
temperature or the battery pack’s temperature is outside the range of approx. 0 °C to 40 °C, charging will
not start.
•
If remaining battery time is an issue, you can power the camcorder using the compact power adapter so
the battery pack will not be consumed.
•
Charged battery packs continue to discharge naturally. Therefore, charge them on the day of use, or the
day before, to ensure a full charge.
•
We recommend that you prepare battery packs to last 2 to 3 times longer than you think you might need.
step 2
Basic Preparations
Before you begin, make basic adjustments and learn about a few of the frequently-used parts. See
Preparing the Camcorder
(
;
23) for details. See
Handling Precautions
(
;
167),
Cleaning
(
;
171) for important information about how to take care of the touch screen.
1
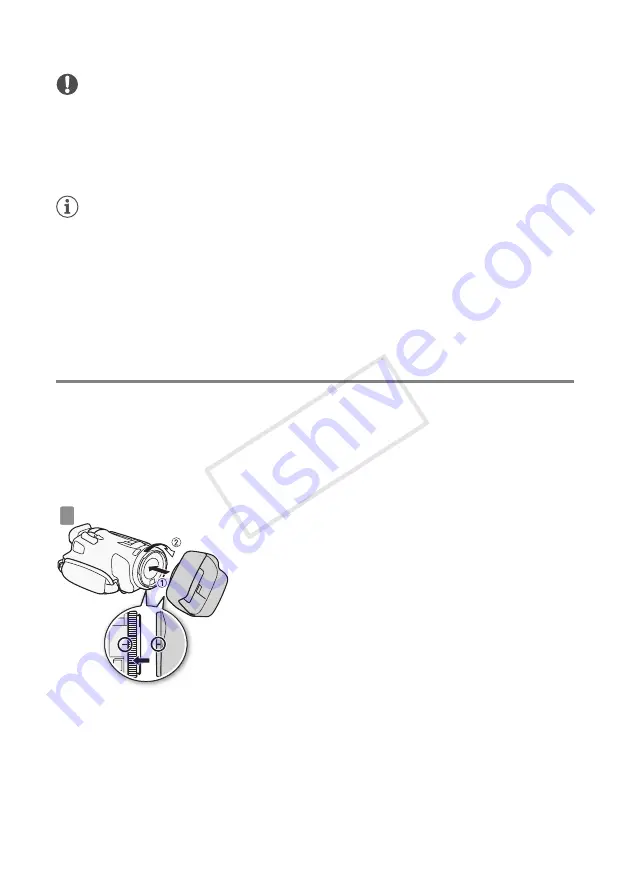
Attach the lens hood.
Place the lens hood on the front of the lens so that the
groove on the lens hood is aligned with the bottom of the
lens (
1
), and then turn the lens hood clockwise (
2
).
• Be careful not to deform the lens hood.
• Make sure that the lens hood is aligned with the thread.
1
COP
Y


