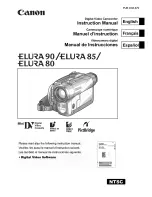
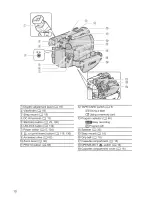
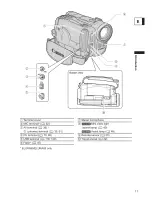
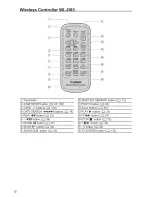
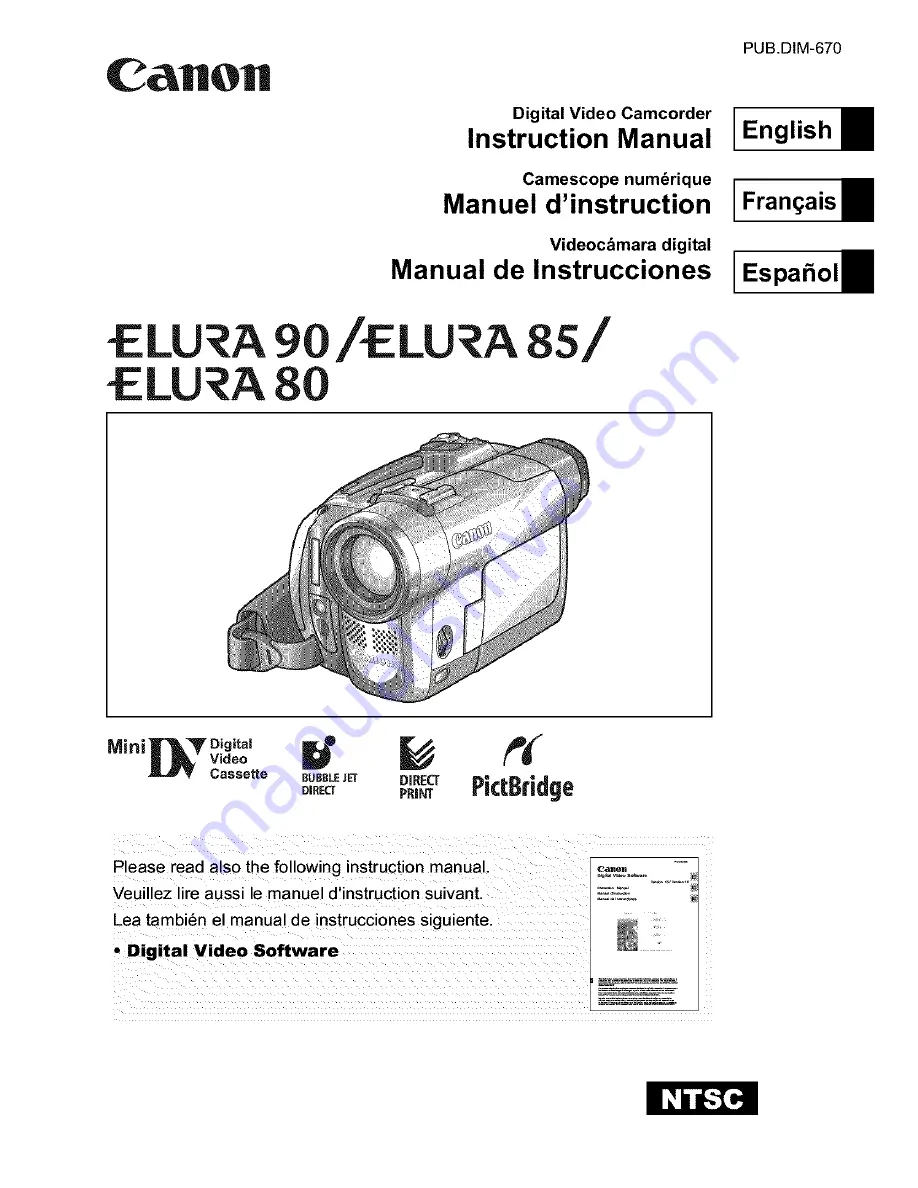
background image

Summary of Contents for LU A 8S

Page 1: ...nes LU a 90 LU A 8S LU_A 80 PUB DIM 670 English E Fran_ais E Miniir _ Y Digita _T Cassette BUBBt JEr DIRECT r LD U_ Cm _ _ e DIRECT PRII_r Please read also the following instruction manual Veuillez lire aussi le manuel d instruction suivant Lea tambien el manual de instrucciones siguiente Digital Video Software _ Z__ o __ _ _ _ _ ...

Page 2: ...ch can be determined by turning the equipment off and on the user is encouraged to try to correct the interference by one or more of the following measures Reorient or relocate the receiving antenna increase the separation between the equipment and receiver Connect the equipment into an outlet on a circuit different from that to which the receiver is connected Consult the dealer or an experienced ...

Page 3: ... product and cart combination to overturn 10 Power Sources The CA 570 Compact Power Adapter should be operated only from the type of power source indicated on the marking label If you are not sure of the type of power supply to your home consult your product dealer or local power company Regarding other power sources such as battery power refer to instructions in this manual 11 Polarization The CA...

Page 4: ...osed to rain or water d If the product does not operate normally even if you follow the operating instructions Adjust only those controls that are covered by the operation instructions Improper adjustment of other controls may result in damage and will often require extensive work by a qualified technician to restore the product to its normal operation e If the product has been dropped or the cabi...

Page 5: ...he ELURA90 Operating modes see below Menu item showing at its default position Button and switches to be operated Setting the Time Zone_ Date and Time sE f ai_B _ The operating modes are determined by the position of the POWER switch and the TAPEICARD switch Operating Mode POWER Switch TAPE CARD Switch CAMERA CAMERA _ TAPE PLAY VCR PLAY VCR _ TAPE CARD CAMERA CAMERA _ CARD CARD PLAY PLAY VCR C_ CA...

Page 6: ...sting the Volume 35 Playing Back on a TV Screen 36 Advanced Functions Menus and Settings 38 Recording Using the Recording Programs 46 Using the Night Modes 49 Skin Detail Function 51 Adjusting Exposure Manually 52 Adjusting the Focus Manually 53 Setting the White Balance 55 Setting the Shutter Speed 57 Using the Self Timer 59 Changing the Recording Mode SP LP 60 Audio Recording 61 Using Digital Ef...

Page 7: ... Selecting the Drive Mode 104 Recording Panoramic Images Stitch Assist Mode 106 Playing Back a Memory Card 108 Protecting images 110 Erasing Images 111 Combining images Card Mix 112 Formatting a Memory Card 116 Creating a Start up image 117 Direct Printing Printing Still Images 118 Selecting the Print Settings 121 Trimming Settings 126 Printing with Print Order Settings 127 Transferring Images Tra...

Page 8: ... STV 250N Stereo Video Cable WA 34 Wide i Attachment The serial number of this product can be found at the battery attachment unit of the camcorder Write down the number and other information here and retain this book as a permanent record of your purchase to aid identification in case of theft Date of Purchase Model Name ELURA90tELURA85tELURA80 A Purchased From Serial No Dealer Address Dealer Pho...

Page 9: ...81 6_ _ flash button C 3 97 t _t playtpause button _ 33 NIGHT MODE button _ 49 t stop button _ 33 ELURA90tELURA85 only _8 _ EXP button C 3 52 t END SEARCH button _ 72 CARD MIX button _ 112 r4_ stitch assist button C_ I06 t SLIDE SHOW button _ 109 LCD BACKLIGHT button Z3 21 Lfl_LCD screen _ 21 _ OPEN button _ 25 SET dial _ 38 Lf_MENU button C_ 38 _ BATTERY RELEASE button _ 13 Battery attachment uni...

Page 10: ...witch C 3 5 134 _ _ N printtshare button _ 119 130 Accessory shoe C 3 62 Zoom lever C 3 30 PHOTO button E_ 93 TAPE CARD switch C _35 Using a tape Using a memory card Program selector C _3 46 Easy recording Program AE _ _Speaker _ 35 Strap mount _ 19 Lf_Grip belt _3 18 Cassette compartment C _ 16 OPENtEJECT _ switch _ 16 Cassette compartment cover Q3 16 10 ...

Page 11: ...62 AV terminal E_ 36 t _ phones terminal C 3 35 61 _ DVterminal C 3 79 88 USB terminal _ 118 129 Flash C _ 97 ELURA90 ELURA85 only _7_Stereo microphone _Mini video light assist lamp E_ 49 _ Assist lamp CI3 49 Remote sensor C 3 20 _ Tripod socket C_ 32 11 ...

Page 12: ... _ 74 _ REW _ button E Z333 _ t_ H button 1 _ 34 _7_PAUSE l button C 3 34 _ SLOW _1_ button Z3 34 _ AUDIO DUB button Z3 85 I_ ZERO SET MEMORY button _ 73 _ PHOTO button C 3 93 Zoom buttons E_ 30 _ _PLAY _ button _ 33 FF _ button 1 _ 34 STOP button C 3 33 __ t _ button _ 34 x 2 button C 3 34 TV SCREEN button 1 3 3 135 12 ...

Page 13: ...ttery Rack _ _ 13 1 Connect the power cord to the _ adapter 2 Plug the power cord into a power outlet 3 Connect the power adapter to the camcorder s DC IN terminal The CHARGE indicator starts flashing It glows steadily when charging is complete 4 When charging is complete disconnect the power adapter from the camcorder Unplug the power cord from the power outlet and disconnect it from the adapter ...

Page 14: ... that are not expressly recommended to the camcorder s DC IN terminal or to the power adapter O You may hear some noise from the power adapter during use This is not a malfunction O Do not disconnect and reconnect the power cord while charging a battery pack Charging may stop The battery pack may not be charged correctly even if the CHARGE indicator glows steady The battery pack may also not be ch...

Page 15: ...n 185 min 230 min Approximate times for recording with repeated operations such as start stop zooming power onloff Actual time may be shorter O We recommend charging the battery pack in temperatures between 10 C and _ 30 C 50 F and 86 F Outside the temperature range of 0 C to 40 C 32 F _ _ to 104 F the CHARGE indicator flashes rapidly and charging stops _ n OA lithium ion battery pack can be charg...

Page 16: ...out 3 Press the _ mark on the cassette compartment until it clicks 4 Wait for the cassette compartment to retract automatically and close the cassette compartment cover O Do not interfere with the cassette compartment while it is opening or closing automatically or attempt to close the cover before the cassette compartment has fully retracted O Be careful not to get your fingers caught in the cass...

Page 17: ...r source to the camcorder when replacing the backup battery to retain the settings 1 Press the OPEN button to open the LCD panel 2 Pull out the battery holder 3 Place the lithium battery with the side facing downward into the battery holder 4 insert the battery holder 5 Close the LCD panel _w The backup battery has a life span of about a year _ flashes in red to inform you that it needs to be repl...

Page 18: ...ap 2 Pass the grip belt through the loop on the cord Press the buttons on the lens cap when attachinglremoving it Hook the lens cap on the grip belt while you are recording and place it over the lens when you have finished East_niog the G_ip B_lt Hold the camcorder with your right hand and adjust the belt with your left Adjust the grip belt so that you can reach the zoom lever with your index fing...

Page 19: ...rces through the wide attachment It could damage your eyesight O If you zoom to telephoto the picture will not be in focus O The wide attachment may obstruct the remote sensor the range of the wireless controller narrows or may cause a shadow to appear on the picture when recording with the assist lamp O Filters cannot be used with the wide attachment O If dust accumulates on the wide attachment o...

Page 20: ...holder 2 Place the lithium button battery with the side facing up 3 Insert the battery holder _Tab O The wireless controller may not work properly when the remote sensor is subjected to strong light sources or direct sunlight O If the wireless controller does not work check if the remote sensor is set to OFF _ CJ3 77 O When the camcorder cannot be operated with the wireless controller or when it c...

Page 21: ... the LCD screen between normal and bright by pressing _ the LCD BACKLIGHT button This is useful for outdoor recordings _ _ LCD BACKLIGHT button Press the LCD BACKLIGHT button O This setting does not affect the brightness of the recording or the viewfinder screen O When using a battery pack the camcorder retains the setting even if you change the position of the POWER switch O The battery usage tim...

Page 22: ...appears see table on the next page The default setting is New York 4 Turn the SET dial to select the setting option that represents your time zone and press the SET dial To adjust for daylight saving time select the time zone with the _ next to the area Settingth at a d im I MENU _38 SYSTEM _ D TIME SET JAN 12 OOI 2005AM 5 Turn the SET dial to select D TIME SET and press the SET dial The year disp...

Page 23: ... Angeles KARACHI DENVER DACCA CHICAGO BANGKOK N Y New York H KONG Hong Kong CARACAS TOKYO RIO Rio de Janeiro SYDNEY FERNAN Fernando de Noronha SOLOMON AZORES Once you have set time zone date and time you do not need to reset the clock each time you travel to another time zone Just set the time zone to the one of your destination and the camcorder automatically adjusts the clock F_ _ 23 ...

Page 24: ... MENU DISPLAY SETUP _ _ D T DISPLAY OFF _ 38 J 1 Press the MENU button to open the menu 2 Turn the SET dial to select DISPLAY SETUP _ and press the SET dial 3 Turn the SET dial to select D T DISPLAY and press the SET dial 4 Turn the SET dial to select ON 5 Press the MENU button to close the menu 24 ...

Page 25: ... to CAMERA mode Set the POWER switch to CAMERA and the TAPEICARD switch to 3 Push the OPEN button at the LCD panel and open the LCD panel 4 Press the start stop button to begin recording Press the start stop button again to pause recording When You Have Finished Recording 1 Turn the POWER switch to OFF 2 Close the LCD panel 3 Replace the lens cap 4 Unload the cassette 5 Disconnect the power source...

Page 26: ...ordings even if you turn the camcorder off O Bright light may make it difficult to use the LCD screen In such case use the viewfinder instead O When recording near loud sounds such as fireworks drums or concerts sound may become distorted or may be recorded not in the actual sound level This is not a malfunction A o ing the Subject to M nitQ the LCD Screen You can rotate the LCD panel so that the ...

Page 27: ...When LCD MIRROR is set to ON only tape or card operation and self timer displays appear on the LCD screen all displays appear on the viewfinder screen _ _ _ 27 ...

Page 28: ... the type of the tape the indication may not be displayed correctly The battery symbol indicates the charge status of the battery pack _J starts flashing in red when the battery pack is empty When you attach an empty battery pack the power may turn off without displaying _ _ The actual battery charge may not be indicated accurately depending on the condition under which battery pack and camcorder ...

Page 29: ...ease the record review button The camcorder rewinds the tape plays back the last few seconds and returns to record pause mode g _2 __ n Record Search In record pause mode this function allows you to play back the tape forward or reverse to locate the point where you wish to begin recording Press and hold the REC SEARCH button forward or button reverse Release the button at the point you wish to be...

Page 30: ...gle Move it toward T to zoom in telephoto Press the zoom lever slightly for a slow zoom Press harder for a faster zoom O You can also use the lr and W buttons on the wireless controller However you cannot control the zoom speed O The zoom speed is slightly faster in record pause mode O Keep at least 1 m 3 3 ft to the subject At wide angle you can focus on a subject as close as 1 cm 0 39 in 3O ...

Page 31: ...dial to select CAMERA SETUP and press the SET dial 3 Turn the SET dial to select D ZOOM and press the SET dial 4 Turn the SET dial to select a setting option 5 Press the MENU button to close the menu _boo Cb _n C Digital zoom cannot be used in the night modes O Digital zoom cannot be used in Stitch Assist mode or when the multi image screen is selected O A zoom indicator appears for 4 seconds It e...

Page 32: ...ouch the microphone or lens For More Stability Lean against a wall Put the camcorder on a table Lie on your elbow Kneel on one knee Use a tripod When recording outdoors we recommend recording with the sun at your back O When using a tripod do not leave the viewfinder exposed to direct sunlight as it may melt due to concentration of the light by the lens O Do not use tripods with fastening screws l...

Page 33: ...e POWER switch to PLAY VCR and the TAPE CARD switch to 6b 2 Open the LCD panel 3 Press the _l_ button to rewind the tape 4 Press the _ l button to begin playback 5 Press the button to stop playback _2 _n C To use the viewfinder close the LCD panel C About the screen display During playback the time code gives the hours minutes seconds and frames The remaining tape time may not appear when the time...

Page 34: ...ck pause Press and hold it to play back continuous frame advance flame reverse SLOW J_ Slow Forward Slow Reverse Plays back at about 1 3 normal speed Press the button on the wireJess controller during normal or reverse playback Press the _ play button to return to normal playback 2 Forward x2 PJayback l Reverse 2 Playback Plays back at 2 times normal speed Press the button on the wireless controll...

Page 35: ...change the setting following the procedure _ below _ I 1 MENU VCR SETUP I_ AVIPHONES Q AV _ 38 J Open the menu and select VCR SETUP Select AV PHONES f set it to PHONES Q and close the menu O The speaker does not sound when Q is displayed O Do not connect headphones unless f _ is displayed as it produces noise Adjusting the me i I Turn the SET dial up to increase the volume and down to lower the vo...

Page 36: ...tarting the connections 2 Connect the STV 250N Stereo Video Cable to the camcorder s AV terminal and the audio video terminals on the TV VCR Connect the white plug to the white audio terminal L left the red plug to the red audio terminal R right and the yellow plug to the yellow video terminal VIDEO 3 If connecting to a IV set the input selector to VIDEO If connecting to a VCR set the input select...

Page 37: ...rn the SET dial to select AUDIO SETUP and press the SET dial 3 Turn the SET dial to select OUTPUT CN and press the SET dial 4 Turn the SET dial to select a setting option LtR Stereo L R channels Bilingual Main Sub LtL Stereo L channel Bilingual Main RtR Stereo R channel Bilingual Sub 5 Press the MENU button to close the menu b00 B The setting resets to the LiR setting when you turn the camcorder o...

Page 38: ... dial to select a submenu and press the SET dial 3 Turn the SET dial to select a menu item and press the SET dial 4 Turn the SET dial to select a setting option 5 Press the MENU button to close the menu When setting the white balance shutter speed or language press the SET dial first before pressing the MENU button C Pressing the MENU button at any time closes the menu O Items that are not availab...

Page 39: ...TUP WIND SCREEN AUDIO MODE O VOLUME ELURA90tELURA85 only Setting Options OFF FADER EFFECT MULTI S FADE T WIPE CORNER JUMP FLIP PUZZLE ZIGZAG BEAM TIDE ART BLACK WHITE SEPIA MOSAIC BALL CUBE WAVE COLOR MASK MIRROR MANUAL FAST MODERATE SLOW 4 9 16 AUTO 1 60 1 100 1 250 1 500 1 1000 1 2000 ON OFF OFF 80X 400X OFF 72X 360X ON OFF AUTO SET_ INDOOR_O OUTDOOR o AUTO OFF ON _ OFF _NIGHT _NIGHT _S NIGHT SO...

Page 40: ...nguages 76 76 ON OFF 78 SYSTEM ON OFF l_ _P 77 ON OFF 77 See list of time zones 22 22 MY CAMERA OFF DEFAULT MY SOUND 75 Menu Item BRIGHTNESS LCD MIRROR TV SCREEN D T DISPLAY LANGUAGE_ DATE FORMAT DEMO MODE WL REMOTE BEEP T ZONE DST D TIME SET S UP SOUND SHTR SOUND OPER SOUND SELF T SOUND 40 ...

Page 41: ... DV ON OFF 84 AUDIO SETUP OUTPUT CH LIR L L R R 37 AUDIO DUB AUDIO IN MIC IN 85 WIND SCREEN AUTO OFF 62 AUDIO MODE 16bit 12bit 61 12bit AUDIO STEREO1 STEREO2 MIX FIXED MIX 87 VARI MIX BALANCE 87 CARD SETUP IMG QUALITY SUPER FINE FINE NORMAL 90 MOVIE SIZE 320x240 160x120 91 FILE NOS RESET CONTINUOUS 92 DISPLAY SETUP BRIGHTNESS 77 TV SCREEN ON OFF 135 DISPLAYS ON OFF PLAYBK 135 6SEC DATE ON OFF 71 D...

Page 42: ...nu Setting Options SYSTEM ON OFF l_ 77 ON OFF 77 See list of time zones 22 22 MY CAMERA OFF DEFAULT MY SOUND 75 Menu Item WLREMOTE BEEP T ZONE DST D TIME SET S UP SOUND SHTR SOUND OPER SOUND SELF T SOUND 42 ...

Page 43: ...IRROR TV SCREEN D T DISPLAY LANGUAGE _ DATE FORMAT DEMO MODE ELURA90tELURA85 only Setting Options OFF BLACK WHITE AUTO 1 60 1 100 1 250 ON OFF OFF 80X OFF 72X AUTO SET _ _ INDOOR 8 OUTDOOR _ AUTO OFF ON OFF ON Q OFF AUTO OFF _NIGHT _NIGHT _S NIGHT SOFT NORMAL OFF 2sec 4sec 6sec 8sec 10sec SUPER FINE FINE NORMAL t280 960 640x480 320 240 160x120 RESET CONTINUOUS AV PHONES AUTO OFF ON OFF ON OFF ON O...

Page 44: ...nu Setting Options SYSTEM ON OFF l_ 77 ON OFF 77 See list of time zones 22 22 MY CAMERA OFF DEFAULT MY SOUND 75 Menu Item WLREMOTE BEEP T ZONE DST D TIME SET S UP SOUND SHTR SOUND OPER SOUND SELF T SOUND 44 ...

Page 45: ...AV PHONES AV PHONES _ 36 DISPLAY SETUP BRIGHTNESS 77 TV SCREEN ON OFF 135 DISPLAYS ON OFF PLAYBK 135 D TIME SEL DATE TIME DATE TIME 70 LANGUAGE S See list of languages 76 DATE FORMAT 76 SYSTEM WLREMOTE ON OFF _ _3 77 BEEP ON OFF 77 T ZONE DST See list of time zones 22 D TIME SET 22 MY CAMERA 117 NO IMAGE CANON LOGO MY IMAGE 75 OFF DEFAULT MY SOUND 75 _ PRINT 128 CREATE START UP IMAGE SELS UP IMG S...

Page 46: ...lly _Sports Use this mode to record sports scenes such as tennis or golf or moving objects such as roller coasters I_ Portrait Use this mode to give accent to your subject by blurring the background or foreground The blur effect increases the more you zoom to telephoto _Spotlight Use this mode to record spotlit scenes or fireworks _Sand Snow Use this mode in bright places such as a sunny beach or ...

Page 47: ... i X A O White Balance i x A O Shutter Speed i x A O x A Exposure Lock i x O _ Digital Effects i x O _ Card Mix i x O _ _ O Available x Not available A Auto setting _ Shaded area Can be used only in CAMERA mode c The setting is automatically set to ON _ ca I Set the program selector to EASY _ C EASY appears _ 47 ...

Page 48: ...e mode during recording as the brightness of the image may change abruptly O SportslPortrait mode The picture may not appear smooth when played back O Sand Snow mode The subject may become overexposed in dark surroundings Check the image on the screen The picture may not appear smooth when played back O Low Light mode Moving subjects may leave a trailing afterimage Picture quality may not be as go...

Page 49: ...ts up automatically responding to the surround ng br ghtness Night Mode Night Mode Super Night Mode o _Mini video light assist lamp _ Assist lamp Program selector NIGHT MODE button _ 11 n MENU _ 38 CAMERA SETUP _ NIGHT MObE _ _ NIGHT 1 Set the program selector to _ 2 Open the menu and select CAMERA SETUP Select NIGHT MODE select a setting option and close the menu 3 Press the NIGHT MODE button The...

Page 50: ...long time C Do not use the mini video light dose to people s eyes O Moving subjects may leave a trailing afterimage O Picture quality may not be as good as in other modes C White points may appear on the screen C Autofocus may not work as well as in other modes In such case adjust the focus manually C Digital zoom and multi image screen cannot be used while a night mode is activated C The program ...

Page 51: ... Open the menu and select CAMERA SETUP Select SKIN DETAIL set it to SOFT and close the menu O Skin detail function cannot be used when the program selector is set to EASY O SKIN DETAIL resets to NORMAL when you change the position of the POWER switch or the program selector O To obtain the best effect use this function when recording a person in close up Note that areas similar to the skin color m...

Page 52: ... button E LOCK 0 appears on the screen When you operate the zoom during exposure lock the brightness of the image may change EXPi EXpQsureAdjustment When the exposure is locked you can adjust it manually to handle difficult lighting conditions The camcorder s iris can be set to any position from fully closed to fully open Turn the SET dial to adjust the brightness of the image The adjustment range...

Page 53: ...ows SET dial Zoom lever FOCUS button Program selector 1 Set the program selector to l_ _ sg cQ _ rl 2 Adjust the zoom When you operate the zoom after adjusting the focus the subject may not stay in focus Adjust the zoom before the focus _W T FOCUSIDATACODE 3 Press the FOCUS button iv1F appears 4 Turn the SET dial to adjust the focus Turn the SET dial up or down until the image appears focused Pres...

Page 54: ...the camcorder Infinity E_us Use this function when you wish to focus on faraway subjects such as mountains or fireworks Press the FOCUS button more than 2 seconds after step 2 in Adjusting the Focus Manually MF oo appears When you operate the zoom or turn the SET dial oo disappears and the camcorder changes to manual focus 54 ...

Page 55: ...ium lamps OUTDOOR _ Use this mode for recording night scenes fireworks sunrise or sunset SET dial MENU botton Program selector MENU _ 38 CAMERA SETUP _ WRITE BAL AUTO 1 Set the program selector to lB 2 For custom white balance Point the camcorder at a white object and zoom in until it fills the whole screen Keep the camcorder zoomed at the white object until step 3 is completed 3 Open the menu and...

Page 56: ... CARD switch C When you have set the custom white balance Depending on the light source _ _ may keep flashing The result will still be better than with the auto setting Reset the white balance when the lighting condition changes Turn off the digital zoom C Custom white balance may provide better results in the following cases Changing lighting conditions Close ups Subjects in a single color sky se...

Page 57: ...Do not point the camcorder directly at the sun when the shutter speed is set to 1t1000 or higher O The image may flicker when recording with high shutter speeds O Recording under fluorescent lights CAMERA mode In Easy Recording Auto mode or the night modes the camcorder automatically detects the flicker of fluorescent lighting and adjusts the shutter speed accordingly However if the screen starts ...

Page 58: ... when the flash mode is set to flash off MENU _38 CAMERA SETUP _ A SL SHUTTER 0N Open the menu and select CAMERA SETUP Select A SL SHUTTER set it to OFF and close the menu O When set to ON moving subjects may leave a trailing afterimage O The camcorder retains the setting separately in CAMERA and CARD CAMERA mode O The setting cannot be changed when exposure is locked O If _ camcorder shake warnin...

Page 59: ...art stop button n The camcorder starts recording after a 10 second countdown 2 seconds when using the wireless controller The count down appears on the screen 6 To record a still image press the PHOTO button 3 93 O To cancel the self timer set SELF TIMER to OFF Once the countdown has begun you can also press the start stop button when recording movies or the PHOTO button when recording still image...

Page 60: ...condition of the tape picture and sound recorded in LP mode may be distorted We recommend using the SP mode for important recordings 0 If you record in both SP and LP modes on the same tape the playback picture may become distorted and the time code may not be written correctly 0 If you play back a tape that has been recorded in LP mode with another digital device on this camcorder or vice versa p...

Page 61: ...nds Using HeadphQnes during ReCording The headphones terminal also serves as AV terminal Headphones can only be used when O is displayed on the screen If not change the setting following the procedure below I 1 m _WENU VCR SETUP _AV PHONES 9 AV _ 38 J J Open the menu and select VCR SETUP Select AV PHONES 9 set it to PHONES Q and close the menu MENU AUDIO SETUP C_38 Open the menu and select AUDIO S...

Page 62: ...a commercially available microphone equipped with an accessory shoe Refer also to the instruction manual of the microphone 1 Attach the microphone to the accessory shoe 2 When using a commercially available microphone connect it to the MIC terminal O When recording in silent places the built in microphone may pick up the motor noise of the camcorder In such case we recommend using an external micr...

Page 63: ...g Digital Effects Faders _ 65 Begin or end scenes with a fade to or from black Fade Trigger FADE T Wipe WIPE Corner Wipe CORNER i Flip FLIP I Zigzag ZIGZAG Tide TIDE Jump JUMP Puzzle PUZZLE Beam BEAM s_ 63 ...

Page 64: ...hite BLACK i WHITE i Ball BALL Color Mask COLOR i MASK Sepia SEPIA Cube CUBE Mirror MIRROR Multi Image Screen q3 66 Captures moving subjects in 4 9 or 16 sequences of still images and displays them at one time Sound will be recorded normally 4 Sequences 9 Sequences 16 Sequences 4 i T 64 ...

Page 65: ...ted fader flashes CAMERA mode 4 Fade in In record pause mode press the D EFFECTS button and begin recording by pressing the start stop button Fade out During recording press the D EFFECTS button and pause recording by pressing the start stop button The fader can be activated deactivated by pressing the D EFFECTS button PLAY VCR mode 4 Fade in In playback pause mode press the D EFFECTS button and b...

Page 66: ... button D EFFECTS Selecting an Effect in CARD CAMERA Mode i 1 Open the menu and select D EFFECT SETUP ENU _ Select EFFECT set it t BLACK WHITE and c se l _ _ _ _BhLK ewnHU _ flashes 2 Press the D EFFECTS button D EFFECTS BLK WHT stops flashing The effect can be activated deactivated by pressing the D EFFECTS button Using the M _ You can operate the multi image screen only in the following playback...

Page 67: ...t number of images will be captured at the set speed To cancel the multi image screen press the D EFFECTS button 6 Press the start stop button to begin recording The multi image screen is recorded on the tape O Turn off the digital effect when you do not use it O The camcorder retains the setting even if you turn it off or change the program AE mode O The image quality may be slightly lower with d...

Page 68: ...O When you turn off the image stabilizer you will get a larger horizontal angle of view O The multi image screen cannot be used when the widescreen mode is selected O Simultaneous recording on a memory card cannot be used when the widescreen mode is selected O If you play back a widescreen recording on a normal TV the image appears horizontally squeezed O If you connect the camcorder to a TV with ...

Page 69: ... image move the zoom lever toward T To shrink the image below 2 times magnification move the zoom lever toward W 2 Select the magnified area with the SET dial Turn the SET dial to move the image to the right and left or up I i and down Pressing the SET dial switches between the I directions I To cancel the magnification move the zoom lever toward W L until the frame disappears Movies played back f...

Page 70: ...a code combination you wish to display SET dial MENU button DATA CODE button S_ _cting tb_Datel ime Disp a_ CQmbination 1 MENU DISPLAY SETUPI_ I_ DITIME SEL DATE TIME _ 38 J Open the menu and select DISPLAY SETUP _ Select D TIME SEL set it to DATE or TIME and close the menu MFNU DISPLAY SETUP _ _ 38 _ DATA CODE DATE TIME Open the menu and select DISPLAY SETUP _ Select DATA CODE set it to CAMERA DA...

Page 71: ... Only date and time appear in CARD PLAY mode Date and time appear for 6 seconds when you begin playback or to indicate that date or time zone has changed I 1 MENU DISPLAY SETUPI_ I_ 6SEC DATE OFF _ 38 J Open the menu and select DISPLAY SETUP _ Select 6SEC DATE set it to ON and close the menu mmm _ tl n 71 ...

Page 72: ...ND SEARCH appears The camcorder rewinds fast forwards the tape plays back the last few seconds of the recording and stops the tape Pressing the button again cancels the search O End search cannot be used once you unload the cassette O End search may not work properly if a blank section exists on the tape O You cannot use end search to locate the editing end of audio dubbing 72 ...

Page 73: ...d with the wireless I Q _ D o olID controller 7 D Q_T I O 6_ _ _ STOP button button 1 Press the ZERO SET MEMORY button at the point you wish to return to later 0 00 00 _ appears To cancel press the ZERO SET MEMORY button again 2 When you have finished playback rewind the tape _ RTN appears The tape stops automatically at 0 00 00 The tape counter changes to time code The zero set memory may not fun...

Page 74: ... the wireless controller Press the _4 or _ button to begin searching Press more than once to search for further date changes up to 10 times Press the STOP button to stop searching C A recording of longer than a minute per date area is required O Date search may not function if the data code is not correctly displayed 74 ...

Page 75: ... and select MY CAMERA 2 Select the menu item you wish to change When selecting a start up image set the camcorder to CARD PLAY mode 3 Select a setting option and close the menu O You can save your original images or the images and sounds contained in the supplied software ZoomBrowser EX for Windows or ImageBrowser for Macintosh to the setting options MY IMAGE and MY SOUND For details refer to the ...

Page 76: ...AY SETUP _ _ 38 _ LANGUAGE_ ENGLISH To change the display language open the menu and select DISPLAY SETUP _ Select LANGUAGE_ select a language and close the menu O If you have mistakenly changed the language follow the _ mark next to the menu item to change the setting O The displays and at the bottom of the screen refer to the button names on the camcorder and will not change when you change the ...

Page 77: ...8 J J To turn the beep off open the menu and select SYSTEM Select BEEP set it to OFF and close the menu L MENU DZSPLAY SETUP _ _ BRZGHTNESS d 2 _h _ _ 38 2 Open the menu and select DISPLAY SETUP _ Select BRIGHTNESS adjust the brightness level and close the menu __ Changing the brightness of the LCD screen does not affect that of the viewfinder _ or the recordings g the I L J _ 38 SYSTEM _ WL REMOT...

Page 78: ... O The image stabilizer is designed to compensate a normal degree of camcorder shake O The image stabilizer might not be as effective when using the night modes ade The demonstration mode displays the camcorder s main features It starts automatically when you leave the camcorder turned on without loading a recording media for more than 5 minutes However you can set the camcorder not to start the d...

Page 79: ...n manual of the digital video device Commercially available DV cable Re_Q_ding ill i_i I_I_ ii i i i iiiili I _ii _ i _i_ i iii i II _ i iiii 1 Set the camcorder to PLAY VCR mode and load a recorded cassette If you are connecting via AV terminal check the setting _ 36 2 Connected device Load a blank cassette and set the device to record pause mode 3 Locate the scene you wish to copy and pause play...

Page 80: ...ital video device If the picture does not appear reconnect the DV cable or turn the camcorder off and back on again Proper operation cannot be guaranteed for all digital video devices equipped with a DV terminal If operation does not work use the AV terminal O We recommend powering the camcorder from a household power source 8O ...

Page 81: ...eck the picture on the screen WmDESCREEN 5 Connected device Play back the tape RECPAUSE 6 Press the _ button when the scene you wish to record appears Recording starts 7 Press the button to stop recording Press the _ button to pause recording Press the _t n button again to restart recording 8 Connected device Stop playback NmGHT MODE 2 O Headphones cannot be used during analog lineqn recording O D...

Page 82: ...g Press the _ button to pause recording Press the _ 11 button again to restart recording 8 Connected Device Stop playback NmGHT MODE O Blank sections may be recorded as anomalous picture O If the picture does not appear reconnect the DV cable or turn the camcorder off and back on again O You can only record signals from devices with the j _r logo recording in SD system in SP or LP format note that...

Page 83: ... signals to digital signals and output the digital signals via the DV terminal The DV terminal serves as output terminal only _ n n np__tin n the_ D_vie ____ Turn off all devices before starting the connections Unload the tape from the camcorder Refer also to the instruction manual of the connected device _ VIDEO AUDIO Signal flow Commercially available DV cable 83 ...

Page 84: ...l signals might not work properly e g signals that include copyright protective signals or anomalous signals such as ghost signals O For normal use set AV _ DV to OFF If it is set to ON digital signals cannot be input via the camcorder s DV terminal O Depending on the software and the specifications of your computer you may not be able to transfer converted signals via the DV terminal We recommend...

Page 85: ...onnected device Audio device e g CD player supplied _ _ Connecting a Microphone See Recording with an External Microphone _3 62 MENU AUDIO SETUP _ _ AUDIO DUB AUDIO IN _ 38 J 1 Set the camcorder to PLAY VCR mode and load a recorded cassette Use a tape recorded in SP 12 bit mode with this camcorder 2 Open the menu and select AUDIO SETUP Select AUDIO DUB set it to AUDIO IN or MIC IN and close the me...

Page 86: ...built in microphone do not connect any devices to the MIC terminal O You cannot use the DV terminal for audio dubbing O If you add sound to a tape not recorded with this camcorder sound quality may decrease O Sound quality may decrease when you add sound to the same scene for more than 3 times O You can check the picture on the LCD screen O When you connect an audio device check the sound via buil...

Page 87: ...ed sound MIX FIXED Plays back Stereo 1 and Stereo 2 in the same level MIXiVARI Plays back Stereo 1 and Stereo 2 The mix balance can be adjusted 2 If you have seJected MIX VARI adjust the mi level Open the menu and select AUDIO SETUP Select MIX BALANCE adjust the baJance with the SET dial and close the menu Turn the SET dial down to increase the volume of Stereo 1 and up to increase the volume of S...

Page 88: ...cable __ _ L J 6 pin 4 pin O Operation may not work correctly depending on the software and the specifications settings of your computer O If the computer freezes while you have connected the camcorder disconnect and reconnect the DV cable If the problem persists disconnect the interface cable turn off camcorder and computer turn camcorder and computer back on and reconnect them O Before connectin...

Page 89: ...emory card without first pushing it in 1 Turn off the camcorder Make sure that the card access indicator is not flashing before you turn off the camcorder 2 Open the cover 3 Push the memory card to release it Remove the memory card 4 Close the cover Card access indicator O This camcorder is compatible with SD Memory Cards or MultiMediaCards only Do not use any other types of memory cards O Proper ...

Page 90: ...MENU _38 CARD SETUP _ IMAGE SIZE 1280x960 Open the menu and select CARD SETUP Select IMAGE SIZE set it to 640 480 and close the menu C Still images are recorded with JPEG Joint Photographic Experts Group compression O Estimated Capacity of an 8 MB Memory Card _ _e Size 1280 x 960 640 x 480 No of File Size No of File Size Image Qualit_ Images perlmage Images perlmage Superfine 6 850 KB 34 175 KB Fi...

Page 91: ...pen the menu and select CARD SETUP Select MOVIE SIZE set it to 160 120 and close the menu O Movies are recorded with Motion JPEG compression O Maximum recording time on a 8 MB SD Memory Card Recording Time Image Size 8 MB File Size per Second 320 x 240 approx 20 sec 250 KB sec 160 x 120 approx 50 sec 120 KB sec O o E 91 ...

Page 92: ... files the consecutive file number will be assigned The camcorder memorizes the file number of the last image and assigns the consecutive file number to the next image even when a new memory card is inserted If a higher file number already exists on the memory card the consecutive number will be assigned There will be no duplication of file numbers This is useful for organizing images on a compute...

Page 93: ...en focus is adjusted The beep sounds twice The picture may appear out of focus for a moment whi e the camcorder is focusing _ Exposure is locked When you press the PHOTO button on the wireless controller recording starts immediately 3 Press the PHOTO button fully _m_ and focusing frame disappear and you hear a shutter I _ sound I The card access indicator flashes and the card access display I _ _ ...

Page 94: ...up to 2 seconds until focus is adjusted and the still image can be recorded to the memory card Up to 4 seconds in the Low Light and the night modes If the subject is not suitable for autofocus the focusing frame turns yellow and locks the focus Adjust the focus manually with the SET dial O When the Focus Priority mode is set to OFF No focusing frame appears In step 2 turns green and focus and expo...

Page 95: ... image cannot be recorded on a memory card when a fader effect or the multi image screen is activated O The still image cannot be recorded on a memory card when the widescreen mode is selected 0 _ _ appears when you press the PHOTO button when STILL I REC is set to OFF R_ q_d i 8g f_ m a Tap i8 b am _der ii il i I i iii I i iiiiiii ilii 1 Play back the tape 2 Press the PHOTO button halfway when th...

Page 96: ... and play back the tape 3 Press the PHOTO button halfway when the scene you wish to record appears The still image remaining image capacity and other information appear When you press the PHOTO button on the wireless controller recording starts immediately 4 Press the PHOTO button fully The card access indicator flashes O When recording from a tape in the camcorder or other video devices A still i...

Page 97: ...ubject red eye reduction auto The flash fires automatically according to the brightness of the subject and the assist lamp lights up to reduce the red eye effect flash on The flash always fires flash off The flash does not fire Use this setting in places where flash photography is prohibited I Press the _ flash button The setting changes with each press of the button The symbol of the selected fla...

Page 98: ...ording movies on a tape When STILL I REC is set to OFF in CAMERA mode When a shutter speed of 1t2000 is set in A auto or red eye reduction auto and in CAMERA mode When the multi image screen is selected During auto exposure bracketing When an abnormality occurs during charging O When _ flash on is selected and a shutter speed of 1t2000 is set in CAMERA mode the shutter speed becomes set to 1t1000 ...

Page 99: ...ption and close the menu O A still image is displayed as long as you hold the PHOTO button after recording O The FILE OPER menu appears when you press the SET dial while you are reviewing a still image or when you press the SET dial right after recording In this menu you can protect _ 110 or erase C 3 111 the image O REVEW cannot be selected when D_ continuous shooting _ high speed continuous shoo...

Page 100: ...r remove the memory card while the card access indicator is flashing Doing so could result in data damage O When you are using a SD Memory Card make sure that the protect switch is set to allow recording O Do not Ioadlunload a cassette during recording D We recommend using a Canon SD Memory Card or a SD Memory Card with a transfer rate of more than 2 MB sec right after you have formatted it with t...

Page 101: ...pe 2 Press the start stop button when the scene you wish to record appears 3 Press the start stop button to stop recording Re_o_ding You can record movies from devices connected via the AV terminal analog line in function or via the DV terminal on a memory card For connecting instructions refer to o page 36 and 79 _ 1 Set the camcorder to PLAY VCN mode If a cassette is loaded make sure the tape is...

Page 102: ...e in the camcorder or other video devices O A movie recorded from an image in widescreen mode will be vertically compressed O The data code of the movie will reflect the date and time it has been recorded on the memory card 102 ...

Page 103: ...frame to the left O The focusing frame gives an indication of the focusing point Depending on the size of the subject or the distance the camcorder may focus outside the frame O When you operate the zoom lever the frames other than the selected one disappear O The focusing point can be selected only when Focus Priority is set to ON in CARD CAMERA mode O The focusing point returns to the center if ...

Page 104: ... each press of the button CentinUeus SheQ_ingi Hig h_ peed Continuou ng ill i i_ _ _ _il _I _ _ i _ i ii i i ii iiiii iii iii iiiili I iiill iii iiii ili_ i_ i_i _ ii ili Press and hold the PHOTO button A series of still images will be recorded as long as you hold the PHOTO button O Maximum number of continuous shots at one time Frames per Second Maximum Number Still Image Size Normal speed High s...

Page 105: ...lZi _ il i_ ii _ _i _ I iZ _ _ _ i_ _ii Press the PHOTO button Three still images in different exposures are recorded to the memory card Make sure that there is sufficient space on the memory card 0 o 105 ...

Page 106: ...ding in Stitch Assist Mode PhotoStitch detects the overlapping portion of adjoining images and merges them Try to include a distinctive item landmark etc in the overlapping portion 1 Press the r4_ button I _ARDMIXI_ _ LDESH0W REC SEARCH 3 Select the program AE mode and zoom on the subject Adjust focus and exposure manually as necessary Once the sequence has started you cannot change the program AE...

Page 107: ...n be recorded 6 Press the E_ button after the last image CARDMIX For details on how to merge these images refer to the Digital Video Software Instruction Manual O Compose each image so that it overlaps 30 to 50 of the adjoining image Try to keep the vertical misalignment within 10 O Do not include a moving subject in the overlapping portion O Do not try to stitch images that include both distant a...

Page 108: ... button during playback pauses the playback Press the _ button again to restart playback Pressing the button displays the first scene of the movie Press the CARD button or the REW_ FFD_ _ button on the wireless controller for 8x fast forward fast rewind playback D Images not recorded with this camcorder uploaded from a computer except the sample images _ 114 edited on a computer and images whose f...

Page 109: ...lide show _ i ii _i i i _ i i i I _iii I I I _ i 1 Move the zoom lever toward W W T Up to 6 images appear With movies the index screen can only be started when the first scene is displayed as a still image 2 Turn the SET dial to select an image Move the C_ to the image you wish to view You can switch between the index pages by pressing the CARD or CARD button 109 ...

Page 110: ... menu In CARD CAMERA mode the menu appears when you press the SET dial while you are reviewing a still image or when you press the SET dial right after recording 3 Select O_ PROTECT O_ appears and now the image cannot be erased To cancel the protection press the SET dial 4 Select RETURN to close the menu cAR 38 IOO PR0 EC 1 Move the zoom lever toward W Up to 6 images appear Select the image you wi...

Page 111: ...protected YES appears in purple 4 Select YES The image is erased and the previous image appears 5 Select _ RETURN to close the menu Erasing a Single ImagelA mages I o o L J _ 38 CARD OPERATIONS _ _ IMAGE ERASE 1 Open the menu and select CARD OPERATIONS 2 Select IMAGE ERASE 3 Select SINGLE or ALL When erasing a single image ERASE THIS IMAGE NO and YES appears If an image is protected YES appears in...

Page 112: ... The live video recording will appear in place of the light area of the card mix image Mix level adjustment light area of the still image Live video recording Card mix image Camera Chroma Key CAM CHROMA Combines backgrounds with your recordings Record your subject in front of a blue curtain and the subject not blue will be superimposed on the card mix image Mix level adjustment blue area of the li...

Page 113: ...mages from Your Computer to the Memory Card in the Digital Video Software Instruction Manual 2 Set the program selector to _ 3 Open the menu and select D EFFECT SETUP 4 Select ml_ CARD MIX The card mix menu appears 5 Select the image you wish to combine with the CARD button 6 Select MIX TYPE CARD CHROMA CARD LUMI CAM CHROMA and C ANIMATION appears 7 Select the mix type matching the sample image yo...

Page 114: ...stops flashing The combined image appears O Card mix cannot be used when STILL I REC is set to _ FINE or t _ NORMAL O Movies recorded on a memory card cannot be combined with camcorder recordings Below are some sample images provided on the supplied DIGITAL VIDEO SOLUTION DISK Card Chroma Key Card Luminance Key Camera Chroma Key Card Animation 114 ...

Page 115: ...ges for other purposes PhotoEssentials Royalty Free Stock Photography The PhotoEssentials suite of royalty4ree images on CD ROM features premium quality assignment photography and is ideally suited for use in advertising brochures reports multimedia websites books packaging and more For more information please visit their website www photoessentials com O o 115 ...

Page 116: ...mages C Images erased by formatting cannot be recovered O If you use a memory card other than the supplied one format it with the camcorder I ocAR00 s I lL F R AT J 1 Open the menu and select CARD OPERATIONS 2 Select FORMAT CANCEL and EXECUTE appears 3 Select EXECUTE ALL DATA WILL BE ERASED FORMAT THIS CARD NO and YES appears 4 Select YES and close the menu Formatting starts Selecting NO brings yo...

Page 117: ...ttons 2 Open the menu and select MY CAMERA 3 Select CREATE START UP iMAGE SET THIS AS START UP IMAGE YES and NO appears 4 Select YES OVERWRITE MY IMAGE NO and YES appears 5 Select YES The still image will be saved and the image that was saved to MY IMAGE is erased Retain the original data of the still image you have set as the start up image on your computer or removable disk O 117 ...

Page 118: ... p_a PictBridge compliant non Canon Printer _ PictBfidge Includes the CP 330iCP 220iCP 300iCP 200 Connecting the _ inte 118 Printer with direct print function I 1 Turn off the camcorder and insert a memory card that contains still images 2 Turn on the printer 3 Set the camcorder to CARD PLAY mode 4 Connect the camcorder to the printer using the cable _ appears and changes to _ _ or _ when the prin...

Page 119: ...er source O Refer also to the instruction manual of the respective printer O The print setting menu may differ slightly depending on the connected printer Bu tQ n You can print an image without changing the settings by simply pressing the _ _ print share button 1 Select the still image you wish to print with the REC SEARCH CARD button 2 Press the _ _v print share button Printing starts The _ _ but...

Page 120: ...e SET dial Canon Printer Printing stops even if it is incomplete and the paper is fed through Canon CP Printer CP IOiCP IO0 A print in progress cannot be stopped Printing stops when the current print is finished and the remaining prints are canceled O Printing Errors If an error occurs during the printing process an error message appears _ 139 Canon Printer Resolve the error When printing does not...

Page 121: ...rinter model PAPER TYPE PHOTO FAST PHOTO DEFAULT PAGE LAYOUT BORDERLESS BORDERED DEFAULT 8 UP Q date print ON OFF DEFAULT print effect ON OFF VIVID NR VlVID NR DEFAULT O Print setting options and DEFAULT settings vary depending on the printer model For details refer to the instruction manual of your printer O BORDERED The image area remains relatively unchanged from the recorded image when it is p...

Page 122: ... your printer 3 Turn the SET dial to select the paper type and press the SET dial Select the paper type of the paper set in your printer 4 Turn the SET dial to select a layout option and press the SET dial Including the Date in the Print o o _ _ _ _ 1 in the print setting menu turn the SET dial to select date and press the SET dial 2 Turn the SET dial to select a date print option and press the SE...

Page 123: ...For details on paper type refer to the Bubble Jet Printer User Guide BORDERS BORDERLESS Prints right to the edges of the page IBORDERED Prints with a border Recommended paper size BORDERED The image area remains relatively unchanged from the recorded image when it is printed BORDERLESS The center portion of the recorded image is printed at an enlarged size The image s top bottom and sides may be c...

Page 124: ...nts 1 still image per page MULTIPLE Prints 8 copies of the same still image on one page BORDERS BORDERLESS Prints right to the edges of the page BORDERED Prints with a border O BORDERED The image area remains relatively unchanged from the recorded image when it is printed BORDERLESS MULTIPLE The center portion of the recorded image is printed at an enlarged size The image s top bottom and sides ma...

Page 125: ...e style and press the SET dial Pressing the MENU button brings you back to the print settings menu Selecting the Borders 2 Turn the SET dial to select _ BORDERS and press the SET dial 3 Turn the SET dial to select a borders option and press the SET dial Pressing the MENU button brings you back to the print settings menu 125 ...

Page 126: ... SET dial to switch between the directions uptdown or right left Pressing the MENU button brings you back to the print settings menu O About the color of the trimming frame Canon CP Printers only White No trimming settings Green Recommended trimming size The trimming frame may not appear in green depending on the image size paper size or borders settings Red The image is magnified beyond recommend...

Page 127: ...ders I 1 Select the still image you wish to print 2 Press the SET dial to open the FILE OPER menu 3 Select _PRINT ORDR 4 Select the number of copies _ appears on the image To cancel the print order set the number of copies to 0 5 Select _ RETURN to close the menu Selecting in Index Screen Display _ _ _ _ _ 1 Move the zoom lever toward W Up to 6 images appear Select the image you wish to print 2 Op...

Page 128: ...function and select _ _PRINT without having set the print order 3 Make sure that PRINT is selected and press the SET dial Printing starts The print setting menu disappears when printing is complete C Depending on the connected printer you can select style or paper settings before step 3 C Cancel Printing Printing Errors C 3 120 C Restarting Printing Open the CARD PLAY menu and select _ _PRINT Sele...

Page 129: ...ecificationstsettings of your computer O The image files on your memory card and the image files saved on the hard disk drive of your computer are valuable original data files If you wish to use image files on your computer make copies of them first and use the copied file retaining the original 0 Make sure that camcorder and computer are not connected with a DV cable before connecting the camcord...

Page 130: ...atiens The first time you connect the camcorder to the computer you need to install the software and set the auto launch setting 1 Install the supplied Digital Video Software See Installing the Software in the Digital Video Software Instruction Manual 2 Set the can corder to CARD PLAY mode 3 Connect the carncorder to the computer using the USB cable See Connecting the Camcorder to a Computer in th...

Page 131: ...he transfer menu when transfer is complete To cancel transfer turn the SET dial to select CANCEL and press the SET dial or press the MENU button Transferring a Se e _d mage I 1 Turn the SET dial to select F_ _ SELECT TRANSFER 2 Press the _ _ button 3 Select the image you wish to transfer with the CARD button 4 Press the _ _ J button The selected image is transferred to the computer and displayed i...

Page 132: ...OK and press the SET dial O When transferring with the _ N button the camcorder retains the transfer setting even if you turn it off or change the position of the TAPEICARD switch When you have selected E_ SELECT TRANSFER or O WALLPAPER the screen to select a still image appears Press the MENU button to display the direct transfer menu O When the protect switch of the SD Memory Card is activated d...

Page 133: ..._ting in ndex Screen Disp ay iill i_ ii _ _ _ ii_ii _ _ iii _i iiiiiiii ii i_i ii _ i_i_i iiiiiiii iiI _iiiill _ _ _ ii _i _ ii _ _ _ ilii MENU _38 CARD OPERATIONS _ _TRANSFER ORDER I Move the zoom lever toward W Up to 6 images appear 2 Open the menu and select CARD OPERATIONS Select _ _ TRANSFER ORDER 3 Press the SET dial on the image you wish to transfer _ appears on the image To cancel the tran...

Page 134: ... to NETWORK 4 Connect the camcorder to the computer using a DV cable NETWORK MODE appears on the camcorder screen 5 Start DV Messenger UNLOCK Before connecting the camcorder to the computer using a DV cable make sure that camcorder and computer are not connected with a USB cable and that no other 1394 device is connected to the computer O In NETWORK mode the camcorder can only be operated from the...

Page 135: ... operation displays appear for 2 seconds Displays cannot be hidden on the index screen Niding Sb_wisg _be Oisp a_s oo_tbe Sc eea When you connect a TV for recording you can select to hide the camcorder displays on the TV screen For playback you can show the camcorder displays on the TV screen i I MENU DISPLAY SETUP _ _ 38 TV SCREEN ON J Open the menu and select DISPLAY SETUP _ Select TV SCREEN set...

Page 136: ..._i Condensation warning _ 142 Remote sensor Z3 77 _Headphones _ 61 Wind screen _ 62 Audio mode _ 61 3_ Widescreen mode C_ 68 _ Remaining card capacity for still images _ 95 12 bit audio _ 87 _ End search _ 72 _ Date search _3 74 Audio dubbing C 3 85 _ Data code _ 70 _ DV connection _ 82 Volume level of speaker or headphones _ 35 REC PAUSE STOP EJECT FF _ REW _ _ Fast forward playback rewind playba...

Page 137: ...frame C 3 103 _ Flash 121397 _Camcorder shake warning _ 58 Drive mode _ 104 ELURA90 ELURA85 only CARD PLAY Mode _ Slide show C 3 109 _ Data code _ 70 _3_Lap time _ Length of the movie _ Current imagettotal images File number Q3 92 _ Protect mark _ 10 137 ...

Page 138: ...to play back a tape recorded in HD format PLAYBACK NOT POSSIBLE CHECK THE CASSETTE You attempted to perform audio dubbing on a tape recorded in HD WRONG FORMAT format HEADS DIRTY USE Video heads are dirty Clean the video heads 142 CLEANING CASSETTE COPYRIGHT PROTECTED You attempted to play back a copyright protected tape 82 PLAYBACK IS RESTRICTED COPYRIGHT You attempted to dub a copyright protecte...

Page 139: ...ected paper or paper output tray is open NO PAPER Paper is not correctly inserted or there is no paper If the printer is equipped with a photo paper cassette specify the paper feed location using the Paper Feed switch PAPER JAM The paper jammed during printing Select STOP to cancel printing After removing the paper set some paper again and press the resume button on the printer PAPER HAS BEEN Pape...

Page 140: ... settings HARDWARE ERROR Cancel printing Turn offthe printer and turn it back on Check the printer i status If the printer is equipped with a battery it might be exhausted In such case turn off the printer replace the battery and turn it back on If the error persists consult your dealer or a Canon Service Center listed in the Contact List provided with the printer or the printer manual RECHARGE TH...

Page 141: ...er to shocks or vibration as this may cause damage O Avoid sudden changes in temperature Moving the camcorder rapidly between hot and cold temperatures may cause condensation to form on its internal surfaces IZ 2 142 Storage 0 If you do not intend to use the camcorder for a long time store it in a place free of dust in low humidity and at temperatures not higher than 30 C 86 F O After storage chec...

Page 142: ...ed Continued use may damage the camcorder Condensation may form in the following cases When the camcorder is moved from an air conditioned room to warm humid place When the camcorder is moved from a cold place to a warm room Oo C 142 When the camcorder is left in a humid room When a cold room is heated rapidly How to avoid condensation 0 Unload the cassette place the camcorder in an airtight plast...

Page 143: ...tery pack for a long time about 1 year can shorten its lifecyde or affect performance we recommend to discharge the battery pack fully and to store it in a dry place at temperatures no higher than 30 C 86 F If you do not use the battery pack for long periods charge and discharge it fully at least once a year If you have more than 1 battery pack perform these precautions at the same time for all ba...

Page 144: ... after use If the tape becomes slack and damaged it may cause picture and sound distortion O Return cassettes in the case and store them upright O Do not leave the cassette in the camcorder after use O Do not use spliced tapes or nonstandard cassettes as they may damage the camcorder O Do not use tapes that have been jammed as video heads may become dirty O Do not insert anything into the small ho...

Page 145: ...urfaces If condensation forms on the card put it aside until the droplets have evaporated completely O Do not touch or expose the terminals to dust or dirt O Check the direction before inserting the memory card Forcing a memory card backwards into the slot may damage the memory card or the camcorder O Do not remove the label from the memory card or affix other labels on the memory card Using the P...

Page 146: ...l not charge Replace or charge the battery pack Charge the battery pack in temperatures between 0 C and 40 C 32 F and 104 F Battery packs will not charge outside the temperature range of 0 C and 40 C 32 F and 104 F Battery packs become hot with use and may not charge Recording Playback Problem Buttons will not work Wait until the battery pack temperature is below 40 C 104 F and retry charging The ...

Page 147: ...the camcorder to CAMERA mode Set the time zone date and time Replace the backup battery and reset the time zone date and time Insert the backup battery with the side facing outward and set the time zone date and time Turn on the power Load a cassette Rewind the tape or replace the cassette Change the position of the protect switch Set the camcorder to CAMERA mode Focus manually Adjust the viewfind...

Page 148: ...ou attempted to play back or dub copyright protected tape Speaker volume is turned off AV PHONES _ is set to AV in the menu Solution Set the camcorder to PLAY VCR mode Set the TAPE CARD switch to TAPE Load a cassette Rewind the tape Set AV PHONES _ _ to AV in the menu Set lAY _ DV to OFF in the menu Set the selector to VIDEO Clean the video heads Stop playback d ubbing Adjust the volume with the S...

Page 149: ...images Format the memory card Insert a memory card Set FILE NOS to RESET in the menu and insert a new memory card Change the position of the protect switch Set the camcorder to CARD PLAY mode Insert a memory card Cancel the protection Change the position of the protect switch Turn off the camcorder Remove and reinsert the memory card Format the memory card if flashing persists 23 89 89 116 89 92 8...

Page 150: ...ack CA 570 Compact Power Adapter NB 2L NB 2LH BP 2L12 BP 2L14 Battery Pack Stereo Microphone commercially available CB BP 900 Series Battery Pack VL 10Li Battery Video Light SC 1000 Soft Carrying Case SC 2000 Soft SC A50 Soft Carrying Case Carrying Case STV 250N Stereo Video Cable VCR _vailable ice DV Cable B SDC 128M PC Card Adapter SD Memory Card USB Reader Writer_ I B MultiMediaCard IFC 300PCU ...

Page 151: ...ase note that this warranty does not apply to repairs arising out of the malfunction of non genuine Canon accessories although you may request such repairs on a chargeable basis Battery Packs When you need extra battery packs select from the following NB 2L NB 2LH BP 2L12 BP 2L14 CB 2LT Battery Charger Use the battery charger for charging the battery packs It plugs directly into a power outlet wit...

Page 152: ...or shots or panoramic views _When the Wide converter is attached a shadow may appear in the picture when you record with flash or assist lamp FS 34U Filter Set Neutral density and MC protector filters help you to control difficult lighting conditions VL 10Li Battery Video Light This compact yet powerful video light can be used for both indoor and outdoor shooting It attaches to the SA I Adapter Br...

Page 153: ...essories SC A50 Soft Carrying Case This lightweight bag keeps the camcorder within easy reach without weighing you down or getting in the way This mark identifies genuine Canon video accessories When you use Canon video equipment we recommend Canon brand accessories or products bearing the same mark 1o s _ 153 ...

Page 154: ...3 4 18x power zoom 35ram equivalent Tape 4 3 recording 50 5 909 mm 16 9 recording image stabilizer ON 44 6 803 mm 16 9 recording image stabilizer OFF 41 3W43 mm Card 37 9 682 mm Lens Configuration 10 elements in 8 groups Filter Diameter 34 mm AF System TTL autofocus manual focusing possible Minimum Focusing Distance 1 m 3 3 ft 1 cm 0 39 in on maximum wide angle White Balance Auto white balance pre...

Page 155: ...x 3 1 x 5 2 in excluding protrusions Weight camcorder body only 500 g 1 1 tb CA_5ZO CQmpact Pawer Adapter Power supply 100 240 V AC 50 60 Hz Power consumption 17W Rated output 8 4 V DC 1 5 A Operating temperature 0 40 C 32 104 F Dimensions 52 x 90 x 29 mm 21 x35 x 11 in Weight 135 g 4 8 oz NB_2LH Batte_ Pack Battery type Rechargeabte Lithium ion Battery Rated voltage 7 4 V DC Operating temperature...

Page 156: ... BP 2L14 Battery Pack NB 2L Battery Pack CB 2LT Battery Charger CBC NB2 Car Battery Charger TL H34 Tele converter WD H34 Wide converter FS 34U Filter Set WS 20 Wrist Strap SC 2000 Soft Carrying Case SC 1000 Soft Carrying Case SC A50 Soft Carrying Case VL 10Li Battery Video Light JR 7 2V 10WF Halogen Bulb DVM CL DV Cleaning Cassette 7871A002AA 9582A002AA 7302A001AA 7303A001AA 7873A002AA 9583A001AA ...

Page 157: ...ng 104 Copyright signals 82 m Data code 70 Date and time 22 Date format 76 Date search 74 Demo mode 78 Digital effects 63 Digital Zoom 31 Direct print function 118 Direct transfer 130 Drive mode 104 DV dubbing 82 DV terminal 79 88 El Easy recording 46 Effects 64 End search 72 Erasing images 111 Exposure 52 m Faders 63 Fast forward 34 File numbers 92 Flash 97 Focusing 53 Focusing point 103 Focus Pr...

Page 158: ...ing still images memory card 93 Remote sensor 77 Review 99 Rewind 33 n Sample images 114 Sand Snow mode 46 Screen displays 135 SD Memory Card 89 Self timer 59 Shoulder strap 19 Shutter speed 57 Skin detail 51 Slide show 109 SP mode 60 Speaker 35 Sports mode 46 Spotlight mode 46 Still image quality 90 Still image size 90 Stitch Assist mode 106 Super Night mode 49 n Tape protection 144 Time code 28 ...

Page 159: ...low operating instructions B If the equipment is defective as a result of leaking batteries sand dirt or water damage C tf defects or damages are caused by the use of unauthorized parts or by service other than our authorized agent D tf the equipment is used for commercial or industrial use This Limited Warranty does not cover cabinet exterior finish video cassette tape head cteanings nor does it ...

Page 160: ...ideo equipment is used for commercial professional or industrial purposes This limited warranty does not cover the cabinet exterior finish of the digital video equipment video cassette tapes head cIeanings nor does it apply to digital video equipment purchased outside Canada TO OBTAIN WARRANTY SERVICE Ship your Canon digital video equipment in its original carton box or equivalent properly packed ...

Reviews: