[1850
*1
],
[1855
*1
]
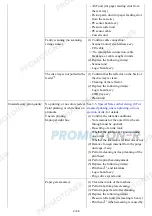
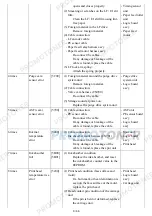
Open the inner cover,
set the disc tray and
press [OK].
Open the inner cover, set the disc
tray, and press the OK button.
- Spur unit
- Inner
cover
unit
Time-out in disc
label printing
[1830
*1
]
---
Timeout error has
occurred.
A prescribed period of time (12
minutes) has elapsed without the
disc tray inserted since the
message appears to indicate that
the machine was preparing for
printing. Press the Stop button to
clear the error.
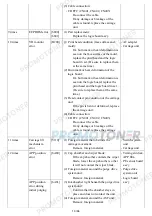
Multiple ink tanks
of the same color
installed.
[1487]
U071 More than one ink
tank of the following
color is installed.
Replace the wrong ink tank(s)
with the correct one(s).
- Ink tank
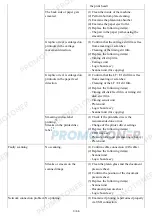
Ink tank in a
wrong position.
[1680]
U072 Some ink tanks are
not installed in place.
Install the ink tank(s) in the
correct position.
- Ink tank
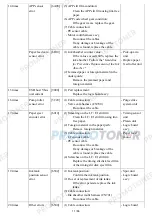
Warning: The ink
absorber becomes
almost full.
[1700]
---
The ink absorber is
almost full. Press
[OK] to continue
printing. Contact the
service center for
replacement.
Replace the ink absorber, and
reset its counter. [See
3-3,
Adjustment and Settings in
Service Mode.
]
Pressing the OK button will exit
the error, and enable printing
without replacing the ink
absorber. However, when the ink
absorber becomes full, no further
printing can be performed unless
the applicable ink absorber is
replaced.
- Absorber
kit
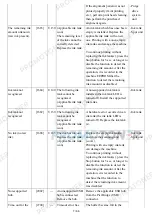
The connected
digital camera or
digital video
camera does not
support Camera
Direct Printing.
[2001]
---
Incompatible device
detected. Remove the
device.
Remove the cable between the
camera and the machine.
Automatic two-
sided printing
cannot be
performed.
[1310]
---
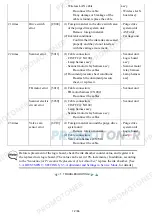
This paper is not
compatible with two-
sided printing.
Remove the paper
and press [OK].
The paper length is not supported
for two-sided printing.
Press the OK button to eject the
paper being used at error
occurrence.
Data which was to be printed on
the back side of paper at error
occurrence is skipped (not
printed).
- Duplex
paper
feed
roller
unit
- PE sensor
board
ass'y
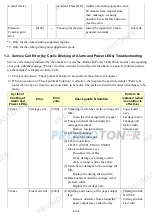
Failed in
automatic print
head alignment.
[2500]
--- Auto head align has
failed. Press [OK]
and repeat operation.
<See manual>
Press the OK button to clear the
error, then perform the automatic
print head alignment again. (Use
Matte Photo Paper MP-101.)
- Carriage
unit
head
6 / 66
Summary of Contents for MG6110
Page 24: ...5 Remove the main case no screws 20 66...
Page 36: ...3 Attach the cassette feed guide 4 Install the cassette feed roller unit 32 66...
Page 44: ...4 Slowly lift the print unit to separate it from the bottom case 40 66...
Page 58: ...54 66...
Page 63: ...4 2 Integrated Inspection Pattern Print Print sample 59 66...
Page 64: ...4 3 Ink Absorber Counter Value Print Print sample 4 VERIFICATION AFTER REPAIR 60 66...
Page 68: ...64 66...


