background image

Summary of Contents for MultiPASS C20
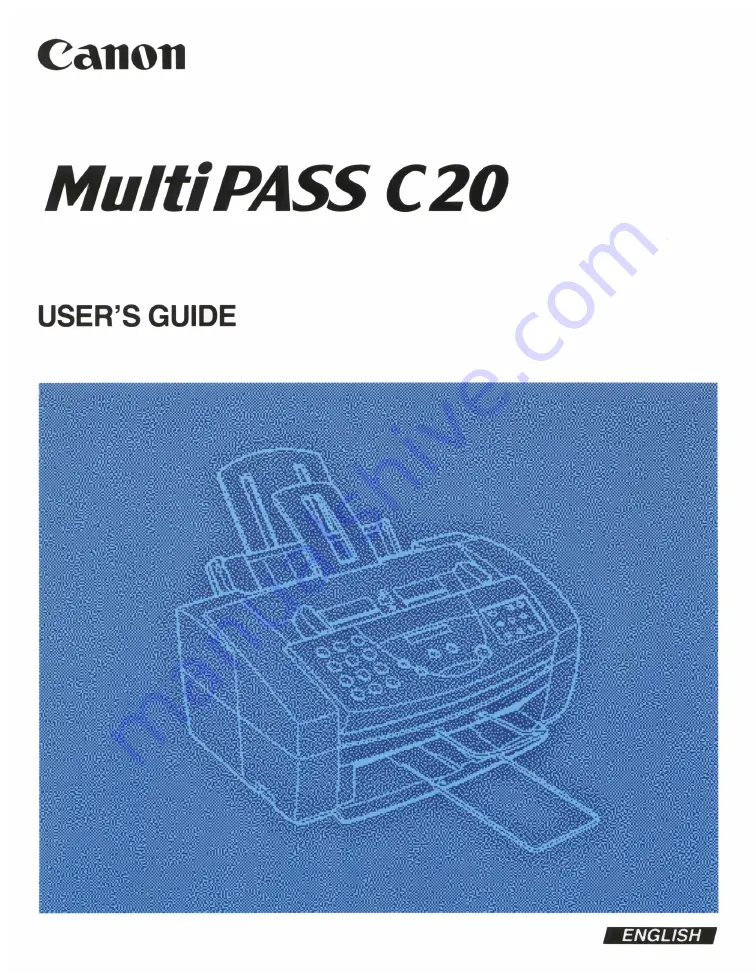
Page 1: ......

Page 2: ...ough this equipment can use either loop disconnect or DTMF signalling only the performance of the DTMF signalling is subject to regulatory requirements for correct operation It is therefore strongly recommended that the equipment is set to use DTMF signalling for access to public or private emergency services DTMF signalling also provides faster call set up This CE Marking shows compliance of this...

Page 3: ...is a trademark of Institute of Electrical and Electronics Engineers Inc Microsoft and Windows are registered trademarks of Microsoft Corporation PhotoFinish is a trademark of Zsoft Corporation WordScan is a trademark of Caere Corporation Other brand and product names may be trademarks or registered trademarks of their respective companies As an Energy Star Partner Canon has determined that the Mul...

Page 4: ...e network may be connected If required a suitable adaptor approved under Approval Number NS G 23 L 100005 for connections between the fax machine and any piece of approved telecommunications apparatus is available from your Canon supplier This socket is intended for connection of a telephone an answering machine or similar device Voltage and current available at these sockets is determined by the ...

Page 5: ...easily accessible The fact that the equipment operates satisfactorily does not imply that the power point is earthed and the installation is completely safe For your safety if in any doubt about the effective earthing of the power point consult a qualified electrician Caution New Zealand only 1 This equipment may not necessarily provide for the effective hand over of a call to or from a telephone ...

Page 6: ... from the power source 3 Reconnect the equipment to the power source 4 Reconnect the equipment to the Telecom connection 5 If the supply cord of this equipment is damaged it must be replaced by the special cord Parts No HH2 1910 6 Not all standard telephone will respond to incoming ringing when connected to the extension socket ...

Page 7: ...ide 1 15 For Customer Support 1 16 Chapter 2 Setting Up Your MultiPASS C20 2 1 Choosing a Location for Your MultiPASS C20 2 3 Unpacking Your MultiPASS C20 2 5 Do You Have Everything 2 5 Removing Shipping Materials 2 8 Getting Acquainted with Your MultiPASS C20 2 11 Front View 2 11 Rear View 2 12 The Handset Option 2 12 The Operation Panel 2 13 Special Function Buttons 2 15 Inside the Printer Cover...

Page 8: ...n Paper HR 101 2 48 Printing on FS 101 Fabric Sheets 2 50 Using the Paper Output Guides with the BC 22 22e and BC 29F Cartridges 2 51 Entering User Information in the MultiPASS C20 2 52 Guidelines for Entering Information 2 53 Entering a Name 2 53 Editing Information 2 54 Entering Your Identification Information 2 55 Editing Your Identification Information 2 56 The MultiPASS C20 Settings 2 57 List...

Page 9: ... 3 25 Redialling with Manual Sending via the Handset 3 25 Sequential Broadcasting 3 26 Group Dialling 3 28 Creating Groups for Group Dialling 3 28 Using Group Dialling 3 32 If a Power Cut Occurs 3 33 Dialling Through a Switchboard 3 34 Registering the Access Type and the Outside Line Number under the R Button 3 34 Long Distance Dialling 3 36 How to Enter Pauses 3 36 Confirming a Dial Tone 3 37 Usi...

Page 10: ...Document 4 5 Adding Pages to the Document in the Automatic Document Feeder ADF 4 7 Trouble with Multipage Documents 4 8 Making Copies 4 9 Chapter 5 Printing from Your PC 5 1 Paper Handling 5 2 Selecting Paper Types 5 2 Printing on Envelopes 5 2 Some Advice for Colour Printing 5 6 Selecting Paper and Other Print Media 5 6 Understanding Your Application s Capabilities 5 6 Understanding Your Computer...

Page 11: ...BJ Cartridge 7 6 Replacing the BJ Cartridge 7 8 Replacing an Ink Tank in the BC 21 21e Colour BJ Cartridge 7 13 Transporting the MultiPASS C20 7 17 Appendix A Specifications A 1 General A 2 Plain Paper Fax A 4 Copier A 5 Telephone A 5 Printer A 6 Printable Area Papers A 7 Printable Area Envelopes A 8 Scanner A 10 Document Sizes A 11 PC Interface A 12 MultiPASS Desktop Manager for Windows A 12 Appe...

Page 12: ...xii Preface ...

Page 13: ...he Main Features of the MultiPASS C20 1 3 Colour Printer Features 1 4 Plain Paper Fax Features 1 5 Scanner Features 1 6 Copier Features 1 7 Telephone Features 1 7 Using the MultiPASS C20 with the MultiPASS Desktop Manager for Windows 1 8 Supplies and Options 1 9 BJ Print Cartridges and Ink Tanks 1 9 Special Print Media 1 9 Canon Photo Kit 1 10 Safety Instructions 1 11 Using Your Documentation 1 14...

Page 14: ...e Thank you for purchasing the new Canon MultiPASS C20 We are sure that your MultiPASS C20 will help you work more effectively and help you meet your fax and phone requirements easily and conveniently as well as your printing copying and scanning needs ...

Page 15: ...ws version 2 10 This exclusive Canon software package provides you with a PC Fax you can print fax scan and use the telephone from within your PC s Windows environment The MultiPASS C20 s multitasking ability enables you to perform a number of operations simultaneously For example you can print scan a document or make copies at the same time you are sending a fax or receiving a fax into memory The...

Page 16: ...up to five pages per minute Impressive output on a variety of media The MultiPASS C20 can provide sharp black or vibrant colour printing on a wide variety of media including A4 letter and legal plain paper glossy paper envelopes transparencies back print film for display on a backlighted panel and fabric sheets Convenient paper handling The unit s sheet feeder holds up to 100 sheets of A4 letter o...

Page 17: ...s that increase transmission speed to approximately 6 seconds per page Memory sending receiving The MultiPASS C20 can store up to 42 fax pages either received or to be sent in its built in memory and can receive faxes while printing or even when your PC is turned off Reduced size printing The MultiPASS C20 automatically scales received faxes to fit the size of the paper loaded into the sheet feede...

Page 18: ...e MultiPASS C20 can scan documents at 200 dpi electro enhanced 300 dpi or electro enhanced 400 dpi TWAIN compatible The MultiPASS C20 supports the TWAIN scanning standard which allows you to scan images using any graphics or optical character recognition OCR application that also supports the TWAIN standard 256 level greyscale When you use the greyscale settings in the MultiPASS C20 Desktop Manage...

Page 19: ...lling The MultiPASS C20 s three automatic dialling methods one touch speed dialling coded speed dialling and group dialling can be used to store phone and fax numbers for easy and efficient calling Connection for the optional handset extension telephone or answering machine Connecting the optional handset or an extension phone to the MultiPASS C20 lets you use it to make and receive normal telepho...

Page 20: ... the TWAIN scanning standard Store an unlimited list of fax or phone numbers in a fax telephone address book on your PC View faxes on your PC s monitor as well as save rotate or print them or copy them to the PC s clipboard Broadcast faxes from your PC to any number of destinations Attach custom cover sheets to each fax you send from the PC The Desktop Manager package also includes a utility progr...

Page 21: ...to maintain If your BC 21 21e Colour BJ Cartridge runs out of ink just replace the empty ink tank black or colour If the BX 20 Black Cartridge BC 22 22e Photo Colour Cartridge or BC 29F Fluorescent BJ Cartridge runs out of ink just replace the entire cartridge N To avoid printing problems use only Canon BJ print cartridges and ink tanks Other cartridges can produce unsatisfactory results In additi...

Page 22: ...n Photo Kit Canon s optional Photo Kit enables the MultiPASS C20 to use halftones to print photos beautifully The kit includes the BC 22 22e Photo Colour BJ cartridge the SB 21 BJ cartridge container and 60 sheets of Canon high resolution paper HR 101 ...

Page 23: ...ce centre The back and bottom of the MultiPASS C20 include slots and openings for ventilation To keep the MultiPASS C20 from overheating which can cause it to operate abnormally and create a fire risk take care not to block or cover these openings Do not operate the unit on a bed sofa rug or other similar soft surface or near a radiator or other heat source Do not place the MultiPASS C20 in a cupb...

Page 24: ...tre Always unplug the MultiPASS C20 before moving or cleaning it Whenever you unplug the MultiPASS C20 wait at least five seconds before you plug it back in Keep the MultiPASS C20 away from direct sunlight as this can damage it If you have to place it near a window install heavy curtains or blinds Do not expose the MultiPASS C20 to extreme temperature fluctuations Install the unit in a place with ...

Page 25: ...n or liquids If you notice smoke or unusual noises or odors coming from it If the MultiPASS C20 does not operate normally when you follow the operating instructions Adjust only those controls that are covered by the operating instructions in this user s guide or you can damage the unit and require extensive repair work If the MultiPASS C20 is dropped or its cabinet damaged If the MultiPASS C20 beg...

Page 26: ... learning how to set up and operate your MultiPASS C20 be sure to do the following Read this chapter to learn about the MultiPASS C20 s main features available supplies and options and guidelines on using the unit safely Carefully follow the instructions in Chapter 2 Setting Up Your MultiPASS C20 to get your unit unpacked and assembled properly Read Chapters 3 through 5 to learn how to use the Mul...

Page 27: ...l you how to avoid actions that could injure you or damage your MultiPASS C20 N Notes provide advice for using your MultiPASS C20 more effectively describe operating restrictions and tell how to avoid minor operating difficulties In addition this guide uses bold capital letters to show the names of buttons and switches on the MultiPASS C20 such as FUNCTION STOP and START COPY Text that appears in ...

Page 28: ...test technology to provide trouble free operation If you have a problem with the unit s operation try to solve it by using the information in Chapter 6 Troubleshooting If you cannot solve the problem or if you think your MultiPASS C20 needs service contact your local authorised Canon dealer or service centre ...

Page 29: ...th Your MultiPASS C20 2 11 Front View 2 11 Rear View 2 12 The Handset Option 2 12 The Operation Panel 2 13 Special Function Buttons 2 15 Inside the Printer Cover 2 16 Assembling the MultiPASS C20 2 17 Attaching Components 2 17 Attaching the Sending Document Support 2 17 Attaching the Document Support 2 18 Attaching the Output Tray Extension 2 19 Connecting the MultiPASS C20 to Your PC 2 20 Connect...

Page 30: ...th the BC 22 22e and BC 29F Cartridges 2 51 Entering User Information in the MultiPASS C20 2 52 Guidelines for Entering Information 2 53 Entering a Name 2 53 Editing Information 2 54 Entering Your Identification Information 2 55 Editing Your Identification Information 2 56 The MultiPASS C20 Settings 2 57 List of Settings 2 57 General Settings 2 58 Sending Settings 2 59 Receive Settings 2 61 Speed ...

Page 31: ...0 near an existing telephone outlet to avoid the expense of installing a new one Place the unit near a standard 200 240 VAC power outlet Place the MultiPASS C20 near the PC you will be connecting it to Make sure you can reach it easily as you will be using it as a printer fax machine copier scanner and telephone Do not plug the MultiPASS C20 into the same circuit as an appliance such as an air con...

Page 32: ...Up Your MultiPASS C20 Chapter 2 N If you need help installing your MultiPASS C20 or have any questions about it please contact your local authorised Canon dealer or service centre 618 mm 361 mm 400 mm 482 mm 281 mm ...

Page 33: ... case you want to move or ship the unit in the future 1 Carefully remove all items from the box You should have someone help by holding the box while you lift the MultiPASS C20 and its protective packaging out of the carton DOCUMENT SUPPORT FOR SCANNED DOCUMENTS SENDING DOCUMENT SUPPORT BC 21 21e COLOUR BJ CARTRIDGE BX 20 BLACK BJ CARTRIDGE POWER CORD TELEPHONE LINE MultiPASS C20 UNIT MultiPASS C2...

Page 34: ...nding on the country of purchase MultiPASS C20 USER S GUIDE This book DOCUMENT SUPPORT FOR SCANNED DOCUMENTS SENDING DOCUMENT SUPPORT OUTPUT TRAY EXTENSION BX 20 BLACK BJ CARTRIDGE SB 21 BJ CARTRIDGE CONTAINER POWER CORD TELEPHONE LINE BC 21 21e COLOUR BJ CARTRIDGE MultiPASS C20 UNIT B T ADAPTOR UK Only DESKTOP MANAGER FOR WINDOWS SOFTWARE USER S GUIDE PRINTER DRIVER FLOPPY DISK DESKTOP MANAGER FO...

Page 35: ...ng notify your Canon dealer immediately In addition to the items shipped with your MultiPASS C20 you will need a Centronics compatible parallel interface cable which you can purchase from your Canon dealer Canon recommends a cable that complies with IEEE 1284 For best results use a cable that is no more than 2 metres long ...

Page 36: ...king your MultiPASS C20 remove the tape and cardboard that are inserted into the unit to protect it during shipping Do this as follows 1 Remove all pieces of shipping tape from the outside of the MultiPASS C20 2 Remove the shipping tape and protective cardboard from the sheet feeder ...

Page 37: ...g Up Your MultiPASS C20 3 Open the operation panel by grasping it with both hands and gently pulling it toward you 4 Remove the soft styrofoam sheet from the unit s Automatic Document Feeder ADF then gently push the operation panel shut until it clicks ...

Page 38: ...2 10 Setting Up Your MultiPASS C20 Chapter 2 5 Peel the clear protective sheet off of the LCD display ...

Page 39: ...C20 look over the diagrams on these pages to become familiar with the unit s components and their functions Front View OPERATION PANEL PRINTER COVER AUTOMATIC DOCUMENT FEEDER ADF SENDING DOCUMENT SUPPORT DOCUMENT SUPPORT FOR SCANNED DOCUMENTS OUTPUT TRAY EXTENSION OUTPUT TRAY SHEET FEEDER PAPER GUIDE PAPER OUTPUT GUIDES PAPER REST DOCUMENT GUIDES ...

Page 40: ...SS C20 Chapter 2 Rear View The Handset Option For a description of the optional handset components see Appendix B BI DIRECTIONAL PARALLEL PORT MANUAL FEEDER POWER CONNECTOR TELEPHONE LINE JACK OPTIONAL HANDSET EXTENSION PHONE JACK ...

Page 41: ...l Fax Tel Mode w LCD display This displays messages and prompts during operation and displays selections text numbers and names when registering information e RESOLUTION button Press this button to select the resolution the MultiPASS C20 will use for the document you want to fax or scan 1 2 ABC 3 DEF 4 5 JKL GHI 6 MNO 7 8 TUV PQRS 9 WXYZ 0 PAUSE RECEIVE MODE RESOLUTION ALARM CODED DIAL 1 2 3 4 5 6...

Page 42: ...button to redial the last number that was dialled using the number buttons or to enter pauses between digits when dialling fax numbers u CODED DIAL button Press this button followed by entering a two digit code with the numeric buttons to dial a fax number that you have registered for coded speed dialling i START COPY button Press this button to begin sending receiving scanning or other operations...

Page 43: ...2 Use these buttons to scroll through menu selections or to move the cursor when registering data PRINTER RESET button 3 Press this button to reset the MultiPASS C20 if your PC crashes This will maintain all the faxes currently in memory Do not unplug the MultiPASS C20 to reset the unit or the faxes in memory will be lost TONE button 4 Press this button to switch to tone dialling temporarily when ...

Page 44: ...2 16 Setting Up Your MultiPASS C20 Chapter 2 Inside the Printer Cover PAPER THICKNESS LEVER CARTRIDGE HOLDER ...

Page 45: ...C20 will look fully assembled see Getting Acquainted with Your MultiPASS C20 on page 2 11 Attaching Components Attaching the Sending Document Support The sending document support holds documents as they feed into the Automatic Document Feeder ADF To install this support insert one of its tabs into the corresponding slot above the MultiPASS C20 s Automatic Document Feeder ADF then firmly but gently...

Page 46: ... the front of the MultiPASS C20 as shown below To install it slightly squeeze the ends of the support toward each other insert them in the slots and gently release them Then slide the support into the unit until it clicks in position When the support is installed you can pull it out or push it in to suit the size of the document N When inserting the document support make sure that it curves upward...

Page 47: ...tension The output tray extension catches printed pages as they come out of the MultiPASS C20 s output tray The ends of the metal support fit into the slots on the output tray as shown below To install it squeeze the ends of the support toward each other insert them into the slots and gently release them ...

Page 48: ...with IEEE 1284 Contact your local authorised Canon dealer if you need help in selecting a cable Connect the MultiPASS C20 to your computer as follows 1 Make sure the computer is turned off and the MultiPASS C20 is unplugged 2 Connect the parallel cable to your MultiPASS C20 a Align the cable connector with the interface port so their shapes match b Gently press the cable connector into the port c ...

Page 49: ...ultiPASS C20 Connecting the Telephone Line Connect the MultiPASS C20 to a telephone line as follows 1 Connect one end of the supplied telephone line to the jack marked on the side of the MultiPASS C20 2 Connect the other end of the line to your wall telephone jack ...

Page 50: ... machine with or without an extension telephone Do this by connecting the line from the optional handset extension phone or answering machine into the jack marked on the side of the MultiPASS C20 Users in the UK only To connect an extension phone or answering machine to the MultiPASS C20 you may need to connect the B T adaptor N If you connect an answering machine to the MultiPASS C20 be sure to r...

Page 51: ... on the cord Do not plug the MultiPASS C20 into an outlet shared with an appliance such as an air conditioner computer electric typewriter or copier These devices generate electrical noise which can interfere with the MultiPASS C20 s operation Make sure nothing is laying on the power cord and that the cord cannot be walked on or tripped over Do not overload the electrical outlet Make sure the tota...

Page 52: ... accumulated in its memory the MultiPASS C20 can take up to four minutes to warm up While the MultiPASS C20 is warming up the message PLEASE WAIT appears in the LCD display When the time and receive mode appear the MultiPASS C20 is in standby mode and ready for use N If the BJ cartridge has not been installed yet the message PUT IN CARTRIDGE alternates with the standby mode display 13 30 FaxOnly P...

Page 53: ... BJ cartridges following these guidelines Store cartridges at room temperature Keep cartridges in their sealed containers until you are ready to use them Install the cartridge immediately after removing its print head cap and protective tape Always use the cartridge within one year of unpacking it When changing cartridges always store the unused cartridge in the SB 21 BJ cartridge container that c...

Page 54: ...ARTRIDGE button Leaving it out of its home position will dry out the print head on the cartridge Clean the print head when print quality is no longer satisfactory See Cleaning and Testing the BJ Cartridge Print Head on page 7 5 for instructions If the print quality does not improve after five consecutive cleanings replace the ink tank or BJ cartridge Do not use a BC 21 21e Colour BJ cartridge with...

Page 55: ...is cartridge incorporates a BJ print head and black ink in a single unit The BX 20 can be used if most of your printing is black e g for receiving faxes making copies and monochrome printing It can print twice as fast as a colour cartridge and at higher resolution BC 21 21e Colour BJ Cartridge The BC 21 21e incorporates a BJ print head and two replaceable ink tanks a BCI 21 Black and a BCI 21 Colo...

Page 56: ...ality use High Resolution Paper HR 101 N The MultiPASS C20 cannot print incoming faxes or make copies while the BC 22 22e or BC 29F cartridge is installed This is an ink saving feature because the BC 22 22e and BC 29F are single units and do not have ink tanks that can be replaced separately using them to print faxes will use the black ink faster using up the cartridges while they still have a con...

Page 57: ...ess CARTRIDGE The unit beeps and the cartridge holder moves toward the centre of the unit 3 Open the printer cover by grasping the document guides and lifting C Do not try to manually move or stop the cartridge holder or you may damage the MultiPASS C20 Do not touch the ribbon cable the small circuit board the guide rail or the round shaft CARTRIDGE RIBBON CABLE GUIDE RAIL ROUND SHAFT CIRCUIT BOAR...

Page 58: ... sharp edges around the print head the silver plate on the bottom of the cartridge or the silver metal or circuit area on its side 4 Raise the green cartridge lock lever on the cartridge holder by gently pulling up on it DO NOT TOUCH THE RIBBON CABLE DO NOT TOUCH THE GUIDE RAIL DO NOT TOUCH THE ROUND SHAFT PRINT HEAD ...

Page 59: ...w BJ cartridge s protective packaging and remove the cartridge 6 Lift the orange cap off the cartridge s print head then remove the orange tape N Discard the cap and tape immediately Never attempt to re attach the cap or tape to the print head or you can adversely affect the ink flow or quality of the ink colour ...

Page 60: ...d to the right then slide it into the cartridge holder 8 Lower the green lock lever completely The BJ cartridge is now locked into position C Do not try to manually move or stop the cartridge holder or you may damage the MultiPASS C20 DO NOT TOUCH THE RIBBON CABLE DO NOT TOUCH THE GUIDE RAIL DO NOT TOUCH THE ROUND SHAFT ...

Page 61: ... settings 10 Close the printer cover 11 Press CARTRIDGE The MultiPASS C20 beeps twice and the cartridge holder moves to its home position on the right side of the unit Once the cartridge holder is in its home position the unit automatically cleans the print head N Unplug the MultiPASS C20 only when it is in standby mode time and receiving mode show in the LCD display Do not unplug the MultiPASS C2...

Page 62: ...ome position at the right side of the unit and capping itself If you remove a partially used BJ cartridge from the MultiPASS C20 store it in the SB 21 BJ cartridge container that came with your unit 1 Insert the cartridge in the container with the cartridge s label facing forward and the print head down 2 Close the container lid and snap it shut Ink Cartridge BCl 21 Color Made in Japan Color Slot ...

Page 63: ...e sure to test the medium you intend to use before ordering it in bulk If you have any questions about whether a particular medium is suitable for your MultiPASS C20 please contact your local authorised Canon dealer For complete paper specifications see Printer on page A 6 N Please note that not all print media mentioned here may be available in your country Contact your local authorised Canon dea...

Page 64: ... 22 22e Photo Colour BJ Cartridge When using HR 101 paper be sure to print on the whiter side of the sheets and after printing a pack of this paper use the cleaning sheet provided with it to clean the printer roller Canon Transparencies CF 102 These overhead transparencies are specially designed for Canon BJ colour printers Use these clear transparencies to produce crisp and professional overhead ...

Page 65: ... at 720 360 dpi resolution Fabric Sheets FS 101 These white cotton fabric sheets are specifically designed for Canon BJ Colour printers and enable you to print your own designs for cross stitch pillows holiday stockings and other craft projects T Shirt Transfers TR 101 This special sheet allows you to print your own designs and transfer them to any cotton or cotton polyester blend t shirt sweatshi...

Page 66: ...he medium Plain Paper and Special Media The shaded area in the figure below shows the printable area for papers Printable Area The height of the lower margin varies depending on the printing conditions 7 mm 0 28 for monochrome printing when not using the printer driver 4 mm 0 16 when printing from memory 16 mm 0 63 for monochrome and colour printing when using the printer driver Legal Size a 8 5 b...

Page 67: ...ng Up Your MultiPASS C20 Envelopes The shaded portion below shows the printable area for envelopes Printable Area U S Commercial No 10 a 9 5 b 0 25 c 1 2 d 4 1 e 0 12 f 0 27 European DL a 220 mm b 6 4 mm c 10 4 mm d 110 mm e 3 0 mm f 7 0 mm e f d a b c ...

Page 68: ...he print head and the paper is not adjusted properly smudging or otherwise poor print quality can result Set the paper thickness lever as follows 1 Press CARTRIDGE to move the cartridge holder to the centre of the unit 2 Open the printer cover by grasping the document guides and lifting C Do not try to move or stop the cartridge holder manually or you may damage the MultiPASS C20 DO NOT TOUCH THE ...

Page 69: ...resolution paper Centre GP 101 glossy paper Centre CF 102 transparencies Centre BF 102 back print film Centre HG 101 high gloss film Centre FS 101 fabric sheet Right TR 101 T shirt transfers Right C Do not try to manually move or stop the cartridge holder or you may damage the MultiPASS C20 4 Close the printer cover 5 Press CARTRIDGE again to move the cartridge holder back to its home position DO ...

Page 70: ...e trouble with sheets skewing double feeding or jamming when using coated paper transparencies or back print film in the sheet feeder use manual feeding instead These problems are more common at cooler temperatures Let the paper run out before you refill the sheet feeder Avoid mixing new paper with paper remaining in the sheet feeder Use cut sheet paper only not paper that comes on a roll like fax...

Page 71: ...edure to load plain paper CF 102 transparencies BF 102 back print film or HR 101 high resolution paper into the MultiPASS C20 s sheet feeder Instructions for other media are given in the following pages 1 Open the printer cover by grasping the document guides and lifting Make sure the paper thickness lever is set properly for the type of media you are using See Adjusting the Paper Thickness Lever ...

Page 72: ... sheets and fan the edge that will feed into the MultiPASS C20 first then tap the stack on a flat surface to even its edges 4 Insert the stack into the sheet feeder until its stops so that the right edge of the stack is aligned with the right side of the sheet feeder ...

Page 73: ...edia have a right side for printing If you are using such a medium make sure you set it in the sheet feeder with the print side facing upward BF 102 back print film matte side up HR 101 high resolution paper lighter side up After printing a pack of HR 101 high resolution paper be sure to use the provided cleaning sheet to clean the MultiPASS C20 s printer roller see Printing on High Resolution Pap...

Page 74: ...e 1 Open the printer cover by grasping the document guides and lifting Make sure the paper thickness lever is set to the centre See Adjusting the Paper Thickness Lever on page 2 40 2 Close the printer cover 3 Pull the paper rest up until it stops 4 Insert a sheet of glossy paper with the glossy side facing up into the sheet feeder until it stops and align the paper guide with the edge of the sheet...

Page 75: ...anual feed the sheet will be ejected 1 Open the printer cover by grasping the document guides and lifting Make sure the paper thickness lever is set properly for the type of media you are using See Adjusting the Paper Thickness Lever on page 2 40 2 Hold the sheet with its print side facing upward and align the sheet with the left edge of the manual feeder located at the back of the unit 3 Insert t...

Page 76: ...rinter cover 3 Pull the paper rest up until it stops 4 Load the paper into the sheet feeder as described in Loading Print Media for Automatic Feed on page 2 43 5 Raise the output guides as described in Using the Paper Output Guides with the BC 22 22e and BC 29F Cartridges on page 2 51 6 When you are finished printing remove the remainder of the HR 101 paper from the sheet feeder Using the Cleaning...

Page 77: ... the sheet with the right edge of the sheet feeder and slide it in until it stops 3 Adjust the paper guide to the edge of the cleaning sheet 4 Launch Wordpad on your computer 5 Set the application to print a blank sheet of paper The cleaning sheet is fed into the MultiPASS C20 The cleaning procedure is completed when the sheet comes out of the unit ...

Page 78: ...eded when printing with the MultiPASS C20 Do not touch the printing on a newly printed fabric sheet until the ink has dried completely normally about an hour 1 Open the printer cover by grasping the document guides and lifting Make sure the paper thickness lever is set to the right See Adjusting the Paper Thickness Lever on page 2 40 2 With the cloth side facing you and the open end up insert one ...

Page 79: ...hrough the unit as it exits which can lead to poor print quality 1 Raise both paper output guides until they are vertical N Always raise both paper output guides Always use the paper output guides when printing on HR 101 high resolution paper even when using the BX 20 or BC 21 21e cartridges 2 When you finish using the BC 22 22e or BC 29F cartridge return the paper output guides to their original ...

Page 80: ...o the MultiPASS C20 using the instructions on the following pages This allows you to use the MultiPASS C20 as a fax machine even if you do not have a PC connected to it Method 2 MultiPASS Desktop Manager You can also enter the user information using the MultiPASS Desktop Manager Entering information in this way will override any information entered directly into the MultiPASS C20 See the MultiPASS...

Page 81: ...red up to the last time you pressed the START COPY button If you hear nothing or a slow beep someone is trying to send a fax press the START COPY button If you hear a voice you are receiving a normal telephone call If your MultiPASS C20 is set to receive faxes automatically you do not have to press the STOP button the MultiPASS C20 will automatically receive the fax See Receiving Faxes on page 3 4...

Page 82: ...ave to use the right cursor button For example you would enter AA like this 1 Press until an A appears on the right of the display then press 2 once to display the first A 2 Press the right cursor button to enter the A and move the cursor to the right 3 Press 2 until the second A is displayed Editing Information If you make a mistake while entering a name you can correct it by using the and button...

Page 83: ...ly set date and time appears 4 Use the numeric buttons to type in the correct date and time Use the DD MM YY format for the date and use the 24 hour clock for the time so 2 38 p m would be 14 38 for example Ex 5 Press START COPY to save the Date and Time 6 Press START COPY again and enter your fax number up to 20 digits using the numeric buttons Ex You can enter spaces with the button to make the ...

Page 84: ...mpany if you are not sure what type of phone line you have 11 Press START COPY to save the Tel Line Type 12 Press STOP to return to standby mode Editing Your Identification Information If you ever need to change the user name fax number or phone line type or to reset the date or time you can use the procedures above to display the settings you need to change then edit them using the numeric button...

Page 85: ...through the operation panel is convenient when you do not have your MultiPASS C20 connected to a PC Also certain settings can only be set from the operation panel N We recommend that settings that can be adjusted from both the MultiPASS Desktop Manager and the operation panel be set using the MultiPASS Desktop Manager Using the MultiPASS Desktop Manager enables you to customise more settings In ad...

Page 86: ...LCD See page 2 68 display Setting whether you want Confirm before to be prompted to confirm Deleting when you delete a document from the MultiPASS Desktop Manager Setting the printing spooler Printing Spooler Setting whether the optional Telephone Attached handset or a telephone is to Unit connected to your MultiPASS C20 unit Setting the volume Incoming Ring CALLING VOLUME Keypad KEYPAD VOLUME Ala...

Page 87: ...one line Phone Line Type TEL LINE TYPE type See page 2 55 Setting a prefix to access Outside Dialling Prefix an outside phone line Setting automatic redialling Automatic Retries Number preferences Wait between Retries Setting whether a sending Automatic Report Print report is printed and when Include Fax Image it is printed out Setting the modem Speed speed used to send faxes Setting the length of...

Page 88: ...position of the fax Fax Heading Position heading information TTI Setting whether the On Error Resend MultiPASS C20 redials if an error occurs and which pages are resent Setting the R button options R Key R KEY SETTING See page 3 34 Setting the M button options M Key M KEY SETTING UK only See page 3 39 Setting the phone lock options Phone Lock Setting Description Desktop Manager Operation Panel Set...

Page 89: ...xes are handled when your computer is turned on or off You can also set how faxes are handled when the MultiPASS C20 runs out of paper Setting whether a reception Report Print report is printed and when it is printed out Setting the modem Speed speed used to receive faxes Setting Error Correction Error Correction ECM Mode ECM on or off for fax reception Can be adjusted with the RECEIVE MODE button...

Page 90: ... Telephone Setting whether in manual Manual Auto Switch mode the MultiPASS C20 automatically switches to fax receiving after a specified ring time Setting options when an Answering Machine answering machine is Mode Options connected to the MultiPASS C20 unit Setting whether remote Remote Receive receive is enabled and setting Remote Identification the identification number Number used to receive S...

Page 91: ...ling See the Speed Dial tab GROUP DIAL numbers See page 3 28 Printing a fax stored in FILE PRINT memory instead of See page 3 53 uploading it to your PC Cleaning the BJ cartridge CLEANING print head See page 7 5 Printing a test pattern to NOZZLE CHECK check the BJ cartridge See page 7 4 Setting Description Desktop Manager Operation Panel Setting Name Setting Name Speed Dialling Settings Setting De...

Page 92: ...ed Dialling CODED SPEED DIAL See Storing Numbers for 3 17 Coded Speed Dialling GROUP DIAL See Group Dialling 3 28 USER SETTINGS DATE TIME Enter the date and time 2 55 UNIT TELEPHONE Enter your fax telephone 2 55 number UNIT NAME Enter your name or company 2 55 name SCAN CONTRAST Sets the scanning contrast STANDARD 3 4 of the faxes you send DARKER LIGHTER VOLUME CONTROL CALLING VOLUME Sets the volu...

Page 93: ...D DIAL LIST Prints a list of registerd telephone numbers USER S DATA LIST Prints information registered in your unit R KEY SETTING Sets the PBX type through PSTN 3 34 which your unit is connected PBX M KEY SETTING Sets the access and ID code OFF 3 39 UK only for the 2300 service of Mercury ON Communications Limited MID PAUSE SET Sets the length of the pause 04 SEC 2 68 UK only entered by each pres...

Page 94: ...t GERMAN ITALIAN DUTCH FINNISH PORTUGUESE NORWEGIAN SWEDISH DANISH SLOVENE CZECH HUNGARIAN FILE PRINT Prints faxes stored in the 3 53 MultiPASS C20 s memory instead of uploading them to your PC CLEANING Cleans the BJ cartridge s 7 5 print head NOZZLE CHECK Prints a test pattern to check 7 4 whether the BJ cartridge is functioning normally Setting Description Settings Page ...

Page 95: ...select USER SETTINGS Ex 3 Press START COPY 4 Use or to select VOLUME CONTROL Ex 5 Press START COPY Ex 6 Use or to select the setting you want to set or change Ex Select CALLING VOLUME KEYPAD VOLUME ALARM VOLUME or LINE MONITOR VOL 7 Press START COPY Ex The current setting is displayed VOL MID KEYPAD VOLUME CALLING VOLUME VOLUME CONTROL DATE TIME USER SETTINGS FUNCTION Chapter 2 Setting Up Your Mul...

Page 96: ...dby mode To Access the RX CALL LEVEL MID PAUSE SET and DISPLAY LANGUAGE Settings 1 Press FUNCTION To access the RX CALL LEVEL setting 2 Use or to select USER SETTINGS Ex 3 Press START COPY 4 Use or to select RX CALL LEVEL RX CALL LEVEL DATE TIME USER SETTINGS FUNCTION 13 00 FaxOnly ALARM VOLUME VOL MAX 2 68 Setting Up Your MultiPASS C20 Chapter 2 1 2 FUNCTION 1 2 1 2 ...

Page 97: ...ge Ex Select MID PAUSE SET or DISPLAY LANGUAGE 3 Press START COPY Ex The current setting is displayed 4 Use or to select the new setting 5 Press START COPY The new setting will not be effective until you press the START COPY button 6 Press STOP to return to standby mode The MID PAUSE SET setting is only available in the UK The pause length is fixed to four seconds in Hong Kong and to two seconds i...

Page 98: ...from the output tray immediately to avoid paper jams Make sure your text or graphics fall within the printable area If the print head is printing past the edge of the paper and directly on the platen clean the platen See Cleaning the MultiPASS C20 s Interior on page 7 2 If you are printing on transparencies or back print film note the following Remove each sheet of film after it exits from the uni...

Page 99: ...ancelling a Transmission 3 10 Automatic Speed Dialling 3 11 Storing Numbers for One Touch Speed Dialling 3 12 Changing a Number Name Stored under a One Touch Speed Dialling Button 3 14 Storing Numbers for Coded Speed Dialling 3 17 Changing a Number Name Stored under a Coded Speed Dialling Code 3 19 Using One Touch or Coded Speed Dialling 3 22 Automatic Redialling 3 24 Cancelling Automatic Redialli...

Page 100: ... Receiving Faxes 3 43 Setting the Receive Mode 3 44 Receiving Faxes and Phone Calls Automatically Fax Tel Mode 3 45 Receiving Faxes Manually MANUAL MODE 3 47 Receiving Faxes Automatically FAX ONLY MODE 3 48 Using an Answering Machine ANS MACHINE MODE 3 48 Using the MultiPASS C20 with an Answering Machine 3 48 Network FAX TEL Switching Australia Only 3 50 Setting the Unit for Network Switch 3 50 Ne...

Page 101: ... The MultiPASS C20 has three resolution settings STANDARD resolution 8 pels mm 3 85 lines mm is adequate for most text documents FINE resolution 8 pels mm 7 7 lines mm is suitable for documents with fine print smaller than the print in this sentence PHOTO resolution 8 pels mm 7 7 lines mm with halftones is for documents that contain photographs With this setting areas of the document that contain ...

Page 102: ...htest and darkest parts of a printed document You can adjust the contrast the MultiPASS C20 uses for sending faxes DARKER STANDARD or LT through the operation panel of the MultiPASS C20 or through the MultiPASS Desktop Manager STANDARD is the default and is adequate for most documents To darken a light original choose DARKER to lighten a dark original use LT lighter Setting the Contrast 1 Press FU...

Page 103: ...t setting appears 5 Press or to select the scanning contrast you want You can select STANDARD DARKER or LT lighter You can cancel and return to standby mode by pressing the STOP button any time before pressing the START COPY button in step 6 6 Press START COPY to save your selection then press STOP to return to standby mode 14 38 FaxOnly STANDARD SCAN CONTRAST 1 2 1 2 ...

Page 104: ...Document Feeder ADF as described in Loading the Document on page 4 5 Once the document is loaded the display shows how much of the unit s memory is in use then displays the current resolution and finally the message DOCUMENT READY Currently used image memory Current resolution Standby to scan 2 If you want to change the resolution press RESOLUTION to display the resolution you want FINE resolution...

Page 105: ...voice and fax transmissions 1 Prepare the document load it into the Automatic Document Feeder ADF and adjust the resolution as described in Loading the Document on page 4 5 2 Lift the handset and dial the number Ex 3 If a person answers you can converse normally When you are ready to send the fax ask the person to press the start button on their fax or set their fax machine to receive Then press S...

Page 106: ...nt load it into the Automatic Document Feeder ADF and adjust the resolution as described in Loading the Document on page 4 5 You may not be able to use memory sending if the percentage shown in the MEMORY USED display is close to 100 In this case use manual sending via the handset to send your document 2 Use the numeric buttons to dial the other party s fax number Ex You can either dial the number...

Page 107: ...ocument in transaction reports The display continues to show these three displays in order while the fax is sending When the MultiPASS C20 finishes sending the fax the display shows the TRANSMITTING OK message N If an error occurs during sending the MultiPASS C20 will print out an error report If this happens try sending the fax again See Faxing Problems on page 6 22 for details about errors TRANS...

Page 108: ... are sending from memory the following appears in the display 2 To cancel the fax press If you change your mind and want the unit to continue sending press the button The MultiPASS C20 will continue sending normally C After you cancel a fax you may need to open the operation panel to remove the document from the Automatic Document Feeder ADF See Jams in the Automatic Document Feeder ADF on page 6 ...

Page 109: ...one touch speed dialling button that the number is assigned to Coded speed dialling Dial a fax number by pressing the CODED DIAL button followed by the two digit code assigned to that fax number Group dialling Send a fax to a pre defined group of fax numbers The numbers must already be stored as one touch speed dialling numbers or coded speed dialling numbers PC dialling Dial a fax number from you...

Page 110: ... 1 Press FUNCTION 2 Press or to select TEL REGISTRATION 3 Press START COPY twice 4 Use or to select a one touch speed dialling button between 01 and 06 If a number is already stored under the button you select that number appears If the button you select is registered for group dialling GROUP DIAL appears 5 Press START COPY Users in the UK only If you have set the M KEY SETTING in the USER SETTING...

Page 111: ...on one or more times Users in the UK can only enter one pause between digits in tel fax numbers 7 Press START COPY 8 Press START COPY again then use the numeric buttons to store the name that goes with the number See page 2 53 for details on entering letters Ex You can store up to 16 characters for the name 9 Press START COPY 10 To continue registering numbers and names repeat steps 4 to 9 or If y...

Page 112: ...all information stored in a button 1 Press FUNCTION 2 Press or until TEL REGISTRATION is displayed 3 Press START COPY twice Ex 4 Use or to select the one touch speed dialling button you want to change between 01 and 06 Ex If the button you select is registered for group dialling GROUP DIAL is displayed 5 Press START COPY twice Ex TEL 516 488 6700 TELEPHONE NUMBER 04 516 488 6700 01 538 4500 1 TOUC...

Page 113: ...r Ex The telephone fax number can be up to 39 digits long If you only want to change the name ignore this step and go to step 7 7 Press START COPY twice to display the registered name Ex 8 To change the name use the numeric buttons to enter the new name over the previous name See page 2 53 for details on entering letters Ex You can enter up to 16 characters for the name If you want to keep the sam...

Page 114: ...ing Faxes Chapter 3 9 Press START COPY Ex To change additional numbers and or names repeat steps 4 to 9 10 When you are finished changing numbers and or names press STOP to return to standby mode 14 38 FaxOnly 05 905 795 1111 ...

Page 115: ... numbers from your PC refer to the MultiPASS Desktop Manager for Windows User s Guide 1 Press FUNCTION 2 Press or until TEL REGISTRATION is displayed 3 Press START COPY then use or to display CODED SPEED DIAL 4 Press START COPY 5 Use or to select a two digit code 00 49 in the display If a number is already registered at the code you select that number is displayed If the code you select is registe...

Page 116: ...n the UK can only enter one pause between digits in tel fax numbers 8 Press START COPY 9 Press START COPY again then use the numeric buttons to store the name that goes with the number See page 2 53 for details on entering letters Ex You can store up to 16 characters for the name 10 Press START COPY 11 To continue registering numbers and names repeat steps 5 to 10 or If you have finished registeri...

Page 117: ...on stored under a code 1 Press FUNCTION 2 Press or until TEL REGISTRATION is displayed 3 Press START COPY then use or to display CODED SPEED DIAL 4 Press START COPY Ex 5 Press or to select the coded speed dialling code you want to change between 00 and 49 Ex If the button you select is registered for group dialling GROUP DIAL is displayed 6 Press START COPY twice Ex TEL 7390802 TELEPHONE NUMBER 05...

Page 118: ...phone fax number can be up to 39 digits long If you only want to change the name ignore this step and go to step 8 8 Press START COPY twice to display the registered name Ex 9 To change the name use the numeric buttons to enter the new name over the previous name See page 2 53 for details on entering letters Ex You can enter up to 16 characters for the name If you want to keep the same name do not...

Page 119: ...ding and Receiving Faxes 3 21 Sending and Receiving Faxes 10 Press START COPY Ex To change additional number and or names repeat steps 5 to 10 11 Press STOP to return to the standby mode 14 38 FaxOnly 06 49 39 25 25 ...

Page 120: ...20 will begin sending automatically If you make a mistake while dialling press the STOP button Then press the correct one touch speed dialling button or press CODED DIAL and enter the correct code If no fax number is assigned to the one touch dialling button you press or the code you enter the LCD displays the following If this happens make sure you pressed the correct button or entered the correc...

Page 121: ...ed the correct button or entered the correct code and that the number you want to dial is registered to that button or code 4 Press START COPY If you do not press the START COPY button within five seconds the MultiPASS C20 will begin sending automatically If an error occurs during sending the MultiPASS C20 will print an error report If this happens try sending the fax again See Faxing Problems on ...

Page 122: ...indows User s Guide When automatic redialling is in use the MultiPASS C20 alternately displays AUTO REDIAL and the transaction number while it is waiting to redial Ex When it begins redialling it alternately displays DIALING the transaction number the fax number you dialled and CALLING During dialling Ex During sending Ex Ex If you used one touch or coded speed dialling to dial the number the name...

Page 123: ...l the MultiPASS C20 begins redialling 2 Press STOP The MultiPASS C20 asks you to confirm that you want to cancel 3 To cancel the redialling press The MultiPASS C20 beeps and alternates the following displays Ex The unit then prints an error report Redialling with Manual Sending via the Handset If you are sending a fax manually using the handset you can redial by pressing the REDIAL PAUSE button Th...

Page 124: ...ttons To send a fax using sequential broadcasting do the following 1 Prepare the document load it into the Automatic Document Feeder ADF and adjust the resolution as described in Loading the Document on page 4 5 2 Enter up to 57 fax numbers using the following three methods One touch speed dialling press the desired one touch button s Coded speed dialling press CODED DIAL then enter the two digit ...

Page 125: ...ART COPY to begin sending or wait a few seconds for the MultiPASS C20 to begin sending automatically The MultiPASS C20 then scans the document into memory and begins sending it to the destinations in numerical order starting with the coded dial numbers then the one touch numbers and finally the manual number if there is one N If the MultiPASS C20 s memory becomes full while scanning your document ...

Page 126: ...your PC refer to the MultiPASS Desktop Manager for Windows User s Guide Creating Groups for Group Dialling The numbers you use in a group must already be stored under one touch speed dialling buttons or coded speed dialling codes Each group is stored under a one touch speed dialling button or a coded speed dialling code Create groups for group dialling as follows 1 Press FUNCTION 2 Press or until ...

Page 127: ...alling button or coded speed dialling code can store either a name and number for speed dialling or a group Be careful not to override speed dialling numbers and names when creating and registering groups If you wish to register a group under a one touch speed dialling button or coded speed dialling code already registered for speed dialling or if you want to re enter a group you must delete the p...

Page 128: ...layed and then the START COPY button If you want to delete all numbers in the group press repeatedly until all numbers are deleted and then press the START COPY button Deleting all numbers will cancel the group If you want to add a number to the group press the one touch speed dialling button or coded speed dialling code the number is registered under and then press the START COPY button The numbe...

Page 129: ...ng and Receiving Faxes 3 31 Sending and Receiving Faxes 9 Press START COPY 10 To enter additional group repeat steps 5 to 9 or If you have finished registering groups press STOP to return to standby mode 14 38 FaxOnly ...

Page 130: ...e up to 55 groups If you press a one touch speed dialling button or coded speed dialling code that has no group or fax number registered under it the LCD displays NO TEL Make sure you pressed the correct one touch speed dialling button or entered the correct coded speed dialling code and that the group you want has been registered correctly under that button or code After entering a one touch spee...

Page 131: ... be lost The MultiPASS C20 automatically prints a list of the lost documents when power is restored Because of this you should be sure to print documents stored in memory or resend them as soon as possible While power is off you can only use the MultiPASS C20 to receive telephone calls if you have an extension telephone connected You cannot make calls or send or receive faxes ...

Page 132: ...ber under the R button so that you only have to press the FUNCTION and R buttons before dialling the telephone or fax number you wish to reach Follow the instructions below for registering the R button Registering the Access Type and the Outside Line Number under the R button Follow these steps for registering the access type and the outside line number under the R button 1 Press FUNCTION 2 Press ...

Page 133: ... 7 Enter the outside line access number using the numeric buttons Ex You can enter up to 19 digits for the outside line access number 8 Press PAUSE 9 Press START COPY then press STOP to return to standby mode If you selected EARTH CONNECTION or HOOKING in step 5 7 Press START COPY then press STOP to return to standby mode 14 38 FaxOnly 14 38 FaxOnly 123456P 123456 EARTH CONNECTION HOOKING PREFIX 1...

Page 134: ...o enter the number 2 To enter a pause within a number press PAUSE To enter a pause at the end of a number press the REDIAL PAUSE button and then press the START COPY button A pause entered within a number p is two seconds long If necessary you can adjust the length of a pause within a number See page 2 65 for more details To make a longer pause within a number press the REDIAL PAUSE button again E...

Page 135: ...one detection 1 Use the numeric buttons to enter the first part of the number until dial tone detection is required Ex 2 When a dial tone detection is required press D T Where the dial tone is inserted you will see a small dot During dialling this is where the unit waits for the dial tone 3 Enter the remainder of the number This feature is ineffective in the UK Hong Kong Australia New Zealand Sing...

Page 136: ...er pressing the TONE button will be dialled using tone dialling 3 When you have finished hang up the handset N When registering one touch speed dialling and coded speed dialling numbers if you enter the TONE button after the number you will switch to tone dialling after the phone connection is made Example Operation Display After the number 123456 is dialled it will pause for 6 seconds ppp to allo...

Page 137: ... you subscribe to such a service you can save money on most long distance international communications The procedures described in this section show you how to use your unit with the 2300 Service of Mercury Communications Limited For details on using your unit with alternative telephone services contact your Canon authorised representative Attaching the M Label Before operating the unit attach the...

Page 138: ...P above press START COPY again and use the numeric buttons to enter the ID code Ex This code is given to you by Mercury Telecommunications Limited If your access code is 132 you do not have to enter the ID code Go on to the next step Your code can be up to 20 digits long pauses are unnecessary If an ID code is already registered you will see a string of asterisks on the display 7 Press START COPY ...

Page 139: ...TART COPY The MultiPASS C20 automatically dials the access code and ID code registered under the M button Next the unit dials the number of the party you are calling and connects the call N In order to protect your codes the access code and ID code are not printed on activity reports If M KEY SETTING is set to ON the button 6 cannot be used for one touch speed dialling If you try to register a num...

Page 140: ...n before you can register them under speed dialling numbers 1 While you are registering a number for one touch or coded speed dialling and you come to a step that asks you to enter the number of the other party press FUNCTION then press M 2 Use the numeric buttons to enter the number Ex 3 Continue with the procedure for registering one touch or coded speed dialling numbers Once you have registered...

Page 141: ... rings for every call whether phone or fax and you must press the START COPY button to begin receiving a fax FAX ONLY MODE Use this mode if the MultiPASS C20 will be connected to a separate telephone line used only for transmitting faxes The MultiPASS C20 answers all calls but accepts only those from fax machines and disconnects all others ANS MACHINE MODE Use this mode if you plan to connect an a...

Page 142: ... mode setting 2 If you want to change the receive mode press RECEIVE MODE repeatedly until the mode you want appears After about five seconds the MultiPASS C20 returns to standby mode and displays the time and the new receive mode 14 38 FaxOnly 14 38 Manual 14 38 FaxTel 14 38 AnsMode FAX ONLY MODE MANUAL MODE Fax Tel Mode ANS MACHINE MODE FAX ONLY MODE RECEIVE MODE RECEIVE MODE ...

Page 143: ...ing document manually Sending document automatically C20 answers without ringing C20 listens for FAX TONE For 8 sec FAX TONE detected FAX TONE is not detected Document received automatically C20 starts ringing Pick up the handset to talk If you do not pick up the handset within 22 seconds F T SW ACTION Choose between Receive factory default setting and Disconnect DISCONNECT RECEIVE Factory default...

Page 144: ...FAX TONE For those cases you can set your MultiPASS C20 to switch to receive mode automatically and start receiving the document If no document comes in it disconnects after approximately 35 seconds See the MultiPASS Desktop Manager for Windows User s Guide for instructions on setting this switch If the MultiPASS C20 runs out of paper or if its BJ cartridge runs out of ink while the unit is receiv...

Page 145: ... A fax machine is trying to send you a document Press START COPY on the MultiPASS C20 or Enter the two digit ID code from the extension phone then hang up The MultiPASS C20 then begins receiving the document This is particularly convenient if your extension phone is located away from the MultiPASS C20 If you do not hang up after pressing the two digit ID code the unit beeps intermittently for a fe...

Page 146: ...nswering machine to answer incoming calls then listens for a fax tone or for four seconds of silence also an indication that a fax is coming in and automatically receives the fax if it detects the fax tone or a four second silence For instructions on connecting an answering machine to the MultiPASS C20 see Connecting the Optional Handset Extension Phone or Answering Machine on page 2 22 N Canon do...

Page 147: ... The entire message including the four second pause must be no more than 15 seconds long In the message tell your callers how to send a fax For example Hello I can t answer the phone right now but please leave a message after the beep I ll return your call as soon as possible If you would like to send a fax press the start button on your fax machine after you leave your message Thank you ...

Page 148: ...tting For details see the MultiPASS Desktop Manager for Windows User s Guide Network Switch System Operation The procedure for using the network switch system is almost the same as when using the unit over a normal telephone line When you receive calls however the unit will respond slightly differently as described below When you hear the telephone call ring pattern Pick up the handset and talk no...

Page 149: ...ows User s Guide Network Switch System Operation The procedure for using the network switch system is almost the same as when using the unit over a normal telephone line When you receive calls however the unit will respond slightly differently as described below When you hear the telephone call ring pattern Pick up the handset and talk normally If you hear a slow beep it means the call is from a f...

Page 150: ...them from memory Cause The BJ cartridge ran out of ink or is not installed properly Action Make sure the cartridge is installed properly and install a new one if needed See Replacing the BJ Cartridge on page 7 8 or Replacing an Ink Tank in the BC 21 21e Colour BJ Cartridge on page 7 13 Cause There is no BJ cartridge in the MultiPASS C20 Action Install a BJ cartridge See Installing the BJ Cartridge...

Page 151: ...ransferring them to your PC do not turn on your PC and follow these steps 1 Press FUNCTION 2 Press or until FILE PRINT is displayed 3 Press START COPY The MultiPASS C20 then prints all received faxes currently in memory N When you print the fax it is erased from memory and can no longer be transferred to the PC FILE PRINT FUNCTION FUNCTION 1 2 ...

Page 152: ...r settings making copies or printing a report If your MultiPASS C20 is set to print received faxes the faxes are stored in memory if they arrive while you are making copies or printing a report manually Then as soon as you finish making copies or printing the report the MultiPASS C20 automatically prints the fax If you are entering registration information the fax is printed as soon as it is recei...

Page 153: ... describes how to load documents into the MultiPASS C20 for faxing copying or scanning and tells how to make copies Scanning Documents 4 2 Types of Documents You Can Scan 4 2 Effective Image Size 4 4 Loading the Document 4 5 Adding Pages to the Document in the Automatic Document Feeder ADF 4 7 Trouble with Multipage Documents 4 8 Making Copies 4 9 ...

Page 154: ...oFinish and Caere WordScan This chapter describes the types of documents you can scan and how to load the documents for scanning For instructions on faxing a scanned document see Chapter 3 Sending and Receiving Faxes For instructions on using the Desktop Manager to scan documents see the MultiPASS Desktop Manager for Windows User s Guide For information on using other applications to scan document...

Page 155: ... Document Feeder ADF do not use any of the following in the MultiPASS C20 Remove all staples paper clips or any other fasteners before loading the document into the Automatic Document Feeder ADF Make sure any glue ink or correction fluid on the paper is completely dry before loading the document into the Automatic Document Feeder ADF If you have a document that will not feed into the MultiPASS C20...

Page 156: ...Size The MultiPASS C20 does not scan the areas within the maximum margins of 4 5 mm on either side of the sheet and 4 0 mm on the top and bottom Make sure your document s text and graphics do not extend into these margins A4 MAX 4 5 mm MAX 4 0 mm MAX 4 0 mm MAX 4 5 mm ...

Page 157: ...t surface to even the stack s edges 2 Adjust the document guides to the width of the document N If you are scanning a business card or postcard that is thicker than 0 13 mm it may not scan correctly If you wish to scan a document that is thicker than 0 13 mm scan only one sheet at a time and push the document slightly to feed it through the sheet feeder A4 LTR ...

Page 158: ...ently insert the document face down top of the document towards you into the Automatic Document Feeder ADF until you hear a beep The document is now ready for scanning The MultiPASS C20 automatically feeds the pages one by one from the bottom of the stack ...

Page 159: ...er ADF can hold up to 20 A4 size 20 letter size or 10 legal size pages at a time If your document has more pages than this you can add pages while the MultiPASS C20 is scanning as follows 1 Wait until the last sheet in the Automatic Document Feeder ADF starts feeding 2 Load up to 20 additional sheets 10 legal size Insert the first new page so that it overlaps the last page by about 2 5 cm 2 5 cm ...

Page 160: ...he stack so that its front edge is bevelled as shown below then insert the stack into the Automatic Document Feeder ADF N If you have further trouble with page jams while feeding see Jams in the Automatic Document Feeder ADF on page 6 6 You cannot feed a multipage document of thick media such as postcards or business cards Wait until all pages of your document have been scanned completely before s...

Page 161: ...ument Feeder ADF as described in Loading the Document on page 4 5 Once the document is loaded the LCD display shows the following Currently used memory Current resolution for fax sending Standby to scan 2 Press START COPY The display now shows COPY the reduction size the copy will be printed at the default is 100 and the number of copies the default is 1 3 To change the copying resolution press RE...

Page 162: ...artridge for making copies These cartridges are only to be used for printing colour documents from your PC 4 If you want to reduce the size of the copies use the and buttons to select the reduction percentage you want 70 80 90 or 100 Ex 5 If you want to make multiple copies use the numeric buttons to enter the number of copies up to 99 6 Press START COPY to begin copying To stop copying press STOP...

Page 163: ...ing multiple copies of a document you will not be able to use the multiple copy feature for copying the document Instead you will need to make single copies of the document as many times as required To correct this situation print out the documents stored in memory using the FILE PRINT function See Printing Documents Stored in Memory on page 3 53 ...

Page 164: ...4 12 Scanning Documents and Making Copies Chapter 4 ...

Page 165: ... to prepare the print media and gives some advice on printing with colour Paper Handling 5 2 Selecting Paper Types 5 2 Printing on Envelopes 5 2 Some Advice for Colour Printing 5 6 Selecting Paper and Other Print Media 5 6 Understanding Your Application s Capabilities 5 6 Understanding Your Computer s Monitor and Colour 5 7 Improving Print Speed 5 8 Controlling Printing Costs 5 9 ...

Page 166: ...velopes The MultiPASS C20 s sheet feeder can hold up to 10 envelopes European DL envelopes and U S Commercial No 10 COM10 envelopes are recommended You may be able to stack envelopes of other sizes in the sheet feeder but Canon cannot guarantee consistent performance on envelope sizes other than DL or Commercial No 10 Avoid printing on any of the following as they can cause jams or smears or damag...

Page 167: ...wn firmly on the envelopes edges to make the folds crisp Press all the way around the envelopes to remove any curls and expel air from inside the envelopes Also press firmly on the area that corresponds to the edges of the flap 2 Remove any curling from the envelopes by holding the edge of the envelopes diagonally and bending them gently FLAP PRESS DOWN FIRMLY ON THE EDGES OF THE FLAP ...

Page 168: ...t curled 4 Open the printer cover by grasping the document guides and lifting to make sure the paper thickness lever is set properly For more details see Adjusting the Paper Thickness Lever on page 2 40 5 Close the printer cover DO NOT TOUCH THE GUIDE RAIL DO NOT TOUCH THE RIBBON CABLE FLAP ...

Page 169: ... of envelopes into the sheet feeder until it stops Align the paper guide with the left edge of the stack The MultiPASS C20 is now ready to print envelopes CAN ON INC TAMA GAWA PLANT 3 16 1 SHIMO NOGE TAKAT UKU KAWA SAKI S HI KANAG AWA 213 JAPAN PHON E 044 811 2 111 PA R AV ION ...

Page 170: ...ning you can overuse colour and actually detract from the document s content Selecting Paper and Other Print Media Selecting the right print media is crucial for achieving the best possible print quality See Selecting the Print Media on page 2 35 for guidelines to help you choose the right media for your particular print requirements N If you use coated paper the colours may print out differently ...

Page 171: ...ution and by the number of different colours they can display The following factors can affect how well the colours on your printed page match the colours displayed on your monitor Monitors create the colours they display by combining red green and blue at different intensities Printers create colours by combining overlaying dots of cyan yellow magenta and black in a variety of combinations with v...

Page 172: ...reen savers or other memory resident applications Limit the number of colours you use Use smaller graphics and more white space in your documents When printing presentation graphics use only the MultiPASS C20 s primary colours black cyan magenta and yellow Use Draft mode printing when not producing a final copy Use plain paper and set the Media Type to Plain Paper on your PC This sets the MultiPAS...

Page 173: ... graphs and charts set the fill option to coloured hatch patterns instead of solid colours Hatch patterns require less ink Use lighter colours that incorporate more white space For example use pink instead of red The MultiPASS C20 produces light colours by alternating coloured dots with white unprinted dots and so uses less ink Avoid full colour backgrounds If you must use one do not set the backg...

Page 174: ...5 10 Printing from Your PC Chapter 5 ...

Page 175: ...Document Feeder ADF 6 6 Jams in the Sheet Feeder 6 8 Printing Problems 6 9 Print Quality Problems 6 14 Colour Printing Problems 6 16 Problems Feeding Paper Into the MultiPASS C20 Sheet Feeder 6 19 Faxing Problems 6 22 Sending Faxes 6 22 Receiving Faxes 6 24 Telephone Problems 6 27 Copying Problems 6 28 General Problems 6 29 Error Codes Messages and Solutions 6 30 ...

Page 176: ...rrect the problem For example many printing problems are related to how your software interacts with the MultiPASS C20 If you were having trouble printing but found that your MultiPASS C20 could make copies correctly you would know that the problem was with your computer software or cables and not with the MultiPASS C20 itself C If the MultiPASS C20 makes strange noises emits smoke or strange smel...

Page 177: ...e sure you have the following information about your MultiPASS C20 The unit s name MultiPASS C20 The MultiPASS C20 s serial number on a label on the back of the MultiPASS C20 The MultiPASS C20 s ROM version number to find this print the user data list see the MultiPASS Desktop Manager for Windows User s Guide The MultiPASS Desktop Manager version number see the MultiPASS Desktop Manager for Window...

Page 178: ...ntout curls 6 13 Print Quality Problems Print is not clear 6 14 Output appears jagged 6 14 The printout has dots of ink splashed on it 6 14 The printout has white streaks or missing dots 6 14 Output is faint 6 15 Printing takes too much time 6 15 The printout contains blurred or smudged ink 6 15 Colour Printing Problems Colours are missing and the output contains only black ink 6 16 Colours are br...

Page 179: ...4 The MultiPASS C20 cannot receive faxes automatically 6 24 The MultiPASS C20 will not switch between telephone and fax calls automatically 6 25 The MultiPASS C20 will not receive faxes manually 6 25 The print quality is poor 6 26 The MultiPASS C20 cannot receive faxes using ECM 6 26 Nothing prints 6 26 Received faxes are blotched or uneven 6 27 Errors occur frequently while receiving 6 27 Telepho...

Page 180: ...You do not need to unplug the MultiPASS C20 while clearing paper jams Jams in the Automatic Document Feeder ADF Use this procedure if the document in the MultiPASS C20 s Automatic Document Feeder ADF jams or misfeeds If this occurs the message CHECK DOCUMENT appears in the display 1 Press STOP N Do not try to pull the document out without opening the operation panel or you may tear or smudge the d...

Page 181: ...o not force it Contact your local authorised Canon dealer or service centre 4 Gently push the operation panel shut until it clicks 5 Press STOP to clear the error message 6 If you have a multipage document remove the entire document from the Automatic Document Feeder ADF and reload it following the instructions in Loading the Document on page 4 5 ...

Page 182: ... for Automatic Feed on page 2 43 Make sure you push the paper to the back and right of the sheet feeder and that the stack is not higher than the paper limit mark D See page 2 45 for more details 3 Press STOP to clear the error message If the Alarm light is on press the RESUME button to clear the error message If you are printing from a Windows application follow the instructions displayed by the ...

Page 183: ... display will show the time and receiving mode standby mode If the ALARM lamp stays on call your local authorised Canon dealer or service centre Nothing prints The power cord may not be Make sure the power cord plugged in securely is plugged securely into the unit and into a wall outlet The interface cable may not Check the interface cable s be securely connected to the connections See page 2 20 M...

Page 184: ...ou are Check the computer and the printing from may not be application to make sure set up properly they are configured correctly The application may not Make sure the Print Setup have the correct printer option in your application selected has MultiPASS C20 Printer Driver selected as the printer The printer driver may be Make sure the MultiPASS configured with the wrong C20 MultiPASS Printer port...

Page 185: ... occurs Make sure the MultiPASS device time out when the PC sends data to C20 is plugged in and that the MultiPASS C20 but the its interface cable is securely MultiPASS C20 does not attached to the MultiPASS respond The MultiPASS C20 C20 and the PC Clear any may be unplugged not paper jams and make sure connected to the PC paper is loaded properly in or have a paper jam the sheet feeder The printe...

Page 186: ...a type selected for the Media Type rather than Plain Paper See the MultiPASS Desktop Manager for Windows User s Guide Previous software settings Make sure the MultiPASS may not be cleared C20 was cleared of the previous software settings before the print job started See the application s documentation Printout does not Paper may not be loaded Make sure the paper is match paper size and aligned cor...

Page 187: ...ued Driver See the MultiPASS Desktop Manager for Windows User s Guide N If the print head prints on the platen clean the ink off the platen by launching Notepad and setting the application to print 2 or 3 blank sheets of paper The printout curls Your pages may include a Remove the printout large amount of ink as soon as it exits the MultiPASS C20 and let it dry then roll it in the direction opposi...

Page 188: ...er and printing on the other side The print head nozzles Clean the print head See may be clogged page 7 5 Output appears jagged You may be using Draft Change the resolution to mode 180 dpi which can standard on your PC See give output a jagged look the MultiPASS Desktop Manager for Windows User s Guide The printout has dots The print head nozzles may Clean the print head See of ink splashed on it ...

Page 189: ...r Fine mode See the MultiPASS Desktop Manager for Windows User s Guide Printing takes too You may be using Fine Try using Standard mode much time mode See the MultiPASS Desktop Manager for Windows User s Guide The printout contains The medium you are using Use only print media blurred or smudged ink may not be supported by specified in Selecting the the MultiPASS C20 Print Media on page 2 35 You m...

Page 190: ...olour On Screen Matched Colour See the MultiPASS Desktop Manager for Windows User s Guide The colour BJ cartridge may Print the NOZZLE CHECK not be working properly test pattern to make sure the Colour BJ cartridge and ink tanks are firing correctly See page 7 4 An ink tank may be Replace empty ink tanks empty as needed See page 7 13 The print head unit may Clean the print head See need cleaning p...

Page 191: ...you selected not be selecting colour Colour or Screen Matched Colour on your PC See the MultiPASS Desktop Manager for Windows User s Guide The printer driver may Make sure you selected the not be selecting the right correct media type on the media PC See the MultiPASS Desktop Manager for Windows User s Guide N Some colours are impossible to match exactly though the MultiPASS C20 is designed to com...

Page 192: ...g decrease the C20 uses CMYK Cyan amount of magenta by 30 Magenta Yellow Black to produce a royal blue colour Thus the printed blue a mix of cyan and If you just want a nice blue magenta looks colour try cyan It prints darker and more purple beautifully and quickly than the blue on the and is available in almost monitor all applications that support colour See the MultiPASS Desktop Manager for Win...

Page 193: ...em Possible cause Solution Paper does not feed The sheet feeder may Make sure the sheet feeder into the MultiPASS C20 contain too many sheets is not filled past the limit mark D See page 2 45 Paper may not be inserted Make sure paper is inserted in the sheet feeder correctly all the way into the sheet feeder See page 2 43 Printing is skewed Paper may not be stacked Make sure the stack of correctly...

Page 194: ... not force the stack into the sheet feeder The sheet feeder may Load only one type of paper contain more than one at a time type of paper Make sure the paper you use meets the specifications for media in Appendix A Specifications Transparencies or back The sheets may not be loaded Make sure you load no print film do not feed correctly more than 50 sheets of correctly transparencies or 10 sheets of...

Page 195: ...e there are no more than 10 envelopes in the sheet feeder The correct envelope size Make sure you select the may not be selected in your correct envelope size in the printer driver Paper Setting dialog box on your PC See the MultiPASS Desktop Manager for Windows User s Guide The envelopes may not Envelopes must be meet the MultiPASS C20 s European DL specifications 220 110mm or U S Commercial No 1...

Page 196: ...ave you have See page 2 56 pulse tone If you are not sure what type of line you have contact your local telephone company The document may not Remove the document stack have been set in the it and feed it into the Automatic Document Automatic Document Feeder ADF properly Feeder ADF again See page 4 5 The one touch or coded Check the content of the one speed dialling number you touch or coded speed...

Page 197: ...ng it back in If the problem persists contact your local authorised Canon dealer or service centre Please note that any documents stored in memory will be erased when the MultiPASS C20 is unplugged Images on faxes The receiving fax machine Check the MultiPASS C20 received from the may not be working by making a copy If the MultiPASS C20 are properly copy is clear the problem spotted or dirty may b...

Page 198: ...axes Problem Possible cause Solution The MultiPASS C20 The MultiPASS C20 may not For the MultiPASS C20 to cannot receive faxes be set to receive faxes receive faxes automatically automatically automatically it must be in FaxOnly AnsMode or FaxTel mode See page 3 44 The MultiPASS C20 may have Print out any documents a document in memory stored in memory See page leaving little or no memory 3 53 ava...

Page 199: ...See page 6 30 for a listing of the MultiPASS C20 s error messages Print an activity report and look for an error code See the MultiPASS Desktop Manager for Windows User s Guide The sheet feeder may Make sure the sheet feeder be empty has paper in it The sending fax machine In such cases you will have may not send the CNG to receive the document signal that tells the manually See page 3 47 MultiPAS...

Page 200: ...ng may not support ECM not support ECM then the ECM ECM RX does MultiPASS C20 receives the not appear in the LCD fax in normal mode display when receiving without error checking ECM reception may not be Make sure the MultiPASS turned on C20 has its ECM RX setting turned on See the MultiPASS Desktop Manager for Windows User s Guide Nothing prints The orange tape may not Be sure to remove the tape h...

Page 201: ... which while receiving in poor condition or you the unit receives faxes in the may have a bad connection RX START SPEED setting See the MultiPASS Desktop Manager for Windows User s Guide Telephone Problems Problem Possible cause Solution The MultiPASS C20 The telephone line may not Make sure the telephone cannot dial be connected properly line is securely connected to the MultiPASS C20 See page 2 ...

Page 202: ...ment placed in the Automatic you are copying is set in the Document Feeder ADF Automatic Document correctly Feeder ADF properly and the LCD display shows DOCUMENT READY See page 4 5 The MultiPASS C20 may Print a document from your not be operating properly PC to make sure the MultiPASS C20 is working properly See the MultiPASS Desktop Manager for Windows User s Guide MEMORY FULL The MultiPASS C20 ...

Page 203: ...g power substituting another or by using a voltmetre to test it for continuity The MultiPASS C20 will The MultiPASS C20 may have Replace the empty ink tank not print reports a BC 21 21e Colour BJ See page 7 13 cartridge installed and its black ink tank may be empty Nothing appears in the The MultiPASS C20 may not Check the plug and be sure LCD display be receiving power it is firmly plugged into t...

Page 204: ...em check their fax machine Contact the other party and have them send or receive the document using a G3 machine Set your MultiPASS C20 for your telephone line tone or pulse Contact the other party and have them check their fax machine You can also try to send the document manually For an overseas call add pauses to the registered number If you want to cancel the transmission press the STOP button...

Page 205: ...32 minutes to receive a document The document is longer than 1 metre Make a copy or print a document If the printout is light or blank replace the BJ cartridge Documents received in memory will then be printed automatically Replace the BJ cartridge and have the other party send the fax again Remove the document you are trying to send or copy and load it again Set the correct paper size in the FAX ...

Page 206: ...etailed document Send the fax scan the document or make a copy Faxes can take longer to receive when using ECM Try turning ECM off if you need to receive quickly or if you know your local telephone lines are in good condition Faxes can take longer to send when using ECM Try turning ECM off if you need to send quickly or if you know your local telephone lines are in good condition Place the handset...

Page 207: ... code that has a group registered in it The MultiPASS C20 is warming up The BJ cartridge is not installed properly Wait until the fax is sent The MultiPASS C20 continues to send the fax as memory becomes available If you need more memory print or send any documents stored in memory Make sure you dialled the correct number Try again later Register the number In manual sending via the handset you ca...

Page 208: ... STOP button to cancel the transmission When the MultiPASS C20 sends or receives a fax it assigns a unique identification number to it Add paper to the sheet feeder change the BJ cartridge or clear the paper jam as needed Print the document from memory by pressing the START COPY button Print the file from the PC Start the procedure again from the beginning Write the number down if you will need it...

Page 209: ...s or tanks as needed Cleaning the MultiPASS C20 7 2 Cleaning the MultiPASS C20 s Exterior 7 2 Cleaning the MultiPASS C20 s Interior 7 2 Maintaining BJ Cartridges 7 4 Printing the Nozzle Check Pattern 7 4 Cleaning and Testing the BJ Cartridge Print Head 7 5 When to Replace the BJ Cartridge 7 6 Replacing the BJ Cartridge 7 8 Replacing an Ink Tank in the BC 21 21e Colour BJ Cartridge 7 13 Transportin...

Page 210: ...ultiPASS C20 to send your document again once you finish cleaning the unit Do not use tissue paper paper towels or similar materials for cleaning they can stick to the components or generate static charges Cleaning the MultiPASS C20 s Exterior Clean the MultiPASS C20 s outer casing as follows 1 Disconnect the power cord from the MultiPASS C20 2 Wipe the MultiPASS C20 s exterior with a clean soft l...

Page 211: ...S C20 1 Disconnect the power cord from the MultiPASS C20 2 Open the printer cover by grasping the document guides and lifting 3 Use a clean soft dry lint free cloth to remove any ink or paper debris from the unit s interior especially around the platen Be careful not to touch the cartridge 4 Check the small black rollers If they are dirty clean them with a soft dry toothbrush 5 When finished close...

Page 212: ...he nozzle check pattern to test the BJ cartridge installed in the MultiPASS C20 This pattern shows if each print head nozzle is operating properly 1 Press FUNCTION 2 Use or to select NOZZLE CHECK 3 Press START COPY The MultiPASS C20 prints the nozzle check pattern If results are unsatisfactory clean the print head as described on the next page and then print the nozzle check pattern again If resul...

Page 213: ...t and printing speed For instructions see the MultiPASS Desktop Manager for Windows User s Guide Try this before cleaning the print head C Cleaning the print head uses a small amount of ink Cleaning too often significantly reduces the amount of ink in the cartridge so clean only when necessary 1 Make sure the MultiPASS C20 is plugged in 2 Press FUNCTION 3 Press or until CLEANING is displayed 4 Pre...

Page 214: ...ned the print head five times as described above If your colour printouts appear to be missing a colour even after you have cleaned the print head five times as described above In addition If you are using the BC 21 21e Colour BJ cartridge and your output is blank one of the ink tanks is probably empty and needs to be replaced Print the NOZZLE CHECK test pattern to check whether the BJ cartridge n...

Page 215: ...BJ cartridges the BC 21 21e Colour BJ cartridge the BX 20 Black BJ cartridge the BC 22 22e Colour Photo BJ cartridge and the BC 29F Fluorescent BJ cartridge are designed specifically for Canon s colour BJ printers and are the only ones Canon recommends Also the BCI 21 colour and BCI 21 Black ink tanks are designed specifically for the BC 21 21e Colour BJ cartridge and are the only ones Canon recom...

Page 216: ...ves to the centre of the unit 3 Open the printer cover by grasping the document guides and lifting C Do not try to move the cartridge holder manually or you may damage the MultiPASS C20 The MultiPASS C20 includes an automatic protection feature that helps keep it from overheating If the cartridge holder does not move and the unit beeps several times unplug the MultiPASS C20 and let it cool for sev...

Page 217: ...e cartridge holder by gently pulling up on it 5 Remove and dispose of the old BJ cartridge or store it in the SB 21 BJ cartridge container Chapter 7 Maintaining Your MultiPASS C20 7 9 Maintaining Your MultiPASS C20 PRINT HEAD DO NOT TOUCH THE GUIDE RAIL DO NOT TOUCH THE ROUND SHAFT DO NOT TOUCH THE RIBBON CABLE In k C artrid g e B C l 21 C o lo r M ade in Japan DO NOT TOUCH THE GUIDE RAIL DO NOT T...

Page 218: ...card the cap and tape immediately Never attempt to re attach the cap or tape to the print head or you can adversely affect the ink s colour and flow Ink Ca rtr idg e BCl 21 Ma de in Ja pa n Color Ink Ca rtr idg e BCl 21 Ma de in Ja pa n Black Ma de in Ja pa n Co lor BJ Ca rtri dg e BC 21 Ink Ca rtr idg e BCl 21 Ma de in Ja pa n Color Ink Ca rtr idg e BCl 21 Ma de in Ja pa n Black Ma de in Ja pa n ...

Page 219: ...o position C Do not manually move the mechanism that houses the BJ cartridge or you will damage the unit 10 Close the printer cover then press CARTRIDGE The MultiPASS C20 beeps twice and the cartridge holder moves to its home position on the right side of the unit In k Cartrid ge BCl 21 Color Made in Japan In k C artrid ge B C l 21 B lack M ade in Japan In k C artrid g e B C l 21 C o lo r M ade in...

Page 220: ...r 7 C Do not unplug the MultiPASS C20 unless the cartridge holder is in its home position on the right If you unplug the unit while it is printing or move the ink cartridge from the home position the cartridge will not be capped and can dry out ...

Page 221: ...ws 1 Make sure the MultiPASS C20 is plugged in 2 Press CARTRIDGE The unit beeps once then the cartridge holder moves to the centre of the unit C The MultiPASS C20 includes an automatic protection feature that helps keep it from overheating If the cartridge holder does not move and the unit beeps several times unplug the MultiPASS C20 and let it cool for several minutes When it has cooled plug it i...

Page 222: ... Dispose of the ink tank properly You may want to place it in a plastic bag to keep any residual ink from spilling In k C artrid ge B C l 21 B lack M ade in Japan In k C artrid ge B C l 21 C olor M ade in Japan DO NOT TOUCH THE GUIDE RAIL DO NOT TOUCH THE ROUND SHAFT DO NOT TOUCH THE RIBBON CABLE Ink Cartridge BCl 21 Color Made in Japan Ink Cartridge BCl 21 Black Made in Japan Color BJ Cartridge B...

Page 223: ...ng Your MultiPASS C20 7 15 Maintaining Your MultiPASS C20 6 Take the new ink tank out of its bag and remove its orange cap C Be careful not to touch the bottom of the ink tank as you may get ink on your hands DO NOT TOUCH ...

Page 224: ...t unplug the MultiPASS C20 unless the BJ cartridge is in its home position on the right If you unplug the unit while it is printing or move the cartridge from the home position the cartridge will not be capped and may dry out In k Cartrid ge BCl 21 Color Made in Japan In k C artrid ge B C l 21 B lack M ade in Japan DO NOT TOUCH THE GUIDE RAIL DO NOT TOUCH THE ROUND SHAFT DO NOT TOUCH THE RIBBON CA...

Page 225: ...ndset extension phone or answering machine if using them the telephone line and the parallel cable to the PC 6 Remove the sending document support document support for scanned documents and output tray extension See Attaching Components on page 2 17 7 Replace all tapes and shipping materials you removed when you first unpacked the MultiPASS C20 See Removing Shipping Materials on page 2 8 8 Pack th...

Page 226: ...7 18 Maintaining Your MultiPASS C20 Chapter 7 ...

Page 227: ...ecifications of the MultiPASS C20 are listed in this section General A 2 Plain Paper Fax A 4 Copier A 5 Telephone A 5 Printer A 6 Printable Area Papers A 7 Printable Area Envelopes A 8 Scanner A 10 Document Sizes A 11 PC Interface A 12 MultiPASS Desktop Manager for Windows A 12 ...

Page 228: ... 42 pages LCD displays memory used Uses direct transmission when memory is full Liquid crystal display 16 1 Display languages English French Spanish Italian Finnish German Danish Swedish Dutch Norwegian Portuguese Slovene Czech and Hungarian Power source 200 240 V 50 60 Hz Power consumption Maximum approximately 48 6 W Minimum approximately 6 4 W standby mode Dimensions 400 361 197 mm W D H main u...

Page 229: ...pecifications Environmental Temperature 10 32 5 C requirements Humidity 20 85 RH Applicable standards Electrical safety GS FIMKO Radiation CISPR Pub22 ClassB PTT Energy Star compliant Interface IEEE 1284 compatible parallel interface ...

Page 230: ...rinting Fax printing speed Approx 4 pages minute Dialling Automatic dialling One touch speed dialling 6 locations Coded speed dialling 50 locations Group dialling 55 locations Manual dialling with numeric buttons Automatic redialling including error redialling Manual redialling Pause button Networking Sequential broadcast up to 57 locations Automatic receiving Non ring reception Deactivate ECM Net...

Page 231: ...size 100 Reduction sizes 70 80 90 Copy speed Initial copy 45 seconds Subsequent copies 20 seconds Multiple copies Up to 99 copies of a document Telephone Automatic FAX TEL switchover Answering machine connection CNG detecting signal no sound Optional handset connection Extension phone connection Remote reception by extension phone Default reception ID 25 Tone button Pause button Net Switch Austral...

Page 232: ...Media types Plain paper Coated paper Canon LC 301 and HR 101 Overhead projector film Canon CF 102 Back print film Canon BF 102 High gloss film Canon HG 101 Fabric sheet Canon FS 101 Envelope European DL or Commercial No 10 Paper weight 64 90 g m2 for automatic feed 90 105 g m2 for manual feed Line feed speed Approximately 60 ms line at 1 6 in line Printing speed BC 21 21e Colour BJ Cartridge Black...

Page 233: ...argin varies depending on the printing conditions 7 mm 0 28 for monochrome printing when not using the printer driver 4 mm 0 16 when printing from memory 16 mm 0 63 for monochrome and colour printing when using the printer driver Legal size a 8 5 b 0 25 c 14 0 d 0 12 e 0 28 Letter size a 8 5 b 0 25 c 11 0 d 0 12 e 0 28 A4 size a 210 mm b 3 4 mm c 297 mm d 3 0 mm e 7 0 mm a b d c e b ...

Page 234: ... Envelopes The shaded portion in the following figure shows the printable area for envelopes Printable area U S Commercial No 10 a 9 5 b 0 25 c 1 2 d 4 1 e 0 12 f 0 27 European DL a 220 mm b 6 4 mm c 10 4 mm d 110 mm e 3 0 mm f 7 0 mm e f d a b c ...

Page 235: ...opropyl alcohol 67 63 0 glycerine 56 81 5 ethylene glycol 107 21 1 Contents colour Glycerine 56 81 5 Ink tank yield BCI 21 Colour approx 100 pages tank at 7 5 coverage for each colour BCI 21 Black approx 150 pages tank at 7 5 coverage BC 22 22e Photo BJ cartridge Print head 64 nozzles for black 24 nozzles each for cyan magenta yellow Ink colours Black cyan magenta yellow Cartridge yield Approx 50 ...

Page 236: ...pi 8 pels mm 7 7 lines mm Enhanced 300 dpi 12 pels mm 11 55 lines mm Enhanced 400 dpi 16 pels mm 15 4 lines mm Automatic document 20 A4 or letter size sheets feeder capacity 10 legal size sheets Document sizes Maximum 216 1000 mm W L Minimum 88 9 63 5 mm Effective scanning 214 mm width Compatibility TWAIN Scanning speed Text mode 23 sec page Greyscale mode 46 sec page Std mode 92 sec page Fine mod...

Page 237: ...ure below shows how much of an A4 size document the MultiPASS C20 scans when faxing or scanning A margin of up to 4 5 mm on either side of the sheet and up to 4 0 mm on the top and bottom are outside the MultiPASS C20 s scanning area A4 MAX 4 5 mm MAX 4 0 mm MAX 4 0 mm MAX 4 5 mm 216 mm 210 mm 148 mm UP TO A MAXIMUM OF 32 MINUTES FOR SENDING EACH PAGE OR 1 METRE IN LENGTH ...

Page 238: ... faster processor i486 DX or faster recommended 8 MB of RAM 16 MB recommended 25 MB of free hard disk space Windows 3 1 3 11 Windows 95 or Windows 98 Bidirectional parallel cable CD ROM Drive PC Fax Canon proprietary MultiPASS Desktop Manager for Windows Fax Telephone address book Fax Viewer Fax Log Fax distribution lists Real time MultiPASS C20 hardware status available through PC ...

Page 239: ...tion describes the optional equipment available for use with the MultiPASS C20 Optional Handset B 2 Package Contents B 2 Type A Handset B 2 Type B Handset B 3 Attaching the Handset to Your Unit B 4 Control Panel and Functions B 7 Maintaining Your Handset B 10 ...

Page 240: ...s are available in your country Package Contents Make sure you have the following items If anything is damaged or missing notify your Canon dealer immediately Type A Handset N The two screws with a plastic white head are not for use with the MultiPASS C20 You only need the two screws with plugs provided HANDSET HANDSET CRADLE SCREWS WITH PLUGS SCREWS NOT USED FOR THE MultiPASS C20 ...

Page 241: ...Options Appendix B Options B 3 Type B Handset 15 mm 14 mm Screw 1 Screw 2 Screw 3 with plug Not used Not used Use these screws and plugs HANDSET CRADLE HANDSET SCREWS 3 TYPES ...

Page 242: ... to remove the two covers on the left side of the unit 2 Remove the screws from the plugs and insert the plugs in the holes on the handset cradle Type A Type B When attaching the handset cradle to your unit be sure to insert the screws and plugs in the appropriate holes on the handset cradle HOLES FOR ATTACHING TO THE MULTIPASS C20 ...

Page 243: ...cing you and the right side is placed against a wall This will allow you to insert the plugs without the unit moving 4 Insert the screws into the plugs and push them in with your finger N If you cannot push the screws in with your finger use a phillips screwdriver to push them in Do not screw them in as the screws may break Make sure the screws are inserted all the way into the plugs ...

Page 244: ...o the input jack marked on the left side of the unit C When carrying the unit do not lift it by the handset cradle as it may break N If you need to remove the handset cradle after it is installed use a small phillips screwdriver to remove the two screws ...

Page 245: ...unless otherwise stated and these handsets also have a R E N value of 1 You can therefore use additional equipment with a total R E N value of up to 2 If the R E N value exceeds 4 the ringer volume will be reduced and one or more of the connected equipment may not function HOOK BUTTON q R BUTTON w RINGER SWITCH e TONE PULSE SWITCH y TONE BUTTON t SECRECY BUTTON e TONE PULSE SWITCH w RINGER SWITCH ...

Page 246: ... to your preference For Type A you can also select OFF e TONE PULSE Switch The handset is designed to operate on both Multi Frequency Tone and Loop Disconnect Pulse telephone lines The TONE PULSE switch enables you to switch from tone dialling to pulse dialling or vice versa Contact your service provider for further information Type A Use a pointed instrument to set this switch to P pulse dialling...

Page 247: ... and LD for Type B u PAUSE Button This button allows you to enter pauses between digits when dialling a number You may need to use the PAUSE button if your handset is connected to a PABX or when dialling long distance numbers See page 2 14 and 3 34 of this user s guide N Each time you press the PAUSE button a pause of approximately 4 seconds is inserted between the dialled digits Whether you need ...

Page 248: ...ur handset in top working condition Do not leave your handset exposed to direct sunlight Do not install your handset in hot or humid conditions Do not spray aerosol polishes on your handset as they may enter the holes on your handset and cause damage Use a damp cloth to clean your handset ...

Page 249: ...s and make telephone calls using the Address Book See Registering Application program Software prepared for a specific function or set of functions Examples include word processing programs and the MultiPASS Desktop Manager Developers who make application programs include driver s that support different types of printers ASCII Acronym for American Standard Code for Information Interchange A set of...

Page 250: ...fax is still busy or does not answer the MultiPASS C20 waits the specified time and dials again If the fax still doesn t go through the MultiPASS C20 prints an activity report B Bi directional parallel interface port An interface connection that can send and receive signals For example when you print or send a fax from your computer data goes from your computer to the MultiPASS C20 when you scan o...

Page 251: ...s after it receives data from the host computer CMYK Acronym for cyan magenta yellow and black the four colours used in the standard colour model of the printing industry Refers to a method of specifying colour using CMYK colour values K is used for black because B is used to represent blue in RGB CNG Calling Tone This is a signal sent by fax machines to identify the call as an incoming document W...

Page 252: ...s speed Cursor The underline symbol you see on the LCD display when you register numbers and names in the MultiPASS C20 Press the arrow buttons to move the cursor D dB A Stands for decibel level a decibel being a unit of measurement for the intensity of the sound coming from the unit adjusted for background noise Delayed sending The ability to send a document at a preset time in the future You do ...

Page 253: ...C20 sends a fax from memory E ECM Error Correction Mode The ability of your MultiPASS C20 to reduce system and line errors when sending or receiving from another fax with ECM capability ECM is most effective in areas where the telephone lines are in poor condition or there is frequent interference on the line Do not use ECM if you need to send a document quickly and you are sure the other party ca...

Page 254: ...ge data while reducing the amount of data that needs to be transmitted thus reducing transmission time G3 fax machines can transmit one page in less than one minute Encoding schemes for G3 fax machines are Modified Huffman MH Modified READ MR and Modified Modified READ MMR Graphic A written printed or electronically displayed symbol or drawing Also characters or text that have been generated by a ...

Page 255: ...et printer A nonimpact printer that ejects ink into paper to form characters The MultiPASS C20 has a special type of ink jet printer built in called a Bubble Jet printer Ink saver You can enable or disable economy printing ink saving feature when receiving faxes By enabling the INKSAVER mode ink consumption can be decreased by as much as fifty percent resulting in a longer effective cartridge life...

Page 256: ...rait orientation printing across the width of the page The term landscape is derived from pictures of the landscape which are usually horizontal in format Line feed A printer function that advances the paper one line Line weight The thickness of lines used in a graphic image or the stroke weight of text characters M Manual receiving A method of receiving faxes in which you answer all incoming call...

Page 257: ...for Windows software Canon s exclusive software package that allows you to use the MultiPASS C20 with your Windows software applications You must install the desktop manager to use your MultiPASS C20 as a printer scanner or PC fax N Noise A term applied to a variety of problems that impair the operation of telephone lines used for faxing Noise level See dB A Nonbleed A special mode in colour print...

Page 258: ... Paper feed Refers to guiding a sheet of paper into the printer s paper path Parallel interface An interface that transmits multiple bits simultaneously usually in one byte segments Your MultiPASS C20 has a built in Centronics type bi directional parallel interface See also Interface port Pause A timing entry required for registering certain long distance numbers and for dialling out through some ...

Page 259: ...or becoming clogged with dust Printable area The area of a sheet of paper on which a printer can reproduce text or graphics the printing area is smaller than the paper On this unit the printing area varies depending on the type of paper being used Printer driver Software that sends printing instructions to a printer in this case the MultiPASS C20 The printer driver keeps track of the attributes of...

Page 260: ...nts you want to print scanned and received documents and downloaded fonts RECEIVE MODE The button that controls how the MultiPASS C20 receives fax and telephone calls Receiving Receiving transmission is also defined as RX or Reception The MultiPASS C20 can be customised to receive fax documents in many ways Receive fax documents only Automatic Receiving Receive both telephone calls and fax documen...

Page 261: ... manually activate a fax using an extension phone that is connected to the MultiPASS C20 Remote reception Activating a fax by answering an extension telephone that is connected to the MultiPASS C20 but that is not located near the MultiPASS C20 You need to dial a remote receiving ID number to start remote reception Reports A document printed by the MultiPASS C20 and containing information about th...

Page 262: ...on dialling system you hear tones Rotary pulse dialling requires certain setting adjustments RX See Receiving S Saturation The vividness or amount of a colour See Intensity Scanning contrast A setting that darkens or lightens the scanning of documents Sender ID Information printed at the top of a fax also called TTI or Transmit Terminal ID Date and time the fax was sent Sender s fax phone number S...

Page 263: ...PASS C20 is on and ready to use All operations start from standby mode when the LCD displays the time and receiving mode Subtractive colours The three primary colours cyan yellow and magenta when combined through a subtractive process give a spectrum of colours T Timed sending See Delayed sending Tone pulse setting The ability to set the MultiPASS C20 to match the telephone dialling system your te...

Page 264: ...y between image input devices and applications by acting as the liaison between hardware devices and software applications Because your MultiPASS C20 supports TWAIN you can use the scanning features of the MultiPASS C20 with any Windows application that also supports TWAIN TWAIN the industry standard was developed by the TWAIN working group which consists of representatives from many leaders in th...

Page 265: ...24 Automatic dialling coded 3 11 3 17 to 3 21 3 22 to 3 23 group 3 11 3 28 to 3 32 one touch 3 11 3 12 to 3 16 3 22 to 3 23 speed 3 11 Index 1 TOUCH SPEED DIAL setting 2 63 2 64 3 12 A Access type registering 3 34 3 35 Accessing unit settings 2 67 to 2 69 Adding pages to document 4 7 ADF See Automatic Document Feeder Adjusting paper thickness lever 2 33 2 40 2 41 ALARM lamp 2 14 Alarm setting 2 58...

Page 266: ...le Jet Paper LC 101 2 36 BUSY NO SIGNAL message 6 30 Button arrow 2 15 CARTRIDGE 2 15 CODED DIAL 2 14 D T 2 15 3 37 FUNCTION 2 15 M 3 39 3 41 3 42 numeric 2 14 one touch speed dial 2 14 PRINTER RESET 2 15 R 2 15 3 34 3 35 RECEIVE MODE 2 13 REDIAL PAUSE 2 14 RESOLUTION 2 13 RESUME 2 15 special function 2 14 2 15 START COPY 2 14 STOP 2 14 TONE 2 15 3 38 BX 20 Black BJ cartridge 2 6 2 27 C CALLING me...

Page 267: ...description 3 11 storing 3 17 3 18 using 3 22 3 23 with sequential broadcasting 3 26 Colour printing advice 5 6 features 1 4 monitors and 5 7 problems 6 16 to 6 18 selecting paper 5 6 COMMUNICATING PLEASE WAIT message 6 31 Company setting 2 59 Components 2 6 2 11 to 2 16 attaching 2 17 to 2 19 unpacking 2 5 Confirm before Deleting setting 2 58 Connecting See Connection Connection answering machine...

Page 268: ...to 4 11 guides 2 11 in memory 3 52 3 53 loading 4 5 4 6 problem 4 3 problems with 4 8 removing from ADF 6 6 6 7 scanning 4 2 to 4 8 DOCUMENT READY message 6 32 Document support 2 6 2 11 attaching 2 18 Documentation 1 14 E ECM See Error Correction Mode ECM RX message 6 32 ECM TX message 6 32 Editing information 2 54 user information 2 56 Entering date 2 55 guidelines 2 53 letters 2 53 2 54 numbers ...

Page 269: ...19 to 6 21 FILE PRINT setting 2 63 2 66 3 53 Film Back Print Film BF 102 2 36 High Gloss Film HG 101 2 37 FS 101 See Fabric Sheets FS 101 FUNCTION button 2 15 G GROUP DIAL setting 2 63 2 64 3 28 Group dialling creating groups 3 28 to 3 31 description 3 11 using 3 32 H Handset attaching See Appendix B connecting 2 22 jack 2 12 HANG UP PHONE message 6 32 Heading setting 2 59 HG 101 See High Gloss Fi...

Page 270: ...et Paper LC 301 LCD display 2 13 messages 6 30 to 6 34 Letters editing 2 54 entering 2 53 2 54 Lifting unit 1 12 Line connecting 2 21 jack 2 12 LINE MONITOR VOL setting 2 58 2 65 2 67 Listen Time before Ringing setting 2 62 LOAD PAPER message 3 52 6 32 Loading documents 4 5 4 6 Loading print media automatic feed 2 43 to 2 46 manual feed 2 47 Location selecting 2 3 2 4 Long distance dialling 3 36 M...

Page 271: ...switching Australia 3 50 New Zealand 3 51 operation 3 50 3 51 setting 3 50 3 51 New Zealand network FAX TEL switching 3 51 NO ANSWER message 6 33 NO TEL message 6 33 NOT AVAILABLE message 6 33 Nozzle check pattern 7 4 NOZZLE CHECK setting 2 63 2 66 7 4 Number of Rings setting 2 61 Numbers editing 2 54 entering 2 53 2 54 storing for speed dialling 3 12 3 13 3 17 3 18 Numeric buttons 2 14 O Off Hook...

Page 272: ... 11 Phone Line Type setting 2 59 Phone Lock setting 2 60 Photo Kit 1 10 Plain paper See paper Plain paper fax features 1 5 PLEASE WAIT message 6 33 Port bi directional parallel 2 12 interface 2 20 Power connector 2 12 Power cord 2 6 connecting 2 23 2 24 Power cut 3 33 Print head cleaning 7 5 testing 7 5 Print media 1 9 Back Print Film BF 102 2 36 Bubble Jet Paper LC 301 2 36 Canon 2 36 2 37 envelo...

Page 273: ...Fax Options setting 2 61 RECEIVE MODE button 2 13 3 44 RECEIVED IN FILE message 6 34 Receiving ANS MACHINE MODE 3 43 3 44 3 48 answering machine 3 43 3 44 3 48 automatic switchover 3 43 3 44 3 45 3 46 automatically 3 43 3 44 3 48 FAX ONLY MODE 3 43 3 44 Fax Tel Mode 3 43 3 44 3 45 3 46 MANUAL MODE 3 43 3 44 3 47 manually 3 43 3 44 3 47 modes 3 43 problems 6 24 to 6 27 remote 3 47 setting mode 3 44...

Page 274: ...rks 3 39 to 3 42 cancelling 3 10 group dialling 3 32 manual via the handset 3 7 memory 3 8 3 9 preparing for 3 6 problems 6 22 to 6 24 several destinations 3 26 3 27 through switchboard 3 34 Sending document support 2 6 2 11 attaching 2 17 Sequential broadcasting 3 26 using 3 26 3 27 Serial number 6 3 Settings 2 57 to 2 69 accessing 2 67 to 2 69 general 2 58 list 2 57 to 2 66 other 2 63 receive se...

Page 275: ...line 2 6 connecting 2 21 jack 2 12 Temperature location 2 3 paper storage 2 42 Testing print head 7 5 unit 2 70 Thickness lever See Paper thickness lever Tone dialling on a pulse line 3 38 TONE button 2 15 using 3 38 TR 101 See T Shirt Transfers TR 101 Transmission speed 1 5 Transparencies CF 102 Transparencies 2 36 loading 2 42 2 43 Transparencies CF 102 2 36 Transporting unit 7 17 TWAIN 1 6 TX R...

Page 276: ...USER SETTINGS 2 64 User s guide 1 14 2 6 MultiPASS Desktop Manager for Windows 1 14 2 6 type conventions 1 15 using 1 14 V Ventilation 2 3 2 4 Voltage 2 3 2 23 VOLUME CONTROL setting 2 64 2 67 W Wait between Retries setting 2 59 Weight 2 3 ...

Page 277: ......

Reviews: