background image

0024W503
PUB.DIE-165

© CANON INC. 2001

PRINTED IN JAPAN

XX00A/ABXXXX

DY8-9020-100-000

IMPRIME AU JAPON

CANON INC.

Canon Europa N.V.

P.O. Box 2262, 1180 EG Amstelveen, the Netherlands

Canon UK Ltd.

Ribcon Way
Luton Bedfordshire LU4 9UR
Telephone 0870-241-2161

Canon Australia Pty. Ltd

1 Thomas Holt Drive, North Ryde, N.S.W. 2113, Australia
Telephone 805-2000, Fax 887-4484

Canon New Zealand Ltd

Fred Thomas Drive, Takapuna, P.O. Box 33-336, Auckland, New Zealand
Telephone 486-1570, Fax 486-6420

Canon Singapore Pte. Ltd

79 Anson Road #09-01/06, Singapore 079906
Telephone (65)-532-4400, Fax (65)-221-2939

Canon Hongkong Company Ltd

9/F, The Hong Kong Club Building, 3A Chater Road, Central, Hong Kong

Canon Latin America, Inc.

Sales & Enquiries: 6505 Blue Lagoon Drive Suite 325 Miami FL 33126 USA

Mini

Digital
Video
Cassette

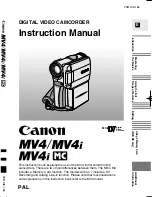
DIGITAL VIDEO CAMCORDER

Instruction Manual

E

PAL

This instruction book explains the use of the MV4, MV4i and MV4i MC 
camcorders. There are two main differences between them. The MV4i MC 
includes a Memory Card function. The models with an 'i' include a DV 
Recording and Analog Line-in function. Please note that most illustrations 
and explanations in this instruction book refer to the MV4 model.

Introduction

Mastering 

the Basics

Using the Full 

Range of Features

Editing

Using a Memory Card

(MV4i MC only) 

Additional

Information

PUB.DIE-165

PUB.DIE-165

Printed on 100% reused paper.

#0_MV4/MV4MC-i_E_cover  01/7/31 9:45  Page 1 (1,1)

Summary of Contents for MV MV4

Page 1: ...s between them The MV4i MC includes a Memory Card function The models with an i include a DV Recording and Analog Line in function Please note that most illustrations and explanations in this instruction book refer to the MV4 model Introduction Mastering the Basics Using the Full Range of Features Editing Using a Memory Card MV4i MC only Additional Information PUB DIE 165 PUB DIE 165 ...

Page 2: ...ith the letter N or coloured black The wire which is coloured BROWN must be connected to the terminal which is marked with the letter L or coloured red Neither Blue wire or Brown wire is to be connected to the Earth pin of a 3 pin plug THE SEVERED PLUG MUST BE DESTROYED IMMEDIATELY TO AVOID ANY POSSIBLE ELECTRIC SHOCK HAZARD Mains Lead BLUE NEUTRAL BROWN LIVE WARNING TO REDUCE THE RISK OF ELECTRIC...

Page 3: ...iting to a VCR 80 Dubbing with Digital Video Equipment 81 Recording from a VCR TV or Analog Camcorder Analog Line in MV4i and MV4i MC only 84 Recording Over Existing Scenes A V Insert Editing MV4i and MV4i MC only 86 Audio Dubbing 89 Setting the Audio Mix 95 Connecting to a PC 97 Memory Card Introduction 98 Recording Still Images to a Memory Card 103 Recording an Image from a Cassette as a Still I...

Page 4: ...ding enjoyment Getting started To get started we suggest that you master the basic operations of the camcorder first before moving on to use its full range of features For quick reference in addition to the contents and index please refer to Finding Your Way Around the Camera 6 Screen displays 142 Troubleshooting in case you run into any problems 134 Menu at a Glance 154 Symbols used in this instr...

Page 5: ...clear still pictures Choose your favourite scenes from videos taken using progressive scan and display them as blur free still pictures too Progressive Scan CCD Advanced digital technology allows you to add special effects during recording or playback Display 4 9 or 16 still images at once with the multi image screen Digital Effects IEEE 1394 DV Terminal Memory Card MV4i MC only Record manage and ...

Page 6: ...terminal p 30 84 86 DV OUT terminal p 81 MV4i and MV4i MC DV IN OUT terminal p 82 86 106 Power source attachment unit p 9 LCD screen p 20 Play Pause button p 23 MIX SLIDE SHOW button MV4i MC only p 108 REC record SEARCH button p 52 fast forward button p 23 CARD button MV4i MC only p 107 Record review button p 52 REC record SEARCH button p 52 rewind button p 23 CARD button MV4i MC only p 107 stop b...

Page 7: ...lector p 53 Stereo microphone p 89 92 POWER dial lock lever p 18 POWER dial p 14 35 OFF POWER PLAY P S C A N MOVIE MV4 Speaker p 26 Finder release button p 131 Viewfinder focusing lever p 126 Grip belt p 126 Cassette compartment p 12 Cassette compartment cover p 12 Zoom control p 19 PHOTO button p 50 103 SELECT dial p 26 36 OFF POWER VCR P S C A N MOVIE MV4i OFF POWER VCR P S C A N MOVIE C A R D R...

Page 8: ...n p 15 MENU button p 36 TV SCREEN button p 142 SELF TIMER button p 67 DATA CODE button p 75 REC PAUSE button p 82 84 MV4i and MV4i MC only ZERO SET MEMORY button p 79 CARD buttons p 107 MV4i MC only Transmitter Zoom buttons p 19 SET button p 36 D EFFECTS ON OFF button p 61 MIX BALANCE buttons p 95 Controller buttons p 36 Search buttons p 78 SEARCH SELECT button p 78 AUDIO MONITOR button p 95 AUDIO...

Page 9: ... the camera to a mains outlet 1 2 4 3 Use the power adapter to provide your camera with instant power from a mains outlet Always turn the camera off before connecting removing the power source 1 Insert the DC coupler s terminals into the camera and press the other end until it clicks into place 2 Connect the power cable to the adapter 3 Plug the power cable into a mains outlet 4 Connect the DC cou...

Page 10: ...coupler is not connected Insert the battery s terminals into the adapter and press the other end until it clicks into place The charge indicator flashes red to show that charging is in progress Single flashes mean that the battery pack is less than 50 charged Double flashes mean that it is between 50 and 75 charged Triple flashes mean that it is more than 75 charged The indicator glows steadily wh...

Page 11: ... in the Notes on Using the Batteries 127 These notes include charging and recording times and how to install the backup battery Specifications Power supply 100 240 V AC 50 60 Hz Power consumption 33 W Rated output Adapter mode 7 2 V 2 0 A DC Charger mode 8 4 V 1 0 1 4 2 3 A DC Operating temperature range 0 C 40 C 32 F 104 F Dimensions 75 99 51 mm 3 3 7 8 2 in Weight 210 g 7 3 8 oz without power ca...

Page 12: ...e compartment until it clicks and wait for it to close 5 Click the cover back into place D is a trade mark After loading a cassette use record search 52 to find the point where you want to start recording Do not interfere with the cassette compartment while it is opening or closing automatically or attempt to close the cover Be careful not to get your fingers caught in the cassette compartment cov...

Page 13: ...losed SAVE REC SAVE REC Cassette memory You are unable to use the cassette memory function with this camcorder To protect the tape heads transfer cassettes directly from the tape case to the camcorder do not open the tape protect cover or touch the tape itself Do not use cassettes where the tape has been damaged or spliced they may damage the camcorder Do not insert anything into the small holes o...

Page 14: ...e and time display 46 3 1 4 5 P OFF POWER P L A Y P SCAN MOVIE Before you start recording To record 1 Press the button next to the POWER dial and hold turn the POWER dial to MOVIE The camera automatically sets to record pause mode PAUSE appears in the display The camera power indicator lights up red The confirmation beep sounds The camera will turn itself off if you leave it in record pause mode f...

Page 15: ...pped Replace the lens cap Return the viewfinder to its retracted position Return the LCD screen flush to the camera body Unload the cassette Turn the POWER dial to OFF Disconnect the power source To check that the camera is recording correctly make a test recording first Before making important recordings clean the video heads using a Canon DVM CL Digital Video Head Cleaning Cassette or a commerci...

Page 16: ...d in LP mode on other digital equipment may produce the mosaic like noise and the sound may become distorted when playing back on this camcorder A tape recorded in LP or LP mode on this camcorder may produce the mosaic like noise and the sound may become distorted when playing back on other digital equipment MOVIE P SCAN VCR CARD PLAY Standard recording Extended recording SP LP SP LP 1 5 SP 2 SP 3...

Page 17: ...reen the image will appear to be vertically squashed compressed 16 9 OFF CAM SET UP 34 MOVIE P SCAN About SP and LP modes The image quality of recordings done in SP or LP modes will be lower than that of those done in SP or LP modes A cassette recorded in SP or LP mode cannot be played back on a camcorder not equipped with that mode The recording mode might not appear in the display correctly if y...

Page 18: ...ps About the POWER dial lock lever The POWER dial lock lever has been preset to the 2 position Switch it to the 22 position when you want to use the P SCAN 49 and CARD REC MV4i MC only 103 modes We recommend that you return the lock lever to the 2 position when you finish recording MV4 2 PLAY OFF MOVIE 22 PLAY OFF MOVIE P SCAN MV4i 2 VCR OFF MOVIE 22 VCR OFF MOVIE P SCAN MV4i MC 2 CARD PLAY VCR OF...

Page 19: ...ming Move the control slightly to zoom slowly Move it farther to zoom more quickly The farther you move the zoom control the faster the zoom speed The T and W buttons on the wireless controller adjust the picture angle but not the zoom speed 10 optical zoom T W Zoom out Zoom in To turn the digital zoom off open the menu and select CAM SET UP Then select D ZOOM set it to OFF and close the menu When...

Page 20: ...n also you can rotate the LCD screen so that faces in the direction of the lens 22 Changing the angle of the LCD screen You can also push the panel flat against the camera until it is flush with the side with the screen facing outwards 90 90 180 Avoid touching the LCD screen when moving the LCD panel Do not hold the camera by the LCD panel the viewfinder or the battery pack Make sure you open the ...

Page 21: ...ect BRIGHTNESS adjust the level with the SELECT dial and close the menu A bar showing the level appears in the display for 4 seconds Turn the SELECT dial up to make the display brighter Turn the SELECT dial down to make the display darker The camera will remember your brightness setting even after you turn it off The brightness of the LCD does not affect that of the recorded images or the viewfind...

Page 22: ...lens you can watch yourself during recording or let your subject monitor recording The viewfinder is also activated when the panel is in this position Extend the viewfinder You can choose the display style reversed mirror on or not mirror off The recording itself is unaffected regardless of which one you choose MIRROR ON DISP SET UP 34 To turn the mirror mode off open the menu and select DISP SET ...

Page 23: ...that you slide the tab on the cassette so that it exposes the hole the switch position is usually labelled SAVE or ERASE OFF 1 Attach a power source and turn the POWER dial to PLAY MV4i and MV4i MC VCR The power indicator lights up green 2 Load the cassette 3 Press the e e play button to start playback To end playback press the 3 3 stop button To wind the tape forwards stop playback and press the ...

Page 24: ...ast forward playback To play back the recording at about 11 5 times normal speed press and hold the 1 1 fast forward button during normal playback or press and hold the 1 1 fast forward button during normal fast forward Rewind playback For reverse playback at about 11 5 times normal speed press and hold the rewind button during normal playback or press and hold the rewind button during normal rewi...

Page 25: ...about 1 5 normal speed press the 4a button and then the SLOW M button during normal playback Press the PLAY e button to return to normal playback The camcorder automatically returns to 1 reverse playback after about 30 seconds of slow playback in SP or LP recording mode Reverse Playback To play back in reverse at normal speed press the 4a button during normal forward playback Press the PLAY e butt...

Page 26: ...or camera mode The volume level is the same regardless of mode Use the DU 300 Docking Unit to connect the headphones p 65 The levels you adjust for the built in speaker and headphones are memorized separately The camera remembers your levels even if you turn the camera off and back on again The speaker turns off when the camera is set to any mode other than PLAY MV4i and MV4i MC VCR or when you us...

Page 27: ...the camera is switched off 2 Align the terminals of the docking unit and the camera 3 Push the docking unit onto the camera and turn the locking screw clockwise to fix it securely onto the base To remove turn the locking screw anticlockwise and pull the docking unit from the base of the camera LOCKING SCREW TIGHTEN LOOSEN Attach the enclosed ferrite core before you connect the STV 250N Stereo Vide...

Page 28: ...f your TV or VCR has a SCART terminal without S S1 video AUDIO L MONO AUDIO R VIDEO Connect the PC A10 SCART adapter to the TV or VCR s SCART terminal Connect the camera to the adapter Connect the camera using the STV 250N Stereo Video Cable Connect the white plug to the white audio terminal L left Connect the red plug to the red audio terminal R right Connect the yellow plug to the yellow video t...

Page 29: ...nect the red plug to the red AUDIO terminal R right Do not connect the yellow plug If you are connecting the camera to a TV set the TV VIDEO selector on the television to VIDEO If you are connecting the camera to a VCR set the input selector on the VCR to LINE If your TV or VCR has an S S1 video input terminal For higher picture quality we recommend playing back recordings on a TV with an S S1 ter...

Page 30: ...roduced If your TV or VCR has audio video input terminals Connect the camera using the STV 250N Stereo Video Cable Connect the white plug to the white audio terminal L left Connect the red plug to the red audio terminal R right Connect the yellow plug to the yellow video terminal VIDEO If you are connecting the camera to a TV set the TV VIDEO selector on the television to VIDEO If you are connecti...

Page 31: ...ut taking your eye off the action When holding the camera be sure to avoid touching the lens and the microphone To prevent any unwanted movement you can mount the camera on a tripod or any flat surface at a suitable height and operate it with the wireless controller When you are using a tripod be careful not to leave the viewfinder exposed to bright sunlight or it may melt The light is concentrate...

Page 32: ...ure angle should have a definite purpose Avoid unnecessary or half hearted movements Use pans to record a landscape or follow a moving subject Decide the area you want to cover and stand facing the end of your panning angle Without moving your feet turn your waist to the starting position Start recording and after a few seconds begin to turn slowly from the waist Hold the final image for a few sec...

Page 33: ...e menu and select CAM SET UP Then select IMAGE S set it to OFF and close the menu The i mark disappears from the display when the stabilizer is off The image stabilizer cannot be turned off when the program selector is set to the Easy Recording position The image stabilizer is designed to deal with a normal degree of camera shake Keep the image stabilizer turned off when the camera is mounted on a...

Page 34: ...CAM MENU 2 C REC MENU MV4i MC only CARD R E C P SCAN MOVIE CAM MENU SEL SETSET MENUCLOSE D EFFECTS CARD MIX CAM SET UP VCR SET UP DISP SET UP SYSTEM RETURN 2 PLAY MENU MV4i and MV4i MC VCR 2 C PLAY MENU MV4i MC only CARD PLAY VCR PLAY PLAY MENU SEL SETSET MENUCLOSE D EFFECTS VCR SET UP CARD SET UP CARD OPER DISP SET UP SYSTEM RETURN C REC MENU SEL SETSET MENUCLOSE D EFFECTS CAM SET UP CARD SET UP ...

Page 35: ...s are used throughout this manual to show the setting for the POWER dial OFF POWER VCR P S C A N MOVIE P SCAN VCR MOVIE OFF POWER VCR P S C A N MOVIE C A R D R E C C A R D P L A Y P SCAN CARD R E C CARD PLAY VCR MOVIE OFF POWER PLAY P S C A N MOVIE P SCAN MOVIE PLAY MV4 MV4i MV4i MC ...

Page 36: ... the submenu 9 Turn the SELECT dial and move the arrow to b b RETURN 10 Press the SELECT dial in to select You return to the main menu 11 Press the MENU button The main menu disappears Pressing the MENU button at any time closes the menu Selecting b RETURN takes you back one menu or closes the main menu Available menu items appear in yellow Items that are unavailable due to the tape or card situat...

Page 37: ...NU P SCAN MOVIE q To digital effects submenu w To card mix submenu MV4i MC only e To camera set up submenu r To VCR set up submenu t To display set up submenu y To system menu u Close main menu q Digital effects submenu q Digital effects select 61 w Fader 61 e Effect 62 r Multi image screen speed 63 t Multi image screen split 63 y Return w Card mix submenu MV4i MC only u Mix type 118 i Mix level 1...

Page 38: ...controller 44 5 Tally lamp 45 6 Beep 18 7 Time zone Daylight saving time 46 8 Date time set 48 9 Return SYSTEM SEL SETSET MENUCLOSE WL REMOTE 1 TALLY LAMP ON BEEP ON T ZONE DST D TIME SET RETURN 4 6 8 9 5 7 2 PLAY MV4i and MV4i MC VCR MENU Appears when the POWER dial is set to for the MV4i and MV4i MC There are 6 submenus VCR PLAY PLAY MENU SEL SETSET MENUCLOSE D EFFECTS VCR SET UP CARD SET UP CAR...

Page 39: ... r y e t VCR SET UP SEL SETSET MENUCLOSE OUTPUT CH L R WIND SCREEN ON RETURN u o i q Digital effects submenu q Digital effects select 61 w Fader 61 e Effect 62 r Multi image screen speed 63 t Multi image screen split 63 y Return w VCR set up submenu u Output channel 96 i Wind screen 66 o Return e Card set up submenu MV4i MC only 0 Image quality 99 1 File numbers 101 2 Return r Card operations subm...

Page 40: ... set up submenu r To display set up menu t To system menu y Close main menu q Digital effects submenu q Digital effects select 61 w Effect 62 e Multi image screen speed 63 r Multi image screen split 63 t Return w Camera set up submenu y Shutter speed 70 u Digital zoom 19 i Image stabilizer 33 o White balance 73 0 Return e Card set up submenu 1 Image quality 99 2 File numbers 101 3 Shutter sound 10...

Page 41: ...142 8 Date time display 48 9 Return t System submenu 0 Wireless controller 44 1 Beep 18 2 Time zone Daylight saving time 46 3 Date time set 48 4 Return SYSTEM SEL SETSET MENUCLOSE WL REMOTE 1 BEEP ON T ZONE DST PARIS D TIME SET RETURN 0 2 4 1 3 q To card operations submenu w To VCR set up submenu e To display set up submenu r To system submenu t Close main menu q 1 Card operations submenu when pla...

Page 42: ... Brightness 21 2 Displays 142 3 Date time select 75 4 Return r System submenu 5 Wireless controller 44 6 Tally lamp 45 7 Beep 18 8 Return DISP SET UP SEL SETSET MENUCLOSE BRIGHTNESS DISPLAYS ON D TIME SEL DATE TIME RETURN 1 3 2 4 VCR SET UP SEL SETSET MENUCLOSE REC MODE SP RETURN o 0 CARD OPER SEL SETSET MENUCLOSE PROTECT PRINT MARK RETURN y i u SYSTEM SEL SETSET MENUCLOSE WL REMOTE 1 TALLY LAMP O...

Page 43: ...79 Audio mix 95 A V insert 86 MV4i and MV4i MC only Audio dubbing 89 Insert two AA batteries following the and markings Be careful not to reverse the polarity of the batteries Inserting batteries When using the wireless controller in brightly lit places or outdoors the effective range will be less The camera may have difficulty picking up the remote control signals at extremely close range Do not ...

Page 44: ...ct SYSTEM Then select WL REMOTE set it to A 1 or A 2 and close the menu The selected mode will appear on the display for 4 seconds on the wireless controller Press and hold the REMOTE SET button on the wireless controller Simultaneously press the ZOOM W button for mode 1 or the ZOOM T button for mode 2 Continue to press simultaneously for over 2 seconds Be sure to set the wireless controller to th...

Page 45: ... set to also appears for 4 seconds when you turn the power on Turning off the tally lamp The tally lamp lets you know that the camera is recording receiving signals from the wireless controller or counting down for the self timer However its flashing may be reflected into the lens during close up recording or when recording through glass You may therefore decide to turn it off To turn the tally la...

Page 46: ... time zone daylight saving time 1 Open the menu and select SYSTEM 2 Select T ZONE DST The time zone display appears on the screen Your camcorder s time zone is factory preset to Paris If you are at another time zone select your time zone first and daylight saving time DST setting if necessary 3 Move up or down the list of time zones with the SELECT dial Select the option that represents your time ...

Page 47: ...Time zone No After you have selected your time zone and set the date and time when you travel to another time zone there is no need to reset the date and time Just set the time zone to your destination and the camera s clock will automatically change to display the correct time for your destination The camera automatically accounts for the number of days in a month and leap year 1 24 1 2 3 4 5 6 7...

Page 48: ...you leave the menu and the clock starts If you press the SELECT dial in after setting the minutes you can set the date and time again from the start Setting the clock D TIME SET 1 JAN 2001 12 00 AM SYSTEM 34 Date and time display You can choose to display or hide the date and time display during recording When the date and time display is set to ON the date and time show in the lower left hand cor...

Page 49: ...IE than P SCAN The camera will turn itself off if you leave it in record pause mode for more than about 5 minutes To return to record pause mode set the POWER dial to OFF and then back to P SCAN In Progressive Scan Mode the MV4 MV4i MV4i MC records 25 full frame images per second continuously for superior quality frames Use Progressive Scan Mode for fast moving scenes and moments that are hard to ...

Page 50: ... a still picture at any time during regular video recording or you can put the camcorder into record pause mode first then take a still picture Press the PHOTO button fully down and the still picture will be taken immediately The camcorder takes the image immediately and then records the photo to the tape for approximately 6 seconds 8 seconds in SP or LP recording mode During this time the camcord...

Page 51: ...ll picture The camera takes the image immediately and then records the photo to the tape for approximately 6 seconds During this time the camera also records the sound and the display shows the still picture A counter display appears and counts up as the camcorder records the picture F disappears from the display The camera returns to record pause mode The camcorder automatically returns to record...

Page 52: ...ode Noise may appear on the screen when you play the tape backwards REC SEARCH When the camera is in record pause mode you can use record search to play the tape forwards or backwards to find the point where you want to start or resume recording This is useful when you want to add a new scene to a previously used cassette By using record search you can ensure a smooth noise free join between the n...

Page 53: ... For normal shooting conditions slide the program selector to Q program AE mode Open the program menu and select AUTO 54 For various other recording conditions the camera has 5 more specialised AE auto exposure programs Availability of functions in each recording program P MV4i MC only h Available i Not available A Automatic function only Position of program selector Recording Easy Sand Low Progra...

Page 54: ... recording program appears constantly on the left of the display with the exception of Auto which is displayed and then disappears after 4 seconds Avoid changing programs during recording as the brightness of the image may change suddenly If you switch the camera from the program to the Q program the camera returns to the Auto mode When recording in dark places a bright light in the scene may caus...

Page 55: ...ich can be analysed frame by frame during slow or paused playback Auto This is the same as the Easy Recording program except that you now have the option of using any of the camera s manual functions Portrait Use this program outdoors to make subjects stand out from a softened foreground and background It works well for still lifes and close ups The effect is most noticeable when the zoom position...

Page 56: ...re is automatically adjusted for glare free recordings of subjects lit by a concentrated light source Low Light This program allows you to record in dimly lit places It is generally best used for close ups of slow or stationary subjects as moving subjects may leave a trailing after image However you can take advantage of this to create special effects by rapid zooming or by panning along with a mo...

Page 57: ...from black 59 Fade Trigger Wipe Scroll Mosaic Fade Effects Add flavor to your recordings 60 Art Black and White Sepia Mosaic Multi image Screen Divides the display to show 4 9 or 16 still photos Has 4 transition speed options fast moderate slow and manual 63 Available in PLAY MV4i and MV4i MC VCR mode only h Available i Not available Availability of digital effects by mode MV4i MC only Faders h MO...

Page 58: ... during PLAY MV4i and MV4i MC VCR mode are not recorded onto the original tape Digital effects can be added to another tape when dubbing using the A V out terminal PLAY MV4i and MV4i MC VCR mode but not the DV out terminal You cannot operate digital effects while photo date searching If you slide the program selector to Easy Recording while the digital effect display is flashing it will disappear ...

Page 59: ...he scene gradually fades in from a black screen When you stop recording it gradually fades out Mosaic Fade M FADE Blurs the image by enlarging the size of some pixels The image appears as increasingly large squares of colour as it fades out and smaller squares when it fades in Faders Scroll SCROLL When you start recording the picture appears from the right hand side of the screen and expands sidew...

Page 60: ...nd White BLK WHT Makes the image black and white Adds a paint like effect called solarization to the image Art ART Sepia SEPIA Mosaic MOSAIC Makes a monochrome image with a brownish tint Blurs the image by enlarging the size of some pixels Effects ...

Page 61: ...ctor is set to Q 1 Open the menu and select D EFFECTS 2 Select D E SELECT 3 Select FADER You return to the D EFFECTS submenu 4 Select FADER again the name of the previously selected fader also appears FADE T WIPE SCROLL M FADE settings appear 5 Select the desired setting The menu returns to the submenu 6 Close the menu The name of your selected fader flashes in the display 7 Press the D EFFECTS ON...

Page 62: ... Close the menu The menu disappears and the name of your selected setting flashes in the display 7 If you re in PLAY MV4i and MV4i MC VCR mode press the e play button 8 Press the D EFFECTS ON OFF button The name of your selection stops flashing and takes effect on the display Each time you press the ON OFF button the chosen effect is activated or deactivated Effect on off Select effect 8 If you re...

Page 63: ...S You return to the D EFFECTS submenu 4 Select M S SPEED MANUAL FAST MODERATE and SLOW settings appear 5 Select the desired setting 6 Select M S SPLIT 4 9 16 settings appear Select multi image screen Divides your display image into 4 9 or 16 smaller images with the Image Capture feature With this feature the camera captures the current scene being shot or replayed Choose the transition speed manua...

Page 64: ...eed 10 If you re in MOVIE or P SCAN push the start stop button to begin recording The multi image screen is recorded to the tape MV4i MC If you re in CARD REC mode press the PHOTO button to record the multi image screen to the memory card You cannot use the multi image screen with digital zoom or the 16 9 mode You can operate the multi image screen from record or record pause mode After all the im...

Page 65: ... and headphones Selecting the audio mode MV4 MV4i MV4i MC can record sound in two audio modes 16 bit and 12 bit The 16 bit mode produces the higher sound quality slightly superior to CD while the 12 bit mode records on 2 channels stereo 1 leaving 2 channels free stereo 2 for you to add new sound at a later date AUDIO MODE 12bit VCR SET UP 34 MOVIE P SCAN For greater creative control over audio rec...

Page 66: ...of a tape As a rule use the wind screen when recording outdoors Make sure it s off when recording indoors where there is no wind to affect your recording WIND SCREEN ON VCR SET UP 34 MOVIE P SCAN PLAY VCR 1 Attach the microphone to the adapter bracket Extend the adapter bracket open until it locks 2 Attach the adapter bracket to the docking unit 3 Connect the microphone You can monitor the sound w...

Page 67: ...mera starts to record after a 10 second countdown period or after 2 seconds when you use the wireless controller The time remaining counts down in the display e g 5 SEC SELF T disappears from the display when recording begins The tally lamp starts flashing 3 Press the start stop button to end recording For movies START STOP PHOTO MENU SELF TIMER LINE IN REC PAUSE PHOTO This is useful when you want...

Page 68: ...r approximately 6 seconds 8 seconds in SP or LP recording mode If you re in MOVIE or P SCAN mode the camcorder returns to record pause mode after recording to a tape MV4i MC only If you re in CARD REC mode the currently recording image appears after recording to a memory card If you have the beep turned on it sounds each time the tally lamp flashes before recording To cancel the self timer before ...

Page 69: ...When you are recording in situations where the lighting may change suddenly you can lock the exposure at the current level in order to control the brightness of the image EXP When the exposure is locked you can adjust it manually making the picture brighter or darker in order to deal with difficult lighting conditions The camera s iris can be manually set to any position from fully closed to fully...

Page 70: ...34 Set the shutter speed manually to take stable shots of quickly moving subjects You cannot adjust the exposure without the e mark before E LOCK in the display Push the EXP button so that e appears before E LOCK Then you can adjust the exposure manually The standard exposure level depends on which recording program you have selected Exposure lock is cancelled if you change recording programs You ...

Page 71: ...ds when shooting People doing outdoor sports such as golf or tennis Moving cars or trains or other rapidly moving vehicles such as roller coasters People doing indoor sports such as basketball 1 1000 1 500 or 1 250 1 120 You are unable to set the shutter speed when exposure lock is set in any recording program other than AUTO The image may not appear smooth when a high shutter speed is set 1 2000 ...

Page 72: ... autofocus Press the FOCUS button to turn off autofocus The focus remains locked at the point set by autofocus eM FOCUS appears in the display You can now adjust the focus manually with the SELECT dial Press the FOCUS button again when you want to return to autofocus If you zoom in on your subject after turning off autofocus it may not stay in focus It is generally best to adjust the zoom first an...

Page 73: ...ve finished setting the white balance The W display flashes then remains lit Depending on the light source the flashing may at times continue The result will remain better than with the auto setting and you can continue recording 5 Close the menu The camera s auto white balance system compensates for a wide range of lighting conditions Although slight variations are unavoidable colours will appear...

Page 74: ... and lighting conditions change reset the white balance Try to record with light from a single source Correct white balance cannot be obtained for two types of lighting at once You cannot set the white balance or choose the indoor outdoor mode when the program selector is set to the Easy Recording program The white balance returns to the AUTO setting when you slide the program selector to Easy Rec...

Page 75: ...he data code contains the date and time the recording was made Cassette data codes can also display camera data shutter speed and exposure settings MV4i MC only Only the date and time appear in the data code when using a memory card Displaying Date Time and Camera Data Data Code DATA CODE MENU FOCUS DATA CODE To change the date and time combination open the menu and select DISP SET UP Then select ...

Page 76: ...the following situations During playback of a blank section of tape If the tape was recorded before entering the date and time in the camera s memory If the tape was recorded on a camera without a data code function If noise or tape damage prevents the data code from being read If a recording made on MV4 MV4i MV4i MC is played back on a different DV camcorder the data code may not be displayed cor...

Page 77: ...when you start playback and have the data code turned off The 6 second auto date will adjust for any time zone changes you have indicated To turn the 6 second auto date on open the menu and select DISP SET UP Then select 6SEC DATE set it to ON and close the menu When 6SEC DATE is turned on but DISPLAYS 142 is turned off the six second auto date will still appear for 6 seconds 6SEC DATE OFF DISP SE...

Page 78: ...mes e g press the button 5 times to move forward 5 still pictures or days PHOTO SEARCH DATE SEARCH appears in the middle of the display alongside the or mark and number to search through Press 3 stop to stop mid search If you begin a search very close to the start of a recorded still picture during photo search the camera may skip straight past it When you have set the area for the World Clock dat...

Page 79: ...sition RTN1 or RTN appears in the display The tape counter with  indication disappears from the display and the time code reappears The zero set memory may not function correctly where there is a break between recordings on the tape You can also use zero set memory to mark a position on a tape in camera mode When you then play back the tape pressing rewind will take you back to the pre marked pos...

Page 80: ... different shots to create your own video productions 1 Connect the camera to the VCR See Connections for Playback on a TV Screen on p 27 2 Prepare the TV and VCR Turn on the TV and set the TV VIDEO selector to VIDEO Turn on the VCR and set its input selector to LINE Load a blank cassette and put the VCR in record pause mode See your TV and VCR instruction manuals for details 3 Turn the camera s P...

Page 81: ...ther device in record pause mode See its instruction manual for details 3 Turn the camera s POWER dial to PLAY and load a recorded cassette Preparations 1 Find a point on your recorded cassette slightly before the section you want to dub 2 Press the camera s play button Playback starts 3 Start recording on the other device as the section you want to copy appears on the screen 4 When you get to the...

Page 82: ...e can handle data in both directions If a digital VCR is connected and an anomalous signal is sent from the VCR the images recorded on the tape may also be anomalous although it may not appear so on the TV image or not recorded at all You are unable to dub tapes recorded with the copyright protective signal Side with arrow Side with arrow Signal flow 1 Connect the camera and the other digital devi...

Page 83: ...e section you want to copy and set it to playback pause mode 2 Press the camera s REC PAUSE button The camera enters record pause mode 3 Start playback on the other digital device while you monitor the picture 4 Press the pause button Recording starts 5 When you get to the point where you want to stop recording press the stop button or the pause button Recording stops 6 Stop playback on the other ...

Page 84: ...s S 150 S video Cable STV 250N Stereo Video Cable Signal flow Attach the DU 300 Docking Unit in order to use the S video terminal 27 Recording from a VCR TV or Analog Camcorder Analog Line in MV4i and MV4i MC only You can record a video played on your VCR or analog camcorder for digital camcorders see p 82 or a TV program onto a tape in the MV4i MV4i MC if the TV or other device has audio video ou...

Page 85: ...ut terminals The camcorder enters record pause mode 3 Start playback on the other device or turn on the TV to see the desired program while you monitor the picture 4 Press the pause button Recording starts 5 When you get to the point where you want to stop recording press the stop button or the pause button Recording stops 6 Stop playback on the other device You can monitor the picture in the view...

Page 86: ...LAY FF SEARCH SELECT ZERO SET MEMORY AUDIO DUB STOP A V INSERT PAUSE SLOW 2 REMOTE Scene to be inserted Insert start point Insert end point The video and audio of the new scene replace that of the old The playback tape Before inserting After inserting The tape in the camera The tape in the camera Side with arrow Side with arrow Signal flow S VIDEO S S1 VIDEO OUTPUT AUDIO L R STV 250N Stereo Video ...

Page 87: ...d load a recorded cassette See TV and VCR instruction manuals for details 3 Turn the MV4i MV4i MC s POWER dial to VCR and load a recorded cassette Make sure the REC SAVE tab on the cassette has been slid to REC closed position 1 On the VCR locate a point 3 seconds before the scene to be inserted Set the VCR to playback pause mode 2 On the MV4i MV4i MC press PLAY and locate the recording start poin...

Page 88: ...STOP button of the MV4i MV4i MC Inserting stops and A V INSERT disappears from the display The camera returns to stop mode If instead of pressing STOP you press PAUSE the camera returns to the A V insert pause mode If you set the zero set memory at the position on the tape where you want to stop inserting every time you return to that point the camera will cancel its A V inserting and enter stop m...

Page 89: ...he original sound will not be erased For best results add sound to tapes that have been recorded with this camcorder in SP mode with 12 bit sound If there are non recorded portions on the tape or portions recorded in a mode other than SP mode or with 16 bit or 12 bit 4 channel sound dubbing will stop You cannot dub audio onto a tape recorded with 12 bit and 16 bit sound intermingled To connect an ...

Page 90: ... display 3 Press the PAUSE button Audio dubbing starts Direct your voice into the microphone changes to 4 When you get to the point where you want to stop dubbing press the STOP button Audio dubbing stops and AUDIO DUB disappears from the display The camera returns to stop mode You can also set zero set memory 79 at the place you want to stop audio dubbing then every time you return to that positi...

Page 91: ... to adjust the audio mix 95 when playing back a tape with added sound There may be a loss of sound quality if you add sound to a tape recorded on a camcorder other than the MV4 After adding sound 3 or more times to the same place on a tape there may be some loss in sound quality ...

Page 92: ... bit sound we recommend dubbing your original tape onto a blank tape using the MV4i MV4i MC s analog line in function then dubbing audio onto the new tape Make absolutely sure to set the audio mode of the new tape to 12 bit and the recording mode to SP To connect other audio equipment Do not use the yellow video terminal The A V terminal doesn t put out any video so connect the S video terminals a...

Page 93: ... When you add sound using the built in microphone make sure not to connect any cables to the MIC terminal on the DU 300 To use your TV to monitor video connect the S video terminal 29 or the A V terminal use only the video plug to your TV You can monitor the sound with headphones 65 1 Open the menu and select VCR SET UP 2 Select AUDIO DUB 3 Select AUDIO IN or MIC IN and close the menu REW PLAY FF ...

Page 94: ...g press the STOP button and then stop play on the other audio device if AUDIO IN Audio dubbing stops and AUDIO DUB disappears from the display The camera returns to stop mode You can also set zero set memory 79 at the place you want to stop audio dubbing then every time you return to that position audio dubbing will cancel If instead of pressing STOP you press PAUSE the camera will return to the p...

Page 95: ... Press AUDIO MONITOR on the wireless controller Starting with the last selected setting 4 settings appear as you push the button STEREO1 for just stereo 1 STEREO2 for just stereo 2 MIX FIXED for an equal mix of stereo 1 and 2 MIX VARI mix variable for when you want to mix the balance between stereo 1 and 2 To simply choose STEREO1 STEREO2 or MIX FIXED make sure your choice appears on the display I...

Page 96: ...2 Open the menu and select VCR SET UP Then select OUTPUT CH set it to the desired setting and close the menu Refer to the following list Selecting audio output channels Tape recorded on multiple channels main sub main only sub only OUTPUT CH setting L R L L R R Played back sound Tape recorded with stereo sound L R channels L channel only R channel only OUTPUT CH L R VCR SET UP 34 PLAY VCR ...

Page 97: ...e connected it is recommended that you power your camcorder from a household power socket using the power adapter Turn off the power of both the camcorder and the PC before connecting Optional software necessary Operation may not work correctly depending on the software you are using and the specifications of your PC and its settings See your PC instruction manual for details Connecting to a PC CV...

Page 98: ...emory card such as the various recording programs 53 self timer 67 shutter speed 70 white balance 73 and other manual adjustments Available functions are marked with a or icon 2 While the camcorder is recording the still image appears red in the display While appears red in the display do not remove the memory card or disconnect the power source Doing so could result in data damage 2 While the cam...

Page 99: ...not attempt to pull the memory card out without first pushing it in When you set the POWER dial to CARD PLAY the last image recorded appears If there are no images recorded on the memory card NO IMAGES appears in the display Do not touch the memory card terminals Selecting the recording image quality Select the quality of a still image to be recorded QUALITY FINE CARD SET UP 34 VCR Make sure the P...

Page 100: ... 145 for the memory card displays Depending on the image you are recording sometimes there will be no difference in image quality between settings Images are compressed and recorded in the JPEG Joint Photographic Experts Group format The number of pixels is 640 480 VGA in both FINE and STANDARD modes FINE Approx 124KB save high quality images print out etc Approx 34 images Image quality Necessary ...

Page 101: ... 1 more than the last file number assigned on the previous memory card When the file numbers are set to CONTINUOUS each image taken is assigned a different number avoiding duplication of numbers This is convenient when you want to manage your images on a PC We recommend keeping the file numbers set to CONTINUOUS 2 RESET Each time you insert a new memory card the file number resets to its default v...

Page 102: ...und off Makes the sound of a shutter being released when a still image is recorded to a memory card SHTR SOUND ON CARD SET UP 34 To turn the shutter sound off open the menu and select CARD SET UP Then select SHTR SOUND set it to OFF and close the menu CARD R E C ...

Page 103: ... dial to CARD REC The number of images that can still be recorded on the memory card appears in the display The camera will turn itself off if you are using a battery and do not operate the camera for more than about 5 minutes Set the POWER dial to OFF and then back to CARD REC 3 Press the PHOTO button halfway and hold it Exposure is locked During autofocus F flashes white in the display as the ca...

Page 104: ... fully and the camera immediately takes the image The indicators that appear in the display when recording to a memory card 50 FINE 768 Image quality 99 Backup battery 129 Remaining battery power 127 Number of images that can still be recorded on the memory card 100 2 While the camcorder is recording the still image appears red in the display While appears red in the display do not remove the memo...

Page 105: ...he cassette 1 Play back the cassette 2 When the image you want to record appears in the display press the PHOTO button halfway down and hold it The tape is set to playback pause mode and the number of images that can still be recorded on the memory card appears in the display 3 Press the PHOTO button fully down to record the image to the memory card You can also set the cassette to playback pause ...

Page 106: ...Record images input through the DV in terminal onto the memory card as still images The still image s data code will show the date and time it was originally recorded Preparations 1 Start playback on the other device 2 When the image you want to record appears in the display press the PHOTO button halfway down and hold it The image appears as a still image in the display The number of images that ...

Page 107: ...equently been enhanced on a PC Still images whose image file names have been changed on a PC There are 3 ways to view still images Single image Slide show One after the other automatically in order of recording Index screen Six images at once When the camcorder is in playback pause mode you can use card jump function to move quickly through still images recorded anywhere on a memory card to find a...

Page 108: ...y press the SLIDE SHOW button The images play back one after another To stop the slide show press the SLIDE SHOW button The slide show starts or stops each time you press the SLIDE SHOW button Index Screen Up to 6 images appear at once so you can search quickly for an image CARD PLAY 1 With an image in the display press the INDEX SCREEN button Up to 6 images appear in the display 2 Move the mark t...

Page 109: ... The pre recorded sample images provided on the supplied SD Memory Card are already protected There are 3 ways to protect a still image including the ways to cancel the setting 1 CARD PHOTO REVIEW menu 110 2 File Operation menu 111 3 Card Operations submenu 112 Marking a still image for printing Print Mark An image on a memory card must be marked before it can be printed The camcorder supports the...

Page 110: ...MAGE ERASE and press the SELECT dial in ERASE THIS IMAGE NO YES appears in the display 3 Select YES and press the SELECT dial in The image is erased To erase an image To protect an image CARD PHOTO REVIEW Erasing still images Erase images singly or all at once You cannot erase protected images Cancel image protection first in order to erase an image Erase images with caution Once an image has been...

Page 111: ...rotection select PROTECT and press the SELECT dial in disappears and now you can erase this image 2 Select PRINT MARK and press the SELECT dial in The print mark appears on the image Press the SELECT dial again to cancel it If you select RETURN the menu disappears from the display To cancel a print mark select PRINT MARK and press the SELECT dial in disappears 2 Select IMAGE ERASE and press the SE...

Page 112: ...e sure a memory card that has images recorded on it is inserted into the camcorder 1 With an image in the display press the INDEX SCREEN button Up to 6 images appear in the display Move the mark to the image that you want to protect Index Screen 108 2 Open the menu and select CARD OPER 3 Select PROTECT 4 Press the SELECT dial in The protect mark appears on the image Now you are unable to erase thi...

Page 113: ...d into the camcorder 1 With an image in the display press the INDEX SCREEN button Up to 6 images appear in the display Move the mark to the image that you want to mark an image for printing Index Screen 108 2 Open the menu and select CARD OPER 3 Select PRINT MARK 4 Press the SELECT dial in The print mark appears next to the image Press the SELECT dial again to cancel it 5 Close the menu Notes To c...

Page 114: ...hat has images recorded on it has been inserted into the camcorder 1 With an image in the display open the menu and select CARD OPER 2 Select PRINT MARKS ALL ERASE ERASE ALL PRINT MARKS YES NO appears in the display 3 Select YES and press the SELECT dial in The print mark disappears from the image 4 Close the menu CARD PLAY ...

Page 115: ...he camcorder 1 Select the image you want to erase Use the index screen 108 or card jump function 108 if necessary and make sure the image you want to erase fills the display If you use the index screen press the INDEX SCREEN button after selecting the image The image you selected fills the whole display 2 Open the menu and select CARD OPER 3 Select IMAGE ERASE CANCEL SINGLE and ALL settings appear...

Page 116: ...ple and is unselectable If you select NO you return to step 4 6 Close the menu 1 Open the menu and select CARD OPER 2 Select IMAGE ERASE CANCEL SINGLE and ALL settings appear To cancel erasing select CANCEL and close the menu 3 Select ALL ERASE ALL IMAGES EXCEPT FOR IMAGES NO YES appears in the display 4 Select YES and press the SELECT dial in All images except the protected ones are erased If you...

Page 117: ...s The currently recording image appears in place of the blue area of a prerecorded still image such as a picture frame When recording your own still image for overlapping make sure to record the area in which you want the new image to appear blue with a blue curtain as a background for example Adjust the mix level in the blue area of the pre recorded image CARD LUMI Card luminance key 5 pre record...

Page 118: ... mix level in the blue area CARD CARD Make sure a memory card that has images recorded on it and a cassette have been inserted into the camcorder Make sure the program selector is set to Q 1 Open the menu and select CARD MIX 2 Press the CARD buttons to select the still image to be combined 3 Select MIX TYPE CARD CHROMA CARD LUMI CAM CHROMA settings appear Select MOVIE P SCAN Mix level The mix leve...

Page 119: ... recording The combined images are recorded onto the cassette 1 Press the PHOTO button halfway down and hold it F flashes white in the display as the camcorder adjusts the focus and it is displayed continuously as a green mark when the camcorder is ready to take the image 2 Press the PHOTO button fully down to record the image to the cassette F disappears from the display The combined images are r...

Page 120: ...ges on the cassette after that point will be copied onto the memory card If you want to copy all the images on a cassette rewind the cassette to the beginning 2 Open the menu and select CARD OPER 3 Select COPY 4 Select EXECUTE Select CANCEL to stop copying Cassette and card information appear in the display and copying starts NOW COPYING appears in the display The camera automatically performs the...

Page 121: ...mages on the memory card select the first image 3 Open the menu and select CARD OPER 4 Select COPY CANCEL and EXECUTE settings appear 5 Select EXECUTE Select CANCEL to stop copying Cassette and card information appear in the display and copying starts NOW COPYING appears in the display Each image is copied for about 6 seconds on the cassette Copying stops when all the images have been copied or th...

Page 122: ...ormatting recorded memory cards All images will be permanently erased If you use memory cards other than the supplied one make sure to format them with the camcorder not a PC or other device Make sure a memory card is inserted into the camera 1 Open the menu and select CARD OPER 2 Select FORMAT CANCEL and EXECUTE settings appear 3 Select EXECUTE Select CANCEL to cancel formatting FORMAT THIS CARD ...

Page 123: ...kenly erase the card mix sample images provided on the SD Memory Card they can be downloaded from the following home pages http www canon europa com products products html http www canon asia com http www canon com au You will need a PC Card Adapter or Card Reader to be able to download to a memory card If you purchase additional memory cards format them with the camcorder not a PC or other device...

Page 124: ...n the memory card at a constant temperature and let the moisture evaporate naturally Do not touch the memory card s terminals or let dust or dirt come in contact with the terminals Store and carry memory cards in their case to protect the terminal area There is only one correct way to insert memory cards into the camcorder Do not forcefully insert the memory cards backwards or upside down This cou...

Page 125: ...g Weight and dimensions are approximate Errors and omissions excepted Subject to change without notice PhotoEssentials Royalty Free Stock Photography The PhotoEssentials suite of royalty free images on CD ROM features premium quality assignment photography and is ideally suited for use in advertising brochures reports multimedia websites books packaging and more For more information please visit t...

Page 126: ... the cord to the lens cap and pass the grip belt through the loop on the cord Hook the lens cap on to the grip belt while you are recording and place it over the lens when you have finished Fasten the grip belt Release the Velcro fastening and hold the camera with your right hand while you adjust the belt with your left Your index finger should reach the zoom control and photo button and your thum...

Page 127: ...appears in the display for 4 seconds when the power is completely exhausted The empty battery mark then appears and starts to flash The power indicator light also flashes The indicator is not constant different levels will be shown when you subject the battery pack and camcorder to different conditions How much power is left Recording time will be shorter than usual at low temperatures You can use...

Page 128: ...ery pack is not being used Storing the battery pack If you do not use a battery pack for a period of more than a few months any remaining charge may cause damage to the battery pack and reduce usage time To prevent damage therefore aim to use a battery pack s complete charge before storage See the optional battery pack s instructions for further details When to recharge You can recharge a lithium ...

Page 129: ...cassette compartment will open automatically If necessary close it to give yourself more room to install the backup battery Insert the CR1616 lithium battery as far as it will go with the side facing outwards Make sure the cassette compartment is closed and close the cassette compartment cover This backup battery allows the camera to remember the date and time and other settings when main power so...

Page 130: ...fields Do not use the camera close to TV transmitters portable communication devices or other sources of electric or magnetic radiation They may cause picture interference or permanently damage the camera Do not expose the camera to water Cover the camera when you are recording in rain or mist There is a risk of electric shock if water gets inside the camera contact qualified service personnel as ...

Page 131: ...n temperature moisture may form on the surface of the screen Wipe clean with a soft dry cloth At low temperatures the display may appear to be much darker than usual This is not a fault and as the screen warms up the display will return to normal Camera body and lens Use a soft dry cloth to clean the camera body or lens Never use chemically treated cloth or volatile solvents such as paint thinner ...

Page 132: ...ordan Kenya Kuwait Liberia Malaysia Malta Mozambique the Netherlands New Zealand North Korea Norway Oman Pakistan Portugal Qatar Sierra Leone Singapore South Africa Spain Sri Lanka Swaziland Sweden Switzerland Tanzania Thailand Turkey Uganda United Arab Emirates United Kingdom Yemen former Yugoslavia Zambia Using the camera abroad Video heads When mosaic like noise appears on the playback picture ...

Page 133: ...yed for approximately four seconds Then the power indicator flashes and the h mark flashes in the display If there is a cassette in the camera it stops automatically and REMOVE THE CASSETTE is displayed for approximately 4 seconds and then v flashes in the display If you have the beep turned on it will sound The camera may not detect the condensation immediately the condensation warning may not st...

Page 134: ...unction cannot be used in that recording program 53 The camera was in record pause mode for more than about 5 minutes 14 103 The battery pack is exhausted 10 11 127 The battery pack s power is exhausted Recharge or change to a new battery pack 10 The cassette is not loaded or is set for erasure prevention 12 13 The cassette has reached the end The POWER dial is not set to the appropriate mode 14 1...

Page 135: ...t Horizontal stripes Many subjects at different distances Behind glass Without much contrast e g a white wall Reflective surfaces e g shiny car surfaces Night scenes Fast moving objects Slanted subjects Dark subjects Recording Playback Contd Cause and or what to do about it There are a number of restrictions on using the digital effects 57 64 The POWER dial is not set to PLAY MV4i and MV4i MC VCR ...

Page 136: ...erting again Turn the camcorder s power off and back on again and remove and reinsert the card If the mark continues to flash format the memory card The POWER dial is not set to CARD REC or CARD PLAY 103 107 The memory card is not inserted 109 You are using an SD Memory Card and it is set for erasure prevention Change the position of the protect switch The memory card is full Erase images 115 or i...

Page 137: ... Problem The wireless controller doesn t work The power indicator is flashing The camera malfunctions The DV cable is connected correctly but there s nothing in the display The camera becomes warm during use The PHOTO button doesn t work The image cannot be erased The memory card is not loaded 99 You are using an SD Memory Card and it is set for erasure prevention Change the position of the protec...

Page 138: ...eader CB 400 Car Battery Adapter BP 406 BP 412 and BP 422 Battery Packs DC 400 DC Coupler CA 410 Compact Power Adapter SC 1000 Soft Carrying Case DU 300 Docking Unit Digital Device Personal Computer CV 150F DV Cable CV 150F CV 250F DV Cable SA 1 Adapter Bracket Stereo Microphone commercially available DU 300 Docking Unit ZR 1000 Zoom Remote Controller DU 300 Docking Unit PC Card Adapter FD Adapter...

Page 139: ... time The lithium ion battery packs used with the CH 910 BP 900 series Battery Pack differ from the battery pack used with the camera and can be purchased as optional accessories Note The DC 400 DC Coupler supplied with the MV4 MV4i MV4i MC connects directly to the CH 910 Use it in place of the DC Coupler that is supplied with the CH 910 Maximum recording time One battery pack attached BP 915 4 hr...

Page 140: ...t first connect the DU 300 Docking Unit to the camera CB 400 Car Battery Adapter Power your camara or recharge battery packs on the move The car battery adapter plugs into your car s cigarette lighter socket and runs off a 12 24 V DC negative ground battery VL 10Li Battery Video Light This compact yet powerful video light can be used for both indoor and outdoor shooting Use the BP 900 Series batte...

Page 141: ... R Y SC 1000 Soft Carrying Case A handy camera bag with padded compartments and plenty of space for accessories CD 300 Digital Printer This 300 dpi resolution printer is perfect for printing out the high quality images taken with digital camcorders Print out panorama prints pictures without a white border multiple picture index cards and add titles to pictures A clear overcoat adds luster to your ...

Page 142: ...ncluding connected TV screen but the camcorder will continue to show warning caution displays when necessary and the data code appears in the display if it is set to ON When operating the camcorder the displays appear for 2 seconds However the displays do not disappear when displaying an index screen indicates a flashing display MOVIE P SCAN CARD R E C TV SCREEN ON DISP SET UP PLAY VCR CARD PLAY D...

Page 143: ...ra off Turn it on again and reload the cassette Recording mode 16 Playback is stopped 23 Normal playback 23 Fast forward 23 END 5m i n EJECT EJECT P S Rewind 23 Fast forward playback 24 Rewind playback 24 Frame advance playback 25 Frame reverse playback 25 Playback pause forward and reverse 24 Slow playback forward and reverse 25 2 playback forward and reverse 25 1 playback forward and reverse 25 ...

Page 144: ...MENU SEL S MENU D EFFECTS CAM SET UP CARD SET UP DISP SET UP SYSTEM RETURN C PLAY MENU SEL S MENU CARD OPER VCR SET UP DISP SET UP SYSTEM RETURN The remote sensor is turned off 44 Self timer countdown 67 Zero set memory 79 Audio mode 65 Data code 75 Progressive scan mode 49 Photo mode 50 Setting the AF AE F mark flashes white AF AE locked F mark lights up green Timer Recording programs 53 Manual e...

Page 145: ...2 Shutter speed 70 White balance is 73 Set W Indoor T Outdoor U The 16 9 mode the display flashes when the effect is being selected and appears steadily when it is activated 17 Digital effects The display flashes when the function is being selected and appears steadily when it is activated 57 The wind screen is turned off 66 Volume level 26 Audio output 95 16 9 FADE T WIPE SCROLL M FADE ART BLK WH...

Page 146: ... the camera counts from 0SEC to 10SEC Shots which are shorter than ten seconds may be difficult to edit later On the other hand if you are not planning to edit the recording remember that a shot which does not contain action should generally last no longer than 10 seconds Time Code This records counter information including hour minute second and frame number on a special data code area on the tap...

Page 147: ... REC MODE CHECK THE CASSETTE AUDIO MODE CHECK THE CASSETTE BLANK COPYRIGHT PROTECTED DUBBING RESTRICTED Appears each time you turn the power on until you set the time zone date and time 45 Appears when the battery pack is exhausted 10 127 Appears when the tape has reached the end Refer to p 13 Appears when during DV dubbing the DV cable is disconnected or the power of the digital equipment connect...

Page 148: ...d Make sure to clean the video heads when this caution appears There is no more remaining memory on the memory card Change the card or erase images You have reached the maximum file or folder number 101 The image has been recorded in an incompatible JPEG format or other format that the camera can not play back or the image data has been damaged An error has occurred with the memory card The camcor...

Page 149: ...shutter speed 1 2 000 sec Minimum illumination 3 5 lx using the low light program Recommended illumination More than 100 lx Filter diameter 27 mm Viewfinder 0 44 in TFT colour LCD approx 113 000 pixels LCD screen 2 5 in measured diagonally TFT colour approx 200 000 pixels Microphone Stereo electret condenser microphone Recording media SD Memory Card MultiMediaCard Number of recording pixels 768 57...

Page 150: ...m ion battery Rated voltage 7 4 V DC Operating temperature 0 40 C 32 104 F Battery capacity 680 mAh Dimensions 49 60 11 mm 1 7 8 2 3 8 3 8 in Weight 70 g 2 1 2 oz MV4 Output only MV4i MV4i MC Input output MV4i MV4i MC only Attach the DU 300 Docking Unit Weight and dimensions are approximate Errors and omissions excepted Subject to change without notice BP 406 Battery Pack ...

Page 151: ...bining Images 117 Condensation 133 Connecting to a PC 97 Connection to TV or VCR 27 Copying from Cassette to Memory Card 120 Copying from Memory Card to Cassette 121 Î Data Code 75 Date and Time 46 Date Search 78 Digital Effects 57 Digital Zoom 19 Docking Unit 27 DV Dubbing 81 106 Easy Recording 55 Editing to a VCR 80 Effects 60 Erasing Still Images from a Memory Card 115 Exposure 69 Extended Reco...

Page 152: ...Marked Position 79 Preparing the Camera 126 Preventing Accidental Erasure 112 Print Mark 113 Problems 134 Progressive Scan Mode 49 Protect 112 Â Recharging the Battery Pack 128 Record Pause Mode 14 Record Review 52 Record Search 52 Recording 14 103 Recording from Cassette to Memory Card 105 Recording from DV Device to Memory Card 106 Recording Programs 53 Remote Control 43 Remote Sensor 44 Rewind ...

Page 153: ...aking Better Videos 31 Tripod 31 Troubleshooting 134 TV 27 142 Ë Using the Camera Abroad 132 Using the Menus 34 VCR 27 Video Heads 132 Videocassettes 12 Viewfinder 126 131 Viewing Still Images 107 White Balance 73 Wide angle 19 Widescreen TV 17 Wind Screen 66 Wipe 59 Wireless Controller 43 Û Zero Set Memory 79 Zooming 19 MV4i MC only ...

Page 154: ...ARD MIX CARD OPER CARD OPER DISP SET UP DISP SET UP DISP SET UP SYSTEM D EFFECTS DISP SET UP D EFFECTS D E SELECT EFFECT CARD OPER CARD OPER D EFFECTS D E SELECT FADER CARD SET UP CARD OPER Function First make sure the POWER dial is set to Then select it from this submenu and set CARD R E C CARD R E C CARD R E C CARD R E C CARD R E C CARD R E C CARD R E C P SCAN P SCAN P SCAN P SCAN P SCAN P SCAN ...

Page 155: ...VCR SET UP SYSTEM CAM SET UP CARD SET UP SYSTEM SYSTEM DISP SET UP CAM SET UP VCR SET UP CAM SET UP Function First make sure the POWER dial is set to Then select it from this submenu and set MV4i MC only MOVIE MOVIE MOVIE MOVIE MOVIE MOVIE MOVIE MOVIE MOVIE MOVIE MOVIE MOVIE MOVIE MOVIE P SCAN P SCAN P SCAN P SCAN P SCAN P SCAN P SCAN P SCAN P SCAN P SCAN P SCAN P SCAN P SCAN P SCAN CARD PLAY CARD...

Page 156: ... Ryde N S W 2113 Australia Telephone 805 2000 Fax 887 4484 Canon New Zealand Ltd Fred Thomas Drive Takapuna P O Box 33 336 Auckland New Zealand Telephone 486 1570 Fax 486 6420 Canon Singapore Pte Ltd 79 Anson Road 09 01 06 Singapore 079906 Telephone 65 532 4400 Fax 65 221 2939 Canon Hongkong Company Ltd 9 F The Hong Kong Club Building 3A Chater Road Central Hong Kong Canon Latin America Inc Sales ...

Reviews: