Perform a media registration for standard-size media -
Print the test sheets and create the ruler
Introduction
The different properties of media can influence the alignment of images when the media are
printed. To ensure a correct alignment, you can perform a media registration for each individual
media in the [Media catalog]. The following values will be measured.
• The Z-position of side 1
• The X-length of side 1
• The Z-position of side 2
• The X-position of side 1
• The X-position of side 2.
For each media registration, a paper ruler and 3 test sheets will be printed. Depending on the
regional setting in the Settings Editor, the paper ruler is printed on A4 or Letter. You can use the
first printed sheet to create the paper ruler. However, you can also use a universal ruler of your
own. The ruler must be long enough to carry out the measurements. You must carry out each
measurement on all 3 test sheets. The system calculates the average value of the measurements.
This section describes how to perform a media registration for standard-size media (media with a
length of less than 390 mm / 15.35").
NOTE
It is recommended to perform the media registration when the list of [Scheduled jobs] is empty.
Before you begin
1. On the operator panel, press the [System] button.
2. Press [Media].
3. Select a media from the [Media catalog] for which you want to perform a media registration.
4. Press [Registration].
When a maintenance PIN is defined in the Settings Editor, a numerical keyboard appears.
5. Enter the maintenance PIN to start the wizard.
NOTE
The following procedures often refer to the start of the ruler. The start of the ruler is the line
where the shaft of the arrow starts.
Procedure
1.
Read the introduction on the screen. Then press [Next].
The printed test sheets go to the system output.
2.
Take the first printed sheet.
3.
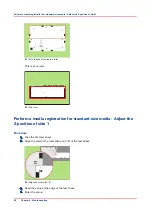
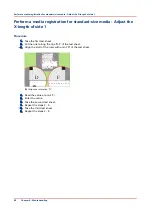
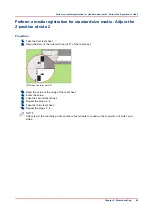
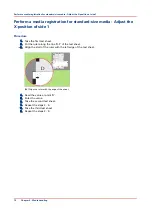
Fold the sheet along the line 'B-H' on side 1.
Perform a media registration for standard-size media - Print the test sheets and create the ruler
Chapter 6 - Media handling
65
Summary of Contents for Oce VarioPrint 6000+ Series
Page 1: ...Operation guide Océ VarioPrint 6000 Line ...
Page 7: ...Chapter 1 Preface ...
Page 11: ...Chapter 2 Introduction ...
Page 13: ...Chapter 3 Power information ...
Page 19: ...Chapter 4 Main parts ...
Page 31: ...Chapter 5 Adapt printer settings to your needs ...
Page 49: ...Chapter 6 Media handling ...
Page 85: ...Chapter 7 Carry out print jobs ...
Page 162: ...Exchange all setups between printers 162 Chapter 7 Carry out print jobs ...
Page 163: ...Chapter 8 Remote Service ORS optional ...
Page 166: ...Remote Service 166 Chapter 8 Remote Service ORS optional ...
Page 167: ...Chapter 9 Remote Monitor optional ...
Page 169: ...Chapter 10 Optional finishers and other devices ...
Page 189: ...Chapter 11 Counters ...
Page 194: ...Find the meter readings 194 Chapter 11 Counters ...
Page 195: ...Chapter 12 Keeping the printer running ...
Page 209: ...Appendix A Miscellaneous ...
Page 212: ...Product specifications 212 Appendix A Miscellaneous ...
Page 220: ...Index 220 ...
Page 221: ......

