background image

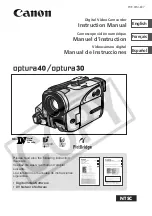
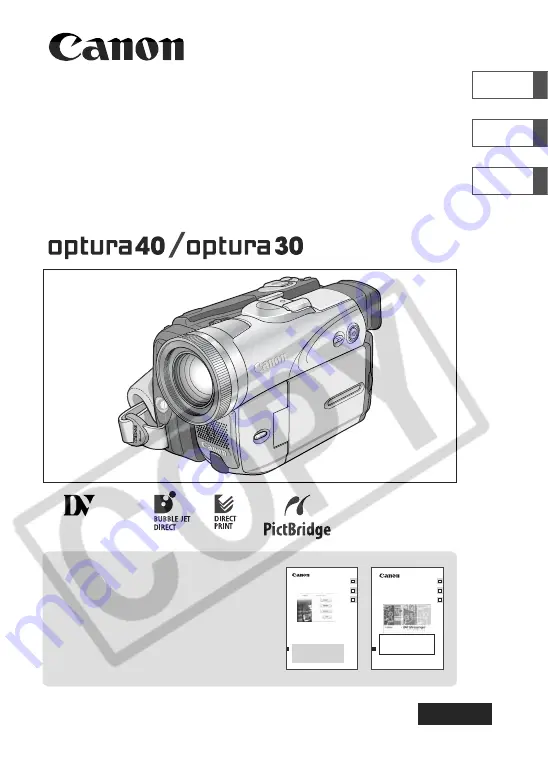
Digital Video Camcorder

Instruction Manual

Camescope vidéo numérique

Manuel d’instruction

Videocámara digital

Manual de Instrucciones

English

Français

Español

NTSC

PUB.DIM-637

Mini

Digital
Video
Cassette

Please read also the following instruction
manuals.

Veuillez lire aussi les modes d’emploi
suivants.

Lea también los manuales de instrucciones
siguientes.

• Digital Video Software
• DV Network Software

Digital Video Software

Version 12

Instruction Manual

If you are using Windows operating system, use the supplied
DIGITAL VIDEO SOLUTION DISK 

For Windows

.

If you are using Macintosh operating system, use the supplied
DIGITAL VIDEO SOLUTION DISK 

For Macintosh

.

Si vous travaillez avec le système d’exploitation Windows, utilisez le disque
DIGITAL VIDEO SOLUTION DISK 

For Windows

 fourni avec l’appareil.

Si vous travaillez avec le système d’exploitation Macintosh, utilisez le disque
DIGITAL VIDEO SOLUTION DISK 

For Macintosh

 fourni avec l’appareil.

Si está utilizando el sistema operativo Windows, use el disco
DIGITAL VIDEO SOLUTION DISK 

For Windows

 suministrado.

Si está utilizando el sistema operativo Macintosh, use el disco
DIGITAL VIDEO SOLUTION DISK 

For Macintosh

 suministrado.

Mode d’emploi

Manual de Instrucciones

PUB. DIM-627

E

F

Es

This instruction manual explains how to install the software, connect the camcorder to a
computer, and download images from a memory card to a computer. For more detailed
operational instructions, refer to the PDF format manual provided on the DIGITAL VIDEO
SOLUTION DISK 

For Windows

 or DIGITAL VIDEO SOLUTION DISK 

For Macintosh

.

Ce manuel d'instruction explique comment installer le logiciel, connecter le
camescope a l'ordinateur et telecharger des images a partir d'une carte memoire sur
un ordinateur. Pour des instructions de fonctionnement plus detaillees, reportez-vous
au manuel au format PDF fournie sur le disque DIGITAL VIDEO SOLUTION DISK

For Windows

 ou DIGITAL VIDEO SOLUTION DISK 

For Macintosh

.

En este manual de instrucciones se explica como instalar el software, conectar la
videocamara a un ordenador, y descargar imagenes de una tarjeta de memoria a un
ordenador. Si desea instrucciones mas detalladas sobre el funcionamiento, consulte el
manual de formato PDF suministrado con el disco DIGITAL VIDEO SOLUTION DISK

For Windows

 o DIGITAL VIDEO SOLUTION DISK 

For Macintosh

.

DV Network Software

Version 2

Instruction Manual (Installation and Preparation)

This software is for use with Windows® XP only.
Ce logiciel ne peut être employé que sous Windows® XP.
Este software solamente es compatible con Windows® XP.

Mode d’emploi (Installation et préparation)

Manual de Instrucciones (Instalación y preparativos)

PUB. DIM-629

E

F

Es

This manual covers the installation and the connection procedures only.
For more operating instructions, refer to the PDF format manual provided on the
DIGITAL VIDEO SOLUTION DISK For Windows.

Ce manuel traite uniquement des procédures d’installation et de connexion. Pour les
instructions d’utilisation, reportez-vous au manuel au format PDF fourni sur le disque
DIGITAL VIDEO SOLUTION DISK For Windows.

Este manual solamente cubre los procedimientos de instalación y conexión. Para más
instrucciones de operación, consulte el manual en formato PDF contenido en el disco
DIGITAL VIDEO SOLUTION DISK For Windows.

Summary of Contents for Optura 30 - optura 30 minidv camcorder

Page 1: ... SOLUTION DISK For Macintosh Ce manuel d instruction explique comment installer le logiciel connecter le camescope a l ordinateur et telecharger des images a partir d une carte memoire sur un ordinateur Pour des instructions de fonctionnement plus detaillees reportez vous au manuel au format PDF fournie sur le disque DIGITAL VIDEO SOLUTION DISK For Windows ou DIGITAL VIDEO SOLUTION DISK For Macint...

Page 2: ...utlet on a circuit different from that to which the receiver is connected Consult the dealer or an experienced radio TV technician for help Use of shielded cable is required to comply with class B limits in Subpart B of Part 15 of FCC Rules Do not make any changes or modifications to the equipment unless otherwise specified in the manual If such changes or modifications should be made you could be...

Page 3: ...n surfaces may cause the product and cart combination to overturn 10 Power Sources The CA 570 Compact Power Adapter should be operated only from the type of power source indicated on the marking label If you are not sure of the type of power supply to your home consult your product dealer or local power company Regarding other power sources such as battery power refer to instructions in this manua...

Page 4: ...ols may result in damage and will often require extensive work by a qualified technician to restore the product to its normal operation e If the product has been dropped or the cabinet has been damaged f When the product exhibits a distinct change in performance This indicates a need for service 19 Replacement Parts When replacement parts are required be sure the service technician has used replac...

Page 5: ... D is a trademark is a trademark Windows is either a registered trademark or trademark of Microsoft Corporation in the United States and or other countries Macintosh and Mac OS are trademarks of Apple Computer Inc registered in the United States and other countries Other names and products not mentioned above may be registered trademarks or trademarks of their respective companies CAMERA CAMERA Op...

Page 6: ... for Making Better Videos 30 Playback Playing Back a Tape 31 Adjusting the Volume 33 Playing Back on a TV Screen 34 Advanced Functions Menus and Settings 37 Recording Using the Recording Programs 45 Using the Night Modes 48 Skin Detail Function 50 Adjusting Exposure Manually 51 Adjusting the Focus Manually 52 Setting the White Balance 54 Setting the Shutter Speed 56 Using the Self Timer 58 Changin...

Page 7: ...ng 104 Recording Motion JPEG Movies on a Memory Card 105 Selecting the Focusing Point 107 Selecting the Drive Mode 108 Recording Panoramic Images Stitch Assist Mode 110 Playing Back a Memory Card 112 Protecting Images 115 Erasing Images 116 Combining Images Card Mix 117 Formatting a Memory Card 121 Creating a Start up Image 122 Direct Printing Printing Still Images 123 Selecting the Print Settings...

Page 8: ...n case of theft Date of Purchase Model Name OPTURA40 OPTURA30 A Purchased From Serial No Dealer Address Dealer Phone No WL D83 Wireless Controller Two AA R6 Batteries Lens Cap and Lens Cap Cord Lithium Button Battery CR2025 CA 570 Compact Power Adapter incl power cord STV 250N Stereo Video Cable IFC 300PCU USB Cable SDC 8M SD Memory Card containing sample images DIGITAL VIDEO SOLUTION DISK For Win...

Page 9: ...share button 123 135 LCD screen 24 OPEN button 24 FOCUS button 52 DATA CODE button 72 DRIVE MODE button 108 stop button 31 self timer button 58 REC PAUSE button 85 BATTERY RELEASE button 13 Battery attachment unit 13 Serial number EXP button 51 END SEARCH button 74 MENU button 37 SET dial 37 Memory card slot 93 OPTURA40 only CARD MIX button 117 SLIDE SHOW button 113 stitch assist button 110 flash ...

Page 10: ...HOTO button 97 Zoom lever 28 Cassette compartment 16 Strap mount 19 CHARGE indicator 13 Power indicator 13 Strap mount 19 Cassette compartment cover 16 Start stop button 24 105 Speaker 33 OPEN EJECT switch Program AE Easy recording Program selector 46 b Using a memory card Using a tape TAPE CARD switch 5 ...

Page 11: ...terminal 33 62 USB terminal 123 134 Assist lamp White LED 48 Terminal cover Terminal cover Tripod socket 30 Flash 101 Focus ring 52 S video terminal 35 OPTURA40 only Stereo microphone 89 DC IN terminal 13 MIC terminal 63 Backup battery compartment 17 Advanced Accessory shoe 159 ...

Page 12: ...OP button 24 105 SELF T button 58 D EFFECTS button ON OFF button 64 TV SCREEN button 140 DATA CODE button 72 DATE SEARCH buttons 76 ZERO SET MEMORY button 75 12bit AUDIO OUT button 91 AUDIO DUB button 89 REC PAUSE button 85 AV DV button 88 REMOTE SET button 79 Transmitter MENU button 37 SET button 37 CARD buttons 112 SLIDE SHOW button 113 REW button 31 PLAY button 31 FF button 32 button 32 STOP bu...

Page 13: ...attery Pack 1 Connect the power cord to the adapter 2 Plug the power cord into a power outlet 3 Connect the power adapter to the camcorder s DC IN terminal The CHARGE indicator starts flashing It glows steadily when charging is complete 4 When charging is complete disconnect the power adapter from the camcorder Unplug the power cord from the power outlet and disconnect it from the adapter 5 Remove...

Page 14: ...he battery pack may also not be charged correctly when a power outage occurs during charging Remove the battery pack and attach it back to the camcorder When the power adapter or battery pack is defective the CHARGE indicator flashes rapidly at about 2 flashes second and charging stops The CHARGE indicator informs you about the charge status 0 50 Flashes once every second More than 50 Flashes twic...

Page 15: ...E indicator flashes rapidly and charging stops A lithium ion battery pack can be charged at any charge state Unlike conventional battery packs you do not need to completely use or discharge it before charging We recommend that you prepare battery packs 2 to 3 times longer than you think you might need To conserve battery charge turn off the camcorder instead of leaving it in record pause mode ...

Page 16: ...on the cassette compartment until it clicks 4 Wait for the cassette compartment to retract automatically and close the cassette compartment cover Do not interfere with the cassette compartment while it is opening or closing automatically or attempt to close the cover before the cassette compartment has fully retracted Be careful not to get your fingers caught in the cassette compartment cover If t...

Page 17: ...rge disassemble heat above 212 F 100 C or incinerate the battery Replace the battery with a CR2025 made by Panasonic Hitachi Maxell Sony Sanyo or with Duracell2025 Use of other batteries may present a risk of fire or explosion Do not pick up the battery using tweezers or other metal tools as this will cause a short circuit Wipe the battery with a clean dry cloth to ensure proper contact Keep the b...

Page 18: ...cap 2 Pass the grip belt through the loop on the cord Press the buttons on the lens cap when attaching removing it Hook the lens cap on the grip belt while you are recording and place it over the lens when you have finished Fastening the Grip Belt Hold the camcorder with your right hand and adjust the belt with your left Adjust the grip belt so that you can reach the zoom lever with your index fin...

Page 19: ...19 Basic Functions Preparations E Attaching the Shoulder Strap Pass the ends through the strap mount and adjust the length of the strap SS 900 Shoulder strap ...

Page 20: ...nd wireless controller are equipped with 2 remote sensor modes 79 If the wireless controller does not work check if camcorder and wireless controller are set to the same mode When the camcorder cannot be operated with the wireless controller or when it can only be operated in very close range replace the batteries Make sure to replace both batteries at the same time The wireless controller may not...

Page 21: ...next page The default setting is New York 4 Turn the SET dial to select the setting option that represents your time zone and press the SET dial To adjust for daylight saving time select the time zone with the U next to the area Setting the Date and Time 5 Turn the SET dial to select D TIME SET and press the SET dial The year display starts to flash 6 Turn the SET dial to select the year and press...

Page 22: ... camcorder automatically adjusts the clock 1 24 1 2 3 4 5 6 7 8 9 10 11 12 13 14 15 16 17 18 19 20 21 22 23 2 3 5 6 7 9 8 10 4 12 11 13 24 19 20 18 17 21 23 22 15 14 16 Time zone LONDON PARIS CAIRO MOSCOW DUBAI KARACHI DACCA BANGKOK H KONG Hong Kong TOKYO SYDNEY SOLOMON WELLGTN Wellington SAMOA HONOLU Honolulu ANCHOR Anchorage L A Los Angeles DENVER CHICAGO N Y New York CARACAS RIO Rio de Janeiro ...

Page 23: ...r of the screen 1 Press the MENU button to open the menu 2 Turn the SET dial to select DISPLAY SETUP and press the SET dial 3 Turn the SET dial to select D T DISPLAY and press the SET dial 4 Turn the SET dial to select ON 5 Press the MENU button to close the menu CARD PLAY CARD CAMERA PLAY VCR CAMERA D T DISPLAY OFF DISPLAY SETUP 37 ...

Page 24: ...RA mode Set the POWER switch to CAMERA and the TAPE CARD switch to b 3 Push the OPEN button at the LCD panel and open the LCD panel 4 Press the start stop button to begin recording Press the start stop button again to pause recording When You Have Finished Recording 1 Turn the POWER switch to OFF 2 Close the LCD panel and return the viewfinder into its initial position 3 Replace the lens cap 4 Unl...

Page 25: ...to protect tape and video heads AUTO POWER OFF appears 20 seconds before shutoff To continue recording turn the POWER switch to OFF and then back to CAMERA About the LCD and viewfinder screen The screens are produced with extremely high precision manufacturing techniques with more than 99 99 of the pixels operating to specification Less than 0 01 of the pixels may occasionally misfire or appear as...

Page 26: ...at are too short Indicates the recording time in hours minutes and seconds Indicates the remaining time of the tape in minutes b moves during recording b END flashes when the tape reaches the end When the time left is less than 15 seconds the remaining tape time may not appear Depending on the type of the tape the indication may not be displayed correctly j flashes in red when the lithium button b...

Page 27: ...the last few seconds and returns to record pause mode Record Search In record pause mode this function allows you to play back the tape forward or reverse to locate the point where you wish to begin recording Press and hold the REC SEARCH button forward or button reverse Release the button at the point you wish to begin recording The camcorder returns to record pause mode CARD PLAY CARD CAMERA PLA...

Page 28: ...the zoom lever toward W to zoom out wide angle Move it toward T to zoom in telephoto Press the zoom lever slightly for a slow zoom Press harder for a faster zoom You can also use the T and W buttons on the wireless controller However you cannot control the zoom speed CARD PLAY CARD CAMERA PLAY VCR CAMERA T W Zoom in Zoom out 14 optical zoom 12 optical zoom Zoom lever ...

Page 29: ...night modes Digital zoom cannot be used when the multi image screen is selected A zoom indicator appears for 4 seconds It extends in light blue when the digital zoom is set to 56x OPTURA40 or 48x OPTURA30 and extends further in dark blue when set to 280x OPTURA40 or 240x OPTURA30 Keep at least 3 3 ft 1 m to the subject At wide angle you can focus on a subject as close as 0 39 in 1 cm CARD PLAY CAR...

Page 30: ...do not touch the microphone or lens For More Stability Lighting When recording outdoors we recommend recording with the sun at your back When using a tripod do not leave the viewfinder exposed to direct sunlight as it may melt due to concentration of the light by the lens Do not use tripods with fastening screws longer than 0 2 inch 5 5 mm as it may damage the camcorder Lean against a wall Put the...

Page 31: ... b 2 Open the LCD panel You can also close the LCD panel with the screen facing outward 3 Press the button to rewind the tape 4 Press the e a button to begin playback 5 Press the 3 button to stop playback To use the viewfinder close the LCD panel About the screen display During playback the time code gives the hours minutes seconds and frames The remaining tape time may not appear when the time le...

Page 32: ...ayback pause Press and hold it to play back continuous frame advance frame reverse SLOW M Slow Forward Slow Reverse Plays back at about 1 3 normal speed Press the button on the wireless controller during normal or reverse playback Press the e play button to return to normal playback 2 Forward 2 Playback Reverse 2 Playback Plays back at 2 times normal speed Press the button on the wireless controll...

Page 33: ...ocedure below Open the menu and select VCR SETUP Select AV PHONES H set it to PHONES H and close the menu The speaker does not sound when H is displayed Do not connect headphones unless H is displayed as it produces noise Adjusting the Volume Turn the SET dial up to increase the volume and down to lower the volume A volume bar appears for 2 seconds You can turn off the volume completely by turning...

Page 34: ...es before starting the connections 2 Connect the STV 250N Stereo Video Cable to the camcorder s AV terminal and the audio video terminals on the TV VCR Connect the white plug to the white audio terminal L left the red plug to the red audio terminal R right and the yellow plug to the yellow video terminal VIDEO 3 If connecting to a TV set the input selector to VIDEO If connecting to a VCR set the i...

Page 35: ...ed plug to the red AUDIO terminal R right Do not connect the yellow plug 4 If connecting to a TV set the input selector to VIDEO If connecting to a VCR set the input selector to LINE We recommend powering the camcorder from a household power source The picture quality is higher when connecting to a TV with an S S1 terminal Optional S 150 S Video Cable required TVs with S1 terminal or Video ID 1 sy...

Page 36: ... press the SET dial 3 Turn the SET dial to select OUTPUT CH and press the SET dial 4 Turn the SET dial to select a setting option L R Stereo L R channels Bilingual Main Sub L L Stereo L channel Bilingual Main R R Stereo R channel Bilingual Sub 5 Press the MENU button to close the menu The setting resets to the L R setting when you turn the camcorder off CARD PLAY CARD CAMERA PLAY VCR CAMERA OUTPUT...

Page 37: ...ect a setting option 5 Press the MENU button to close the menu When setting the white balance shutter speed or language press the SET dial first before pressing the MENU button Pressing the MENU button at any time closes the menu Items that are not available appear in purple You may find it more convenient to use the wireless controller to operate the menu Press the MENU button on the wireless con...

Page 38: ...N DETAIL SOFT NORMAL 50 STILL I REC OFF FINE NORMAL 98 VCR SETUP REC MODE SP LP 59 AV PHONES H AV PHONES H 62 AUDIO SETUP WIND SCREEN AUTO OFF 62 MIC ATT ON OFF 61 MIC LEVEL AUTO MANUAL 60 AUDIO MODE 16bit 12bit 60 H VOLUME 62 DISPLAY SETUP BRIGHTNESS 81 BACKLIGHT NORMAL BRIGHT 82 LCD MIRROR ON OFF 25 TV SCREEN ON OFF 140 D T DISPLAY ON OFF 23 LANGUAGE DEUTSCH ENGLISH ESPAÑOL FRANÇAIS 78 ITALIANO ...

Page 39: ...ions E SYSTEM WL REMOTE A1 A2 OFF B 79 BEEP ON OFF 80 T ZONE DST See list of time zones 21 D TIME SET 21 MY CAMERA S UP SOUND OFF DEFAULT MY SOUND 77 SHTR SOUND OPER SOUND SELF T SOUND Submenu Menu Item Setting Options ...

Page 40: ...16bit 12bit 60 CARD SETUP IMG QUALITY SUPER FINE FINE NORMAL 94 MOVIE SIZE 320 240 160 120 95 FILE NOS RESET CONTINUOUS 96 DISPLAY SETUP BRIGHTNESS 81 BACKLIGHT NORMAL BRIGHT 82 TV SCREEN ON OFF 140 DISPLAYS ON OFF PLAYBK 140 6SEC DATE ON OFF 73 DATA CODE DATE TIME CAMERA DATA CAM D T 72 D TIME SEL DATE TIME DATE TIME 72 LANGUAGE DEUTSCH ENGLISH ESPAÑOL FRANÇAIS 78 ITALIANO DATE FORMAT 78 SYSTEM W...

Page 41: ...41 Advanced Functions E MY CAMERA S UP SOUND OFF DEFAULT MY SOUND 77 SHTR SOUND OPER SOUND SELF T SOUND Submenu Menu Item Setting Options ...

Page 42: ... OFF 2sec 4sec 6sec 8sec 10sec 104 CARD SETUP IMG QUALITY SUPER FINE FINE NORMAL 94 IMAGE SIZE 1632 1224 1280 960 640 480 94 MOVIE SIZE 320 240 160 120 95 FILE NOS RESET CONTINUOUS 96 VCR SETUP AV PHONES H AV PHONES H 62 AUDIO SETUP WIND SCREEN AUTO OFF 62 MIC ATT ON OFF 61 H VOLUME 62 DISPLAY SETUP BRIGHTNESS 81 BACKLIGHT NORMAL BRIGHT 82 LCD MIRROR ON OFF 25 TV SCREEN ON OFF 140 D T DISPLAY ON O...

Page 43: ...ions E SYSTEM WL REMOTE A1 A2 OFF B 79 BEEP ON OFF 80 T ZONE DST See list of time zones 21 D TIME SET 21 MY CAMERA S UP SOUND OFF DEFAULT MY SOUND 77 SHTR SOUND OPER SOUND SELF T SOUND Submenu Menu Item Setting Options ...

Page 44: ...P BRIGHTNESS 81 BACKLIGHT NORMAL BRIGHT 82 TV SCREEN ON OFF 140 DISPLAYS ON OFF PLAYBK 140 D TIME SEL DATE TIME DATE TIME 72 LANGUAGE DEUTSCH ENGLISH ESPAÑOL FRANÇAIS 78 ITALIANO DATE FORMAT 78 SYSTEM WL REMOTE A1 A2 OFF A 79 BEEP ON OFF 80 T ZONE DST See list of time zones 21 D TIME SET 21 MY CAMERA CREATE START UP IMAGE 122 SEL S UP IMG NO IMAGE CANON LOGO MY IMAGE 77 S UP SOUND OFF DEFAULT MY S...

Page 45: ...g the settings manually Sports Use this mode to record sports scenes such as tennis or golf or moving objects such as roller coasters Portrait Use this mode to give accent to your subject by blurring the background or foreground The blur effect increases the more you zoom to telephoto Spotlight Use this mode to record spotlit scenes or fireworks Sand Snow Use this mode in bright places such as a s...

Page 46: ...0 only Selecting the Easy Recording Program Set the program selector to appears CARD PLAY CARD CAMERA PLAY VCR CAMERA Image Stabilizer ON Focus A White Balance A Wind screen A Shutter Speed A Exposure Lock Digital Effects 16 9 Card Mix Microphone attenuator Microphone level A h h h h h h h h h h A h Recording Program Program selector ...

Page 47: ...ogram selector Do not change the mode during recording as the brightness of the image may change abruptly Sports Portrait mode The picture may not appear smooth when played back Sand Snow mode The subject may become overexposed in dark surroundings Check the image on the screen The picture may not appear smooth when played back Low Light mode Moving subjects may leave a trailing afterimage Picture...

Page 48: ... NIGHT MODE button appears Pressing the NIGHT MODE button again resets the camcorder to the Auto mode CARD PLAY CARD CAMERA PLAY VCR CAMERA NIGHT Allows you to record in dark places where lights cannot be used without sacrificing color NIGHT The assist lamp white LED lights up and stays on SUPER NIGHT Allows you to record in very dark places The assist lamp white LED lights up automatically respon...

Page 49: ...e points may appear on the screen Autofocus may not work as well as in other modes In such case adjust the focus manually Digital zoom and multi image screen cannot be used while a night mode is activated The program AE mode cannot be changed while a night mode is activated 49 Advanced Functions Recording E ...

Page 50: ...ance Open the menu and select CAMERA SETUP Select SKIN DETAIL set it to SOFT and close the menu Skin detail function cannot be used when the program selector is set to To obtain the best effect use this function when recording a person in close up Note that areas similar to the skin color may lack in detail CARD PLAY CARD CAMERA PLAY VCR CAMERA SKIN DETAIL NORMAL CAMERA SETUP 37 ...

Page 51: ...he zoom during exposure lock the brightness of the image may change Exposure Adjustment When the exposure is locked you can adjust it manually to handle difficult lighting conditions The camcorder s iris can be set to any position from fully closed to fully open Turn the SET dial to adjust the brightness of the image The adjustment range depends on the brightness at the time you locked the exposur...

Page 52: ...in focus Adjust the zoom before the focus 3 Press the FOCUS button MF appears 4 Turn the focus ring to adjust the focus Turn the focus ring until the image appears focused Press the FOCUS button to return to autofocus CARD PLAY CARD CAMERA PLAY VCR CAMERA Through dirty or wet windows Night Scenes Reflective surfaces Subjects with low contrast or without vertical lines Fast Moving Subjects FOCUS bu...

Page 53: ...ave turned off the camcorder Infinity Focus Use this function when you wish to focus on faraway subjects such as mountains or fireworks Press the FOCUS button more than 2 seconds after step 2 in Adjusting the Focus Manually MF appears When you operate the zoom or turn the focus ring disappears and the camcorder changes to manual focus ...

Page 54: ...ted 3 Open the menu and select CAMERA SETUP Select WHITE BAL select a setting option and close the menu When you have selected SET W W flashes and stops flashing when settings is complete CARD PLAY CARD CAMERA PLAY VCR CAMERA Zoom lever White sheet or paper Program selector SET dial MENU button WHITE BAL AUTO CAMERA SETUP 37 AUTO Auto white balance SET W Custom white balance setting INDOOR T Use t...

Page 55: ...tion of the TAPE CARD switch When you have set the custom white balance Depending on the light source W may keep flashing The result will still be better than with the auto setting Reset the white balance when the lighting condition changes Turn off the digital zoom Custom white balance may provide better results in the following cases Changing lighting conditions Close ups Subjects in a single co...

Page 56: ...gh shutter speeds Recording under fluorescent lights CAMERA mode In Easy Recording Auto mode or the night modes the camcorder automatically detects the flicker of fluorescent lighting and adjusts the shutter speed accordingly However if the screen starts to flicker select AUTO mode and set the shutter speed to 1 100 The setting resets to the auto setting when you switch the program selector to or ...

Page 57: ... Open the menu and select CAMERA SETUP Select A SL SHUTTER set it to OFF and close the menu In CARD CAMERA mode set the flash mode to flash off When set to ON moving subjects may leave a trailing afterimage The camcorder retains the setting separately in CAMERA and CARD CAMERA mode The setting cannot be changed when exposure is locked If camcorder shake warning appears in CARD CAMERA mode stabiliz...

Page 58: ...ess controller The count down appears on the screen To record a still image press the PHOTO button 97 To cancel the self timer press the self timer button Once the countdown has begun you can also press the start stop button when recording movies or the PHOTO button when recording still image to cancel the self timer The self timer will be canceled when you turn off the camcorder CARD PLAY CARD CA...

Page 59: ... Depending on the nature and usage condition of the tape picture and sound recorded in LP mode may be distorted We recommend using the SP mode for important recordings If you record in both SP and LP modes on the same tape the playback picture may become distorted and the time code may not be written correctly If you play back a tape that has been recorded in LP mode with another digital device on...

Page 60: ...ilt in microphone or an external microphone 1 In CAMERA mode set the program selector to Q 2 Open the menu and select AUDIO SETUP Select MIC LEVEL set it to MANUAL and close the menu The audio level indicator appears If a green bar showing the adjustment level is not displayed press the AUDIO LEVEL button 3 Adjust the level with the SET dial The maximum level should only slightly exceed 12 dB Soun...

Page 61: ... to AUTO when you switch the program selector to We recommend using headphones when manually adjusting the audio level Microphone Attenuator Use the microphone attenuator if you need to lower the volume level or correct audio distortion during recording or audio dubbing Check the audio levels with headphones Open the menu and select AUDIO SETUP Select MIC ATT set it to ON and close the menu CARD P...

Page 62: ...y be used when H is displayed on the screen If not change the setting following the procedure below Open the menu and select VCR SETUP Select AV PHONES H set it to PHONES H and close the menu Adjusting the Headphone Volume Open the menu and select AUDIO SETUP Select H VOLUME adjust the volume with the SET dial and close the menu You can turn off the volume completely by turning the SET dial down u...

Page 63: ...rcially available microphone connect it to the MIC terminal When recording in silent places the built in microphone may pick up the motor noise of the camcorder In such case we recommend using an external microphone When using a commercially available microphone Use a microphone with built in power supply condenser microphone Almost all stereo microphones with a plug diameter of 0 14 in 3 5 mm can...

Page 64: ...hole screen The image is wiped off from the sides of the screen Wipe WIPE The image appears from the corners until it fills the whole screen The image is wiped off from the corners Corner Wipe CORNER A small image appears from the left jumps into the center and enlarges until it fills the whole screen The image shrinks jumps from the center to the left and disappears Jump JUMP The image flips into...

Page 65: ...s a beam that becomes thinner and the image appears A yellow beam appears in the center of the screen and expands until it covers the whole image Beam BEAM The image appears from both sides like tides The image disappears from both sides like tides Tide TIDE The image appears in 16 pieces The pieces move around until the puzzle is solved The image is divided into 16 pieces The pieces move around a...

Page 66: ...e image becomes black and white Sepia SEPIA The image becomes monochrome with a brownish tint Mosaic MOSAIC The image is blurred through enlarging the size of some pixels Ball BALL The image becomes like a ball Cube CUBE The image becomes a cube and rotates Wave WAVE Both ends of the image sway in waves Color Masking COLOR M The image becomes a rhombus surrounded by a masking frame that changes th...

Page 67: ...nd pause recording by pressing the start stop button The fader can be activated deactivated by pressing the ON OFF button PLAY VCR mode 5 Fade in In playback pause mode press the ON OFF button and begin playback by pressing the e a button Fade out During playback press the ON OFF button and pause playback by pressing the e a button The fader can be activated deactivated by pressing the ON OFF butt...

Page 68: ...CR CAMERA Selecting an Effect In CAMERA mode set the program selector to Q 1 Press the DIGITAL EFFECTS button D EFFECT FADER EFFECT and MULTI S appear 2 Select EFFECT 3 Select the effect 4 Press the DIGITAL EFFECTS button The name of the selected effect flashes 5 Press the ON OFF button The name of the selected effect stops flashing The effect can be activated deactivated by pressing the ON OFF bu...

Page 69: ...ames In Low Light mode moderate every 8 frames slow every 12 frames 5 Select MULTI S again S SPEED and S SPLIT appears 6 Select S SPLIT 4 9 16 settings appear 7 Select the number of sequences 8 Press the DIGITAL EFFECTS button MULTI S flashes 9 Press the ON OFF button MANUAL Images will be captured each time you press the ON OFF button The blue frame indicating the next sequence disappears after t...

Page 70: ...ower with digital effects Digital effects cannot be used in the following cases When the program selector is set to During DV dubbing Faders cannot be used when Card Mix is activated About the multi image screen The multi image screen cannot be used in the following cases In the night modes When the 16 9 format is selected When Card Mix is activated In PLAY VCR mode Pressing any tape operation but...

Page 71: ... zoom lever toward T To shrink the image below 2 times magnification move the zoom lever toward W 2 Select the magnified area with the SET dial Turn the SET dial to move the image to the right and left or up and down Pressing the SET dial switches between the directions To cancel the magnification move the zoom lever toward W until the frame disappears Movies played back from a memory card cannot ...

Page 72: ...ecting the Date Time Display Combination Open the menu and select DISPLAY SETUP Select D TIME SEL set it to DATE or TIME and close the menu Selecting the Data Code Display Combination Open the menu and select DISPLAY SETUP Select DATA CODE set it to CAMERA DATA or CAM D T and close the menu CARD PLAY CARD CAMERA PLAY VCR CAMERA CARD PLAY CARD CAMERA PLAY VCR CAMERA DATA CODE button SET dial MENU b...

Page 73: ...date and time appear in CARD PLAY mode Six Second Auto Date Date and time appear for 6 seconds when you begin playback or to indicate that date or time zone has changed Open the menu and select DISPLAY SETUP Select 6SEC DATE set it to ON and close the menu CARD PLAY CARD CAMERA PLAY VCR CAMERA CARD PLAY CARD CAMERA PLAY VCR CAMERA 6SEC DATE OFF DISPLAY SETUP 37 ...

Page 74: ...rewinds fast forwards the tape plays back the last few seconds of the recording and stops the tape Pressing the button again cancels the search End search cannot be used once you unload the cassette End search may not work properly if a blank section exists on the tape You cannot use end search to locate the editing end of audio dubbing CARD PLAY CARD CAMERA PLAY VCR CAMERA END SEARCH button ...

Page 75: ...the point you wish to return to later 0 00 00 Â appears To cancel press the ZERO SET MEMORY button again 2 When you have finished playback rewind the tape RTN appears The tape stops automatically at 0 00 00 The tape counter changes to time code The zero set memory may not function correctly when the time code has not been recorded consecutively CARD PLAY CARD CAMERA PLAY VCR CAMERA REW PLAY STOP F...

Page 76: ...more than once to search for further date changes up to 10 times Press the STOP 3 button to stop searching A recording of longer than a minute per date area is required Date search may not function if the data code is not correctly displayed CARD PLAY CARD CAMERA PLAY VCR CAMERA REW PLAY STOP FF ZEROSET MEMORY 12bit AUDIOOUT DATESEARCH DATACODE SLIDESHOW CARD DATE SEARCH buttons STOP 3 button ...

Page 77: ...cting a start up image set the camcorder to CARD PLAY mode 3 Select a setting option and close the menu You can save your original images or the images and sounds contained in the supplied software ZoomBrowser EX for Windows or ImageBrowser for Macintosh to the setting options MY IMAGE and MY SOUND For details refer to the Digital Video Software Instruction Manual You can also create original star...

Page 78: ...low the mark next to the menu item to change the setting The displays and at the bottom of the screen refer to the button names on the camcorder and will not change when you change the language Changing the Date Format You can select between three date formats For example JAN 1 2004 1 JAN 2004 and 2004 1 1 Open the menu and select DISPLAY SETUP Select DATE FORMAT select a format and close the menu...

Page 79: ...for mode 2 Keep the button pressed for over 2 seconds If you have set the camcorder to mode 1 press the ZOOM W button for mode 1 The wireless controller returns to mode 1 when you replace the batteries Change the mode if necessary Make sure that camcorder and wireless controller are set to the same mode Display the camcorder s mode by pressing any button on the wireless controller except of the RE...

Page 80: ...you will get a larger horizontal angle of view To switch 16 9 on open the menu and select CAMERA SETUP Select 16 9 set it to ON and close the menu 16 9 appears The 16 9 mode cannot be selected in the Easy Recording mode The multi image screen cannot be used when the 16 9 format is selected Simultaneous recording on a memory card cannot be used when the 16 9 format is selected If you play back a 16...

Page 81: ...lizer cannot be turned off when the program selector is set to The image stabilizer is designed to compensate a normal degree of camcorder shake The image stabilizer might not be as effective when using the night modes Adjusting the Brightness of the LCD Screen Open the menu and select DISPLAY SETUP Select BRIGHTNESS adjust the brightness level and close the menu Changing the brightness of the LCD...

Page 82: ...ain features It starts automatically when you leave the camcorder turned on without loading a recording media for more than 5 minutes However you can set the camcorder not to start the demonstration mode Open the menu and select DISPLAY SETUP Select DEMO MODE set it to OFF and close the menu To cancel the demo mode once it has begun press any button turn off the camcorder or load a recording media...

Page 83: ...r also to the instruction manual of the digital video device Recording 1 Set the camcorder to PLAY VCR mode and load a recorded cassette If you are connecting via AV terminal check the setting 34 2 Connected device Load a blank cassette and set the device to record pause mode 3 Locate the scene you wish to copy and pause playback shortly before the scene 4 Play back the tape 5 Connected device Beg...

Page 84: ...riginal When connecting a digital video device If the picture does not appear reconnect the DV cable or turn the camcorder off and back on again Proper operation cannot be guaranteed for all digital video devices equipped with a DV terminal If operation does not work use the S video or AV terminal ...

Page 85: ...ted device Load the recorded cassette 4 Press the REC PAUSE button In record pause mode and during recording you can check the picture on the screen 5 Connected device Play back the tape 6 Press the e a button when the scene you wish to record appears Recording starts 7 Press the 3 button to stop recording Press the e a button to pause recording Press the e a button again to restart recording 8 Co...

Page 86: ...Recording starts 7 Press the 3 button to stop recording Press the e a button to pause recording Press the e a button again to restart recording 8 Connected Device Stop playback Blank sections may be recorded as anomalous picture If the picture does not appear reconnect the DV cable or turn the camcorder off and back on again You can only record signals from devices with the logo recording in SD sy...

Page 87: ...he digital signals via the DV terminal The DV terminal serves as output terminal only Connecting the Devices Turn off all devices before starting the connections Unload the tape from the camcorder Refer also to the instruction manual of the connected device You can also connect a VCR with S S1 VIDEO terminal 35 AUDIO VIDEO R L STV 250N Stereo Video Cable supplied Commercially available DV cable Si...

Page 88: ...tive signals or anomalous signals such as ghost signals For normal use set AV DV OUT to OFF If it is set to ON digital signals cannot be input via the camcorder s DV terminal Depending on the software and the specifications of your computer you may not be able to transfer converted signals via the DV terminal We recommend powering the camcorder from a household power source You can also press the ...

Page 89: ... camcorder to PLAY VCR mode and load a recorded cassette Use a tape recorded in SP 12 bit mode with this camcorder 2 Open the menu and select AUDIO SETUP Select AUDIO DUB set it to AUDIO IN or MIC IN and close the menu 3 Locate the scene you wish to start audio dubbing 4 Press the PAUSE a button on the wireless controller CARD PLAY CARD CAMERA PLAY VCR CAMERA R L AUDIO OUTPUT STV 250N Stereo Video...

Page 90: ...not recorded with this camcorder sound quality may decrease Sound quality may decrease when you add sound to the same scene for more than 3 times When you connect an audio device check the picture on the LCD screen and the sound via built in speaker or audio device You can also connect a TV via S video terminal When you use the built in microphone you can either connect a TV via AV terminal to che...

Page 91: ...lance can be adjusted 2 If you have selected MIX VARI adjust the mix level Open the menu and select AUDIO SETUP Select MIX BALANCE adjust the balance with the SET dial and close the menu Turn the SET dial down to increase the volume of Stereo 1 and up to increase the volume of Stereo 2 The camcorder resets to STEREO1 when you turn the camcorder off However the mix balance is memorized by the camco...

Page 92: ...der and computer turn camcorder and computer back on and reconnect them Do not disconnect the DV cable open the memory card cover remove the memory card change the position of the POWER switch or turn off the camcorder and computer while data is being transferred to the computer while the camcorder s card access indicator is flashing Doing so may damage the memory card s data The image files on yo...

Page 93: ... remove the memory card without first pushing it in 1 Turn off the camcorder Make sure that the card access indicator is not flashing before you turn off the camcorder 2 Open the cover 3 Push the memory card to release it Remove the memory card 4 Close the cover This camcorder is compatible with SD Memory Cards or MultiMediaCards only Do not use any other types of memory cards Proper operation can...

Page 94: ...G Joint Photographic Experts Group format Estimated Capacity of an 8 MB Memory Card These figures are approximate They vary according to the recording condition and the subject Sample images already recorded on the supplied SD Memory Card are to be included in the total number CARD PLAY CARD CAMERA PLAY VCR CAMERA CARD PLAY CARD CAMERA PLAY VCR CAMERA IMG QUALITY FINE CARD SETUP IMAGE SIZE 1632 12...

Page 95: ...Select MOVIE SIZE set it to 160 120 and close the menu Movies are recorded in the Motion JPEG format Maximum recording time on a 8 MB SD Memory Card CARD PLAY CARD CAMERA PLAY VCR CAMERA MOVIE SIZE 320 240 CARD SETUP 320 240 approx 20 sec 250 KB sec 160 120 approx 50 sec 120 KB sec Image Size Max Recording Time 8 MB File Size per Second 37 ...

Page 96: ...CARD CAMERA PLAY VCR CAMERA FILE NOS CONTINUOUS CARD SETUP 37 101 0101 101 101 0102 101 0104 101 101 0101 101 101 0103 CONTINUOUS When you record 3 images When you replace the memory card and record an image RESET RESET The file number will be reset each time a new memory card is inserted starting with 101 0101 If the memory card already contains image files the consecutive file number will be ass...

Page 97: ... picture may appear out of focus for a moment while the camcorder is focusing Exposure is locked When you press the PHOTO button on the wireless controller recording starts immediately 3 Press the PHOTO button fully F and focusing frame disappear and you hear a shutter sound The card access indicator flashes and the card access display appears The still image shown on the screen will be recorded o...

Page 98: ...ode is set to OFF No focusing frame appears In step 2 F turns green and focus and exposure are locked The camcorder shuts off when you do not operate it for 5 minutes to save power AUTO POWER OFF appears 20 seconds before shutoff To continue recording turn the POWER switch to OFF and then back to CAMERA Recording a Still Image on a Memory Card While Recording Movies on a Tape When you are recordin...

Page 99: ... function or via the DV terminal as still images on a memory card For connecting instructions refer to page 34 and 83 1 Set the camcorder to PLAY VCR mode If a cassette is loaded make sure that the tape is stopped When recording via the AV terminal make sure that AV DV is displayed on the screen When recording via the DV terminal make sure that AV DV is not displayed Change the setting as necessar...

Page 100: ...Image Recording w Remaining Card Capacity for Still Images e Card Access Display e Image Size flashing in red No card in green 6 or more images in yellow 1 to 5 images in red No more images The indication may not decrease even though a recording has been made or may decrease by 2 images at once All indicators are displayed in green when a memory card is played back Indicates that the camcorder is ...

Page 101: ...ected flash mode appears on the screen disappears after 4 seconds CARD PLAY CARD CAMERA PLAY VCR CAMERA auto The flash fires automatically according to the brightness of the subject red eye reduction auto The flash fires automatically according to the brightness of the subject With the OPTURA40 the assist lamp lights up to reduce the red eye effect With the OPTURA30 the flash fires a pre flash for...

Page 102: ...y flash exposure compensation For the red eye reduction mode to be effective the subject needs to look at the assist lamp OPTURA40 or flash OPTURA30 The degree of reduction depends upon the distance and on each individual The flash will not fire in the following cases When you press the EXP button in auto or red eye reduction auto mode When recording movies on a tape When STILL I REC is set to OFF...

Page 103: ...or theaters Turn off the AF assist lamp in places where flash photography is prohibited Using the Optional VFL 1 Video Flash Light You can also use the optional VFL 1 Video Flash Light with stronger flash The procedure for selecting the flash mode is the same as for the built in flash For instructions on connection and use refer to the instruction manual of the VFL 1 The practical range of the fla...

Page 104: ...s displayed as long as you hold the PHOTO button after recording The FILE OPER menu appears when you press the SET dial while you are reviewing a still image or when you press the SET dial right after recording In this menu you can protect 115 or erase 116 the image REVIEW cannot be selected when continuous shooting high speed continuous shooting or auto exposure bracketing is selected CARD PLAY C...

Page 105: ...s flashing Doing so could result in data damage When you are using a SD Memory Card make sure that the protect switch is set to allow recording Do not load unload a cassette during recording We recommend using a Canon SD Memory Card or a SD Memory Card with a transfer rate of more than 2 MB sec right after you have formatted it with this camcorder With memory cards not formatted with this camcorde...

Page 106: ...ess the start stop button when the scene you wish to record appears 4 Press the start stop button to stop recording When recording from a tape in the camcorder or other video devices A movie recorded from an image in 16 9 format will be vertically compressed The data code of the movie will reflect the date and time it has been recorded on the memory card Recording stops at blank sections or record...

Page 107: ...ion of the focusing point Depending on the size of the subject or the distance the camcorder may focus outside the frame When you operate the zoom lever the frames other than the selected one disappear The focusing point can be selected only when Focus Priority is set to ON in CARD CAMERA mode The focusing point returns to the center if you turn off the camcorder change from CARD CAMERA mode or mo...

Page 108: ...nd may be lower when camcorder shake warning is displayed on the screen CARD PLAY CARD CAMERA PLAY VCR CAMERA CARD PLAY CARD CAMERA PLAY VCR CAMERA Still Image Size Maximum Number of Continuous Shots 1632 1224 2 frames 3 frames 10 images 1280 960 3 frames 5 frames 10 images 640 480 3 frames 5 frames 60 images Frames per Second Normal speed High speed Continuous Shooting High Speed Continuous Shoot...

Page 109: ...d E Auto Exposure Bracketing Press the PHOTO button Three still images in different exposures are recorded to the memory card Make sure that there is sufficient space on the memory card CARD PLAY CARD CAMERA PLAY VCR CAMERA ...

Page 110: ...distinctive item landmark etc in the overlapping portion 1 Press the button 2 Select the direction with the CARD button CARD button clockwise CARD button counterclockwise 3 Select the program AE mode and zoom on the subject Adjust focus and exposure manually as necessary Once the sequence has started you cannot change the program AE mode exposure zoom or focus 4 Press the PHOTO button to record th...

Page 111: ...e A maximum of 26 images can be recorded 6 Press the button after the last image For details on how to merge these images refer to the Digital Video Software Instruction Manual Compose each image so that it overlaps 30 to 50 of the adjoining image Try to keep the vertical misalignment within 10 Do not include moving subject in the overlapping portion Do not try to stitch images that include both d...

Page 112: ...en images 3 To play back a movie press the e a button The first scene appears as a still image when playback is complete Pressing the e a button during playback pauses the playback Press the e a button again to restart playback Pressing the 3 button displays the first scene of the movie Press the CARD button or the REW FF1 button on the wireless controller for 8 fast forward fast rewind playback C...

Page 113: ...access indicator is flashing Doing so could result in data damage Slide Show 1 Press the SLIDE SHOW button Images are played back one after another 2 Press the SLIDE SHOW button to stop the slide show Index Screen 1 Move the zoom lever toward W Up to 6 images appear 2 Turn the SET dial to select an image Move the to the image you wish to view You can switch between the index pages by pressing the ...

Page 114: ...one The number in the upper right of the screen indicates the image number of the current image by the total number of images Press and hold the CARD or CARD button When you release the button the image of the displayed image number appears CARD PLAY CARD CAMERA PLAY VCR CAMERA ...

Page 115: ... menu In CARD CAMERA mode the menu appears when you press the SET dial while you are reviewing a still image or when you press the SET dial right after recording 3 Select PROTECT appears and now the image cannot be erased To cancel the protection press the SET dial 4 Select b RETURN to close the menu Protecting during Index Screen Display 1 Move the zoom lever toward W Up to 6 images appear Select...

Page 116: ...le 4 Select YES The image is erased and the previous image appears 5 Select b RETURN to close the menu Erasing a Single Image All Images 1 Open the menu and select CARD OPERATIONS 2 Select IMAGE ERASE 3 Select SINGLE or ALL When erasing a single image ERASE THIS IMAGE NO and YES appears If an image is protected YES appears in purple When erasing all images ERASE ALL IMAGES EXCEPT FOR IMAGES NO and...

Page 117: ...card mix image Mix level adjustment blue area of the still image Card Luminance Key CARD LUMI Combines illustrations or title with your recordings The live video recording will appear in place of the light area of the card mix image Mix level adjustment light area of the still image Camera Chroma Key CAM CHROMA Combines backgrounds with your recordings Record your subject in front of a blue curtai...

Page 118: ...nd moves to the right and left Random Animation moves randomly in the display Mix level adjustment blue area of the card animation image 1 Set the program selector to Q 2 Open the menu and select CARD MIX The card mix menu appears 3 Select the image you wish to combine with the CARD button 4 Select MIX TYPE CARD CHROMA CARD LUMI CAM CHROMA and C ANIMATION appears CARD PLAY CARD CAMERA PLAY VCR CAM...

Page 119: ... Press the CARD MIX button CARD MIX stops flashing The combined image appears Card mix cannot be used when STILL I REC is set to FINE or NORMAL Movies recorded on a memory card cannot be combined with camcorder recordings Additional sample images are provided on the supplied DIGITAL VIDEO SOLUTION DISK Refer to Adding Still Images from Your Computer to the Memory Card in the Digital Video Software...

Page 120: ...ww canondv com For details on how to add the downloaded images to the memory card refer to Adding Still Images from Your Computer to the Memory Card in the Digital Video Software Instruction Manual PhotoEssentials Royalty Free Stock Photography The PhotoEssentials suite of royalty free images on CD ROM features premium quality assignment photography and is ideally suited for use in advertising bro...

Page 121: ...es Images erased by formatting cannot be recovered If you use a memory card other than the supplied one format it with the camcorder 1 Open the menu and select CARD OPERATIONS 2 Select FORMAT CANCEL and EXECUTE appears 3 Select EXECUTE ALL DATA WILL BE ERASED FORMAT THIS CARD NO and YES appears 4 Select YES and close the menu Formatting starts Selecting NO brings you back to step 3 CARD PLAY CARD ...

Page 122: ...ATE START UP IMAGE SET THIS AS START UP IMAGE YES and NO appears 4 Select YES OVERWRITE MY IMAGE NO and YES appears 5 Select YES The still image will be saved and the image that was saved to MY IMAGE is erased Retain the original data of the still image you have set as the start up image on your computer or removable disk CARD PLAY CARD CAMERA PLAY VCR CAMERA CREATE START UP IMAGE MY CAMERA 37 ...

Page 123: ...n on the printer 3 Set the camcorder to CARD PLAY mode 4 Connect the camcorder to the printer using the cable appears and changes to or when the printer is properly connected to the camcorder Does not appear with movies or still images that cannot be played back with the camcorder The print share button lights up and the current print setting will be displayed for approx 6 seconds Printer with dir...

Page 124: ...urce Refer also to the instruction manual of the respective printer The print setting menu may differ slightly depending on the connected printer Printing with the Print Share Button You can print an image without changing the settings by simply pressing the print share button 1 Select the still image you wish to print with the CARD button 2 Press the button Printing starts The button flashes and ...

Page 125: ...ppears Select OK and press the SET dial Canon Bubble Jet Printer Printing stops even if it is incomplete and the paper is fed through Canon CP Printer A print in progress cannot be stopped Printing stops when the current print is finished and the remaining prints are canceled Printing Errors If an error occurs during the printing process an error message appears 144 Canon Bubble Jet Printer Resolv...

Page 126: ... copies and press the SET dial Setting the Print Style Print setting options and DEFAULT settings vary depending on the printer model For details refer to the instruction manual of your printer BORDERED The image area remains relatively unchanged from the recorded image when it is printed BORDERLESS The center portion of the recorded image is printed at an enlarged size The image s top bottom and ...

Page 127: ...of the paper set in your printer 3 Turn the SET dial to select the paper type and press the SET dial Select the paper type of the paper set in your printer 4 Turn the SET dial to select a layout option and press the SET dial Including the Date in the Print 1 In the print setting menu turn the SET dial to select date and press the SET dial 2 Turn the SET dial to select a date print option and press...

Page 128: ...ains relatively unchanged from the recorded image when it is printed BORDERLESS The center portion of the recorded image is printed at an enlarged size The image s top bottom and sides may be cropped slightly 1 In the print setting menu turn the SET dial to select STYLE and press the SET dial 2 Make sure that PAPER is selected and press the SET dial PAPER CARD 1 CARD 2 CARD 3 LTR A4 For details on...

Page 129: ...LE BORDERED The image area remains relatively unchanged from the recorded image when it is printed BORDERLESS MULTIPLE The center portion of the recorded image is printed at an enlarged size The image s top bottom and sides may be cropped slightly MULTIPLE can only be selected when printing on card size paper The date print function is not supported by the CP Printers CP 10 and CP 100 1 In the pri...

Page 130: ...e Borders 2 Turn the SET dial to select BORDERS and press the SET dial 3 Turn the SET dial to select a borders option and press the SET dial Pressing the MENU button brings you back to the print settings menu Including the Date in the Print 2 Turn the SET dial to select DATE and press the SET dial 3 Turn the SET dial to select a date print option and press the SET dial Pressing the MENU button bri...

Page 131: ...switch between the directions up down or right left and the orientation of the frame vertical horizontal Pressing the MENU button brings you back to the print settings menu About the color of the trimming frame Canon CP Printers only White No trimming settings Green Recommended trimming size The trimming frame may not appear in green depending on the image size paper size or borders settings Red T...

Page 132: ... to print 2 Press the SET dial to open the FILE OPER menu 3 Select PRINT ORDR 4 Select the number of copies appears on the image To cancel the print order set the number of copies to 0 5 Select b RETURN to close the menu Selecting in Index Screen Display 1 Move the zoom lever toward W Up to 6 images appear Select the image you wish to print 2 Open the menu and select CARD OPERATIONS Select PRINT O...

Page 133: ...INT is selected and press the SET dial Printing starts The print setting menu disappears when printing is complete Depending on the connected printer you can select style or paper settings before step 3 Cancel Printing Printing Errors 125 Restarting Printing Open the CARD PLAY menu and select PRINT Select RESUME in the print setting menu and press the SET dial The remaining images will be printed ...

Page 134: ...ve of your computer are valuable original data files If you wish to use image files on your computer make copies of them first and use the copied file retaining the original Make sure that camcorder and computer are not connected with a DV cable before connecting the camcorder to the computer using the USB cable Otherwise the computer may not operate properly We recommend powering the camcorder fr...

Page 135: ...ng Follow the steps 1 to 3 in Starting ZoomBrowser EX in the Digital Video Software Instruction Manual The direct transfer menu appears on the camcorder screen and the button lights up From the second time on you only need to connect the camcorder to the computer to transfer images Windows OS Only SET dial ALL IMAGES Transfers all images to the computer NEW IMAGES Transfers only those images that ...

Page 136: ...ansfer with the CARD button 4 Press the button The selected image is transferred to the computer and displayed in the Main Window of ZoomBrowser EX Pressing the MENU button brings you back to the transfer menu To continue transferring select another image with the CARD button Transferring a Still Image as Wallpaper 1 Turn the SET dial to select WALLPAPER 2 Press the button 3 Select the still image...

Page 137: ... movies in Motion JPEG format can be transferred When transferring with the button the camcorder retains the transfer setting even if you turn it off or change the position of the TAPE CARD switch When you have selected SELECT TRANSFER or WALLPAPER the screen to select a still image appears Press the MENU button to display the direct transfer menu When the protect switch of the SD Memory Card is a...

Page 138: ...ain 4 Select RETURN to close the menu Selecting in Index Screen Display 1 Move the zoom lever toward W Up to 6 images appear 2 Open the menu and select CARD OPERATIONS Select TRANSFER ORDER 3 Press the SET dial on the image you wish to transfer appears on the image To cancel the transfer order press the SET dial again 4 Close the menu Erasing All Transfer Orders 1 Open the menu and select CARD OPE...

Page 139: ...der to the computer using a USB cable or DV cable NETWORK MODE appears on the camcorder screen When you have connected the camcorder to the computer start DV Messenger You can now operate the camcorder from the computer using DV Messenger When DV Messenger is started and set up for communication the video picture appears on the computer screen In NETWORK mode the camcorder can only be operated fro...

Page 140: ...hidden on the index screen Hiding Showing the Displays on the TV Screen When you connect a TV for recording you can select to show the camcorder displays on the TV screen For playback you can hide the camcorder displays on the TV screen Open the menu and select DISPLAY SETUP Select TV SCREEN set it to OFF and close the menu The displays disappear from the TV screen Open the menu and select DISPLAY...

Page 141: ...timer countdown 58 Recording mode 59 Remaining battery charge 26 Wind screen 62 Microphone attenuator 61 Remaining card capacity for still images 98 Backup battery 17 Remote sensor mode 79 Condensation warning 147 Audio mode 60 Headphones 62 16 9 mode 80 Volume level of speaker or headphones 33 DV input 86 Audio level indicator 60 End search 74 Date search 76 Audio dubbing 89 Data code 72 12 bit a...

Page 142: ...rd capacity for still images 100 Stitch assist 110 Drive mode 108 Remaining card capacity for movies 106 Focusing frame 107 Camcorder shake warning 57 Flash 101 CARD PLAY Mode Length of the movie Lap time Current image total images File number 96 Slide show 113 Data code 72 Protect mark 115 ...

Page 143: ...te or change the position of the protect switch Camcorder stopped operating to protect the tape Unload and reload the cassette DV cable is not connected or the connected digital device is turned off Condensation has been detected in the camcorder Tape reached the end Rewind the tape or replace the cassette You attempted to perform audio dubbing on a tape recorded in a mode other than the SP mode Y...

Page 144: ...s been changed between print setting and start of printing You attempted to use a paper size type that is not supported by the printer You attempted to print on paper that cannot be used with the camcorder There is a problem with the ink The ink cartridge is not inserted or is out of ink The ink cartridge needs to be replaced soon There is a problem with the ink cassette The ink cannot be used wit...

Page 145: ...nd turn off the printer After a while turn the printer back on and reconnect the USB cable When you are printing using the button check the print settings Or you attempted to print from a memory card that contains a large number of images Reduce the number of images The print setting cannot be used for printing with the button The printer is in use Check the printer status Printer is warming up If...

Page 146: ...Do not disassemble the camcorder If the camcorder does not function properly consult qualified service personnel Handle the camcorder with care Do not subject the camcorder to shocks or vibration as this may cause damage Avoid sudden changes in temperature Moving the camcorder rapidly between hot and cold temperatures may cause condensation to form on its internal surfaces 147 Storage If you do no...

Page 147: ...eaning cassette Tapes already recorded with dirty video heads may not be played back correctly even when you clean the video heads Do not use wet type cleaning cassettes as this may damage the camcorder Condensation Moving the camcorder rapidly between hot and cold temperature may cause condensation water droplets to form on its internal surfaces Stop using the camcorder if condensation is detecte...

Page 148: ...re or it might explode Do not expose the battery pack to temperature higher than 140 ºF 60 ºC Do not leave it near a heater or inside a car in hot weather Do not try to disassemble or modify it Do not drop or knock it Do not get it wet Charged battery packs continue to discharge naturally Therefore charge them on the day of use or the day before to ensure a full charge Attach the terminal cover wh...

Page 149: ...f the tape becomes slack and damaged it may cause picture and sound distortion Return cassettes in the case and store them upright Do not leave the cassette in the camcorder after use Do not use spliced tapes or nonstandard cassettes as they may damage the camcorder Do not use tapes that have been jammed as video heads may become dirty Do not insert anything into the small holes of the cassette or...

Page 150: ... Inc makes no warranties for corrupted or lost data Do not turn off the camcorder disconnect the power source open the memory card cover or remove the memory card while the card access indicator is flashing Do not use memory cards in places subject to strong magnetic fields Do not leave memory cards in places subject to high humidity and high temperature Do not disassemble memory cards Do not bend...

Page 151: ...k on a TV Screen You can only play back your recordings on TVs with NTSC system The NTSC system is used in the following countries areas American Samoa Antigua Aruba Bahamas Barbados Bermuda Bolivia Canada Chile Columbia Costa Rica Cuba Ecuador El Salvador Guam Guatemala Greenland Haiti Honduras Jamaica Japan Korea Mexico Micronesia Myanmar Nicaragua Panama Peru Philippines Puerto Rico Saint Kitts...

Page 152: ... with use and may not charge The battery pack is damaged Replace or charge the battery pack Attach the battery pack correctly Replace or charge the battery pack Turn on the camcorder Replace or charge the battery pack Open the cassette compartment cover fully Replace or charge the battery pack Consult a Canon Service Center Replace or charge the battery pack Charge the battery pack in temperatures...

Page 153: ...t the viewfinder with the dioptric adjustment lever Clean the lens Adjust the viewfinder with the dioptric adjustment lever flashes red on the screen Image will not appear on the screen SET THE TIME ZONE DATE AND TIME appears on the screen Pressing the start stop button will not start recording Camcorder will not focus A vertical light bar appears on the screen Viewfinder picture is blurred 24 21 ...

Page 154: ...ng the playback button does not start playback Image will not appear on the TV screen Tape is running but image will not appear on the TV screen No sound from the built in speaker Noise comes out of the headphones 31 16 31 34 88 34 147 33 33 Playback When recording near loud sounds such as fireworks drums or concerts sound may become distorted When recording near loud sounds such as fireworks drum...

Page 155: ... Memory card is not inserted Image is protected SD memory card is protected Card error occurred Turn the memory card over and reinsert it Replace the memory card or erase images Format the memory card Insert a memory card Set FILE NUMBERS to RESET and insert a new memory card Change the position of the protect switch Set the camcorder to CARD PLAY mode Insert a memory card Cancel the protection Ch...

Page 156: ...Li Battery Video Light WL D83 Wireless Controller MiniDV Video Cassette SC 1000 Soft Carrying Case Digital Device Computer NB 2L NB 2LH BP 2L12 BP 2L14 Battery Pack WD H34 Wide converter FS 34U Filter Set TL H34 Tele converter SDC 128M SD Memory Card SS 900 Shoulder Strap WS 20 Wrist Strap SC 2000 Soft Carrying Case S 150 S video Cable Commercially available DV Cable CA 570 Compact Power Adapter T...

Page 157: ...ttery pack Please note that this warranty does not apply to repairs arising out of the malfunction of non genuine Canon accessories although you may request such repairs on a chargeable basis Battery Packs When you need extra battery packs select from the following NB 2L NB 2LH BP 2L12 BP 2L14 CB 2LT Battery Charger Use the battery charger for charging the battery packs It plugs directly into a po...

Page 158: ...door shots or panoramic views When the Wide converter is attached a shadow may appear in the picture when you record with video light flash or assist lamp OPTURA40 FS 34U Filter Set Neutral density and MC protector filters help you to control difficult lighting conditions VL 10Li Battery Video Light This compact yet powerful video light can be used for both indoor and outdoor shooting It attaches ...

Page 159: ...dvanced accessory shoe for cable free operation VL 3 Video Light This video light enables you to record brightly in color even in dark places It attaches to the camcorder s advanced accessory shoe for cable free operation DM 50 Directional Stereo Microphone This highly sensitive super directional microphone attaches to the camcorder s advanced accessory shoe It can be used as directional microphon...

Page 160: ...e balance 1 1 lx using the Night mode More than 100 lx Electronic Video Recording System Audio Recording System Television System Image Sensor Tape Format Tape Speed Maximum Recording Time 80 min cassette Fast Forward Rewind Time LCD Screen Viewfinder Microphone Lens Lens Configuration Filter Diameter AF system Minimum Focusing Distance White Balance Minimum Illumination Recommended Illumination I...

Page 161: ... mini B 1 Vp p 75 ohms Y signal 0 286 Vp p 75 ohms C signal AV Terminal DV Terminal MIC Terminal Headphone Terminal USB Terminal S video Terminal Input Output Terminals CA 570 Compact Power Adapter 100 240 V AC 50 60 Hz 17W 8 4 V DC 1 5 A 32 104 F 0 40 C 2 1 3 5 1 1 in 52 90 29 mm 4 8 oz 135 g Power supply Power consumption Rated output Operating temperature Dimensions Weight NB 2LH Battery Pack R...

Page 162: ... CBC NB2 Car Battery Charger 7873A002AA S 150 S Video Cable 3062A002AA D82 0330 202 TL H34 Tele converter 9583A001AA WD H34 Wide converter 9584A001AA FS 34U Filter Set 8081A001AA VFL 1 Video Flash Light 8834A001AA VL 3 Video Light 3175A002AA D86 0121 201 DM 50 Directional Stereo Microphone 3176A002AA D84 0120 201 WS 20 Wrist Strap 3118A002AA D81 0190 202 SC 2000 Soft Carrying Case 9389A001AA SC 10...

Page 163: ... 134 Condensation 147 Connections TV VCR 34 Continuous shooting 108 Copyright signals 86 Data code 72 Date and time 21 Date format 78 Date search 76 Demo mode 82 Digital effects 64 Digital zoom 29 Direct print function 123 Direct transfer 135 Drive mode 108 DV dubbing 86 DV terminal 83 92 Easy recording 45 Effects 66 End search 74 Erasing images 116 Exposure 51 Faders 64 Fast forward 32 File numbe...

Page 164: ...g programs 45 Recording still images memory card 97 Remote sensor 79 Review 104 Rewind 31 S1 video terminal 35 Sample images 119 Sand Snow mode 45 Screen displays 140 SD Memory Card 93 Self timer 58 Shoulder strap 19 Shutter speed 56 Skin detail 50 Slide show 113 SP mode 59 Speaker 33 Sports mode 45 Spotlight mode 45 Still image quality 94 Still image size 94 Stitch Assist mode 110 Super Night mod...

Page 165: ...or failure to follow operating instructions B If the equipment is defective as a result of leaking batteries sand dirt or water damage C If defects or damages are caused by the use of unauthorized parts or by service other than our authorized agent D If the equipment is used for commercial or industrial use This Limited Warranty does not cover cabinet exterior finish video cassette tape head clean...

Page 166: ... equipment is used for commercial professional or industrial purposes This limited warranty does not cover the cabinet exterior finish of the digital video equipment video cassette tapes head cleanings nor does it apply to digital video equipment purchased outside Canada TO OBTAIN WARRANTY SERVICE Ship your Canon digital video equipment in its original carton box or equivalent properly packed full...

Reviews: