background image

34

- 12 -

Base

Whooper Swan

Summary of Contents for PAPER CRAFT Whooper Swan

Page 1: ...and their main breeding ground is northen Eurasia Iceland etc This papercraft is about one half the size of a real whooper swan 1 Notation Key Assembly Instructions Tools Caution 1 Carefully cut out the parts 2 Make mountain folds and valley folds along the dotted lines as indicated by the directions 3 Assemble the parts in the order shown by the numbers on the glue tabs Read the assembly instruct...

Page 2: ...rom the front Make one at a time 1 1 5 5 6 6 1 4 5 6 3 3 4 Completed head Assemble the head 2 Assemble and 2 3 4 1 5 6 1 2 3 4 Attach to and first 1 5 3 Assemble and attach them to the face and The photo shows part 2 Fold inside and glue down Whooper Swan Assembly Instructions ...

Page 3: ...2 Assemble and 25 26 3 Assemble and 8 9 10 27 7 11 12 25 26 Arrange the glue spots of each part Head 5 Head 6 Curl into a cylinder and glue it inside the neck part of 27 5 27 25 26 6 Curl and into cylinders and attach them together Then insert them inside the neck part of Do not glue Assemble either of the necks Whooper Swan Assembly Instructions ...

Page 4: ...e the body Assemble and and make the neck joint 14 13 Assemble and make the front part of the body 15 16 17 18 19 15 Either or can be on top 17 19 Attach and and add curves to the part and attach to 13 13 14 14 15 14 17 19 18 16 15 16 18 17 19 Whooper Swan Assembly Instructions ...

Page 5: ...r 21 20 Assemble and and attach them to and 23 22 21 20 Align the center of the glue tabs on with the edge of 22 20 21 Align the center of and the edge of with the triangle marks 15 20 21 20 20 21 21 20 22 22 22 23 23 21 24 15 19 20 23 20 15 21 15 19 20 23 24 Whooper Swan Assembly Instructions ...

Page 6: ...r adult whooper swans are complete 14 15 24 13 Insert either of the heads into the body You can swap heads later as you please Do not glue Insert the head Do not glue 28 29 Attach parts to together to make the cygnets 33 28 Completion of the adults whooper swans Assembly of cygnets Whooper Swan Assembly Instructions ...

Page 7: ...t their necks form a heart shape 34 35 36 37 34 35 36 37 38 39 7 Assemble the base and complete Glue parts to together as shown 34 38 39 37 Assemble and and assemble the nameplate Assemble to to make the base 37 34 Both swans heads can be turned and posed as you like Why not make two adults and two cygnets to make a whooper swan family Whooper Swan Assembly Instructions ...

Page 8: ...les and females but cygnets younger than one year old are gray with brownish streaks the area around the top of the beak a pinkish white Also adults can weigh more than 10kg which is quite heavy for a flying animal Take off requires the assistance of a run up Whooper swans feed mostly on the stems and roots of aquatic plants and their main breeding ground is northen Eurasia Iceland etc This paperc...

Page 9: ...1 2 3 4 5 6 2 Head Whooper Swan ...

Page 10: ...7 8 9 10 11 12 13 3 Neck Whooper Swan ...

Page 11: ...14 22 23 4 Neck joint Tail Center Whooper Swan ...

Page 12: ...15 14 5 Breast Whooper Swan ...

Page 13: ...16 17 6 Back Wing right Whooper Swan ...

Page 14: ...18 19 7 Back Wing left Whooper Swan ...

Page 15: ...20 25 26 8 Lower Neck 1 Side of body right Whooper Swan ...

Page 16: ...21 27 9 Lower Neck 2 Side of body left Whooper Swan ...

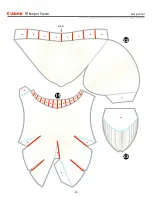
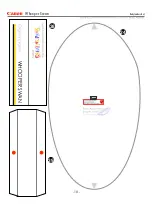
Page 17: ...24 38 39 10 Body underside WHOOPER SWAN Whooper Swan ...

Page 18: ...28 29 30 31 32 33 11 Cygnet Whooper Swan ...

Page 19: ...34 12 Base Whooper Swan ...

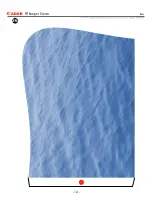
Page 20: ...35 13 Base Whooper Swan ...

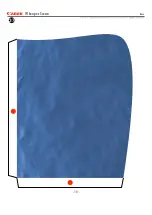
Page 21: ...36 14 Base Whooper Swan ...

Page 22: ...37 15 Base Whooper Swan ...

Reviews: