Reducing or Enlarging a Copy
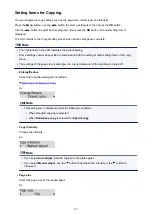
You can specify the magnification optionally or select the preset-ratio copying or fit-to-page copying.
In the copy mode, press the
Menu
button, use the
button to select
Enlarge/Reduce
, then press the
OK
button.
Use the
button to select the reduction/enlargement method, then press the
OK
button.
Ex:
Note
• Some of the reduction/enlargement methods are not available depending on the copy menu.
•
Preset ratio
You can select one of the preset ratios to reduce or enlarge copies.
Use the
button to select a preset ratio to match the size of your original document and printing
paper, then press the
OK
button.
•
Magnification
You can specify the copy ratio as a percentage to reduce or enlarge copies.
Use the
(-)
(+) button or the Numeric buttons to specify the reduction or enlargement ratio (25 -
400%), then press the
OK
button.
Note
• Press and hold the
(-)
(+) button to quickly advance through the ratios. For details, see
•
Fit to page
The machine automatically reduces or enlarges the image to fit the page size.
Note
• When you select
Fit to page
, the size of your original document may not be detected correctly
depending on the original. In this case, select
Preset ratio
or
Magnification
.
• When
Fit to page
is selected, load the original on the platen glass.
361
Summary of Contents for PIXMA E481
Page 15: ...B204 776...
Page 67: ...67...
Page 99: ...Safety Guide Safety Precautions Regulatory and Safety Information 99...
Page 108: ...Main Components Front View Rear View Inside View Operation Panel 108...
Page 124: ...Loading Paper Originals Loading Paper Loading Originals 124...
Page 141: ...Printing Area Printing Area Other Sizes than Letter Legal Envelopes Letter Legal Envelopes 141...
Page 153: ...Photo or thick paper 153...
Page 154: ...Replacing a FINE Cartridge Replacing a FINE Cartridge Checking the Ink Status 154...
Page 222: ...Information about Network Connection Useful Information about Network Connection 222...
Page 244: ...Note This machine supports WPA WPA2 PSK WPA WPA2 Personal and WPA2 PSK WPA2 Personal 244...
Page 272: ...272...
Page 282: ...PRO 10S 282...
Page 289: ...Paper Settings on the Printer Driver and the Printer Paper Size 289...
Page 314: ...Adjusting Brightness Adjusting Intensity Adjusting Contrast 314...
Page 371: ...Scanning Scanning from a Computer Scanning from the Operation Panel of the Machine 371...
Page 410: ...Defaults You can restore the settings in the displayed screen to the default settings 410...
Page 420: ...Defaults You can restore the settings in the displayed screen to the default settings 420...
Page 471: ...471...
Page 478: ...Scan resolution Select the resolution for scanning Ex 478...
Page 643: ...Telephone Problems Cannot Dial Telephone Disconnects During a Call 643...
Page 646: ...Problems with Scanning Problems with Scanning Scan Results Not Satisfactory 646...
Page 739: ...5B02 Cause Printer error has occurred Action Contact the service center 739...
Page 740: ...5B03 Cause Printer error has occurred Action Contact the service center 740...
Page 741: ...5B04 Cause Printer error has occurred Action Contact the service center 741...
Page 742: ...5B05 Cause Printer error has occurred Action Contact the service center 742...
Page 743: ...5B12 Cause Printer error has occurred Action Contact the service center 743...
Page 744: ...5B13 Cause Printer error has occurred Action Contact the service center 744...
Page 745: ...5B14 Cause Printer error has occurred Action Contact the service center 745...
Page 746: ...5B15 Cause Printer error has occurred Action Contact the service center 746...

