• In Windows 8 or Windows 7, right-click the "Canon XXX Printer" icon (where "XXX" is your
machine's name), then select
Printer properties
.
• In Windows Vista or Windows XP, right-click the "Canon XXX Printer" icon (where "XXX" is your
machine's name), then select
Properties
.
4. Click the
Ports
tab to confirm the port settings.
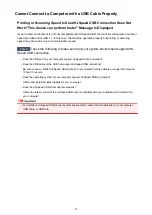
Make sure that a port named "USBnnn" (where "n" is a number) with "Canon XXX Printer" appearing in
the
Printer
column is selected for
Print to the following port(s)
.
Note
• When the machine is used over LAN, the port name of the machine is displayed as
"CNBJNP_xxxxxxxxxx". "xxxxxxxxxx" is the character string generated from the MAC address or a
character string specified by the user when setting up the machine.
• If the setting is incorrect:
Reinstall the MP Drivers with the Setup CD-ROM or install them from our website.
• Printing does not start even though the machine is connected to the computer using a USB cable
and the port named "USBnnn" is selected:
In Windows 8, select
My Printer
on the
Start
screen to start My Printer. If
My Printer
is not
displayed on the
Start
screen, select the
Search
charm, then search for "My Printer".
Set the correct printer port on
Diagnose and Repair Printer
. Follow the on-screen instructions to
set the correct printer port, then select your machine's name.
In Windows 7, Windows Vista, or Windows XP, click
Start
and select
All programs
,
Canon
Utilities
,
Canon My Printer
,
Canon My Printer
, then select
Diagnose and Repair Printer
. Follow
the on-screen instructions to set the correct printer port, then select your machine's name.
If the problem is not resolved, reinstall the MP Drivers with the Setup CD-ROM or install them from
our website.
• Printing does not start even though the port named "CNBJNP_xxxxxxxxxx" is selected when the
machine is used over LAN:
Launch IJ Network Tool, and select "CNBJNP_xxxxxxxxxx" as you confirmed in step 4, then
associate the port with the printer using
Associate Port
in the
Settings
menu.
If the problem is not resolved, reinstall the MP Drivers with the Setup CD-ROM or install them from
our website.
Check3
Make sure that the USB cable is securely plugged in to the machine and the
computer.
When the machine is connected to your computer with a USB cable, check the followings:
• If you are using a relay device such as a USB hub, disconnect it, connect the machine directly to the
computer, and try printing again. If printing starts normally, there is a problem with the relay device.
Consult the reseller of the relay device for details.
• There could also be a problem with the USB cable. Replace the USB cable and try printing again.
Check4
Make sure that the MP Drivers are installed correctly.
Uninstall the MP Drivers following the procedure described in Deleting the Unnecessary MP Drivers, then
reinstall the MP Drivers with the Setup CD-ROM or reinstall them from our website.
Check5
Check the status of the device on your computer.
97
Summary of Contents for Pixma MG3500 Series
Page 1: ...MG3500 series Online Manual Scanning English ...
Page 11: ...Scanning with Favorite Settings 11 ...
Page 84: ...Related Topic Basic Mode Tab 84 ...
Page 87: ...Related Topic Advanced Mode Tab 87 ...
Page 182: ...MG3500 series Online Manual Troubleshooting English ...
Page 219: ...Problems with Printing Quality Print Results Not Satisfactory Ink Is Not Ejected 38 ...
Page 273: ...About Errors Messages Displayed If an Error Occurs A Message Is Displayed 92 ...
Page 300: ...1202 Cause The paper output cover is open Action Close the paper output cover 119 ...
Page 335: ...5B02 Cause Printer error has occurred Action Contact the service center 154 ...
Page 336: ...5B03 Cause Printer error has occurred Action Contact the service center 155 ...
Page 337: ...5B04 Cause Printer error has occurred Action Contact the service center 156 ...
Page 338: ...5B05 Cause Printer error has occurred Action Contact the service center 157 ...
Page 339: ...5B12 Cause Printer error has occurred Action Contact the service center 158 ...
Page 340: ...5B13 Cause Printer error has occurred Action Contact the service center 159 ...
Page 341: ...5B14 Cause Printer error has occurred Action Contact the service center 160 ...
Page 342: ...5B15 Cause Printer error has occurred Action Contact the service center 161 ...
Page 367: ...MG3500 series Online Manual Printing Copying English ...
Page 408: ...Related Topics Registering a Stamp Registering Image Data to be Used as a Background 42 ...
Page 416: ...3 Complete the setup Click OK then it returns to Stamp Background dialog box 50 ...
Page 435: ...Adjusting Colors with the Printer Driver Printing with ICC Profiles 69 ...
Page 467: ...In such cases take the appropriate action as described 101 ...
Page 516: ...Related Features Reducing the Machine Noise Changing the Machine Operation Mode 150 ...
Page 553: ...Specifications 220 ...
Page 594: ...Safety Guide Safety Precautions Regulatory and Safety Information 47 ...
Page 599: ...Main Components and Basic Operations Main Components About the Power Supply of the Machine 52 ...
Page 600: ...Main Components Front View Rear View Inside View Operation Panel 53 ...
Page 612: ...Loading Paper Originals Loading Paper Loading Originals 65 ...
Page 625: ...Printing Area Printing Area Other Sizes than Letter Legal Envelopes Letter Legal Envelopes 78 ...
Page 635: ...Replacing a FINE Cartridge Replacing a FINE Cartridge Checking the Ink Status 88 ...
Page 670: ...Note When performing Bottom Plate Cleaning again be sure to use a new piece of paper 123 ...
Page 686: ...Information about Network Connection Useful Information about Network Connection 139 ...
Page 732: ...5 Delete Deletes the selected IP address from the list 185 ...

