


(4)
Confirm the message, select
Yes
, then press the
OK
button.
The print head alignment sheet will be printed.
Important
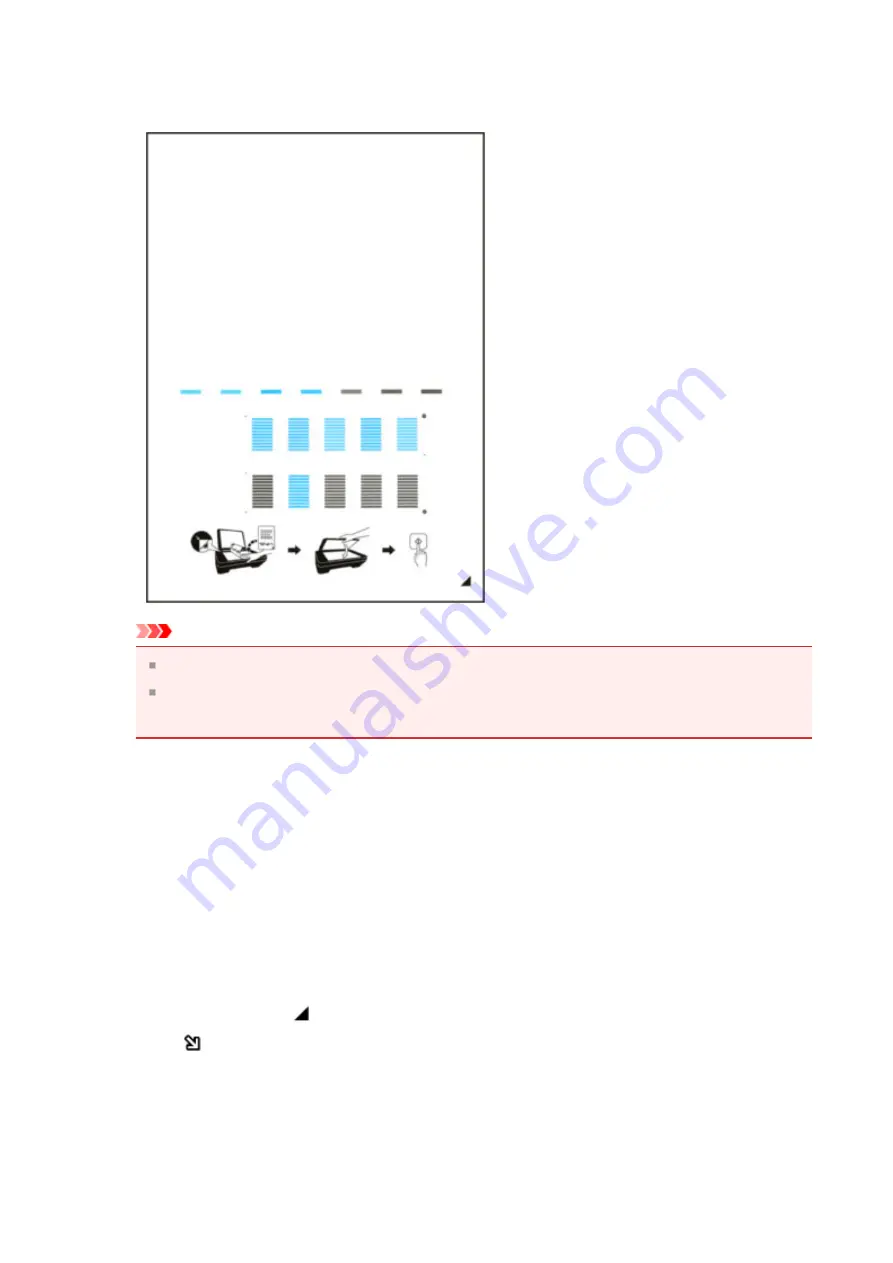
Do not touch any printed part on the print head alignment sheet.
Be careful not to get the print head alignment sheet dirty. If the sheet is stained
or wrinkled, it may not be scanned properly.
(5)
When the message "
Did the patterns print correctly?
" appears,
confirm that the pattern is printed correctly, select
Yes
, then press the
OK
button.
5.
Scan the print head alignment sheet to adjust the print head position.
(1)
Confirm the message, then load the print head alignment sheet on the
platen glass.
Load the print head alignment sheet WITH THE PRINTED SIDE FACING DOWN
and align the mark on the bottom right corner of the sheet with the alignment
mark .
168
Summary of Contents for PIXMA MG5500 Series
Page 69: ...69 ...
Page 89: ...Safety Guide Safety Precautions Regulatory and Safety Information 89 ...
Page 96: ...Main Components Front View Rear View Inside View Operation Panel 96 ...
Page 111: ...Loading Paper Originals Loading Paper Loading Originals 111 ...
Page 143: ...Replacing an Ink Tank Replacing an Ink Tank Checking the Ink Status 143 ...
Page 208: ...Language selection Changes the language for messages and menus on the LCD 208 ...
Page 216: ...Information about Network Connection Useful Information about Network Connection 216 ...
Page 262: ...5 Delete Deletes the selected IP address from the list 262 ...


