background image

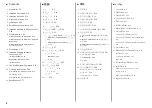
สารบัญ

  7  ติดตั้งซอฟต์แวร์ (การเชื่อมต่อ USB)  P.26 

  6  เลือกวิธีการเชื่อมต่อ  P.24 

  5  ป้อนกระดาษ  P.20 

  3  ติดตั้ง ตลับหมึก  P.14 

  2  ติดตั้ง หัวพิมพ์  P.10 

  1  การจัดเตรียม  P.5 


ตั้งค่าแบบไร้สายโดยใช้ Easy Setup  P.37 


ตั้งค่าแบบไร้สายโดยใช้ WPS (Wi-Fi Protected Setup)  

P.42 


ตั้งค่าแบบไร้สายโดยใช้ WCN (Windows Connect Now)  

P.45 

  8  ตั้งค่าแบบไร้สาย  P.35 


พิมพ์ภาพถ่ายจากการ์ดหน่วยความจำ  P.70 


ลองทำสำเนา  P.73 


พิมพ์ภาพถ่ายจากคอมพิวเตอร์  P.75 

 12  ลองใช้เครื่อง P.68 

 10  ติดตั้งซอฟต์แวร์ (การเชื่อมต่อเครือข่าย)  P.51  


ติดตั้งซอฟต์แวร์  P.52 


การลงทะเบียน (Macintosh)  P.59 


ข้อมูล  P.63 

 11  ใช้จากคอมพิวเตอร์ที่เพิ่มเข้ามา  P.67 

 13  ข้อมูลทางเทคนิค  P.80 

  4  การจัดตำแหน่ง หัวพิมพ์  P.18 

  9  ตั้งค่าแบบมีสาย  P.47 

목차

  7 

소프트웨어


설치

(USB 

연결

)  P.26

  6 

연결


방법


선택

  P.24

  5 

용지


로드

  P.20

  3 

잉크


탱크


설치

  P.14

  2 

프린트


헤드


설치

  P.10

  1 

준비

  P.5


쉬운


설정

(Easy Setup)


사용한


무선


설정


P.37


WPS(Wi-Fi Protected Setup)


사용한


무선


설정

  P.42


WCN(Windows Connect Now)


사용한


무선


설정

  P.45

  8 

무선


설정

  P.35

 11 

추가된


컴퓨터에서


사용

  P.67

 13 

사양

  P.79


메모리


카드에서


사진


인쇄

  P.70


복사해


보기

  P.73


컴퓨터에서


사진


인쇄

  P.75

 12 

기기


사용해


보기

  P.68

  4 

프린트


헤드


정렬

  P.18

 10 

소프트웨어


설치

(

네트워크


연결

)  P.51


소프트웨어


설치

  P.52


등록

(Macintosh)  P.59


정보

  P.63

  9 

유선


설정

  P.47

目錄

  7 

安裝軟體

(USB

連接

)  P.26

  6 

選擇連接方法

  P.24

  5 

載入紙張

  P.20

  3 

安裝墨水盒

  P.14

  2 

安裝列印頭

  P.10

  1 

準備工作

  P.5


使用簡易設定

(Easy Setup)

進行無線設定

  P.37


使用

WPS (Wi-Fi Protected Setup)

進行無線設

  P.42


使用

WCN (Windows Connect Now)

進行無線

設定

  P.45

  8 

無線設定

  P.35

 11 

在其他的電腦上使用

  P.67

 13 

規格

  P.78


從記憶卡列印相片

  P.70


嘗試影印

  P.73


從電腦列印相片

  P.75

 12 

嘗試使用本機

  P.68

  4 

校準列印頭

  P.18

 10 

安裝軟體

(

網路連接

)  P.51 


安裝軟體

  P.52


註冊

(Macintosh)  P.59


資訊

  P.63

  9 

有線設定

  P.47

Contents

  7  Install the Software (USB Connection)  

P.26

  6  Select Connection Method  P.24

  5  Load Paper  P.20

  3  Install the Ink Tanks  P.14

  2  Install the Print Head  P.10

  1  Preparation  P.5


Wireless Setup Using Easy Setup  P.37


Wireless Setup Using WPS (Wi-Fi Protected 

Setup)  P.42


Wireless Setup Using WCN (Windows 

Connect Now)  P.45

  8  Wireless Setup  P.35

 11  Use from Additional Computers  P.67

 13  Specifications  P.77


Print Photos from a Memory Card  P.70


Try Copying  P.73


Print Photos from a Computer  P.75

 12  Try Using the Machine  P.68

  4  Align the Print Head  P.18

 10  Install the Software (Network 

Connection)  P.51 


Install the Software  P.52


Registration (Macintosh)  P.59


Information  P.63

  9  Wired Setup  P.47

Summary of Contents for PIXMA MG6170

Page 1: ...ENGLISH Getting Started Make sure to read this manual before using the machine Please keep it in hand for future reference...

Page 2: ...dows Vista Windows 7 Home Premium Mac OS X v 10 6 x Windows 7 K10360 MG6170 Instructions including important information Prohibited actions Microsoft is a registered trademark of Microsoft Corporation...

Page 3: ...g Basic Guide Describes basic operations and media and gives an introduction to other functions available On screen manuals can be viewed on a computer They are included on the Setup CD ROM and are in...

Page 4: ...13 P 78 P 70 P 73 P 75 12 P 68 4 P 18 10 P 51 P 52 Macintosh P 59 P 63 9 P 47 Contents 7 Install the Software USB Connection P 26 6 Select Connection Method P 24 5 Load Paper P 20 3 Install the Ink T...

Page 5: ...aration Software Installation Installation Complete Machine Installation Flow Machine Wired Setup Try Using the Machine Software Installation Software Installation Using from Additional Computers when...

Page 6: ...chine over a wireless wired connection the following devices are required depending on the connection method Wired Connection Router etc A commercial access point or router that supports IEEE802 11b g...

Page 7: ...the machine when opening covers resulting in malfunction Paper Output Tray A automatically opens when printing starts Do not place anything in front of the Paper Output Tray Remove all orange tape an...

Page 8: ...machine with your computer USB connection only Some accessories 1 are stored within the Paper Output Tray A Open the Paper Output Tray to remove them Make sure all the following items are supplied 1...

Page 9: ...tlet firmly Do NOT connect the USB cable or Ethernet cable at this stage Make sure that the Document Cover B is closed Press the LCD open button C 1 then adjust the LCD Liquid Crystal Display D to a c...

Page 10: ...selection OK Use the or button F on the Operation Panel to select the language for the LCD then touch the OK button When the above screen is displayed touch the OK button and go to the next step If an...

Page 11: ...R lamp H is not lit Operating noise may continue for up to 25 seconds until the machine turns off When removing the power plug make sure that the POWER lamp is not lit before removing the plug Removin...

Page 12: ...2 1 A B B 10 A B A B A B Install the Print Head Lift the Scanning Unit Cover A until it stops Close the Document Cover B and lift it with the Scanning Unit Cover...

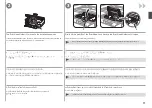
Page 13: ...rint Head Lock Lever in the Print Head Holder until it stops The Print Head Lock Lever may feel heavy Do not touch the inside of the Print Head Holder E The machine may not print properly if you touch...

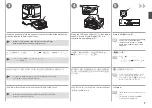
Page 14: ...e pressure to it Do not touch the inside F or metal parts G of the Print Head The machine may not print properly if you touch them There may be some transparent or light blue ink on the inside of the...

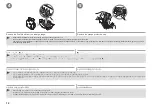
Page 15: ...in place as shown Do not knock the Print Head against the sides of the holder Install in a well lit environment Hold the Print Head Lock Lever firmly and lower it completely Once you have installed t...

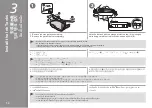
Page 16: ...drop or apply excessive pressure to them Be sure to use the supplied ink tanks If the orange tape remains on the L shape air hole ink may splash or the machine may not print properly If you push the...

Page 17: ...ff Do not push the sides of the ink tank Do not touch the inside C of the orange protective cap or the open ink port D The ink may stain your hands if you touch them Tilt the ink tank then insert it u...

Page 18: ...roperly the Ink lamp lights red Install all the other ink tanks in the same way according to the color order indicated on the label Make sure all the Ink lamps light red Once you have installed the in...

Page 19: ...t the LCD changes as shown in the illustration and go to the next step It takes about 5 minutes before the LCD changes The machine may make some operating noises when preparing to print This is normal...

Page 20: ...Prepare the Paper Support A 1 Open it 2 Withdraw it upwards 3 Tilt it back Move the Paper Guides B to both edges Load a sheet of supplied specialty paper Matte Photo Paper MP 101 in the Rear Tray C Lo...

Page 21: ...ignment is now complete When the pattern is printed remove the printed paper Confirm the above message then go to the next step When an error message is displayed on the LCD touch the OK button to cle...

Page 22: ...aries depending on the media type Specialty paper including photo paper Load paper in the Rear Tray A Plain paper Load paper in the Cassette B For details on how to handle paper refer to Loading Paper...

Page 23: ...with the printing side facing up Make sure that the height of the paper stack does not exceed the line C How to load specialty paper in the Rear Tray This section describes how to load plain paper in...

Page 24: ...G to the edge Slide the front Paper Guide H to align with the actual size of the paper The front Paper Guide will click and stop when it aligns with the corresponding mark of paper size Load plain pa...

Page 25: ...ide of the Cassette 1 and slide the left Paper Guide completely against the left edge of the paper 2 Make sure that the height of the paper stack does not exceed the line I The LCD will turn off if th...

Page 26: ...cables Want to use from multiple computers Wireless Connection USB Connection Intended Use Connection Method Go to 7 Install the Software USB Connection on page 26 Go to 8 Wireless Setup on page 35 A...

Page 27: ...A type of network that connects computers to each other within a limited area room building etc If it is uncertain whether your device access point router etc supports wireless connection or wired co...

Page 28: ...before installation Log on as the administrator or a member of the Administrators group Do not switch users during the installation process Internet connection may be required during the installation...

Page 29: ...u connect the machine via USB cable before installing the software For Windows 7 1 Remove the USB cable connected to your computer 2 Proceed to on page 28 For Windows Vista Windows XP This dialog box...

Page 30: ...into the CD ROM drive If you are using Windows the setup program starts automatically Press the ON button A to TURN OFF THE MACHINE Operating noise may continue for up to 25 seconds until the machine...

Page 31: ...r Account Control Yes Continue Setup OK Click Run Msetup4 exe on the AutoPlay screen then click Yes or Continue on the User Account Control dialog box If the User Account Control dialog box reappears...

Page 32: ...Next Easy Install Custom Install Select a country or region then click Next Select your place of residence then click Next If the Select Language screen appears select a language then click Next Click...

Page 33: ...USB Click Install Follow any on screen instructions to proceed with the software installation Select Use the printer via USB then click Next Important Information for the Installation When the Printer...

Page 34: ...ce Europe Middle East Africa User Registration When the serial number is not displayed on the registration screen automatically input the serial number located inside the machine as shown in the illus...

Page 35: ...u EX Macintosh Canon Solution Menu EX OK Solution Menu EX Click Exit to complete the installation For Macintosh It is necessary to restart the computer before scanning using the Operation Panel on the...

Page 36: ...Driver XPS Congratulations Setup is complete Proceed to page 68 for information regarding the Solution Menu EX and the on screen manual or page 70 to start using the machine Installing the XPS Printer...

Page 37: ...router is connected Add connect the machine to the network Internet Access point or wireless router etc Wireless Setup An Ad hoc connection which establishes a direct connection to the computer over...

Page 38: ...s a risk of disclosing data such as your personal information to a third party The machine cannot be used over a wireless and wired connection at the same time If an error message appears or if you ha...

Page 39: ...most cases Easy Setup will be used to connect the machine to your access point or router Before you continue you must gather the information below which will be required during the installation For y...

Page 40: ...dentify the specific access point Also referred to as encryption key WEP key or WPA WPA2 passphrase Pre Shared key A password required to set to prevent unauthorized access to communication Network Ke...

Page 41: ...D A Setup B C LAN Wireless LAN setup OK Yes OK Wi Fi D A Setup B Use the or button A to display Setup then touch the right FUNCTION button B Use the or button C to select Wireless LAN setup then touch...

Page 42: ...wrote down on page 38 then touch the OK button Make sure that one of the above screens is displayed then touch the right FUNCTION button If the above screen is not displayed go to on page 41 If you a...

Page 43: ...twork Connection on page 51 If Failed to connect to the access point appears touch the OK button make sure that the network key is correct then enter it again If a connection still cannot be establish...

Page 44: ...Protected Setup C LAN Wireless LAN setup OK Yes OK Wi Fi D A Setup B Wireless Setup Using WPS Wi Fi Protected Setup Use the or button A to display Setup then touch the right FUNCTION button B Read th...

Page 45: ...the PIN code method for setup select PIN code method in then touch the OK button Follow the on screen instructions to operate the machine and access point When the screen in appears touch the OK butt...

Page 46: ...or details on the WPS button pressing refer to the manual of your access point The Wi Fi lamp blue flashes while searching for or connecting to an access point When the above screen appears touch the...

Page 47: ...ash drive 4 46 Windows 7 Windows Vista WCN Windows Connect Now USB Canon USB USB WCN UFD Windows 7 Windows Vista 46 Wireless Setup Using WCN Windows Connect Now 1 Click Start Control Panel View networ...

Page 48: ...Add the device or computer using a USB ash drive 4 SSID Next 5 51 10 1 LCD A Setup menu LAN Wireless LAN setup OK 2 Other setup OK 3 WCN OK 4 USB USB B OK 5 LAN Wireless LAN settings completed OK USB...

Page 49: ...9 47 Before connecting the machine to the network make sure that the computer and router is connected Add connect the machine to the network Internet Router etc Wired Setup...

Page 50: ...facturer In an office setup consult your network administrator If you connect to a network that is not protected with security measures there is a risk of disclosing data such as your personal informa...

Page 51: ...vice settings OK A B C Setup D E Device settings OK Remove the Cap A then connect a network device router etc with an Ethernet cable B Use the or button C to display Setup then touch the right FUNCTIO...

Page 52: ...s OK LAN Wired LAN active OK 51 10 Change wireless wired OK LAN LAN settings OK LAN Wired LAN active OK 51 10 Select Change wireless wired then touch the OK button Select LAN settings then touch the O...

Page 53: ...ers during the installation process Internet connection may be required during the installation Connection fees may apply Consult the internet service provider It may be necessary to restart your comp...

Page 54: ...orer 7 Turn on the computer then insert the Setup CD ROM into the CD ROM drive If you are using Windows the setup program starts automatically Easy WebPrint EX Easy WebPrint EX is Web print software t...

Page 55: ...r Account Control Yes Continue Setup OK Double click the Setup icon of the CD ROM folder to proceed to the following screen Enter your administrator name and password then click OK If the CD ROM folde...

Page 56: ...ect Language Next Custom Install Select a country or region then click Next Select your place of residence then click Next Click Easy Install The drivers application software and on screen manuals are...

Page 57: ...Next Install Use the printer on network Next Install Use the printer on network Next Install Click Install Select Use the printer on network then click Next Follow any on screen instructions to proce...

Page 58: ...er on network Macintosh Exit Use the printer on network When the Printer Detection screen appears click Next If the Printer Connection screen appears instead of the screen above the connection method...

Page 59: ...es Next Check Printer Settings Next Update When the Detected Printers List dialog box appears select Canon MG6100 series then click Next On the Canon IJ Network Tool screen select MG6100 series in Pri...

Page 60: ...Macintosh 59 Setup Completion Complete 63 59 Macintosh Setup Completion Complete 63 59 Macintosh When the Setup Completion dialog box appears click Complete Next read Information on page 63 Next read...

Page 61: ...ibes how to register the machine on a Macintosh computer Windows users read Information on page 63 When the Register Printer and Scanner screen appears click Register Printer Registration Macintosh v...

Page 62: ...61 Printer List Add You have no printers available Add Printer Browser More Printers Canon MG6100 series canonijnetwork Add 61 Printer List Add You have no printers available Add Printer Browser More...

Page 63: ...and Scanner Register Scanner Canon IJ Network Canon MG6100 series Add Canon MG6100 series Register Printer and Scanner Register Scanner Make sure that Canon MG6100 series is added to the list of print...

Page 64: ...gs Canon MG6100 series OK Register Printer and Scanner Next 63 Scan from PC Settings Canon MG6100 series OK Register Printer and Scanner Next 63 Select Canon MG6100 series on the Scan from PC Settings...

Page 65: ...creen instructions to proceed with the software installation Important Information for the Installation When the serial number is not displayed on the registration screen automatically input the seria...

Page 66: ...Extended Survey Program Extended Survey Program Exit Macintosh If the Extended Survey Program screen appears If you can agree to Extended Survey Program click Agree If you click Do not agree the Exten...

Page 67: ...enu EX Solution Menu EX Solution Menu EX Windows Macintosh Canon Solution Menu EX OK Solution Menu EX Solution Menu EX The buttons displayed on Solution Menu EX may vary depending on the country or re...

Page 68: ...m Additional Computers Now that the wireless wired connection of the machine is complete it can be used from additional computers on the same network Install software including the drivers on the comp...

Page 69: ...the machine is already connected to a wireless wired connection it can be used from additional computers on the same network To use from additional computers Computer from which the machine can be use...

Page 70: ...the computer along with the drivers You can print creative items by correcting enhancing photos using the application software For details on how to use the application software and the machine refer...

Page 71: ...on Menu EX Easy WebPrint EX Use Easy WebPrint EX to print web pages in Internet Explorer easily Some of its features include Printing a web page by reducing its size to fit the paper width automatical...

Page 72: ...xD Picture Card Type M xD Picture Card Type H MMCmobile I II 3 3V A USB I II 3 3V A USB I II 3 3V A USB Supported Memory Cards Adapter required for TYPE I TYPE II 3 3V Corresponding Card Slot Card Sl...

Page 73: ...lot Cover insert a memory card into the Card Slot When inserting a memory card into the Card Slot the photos on the memory card are read and the screen to specify photos and the number of copies to pr...

Page 74: ...tart After printing open the Card Slot Cover pinch the memory card and pull it straight out After removing the memory card close the Card Slot Cover For more information on printing from a memory card...

Page 75: ...py Place the document face down and align it with the Alignment Mark E Do not place objects weighing 4 4 lb 2 0 kg or more on the Platen Glass F or do not apply pressure to the document by pressing on...

Page 76: ...ouch the left FUNCTION button H 4 Touch the Black button I or the Color button J Copying will start Do not open the Document Cover until copying is complete Remove the document after printing For the...

Page 77: ...oPrint EX Solution Menu EX 68 20 5 Load 10 x 15 cm 4 x 6 photo paper in the Rear Tray A in portrait orientation with the printing side facing up Make sure that the Paper Output Tray B is open If print...

Page 78: ...cintosh Print Print Select the image you want to print then click Layout Print When a photo is selected the number of copies is set to 1 Click Print For more information refer to the on screen manual...

Page 79: ...B 64 bit Windows Vista Vista SP1 Vista SP2 1 GHz processor 512 MB Windows XP SP2 SP3 300 MHz processor 128 MB Mac OS X v 10 6 Intel processor 1 GB Mac OS X v 10 5 Intel processor PowerPC G5 PowerPC G4...

Page 80: ...ta SP1 Vista SP2 1GHz 512MB Windows XP SP2 SP3 300MHz 128MB Mac OS X v 10 6 Intel 1GB Mac OS X v 10 5 Intel PowerPC G5 PowerPC G4 867MHz 512MB Mac OS X v 10 4 11 Intel PowerPC G5 PowerPC G4 PowerPC G3...

Page 81: ...s Vista Vista SP1 Vista SP2 1GHz 512MB Windows XP SP2 SP3 300MHz 128MB Mac OS X v 10 6 Intel 1GB Mac OS X v 10 5 Intel PowerPC G5 PowerPC G4 867MHz 512MB Mac OS X v 10 4 11 Intel PowerPC G5 PowerPC G4...

Page 82: ...ista SP1 Vista SP2 1 GHz 512 MB Windows XP SP2 SP3 300 MHz 128 MB Mac OS X v 10 6 Intel 1GB Mac OS X v 10 5 Intel PowerPC G5 PowerPC G4 867 MHz 512 MB Mac OS X v 10 4 11 Intel PowerPC G5 PowerPC G4 Po...

Page 83: ...01 Keppel Bay Tower Singapore 098632 CANON HONGKONG CO LTD 19 F The Metropolis Tower 10 Metropolis Drive Hunghom Kowloon Hong Kong CANON KOREA BUSINESS SOLUTIONS INC 168 12 Samseong Dong Gangnam gu S...

Reviews: