


3
1
2
3
4
5
6
7
(1)
(2)
(A)
(B)
(C)
(D)
2
2
3
1
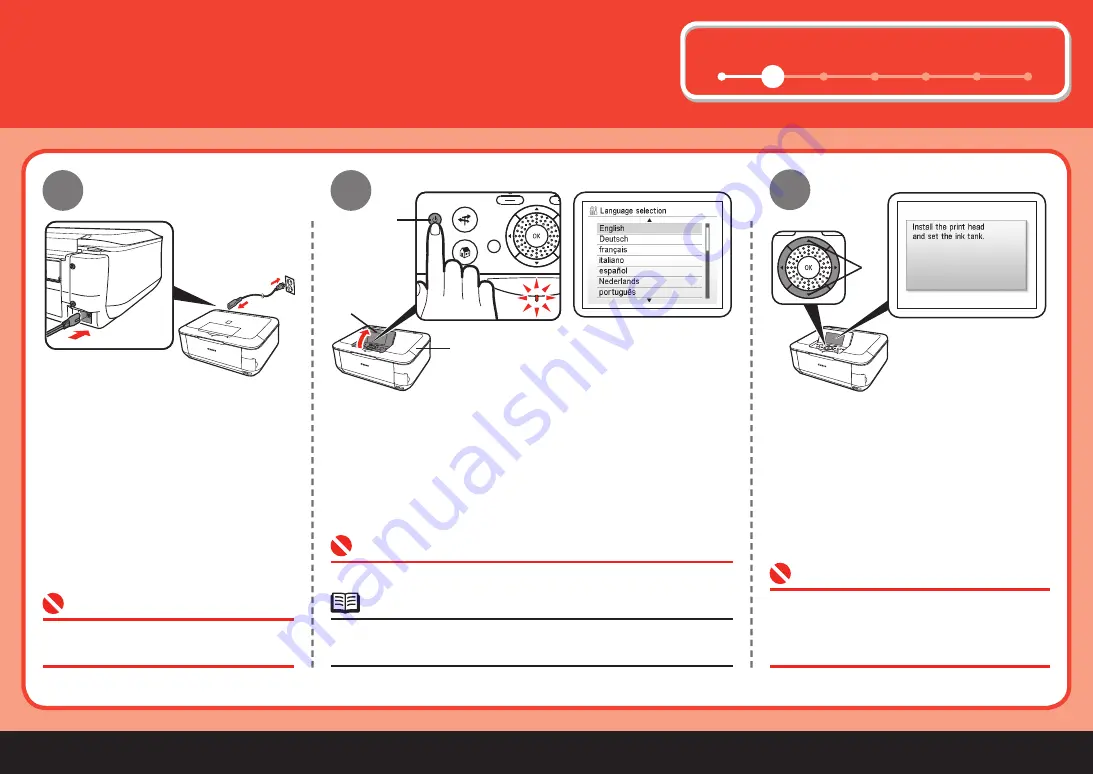
Turn the Power On
Make sure that the Document Cover (C) is closed.
•
Do NOT connect the USB cable at this
stage.
•
Plug in the power cord on the left
side at the back of the machine and
connect the other end to the wall
outlet.
Open the Operation Panel (A) then, press the
ON
button (B)
to turn on the machine.
Use the
{
or
}
button (D) on the
Operation Panel to select the language for
the LCD , then press the
OK
button . The
standby screen is displayed.
The machine may make some operating noises. This is normal
operation.
•
If an unintended language is displayed on
the LCD , press the
Back
button on the
Operation Panel to return to the
Language
selection
screen.
•


