1
2
3
4
5
6
7
8
1
2
3
4
5
6
7
8
C
E
B
D
B
A
C
1
2
3
4
2
보호재
제거하기
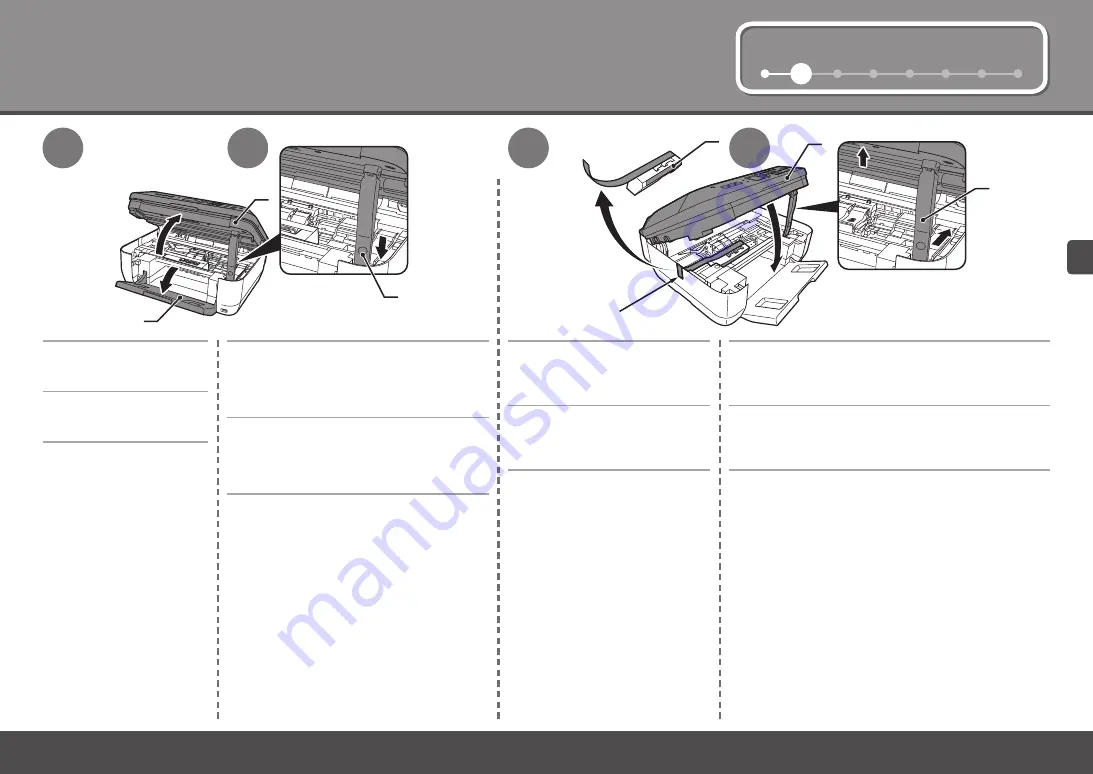
용지
출력
트레이
(A)
를
엽니
다
.
스캔
유닛
(
커버
)(B)
을
제자리에
잠길
때까지
듭
니다
.
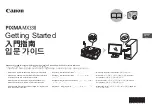
스캔
유닛
받침대
(C)
가
자동으로
고정됩니다
.
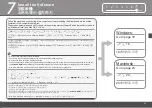
오렌지색
보호
테이프
(D)
를
당겨
보
호재
(E)
를
제거합니다
.
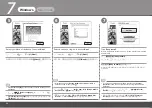
그런
다음
,
스캔
유닛
(
커버
)(B)
을
약간
들고
스캔
유닛
받
침대
(C)
를
접은
다음
스캔
유닛
(
커버
)(B)
을
가볍게
닫습니
다
.
取下保護材料
開啟出紙托盤
(A)
。
抬起掃描單元
(
機蓋
)(B)
直至其鎖定到位。
掃描單元支架
(C)
自動地固定。
拉橙色保護膠帶
(D)
並移除保護材
料
(E)
。
然後,輕輕地抬起掃描單元
(
機蓋
)(B)
並折疊掃描單元支
架
(C)
,然後輕輕地關閉掃描單元
(
機蓋
)(B)
。
Remove the Protective Material
Open the Paper Output
Tray (A).
Lift the Scanning Unit (Cover) (B) until it
locks into place.
Then, lift the Scanning Unit (Cover) (B) slightly and
fold the Scanning Unit Support (C), then gently close
the Scanning Unit (Cover) (B).
Pull the orange protective tape
(D) and remove the protective
material (E).
The Scanning Unit Support (C) is fixed automatically.


