Setting Date and Time
This section describes the procedure to set the date and time.
1.
Check that printer is turned on.
2.
Press the
Setup
button.
The
Setup menu
screen is displayed.
3.
Select
Device settings
, then press the
OK
button.
4.
Select
Other dev. settings
, then press the
OK
button.
5.
Select
Date/time setting
, then press the
OK
button.
6.
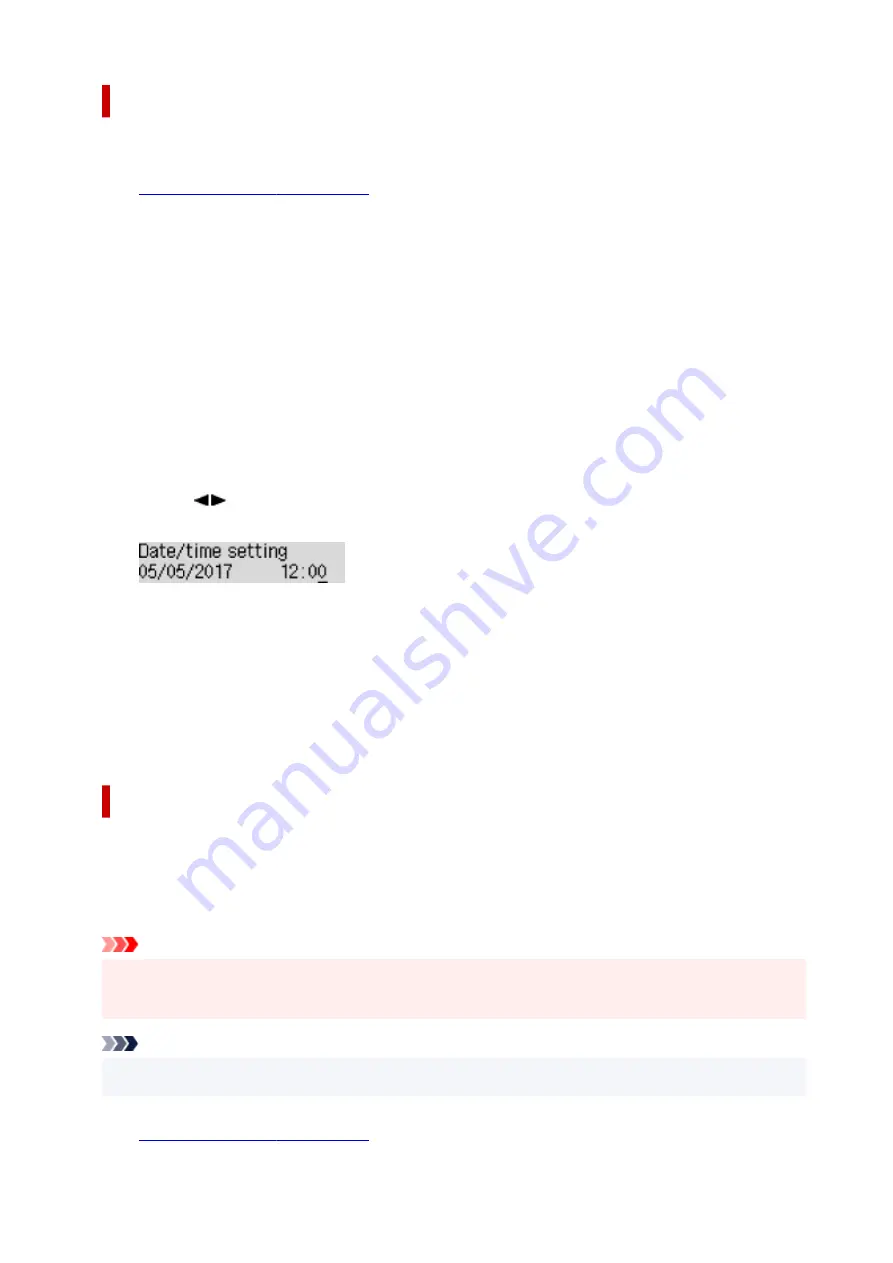
Set the date and time.
Use the
button to move the cursor under the desired position, then use the Numeric buttons to
enter the date and time.
Enter the time in 24-hour format.
Enter only the last two digits of the year.
7.
Press the
OK
button.
8.
Press the
FAX
button to return to the Fax standby screen.
Setting Daylight Saving Time (Summer Time)
Some countries adopt the daylight saving time (summer time) system that shifts the clock time forward at
certain periods of the year.
You can set your printer to automatically change the time by registering the date and time that daylight
saving time (summer time) begins and ends.
Important
• Not all the latest information of all countries or regions is applied for
DST setting
by default. You
need to change the default setting according to the latest information of your country or region.
Note
• This setting may not be available depending on the country or region of purchase.
1.
Check that printer is turned on.
369
Summary of Contents for PIXMA TR4550
Page 1: ...TR4500 series Online Manual English...
Page 78: ...Note This setting item is not available depending on the printer you are using 8 Click Set 78...
Page 82: ...Loading Paper Loading Plain Paper Loading Photo Paper Loading Envelopes 82...
Page 104: ...104...
Page 136: ...Safety Safety Precautions Regulatory Information WEEE EU EEA 136...
Page 161: ...Main Components Front View Rear View Inside View Operation Panel 161...
Page 178: ...pqrs PQRS 7 tuv TUV 8 wxyz WXYZ 9 0 _ SP 2 Switch the input mode 2 SP indicates a space 178...
Page 206: ...3 Press the OK button after deleting all the numbers and the letters 206...
Page 232: ...Envelopes Envelope Envelope Greeting Cards Inkjet Greeting Card Others 232...
Page 243: ...Note Selecting Scaled changes the printable area of the document 243...
Page 261: ...In such cases take the appropriate action as described 261...
Page 296: ...Printing Using Canon Application Software Easy PhotoPrint Editor Guide 296...
Page 316: ...Note To set the applications to integrate with see Settings Dialog Box 316...
Page 329: ...ScanGear Scanner Driver Screens Basic Mode Tab Advanced Mode Tab 329...
Page 416: ...4 When a confirmation message is displayed click Yes 416...
Page 424: ...Receiving Faxes Receiving Faxes Changing Paper Settings Memory Reception 424...
Page 434: ...Other Useful Fax Functions Document Stored in Printer s Memory 434...
Page 470: ...Other Network Problems Checking Network Information Restoring to Factory Defaults 470...
Page 502: ...Scanning Problems Windows Scanning Problems 502...
Page 503: ...Scanning Problems Scanner Does Not Work ScanGear Scanner Driver Does Not Start 503...
Page 507: ...Problems Sending Faxes Cannot Send a Fax Errors Often Occur When Send a Fax 507...
Page 512: ...Problems Receiving Faxes Cannot Receive a Fax Cannot Print a Fax 512...
Page 516: ...Telephone Problems Cannot Dial Telephone Disconnects During a Call 516...
Page 531: ...Errors and Messages An Error Occurs Message Support Code Appears 531...


