5
4
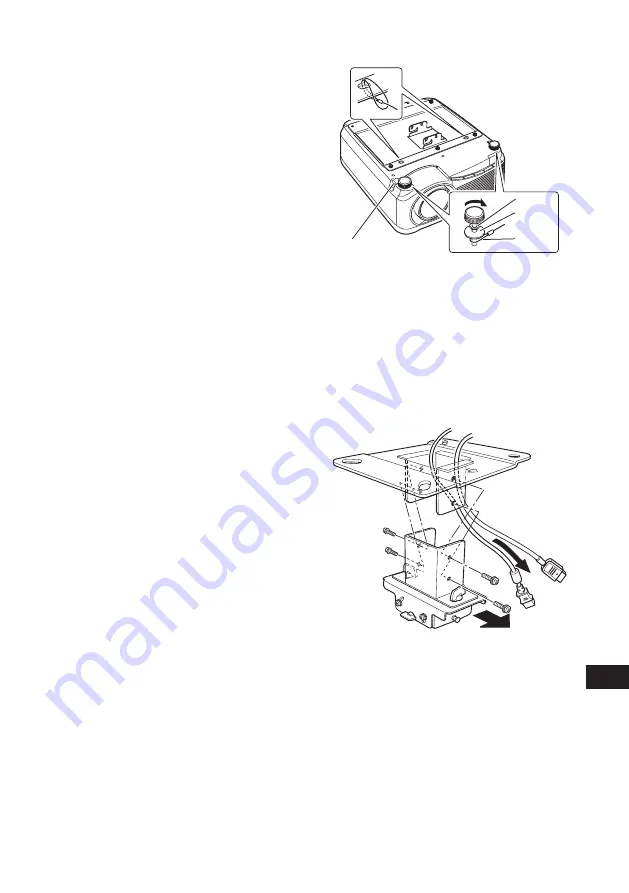
Attach the anti-fall wires
1 Remove the adjusting foot from the
projector.
2 Fully install an attached M8 nut on the
shaft of the removed adjusting foot by
hand and install a washer on the shaft.
3 Pass one end of the attached anti-fall
wire in to the slotted hole (A) on the Base
bracket, and then hook the other end on
the screw of the removed adjusting foot (B).
4 Install the adjusting foot onto the projector
to fix the anti-fall wire.
5 Similarly, install the washer and anti-fall
wire onto the other adjusting foot.
● Make sure to fasten and tighten the adjusting
feet securely.
● Never use a tool such as a spanner when
installing the M8 nut on the shaft of the
removed adjusting foot.
● Be sure to attach both anti-fall wires.
* Use a security bar for preventing the projector
from falling at the time of its installation.
5
Pull cables out of the cable hole in
the ceiling
6
Attach the Joint fitting to the
Ceiling-mount bracket
Secure the Ceiling-mount bracket using the
four M5 screws removed during preparation.
A
B
Direction to the
screen
Washer
M8 nut
Wires
Security bar*
Summary of Contents for RS-CL11
Page 79: ...YT1 7398 000 CANON INC 2010 ...


