Chapter 2
2-26
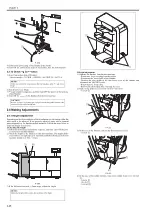
F-2-92
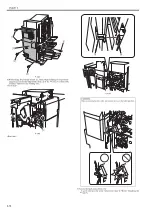
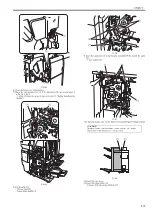
8) Connect the power plug of the finisher to the outlet.
9) Turn ON the power in the order of the finisher, then the host machine.
2.3.12 Checking Connection
0020-9384
1) Input Connection Step of Finisher.
- Service mode > COPIER > OPTION > ACCPST-D > ACC1-8
2) Exit from Service Mode.
3) Execute shutdown sequence, and then turn OFF the power of the host ma-
chine/finisher.
4) Turn ON the power of the finisher then the host machine.
2.4 Making Adjustments
2.4.1 Height Adjustment
0020-5980
Depending on the floor condition of the installation site, the height of the fin-
isher needs to be adjusted. If not properly adjusted, paper can be jammed
more frequently in the finisher pickup assembly. Follow the steps below to
adjust the height if necessary.
1.Checking the height
1) Follow the instruction of shutdown sequence, and then turn OFF the pow-
er of the host machine/finisher.
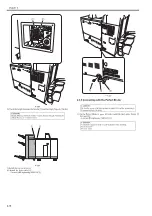
2) Check the height of the finisher and the host machine. The height differ-
ence between the right top [1] of the finisher and the left top [2] of the host
machine should be /-2mm.
F-2-93
3) If the difference e/-2mm range, adjust the height.
2.Height adjustment
1) Separate the finisher from the host machine.
- Disconnect the power plug from the outlet.
- Disconnect the power cable of the finisher.
- Remove the wire saddle at the rear lower cover of the finisher and
disconnect the ARCNET cable.
- Disconnect the shunt cable.
- Remove the latch plates (the front and the rear)
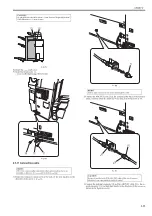
2) Remove the spanner [1] from the finisher front cover.
- 1 screw [2]
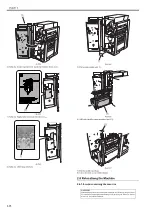
F-2-94
3) In the case of the finisher, remove the front caster cover [1].
- 1 screw [2]
F-2-95
4) In the case of the saddle finisher, remove the saddle inner cover (lower)
[1].
- 1 screw [2]
- 1 knob [3]
- 3 screws [4]
MEMO:
In the case of directly connecting to the host machine, enter "1" and press
"OK".
CAUTION:
Be sure to power cycle after specifying the connecting order otherwise the
accessories will not be recognized.
MEMO:
Adjust the height with 4 casters [1] as shown in the figure.
[1]
[1]
[2]
[1]
[1]
[1]
[2]
[1]
[2]
Summary of Contents for Saddle Finisher-AF2
Page 1: ...SERVICE MANUAL Saddle Finisher AF2 MARCH 6 2009...
Page 2: ......
Page 6: ......
Page 12: ...Contents...
Page 13: ...Chapter 1 Specifications...
Page 14: ......
Page 16: ......
Page 22: ......
Page 23: ...Chapter 2 Installation...
Page 24: ......
Page 26: ......
Page 55: ...Chapter 3 Functions...
Page 56: ......
Page 58: ......
Page 104: ...Chapter 3 3 46...
Page 105: ...Chapter 4 Parts Replacement Procedure...
Page 106: ......
Page 110: ......
Page 157: ...Chapter 4 4 47 F 4 213 3 2 1...
Page 158: ......
Page 159: ...Chapter 5 Maintenance...
Page 160: ......
Page 209: ...Chapter 5 5 47 F 5 221 SW382 SW381 SW383 ENTER SW384 SW385 DSP381 1...
Page 218: ......
Page 219: ...Appendix...
Page 220: ......
Page 221: ...General Timing Chart General Circuit Diagram Finisher Sorter DeliveryTray Saddle Finisher AF2...
Page 222: ......
Page 224: ......
Page 225: ...Contents 1 General Circuit Diagram 1 Signal Names 1 General Circuit Diagram 9...
Page 226: ......
Page 243: ......
Page 244: ......


