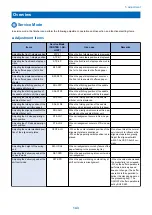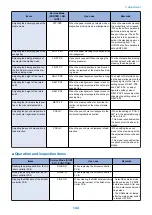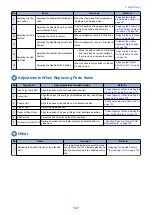
No
Items
Use case
Refer to
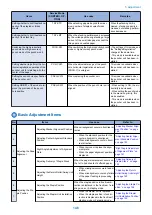
8
Adjusting the Sta-
ple Position
Adjusting the Staple-Free Binding Po-
sition
When the staple-free binding position in
the staple-free binding mode.
“Adjusting the Staple-
Free Binding Position ” on
page 161
9
Adjusting the Fold
Position
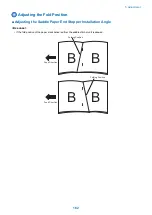
Adjusting the Saddle Paper End Stop-
per Installation Angle
If the fold position of the paper stack deliv-
ered from the saddle stitcher unit is
skewed.
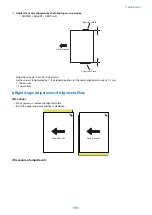
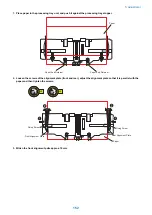
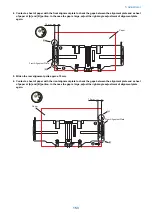
“Adjusting the Saddle Pa-
per End Stopper Installa-
tion Angle” on page 162
10
Adjusting the Fold Placement
When misalignment occurs in feed direc-
tion.
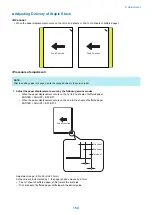
“Adjusting the Fold Place-
ment ” on page 164
11
Adjusting the Saddle Alignment Plate
Position
When misalignment occurs in front/rear di-
rection.
“Adjusting the Saddle
Alignment Plate Position ”
on page 165
12
Adjusting the Sad-
dle Stitch
Adjusting the Stitcher Unit Installation
Position
• When the stitch positions of the front
and rear sides become misaligned
• If you remove or replace the stitcher
unit
“Adjusting the Stitcher
Unit Installation Position ”
on page 167
13
Adjusting the Saddle Stitch Position
When the saddle stitch position in the sad-
dle stitch mode.
“Adjusting the Saddle
Stitch Position ” on page
171
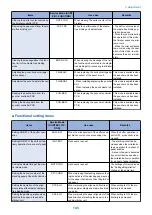
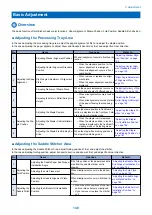
Adjustments When Replacing Parts Items
No
Target part
Adjustment item and description
Refer to
1
Stack Tray Drive Belt
Align the phase of the belt installation position.
“Phase Alignment When Installing the
Stack Tray Drive Belt” on page 173
2
Swing Unit
Align the phase of the swing unit installation position, and fix them
in place.
“Phase Alignment When Installing the
Swing Unit” on page 173
3
Paddle Unit
Align the phase of the paddle unit installation position.
“Phase adjustment of paddle unit” on
page 174
4
Stapler Unit
Adjust the staple position
5
Paper Folding Roller
Align the phase of the paper folding roller installation position.
“Phase Alignment When Installing the
Paper Folding Roller” on page 179
6
Stitcher Unit
Adjust the stitcher unit and the stitch positions.
7
Finisher Controller PCB
Backup operation before replacement and operation after re-
placement
“ Handling Finisher Controller PCB
Replacements” on page 180
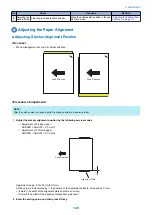
Other
No
Items
Use case
Refer to
1
Releasing the Saddle Delivery Tray Stacking
Limit
This is performed when you want to contin-
uously stack over the allowable stacking ca-
pacity when stacking in the saddle delivery
tray.
“Releasing the Saddle Delivery
Tray Stacking Limit” on page 184
5. Adjustment
147
Summary of Contents for Staple Finisher-AA1
Page 1: ...Revision 4 0 Staple Finisher AA1 Booklet Finisher AA1 Service Manual ...
Page 12: ...Product Overview 1 Features 5 Specifications 6 Names of Parts 14 Optional Configuration 20 ...
Page 83: ...Periodical Service 3 Periodic Servicing Tasks 76 ...
Page 87: ...3 Remove the 2 Connectors 1 2x 1 4 Parts Replacement and Cleaning 79 ...
Page 89: ...Main Units Parts 4 5 6 7 8 1 2 3 4 Parts Replacement and Cleaning 81 ...
Page 128: ...4x 1 2 2 3 3 2x 4 Parts Replacement and Cleaning 120 ...
Page 150: ...Adjustment 5 Overview 143 Basic Adjustment 148 Adjustments When Replacing Parts 173 Other 184 ...
Page 193: ...Troubleshooting 6 Making Initial Checks 186 Processing Tray Area 187 Saddle Stitcher Area 188 ...
Page 204: ...4 5 6 7 8 9 7 Installation 196 ...
Page 205: ...10 7 Installation 197 ...
Page 223: ...2 3 2x 7 Installation 215 ...
Page 224: ...APPENDICES Service Tools 217 General Circuit Diagram 218 ...

