background image

4

4

4-23

4-23

Parts Replacement and Cleaning Procedure > Major Units > Removing the Staple Unit > Procedure

Parts Replacement and Cleaning Procedure > Major Units > Removing the Staple Unit > Procedure

Removing the Staple Unit


Preparation

1) Remove the Finisher Unit from the connected equipment(Refer to page 4-9).
2) Remove the Staple Cartridge(Refer to page 4-22).
3) Remove the Front Cover(Refer to page 4-15).


Procedure

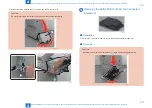
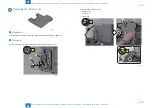
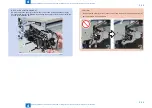
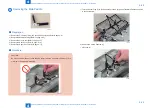
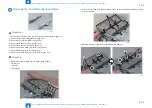
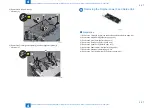
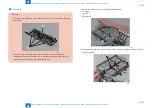
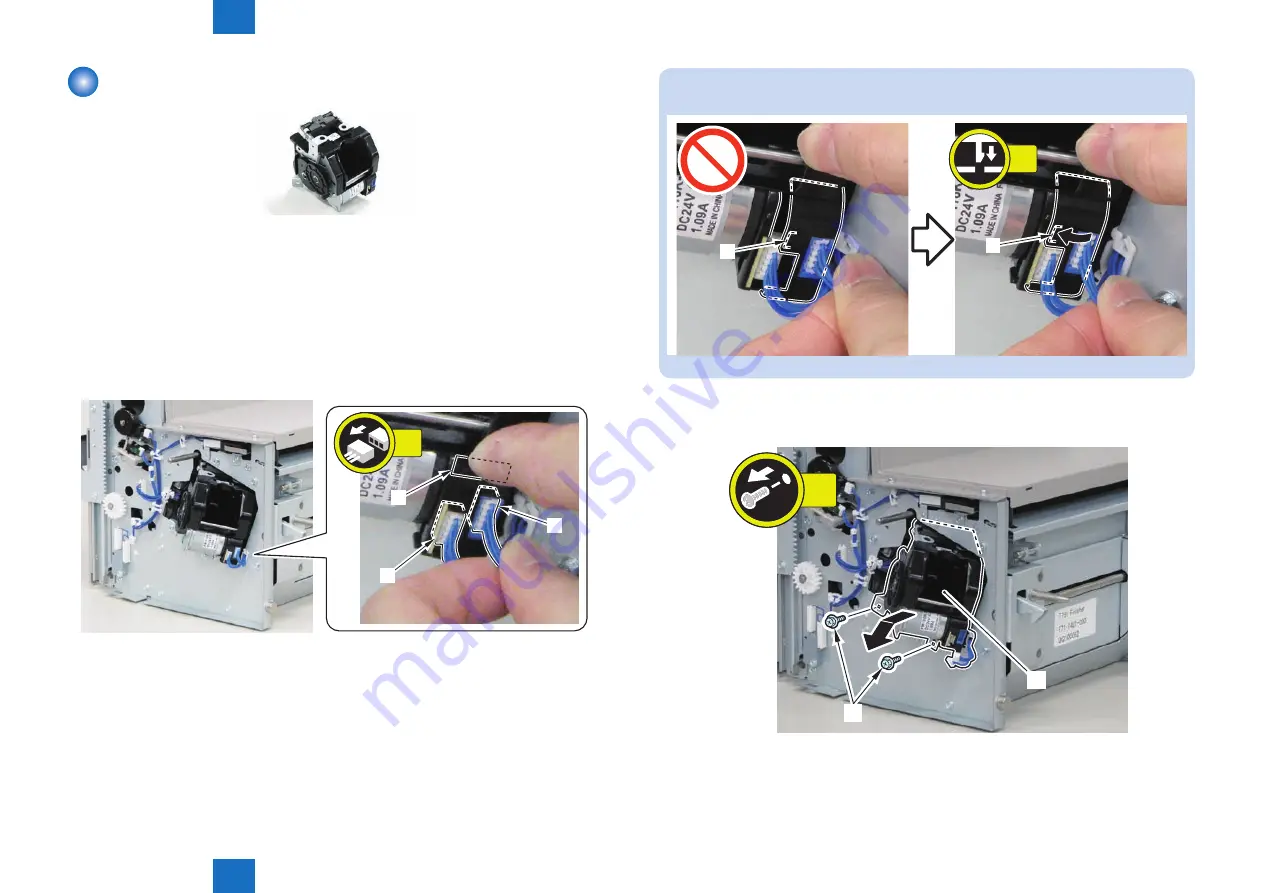
1) While holding the [A] part of the Motor Cover, disconnect the 2 connectors [1].

2x

[A]

[1]

[1]

F-4-50

F-4-51

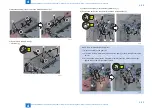
NOTE:

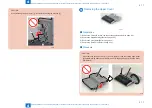
If the claw [2] of the Motor Cover is disengaged, hook the claw again.

[2]

[2]

1x

F-4-52

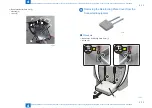
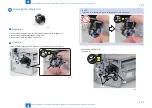
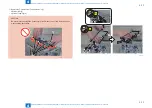
2) Remove the Staple Unit [1].
•  2 Screws [2]

2x

[1]

[2]

F-4-53

Summary of Contents for Staple Finisher-S1

Page 1: ...6 5 4 3 2 1 Staple Finisher S1 Service Manual Rev 1 0 Product Outline Technology Periodic Servicing Parts Replacement and Cleaning Procedure Adjustment Installation Appendix ...

Page 2: ...information as the need arises In the event of major changes in the contents of this manual over a long or short period Canon will issue a new edition of this manual The following paragraph does not apply to any countries where such provisions are inconsistent with local law Trademarks The product names and company names used in this manual are the registered trademarks of the individual companies...

Page 3: ...ion of the electric signal The expression turn on the power means flipping on the power switch closing the front door and closing the delivery unit door which results in supplying the machine with power 2 In the digital circuits 1 is used to indicate that the voltage level of a given signal is High while 0 is used to indicate Low The voltage value however differs from circuit to circuit In additio...

Page 4: ...peration 2 18 Stack Tray Paper Retainer Operation 2 18 Contents Stack Tray Unit 2 19 Stack Tray Shift Operation 2 19 Stack Tray Paper Height Detection Control 2 19 Stack Tray Paper Full Detection Control 2 20 Controller Unit 2 21 Outline 2 21 Detecting Jams 2 22 Outline 2 22 Power Supply 2 23 Outline 2 23 Protective Functions 2 23 Work of Service 2 24 When replacing the parts 2 24 Periodical Servi...

Page 5: ... 43 Remove the Paddle Motor M3 4 44 Removing the Delivery Motor M2 4 45 Removing the Front Alignment Motor M4 4 46 Removing the Rear Alignment Motor M5 4 47 Removing the Tray Auxiliary Guide Motor M6 4 48 Removing the Stack Tray Shift Motor M8 4 49 Switches 4 52 Layout Drawing 4 52 Removing the Front Door Switch S15 4 53 Removing the Stack Tray Lower Limit Sensor S10 4 54 PCBs 4 55 Layout Drawing ...

Page 6: ...Safety Precautions Notes Before Servicing Points to Note at Cleaning ...

Page 7: ...o the specified steps and disconnect the power plug Caution Do not turn off the power switch when downloading is under way Turning off the main power switch while downloading is under way can disable the machine Points to Note at Cleaning Caution When performing cleaning using organic solvent such as alcohol be sure to check that the component of solvent is vaporized completely before assembling ...

Page 8: ...1 1 Product Outline Product Outline Features Specifications Names of Parts ...

Page 9: ...ct staple finisher which corresponds to A4 color high speed MFP Gripper mechanism for delivering paper to the stack tray And the paper stacking of the high consistency is possible by the mechanism Stack tray capacity of approximate 500 sheets Easy to install on the host machine ...

Page 10: ...m2 paper Mixed stacking capacity Non sort sort 73 5 mm or less in height Staple sort 73 5 mm or less in height or 20 sets or less Equivalent of 81 g m2 paper Dimensions 301 mm H 589 mm W 459 mm D Weight Approx 14 kg Power supply From host machine 24V 5V Power consumption Standby 2 5 W or less Operating 35 W or less T 1 1 Staple Unit Item Specifications Remarks Stapling method Punching by rotating ...

Page 11: ...tline Names of Parts Cross Section Names of Parts External View Front Door Stack Tray F 1 2 Cross Section Delivery Roller Inlet Roller Feed Roller Paper Return Paddle Paddle Alignment Plate Stapler Gripper Tray Auxiliary Guide Stack Tray Paper Retainer Stack Tray F 1 3 ...

Page 12: ...2 2 Technology Technology Basic Configuration Controls Basic Operation Feed Unit Processing Tray Unit Stack Tray Unit Controller Unit Detecting Jams Power Supply Work of Service ...

Page 13: ... by its finisher controller PCB The finisher controller PCB has the 16 bit CPU and the controller also controls the communication with the host machine in addition to controlling the finisher s operation sequence The CPU on the finisher controller PCB contains a flash ROM used to store the operating sequence program The finisher controller PCB uses the serial communication line to receive various ...

Page 14: ...y Auxiliary Guide Operation Alignment Shifting Operation Staple Operation Stack Delivery Operation Stack Tray Paper Retainer Operation Stack Tray Unit Stack Tray Shift Operation Stack Tray Paper Height Detection Control Stack Tray Paper Full Detection Control Controller Unit Outline Detecting Jams Outline Power Supply Outline Protective Functions Work of Service When replacing the parts Periodical...

Page 15: ...elivered by the delivery roller is stacked on the processing tray by the paddle A paddle and a paper return paddle are used to align paper in the feed direction If two or more sheets with a length of 150 mm or more are stacked the tray auxiliary guides slide out F 2 3 Tray Auxiliary Guide Paper Return Paddle Paddle 3 The alignment plates are used to align paper in the width direction In the illust...

Page 16: ...he stacked sheets are stapled only in the staple mode Stapler 6 After being shifted the sheets stacked on the processing tray are delivered to the stack tray If the tray auxiliary guides have slid out they slide back before the sheets are delivered to the stack tray Gripper F 2 6 F 2 7 ...

Page 17: ...per feed path in the feed unit to detect the paper feed state and jam M9 M8 M7 M1 M2 M3 M6 M4 5 S1 S2 M1 Feed Motor M7 Gripper Motor M2 Delivery Motor M8 Stack Tray Shift Motor M3 Paddle Motor M9 Staple Motor M4 Front Alignment Motor S1 Buffer Sensor M5 Rear Alignment Motor S2 Feed Path Sensor M6 Tray Auxiliary Guide Motor F 2 8 Buffer Path Cover Open Close Detection The Buffer Path Cover Open Clo...

Page 18: ...ocessing Tray Unit The paper delivered from the host machine is fed by the inlet roller feed roller and delivery roller The paper delivered by the delivery roller is stacked on the processing tray by the paddle M1 M2 M3 Buffer Sensor S1 Feed Path Sensor S2 Inlet Roller Feed Roller Delivery Roller Paddle Delivery Motor Paddle Motor Feed Motor F 2 10 ...

Page 19: ...e Function 1 Paddle Stacks the paper delivered from the delivery roller on the processing tray 2 Paper Return Paddle Presses the paper stacked on the processing tray against the stopper alignment in the feed direction and prevents the previously stacked paper from being fed delivered 3 Front Rear Alignment Plate Aligns the paper stacked on the processing tray in the width direction and shifts the ...

Page 20: ...detection of paper by the Buffer Sensor S1 thus sliding out the tray auxiliary guides M6 Buffer Sensor S1 Tray Auxiliary Guide Delivery Roller Tray Auxiliary Guide Motor F 2 12 2 After the specified time has lapsed since paper has passed through the Feed Path Sensor S2 the paddle motor M3 operates to rotate the paddle once to stack the paper on the processing tray The stacked paper is pressed agai...

Page 21: ...ear alignment motors M4 and M5 operate to move the front and rear alignment plates thus aligning the paper in the width direction In the illustration below the paper is aligned with reference to the central reference position Operations described in 2 and 3 are repeated for each sheet Rear Alignment Plate Front Alignment Plate F 2 14 ...

Page 22: ...ack when paper is delivered by the gripper The home position of each tray auxiliary guide is detected by the Tray Auxiliary Guide HP Sensor S6 M6 Tray Auxiliary Guide Motor Tray Auxiliary Guide HP Sensor S6 Tray Auxiliary Guide Tray Auxiliary Guide F 2 15 The tray auxiliary guide slide out amount varies depending on the operation mode and paper length as follows Operation Mode Paper Length Amount ...

Page 23: ...Front Alignment Plate HP Sensor S4 and Rear Alignment Plate HP Sensor S5 Rear Alignment Motor M5 Front Alignment Motor M4 Rear Alignment Plate HP Sensor S5 Rear Alignment Plate Front Alignment Plate HP Sensor S4 Front Alignment Plate F 2 16 The relationship between operation modes and alignment positions is summarized in the following table Operation Mode Paper Width Alignment Position Non Sort So...

Page 24: ...reference position R 85 Paper width 2 Shift amount 25 mm 139 mm or more to less than 180 mm Front shift position 10 mm frontward from the central reference position Rear shift position 10 mm backward from the central reference position Shift amount 20 mm Staple 203 mm or more Front shift position 10 mm frontward from the central reference position Shift amount 20 mm less than 203 mm Stapling posit...

Page 25: ...t position of central reference when the paper width is less than 180 mm 10mm 10mm Paper Middle of Feeding Path F 2 18 F 2 19 Alignment Operation in Staple Mode 1 After lapse of the specified time since detection of paper by the Feed Path Sensor S2 the front and rear alignment plates move to the standby position Front alignment plate Home position 2 mm Rear alignment plate Paper width 10 mm Standb...

Page 26: ...0 mm or more alignment of the top paper executed at the staple position as well Alignment position of the staple position in the case of the paper width being 200 mm or more and the second and subsequent sheets 2mm Front Alignment Plate Home Position The position that aligns paper by the front and rear alignment plates Paper F 2 22 F 2 23 Staple alignment position when the paper width is less than...

Page 27: ...g in the front The position that aligns paper by the front and rear alignment plates Middle of Feeding Path Rear shift position when the paper width is from 180 mm or more to less than 210 mm 85mm Paper when aligning in the rear The position that aligns paper by the front and rear alignment plates Middle of Feeding Path F 2 25 F 2 26 Front shift position when the paper width is less than 180 mm Al...

Page 28: ...lates Rear shift position when the paper width is 203 mm or more Shifting position and stapling posion is same F 2 29 Staple Operation When the staple mode is selected paper is stapled by the stapler after it has been stacked on the processing tray and aligned The stapler is provided at the front of the finisher Paper is stapled at only one position at the front A maximum of 30 sheets can be stapl...

Page 29: ...of the gripper is detected by the gripper HP sensor S7 M7 Gripper Motor Gripper Drive Belt Gripper Gripper HP Sensor S7 F 2 31 Stack Tray Paper Retainer Operation The paper delivered to the stack tray is retained by the stack tray paper retainer to prevent wrong detection of paper height and misalignment caused by curl The tray paper retainer is released when the gripper presses portion A of the g...

Page 30: ...he specified amount Then the stack tray moves up until the stack tray paper height sensor S9 detects the stack tray top surface top surface of the stacked paper with the stack tray paper height sensor flag M8 Stack Tray Paper Height Sensor Flag Stack Tray Stack Tray Lower Limit Switch SW2 Stack Tray Shift Motor Stack Tray Paper Height Sensor S9 F 2 33 Stack Tray Paper Height Detection Control The ...

Page 31: ... paper full state of the stack tray is detected in the following cases When the power is turned on or during initialization before start of printing When the ON states of both the stack tray paper height sensor S9 and stack tray lower limit switch SW2 are detected When paper is delivered When the ON state of the stack tray lower limit switch is detected two successive times because the height of t...

Page 32: ... finisher controller PCB are summarized below Name Function CPU U1 Controls communications between this finisher and host machine Stores firmware Controls operations of this finisher Motor Driver U5 Controls the driver of feed motor M1 Motor Driver U6 Controls the driver of delivery motor M2 Motor Driver U7 Controls the driver of front alignment motor M4 Motor Driver U8 Controls the driver of rear...

Page 33: ...ed Path Sensor S2 02 1104 Buffer Sensor early arrival jam S1 Detected when the Buffer Sensor S1 detects paper without receiving a delivery signal from the host machine Or detected when the Buffer Sensor S1 detects paper earlier than the specified timing after reception of a delivery signal from the host machine 02 1F01 Stapler jam S11 Detected when the staple HP sensor S11 cannot detect the staple...

Page 34: ...wer is used to drive the motors and the switches while the 5VDC power is used for the sensors and the ICs S15 S10 M M8 Stack Tray Shift Motor Stack Tray Lower Limit Switch Motors Sensors Motor Driver U13 14 Finisher Controller PCB Motor Driver U5 U12 CPU U1 Host Machine Front Door Switch F1 F2 F3 F5 10 F4 5VDC 24VDC Protective Functions The finisher is provided with fuses F1 through 10 which blow ...

Page 35: ...sher controller PCB with the service parts check that the firmware is the latest version If it is not the latest version upgrade it Periodical Servicing This finisher has no periodic service items Upgrading When upgrading the firmware of the finisher controller PCB upgrade from the host machine Refer to the service manual for the host machine as to the detail ...

Page 36: ...3 3 Periodic Servicing Periodic Servicing List of Work for Scheduled Servicing ...

Page 37: ...riodic Servicing List of Work for Scheduled Servicing Periodic Servicing List of Work for Scheduled Servicing List of Work for Scheduled Servicing There is no item that requires the scheduled service in this finisher ...

Page 38: ...4 4 Parts Replacement and Cleaning Procedure Parts Replacement and Cleaning Procedure List of Parts Removing the Equipment External Cover Internal System Major Units Motors Switches PCBs ...

Page 39: ...7 9 11 10 F 4 1 No Parts Name Reference 1 Buffer Upper Feed Guide Unit Refer to page 4 41 2 Buffer Lower Feed Guide Unit Refer to page 4 41 3 Front Door Refer to page 4 14 4 Front Cover Refer to page 4 15 5 Grate shaped Guide Refer to page 4 20 6 PCB Cover Refer to page 4 19 7 Stack Tray 8 Upper Cover Refer to page 4 17 9 Rear Cover Refer to page 4 16 10 Connector Cover 11 Reinforcing Plate Cover ...

Page 40: ...it Front Refer to page 4 35 6 Lower Processing Tray Unit Refer to page 4 40 7 Upper Processing Tray Unit Rear Refer to page 4 35 8 Finisher Upper Feed Guide Unit F 4 2 T 4 2 Motor M7 M4 M9 M1 M5 M6 No Parts Name Main Unit Reference M4 Front Alignment Motor Upper Processing Tray Unit Front Refer to page 4 46 M5 Rear Alignment Motor Upper Processing Tray Unit Rear Refer to page 4 47 M6 Tray Auxiliar...

Page 41: ...page 4 49 F 4 4 T 4 4 Sensor Switch S6 S8 S2 S1 S7 S5 S4 S14 S11 S12 S13 S16 No Parts Name Main Unit Reference S2 Feed Path Sensor Finisher Upper Feed Guide Unit S4 Front Alignment Plate HP Sensor Upper Processing Tray Unit Front S5 Rear Alignment Plate HP Sensor Upper Processing Tray Unit Rear S6 Tray Auxiliary Guide HP Sensor Lower Processing Tray Unit S7 Gripper HP Sensor Finisher Lower Feed Gu...

Page 42: ...er Path Cover Open Close Sensor Buffer Lower Feed Guide Unit S15 S10 S3 S9 No Parts Name Main Unit Reference S3 Paddle HP Sensor Product Configuration S9 Stack Tray Paper Height Sensor Product Configuration S10 Stack Tray Lower Limit Sensor Product Configuration Refer to page 4 54 S15 Front Door Switch Product Configuration Refer to page 4 53 T 4 5 F 4 6 T 4 6 PCB PCB1 No Parts Name Main Unit Refe...

Page 43: ...4 P7 5 S5 Rear Alignment Plate HP Sensor 1 J7 P7 PCB1 Finisher Controller PCB J7 6 P7 6 5 P7 14 S7 Gripper HP Sensor 2 J5 P5 PCB1 Finisher Controller PCB 9 P5 2 M2 Delivery Motor 2 J5 P5 PCB1 Finisher Controller PCB P5 3 P5 3 10 P5 13 M5 Rear Alignment Motor 2 J5 P5 PCB1 Finisher Controller PCB 11 P5 4 M3 Paddle Motor 3 J18 P18 PCB1 Finisher Controller PCB J7 7 P7 7 P5 11 1B P5 11 1A 8 P5 11 M1 Fe...

Page 44: ...2 P8 2 6 P8 12 S6 Tray Auxiliary Guide HP Sensor 1 J8 P8 PCB1 Finisher Controller PCB 7 P8 3 S4 Front Alignment Plate HP Sensor 1 J8 P8 PCB1 Finisher Controller PCB 8 P8 4 S3 Paddle HP Sensor 2 J13 P13 PCB1 Finisher Controller PCB 9 P13 1 S8 Gripper Encoder Sensor 3 J11 P11 PCB1 Finisher Controller PCB P6 2 P6 2 10 P11 11 S14 Staple Paper Detection Sensor 4 J6 P6 PCB1 Finisher Controller PCB 11 P6...

Page 45: ...nisher Controller PCB 9 P2 12 P2 13 S15 Front Door Switch 4 J14 P14 PCB1 Finisher Controller PCB 10 P14 1 P14 2 S10 Stack Tray Lower Limit Sensor 4 J14 P14 PCB1 Finisher Controller PCB 11 P14 3 J14 3 M8 Stack Tray Shift Motor 5 J4 PCB1 Finisher Controller PCB 6 J17 PCB1 Finisher Controller PCB 7 J10 P10 PCB1 Finisher Controller PCB 12 P10 1 M9 Staple Motor 8 J9 P9 PCB1 Finisher Controller PCB 13 P...

Page 46: ...ge 4 12 F 4 11 T 4 11 Removing the Finisher Unit from the Connected Equipment CAUTION When removing this equipment from the connected equipment be sure to check that the power of the connected equipment is OFF and the power plug is disconnected from the outlet When disassembling assembling this equipment be sure to remove it from the connected equipment by following the procedure If the IC Card Re...

Page 47: ...he Equipment Removing the Finisher Unit from the Connected Equipment Procedure Procedure 1 Lift the Control Panel Unit 1 and open the ADF Unit Reader Unit 2 1 2 2 Remove the Delivery Tray 1 2 Hooks 2 1 Claw 3 1 2 2 3 1x F 4 14 F 4 15 3 Remove the Harness Cover 1 1 Claw 2 2 Bosses 3 2 Hooks 4 1 2 3 3 1x 4 4 Disconnect the 2 connectors 1 and remove the 2 Knurled Screws 2 2x 2x 2 1 1 F 4 16 F 4 17 ...

Page 48: ...Connected Equipment Procedure 5 Release the Latch Release Lever 1 and remove the Finisher Unit 2 CAUTION Be careful not to drop the Finisher Unit 1 when disassembling assembling 1 F 4 18 1 2 F 4 19 Removing the Buffer Path Unit from the Connected Equipment Preparation 1 Remove the Finisher Unit from the connected equipment Refer to page 4 9 Procedure CAUTION Be careful not to drop the Buffer Path ...

Page 49: ...arts Replacement and Cleaning Procedure Removing the Equipment Removing the Reinforcing Plate Cover from the Connected Equipment Procedure 1 Remove the Buffer Path Unit 1 2 Bosses 2 1 Hook 3 1 3 2 2 F 4 22 Removing the Reinforcing Plate Cover from the Connected Equipment Procedure 1 Remove the Reinforcing Plate Cover 1 2 Claws 2 1 2 1x 1x 2 F 4 23 F 4 24 ...

Page 50: ...2 1 3 4 5 6 7 9 11 10 F 4 25 No Parts Name Reference 1 Buffer Upper Feed Guide Unit Refer to page 4 41 2 Buffer Lower Feed Guide Unit Refer to page 4 41 3 Front Door Refer to page 4 14 4 Front Cover Refer to page 4 15 5 Grate shaped Guide Refer to page 4 20 6 PCB Cover Refer to page 4 19 7 Stack Tray 8 Upper Cover Refer to page 4 17 9 Rear Cover Refer to page 4 16 10 Connector Cover 11 Reinforcing...

Page 51: ...cement and Cleaning Procedure External Cover Internal System Removing the Front Door Procedure Removing the Front Door Preparation 1 Remove the Finisher Unit from the connected equipment Refer to page 4 9 Procedure 1 Open the Front Door 1 1 F 4 26 F 4 27 2 Remove the Front Door 1 2 Screws 2 1 Claw 3 2 Shafts 4 1 2 3 2x 1x 4 F 4 28 ...

Page 52: ...l Cover Internal System Removing the Front Cover Procedure Removing the Front Cover Preparation 1 Remove the Finisher Unit from the connected equipment Refer to page 4 9 2 Remove the Staple Cartridge Refer to page 4 22 Procedure 1 Remove the grip 1 1 Claw 2 1 Screw 3 1 2 1x 3 1x F 4 29 F 4 30 2 Remove the Front Cover 1 3 Screws 2 1 Claw 3 1 Hook 4 3x 1 4 1x 3 2 F 4 31 ...

Page 53: ...ocedure External Cover Internal System Removing the Rear Cover Procedure Removing the Rear Cover Preparation 1 Remove the Finisher Unit from the connected equipment Refer to page 4 9 Procedure 1 Free the harness 1 from the Harness Guide A of the Rear Cover 1x A 1 F 4 32 F 4 33 2 Remove the Rear Cover 1 3 Screws 2 1 Claw 3 1 Hook 4 3x 1 4 2 1x 3 2 F 4 34 ...

Page 54: ...ap the harness 5 5 1 F 4 35 Removing the Upper Cover Preparation 1 Remove the Finisher Unit from the connected equipment Refer to page 4 9 2 Remove the Staple Cartridge Refer to page 4 22 3 Remove the Front Cover Refer to page 4 15 4 Remove the Rear Cover Refer to page 4 16 Procedure CAUTION When removing the Upper Cover 1 be sure to place it with the Trailing Edge Sheet 2 up while paying attentio...

Page 55: ...ts Replacement and Cleaning Procedure External Cover Internal System Removing the Upper Cover Procedure 1 Remove the Upper Cover 1 1 Connector 2 8 Screws 3 3 Bosses 4 8x 1x 1 4 3 2 4 3 F 4 38 CAUTION When installing the Upper Cover 1 be sure that the Trailing Edge Sheet 5 does not get inside the Delivery Guide 6 1 6 5 F 4 39 ...

Page 56: ...oving the PCB Cover Procedure NOTE How to install the Upper Cover When installing the Upper Cover check that the Trailing Edge Sheet 5 can be seen from the hole A of the Rear Plate as shown in the figure below A 5 F 4 40 Removing the PCB Cover Preparation 1 Remove the Finisher Unit from the connected equipment Refer to page 4 9 Procedure 1 Remove the PCB Cover 1 1 Screw 2 1x 2 1 F 4 41 F 4 42 ...

Page 57: ...er Align the 2 parts A of the PCB Cover with the 2 parts B of the guide of the Finisher A B F 4 43 Removing the Grate shaped Guide Preparation 1 Remove the Finisher Unit from the connected equipment Refer to page 4 9 2 Remove the Staple Cartridge Refer to page 4 22 3 Remove the Front Cover Refer to page 4 15 4 Remove the Rear Cover Refer to page 4 16 Procedure 1 Remove the Stack Tray Support Plate...

Page 58: ...al Cover Internal System Removing the Grate shaped Guide Procedure Parts Replacement and Cleaning Procedure External Cover Internal System Removing the Grate shaped Guide Procedure 2 Remove the Grate shaped Guide 1 4 Screws 2 1 Connector 3 1 2 2 3 2x 2x 1x F 4 46 ...

Page 59: ...guration Refer to page 4 27 4 Staple Cartridge Staple Unit Refer to page 4 22 5 Staple Unit Product Configuration Refer to page 4 23 6 Upper Processing Tray Unit Front Product Configuration Refer to page 4 35 7 Lower Processing Tray Unit Product Configuration Refer to page 4 40 8 Main Paddle Product Configuration Refer to page 4 25 9 Upper Processing Tray Unit Rear Product Configuration Refer to p...

Page 60: ...aration 1 Remove the Finisher Unit from the connected equipment Refer to page 4 9 2 Remove the Staple Cartridge Refer to page 4 22 3 Remove the Front Cover Refer to page 4 15 Procedure 1 While holding the A part of the Motor Cover disconnect the 2 connectors 1 2x A 1 1 F 4 50 F 4 51 NOTE If the claw 2 of the Motor Cover is disengaged hook the claw again 2 2 1x F 4 52 2 Remove the Staple Unit 1 2 S...

Page 61: ...OTE How to install the Staple Unit Be sure to place the sheet 4 of the Finisher Lower Feed Guide Unit between the A part and the B part of the Staple Unit and align the hook 5 of the Staple Unit with the groove C to install the unit 4 5 A B C F 4 54 CAUTION Be sure that the sheet 4 of the Finisher Lower Feed Guide Unit is not hit against the A part of the Staple Unit and flipped 4 A F 4 55 ...

Page 62: ...Remove the Staple Cartridge Refer to page 4 22 3 Remove the Front Cover Refer to page 4 15 4 Remove the Rear Cover Refer to page 4 16 5 Remove the Upper Cover Refer to page 4 17 Procedure CAUTION Be sure to perform the work while keeping contact with the 4 new Main Paddles 1 at a minimum at disassembly assembly 1 1 F 4 57 F 4 56 1 Turn the Sensor Flag 1 to provide access to the 4 A parts of the Ma...

Page 63: ...4 22 3 Remove the Front Cover Refer to page 4 15 4 Remove the Rear Cover Refer to page 4 16 5 Remove the Upper Cover Refer to page 4 17 6 Remove the Paddle Motor M3 Refer to page 4 44 7 Remove the Staple Unit Refer to page 4 23 8 Remove the Front Door Switch S15 Refer to page 4 53 Procedure 1 Remove the following parts from the Main Paddle Shaft 1 2 E rings 2 1 Gear 3 1 Bushing 4 2 2 3 4 1 F 4 60 ...

Page 64: ...nd Rear alignment plates 2 2 Screws 3 1 2 3 2x F 4 64 F 4 65 Removing the Finisher Lower Feed Guide Unit Preparation 1 Remove the Finisher Unit from the connected equipment Refer to page 4 9 2 Remove the Staple Cartridge Refer to page 4 22 3 Remove the Front Cover Refer to page 4 15 4 Remove the Rear Cover Refer to page 4 16 5 Remove the Upper Cover Refer to page 4 17 6 Remove the Paddle Motor M3 ...

Page 65: ... Unit 1 be sure to place it with the sheet 2 up 1 2 When removing the Finisher Lower Feed Guide Unit be sure to adjust the installation position by referring to How to assemble the Process Tray Upper Unit Front Rear and the Finisher Lower Feed Guide Unit F 4 67 1 Remove the following parts from the Main Paddle Shaft 1 2 E rings 2 1 Gear 3 1 Bushing 4 2 2 3 4 1 2 Turn the Sensor Flag 1 to provide a...

Page 66: ...e Delivery Guide 1 4 Screws 2 4x 1 2 2 F 4 70 F 4 71 5 Loosen the 2 screws 2 of the Delivery Motor Unit 1 6 Remove the belt 3 the connector 4 and the 2 Wire Saddles 5 2x 1x 1 5 4 2 3 2 NOTE How to install the Delivery Motor 1 Hook the belt 3 on the gear 6 2 Lift up the Delivery Motor Unit 1 and hook the gear 7 of the Delivery Motor on the belt 3 3 At the position where tension is applied to the be...

Page 67: ...eplacement and Cleaning Procedure Major Units Removing the Finisher Lower Feed Guide Unit Procedure 7 Remove the Finisher Lower Feed Guide Unit 1 2 Screws RS 2 3 Screws Tapping 3 CAUTION Be careful not to damage the 5 sheets 4 of the Finisher Lower Feed Guide Unit when disassembling assembling 4 4 F 4 74 1 2 3 3 3x 2x 2 3 F 4 75 ...

Page 68: ...d Guide Unit 1 While tilting the Finisher Lower Feed Guide Unit to make the edge A of the unit parallel to the edge B of the hole of the Front Plate align the edge C of the Finisher Lower Feed Guide Unit with the D part of the Front Plate A B C D F 4 76 2 Hook the gear 2 on the grooves E of the Rear Plate E 2 3 Lift the front side F of the Finisher Lower Feed Guide Unit and push down the rear side...

Page 69: ...to page 4 16 5 Remove the Upper Cover Refer to page 4 17 6 Remove the Paddle Motor M3 Refer to page 4 44 7 Remove the Staple Unit Refer to page 4 23 8 Remove the Front Door Switch S15 Refer to page 4 53 9 Remove the Finisher Lower Feed Guide Unit Refer to page 4 27 Procedure CAUTION Be sure to perform the work while keeping contact with the 4 new Sub Paddles 1 at a minimum at disassembly assembly ...

Page 70: ... Rear 1 3 E rings 2 2 Bushings 3 1 Belt 4 1 Gear 5 1 Gear 2 6 1 2 2 2 3 3 4 5 6 NOTE When installing the gear 5 be sure to install it with the side with 4 ribs 7 outside 7 7 5 F 4 84 F 4 83 4 Remove the Sub Paddle Front 1 2 E rings 2 2 Bushings 3 1 Belt 4 1 Gear 5 2 2 3 3 4 5 1 NOTE How to install the Sub Paddle Be sure to adjust the installation position of the 4 Sub Paddles when assembling 1 1 F...

Page 71: ... Remove the Upper Cover Refer to page 4 17 6 Remove the Paddle Motor M3 Refer to page 4 44 7 Remove the Staple Unit Refer to page 4 23 8 Remove the Front Door Switch S15 Refer to page 4 53 9 Remove the Finisher Lower Feed Guide Unit Refer to page 4 27 Procedure CAUTION When removing the Process Tray Upper Unit Front Rear be sure to adjust the installation position by referring to How to assemble t...

Page 72: ...it Installation position adjustment needs to be performed when any of the following units is disassembled the Process Tray Upper Unit Front 1 Process Tray Upper Unit Rear 2 or the Finisher Lower Feed Guide Unit 3 A Adjusting the Position of the Guide Plate of the Process Tray Upper Unit Front B Adjusting the Position of the Sub Paddle Front and the Finisher Lower Feed Guide Unit C Adjusting the Po...

Page 73: ...e Position of the Guide Plate of the Process Tray Upper Unit Front 1 Loosen the 2 screws 2 of the Process Tray Upper Unit Front and the 2 screws 4 of the Finisher Lower Feed Guide Unit 3 4x 4 1 3 2 2 Tighten the screw 2 while lifting the Process Tray Upper Unit Front 1 3 Move the Guide Plate 3 of the Process Tray Upper Unit Front 1 in the direction of the arrow until it stops 4 While holding the A...

Page 74: ...on of the Sub Paddle Front and the Finisher Lower Feed Guide Unit 6 While holding the A part of the Finisher Lower Feed Guide Unit 1 tighten the 2 screws 2 CAUTION Be sure to keep the B part of the Finisher Lower Feed Guide Unit 1 from coming in contact with the shaft 3 1 3 B F 4 94 A 1 2 2 2x 7 Rotate the shaft 1 of the Sub Paddle Unit and check that the 2 ends 3 of the paddle each fit in the are...

Page 75: ... the Process Tray Upper Unit Rear and the Finisher Lower Feed Guide Unit C Adjusting the Position of the Guide Plate of the Process Tray Upper Unit Rear 1 Loosen the 2 screws 2 of the Process Tray Upper Unit Rear 1 and the 3 screws 4 of the Finisher Lower Feed Guide Unit 3 5x 1 3 4 4 2 2 F 4 97 2 Tighten the screw 2 while lifting the Process Tray Upper Unit Rear 1 3 Move the Guide Plate 3 of the P...

Page 76: ...Unit Rear with your fingers and check that there is some backlash If there is no backlash perform steps 1 and 4 again 1 F 4 99 D Adjusting the Position of the Sub Paddle Rear and the Finisher Lower Feed Guide Unit 6 While holding the A part of the Finisher Lower Feed Guide Unit 1 tighten the 3 screws 2 A 1 2 2 2 3x 7 Rotate the shaft 1 of the Sub Paddle Unit and check that the 2 ends 3 of the padd...

Page 77: ...r Refer to page 4 16 5 Remove the Upper Cover Refer to page 4 17 6 Remove the Paddle Motor M3 Refer to page 4 44 7 Remove the Staple Unit Refer to page 4 23 8 Remove the Front Door Switch S15 Refer to page 4 53 9 Remove the Finisher Lower Feed Guide Unit Refer to page 4 27 10 Remove the Process Tray Upper Unit Front by referring to Removing the Process Tray Upper Unit Front Rear Refer to page 4 35...

Page 78: ...d Guide Unit Preparation 1 Remove the Finisher Unit from the connected equipment Refer to page 4 9 Procedure CAUTION When separating the Buffer Upper Feed Guide Unit 1 from the Buffer Lower Feed Guide Unit 2 the Open Close Spring 3 might bounce out so be careful not to lose it when disassembling assembling the unit 1 2 3 F 4 105 F 4 104 1 Release the Release Handle 1 and open the Buffer Upper Feed...

Page 79: ...Upper Processing Tray Unit Rear Refer to page 4 47 M6 Tray Auxiliary Guide Motor Lower Processing Tray Unit Refer to page 4 48 M7 Gripper Motor Lower Processing Tray Unit M9 Staple Motor Staple Unit M1 Feed Motor Buffer Lower Feed Guide Unit Refer to page 4 43 F 4 108 T 4 14 M3 M2 M8 No Parts Name Main Unit Reference M2 Delivery Motor Product Configuration Refer to page 4 45 M3 Paddle Motor Produc...

Page 80: ...on 1 Remove the Finisher Unit from the connected equipment Refer to page 4 9 Procedure 1 Turn over the Buffer Path Unit 1 1 2 Disconnect the connector 1 open the Edge Saddle 2 and remove the 3 screws 3 1x 1x 1 2 3x 3 F 4 110 F 4 111 F 4 112 3 Remove the Rear Plate Unit 1 of the Buffer Path Unit 3 Bosses 2 1 Bushing 3 1 Belt 4 1 2 3 4 2 4 Remove the Feed Motor Unit 1 2 Stepped Screws 2 1 Belt 3 2x ...

Page 81: ... the Feed Motor Unit 1 and apply tension to the belt under the motor s own weight Then tighten the 2 Stepped Screws 2 3 4 1 2 2x F 4 115 5 Remove the Feed Motor 1 2 Screws 2 2x 1 2 F 4 116 Remove the Paddle Motor M3 Preparation 1 Remove the Finisher Unit from the connected equipment Refer to page 4 9 2 Remove the Rear Cover Refer to page 4 16 Procedure 1 Remove the Paddle Motor 1 1 Connector 2 1 W...

Page 82: ...stall the Paddle Motor Be sure to place the sheet 5 of the Paddle Motor between the gear 6 and the sensor 7 when assembling 5 5 6 6 7 7 F 4 119 Removing the Delivery Motor M2 Preparation 1 Remove the Finisher Unit from the connected equipment Refer to page 4 9 2 Remove the Rear Cover Refer to page 4 16 Procedure 1 Remove the Delivery Motor 1 2 Screws 2 1 Belt 3 1 Connector 4 2x 1x 2 3 1 4 F 4 120 ...

Page 83: ... 122 Removing the Front Alignment Motor M4 Preparation 1 Remove the Finisher Unit from the connected equipment Refer to page 4 9 2 Remove the Staple Cartridge Refer to page 4 22 3 Remove the Front Cover Refer to page 4 15 4 Remove the Rear Cover Refer to page 4 16 5 Remove the Upper Cover Refer to page 4 17 6 Remove the Paddle Motor M3 Refer to page 4 44 7 Remove the Staple Unit Refer to page 4 23...

Page 84: ...125 Removing the Rear Alignment Motor M5 Preparation 1 Remove the Finisher Unit from the connected equipment Refer to page 4 9 2 Remove the Staple Cartridge Refer to page 4 22 3 Remove the Front Cover Refer to page 4 15 4 Remove the Rear Cover Refer to page 4 16 5 Remove the Upper Cover Refer to page 4 17 6 Remove the Paddle Motor M3 Refer to page 4 44 7 Remove the Staple Unit Refer to page 4 23 8...

Page 85: ...de Motor M6 Preparation 1 Remove the Finisher Unit from the connected equipment Refer to page 4 9 2 Remove the Staple Cartridge Refer to page 4 22 3 Remove the Front Cover Refer to page 4 15 4 Remove the Rear Cover Refer to page 4 16 5 Remove the Upper Cover Refer to page 4 17 6 Remove the Paddle Motor M3 Refer to page 4 44 7 Remove the Staple Unit Refer to page 4 23 8 Remove the Front Door Switch...

Page 86: ... 1x 2 Remove the Tray Auxiliary Guide Motor 1 1 Connector 2 2 Screws 3 2x 1 2 3 3 1x F 4 130 F 4 131 Removing the Stack Tray Shift Motor M8 Preparation 1 Remove the Finisher Unit from the connected equipment Refer to page 4 9 2 Remove the Staple Cartridge Refer to page 4 22 3 Remove the Front Cover Refer to page 4 15 4 Remove the Rear Cover Refer to page 4 16 5 Remove the Grate shaped Guide Refer ...

Page 87: ... Tray Unit 4 CAUTION When the gear 2 is removed the Stack Tray Unit 4 will lower Be sure to support the Stack Tray Unit while performing the work 2 4 4 F 4 134 1 2 3 4 4 F 4 135 3 Remove the Stack Tray Shift Motor Unit 1 3 Screws 2 1 Shaft 3 3x 1 3 2 NOTE How to install the Stack Tray Shift Motor When tightening the 3 screws 2 be sure that the clearance A between the Support Plate of the motor and...

Page 88: ...emoving the Stack Tray Shift Motor M8 Procedure Parts Replacement and Cleaning Procedure Motors Removing the Stack Tray Shift Motor M8 Procedure 4 Remove the Stack Tray Shift Motor 2 from the Stack Tray Shift Motor Unit 1 2 Screws 3 1 Belt 4 2x 4 4 1 2 2 3 F 4 138 ...

Page 89: ...inisher Lower Feed Guide Unit S8 Gripper Encoder Sensor Lower Processing Tray Unit F 4 139 No Parts Name Main Unit Reference S11 Staple HP Sensor Staple Unit S12 Staple Edging Sensor Staple Unit S13 Staple Sensor Staple Unit S14 Staple Paper Detection Sensor Upper Processing Tray Unit Front S1 Buffer Sensor Buffer Lower Feed Guide Unit S16 Buffer Path Cover Open Close Sensor Buffer Lower Feed Guid...

Page 90: ...nected equipment Refer to page 4 9 2 Remove the Staple Cartridge Refer to page 4 22 3 Remove the Front Cover Refer to page 4 15 Procedure 1 Remove the Front Door Switch Unit 1 1 Screw 2 1x 1 2 F 4 141 F 4 142 2 Remove the Front Door Switch 2 from the Front Door Switch Unit 1 1 Screw 3 2 Connectors 4 1 2 3 1x 2x 4 NOTE How to install the Front Door Switch Be sure to fit the boss 1 of the Support Pl...

Page 91: ...reparation 1 Remove the Finisher Unit from the connected equipment Refer to page 4 9 2 Remove the Staple Cartridge Refer to page 4 22 3 Remove the Front Cover Refer to page 4 15 Procedure 1 Remove the Stack Tray Lower Limit Sensor 1 1 Screw 2 2 Connectors 3 1x 2x 1 2 3 F 4 145 F 4 146 NOTE How to install the Stack Tray Lower Limit Sensor Be sure to fit the boss 4 of the Support Plate into the hole...

Page 92: ... page 4 55 F 4 148 T 4 18 Removing the Finisher Controller PCB Preparation 1 Remove the Finisher Unit from the connected equipment Refer to page 4 9 2 Remove the Staple Cartridge Refer to page 4 22 3 Remove the Front Cover Refer to page 4 15 4 Remove the Rear Cover Refer to page 4 16 5 Remove the Grate shaped Guide Refer to page 4 20 Procedure 1 Disconnect the 13 connectors 2 on the Finisher Contr...

Page 93: ...s Removing the Finisher Controller PCB Procedure Parts Replacement and Cleaning Procedure PCBs Removing the Finisher Controller PCB Procedure 2 Remove the Finisher Controller PCB 1 1 Connector 2 2 Wire Saddles 3 2 Screws 4 2 Bosses 5 2x 2x 1x 1 2 3 4 5 F 4 151 ...

Page 94: ...5 5 Adjustment Adjustment Adjustment Item Dip Switch Function ...

Page 95: ...nt Adjustment Item Overview Adjustment Item Overview This finisher has no adjustment items Sensor detection check and motor operation check can be performed using the DIP switch SW1 push switch SW2 and LED LD1 on the finisher controller PCB SW2 SW1 LD1 F 5 1 ...

Page 96: ... Detection Check Mode Entering the Sensor Detection Check Mode Dip Switch Function 1 2 1 DIP Switch SW1 2 Push Switch SW2 Sensor Detection Check Mode Entering the Sensor Detection Check Mode 1 With the host machine turned off set the DIP switch SW1 as shown below While pressing down the push switch SW2 turn on the host machine ON 1 2 3 4 F 5 2 F 5 3 ...

Page 97: ...n detected Other than home position 6 OFF ON OFF ON Tray Auxiliary Guide HP Sensor S6 Home position detected Other than home position 7 OFF ON ON OFF Gripper HP Sensor S7 Home position detected Other than home position 8 ON ON ON OFF Gripper Encoder Sensor S8 Sensor light blocked Sensor light unblocked 9 ON OFF OFF ON Stack Tray Paper Height Sensor S9 Sensor light blocked Stack position Sensor lig...

Page 98: ...FF Paddle Motor M3 Pressing down the push switch SW2 drives the paddle motor to rotate the paddle once 4 ON ON OFF OFF Front Alignment Motor M4 Pressing down the push switch SW2 each time drives the front alignment motor to move the front alignment plate as follows Minimum width paper alignment position Maximum width paper alignment position 5 OFF OFF ON OFF Rear Alignment Motor M5 Pressing down t...

Page 99: ...his Installation Procedure Check Items when Turning OFF the Main Power Points to Note When Relocating the Host machine Product Name Points to Note at Installation Unpacking Installation Outline Drawing Checking the Contents Installation Procedure ...

Page 100: ...e 2 Be sure that display in the Control Panel and the lamp of the main power supply are turned off then disconnect the power plug F 6 1 Points to Note When Relocating the Host machine CAUTION If this machine with the Reinforcing Plate Cover is moved followings may occur Possibility of damaging customer s floor carpeting etc Possibility of overturning Refer to the following Staple Finisher S1 Servi...

Page 101: ...n in the Service Manual for installation of the IC Card Reader Box The Finisher is detected as installed by running a print job or turning on the machine and opening and closing the Front Door of the Finisher Unit Unpacking 1 Take out contents and cushioning materials F 6 3 2 Hold positions as shown in the figure and take out this equipment CAUTION Do not hold the Stack Tray Support Plate and Deli...

Page 102: ... Outline Drawing 3 Take out contents box 4 Take out this equipment from the plastic material and remove all tapes F 6 6 F 6 7 5 Remove all tapes affixed to the Buffer Path Unit Installation Outline Drawing Without Cassette Feeding Unit With Cassette Feeding Unit F 6 8 F 6 9 F 6 10 ...

Page 103: ...ion Sheet X 1 12 Optional Harness Cover X 1 7 Stack Tray X 1 13 Screw P Tightening M3x8 X 1 9 Staple Cartridge X 1 11 Screw W Sems M3x8 X 2 5 Finisher X 1 3 Use this only when the Cassette Feeding Unit is installed 12 and 13 are used when installing IC Card Reader Box F 6 11 Installation Procedure Without Cassette Feeding Unit 1 Remove the Cassette 2 Install the Height Adjustment Plate 2 Screws W ...

Page 104: ...re Without Cassette Feeding Unit 3 Return the cassette 4 Rotate left side of this host machine to face the worker F 6 14 F 6 15 5 Remove the 5 Face Covers of the Left side using for example a flat blade screwdriver 5 Claws CAUTION When removing the cover do not insert a screwdriver in the oval hole F 6 16 F 6 17 ...

Page 105: ...out Cassette Feeding Unit 6 Open the Reader and remove the Reverse Guide The removed Reverse Guide will not be used CAUTION Be sure to remove the Reverse Guide which may cause a jam F 6 18 7 Remove the release paper of Cushion Sheet 8 Affix the Cushion Sheet aligning it with the mark on the bottom of the Reader F 6 19 ...

Page 106: ...ION Check that the Reverse Guide is removed Be careful not to trap cables F 6 20 10 Insert the Positioning Pins into the holes on the host machine to Install the Finisher with the host machine 11 Match the screw holes while raising the latch and secure by Knurled Screws on the upper side 12 Secure the Finisher with Knurled Screws on the lower side 13 Connect the connector of Buffer Path Unit and t...

Page 107: ...l it before installing the Harness Cover Refer to the chapter on Installation in the Service Manual for installation of the IC Card Reader Box 14 Install the Harness Cover NOTE Be sure that 2 hooks are properly hooked to the machine F 6 23 15 Install the Stack Tray 2 Hooks NOTE Make sure that a click sound occurs 16 Rotate this host machine back to the original position 17 Close the Reader F 6 24 ...

Page 108: ...the main power switch With Cassette Feeding Unit NOTE Images and illustrations which do not show the Cassette Feeding Unit as installed are used but steps are same 1 Remove the Cassette of the host machine F 6 26 F 6 27 2 Install the Height Adjustment Plate 2 Screws W Sems M3x8 NOTE Be sure to make the Height Adjustment Plate in close contact with the top of the Cassette Feeding Unit W Sems M3x8 2...

Page 109: ...e Covers of the Left side using for example a flat blade screwdriver 3 Claws CAUTION When removing the cover do not insert a screwdriver in the oval hole F 6 30 F 6 31 5 Install the 2 Reinforcing Plates to the Reinforcing Plate Cover 6 Install the Reinforcing Plate Cover Unit to the left side of the Cassette Feeding Unit as shown in the drawing F 6 32 F 6 33 ...

Page 110: ...h Cassette Feeding Unit 7 Open the Reader and remove the Reverse Guide The removed Reverse Guide will not be used CAUTION Be sure to remove the Reverse Guide which may cause a jam F 6 34 8 Remove the release paper of Cushion Sheet 9 Affix the Cushion Sheet aligning it with the mark on the bottom of the Reader F 6 35 ...

Page 111: ...N Check that the Reverse Guide is removed Be careful not to trap cables F 6 36 11 Insert the Positioning Pins into the holes on the host machine to install the Finisher with the host machine 12 Match the screw holes while raising the latch and secure by Knurled Screws on the upper side 13 Secure the Finisher with Knurled Screws on the lower side 14 Connect the connector of Buffer Path Unit and the...

Page 112: ... the Harness Cover Refer to the chapter on Installation in the Service Manual for installation of the IC Card Reader Box 15 Install the Harness Cover NOTE Be sure that 2 hooks are properly hooked to the machine F 6 39 16 Install the Stack Tray 2 Hooks NOTE Make sure that a click sound occurs 17 Close the Reader 18 Connect the power plug of the host machine to the power outlet 19 Turn ON the main p...

Page 113: ...Appendix Service Tools General Circuit Diagram ...

Page 114: ...the machine Tool name Tool No Ctgr Appearance Remarks Digital multimeter FY9 2002 A Used as a probe extension when making electrical checks Tester extension pin FY9 3038 A Tester extension pin L shaped FY9 3039 A Use for electrical checks Reference Category A Must be kept by each service engineer B Must be kept by each group of about five engineers C Must be kept by each warkshop Solvents and Oils...

Page 115: ... B 5 4 6 5 6 7 7 8 1 9 2 10 J10 P10 J9 P9 P10 1 P9 1 DC MTR GND STP LOW STP READY STP HOME VCC 1 1 2 2 3 3 4 4 5 5 1 1 2 2 3 3 4 4 J4 For Debug For Boot Writing Tool J17 P5 3 4 1 3 2 2 3 1 4 P5 13 P6 2 P6 2 179228 7 1 7 2 6 3 5 1 4 2 3 3 2 4 1 J18 STEPPER MTR P5 11 P7 15 P7 13 J7 7 P18 2 1 A A B B 1 2 3 3 4 4 P5 11 1A P5 11 1B 9 3 8 4 P7 7 BUFFER PASS STAPLER 9 3 10 2 11 1 8 4 10 2 11 1 5 1 6 2 7 ...

Reviews: